When Paint Dries Does It Get Lighter or Darker
When paint dries it can change—you’ll often see oils and alkyds deepen and warm slightly, while many latex and water‑based paints may look a bit lighter as solvents evaporate and the binder settles. Gloss and texture also shift perception: shinier surfaces look brighter, mattes appear deeper. Drying and curing times, humidity, and underlying color all matter, so always test patches and allow full cure; keep going to learn how chemistry, sheen, and technique affect the final result.
Quick Answer: Wet-to-Dry Paint Color Change
Although it might look different when it’s wet, paint usually dries a shade or two lighter—so expect some shift as solvents evaporate. You’ll notice the final hue depends on pigment concentration, sheen, and substrate; higher gloss often reads darker.
Consider color psychology when choosing shades—cool tones can feel lighter, warm tones richer—even if numeric change is small. Test samples in the room’s light and view them at different times to avoid surprises.
Also factor paint durability: higher-quality formulas retain color and finish better over time, reducing perceived change from wear or UV exposure. Trust tests over assumptions.
Why Paint Color Seems to Shift as It Dries
When paint dries, what you see shifts because the liquid carrier evaporates and the pigments, binders, and sheen interact differently once the film solidifies. You notice translucency, gloss change, and pigment settling that alter perceived hue. During paint curing, tiny refractive differences and binder rearrangement affect light scattering, so color consistency may vary between wet and fully cured states. Expect gradual stabilization over days.
When paint dries, evaporation and binder shifts change translucency, gloss, and light scattering, so hues stabilize over days.
- Gloss reduction or increase changes perceived depth
- Pigment concentration at the surface alters tint
- Binder clarity affects chroma
- Light reflection shifts with texture
- Multiple coats improve color consistency
How Paint Chemistry Changes During Drying
As the paint dries you’ll notice more than just moisture leaving — solvent evaporation concentrates pigments and alters gloss.
At the same time, the binder’s polymer chains start to crosslink or coalesce, turning a liquid film into a solid one that locks pigment and affects durability.
Understanding both solvent loss and binder polymerization helps you predict drying time, final appearance, and long-term performance.
Solvent Evaporation Effects
Because solvents leave a paint film at different rates, the chemistry of the coating shifts continuously during drying. You notice pigments, binder concentration, and refractive index change as volatile components evaporate; this affects color consistency and responds to drying temperature. You’ll see subtle darkening or lightening depending on residual solvent and surface gloss.
- Faster evaporation concentrates pigments near the surface.
- Slow solvents allow better pigment settling.
- Temperature speeds evaporation and alters gloss.
- Residual solvent can soften film temporarily.
- Additives modify evaporation patterns and edge appearance.
Monitor environment and formulation to control final appearance precisely.
Binder Polymerization Effects
Although solvents set the stage, the binder’s polymerization is what locks a paint film together. You’ll see chemistry change as monomers, oligomers, or dispersed polymer particles react and coalesce into a continuous matrix.
You’ll notice gloss, hardness, and color shift as crosslinking progresses; binder chemistry alters refractive index and microstructure, affecting how light scatters. That change can reveal or mute pigments, so pigment stability matters—some pigments resist chemical exposure and retain hue, others shift or fade with heat or oxidative curing.
Understanding polymerization helps you predict final appearance and choose systems that preserve color and durability.
How Solvents and Binders Alter Dried Paint Color
When you watch a paint film dry, the solvent evaporation rate changes how the surface sheen and perceived color shift.
You’ll see the binder form a continuous film that can alter light reflection and color depth.
Pay attention to how pigment-binder interactions—wetting, dispersion, and refractive index matching—lock in the final hue.
Solvent Evaporation Effects
How do solvents and binders change the color you see after paint dries? You notice shifts because solvent loss alters pigment concentration and refractive index. Binders influence gloss and translucency.
Color consistency depends on solvent type and evaporation rate, while drying duration affects how pigments settle and how light scatters.
- Fast solvents can lighten appearance by leaving microvoids.
- Slow solvents often deepen color through better pigment packing.
- Inconsistent evaporation causes patchy tones.
- Additives change surface sheen, modifying perceived hue.
- Environmental factors alter drying duration and final shade.
Watch solvent choice and drying conditions to control final color.
Binder Film Formation
Curious how the binder’s film formation changes the color you see? You notice film clarity and thickness shift perceived hue as solvents evaporate and binders coalesce.
As the polymer network densifies, refractive index and surface gloss change, altering light reflection and reducing translucency. You’ll see color consistency suffer if solvent release is uneven; drying variability creates patchy sheen and slight tone shifts across the surface.
Choosing binders with predictable film build and compatible solvent blends minimizes these effects. Control application thickness, temperature, and airflow so the binder forms uniformly, keeping the dried paint color true to expectation.
Pigment-Binder Interactions
Because solvents and binders set the stage for how pigments sit and interact, you’ll often see notable color shifts as paint dries. You notice pigment stability changes as solvent leaves, concentrating particles and altering light scattering.
Binder transparency evolves during film formation, affecting perceived saturation and gloss. You can manage outcomes by choosing compatible pigment and binder chemistries and controlling drying conditions.
- Choose binders with stable refractive indices
- Match solvent evaporation rate to pigment dispersion
- Test for pigment stability under expected cure times
- Prefer binders with consistent Binder transparency
- Adjust additives to prevent pigment flocculation
How Gloss Level Changes Perceived Lightness
When you change a paint’s gloss level, you alter how much light it reflects directly versus how much it diffuses. That shift makes the same color look lighter or darker to your eye.
Changing a paint’s gloss alters direct reflection versus diffusion, making the same color read lighter or darker.
You notice high-gloss surfaces bounce specular highlights, boosting perceived brightness and color saturation, while matte finishes scatter light, softening tones and appearing deeper.
Designers use this deliberately: color psychology links gloss with energy or calm, influencing mood.
Historical trends show shifts between glossy and matte preferences tied to technology and style.
When selecting finishes, test samples under your room’s lighting to predict perceived lightness accurately.
How Pigment Concentration Affects Dried Paint Color
When you adjust pigment volume concentration, you change how much pigment versus binder ends up in the dried film. This directly shifts color strength and appearance.
You’ll notice higher pigment loads increase opacity and tinting strength, while lower loads make colors weak and more translucent.
Also remember that diluting the binder alters pigment dispersion and film formation, which can mute or shift the final hue.
Pigment Volume Concentration
Curious how the same tint can look different after it dries? You’ll notice pigment volume concentration (PVC) controls how densely pigments pack, altering color saturation and texture perception.
Higher PVC often boosts saturation but can change gloss and feel; lower PVC yields smoother, glossier films with subtler tones. You’ll judge dried color by both pigment ratio and binder behavior, so small shifts matter.
- High PVC: vivid color, matte feel
- Low PVC: muted color, smoother gloss
- Mid PVC: balanced saturation and sheen
- Fine pigments: more uniform appearance
- Coarse pigments: increased texture perception
Opacity Versus Tinting Strength
Because pigment concentration determines how much light a dried film blocks or reflects, you’ll see a direct trade-off between opacity and tinting strength.
You’ll notice higher pigment opacity gives stronger hiding power, so less underlying surface shows through, but that can mute color saturation when pigments crowd each other.
Lower concentration increases tinting strength per unit volume, letting small additions shift hue more effectively, though at the cost of coverage.
You’ll balance these by choosing pigments and loadings: opaque pigments for coverage, transparent ones for glazing and intense saturation.
Practical mixes optimize both without overloading binder or losing film integrity.
Binder Dilution Effects
If you thin the binder to spread pigment farther, you’ll change how concentrated those color particles are in the dried film and consequently shift the apparent hue, saturation, and gloss.
You’ll notice binder interaction alters pigment packing: less binder can make colors appear richer but matte, while excess binder can dilute chroma and raise gloss. That balance affects color stability over time and under light.
Adjust dilution to control coverage and long-term performance. Consider tests before large areas.
- Test small patches for final tone
- Note drying gloss changes
- Track pigment settlement
- Measure opacity loss
- Record aging under light
How Sheen and Surface Texture Interact With Color
While color sets the mood, sheen and surface texture decide how that color reads in different lights and from different angles. You’ll notice gloss reflects more light, making hues appear brighter and more saturated, while matte soaks up light, muting intensity.
Surface texture scatters reflections; a rough wall breaks highlights, softening perceived contrast. Sheen choices also affect perceived depth—higher sheen can emphasize imperfections, lower sheen hides them.
Consider paint durability when picking finish: tougher, glossier coats resist scuffs but show marks; flatter finishes hide wear but may need more maintenance. Match sheen and texture to function and desired look.
How Lighting Alters Wet and Dry Color Perception
When you check fresh paint under different lights, you’ll see the same color shift as it dries: wet paint looks darker and glossier because it reflects more specular light, while dry paint scatters light and reveals the pigment’s true value and saturation.
You’ll notice how warm, cool, and mixed lighting change perceived depth and saturation, affecting your expectation of color consistency and judgments about paint durability. Test samples under intended lighting before committing.
Compare wet-to-dry differences in each condition.
- Observe samples at morning light
- Check under incandescent bulbs
- Try cool LED lighting
- Inspect in mixed ambient light
- Evaluate under task lighting
How Nearby Colors and Contrast Shift Perceived Paint Lightness
Because surrounding colors change how your eye judges lightness, a mid-tone paint can read much lighter against a dark trim and noticeably darker against a pale wall. Your visual system compares adjacent areas and shifts perceived value to maximize contrast.
You’ll notice complements push each other apart — warm hues make nearby neutrals appear cooler and vice versa — a principle used in color psychology to guide mood and focus.
When selecting paint, sample swatches next to actual neighboring finishes and fabrics.
Consider how historical pigments once varied under sunlight and aging; their altered contrast teaches you how context transforms perceived lightness.
Typical Paints That Darken as They Dry (Oil, Alkyd)
If you’re picking a traditional oil or alkyd paint, expect it to deepen in tone as it cures because the binder oxidizes and the film loses solvents. You’ll notice richer saturation and a slight sheen change; paint odor fades while chemical reactions continue.
Monitor drying time—surface may feel dry long before full cure deepens color. Use ventilation to reduce odor and speed safe handling.
Surface may seem dry before full cure deepens color—ventilate to cut odor and speed safe handling.
Test a swatch to confirm final shade under your room’s light.
- Choose oil/alkyd for durable, deepening finishes
- Allow extended drying time for true color
- Expect stronger paint odor initially
- Ventilate during curing
- Test samples first
Typical Paints That Lighten as They Dry (Waterborne, Latex)
Switching from oil or alkyd to waterborne latex changes what you should expect as paint cures: instead of deepening, these formulas usually lighten. You’ll notice this as water evaporates and binders settle, reducing surface sheen and producing a slightly paler look.
Modern latex blends aim for color permanence, using stable pigments that resist long-term fading, though initial lightening is common. You’ll also appreciate paint durability on flexible substrates—latex resists cracking and chalking better in many environments.
Plan samples and allow full cure before final judgment, since perceived color shifts after hours can mislead your selection for durable, permanent finishes.
Translucent and Tinted Paints: Drying Behavior
When you use translucent or heavily tinted paints, the amount of translucency will change the final tone as the binder dries and refractive indices shift.
You’ll notice tint strength and drying speed interplay—stronger pigments can mask base color but may also alter drying behavior.
Always test how the base color interacts with the tint on the actual surface before committing to a full coat.
Translucency Affects Final Tone
Because translucent paints let light penetrate and scatter differently than opaque mixes, you’ll notice their color shift more as they dry—often appearing darker or cooler at first and settling into a warmer, softer tone once the vehicle has evaporated.
You’ll learn how translucency changes perceived hue and mood; color psychology and historical pigments show how depth and light affect emotion and technique.
Test thin glazes on the designated surface, observe under consistent light, and record wet versus dry appearance.
Use translucency deliberately to create atmosphere or reveal underlayers.
- Compare wet/dry samples
- Note substrate influence
- Observe under daylight
- Layer strategically
- Document results
Tint Strength And Drying
Although subtle, tint strength changes how a color dries and how quickly it reaches its final appearance, so you should test mixes rather than assume a match. You’ll notice stronger tints often deepen as solvents evaporate, while weak tints can appear washed out; both affect color consistency and paint durability. Test samples under the same light and thickness to gauge final tone and wear. Use the table below to track results.
| Tint Strength | Drying Behavior | Notes |
|---|---|---|
| Strong | Darkens slightly | Higher pigment load |
| Medium | Stable | Typical balance |
| Weak | Lightens | May need extra coats |
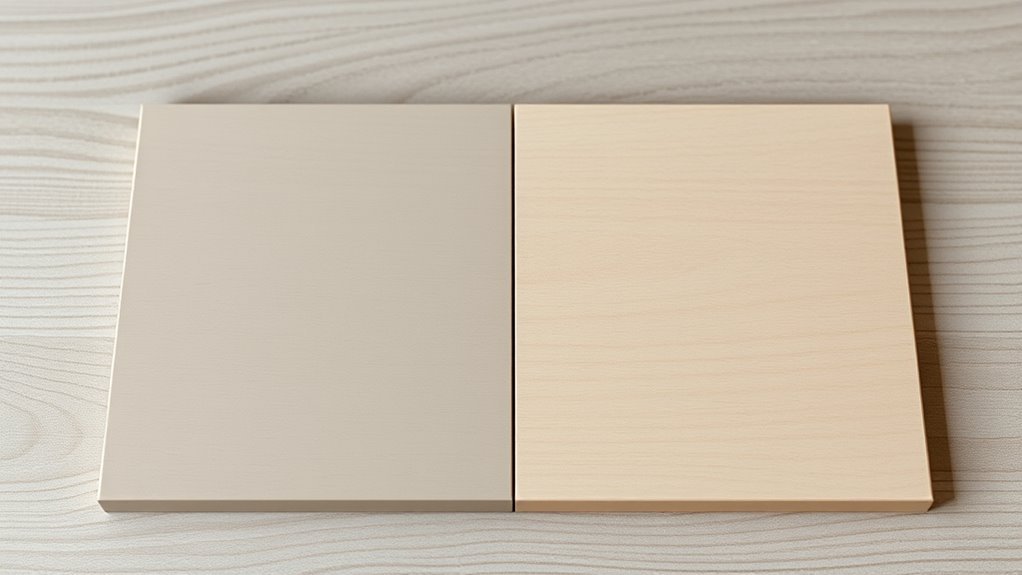
Base Color Interaction
You’ve already seen how tint strength shifts drying tone; now consider how the underlying base color alters that effect, especially with translucent or lightly tinted paints. You’ll notice that a warm base can nudge dried hues warmer, while cool bases pull them cooler.
Translucent layers reveal substrate influences, and paint opacity controls how much base shows through. Use the color wheel to predict shifts, and test samples wet-to-dry.
- Test small swatches over different bases
- Compare wet vs dry on glossy and matte substrates
- Note how low paint opacity reveals undertones
- Use complementary contrasts from the color wheel
- Document lighting and drying times
Predicting Wet-to-Dry Shift From a Paint Swatch
When you hold a paint swatch next to your wall, remember that the color you see wet will usually dry noticeably darker and slightly warmer; estimating that shift lets you choose a shade that matches your final intent.
You’ll gauge likely change by noting sheen, pigment depth, and swatch lighting. Compare swatches under room light and natural light, consider Historical color trends and Cultural paint preferences that favor warmer or cooler finishes, and adjust choice toward a lighter or cooler swatch if you want the dried result to match.
Trust experience and labels indicating expected wet-to-dry shifts when available.
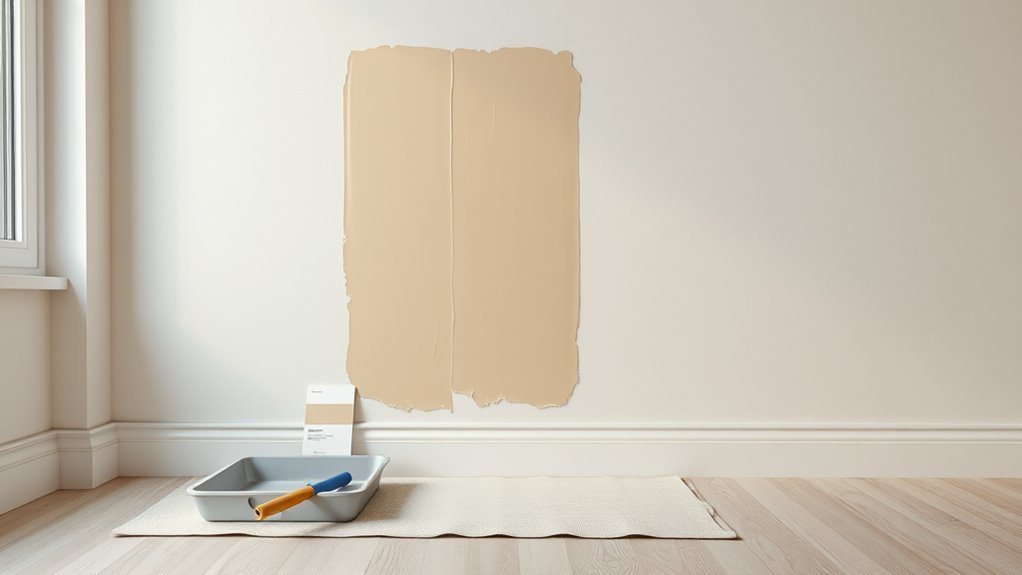
Step-by-Step Wet-to-Dry Testing Method at Home
Start by preparing small test samples on the same surface you’ll paint so you see how the finish and color behave.
Photograph and note the wet appearance, including gloss and shade, so you have a clear record to compare.
After the samples fully dry, compare them side-by-side with your photos to judge the true wet-to-dry shift.
Prepare Test Samples
Before you mix paints for testing, gather a few small boards or heavy cardstock, a disposable brush or stick, a measuring spoon, and a note pad so you can record formulas and drying times. You’ll prepare consistent swatches to compare wet and dry changes. Use the same brush stroke, layer thickness, and drying environment. Pay attention to color mixing ratios and paint texture; note any additives. Label each sample clearly.
- Label board or card with paint name and date
- Apply one even coat per sample
- Measure and record ratios precisely
- Note room temperature and humidity
- Photograph immediately after application
Document Wet Appearance
Although the paint still looks wet, you should record its initial appearance precisely so you can compare changes as it dries. Use good light and a neutral background, photograph samples from the same angle and distance, and note the time.
Jot down hue, saturation, and any sheen impressions; describe how the paint finish reflects light and whether brush strokes alter perception. Check color consistency across samples and label each swatch. Record temperature and humidity briefly.
Repeat photos after a few minutes to capture early leveling. These controlled observations give you a reliable wet baseline for later comparison.
Compare After Drying
Once the surface has fully dried, compare each swatch to your wet baseline using the same light, background, angle, and distance you used before so you get accurate side-by-side observations. You’ll note shifts in color consistency and subtle changes in paint texture. Record whether tones deepen, lighten, or stay true, and photograph each swatch with identical settings. Trust your notes over memory, and repeat if results seem inconsistent.
- Inspect under natural and artificial light
- Touch gently to assess texture changes
- Note sheen and gloss differences
- Rate color consistency numerically
- Photograph for future reference
How Long to Wait Before Judging the Final Paint Color
If you want an accurate sense of the final color, give the paint time to cure rather than judging it the moment it feels dry to the touch. You’ll typically wait 7–30 days for full curing depending on formula, humidity, and temperature; latex paints often need two weeks, oils longer.
Evaluate under consistent lighting at various times of day to account for how color psychology affects mood. Use multiple test patches on the actual wall, not just swatches.
Keep ventilation to reduce VOC emissions while curing. Only judge after the sheen has stabilized and the paint no longer darkens or lightens.
Common Mistakes When Comparing Wet and Dry Samples
Before you judge a color, remember that wet paint and cured paint can look very different, so don’t rely on wet samples to decide. You’ll misread contrast, sheen, and undertones if you compare fresh swatches to finished walls. Consider lighting, surface texture, and how color psychology frames your perception.
Don’t forget that historical pigments behaved differently, so samples from old restorations won’t match modern formulations. Test small areas, observe at different times, and document results.
Use this checklist to avoid errors:
- Comparing wet sheen to dry matte
- Ignoring ambient light changes
- Overlooking substrate effects
- Skipping full cure time
- Relying on old pigment samples
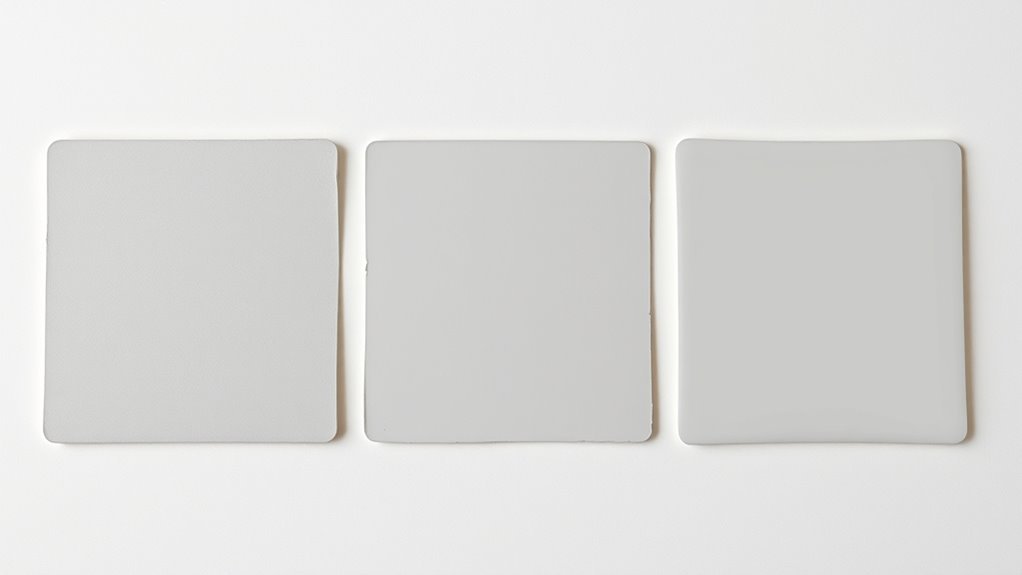
When to Trust Manufacturer Color Chips : and When Not To
Although manufacturer color chips give you a useful starting point, don’t treat them as final proof of how a paint will look on your wall. You should trust chips for basic hue direction and to explore color psychology—cool versus warm feelings—but not for exact value or undertone.
Always test full-size samples on several walls, under the room’s lighting, because paint application, surface texture, and surrounding decor shift perception. Note that finish and number of coats affect depth, so evaluate after proper application and drying.
Use chips as guides, then rely on real samples to confirm the emotional and visual result you want.
Choosing Sheen to Minimize Perceived Color Change
Because sheen changes how light reflects off a surface, it can make the same color read differently—so pick a finish that minimizes those shifts in your room. You’ll control color perception by matching sheen to room use and lighting conditions.
Because sheen alters light reflection, choose a finish that keeps your color consistent with the room’s lighting and use.
Higher sheens reflect more, making colors pop but revealing imperfections; lower sheens mute reflections and keep tones steady.
Test samples on walls at different times. Consider durability needs versus visual stability when choosing.
- Test matte, eggshell, satin, semi-gloss, and gloss
- Observe samples under daylight and artificial light
- Note reflections at various angles
- Prioritize consistency in main areas
- Match sheen to function
How to Adjust Color Choice for Expected Drying Shifts
When paint dries, pigments and binders shift slightly—so plan your selection knowing the wet sample won’t be the final look. Choose a swatch that, when dry, matches your desired outcome: test multiple coats and observe in intended light at different times.
If you want a warmer, cozier feel, pick a shade that dries a touch lighter to preserve color psychology cues; for drama, allow a darker dry result.
Factor paint durability into choices—higher-quality formulas often retain true tone better. Keep notes on brand, sheen, and conditions so you can replicate outcomes without surprises.
Troubleshoot Walls That Dried Darker or Lighter Than Expected
If your freshly painted walls look noticeably darker or lighter than you expected, start by checking a few common culprits: the number of coats, the paint’s sheen, lighting conditions, and the underlying surface.
You’ll want to verify Color consistency across cans and confirm Application techniques matched the room’s needs. Inspect for uneven coverage, primer absence, or sheen shifts that alter perceived tone.
Take photos under consistent light, test a small repainted patch, and compare adjacent walls. If issues persist, consult the supplier about batch variance before repainting.
- Check can labels and batch numbers
- Examine applied coat count
- Assess lighting at different times
- Look for missing primer
- Repaint a test patch
Painters’ Pro Tips to Minimize Surprises During Drying
After you’ve checked batches, coats, and lighting, take a few proactive steps to prevent surprises as paint dries.
Test small swatches in different room areas to confirm color consistency and observe how paint texture shifts when it cures. Use the same batch and stir thoroughly before each use; note sheen differences between samples.
Control humidity and temperature to avoid uneven drying. Apply thin, even coats and follow recommended dry times before recoating.
Keep records of brand, batch, and additives so you can reproduce results. If something looks off, repaint a test strip rather than the whole wall.
Frequently Asked Questions
Does Humidity After Drying Cause Gradual Color Shift Over Months?
Yes — humidity effects can cause gradual color shift over months, especially if coatings absorb moisture or suffer chemical changes; you’ll see reduced color stability in vulnerable paints, so control humidity and use stable formulations to prevent drift.
Can Primer Choice Change the Final Dried Color?
Ye olde yes—you’ll notice primer tinting and color priming affect final dried color; you’re altering undertones, improving coverage, and reducing coats, so picking the right primer shifts hue and value toward your desired finish.
Do VOCS Released During Curing Affect Long-Term Color?
Yes — VOC emissions during curing can subtly alter pigments and binders, so you’ll notice minor shifts over years; curing effects like solvent loss and oxidation slowly change hue, especially with low-quality or high-VOC formulations.
Will Textured Rollers or Brushes Alter Perceived Dried Shade?
Yes — texture influence matters: when you use textured rollers or brushes, surface irregularities change light scattering, so your visual perception shifts; rougher textures often make dried paint look darker or less uniform than smooth finishes.
Can Topcoats or Varnishes Reverse Wet-To-Dry Shifts?
Yes — you can use topcoats or varnishes to reverse some wet-to-dry shifts: you’ll preserve Color consistency and tweak Finish sheen, so you’ll control final appearance and reduce perceived differences between wet and dry stages.
Conclusion
When paint dries, remember it’s like watching a photograph develop in a darkroom: what looks one way wet can reveal its true tones as solvents leave and binders set. Expect some shift—often lighter with flatter sheens, sometimes darker with glossy finishes—and choose sheen and test swatches accordingly. Trust the process, make small adjustments, and treat tests as your oracle so the finished color matches the vision you imagined.