How to Remove Paint From Concrete Block Walls
You can remove paint from concrete block by matching the paint type and wall condition to the right method: test adhesion and porosity, protect plants and nearby surfaces, then try gentle options first—scrubbing with a stiff brush, mild detergent, or a poultice—before moving to chemical strippers, low‑pressure abrasive blasting, or grinders for heavy layers. Wear proper PPE, contain and dispose of waste correctly, and repair mortar or efflorescence before repainting. Continue onward to get method details and safety tips.
What This Guide Covers
Wondering what we’ll cover? You’ll get clear steps for evaluating painted concrete block, choosing the right remover, and prepping surfaces safely.
Wonder what’s ahead? Clear steps to evaluate painted block, pick removers, and prep safely.
You’ll learn how to test small areas, protect surrounding landscaping and finishes, and pick tools that match block texture.
We explain removing common decorative finishes and stubborn paint color layers without harming mortar.
Safety precautions, waste disposal, and when a grinder, chemical stripper, or pressure washer fits the job are all included.
Finally, you’ll see troubleshooting tips for stains or uneven results and guidance on prepping the wall for repainting or sealing after paint removal.
Which Method Should You Choose: DIY Or Hire a Pro?
Deciding between DIY and hiring a pro comes down to cost, the skills and time you can commit, and how damaged the block surface is.
If you’re watching your budget and the wall’s in good shape, you can often handle it yourself with basic tools.
But if the paint’s stubborn, the surface is fragile, or you’re short on time, a pro can save you headaches and may prevent costly mistakes.
Cost Comparison
A clear factor you’ll weigh is cost: doing the job yourself usually saves on labor but can add up in tool rentals, specialty chemicals, and your time, while hiring a pro costs more upfront but brings speed, expertise, and often a warranty. You’ll balance price against goals like eco friendly options or historical preservation; pros may charge for careful, compliant work. Compare estimates, factor disposal fees, and decide if warranty or lower material cost matters more.
| DIY Costs | Pro Costs |
|---|---|
| Tools & rentals | Labor & markup |
| Chemicals | Warranty |
| Disposal | Fast completion |
| No guarantee | Expert assurance |
Skill And Time
If you’ve got steady hands and basic masonry experience, you can tackle paint removal on concrete block walls yourself, but expect the project to demand time, patience, and some trial-and-error. Otherwise, hiring a pro will save hours and reduce the risk of surface damage.
You’ll weigh skill, schedule, and desired finish—DIY suits smaller areas or when you’re protecting outdoor furniture and matching interior decor, while pros handle large jobs fast. Consider:
- Your experience with tools and chemicals
- Available free days and stamina
- Willingness to accept imperfections
- Budget for repairs or pro help
Surface Condition
How worn or damaged is the block surface? You’ll assess chips, spalling, and coatings to decide whether to DIY or hire a pro.
If surface texture is rough but intact and moisture content is low, you can likely use hand scrapers, chemical strippers, or a pressure washer carefully.
If blocks are friable, heavily cracked, or show high moisture content, don’t risk further damage—call a pro with masonry repair and commercial stripping gear.
Pros can stabilize degraded texture, control water intrusion, and match finishes.
Weigh repair needs, tools, and your confidence before choosing the appropriate method.
Who Needs Paint Removed From Concrete Block: And Why
When paint starts flaking, staining, or trapping moisture in your concrete block walls, you’ll want it removed to prevent structural damage, mold growth, and a grimy appearance that lowers property value.
You should consider removal if you’re:
- A homeowner restoring masonry where decorative finishes failed and you want original texture back.
- A landlord addressing tenant complaints about peeling paint and odor from trapped moisture.
- A contractor prepping blocks for new coatings that demand clean, sound surfaces.
- A facility manager avoiding long-term deterioration and meeting aesthetic considerations for resale or compliance.
Quick Decision Matrix: Best Methods By Wall Condition

Start by matching the wall’s condition to the right removal method so you don’t waste time or damage the block.
For fresh paint or small areas, you’ll usually use scraping or a solvent.
While weathered or partial paint often needs a wire brush or pressure washing.
Heavily coated sections and multiple layers typically call for chemical strippers or sandblasting, so plan accordingly.
Fresh Paint, Small Areas
Looking to remove a small patch of fresh paint from your concrete block wall? You can act fast, protect surrounding texture, and preserve any planned color matching or artistic techniques. Use gentle, precise steps to avoid surface damage.
- Blot excess with a damp cloth, don’t rub.
- Apply mild solvent (water-based) on a test spot.
- Scrub softly with a nylon brush following mortar lines.
- Rinse, dry, and touch up with matching paint or faux finish.
Work quickly, test first, and keep materials ready so you can control spread and maintain your desired finish.
Weathered Surface, Partial Paint
If your concrete block shows patches of old paint amid weathering, assess surface hardness, paint adhesion, and how much texture you want to preserve before choosing a removal method.
For a weathered surface with partial paint, start with a stiff nylon brush and mild trisodium phosphate wash to reveal true adhesion.
Where paint flakes lightly, use a pressure washer on low to medium setting, keeping nozzle 12–18 inches away to avoid surface damage.
For stubborn spots, apply a poultice remover or a biodegradable gel stripper, then scrape gently with a plastic or wood tool.
Rinse thoroughly and let blocks dry before any repairs or repainting.
Heavily Coated, Multiple Layers
When a concrete block wall’s covered in multiple thick paint layers, you’ll need a clear decision matrix to match removal methods to conditions like coating thickness, age, substrate hardness, and environmental constraints. This guide helps you choose the fastest effective option that minimizes surface damage and cleanup.
You’ll assess paint durability and whether color matching for recoating matters. Choose between mechanical, chemical, or thermal approaches based on porosity and nearby surfaces. Consider containment for runoff and worker safety.
- Test adhesion and thickness.
- Start with low-impact abrasive or soda.
- Use stripper for stubborn layers.
- Grind only if necessary.
How to Tell the Paint Type and Adhesion You’re Dealing With
Because different paints and degrees of adhesion call for different removal methods, you need to identify what you’re dealing with before you start scraping or blasting. First, examine the paint sheen: glossy surfaces usually indicate oil or enamel and bond strongly, while flat or chalky finishes suggest older latex that may powder.
Peel a small area with a putty knife; easy lifting means poor paint adhesion and gentler methods will work. Do a solvent test: dab denatured alcohol—if paint softens, it’s latex; if mineral spirits affect it, it’s oil-based.
Note bubbling, cracking, or lifting to gauge removal effort required.
Inspecting Block Condition Before Stripping Paint
Before you start stripping paint, check the blocks for cracks, spalling, or loose mortar that could get worse during removal.
You should also confirm the paint type and how well it’s adhered so you pick the right stripper and technique.
Finally, look for surface contamination like efflorescence, oil, or mildew that’ll affect cleanup and adhesion after you finish.
Check For Structural Damage
If you plan to strip paint from concrete block walls, start by evaluating the blocks for cracks, spalling, loose mortar, and settled joints that could worsen during scraping or blasting. You’ll assess structural integrity and overall wall stability before any work. Look, probe, and document damage; small repairs prevent big failures.
- Tap blocks to locate hollow sounds.
- Inspect mortar joints for gaps or crumbling.
- Check for vertical or stair-step cracks indicating movement.
- Note areas with efflorescence or water stains.
If you find serious defects, halt and consult a structural pro before stripping.
Identify Paint Type
After you’ve checked for structural problems and made any necessary repairs, identify the paint type so you can choose a safe, effective removal method.
Examine texture: glossy finishes usually indicate oil or enamel; flat, chalky surfaces often mean older latex. Test a small area with denatured alcohol and acetone to distinguish water- from solvent-based paints.
Note areas where paint adhesion is poor or where multiple layers exist.
Record original hues for color matching if you plan to repaint. Photograph samples and label them.
Knowing the paint type helps you pick appropriate strippers, tools, and precautions to protect the block.
Assess Surface Contamination
Since contaminants like dirt, efflorescence, grease, or mildew will affect stripper performance and adhesion of any new finish, inspect the block closely for these issues before you start work. You’ll check porosity, surface salts, biological growth, and existing coatings to decide prep methods.
Note areas needing repair so texture enhancement or color mixing of a future finish won’t highlight defects. Use this quick checklist to guide testing and cleaning:
- Porosity test — sprinkle water; note absorption.
- Efflorescence — white powdered salts present?
- Organic growth — scrub and bleach test.
- Coating adhesion — tape or scrape sample.
Safety Gear You Must Wear for Paint Removal on Concrete
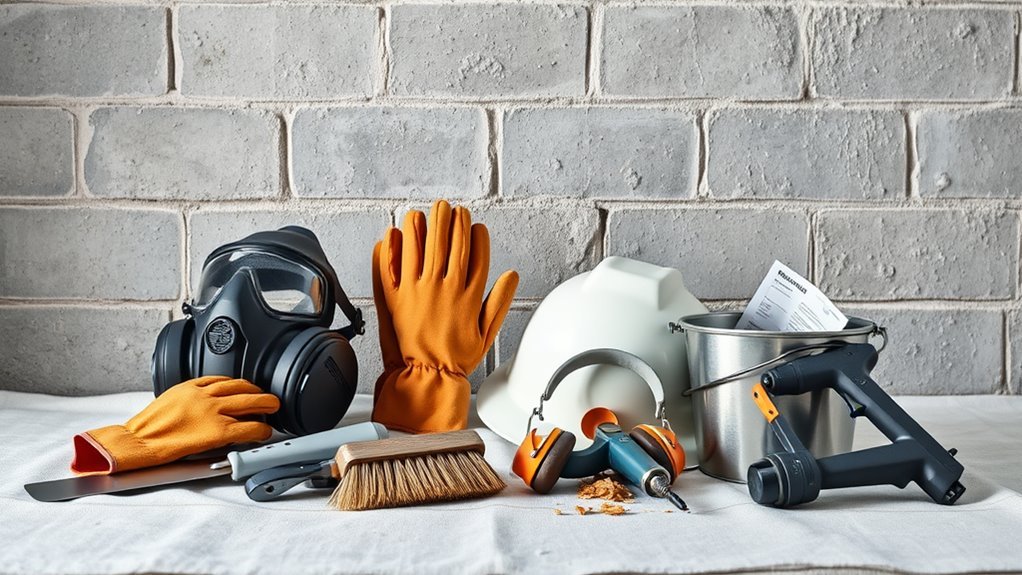
Before you strip a single coat of paint, put on the right personal protective equipment—respirator, goggles, gloves, and sturdy clothing—to protect your lungs, eyes, skin, and hands from dust, chemicals, and debris. You’ll also wear knee pads and steel-toed boots for stability. Choose a NIOSH-rated respirator for chemical solvents and a dust mask for dry scraping. If you’ll repaint, plan color matching and consider eco friendly options for any new coatings. Inspect gear for damage and replace disposable items after heavy use.
| Item | Purpose | When to Replace |
|---|---|---|
| Respirator | Filter chemicals | After heavy exposure |
| Goggles | Eye protection | Scratch or crack |
| Gloves | Chemical barrier | Tearing or permeation |
| Clothing | Skin protection | Heavily contaminated |
| Boots | Foot safety | Damage or wear |
Protecting Nearby Surfaces and Landscaping
Now that you’ve got your protective gear in place, take steps to shield nearby surfaces and plants so paint chips, stripper runoff, and dust don’t create a bigger cleanup job. Cover plants and mulch with breathable fabric or plastic, weight edges to prevent wind lift. Protect nearby structures with drop cloths, taped seams, and plywood barriers for splatter-prone work. Divert runoff away from beds and drains.
- Lay down heavy-duty tarps toward work area.
- Erect temporary shielding for windows and doors.
- Mulch and delicate plants: water, then cover.
- Keep a bucket and absorbent pads for spills.
Minimize landscaping disruption by planning containment.
Tools Checklist for Removing Paint From Concrete Block
When you’re ready to strip paint from concrete block, gather a compact set of reliable tools so the job stays efficient and safe. You’ll need a stiff wire brush, masonry scraper, and a drill with a rotary wire brush attachment for stubborn areas.
Include a chemical paint stripper rated for masonry, plastic scrapers, and disposable LED work light.
Wear nitrile gloves, eye protection, respirator, and knee pads.
Use drop cloths, painter’s tape, and plastic sheeting to protect surroundings.
Keep a bucket, sponges, scrub brushes, and a hose or pressure washer.
Note paint color and wall texture to choose appropriate methods.
How to Test a Small Area Before Full Removal
With your tools ready, pick a discreet 6–12 inch test patch to try your chosen removal method and materials. This quick experiment tells you how the concrete and paint will react so you can adjust techniques and safety measures. Use PPE and document results.
Try these steps:
- Clean patch and note existing color matching issues.
- Apply remover or technique briefly; wait recommended dwell time.
- Scrape gently to assess paint adhesion and surface damage.
- Rinse, dry, and photograph results for comparison.
If adhesion is strong or substrate harmed, change method or consult a pro before proceeding across the wall.
When to Use a Pressure Washer on Painted Block
If the paint is flaking off in large sections, the mortar joints are intact, and your test patch showed the concrete tolerates high-pressure rinsing, you can consider using a pressure washer to speed removal.
But avoid it on thinly coated or fragile surfaces, fresh masonry, or areas with deteriorated mortar where high pressure can drive water into the block and cause damage.
You’ll choose pressure washing when bulk removal is needed, surfaces are sound, and you can control runoff.
Don’t use it if you plan delicate color matching or want to preserve decorative finishes—those need gentler methods and careful restoration planning.
Pressure Washer Settings and Nozzle Choices for Block
Because concrete block varies in porosity and paint adhesion, you’ll want to match pressure, nozzle, and distance to the job rather than just crank the washer to max. You’ll choose settings based on paint type, age, and whether you’re prepping for color matching or tackling graffiti removal.
Match pressure, nozzle, and distance to paint type and age—don’t just crank the washer to max.
Try these guidelines:
- Start at 1200–1500 PSI; increase cautiously if needed.
- Use a 25° nozzle for general stripping; switch to 15° for stubborn paint.
- Hold 12–24 inches from the block to avoid deep erosion.
- Finish with a wider fan or low PSI rinse for even surface texture and inspection.
Avoiding Water Damage When Pressure Washing Block
After you’ve dialed in pressure and nozzles, shift focus to protecting the structure and nearby areas from excess water. You’ll seal windows, doors, and vents with plastic and tape, divert runoff with temporary berms, and cover landscaping.
Work top to bottom so water flows away from sensitive spots. Avoid directing the stream at mortar joints or decorative finishes; prolonged saturation can loosen grout and harm underlying paint meant for color matching later.
Monitor for seepage into basements or cavities, stop if you see it, and dry the block with fans or sunlight before repainting or applying new finishes.
How Chemical Paint Strippers Work on Masonry
Curious how chemical strippers remove paint from porous masonry? You’ll see that they penetrate porous concrete, soften binders, and lift coatings so you can scrub or rinse them away. Understand both how they work and their Environmental impact before use.
- Solvents swell and dissolve paint binders via Chemical reactions, breaking polymer chains.
- Caustic agents saponify oil-based paints, turning them into removable residues.
- Gel formulas cling to vertical block, increasing dwell time for deeper penetration.
- Residue and runoff need containment to limit contamination and comply with disposal rules.
Use appropriate PPE and ventilate; neutralize and collect waste responsibly.
Choosing the Right Chemical Stripper for Concrete Block Paint
Now that you know how strippers penetrate masonry and what environmental precautions to take, choosing the right product comes down to matching stripper chemistry and form to the paint type, block porosity, and work conditions.
Choose a stripper by matching its chemistry and form to paint type, block porosity, and work conditions.
You’ll identify paint by solvent tests—alkyd, latex, or masonry coatings—and pick a stripper whose chemical reactions break those binders.
Gelled formulas cling to vertical, porous block; low-odor, water-based strippers suit enclosed areas.
For thick or multi-layer paint, consider stronger solvents or blended systems.
Match application method to your painting techniques to avoid overworking the surface, and always confirm compatibility on a small, inconspicuous area.
Applying Chemical Stripper Safely and Effectively
Pick the right stripper for masonry and test it on a small, inconspicuous area so you know how it reacts to the block.
Prepare the work area by ventilating, protecting nearby surfaces, and wearing proper PPE.
After you strip the paint, neutralize according to the product instructions and rinse the wall thoroughly.
Choose The Right Stripper
Before you buy anything, match the stripper to the paint and the block: water-based paint lifts with less aggressive, low-VOC gels, while heavy-duty oil-based or multiple coats often need a stronger, solvent or methylene chloride-free stripper formulated for masonry.
You’ll want to evaluate:
- Paint type — latex, enamel, or oil.
- Block porosity — dense vs. highly textured surfaces.
- Residue impact — choose low-VOC for indoor use.
- Cleanup method — brush, pressure wash, or neutralizer.
Pick a product that supports color matching and texture restoration so removed areas blend when you repaint or seal. Test a small patch first.
Prepare The Work Area
When you’re working with chemical strippers, set up the area so you control fumes, runoff, and accidental contact—open windows and doors, run fans to push air out, and seal off adjacent rooms or landscaping with plastic sheeting and tape.
Wear chemical-resistant gloves, eye protection, and a respirator rated for solvents.
Lay down absorbent pads and plastic to catch drips; keep a dedicated disposal container nearby.
Test a small patch to check color blending and adhesion before full application.
Post warning signs and keep children and pets away.
Have neutralizing materials and first-aid supplies on hand, and work in manageable sections.
Neutralize And Rinse Thoroughly
After the stripper has softened the paint, neutralize the surface promptly to stop the chemical reaction and make rinsing safer. You’ll need a neutralizer recommended by the stripper maker or a mild baking soda solution.
Apply it evenly, scrub with a stiff brush, then let it dwell as instructed. Rinse thoroughly with low-pressure water to avoid driving residue into pores.
Proper neutralization preserves future color matching and improves paint adhesion if you’ll repaint.
Follow this quick checklist:
- Wear PPE and ventilate the area.
- Apply neutralizer per label.
- Agitate with a brush.
- Rinse until runoff is clear.
Neutralizing and Rinsing Chemical Strippers From Masonry
Because chemical strippers leave alkaline or acidic residues that can damage masonry and interfere with new coatings, you’ll need to neutralize and thoroughly rinse the surface before proceeding. You test small areas, choose neutralizers matched to chemical reactions from the stripper, and consider paint formulations removed. Work systematically, scrub with stiff brushes, then rinse with clean water until runoff is neutral (pH ~7). Allow to dry and recheck pH before priming.
| Step | Neutralizer | Rinse method |
|---|---|---|
| 1 | Mild acid or base | Low-pressure hose |
| 2 | Follow label | Continuous flushing |
| 3 | pH test strips | Repeat until neutral |
Heat Guns & Infrared Tools: Pros and Cons for Block Paint
When using heat guns you’ll need to follow strict safety tips—wear heat-resistant gloves, eye protection, and keep a fire extinguisher nearby.
Infrared paint-stripping can soften multiple paint layers without burning, but you’ll still need to test a small area to gauge effectiveness.
Be careful on block and mortar surfaces though, since excessive heat can damage the masonry or loosen mortar joints.
Heat Gun Safety Tips
Though heat guns can strip paint from concrete block faster than scraping, they demand careful handling to avoid burns, fire, and damage to the masonry. You’ll protect paint color integrity and prevent altering wall texture by controlling heat, keeping the gun moving, and testing a small area first.
Follow these safety tips:
- Wear heat‑resistant gloves, eye protection, and a respirator for fumes.
- Maintain a safe distance; don’t hold the nozzle near mortar joints or seams.
- Keep a fire extinguisher nearby and clear flammable materials.
- Allow blocks to cool between passes; avoid prolonged heating that can crack the block.
Infrared Paint Stripping
Curious whether infrared or heat‑gun stripping is right for your concrete block walls? Infrared tools heat paint gently, softening layers so you can scrape more cleanly than with a heat gun that risks scorching. You’ll work faster on large, flat sections and avoid many fumes; still, you should ventilate and wear protection.
Infrared pairs well with eco friendly solvents when stubborn spots resist, reducing chemical volume. For graffiti removal, infrared lets you control heat to loosen coatings without aggressive blasting.
Balance speed, safety, and finish: test a small area first to confirm effectiveness before committing to the whole wall.
Surface And Mortar Effects
You’ve seen how infrared softens paint for easier scraping; now consider how heat—whether from infrared panels or a handheld gun—affects the block itself and the mortar joints. You’ll judge tools by results on surface texture and mortar joints, weighing speed against risk.
- Infrared: gentle on surface texture, reduces chipping, but slower on multiple coats.
- Heat gun: fast stripping, can blister paint and weaken mortar joints if overheated.
- Combination: infrared to loosen, gun for stubborn spots minimizes damage.
- Test small areas, cool frequently, and avoid prolonged exposure to protect block integrity.
Mechanical Removal Options: Grinders, Sanders, Wire Brushes
When paint on concrete block won’t come off with chemicals, mechanical methods give you control and speed: grinders and angle grinders remove thick, stubborn coatings. Sanders smooth residues from flatter areas, and wire brushes—manual or powered—help reach mortar joints and textured faces.
You’ll pick tools based on paint thickness, block texture, and your end goal: exposing bare block for a new coat, prepping for color mixing in decorative finishes, or simply cleaning.
Wear PPE, work in sections, and test each tool on an inconspicuous area. Keep dust containment and disposal in mind, and avoid excessive pressure that damages the block.
How to Use a Grinder on Block Without Gouging
Pick a masonry or diamond cup disc suited for concrete, not an aggressive metal-cutting wheel, so you get steady material removal without chewing the block.
Keep the grinder moving, use light, consistent pressure, and let the tool’s speed do the work instead of forcing it.
Adjust RPMs and use lower speed for corners or thin paint layers to avoid gouging.
Choose The Right Disc
Which disc you choose makes the difference between a clean strip and a gouged mess. You want a blade that removes paint while keeping concrete integrity for color matching and texture preservation.
Consider these options:
- Diamond cup — aggressive removal, use for thick coatings.
- Silicon carbide — moderate, good for delicate surfaces.
- Flap disc — blends edges, aids texture preservation.
- Wire wheel — fine for spot work, avoid overuse.
Match disc grit to paint hardness and test on an inconspicuous block.
You’ll protect the block’s look by choosing the right disc before you grind.
Control Pressure And Speed
After you’ve matched the disc to the job, focus on controlling pressure and speed so you strip paint without gouging the block. Hold the grinder with both hands, keep it flat, and let the disc do the work; don’t force it.
Use light, consistent passes, increasing speed only if paint resists. Test a corner and adjust RPMs and pressure until you remove paint while preserving mortar texture.
Work methodically to avoid overcutting. When refinishing, consider color matching while planning paint removal for future coats and how exposed block will affect overall interior design decisions.
Hand Tools and Spot‑Scraping Techniques for Small Areas
When you’re dealing with small patches of peeling or flaking paint on a concrete block wall, hand tools let you work precisely without disturbing surrounding areas. You’ll focus on careful scraping, feathering edges, and prepping for color matching and texture restoration so repairs blend.
- Use a stiff putty knife for loose paint, holding it flat to avoid gouging.
- Employ a wire brush sparingly to clean crevices, then vacuum debris.
- Try a triangular scraper for mortar joints and tight spots.
- Sand lightly with a sanding block to feather edges before priming.
Work slowly, check progress, and touch up gradually.
Media Blasting for Block Paint: Soda, Sand, and Alternatives
When you need to strip paint from concrete block quickly, media blasting gives you several options: soda blasting for a gentler, less abrasive finish, traditional sandblasting for aggressive removal, and alternatives like crushed glass or garnet that balance cut and surface damage.
You’ll want to weigh each method’s effectiveness, dust and health risks, and how much detail or texture you need to preserve.
I’ll outline pros and cons so you can pick the best abrasive for your wall and cleanup constraints.
Soda Blasting Basics
Curious which blasting method works best on painted concrete block? Soda blasting uses sodium bicarbonate particles propelled at lower velocity to strip paint without aggressively etching the block.
You’ll appreciate eco-friendly methods and historical preservation benefits: soda is non-toxic, water-soluble, and gentle on masonry.
Consider these points:
- Surface preparation: clear debris, test a small patch.
- Equipment: choose adjustable pressure and compatible nozzle.
- Technique: maintain angle and distance to avoid surface damage.
- Cleanup: vacuum residues, rinse, and neutralize as needed.
You’ll get effective paint removal with minimal substrate harm when you follow proper setup and safety practices.
Sandblasting Pros Cons
Although sandblasting can strip paint from concrete block quickly and cheaply, it also carries risks you’ll want to weigh against alternatives like soda or crushed glass. You should consider surface damage, dust, and containment needs. Sand can etch blocks, complicating color matching for repairs or artistic techniques later. You’ll need PPE, permits, and cleanup plans.
| Benefit | Risk | Mitigation |
|---|---|---|
| Fast removal | Surface etching | Test small area |
| Affordable | Hazardous dust | Use containment |
| Effective | Overshooting detail | Lower pressure |
Decide based on wall condition, nearby environments, and finish goals.
Alternative Abrasive Options
If you need to remove paint from concrete block but want to avoid the drawbacks of traditional sandblasting, consider alternative media blasting options like sodium bicarbonate (soda), crushed glass, crushed walnut shells, or plastic abrasives.
Each balances aggressiveness, cleanup, and surface impact differently, so pick the one that matches your block condition, paint type, and finish goals. You’ll weigh Eco friendly alternatives and cost, plus follow DIY safety tips.
Choose softer media for delicate mortar or gentle profilings.
- Soda: gentle, biodegradable.
- Crushed glass: aggressive, fast.
- Walnut shells: moderate, nonabrasive.
- Plastic beads: controllable, reusable.
Choosing Blasting Media That’s Safe for Concrete Block
When you pick a blasting media for concrete block, focus on abrasives that strip paint without eroding the block’s surface; choose media that balance cleaning power and gentleness. You’ll prefer crushed walnut shells, baking soda, or fine glass beads over harsher abrasives.
They support eco friendly cleaning and minimize surface profile changes that could affect paint adhesion if you plan to repaint. Test a small area to confirm effectiveness and surface integrity.
Adjust pressure and nozzle distance rather than switching to a more aggressive media. Always wear protection and follow disposal rules for used media and removed paint debris.
Removing Paint From Textured or Split‑Face Concrete Block
Because textured or split‑face concrete blocks have deep crevices and irregular surfaces, you’ll need methods that get into nooks without damaging the raised faces or tearing out aggregate. Start by evaluating concrete texture and paint adhesion to choose pressure, media, and chemicals that reach pores. Use gentle action first and test small areas.
- Soft-bristle brushes and low-pressure wash for loose paint.
- Chemical strippers formulated for masonry, applied with scrapers and scrubbers.
- Fine abrasive blasting (e.g., walnut shell) at controlled pressure.
Rinse thoroughly, allow full drying, then inspect for remaining adhesion issues.
Dealing With Stubborn or Multiple Paint Layers
Although multiple paint layers and old, stubborn coatings can seem impossible to remove, you can tackle them methodically by combining mechanical, chemical, and thermal approaches while protecting the block.
Start with test patches to determine which method works fastest without damaging mortar. Use grinders, pressure washers, or heat guns in controlled passes; follow with a compatible chemical stripper for remaining layers. Rinse thoroughly and let dry.
When prepping for repainting or repair, plan for color matching and texture matching so patched areas blend. Seal and prime appropriately to prevent future adhesion problems and guarantee consistent finish across the wall.
Stain and Residue Removal After Paint Is Stripped
After stripping paint, you’ll want to inspect the block closely to identify any remaining residue—chalky film, adhesive traces, or color stains each need different treatments.
Test small areas with appropriate cleaners like trisodium phosphate, oxalic acid, or a mild muriatic solution to see what breaks the stain without damaging the block.
Once you know the residue type, you can choose targeted options—scrubbing, poultices, or repeating chemical treatments—to restore the surface.
Residue Identification
Once you strip paint from a concrete block, you’ll often find another challenge: the leftover stains and residues that reveal what was beneath the finish. You’ll need to identify types to decide next steps without jumping into treatments. Look for texture, color, odor, and penetration depth. Note whether marks relate to previous topcoat, primer, efflorescence, rust, or graffiti.
- Surface discoloration: shallow, often from previous paint or fading.
- Deep staining: may indicate rust or oil seeping into pores.
- Powdery residue: suggests efflorescence or lime bloom.
- Sharp pigments: point to graffiti or spray paint.
Stain Treatment Options
Now that you can identify the residue types, you’ll choose treatments matched to each stain rather than applying a one-size-fits-all method.
For paint ghosting, use a mild acid rinse or poultice, rinse thoroughly, and test in an inconspicuous area.
For tannin or rust, apply chelating cleaners and gentle scrubbing.
For adhesive or sealant residues, use a solvent recommended for masonry and ventilate.
After cleaning, neutralize any chemicals and allow full drying before evaluating color matching or applying sealers.
If you plan decorative finishes, test primers and samples to verify adhesion and consistent appearance across the block surface.
Repairing Mortar and Block Damage After Stripping
When stripping paint exposes cracked mortar or chipped blocks, you’ll want to address those issues before repainting or sealing. Repairing now prevents moisture intrusion and guarantees a smooth finish. You’ll assess damage, remove loose material, and choose compatible mortar or patching compound. Consider color matching for visible repairs and treat lingering surface staining before repairs set.
Address cracked mortar and chipped blocks after paint stripping: remove loose material, match mortar, patch, cure, and seal to prevent moisture.
- Remove debris and undercut failing mortar.
- Mix and apply repair mortar to match texture.
- Patch chips with a concrete repair compound.
- Cure, then lightly sand high spots for uniformity.
Finish by sealing repairs to protect against future moisture.
Prep Steps for Repainting or Sealing Stripped Block
Before you repaint or seal the stripped block, clear all loose paint chips, dust, and dirt with a stiff brush or pressure washer so the new coating will adhere properly.
Check for and repair any lingering mortar gaps or cracks.
Then test for moisture by taping a plastic sheet to the wall for 24 hours to spot damp areas.
Only proceed with painting or sealing once surfaces are clean, dry, and sound.
Surface Cleaning And Debris Removal
Ready to repaint or seal your stripped concrete block? You’ll want a clean, debris-free surface so paint or sealer adheres evenly and color mixing looks true across varied wall textures.
Start by sweeping loose dust and vacuuming crevices. Use a stiff brush and mild detergent to remove grime, then rinse with a low-pressure washer; avoid saturating joints.
For remaining paint flakes, scrape carefully and spot-sand rough areas. Allow the block to dry fully before masking.
Inspect for oil, efflorescence, or mold and treat specifically. Proper cleaning prevents adhesion problems and guarantees a consistent finish and longevity.
- Sweep and vacuum
- Brush and wash
- Scrape and sand
- Rinse and dry
Moisture Inspection And Repair
Since moisture trapped in concrete block ruins paint and promotes mold, inspect thoroughly for damp spots, efflorescence, and active leaks before you coat. Check interior and exterior faces, joints, and sill areas; use a moisture meter to map readings.
Address any plumbing or grading issues causing moisture damage, repair cracks with hydraulic cement, and replace failed flashing.
Dry the wall fully—use fans or dehumidifiers if needed—and clean efflorescence with a mild acid wash.
Apply a breathable masonry primer and consider waterproofing only after repairs.
These steps guarantee long-term adhesion and effective mold prevention before repainting or sealing.
Best Primers and Paints for Previously Painted Block
When you’re repainting a block that’s already been painted, choosing the right primer and paint makes the job last and look professional. Pick a high-adhesion masonry primer to lock to old coats and fill minor pores.
Use 100% acrylic exterior paint for flexibility and durability. Consider color psychology—lighter hues brighten basements; neutrals hide imperfections. If you prefer low impact, choose eco-friendly alternatives like low-VOC primers and paints.
Use 100% acrylic exterior paint for lasting flexibility; choose lighter hues to brighten basements and low‑VOC options for lower impact.
Follow this checklist:
- Test adhesion with a patch.
- Match primer to topcoat type.
- Check moisture content before painting.
- Use breathable products to avoid trapping dampness.
How to Seal Raw Concrete Block to Preserve the Finish
Before you seal raw concrete block, make sure you clean, repair cracks, and remove efflorescence so the sealer bonds properly.
Pick a sealer suited to the block’s porosity and exposure—breathable silane/siloxane for exterior work or a clear acrylic for interior finishes.
Apply per the manufacturer’s instructions, allow proper curing time, and avoid foot or equipment traffic until the seal is fully set.
Surface Preparation Steps
If you want your cleaned concrete block to keep looking good and resist stains, sealing it’s a must—sealants lock out moisture, prevent efflorescence, and make future maintenance easier.
Start by sweeping and vacuuming loose dust, then scrub stains with a mild detergent and rinse. Repair cracks with cementitious patch and allow full cure. Test a small area to check color matching and texture enhancement under the sealer.
- Remove debris and oil.
- Neutralize efflorescence with a suitable cleaner.
- Fill voids and sand rough spots.
- Guarantee surface is dry before sealing.
Choosing The Right Sealer
Which sealer will best protect your raw concrete block and keep the finish looking like new? You’ll pick a breathable, penetrating sealer designed for masonry to avoid trapping moisture.
Choose a water-repellent silane or siloxane if you want invisible protection, or a clear acrylic for slight sheen. Consider color blending options if matching repaired areas matters; tinted sealers can unify appearance without hiding texture.
For blocks needing texture restoration, pick a sealer that won’t flatten relief—test on a small patch.
Check VOC levels, durability ratings, and compatibility with previous treatments before committing to a product.
Application And Curing
Once you’ve picked a compatible sealer and prepared the surface, apply it evenly so the product can penetrate and cure properly. Work in consistent strokes, avoid pooling, and keep humidity low during curing.
Watch for areas with different paint texture or where color mixing altered absorption; those may need a second coat.
- Test a small section first.
- Use a roller for flat faces, brush for crevices.
- Allow recommended dry time between coats.
- Maintain airflow and temperature per label.
After curing, inspect for sheen uniformity. Touch up only where penetration was insufficient to preserve the finish.
Environmental Rules and Disposal for Paint Waste/Runoff
Because paint waste can contain hazardous chemicals, you need to handle runoff and leftover materials carefully to protect waterways and comply with regulations. Use eco-friendly solvents where possible, contain wash water, and never let runoff enter storm drains.
Collect chips, rags, and slurry in labeled, sealed containers for hazardous-waste pickup or drop-off per local disposal regulations.
Wear protective gear when transferring wastes, and keep records of disposal receipts if required.
For small amounts, follow municipal guidance for dried paint disposal.
When in doubt, contact your local environmental agency to avoid fines and prevent contamination.
Cost Comparison: Pressure Wash vs Chemical vs Mechanical
Handling disposal correctly can also affect the overall price of removing paint from concrete block walls, so weigh cleanup and waste fees alongside the method’s upfront costs. You’ll need to balance labor, equipment rental, and follow-up prep like color matching or treating paint adhesion issues.
Consider:
- Pressure wash: lower rental cost, higher water/runoff handling and possible surface repair.
- Chemical stripper: mid-cost, needs hazardous waste disposal and neutralizing for paint adhesion.
- Mechanical (grinder/sandblaster): higher equipment and PPE cost, generates contaminated dust.
- Hybrid approach: higher planning cost but can reduce rework.
Pick based on budget, disposal rules, and desired finish.
Time Estimates By Wall Size and Method
When you’re planning paint removal, expect time to vary widely by wall size and method, so estimate per-square-foot rates and scale up for prep, drying, and cleanup.
For small sections (under 50 sq ft), hand-scraping or chemical gel takes 1–4 hours; mechanical sanding speeds to 1–2 hours but needs dust control.
Medium walls (50–300 sq ft) pressure washing or combined chemical brushing runs 4–12 hours including rinsing.
Large walls (300+ sq ft) often require staged work over days with commercial pressure units.
Allow extra time if you plan decorative finishes later or to integrate waterproofing techniques after removal.
Common Mistakes That Damage Concrete Block: And How to Avoid Them
If you push too hard with grinders, pressure washers, or harsh chemicals, you’ll strip away more than paint—you can chip faces, widen mortar joints, or expose aggregate and weaken the block. Avoid common mistakes by working deliberately and testing methods on inconspicuous areas.
Balance removal with preserving texture, and plan for color matching if you’ll repaint. For graffiti removal, use products formulated for masonry and follow manufacturer dwell times.
- Over-sanding: wears block surface.
- Excess pressure: dislodges mortar.
- Wrong chemical: stains or etches.
- Skipping patching: leaves structural gaps.
Inspect, test, and proceed slowly.
Troubleshooting: Paint That Won’t Come Off
Because concrete and coatings vary so much, some paint just won’t budge with basic methods—and that’s okay. Start by testing a small area with stronger strippers, scouring, or a wire brush, and note results.
If residue remains, try a slow, controlled heat gun or gel stripper designed for masonry. Protect surrounding surfaces as if displaying work in an art gallery, and rotate tools like a paint palette until you find what cuts cleanly without etching the block.
When nothing removes it, consider sealing, painting over with a bonding primer, or consulting a professional to avoid damaging the block.
Seasonal Considerations: Best Time of Year to Strip Paint
Why pick a specific season to strip paint? You want conditions that help adhesion removal, drying, and cleanup. Aim for mild, dry weather and plan around outdoor activities like seasonal gardening and holiday decorating.
- Spring: moderate temps, good for prepping before planting.
- Summer: hot and dry speeds drying but can make chemicals volatile.
- Fall: cooler, stable temps, avoids interfering with holiday decorating.
- Winter: cold and wet slows removal, risks freezing cleaning solutions.
Choose a window with low humidity and no forecasted rain. Schedule windy-day precautions and keep plants protected during work.
Lead or Historic Paint? Required Steps and Legal Rules
Before you start stripping paint, determine whether the coating is lead-based or historically significant—this affects what you can legally do and how you must protect people and the environment.
Before stripping paint, test for lead and check historic status—rules and protections may limit removal.
You should test suspect layers for lead paint with a certified lab or EPA-approved kit before work.
If results show lead, follow federal and local abatement rules: contain and minimize dust, use HEPA filtration, provide PPE, and notify occupants.
For historic coatings, consult preservation guidelines and local historic commissions—removal may be be restricted or require specific methods to preserve character.
Document findings and permits before proceeding.
Hiring a Contractor for Block Paint Removal: Questions to Ask
When hiring a contractor to remove paint from concrete block walls, ask targeted questions that reveal their experience, safety practices, and compliance with regulations so you can compare bids confidently. Verify licensure, insurance, and references for projects involving historical preservation or suspected lead.
Ask about eco-friendly methods, waste disposal, and containment plans. Clarify timelines, written estimates, and warranty terms.
- Experience with block substrates and historic properties?
- Preferred removal techniques and environmental controls?
- Proof of insurance, certifications, and permit handling?
- Cleanup, debris disposal, and post‑work inspection?
Trust clear answers and written contracts.
Quick Maintenance Tips to Keep Block Walls Looking Good
If you want your block walls to keep looking sharp with minimal effort, establish a simple routine of inspection, cleaning, and small repairs every few months. Walk the perimeter, note chips, efflorescence, or peeling paint, and address stains promptly.
Use a mild detergent and soft brush for routine cleaning; pressure-wash cautiously to protect mortar. Touch up exposed areas with matched paint, paying attention to color matching for seamless repairs.
Seal porous blocks and reapply a breathable sealer to improve weather resistance. Keep gutters and plants trimmed to reduce moisture exposure, and log maintenance dates for consistent care.
Recommended Tools and Products By Common Scenario
Since different problems call for different approaches, you’ll want the right tools and products matched to the situation—basic cleaning, heavy paint removal, or patch-and-paint repairs. You’ll choose based on surface condition: dirt, peeling paint, or damaged blocks.
Use detergents and stiff brushes for grime; chemical strippers or a pressure washer for stubborn paint; mortar repair and block primer for patches.
Pay attention to color mixing when matching touch-ups and practice brush techniques for even coverage.
Suggested kits:
- Basic cleaner, stiff poly brush, garden hose.
- Paint stripper, scraper, safety gear.
- Pressure washer, rotary brush.
- Mortar repair, primer, paintbrush.
Frequently Asked Questions
Can Paint Removal Damage Nearby Underground Utilities or Septic Systems?
Yes — if you use harsh chemicals or pressure washing, you can damage underground lines and harm septic systems; you’ll need utility safety checks and containment to minimize environmental impact and prevent contamination or structural harm.
Will Removing Paint Affect My Home Insurance or Property Valuation?
Ironically, yes — cosmetic changes can matter. You’ll avoid Insurance concerns by using approved methods and documenting work; that preserves Property value. Unpermitted or hazardous removal could raise claims or lower resale appeal, so proceed carefully.
How Long Before Repainting Can People Safely Occupy the Area?
You can safely occupy the area after 24–72 hours if ventilation’s strong; however, for sensitive people wait 3–7 days to minimize indoor hazards and paint fumes exposure, and keep windows open and fans running.
Can Wildlife or Pets Be Harmed by Paint Removal Activities?
Yes — wildlife safety and pet protection matter; you should keep animals away, seal vents, use low-tox or biodegradable removers, ventilate thoroughly, and dispose of waste properly to prevent poisoning, inhalation, or contamination.
Are There Permits Required for Large-Scale Exterior Paint Removal?
Yes — you’ll often need permits for large-scale exterior paint removal; check local regulations. Consider environmental impact and follow safety precautions, including containment, proper disposal, air monitoring, and notifying authorities to avoid fines and hazards.
Conclusion
Removing paint from concrete block can be transformative—and you’ll likely save money DIY: professionals say homeowners can tackle up to 60% of small jobs themselves. With the right test for adhesion and paint type, you’ll pick a safe, effective method and avoid costly mistakes. If the job’s large, lead‑paint, or structural, hire a pro. Follow prep, proper PPE, and maintenance tips to keep blocks clean and long‑lasting.