How to Paint Without Streaks on the Walls
Prep thoroughly: clean, sand, patch and prime as needed so paint goes on smooth. Use high-quality, pigmented paint and matching primer, stir and strain it, and pick the right roller nap for your wall texture. Keep tools loaded but not dripping, work in sections with a wet edge using a “W” pattern, overlap and feather each pass, and maintain consistent pressure. Inspect in good light and touch up problem areas—keep going for step-by-step tips to perfect the finish.
Quick Checklist: Prevent Streaks Before You Start
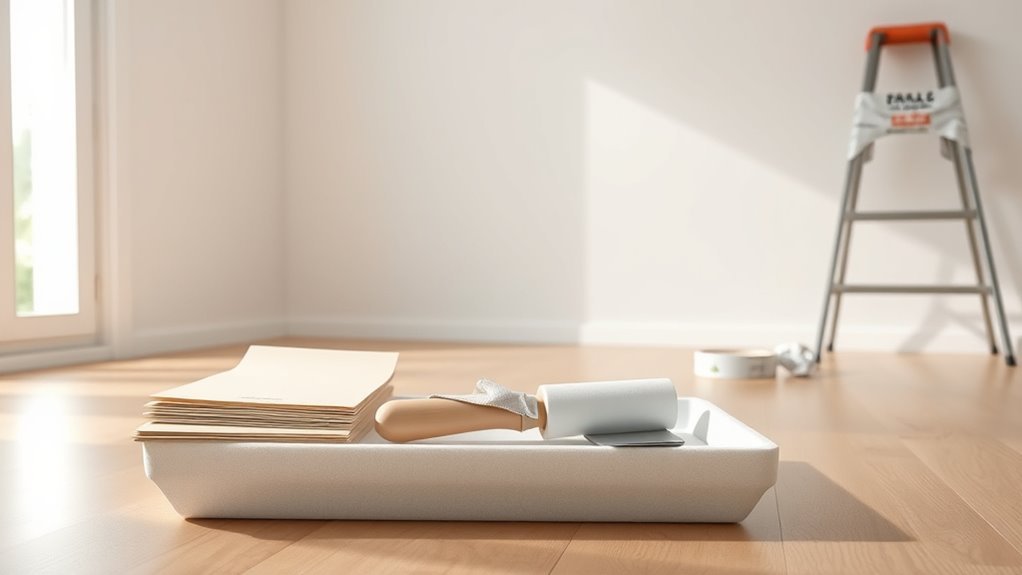
Before you open a can of paint, run through a quick checklist to stop streaks before they start.
Check wall prep: clean, sand, and patch imperfections so rollers glide evenly.
Clean, sand, and patch walls first so rollers glide smoothly and finish stays streak-free
Test a small swatch to confirm coverage and how Color psychology will influence room mood under different light.
Choose high-quality rollers and extension poles for consistent pressure.
Stir paint thoroughly and strain to remove lumps.
Pick eco-friendly paints with good pigment load to reduce multiple coats.
Plan coat timing: keep wet edges and maintain a wet edge across each wall to avoid lap marks and uneven sheen.
How Paint Finish Affects Roller Marks
While finish choice might seem cosmetic, it directly changes how roller marks show up on your walls. You’ll notice flat or matte paint hides surface irregularities better because it scatters light, reducing visible roller texture.
Eggshell and satin have slight sheen that can highlight overlap or nap lines if application isn’t uniform. High-gloss amplifies every subtle ridge, so you’ll need flawless technique.
Adjust roller consistency by loading the roller evenly and avoiding overworking wet edges; that minimizes marks regardless of sheen. Test a small section first to confirm how your chosen paint sheen interacts with your rolling method and room lighting.
Pick Paint Quality and Formulation That Hides Flaws
If you want walls that hide imperfections, choose a paint formulated to do the job. Pick high-quality, pigment-rich paints with a slightly thicker paint texture to fill minor dents and smooth uneven surfaces.
Sheen choice matters—matte or flat hides flaws better than satin or gloss. Test samples on wall sections to confirm how color selection affects perceived depth; darker or cooler tones can conceal irregularities, while very light or glossy finishes reveal them.
Look for paints labeled “stain-blocking” or “high-hide” and read technical data for hide ratings. Spending more on formulation saves time and touch-ups later.
When to Prime: Timing and Primer Types
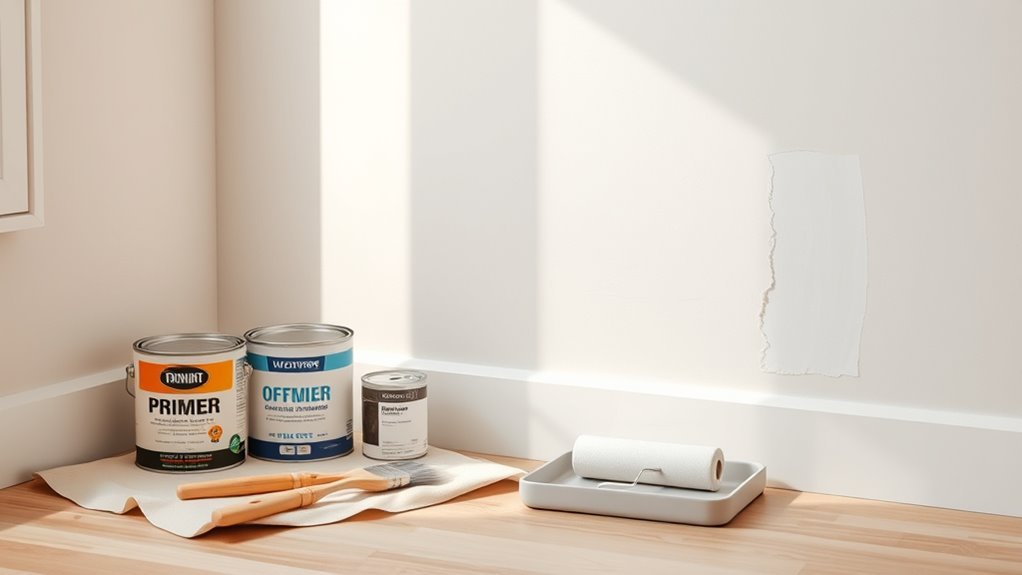
You’ll want to prime before painting whenever the surface is porous, stained, or has patched areas to guarantee even absorption and prevent streaks.
Choose a primer type based on the job: latex for general walls, oil or shellac for stubborn stains or tannin bleed, and bonding primers for slick surfaces.
Apply primer when the substrate is clean and dry, and let it fully cure to get a uniform topcoat.
When To Prime
When should you prime? You should prime before painting when switching bold color schemes, covering stains, or painting over glossy finishes. Prime also when wall textures vary or repairs leave porous patches. Wait for patching compound to fully cure and for moisture to drop below 15%.
| Situation | When to Prime | Benefit |
|---|---|---|
| New drywall | Before painting | Seals paper, evens absorption |
| Stained walls | Always | Blocks bleed-through |
| Dark-to-light color | Always | Improves coverage |
| Glossy surfaces | After sanding | Promotes adhesion |
| Textured repairs | After cure | Prevents patch show-through |
Choose primer timing to guarantee smooth, streak-free results.
Primer Types Explained
Because primers vary in formulation and purpose, picking the right one matters as much as timing—latex primers work well for most interior walls and dry quickly. Oil-based primers block stains and bond to glossy or problematic surfaces. Specialty primers (like shellac or bonding primers) handle tough stains, odors, or slick finishes.
You’ll choose based on substrate, stain severity, and desired finish. Consider primer chemistry: water-based for flexibility, oil or shellac for sealing. Test surface adhesion on a small patch.
Apply primer thinly and evenly, let it cure fully, then sand lightly before painting to prevent streaking and guarantee uniform coverage.
Repair Dents, Holes, and Texture First
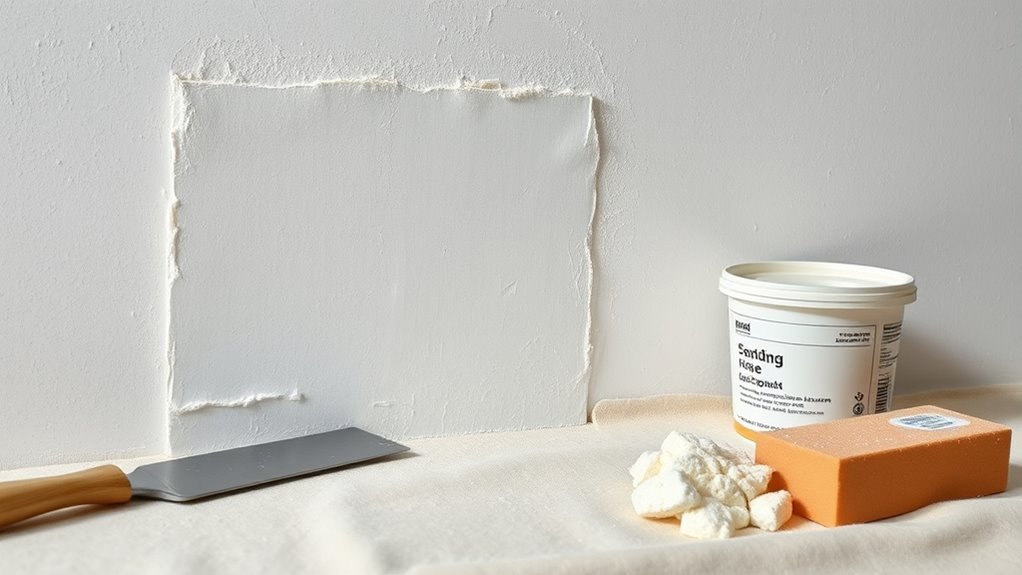
Before you paint, walk the walls and mark every dent and hole so you don’t miss anything.
Patch gaps with spackle or joint compound, let it dry, then sand smooth.
If your wall has a textured finish, match or recreate that texture before you prime and paint.
Assess And Mark Damage
If you want a flawless finish, start by walking the room and marking every dent, hole, and uneven texture you see; assess damage systematically, working from top to bottom and one wall at a time.
Use consistent symbols or colored tape to mark flaws so you don’t miss anything later. Note hairline cracks, loose paint, and areas where texture changes.
Photograph or sketch larger problem spots and record measurements for supplies.
Prioritize safety around electrical outlets and trim.
This organized approach to Assess Damage and Mark Flaws saves time, prevents surprises, and sets you up for efficient, streak-free painting.
Patch, Sand, Texture
Now that you’ve marked every flaw, tackle repairs so your paint lays smooth. Begin with a Patch repair: clear loose material, apply a lightweight filler, and press it into dents and holes. Let it dry fully.
Sand flush with fine-grit sandpaper, feathering edges so transitions disappear. For textured walls, match the existing pattern using texture techniques—dab, stipple, or spray to replicate the finish.
Prime repaired spots to equalize absorption. After priming, re-sand any high edges lightly. Inspect under good light; repeat minor corrections until seamless.
Proper prepping prevents streaks and guarantees an even final coat.
How to Thin and Mix Paint for Smooth Flow
When you thin and mix paint properly, it flows evenly from brush or roller and lays down without brush marks or lap lines. Start by checking paint consistency; it should coat but drip slowly. Use manufacturer-recommended thinners—water for latex, mineral spirits for oil—adding small amounts and stirring thoroughly.
Employ mixing techniques like a slow, steady stir from bottom to top to reincorporate pigments and avoid bubbles. Strain mixed paint to remove clumps. Test on a scrap board, adjust slightly if it beads or runs, and remix.
Keep a clean, labeled container for mixed batches to maintain uniform color and flow.
Best Rollers and Nap Lengths for Smooth Walls
You’ll pick a roller type based on the finish you want—smooth walls call for a dense, short-nap roller while textured surfaces need thicker naps.
For most interior smooth walls, a 3/16″ to 3/8″ nap gives even coverage without texture.
Match roller fabric to your paint (synthetic for latex, natural for oil) to reduce streaks and shedding.
Roller Type Choice
Choosing the right roller makes a bigger difference than most people expect, so pick one that matches your wall texture and paint type. You want a roller that holds paint evenly and minimizes lap marks, and you’ll care about roller maintenance to keep naps clean and effective.
Also consider how paint color selection affects coverage—darker or bolder colors may need more uniform application.
- Synthetic blend: durable with latex, resists matting, easy roller maintenance.
- Natural fiber: excels with oil-based paints, gives smooth finish on primed walls.
- Microfiber: best for thin-bodied paints, high pickup and release.
Nap Length Guide
If your walls are smooth, pick a shorter nap to lay down paint thinly and evenly. You’ll control coverage, reduce streaks, and showcase color psychology choices more accurately—subtle hues need crisp application. Use 1/4″–3/8″ naps for smooth plaster or drywall; switch to 1/2″ for lightly textured surfaces. For eco friendly paints, thinner naps prevent waste and uneven sheen. Match roller material to paint type and keep a wet edge. Refer to this quick guide for context.
| Surface | Recommended Nap |
|---|---|
| Glassy smooth | 1/4″ |
| Smooth drywall | 3/8″ |
| Light texture | 1/2″ |
Brushes That Won’t Leave Brush Strokes
When you want a smooth, streak-free finish, pick brushes with dense, tapered filaments that hold paint evenly and release it smoothly onto the wall. Choose high-quality synthetic filaments for latex or eco-friendly paints to prevent split bristles.
Consider how color psychology affects perception—smoother application reduces banding that distracts from hue. Keep brushes clean and store flat to maintain shape.
Remember that smooth application minimizes distracting banding—clean and store brushes flat to preserve tip shape.
Work with light, overlapping strokes and avoid overloading the brush.
- Synthetic tapered filaments for even release
- Appropriate brush width for wall scale
- Regular cleaning and proper storage to preserve tip shape
Cutting In: Blend Edges Seamlessly
When cutting in, pick the right tools—an angled sash brush or a tapered-edge brush and a steady trim pad will give you clean edges.
Use feathering strokes and slight overlap to blend the cut line into the rolled sections without leaving ridges.
Keep a wet edge and work in short sections so your overlaps disappear into a seamless finish.
Tools For Clean Edges
Although cutting in feels like a delicate art, the right tools let you blend edges seamlessly and work faster with fewer touch-ups. You’ll want a sharp angled sash brush for control, a high-density foam brush for smooth blends, and a quality trim roller for tight spots.
Choose supplies that suit the finish and consider color psychology when planning accents; eco-friendly paints pair well with precise tools to showcase true hues. Clean, well-fitted tape helps but don’t over-rely on it.
Practice steady wrist motion, keep brushes loaded correctly, and replace worn tools to maintain crisp, streak-free edges.
- Angled sash brush
- High-density foam brush
- Trim roller
Feathering And Overlap
Because crisp lines depend on smooth progressions, feathering and deliberate overlap are the techniques you use to make cut-in edges disappear into the main field of paint. You load a brush modestly, tap off excess, and use short, light strokes to blend the edge—those Feathering techniques prevent ridges and visible brush marks.
Work toward the wet edge of the rolled area, matching direction and pressure.
For Overlap strategies, overlap each cut-in by a few inches into the rolled section while it’s wet so seams vanish.
Step back, inspect in different light, and touch up immediately if you spot contrast.
Roller Loading and Pressure: Get It Right
If you load the roller evenly and apply consistent pressure, you’ll avoid thin spots and ridges that cause streaks. You want a saturated nap without drips; dip, roll on the tray’s grid, and inspect coverage. Good roller technique and pressure control keep paint uniform so you don’t press too hard or skimp.
- Start with a moderate load — not dripping, not dry.
- Maintain steady pressure — consistent contact, no digging or lifting.
- Reload when coverage thins — even layers beat heavy touch-ups.
Practice these steps and you’ll get smooth, streak-free walls without overworking the paint.
The “W” Pattern: Roller Technique Step-by-Step
Now that your roller’s loaded evenly and your pressure’s consistent, start the “W” pattern to spread paint uniformly before filling it in. Hold the roller near the top of a section, press gently, and roll a large W without lifting. Then fill the gaps with parallel strokes, blending edges to avoid lap marks.
Work in manageable sections so color contrast stays consistent across the wall. Keep a steady pace and watch for thin spots, reloading as needed. Guarantee good paint ventilation to dry layers evenly and reduce drips.
Practice the motion once or twice on scrap drywall before tackling the main wall.
Maintain a Wet Edge and Avoid Overlap Lines
As you roll, keep the edge you’re working on wet so each pass blends into the last.
If paint starts to skin over, overlap just enough and feather the seam with light, even strokes.
That way you’ll avoid visible overlap lines and get a smooth finish.
Keep Edge Wet
Keeping the edge wet is the single best way to prevent visible overlap lines. You’ll focus on edge maintenance and paint consistency so each stroke blends into the next. Work in manageable sections, keep a loaded brush or roller nearby, and watch drying times.
- Start with the right paint consistency: thin slightly if it drags, but don’t overwater.
- Roll or brush toward the wet edge, maintaining a 6–12 inch overlap so edges stay wet.
- If an edge starts to dry, rework it immediately with a lightly loaded tool to avoid lap marks.
Blend Overlap Seamlessly
Once you’ve kept the edge wet, blend overlaps by working each new stroke into the still-wet paint so seams disappear. You’ll float the brush or roller with light pressure, matching direction and speed to adjacent strokes.
Watch color coordination to guarantee tones read uniform across the wall, and adjust pigment mixes if a strip looks off. Use consistent lighting effects—natural or staged—while you work so you spot sheen shifts and correct them immediately.
If a lap shows, feather it out with a damp brush and quick, gentle passes. Finish each section before paint skins to avoid visible lines.
Back-Rolling and Brushing: When to Combine Them
When you need both even coverage and crisp edges, combine back-rolling with brushing to get smooth, streak-free results. You’ll roll large areas to lay down consistent paint, then back-roll to work it into the surface. Use a brush to cut in corners and refine trim, matching strokes so texture and paint sheens blend.
Consider color combinations carefully; contrasting tones demand cleaner edges.
Choose colors thoughtfully—strong contrasts require sharper edges and cleaner transitions for a polished, professional look.
- Roll: apply even base coat, then back-roll for uniformity.
- Brush: cut in around edges, doors, and windows.
- Blend: feather brush strokes into rolled areas for a seamless finish.
Temperature and Humidity Rules for Streak-Free Paint
After you’ve blended brushed edges into rolled areas, pay close attention to temperature and humidity—both affect how paint flows, levels, and dries, and mishandling them leads to streaks, lap marks, or uneven sheen.
You’ll want consistent Temperature regulation: avoid painting below the manufacturer’s minimum or above the maximum; extreme cold or heat alters viscosity and drying rate. Use humidity control to prevent slow drying or blistering—high humidity prolongs tackiness and encourages runs, low humidity can cause premature skinning.
Monitor conditions with a thermometer and hygrometer, adjust with heaters, fans, or dehumidifiers, and pause if conditions change markedly.
How Many Coats You Need and Drying Times
If you want streak-free, durable walls, plan your coats and respect each layer’s drying time: most interior latex jobs need two coats for even coverage, while dark or high-contrast colors and porous surfaces often demand a third.
You’ll check paint consistency before starting; thin or lumpy paint hides poorly and lengthens the drying process. Apply full coats, avoid skimpy passes, and let recommended intervals elapse. Use light sanding between coats if needed.
- Two coats standard — inspect for coverage after first.
- Third coat for deep hues or rough substrates.
- Follow manufacturer drying process times precisely.
Motion Mistakes That Cause Streaks (And Fixes)
Because your technique directly shapes the finish, a few common motion mistakes—overworking edges, rolling too fast, and stopping mid-stroke—are the usual culprits behind streaks. You should keep a steady, even stroke, maintain a wet edge, and overlap passes by about 50%.
Don’t press too hard; let the roller or brush lay paint. For trim, use controlled short strokes and feather outward. Pace yourself so drying times suit color psychology choices—darker hues reveal flaws faster.
Choose eco friendly options that level well; low-VOC paints often improve flow. Practice consistent rhythm and clean tools for streak-free walls.
Troubleshooting Common Streak Patterns and Repairs
Now that you’ve tightened up your motion and tool choices, you’ll still run into streaks that follow predictable patterns—lap marks, thin bands, and directional lines each point to different causes and fixes.
You’ll diagnose by matching pattern to cause, then repair with sanding, spot-priming, and careful repainting. Watch for poor color mixing that creates subtle streaks and for paint storage issues that thicken or separate paint.
- Lap marks: repaint wet-edge to wet-edge; thin roller cover helps.
- Thin bands: guarantee even thickness; back-roll and maintain load.
- Directional lines: feather strokes; sand and recoat if set.
Best Tools and Accessories for a Streak-Free Finish
When you want a streak-free finish, choosing the right tools and accessories matters as much as your technique. Quality rollers, brushes, and edging tools help you lay paint evenly and avoid problems before they start.
Pick a dense nap roller for smooth walls and a thicker nap for textured surfaces. Use angled sash brushes for corners and a good-quality trim brush for crisp lines. Get a microfiber roller cover to reduce lint and a foam brush for touch-ups.
Consider samples to test Color psychology effects. Choose eco-friendly paints and low-VOC options to guarantee consistent coverage and healthier indoor air.
Cleaning and Storage to Preserve Tool Performance
If you want your rollers, brushes, and trays to keep performing, clean them right after each job and store them properly so they stay ready for the next coat. You’ll remove dried paint, prevent bristle splay, and extend tool life by rinsing water-based paint until clear, using solvent for oil-based, and combing bristles.
Apply basic tool maintenance: reshape brushes, spin rollers to remove water, and label trays. Use airtight containers, hang brushes or wrap heads in plastic, and store rollers upright to keep shape.
Good Storage techniques cut prep time and help you achieve streak-free walls every time.
- Rinse and comb
- Reshape and dry upright
- Airtight storage and labeling
When to Hire a Pro vs. DIY for Flawless Results
Keeping your tools clean and stored properly will save time and improve results, but there are moments when hiring a pro makes more sense than tackling a job yourself.
Keep tools clean and stored — it saves time and yields better results, though some jobs merit a pro.
You should DIY for small rooms, simple trim, or when experimenting with color psychology on accent walls.
Hire a pro for high ceilings, textured surfaces, or complex color gradations that demand flawless blending and consistent sheens.
Pros also help source eco-friendly paints and guarantee proper application to avoid streaks.
Consider your skill, time, and budget: if perfection and durability matter more than savings, call a pro.
Frequently Asked Questions
Can I Paint Over Wallpaper Without Causing Streaks?
Yes — you can, but you’ll avoid streaks best by doing wallpaper removal first, repairing underlying flaws, then surface priming before painting; if you skip prep, paint will soak unevenly and create visible streaks.
How Do Pets or Dust Affect Paint Drying and Streaking?
Pets and dust particles can cause streaking by sticking to wet paint; you’ll get bumps, uneven texture, and slower drying. Keep pets out, vacuum and tack-rag surfaces, and use filters or gentle airflow to minimize contamination.
Will Low-Voc Paints Change Application Technique for Streak Prevention?
Like a quiet breeze, yes — low-VOC paints can alter technique: you’ll favor Eco friendly finishes that level better, adjust thinning and drying times, and choose Brush vs. roller strategically to minimize streaks and guarantee even coverage.
Can Lighting Reveal Streaks Not Visible During Painting?
Yes — lighting effects can reveal streak visibility you didn’t notice while painting, so you’ll check under different angles and light sources, adjust technique or add touch-ups, and avoid finishing until surfaces look uniform.
Do Different Substrate Types (Plaster vs. Drywall) Need Different Prep?
Yes — you’ll prep plaster and drywall differently: match surface texture and choose primer selection accordingly. You’ll sand, fill imperfections, use a high-adhesion primer on plaster, and a drywall-specific primer-sealer for smooth, consistent coverage.
Conclusion
You’ve got the steps to stop streaks and get smooth walls—now go do it. Remember: using the right finish and quality paint cuts marks, and proper prep makes all the difference. Interesting fact: professionals report that using a quality roller and correct technique reduces visible streaks by up to 60%, so invest in tools and practice. If a wall still shows flaws after two coats, consider a pro for flawless results.