How to Paint Over a Chalk Wall
You can paint over a chalk wall if you prepare it properly: remove loose chalk, wash with mild soap, and sand any glossy or rough spots. Patch dents and voids, then seal ghosting and stains with a high‑adhesion, stain‑blocking primer. Apply multiple thin topcoats of a durable, washable finish, sanding lightly between coats and allowing full dry times. Finish with a scuff‑resistant clear coat in high‑traffic areas, and keep reading for step‑by‑step tips and troubleshooting.
Can You : and Should You : Paint a Chalk Wall? Quick Checklist
Even though you can paint over a chalk wall, you should check a few things first: is the surface sealed or heavily chalked, are there stains or damage, and do you want a smooth paint finish or to preserve some chalkboard functionality?
Even if you can paint a chalk wall, first check sealing, heavy chalking, stains, damage, and desired finish.
Decide if you’ll remove chalk dust thoroughly; leftover residue can affect adhesion. Consider wall texture—rough surfaces need more primer and paint to hide imperfections.
Ask whether the space still benefits from occasional chalk use or if you want durable, washable paint. If stains or gouges exist, patch and prime.
When in doubt, test a small, representative area first.
Inspect the Wall: Material and Chalkboard Finish
Now that you’ve checked stains, surface texture, and whether to keep chalkboard use, inspect exactly what you’re dealing with: is the wall true chalkboard paint, a chalkboard panel, wood, drywall, or plaster?
You’ll note variations in wall texture and how chalk residue adheres. Check edges, seams, and substrate firmness so you know prep needs and primer choice.
- Is the finish matte or glossy?
- Are panels glued or nailed?
- Does chalk cling in patches?
- Is the surface porous or sealed?
- Any soft spots or delamination?
This quick inventory guides sanding, cleaning, and product selection before painting.
Find and Classify Ghosting, Stains, and Texture
Look for ghosting by holding a light at an angle to reveal faint chalk outlines you’ll need to address.
Note whether marks are surface chalk, ink, or water stains so you can choose cleaning or priming methods.
Run your hand over the wall to judge texture—smooth, chalky, or rough—and decide if sanding or skim-coating is required.
Identify Ghosting Areas
Before you prep the wall, inspect it closely under good light to find ghosting, stains, and texture issues that will affect how the new paint adheres and looks. You’ll map faded chalk outlines, darker shadow bands, and raised texture so you can plan primers or sanding.
Note where previous colors cause subtle color blending and where surface irregularities need texture enhancement.
- Trace outlines of heavy chalk use
- Mark shadow bands near trim and corners
- Flag areas with raised texture or peeling
- Note spots with uneven sheen from past coatings
- Photograph zones for reference during repair
Distinguish Stain Types
Having mapped ghosting, stains, and texture, you’ll next sort what you found into specific stain types so you can pick the right cleanup and primer.
Walk the wall, noting powdery chalk dust deposits versus greasy marks, water stains, mold, or marker ink. Test each spot with a damp cloth: chalk dust wipes away; grease smears and needs degreaser. Water stains often discolor but don’t rub off; mold feels musty.
Marker and paint transfer require stronger solvents. Record stain locations and severity alongside wall texture notes so you can choose cleaners and the appropriate stain-blocking primer for each condition.
Assess Surface Texture
Once you’ve mapped ghosting and stains, walk the wall slowly to feel and catalog its texture—smooth, sandy, bumpy, or peeling—so you can match repair and paint methods to each area.
You’ll note where Surface texture affects Chalk absorption, and where staining sits atop versus within the substrate. Lightly sand glossy spots, scrape peeling bits, and test porous areas with a damp sponge to judge absorption. Mark zones for primer type and patching.
Prioritize edges and high-traffic swaths.
- Smooth: scuff, degloss
- Sandy: seal, prime
- Bumpy: skim, sand
- Peeling: strip, patch
- Porous: test, prime
Do You Need to Repair? Dents, Gouges, and Uneven Areas
Check the wall for dents, gouges, and any uneven areas that will show through new paint.
You’ll want to fill holes with spackle or joint compound and let it dry fully.
Sand the repairs smooth so the surface is even before priming and painting.
Assess Surface Damage
Before you grab sandpaper or filler, take a close look at the wall to identify dents, gouges, and any uneven areas that will affect how paint adheres and looks. You’ll also spot chalk dust buildup and variations in wall texture that change primer and paint performance.
Work methodically: mark trouble spots, note depth and size, and decide if repair is necessary before priming. Consider how surface irregularities catch light and show through color. Prioritize visible or tactile defects that will telegraph through paint.
- Scan for shallow dents
- Check for deep gouges
- Feel for bumps or ridges
- Note chalk dust patches
- Assess overall wall texture
Fill Dents And Gouges
If dents, gouges, or uneven spots will show through your finish, you’ll want to repair them now so the primer and paint go on smooth and last longer. You’ll clean loose chalk dust from the area with a soft brush or vacuum.
Then apply a suitable filler or spackling compound into dents and gouges. Press filler firmly, overfill slightly, and let it dry fully. Avoid altering surrounding wall texture more than necessary; try to match the existing wall texture as you fill.
Once cured, scrape excess carefully and prepare the repaired spots for priming so the paint bonds evenly.
Sand And Smooth Areas
Wondering whether you need to sand or just spot-repair? You’ll inspect the chalk wall for dents, gouges, and inconsistent wall texture. If surface highs and lows remain after filling, sand lightly to blend and remove loose chalk dust. Work with fine-grit paper, keep dust down with a damp cloth, and feather edges so repairs aren’t visible under primer.
- Check painted sections for uneven sheen
- Sand filled areas until smooth to touch
- Wipe away chalk dust between passes
- Match surrounding wall texture before priming
- Reinspect under good light for imperfections
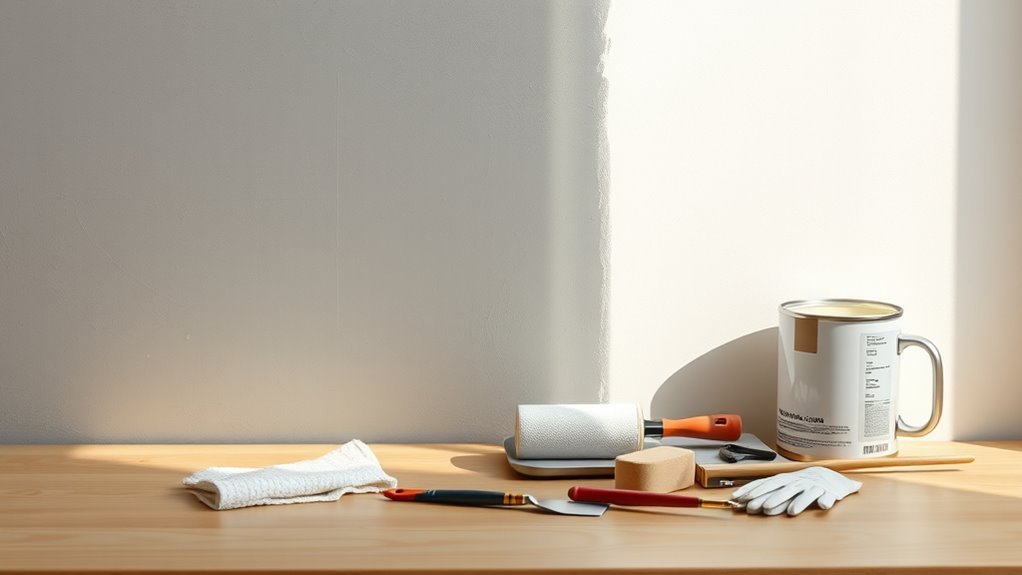
Gather Tools and Materials (Before You Start)
Because prepping a chalk wall well makes the painting go faster and look cleaner, gather the right tools and materials before you touch a brush. You’ll want a good vacuum or damp cloth for chalk dust, primers suited to wall texture, quality brushes, rollers, painter’s tape, drop cloths, and a small patch kit for minor repairs. Organize supplies near the work area and check paint sheen and coverage. Use the table to match tools to purpose.
| Tool | Purpose | Notes |
|---|---|---|
| Vacuum/cloth | Remove chalk dust | Use HEPA or dampen |
| Primer | Seal surface | Match to texture |
| Roller/brush | Apply paint | Choose nap |
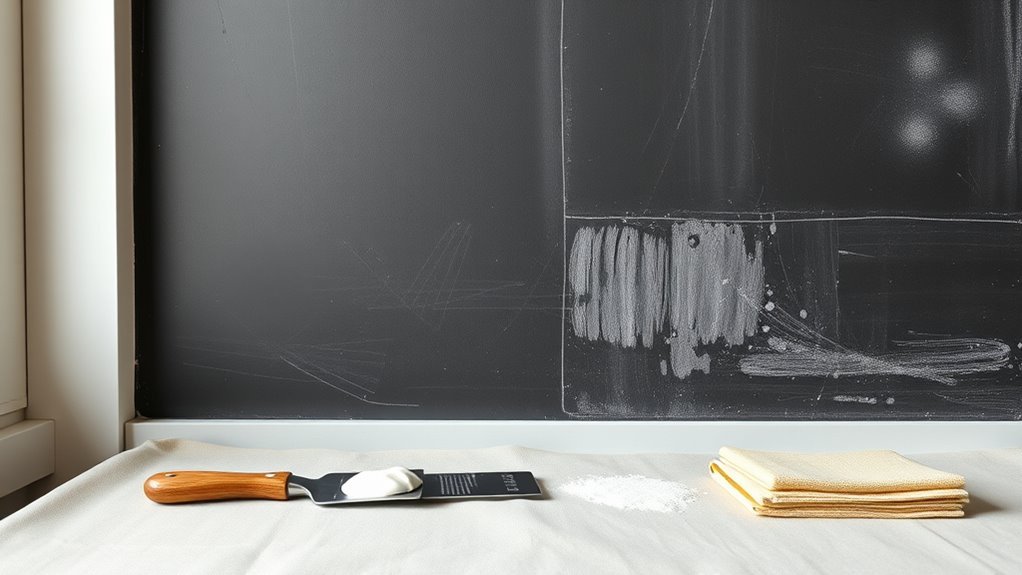
Clean the Chalk Wall: Step‑By‑Step
Start by brushing away loose chalk with a soft brush or cloth so you’re working on a clean surface.
Next, wash the wall with a mild soap solution to remove remaining residue and stains.
Rinse thoroughly and let the wall dry completely before priming or painting.
Remove Loose Chalk
How do you get the chalk dust that’s just sitting on the surface to go away? You’ll gently remove loose chalk before any damp cleaning so paint adheres. Work top to bottom, watching how wall texture holds residue. Use soft, dry tools and light pressure to avoid abrasion.
- Use a clean, dry microfiber cloth for broad swipes.
- Lightly brush with a soft-bristled brush, following the grain of wall texture.
- Vacuum with a brush attachment to lift stubborn dust.
- Tap the wall gently with a foam brush to dislodge clumps.
- Repeat until no visible chalk dust remains.
Wash With Mild Soap
Ready to get the wall truly clean? You’ll wash with a mild soap solution to lift remaining chalk dust without harming the wall texture. Mix a few drops of gentle dish soap in warm water, dampen a soft sponge, and work in small sections.
Wring the sponge so it’s damp, not dripping, and scrub in circular motions to avoid abrasion. Change water as it gets cloudy to prevent redepositing dust.
For stubborn marks, let the soapy water sit a minute before gently agitating. Finish when the surface looks uniformly clean and free of visible chalk dust.
Rinse And Dry Thoroughly
Once you’ve wiped with soapy water, rinse the wall with clean water to remove any soap residue and lingering chalk particles. Use a fresh sponge or a microfiber cloth dampened in plain water and work in overlapping strokes from top to bottom.
After rinsing, blot excess moisture with clean towels and let the wall air-dry fully before priming.
Remove remaining chalk dust with a soft brush or vacuum with a brush attachment. Avoid saturating drywall.
Use proper cleaning supplies and gentle motions to prevent damage.
Check for streaks, repeat spot-rinsing if needed, and make certain the surface feels totally dry.
- Rinse thoroughly
- Blot excess water
- Air-dry completely
- Remove residual chalk dust
- Inspect for streaks
Remove Stubborn Chalk Residue and Oils
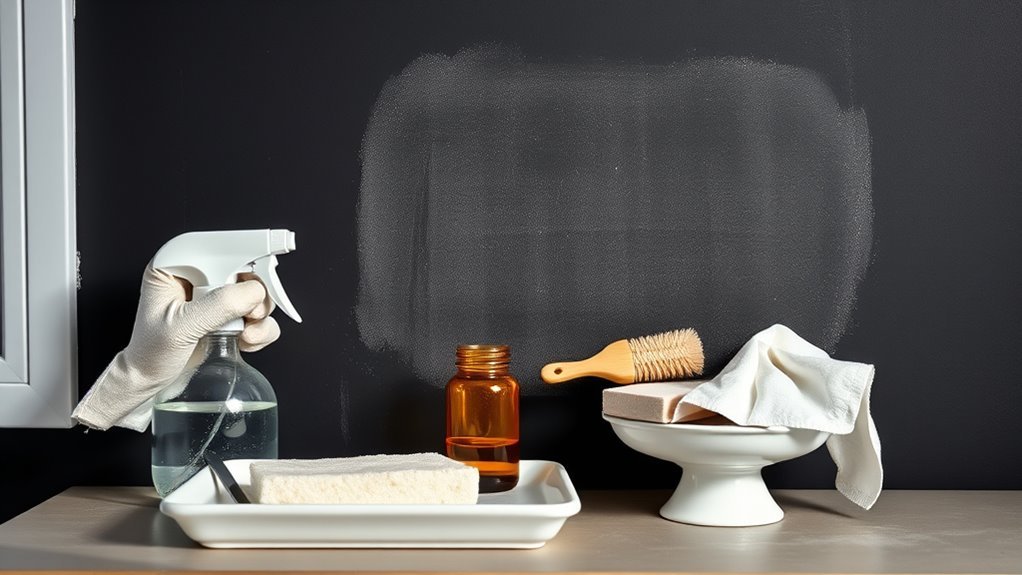
Because chalk and hands can leave a waxy film, you’ll need to tackle stubborn residue and oils before priming or painting.
Mix warm water with a few drops of dish soap and wipe down the surface with a microfiber cloth to lift most chalk residue.
For lingering oil stains, apply a paste of baking soda and water or use a degreasing cleaner, scrub gently, then rinse thoroughly.
Spot-test any cleaner first.
Allow the wall to dry completely and recheck for faint marks; repeat treatment only where needed.
Removing these contaminants guarantees primer and paint will adhere evenly and last longer.
Sanding: When It’s Necessary and How Much to Sand
If your chalk wall has rough patches, glossy areas, or leftover residue after cleaning, you’ll need to sand before painting.
Use light, even sanding with fine-grit paper—just enough to scuff the surface and smooth imperfections without stripping underlying paint.
Work in straight strokes, keep the pressure consistent, and wipe away dust before priming.
When To Sand
Wonder whether you need to sand a chalk wall before painting? You’ll sand when loose chalk dust covers the surface or when uneven wall texture will show through new paint. Light prep often suffices; heavier sanding only if the finish feels chalky or flaky. Follow visual and tactile cues.
- If rubbing releases chalk dust, sand lightly.
- If the wall texture is rough or bumpy, smooth selectively.
- If previous coatings peel, remove loose areas.
- If you plan a glossy finish, even minor irregularities matter.
- If you’ll apply wallpaper, guarantee a flat substrate.
Stop once the surface’s stability and appearance satisfy you.
How Much To Sand
When you’re deciding how much to sand, aim to remove only what’s necessary to create a sound, even surface—light scuffing with a fine-grit sponge or 120–150 grit sandpaper usually does the trick unless the chalk finish is flaky or heavily textured.
Check for loose flakes, glossy spots, or pronounced wall textures that will prevent primer and paint from adhering. If the surface is uniform and matte, minimal sanding to dull sheen and knock down loose powder is enough.
Always clean up chalk dust thoroughly before priming. Over-sanding wastes effort and risks altering the wall plane; be measured and purposeful.
Sanding Technique Tips
Because proper sanding sets the stage for a durable finish, focus on light, controlled strokes with a fine-grit sponge or 120–150 grit sandpaper to dull sheen, remove loose chalk, and even out minor texture without gouging the substrate. You’ll inspect the wall for glossy spots, residual chalk art, and raised seams; sand until the surface feels uniformly matte. Don’t oversand—stop when texture removal is consistent.
Clean dust before priming. Use a sanding block for flat areas and hand-sand contours. Test a small patch first to confirm adhesion.
- Use even pressure
- Sand with the grain
- Replace worn paper
- Vacuum frequently
- Wear a mask
Pick a Primer for Chalkboard Surfaces
Before you start painting, choose a primer formulated for chalkboard surfaces so the topcoat will stick and cover evenly; these primers block residual chalk dust, seal porous matte finishes, and promote adhesion for latex or enamel paints. You’ll want a stain-blocking, shellac or high-adhesion acrylic primer if chalk art residue or uneven wall texture remains. Apply two thin coats, sanding lightly between. Test compatibility with your chosen paint.
| Primer Type | Best For |
|---|---|
| Shellac | Heavy chalk stains |
| Acrylic | General use |
| Bonding | Smooth glossy areas |
| Stain-Blocking | Ghost marks |
Choose a Paint Finish for Chalk Walls That Cleans Easily
Want a finish that wipes clean without ghosting or dulling over time? You’ll pick a durable, washable finish that balances appearance and function. Consider satin or semi-gloss for easy cleaning; they resist staining and handle repeated wipes. Keep color coordination in mind so repairs blend seamlessly, and use finishes that minimize texture contrast between patched and original areas.
Test a small swatch with chalk and erasing before committing. Choose low-VOC formulas for indoor use.
Follow these quick considerations:
- Satin for subtle sheen and wipeability
- Semi-gloss for high-clean durability
- Low-VOC options
- Test swatch first
- Match sheen to wall surroundings
Match Paint Color and Opacity to Hide Chalk Marks
When you pick a paint color and opacity, aim to overpower the chalk rather than just cover it; higher-opacity (higher-hide) paints and colors close to the chalkboard background will prevent ghosting and reduce the number of coats you need. You’ll minimize visible chalk dust and faded marks by matching undertones—do color matching with swatches under your room’s light. Test samples at actual size, let them dry, then inspect for ghosting. Use satin or eggshell for cleanability if desired. Compare small areas:
| Sample | Result |
|---|---|
| Light gray | Shows ghosting |
| Deep charcoal | Hides marks well |
| Mid-tone | Moderate coverage |
Prime the Wall: Application Tips and Drying Times
Although priming feels like an extra step, you’ll seal chalk residue and create a uniform surface that lets your topcoat hide marks with fewer coats. You’ll first remove loose chalk dust, wipe the wall, and patch imperfections.
Choose a stain-blocking primer suited to chalk surfaces; quality affects adhesion and coverage. For primer application, work in sections, maintain wet edges, and use even strokes. Observe manufacturer drying times; temperature and humidity change cure rates.
After priming, lightly sand any raised fibers and tack cloth before painting.
- Remove chalk dust thoroughly
- Patch and sand defects
- Use stain-blocking primer
- Follow drying times
- Lightly sand before topcoat
Paint the Wall: Tools and Techniques for Smooth Coverage
Now that the primer is fully cured and you’ve smoothed the surface, you’re ready to apply your topcoat. Use a high-quality roller for flat areas and a brush for edges and any remaining chalk art details you want to preserve or disguise.
Match nap length to wall textures—short nap for smooth, medium for slight texture. Work in manageable sections, rolling in a “W” pattern then filling to avoid lap marks. Keep a wet edge and maintain consistent pressure.
Lightly back-roll brushed areas for uniform sheen. Clean tools promptly and inspect under good light to catch missed spots.
Apply Multiple Coats: When and Recommended Dry Times
Because a single coat rarely gives full coverage over chalked surfaces, plan to apply at least two topcoats and more for deep colors or high-contrast chalk markings. You’ll wait between coats to guarantee proper adhesion and avoid tackiness; drying times vary by paint type, humidity, and temperature.
Aim for recommended recoat windows on the can, usually 2–4 hours for acrylics, longer for oils. Multiple thin coats beat one thick coat for color blending and texture enhancement. Check for full cure before heavy use.
- Start with a thin, even first coat
- Sand light imperfections between coats
- Follow manufacturer recoat times
- Adjust for room conditions
- Inspect for uniform coverage
Choose Scuff‑Resistant Topcoats and Protectors
When you want a finish that stands up to daily wear, pick a scuff‑resistant topcoat designed for high‑traffic surfaces; these products add a durable layer that guards against marks, abrasion, and frequent wiping without dulling the paint’s color. After proper surface preparation and removing chalk dust, choose water‑based polyurethane or acrylic clear coats for low odor and easy cleanup. Apply thin, even layers and follow drying times. Use corner guards or clear strip protectors where abrasion concentrates. Refer to the quick guide below to match protector type to use.
| Protector | Best For |
|---|---|
| Water‑based clear coat | Walls, low sheen |
| Acrylic sealer | High humidity areas |
| Corner guard | Edges, doorways |
| Vinyl strip | Playrooms, desks |
Common Post‑Paint Problems and How to Fix Them
Although a freshly painted chalk wall looks great, you’ll likely encounter a few predictable issues as it cures and gets used — think peeling, tackiness, uneven sheen, or lingering chalk dust showing through.
Although fresh chalk paint looks great, expect peeling, tackiness, sheen issues, or chalk dust showing through as it cures.
You can fix most problems without undoing your decorative techniques or forgetting chalk wall history lessons: prep, patience, and targeted touchups work best.
- Peeling: sand edges, prime, recoat.
- Tackiness: improve ventilation, allow longer cure time.
- Uneven sheen: scuff-sand and apply a uniform topcoat.
- Chalk bleed-through: seal with a stain-blocking primer.
- Surface grit: clean, sand lightly, then recoat.
Follow product directions carefully.
Maintenance Tips to Keep a Painted Chalk Wall Looking Fresh
After you’ve tackled common post-paint problems, keeping a painted chalk wall looking fresh comes down to simple, regular care. Wipe dust with a soft, dry cloth weekly and spot-clean smudges using a damp sponge and mild soap; avoid abrasive cleaners that harm paint durability.
If you display chalk wall art, fix smears by lightly re-chalking and sealing that area with a clear, compatible topcoat. Touch up chips promptly with matching paint to prevent larger repairs.
Keep humidity stable and avoid direct sunlight to reduce fading. Regular, minimal maintenance preserves appearance and extends the life of your painted chalk wall.
Frequently Asked Questions
Can I Paint a Chalk Wall Outdoors or on an Exterior Surface?
Yes — you can paint an exterior chalk wall, but you’ll need thorough surface preparation and choose products rated for outdoor durability. Clean, sand, prime with a weather-resistant primer, then apply exterior paint for lasting protection.
Will Painting Affect Magnetic Chalkboard Properties?
Like peeling away a thin veil, yes — painting can reduce magnetic retention if you coat the metal layer. You’ll compromise surface durability too, so you shouldn’t paint over a magnetic chalkboard unless you accept weaker magnets and less long-term toughness.
Can I Revert the Painted Wall Back to a Chalkboard Later?
Yes — you can often restore it, but success depends on chalk wall removal and paint compatibility; you’ll need to strip paint fully, choose a compatible chalkboard paint or magnetic primer, and prep the surface carefully before re-coating.
Is VOC Content or Odor a Concern for Indoor Painting?
Yes — VOC concerns matter indoors, and you’ll want odor mitigation strategies. Choose low-VOC or zero-VOC paints, ventilate thoroughly, use fans and air purifiers, and allow extra drying time to minimize smell and health risks.
Do Temperature and Humidity Affect Paint Cure and Adhesion?
Of course not—nature loves drama: you’ll see paint adhesion suffer when temperature effects swing too far, and high humidity or cold slow cure, causing tacky finishes and poor bonding you won’t want to live with.
Conclusion
You’ve turned a dusty, well‑worn canvas into a fresh, painted plane — like smoothing ripples on a pond until light reads clean across it. Inspect, repair, prime, and layer with patience; choose durable finishes and let each coat breathe. When scuffs appear, touch them gently, not angrily, and keep supplies handy for quick fixes. With routine care, your once‑chalked wall will stay crisp and ready, a calm backdrop for whatever comes next.