Can You Paint Stone Exterior
You can paint a stone exterior, but success depends on stone type, porosity, and existing sealers, so you’ll need careful inspection and prep. Clean, remove loose mortar or biological growth, repair cracks, and test for old sealers (water/alcohol tests) before priming with a masonry-appropriate, breathable primer. Use spray, roll, or brush techniques and expect at least two coats; consider costs and moisture risks. Keep going and you’ll find guidance on selection, methods, and long-term care.
Can You Paint a Stone Exterior?

Yes—you can paint a stone exterior, but success depends on the type of stone, its condition, and proper preparation. You’ll inspect for porosity, mortar condition, and previous coatings, since dense stones resist paint while softer ones absorb it.
Yes—you can paint stone exteriors, but success hinges on stone type, condition, and thorough preparation.
You’ll clean, repair, and use breathable primers and masonry paints to avoid trapped moisture.
Consider color trends to modernize appearance, but balance them with regional context. If the building has historical preservation concerns, you’ll consult guidelines and possibly choose reversible, compatible treatments.
With careful material selection and technique, you’ll achieve durable, attractive results without compromising the substrate.
When Painting Stone Makes Sense (Vs. Leaving It Natural)
When you want to modernize, protect, or unify a building’s look, painting stone can be the practical choice—especially if the stone’s color, texture, or condition clashes with your design goals or needs weatherproofing. You should choose painting when Color coordination matters, damaged mortar shows, or mixed materials need unifying. Consider weather considerations—humidity, freeze-thaw cycles, and sun exposure affect paint longevity. If natural character or historic value is central, leave it bare.
| Benefit | When to Paint | When to Leave |
|---|---|---|
| Aesthetics | Mismatched tones | Distinctive patina |
| Protection | Porous damage | Stable surface |
| Cohesion | Mixed facades | Single material |
Which Masonry Surfaces Take Paint Best (Limestone, Brick, Slate, Stucco)
Because each masonry type soaks up and holds paint differently, you’ll want to match your coating and prep to the material—limestone and brick are more porous and accept paint readily after proper cleaning and priming.
Because masonry soaks up paint differently, match your prep and coating to the material—clean, prime, then paint.
While dense slate resists absorption and often needs a specialty primer, stucco’s rough, textured surface requires thicker, flexible coatings to bridge crevices and control moisture movement.
You should consider color psychology when choosing hues: lighter colors enlarge, darker anchor.
Use eco-friendly paints where possible.
Quick guide:
- Limestone/brick: clean, lime-tolerant primer, masonry paint
- Slate: adhesion primer, elastomeric topcoat
- Stucco: thick, breathable render-friendly paint
How Porosity and Texture Affect Paint Adhesion
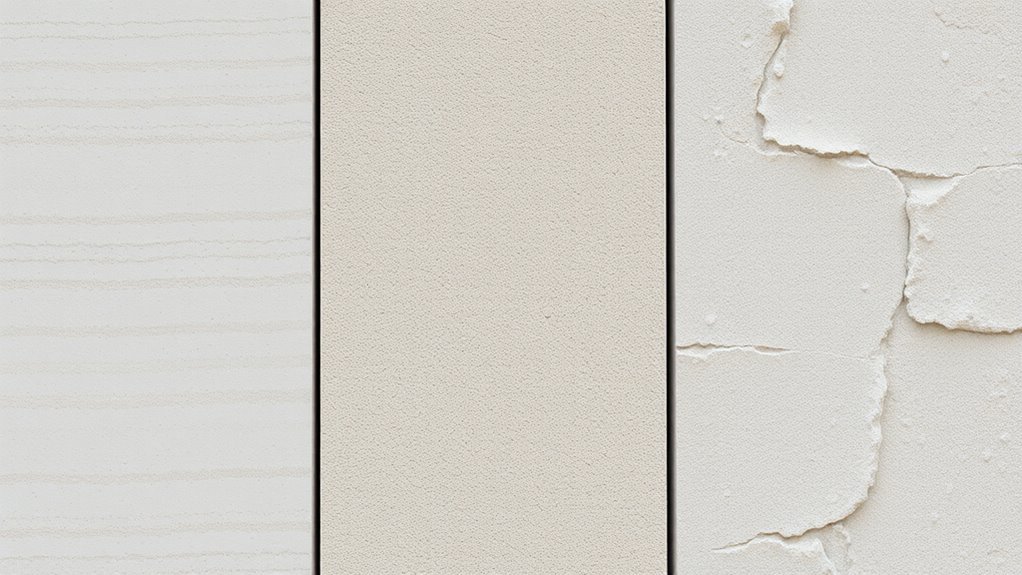
You’ll notice that highly porous stone soaks up primer and paint differently than dense surfaces, so evaluating porosity is your first step.
Rough or pitted textures change how paint penetrates and grips, often needing different products or techniques to get even coverage.
Prep—cleaning, patching, and using the right primer—keeps absorption consistent and improves adhesion.
Surface Porosity Levels
If stone soaks up water like a sponge, it’ll also drink in paint and primer differently than a smooth surface, which directly affects adhesion and coverage. You’ll assess porosity to choose primer type and coat count, balancing Color matching with Texture enhancement goals.
High-porosity stone needs more sealer and primer to avoid uneven sheen and excessive absorption; low-porosity stone may require etching or bonding primer.
- High porosity: more primer, potential multiple coats
- Medium porosity: standard primer, monitor absorption
- Low porosity: surface prep, bonding primers
Test small areas to confirm adhesion and final appearance before proceeding.
Texture And Paint Penetration
Although rough, pitted stone can trap paint in deep crevices and smooth stone can cause films to slide rather than grip, the surface texture and porosity together determine how well primer and paint penetrate and adhere.
You’ll notice textured surfaces absorb more, anchoring coatings mechanically, while dense, low-porosity stone relies on film adhesion. That affects longevity, finish uniformity, and how current color trends look over time.
Consider that deeper penetration can reduce peel but increase material use and environmental impact. Balance desired aesthetic, expected wear, and coating formulation so the paint performs and the look endures.
Preparation For Even Adhesion
Because porosity and texture dictate how primer soaks in and how paint keys to the surface, you should tailor surface prep to each stone type before you ever open a can. Test absorption with water and note roughness; that informs primer choice, sanding, or limewash considerations. Consider historical preservation rules if working on heritage masonry and weigh Color options against breathability needs.
Prep steps often include:
- Remove loose mortar and biological growth with a soft brush and appropriate cleaner.
- Fill large pores or spalls with compatible grout or mortar.
- Apply a breathable primer designed for masonry, allowing full cure before topcoats.
Detecting Old Sealers and Adapting Your Prep
Before you start sanding or priming, check whether the stone has an old sealer—it’s the step that determines what prep you’ll need. Scrape a small area, then apply rubbing alcohol or water to test adhesion: beading means a sealer remains.
Identify sealer types—silane, acrylic, or siloxane—by solvent behavior or product records. If a sealer’s present, strip or abrade it; some require chemical removers, others just pressure washing and scuffing.
Removing sealers *guarantees* paint durability by improving primer bond. After treatment, retest adhesion before priming to ensure the surface accepts coatings evenly.
What Tools and Safety Gear You Need
Before you start painting stone, make sure you’ve got the right protective clothing and gloves plus a respirator and eye protection to keep dust and fumes off you.
You’ll need quality brushes and rollers for textured surfaces, and a power washer to prep the stone properly.
I’ll walk through each tool and safety item so you can work efficiently and safely.
Protective Clothing And Gloves
When you’re prepping and painting exterior stone, wearing the right protective clothing and gloves keeps you safe and lets you work longer without discomfort. Choose durable, breathable coveralls and long sleeves to guard against splatter and abrasive surfaces. Follow protective gear and safety protocols to minimize skin exposure.
Pick gloves suited to solvents and rough textures—nitrile for chemicals, reinforced leather for abrasion. Keep clothing clean and replace damaged items. Consider layering for temperature changes and a hat to shield neck and scalp.
- Chemical-resistant nitrile gloves for primers and cleaners
- Reinforced leather gloves for sanding and scraping
- Breathable, durable coveralls
Respirators And Eye Protection
Along with sturdy clothing and gloves, you’ll want proper respiratory and eye protection to keep dust, fumes, and chemical splashes out of your lungs and eyes. Choose a NIOSH-rated respirator for paint fumes and fine masonry dust; fit-test it, change cartridges per manufacturer guidance, and store it clean to maintain respirator safety.
For eye protection importance, wear wraparound safety glasses or goggles that seal against splashes and particles; consider a face shield for heavy work. Replace scratched lenses, clean after each use, and never rely on sunglasses.
Proper maintenance and consistent use reduce irritation, injury, and long-term health risks while painting.
Brushes, Rollers, Power Washer
Because good tools make the job faster and the finish last, you’ll want the right brushes, rollers, and a power washer—and the proper safety gear—to get stone exterior painting done well.
You’ll use a stiff-bristle brush for crevices, a thick-nap roller for textured stone, and a power washer to prep surfaces. Practice roller techniques to avoid splatter and assure even coverage.
Keep brush maintenance in mind: clean immediately, reshape bristles, and store upright. Wear goggles, gloves, and a respirator when pressure washing or painting.
Typical kit includes:
- Stiff bristle brushes
- Thick-nap rollers
- Pressure washer and PPE
How to Test a Small Area for Paint Adhesion
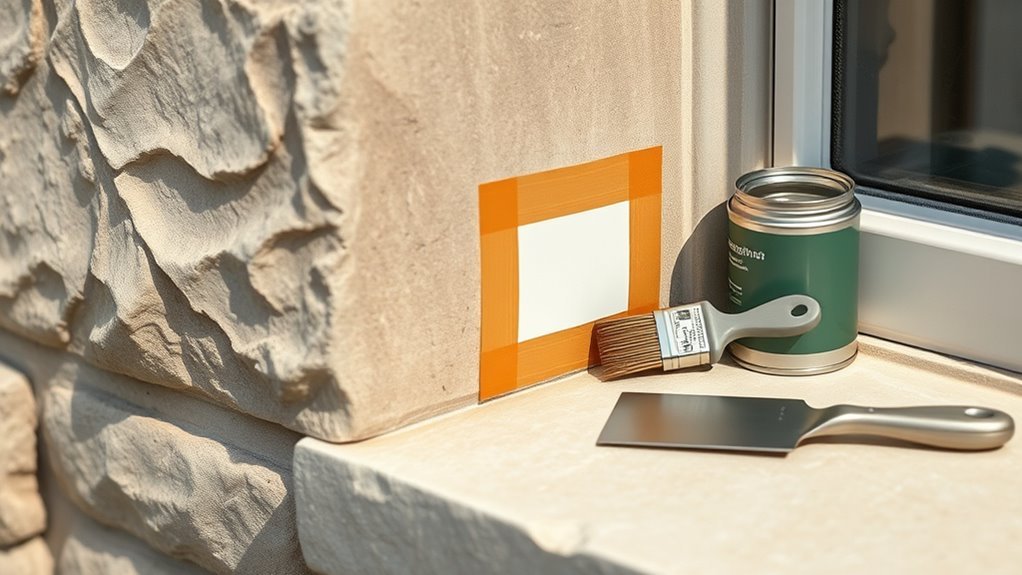
Want to make sure your paint will stick before you commit to the whole wall? Pick a small, inconspicuous patch and test your chosen color selection on the stone.
Clean loose debris, let it dry, then apply primer and a small coat of the exterior paint you plan to use.
Wait 24–48 hours, then check adhesion by gently scratching or using a piece of painter’s tape pulled at a 90° angle.
Inspect for peeling, flaking, or chalking; this also hints at long-term paint durability.
If it fails, try a different primer, paint type, or color selection and retest.
How to Clean Stone Before Painting
If your adhesion test looks good, the next step is to thoroughly clean the stone so paint will bond properly. You’ll remove dirt, mildew, and loose particles, using a stiff brush, mild detergent, and a pressure washer on a low setting. Rinse thoroughly and let the stone dry fully—moisture ruins adhesion.
Consider color selection now; darker paints absorb heat, lighter ones reflect it. Also factor in weather considerations: pick a dry, mild stretch of days to clean and paint.
Visualize the process with tools and stages:
- stiff brush and scrub solution
- low-pressure washer and rinse
- full drying time before priming
Repairing Cracks, Loose Stone, and Mortar Joints
Before you paint, assess the stone for cracks, loose pieces, and failing mortar so you know what needs fixing.
You’ll secure or reset any loose stones with appropriate adhesive or mechanical anchors.
Finally, repoint deteriorated mortar joints with a compatible mortar to guarantee a sound, paintable surface.
Assess Damage First
How badly is the stone damaged? You’ll inspect cracks, mortar gaps, and loose pieces before painting; color consistency and weather considerations matter for repair timing and matching. Check these specifics:
- Small hairline cracks: clean, fill with compatible mortar, sand for even texture.
- Mortar joints: rake out deteriorated mortar, repoint to maintain seal and appearance.
- Surface chips: undercut edges slightly, fill and blend so paint won’t highlight flaws.
Document repairs and let materials cure in recommended dry conditions. Addressing these issues first prevents paint failure and helps you achieve an even, long-lasting finish.
Secure Loose Stones
Ready to secure loose stones? You’ll first clean debris and gently tap to find unstable pieces.
Use a masonry adhesive suited to limestone durability to bond fractured stone back into place; follow manufacturer cure times.
For small gaps, pack a compatible mortar mix, matching color and Stucco texture so repairs blend.
Clamp or brace stones until adhesive sets.
Remove excess mortar promptly with a damp sponge to avoid staining.
Check surrounding units for hairline cracks and stabilize with injection grout where needed.
After repairs cure, inspect again before any painting to guarantee a sound, long-lasting surface.
Repoint Mortar Joints
When mortar joints are cracked or crumbling, you’ll want to repoint them to restore structural integrity and prepare the surface for painting. Work methodically: remove loose mortar, match original mortar composition for historical preservation, and tool joints to shed water. You’ll avoid damage and guarantee paint adheres evenly. Consider how choice of paint tint interacts with color psychology and the building’s character.
- Chisel out deteriorated mortar to a consistent depth.
- Mix mortar to match texture and strength of original.
- Damp joints, apply new mortar, and finish for uniform appearance.
Let mortar cure fully before priming and painting.
Best Masonry Primers for Stone Exteriors
Because stone soaks up moisture and varies in texture, choosing the right masonry primer matters more than you might expect before painting exterior stone. You’ll want a primer labeled for masonry that seals porous surfaces, evens absorption, and promotes paint durability.
Pick a stain-blocking formula if tannins or efflorescence are present. For aesthetic control, use primers that aid color matching—either white-tintable or gray bases—to reach the shade you want without extra coats.
Look for products with mildew resistance and strong adhesion. Apply per manufacturer instructions, ensuring clean, dry stone and proper cure time before topcoating.
Breathable vs. Acrylic Paint for Stone
Although both breathable mineral paints and acrylic masonry paints can protect stone, they work very differently and choosing between them affects longevity and moisture management. You’ll weigh breathability versus surface film benefits.
Breathable mineral paint lets trapped moisture escape, reducing freeze-thaw damage and maintaining substrate health.
Breathable mineral paint allows moisture to escape, preventing freeze-thaw damage and preserving the stone’s health.
Acrylic forms a flexible, water-resistant film offering superior paint durability and easier cleaning, but may trap moisture if substrate isn’t dry.
- Breathable: vapor-permeable, resists blistering.
- Acrylic: resists abrasion, better for high-traffic areas.
Consider substrate moisture, local climate, and risk of color fading when deciding.
Choosing Finish and Color for Textured Stone
How do you pick the right finish and color for textured stone so the surface reads well from both close up and afar? Consider color psychology: warm tones invite, cool tones recede, neutrals highlight texture. Test swatches at different distances and lighting times to judge perception.
Choose a finish that balances sheen and concealment—matte softens irregularities, low-luster shows depth. Prioritize finish durability for exterior exposure; look for UV resistance and abrasion tolerance.
Coordinate with surrounding trim and landscape so the stone complements rather than competes. Finalize choices after live samples weather a few days to confirm appearance and performance.
Step‑by‑Step: Painting Stone Exteriors
When you’re ready to paint a stone exterior, start by evaluating and preparing the surface so the coating will adhere and last. Clean, repair mortar, and test a small patch to confirm adhesion and color.
When ready to paint stone exteriors, evaluate and prep the surface—clean, repair mortar, and test a small patch.
Choose primer and paint rated for masonry and weather resistance; consider color psychology to influence mood and curb appeal. Follow this sequence:
- Power wash and let dry completely.
- Patch cracks, apply masonry primer, then a breathable topcoat.
- Paint in consistent sections, checking for uniform coverage and drips.
Allow proper curing between coats, inspect final coverage, and seal if recommended for long-term protection.
Brushing, Rolling, and Spraying Textured Stone
Before you pick up a brush, roller, or sprayer, you’ll want to clean the textured stone thoroughly and repair any loose mortar or flaking surface.
Decide which application method suits the texture and your goal—brushing for crevices, rolling for broad coverage, or spraying for speed and even coat.
Each method has different prep and technique needs, so plan accordingly.
Preparation And Cleaning
Because textured stone holds dirt and loose particles in its crevices, you’ll need to clean and prep the surface thoroughly before painting. You’ll remove grime, loose mortar, and biological growth so paint adheres and respects historical preservation concerns and meant color contrast.
Work systematically: rinse, scrub, and dry. Use gentle tools to avoid damage.
- Scrub with stiff brush and masonry cleaner to lift embedded dirt.
- Rinse with low-pressure washer, letting water run clear to avoid trapped moisture.
- Patch loose mortar, allow full cure, then sand rough spots for an even bond.
Proper prep guarantees lasting, respectful results.
Choosing Application Method
If you’re aiming for an even, durable finish on textured stone, pick the application method that matches the surface profile and your skill level.
For deep crevices, spraying gives uniform coverage fast, but you’ll need masking and practice to control overspray.
Rolling with a thick-nap roller balances speed and penetration into texture; use extension poles for height.
Brushing lets you work detail areas and adjust for tight spots, aiding precise color matching where surfaces join.
Always test a small area to confirm Paint durability and appearance.
Clean equipment promptly and follow manufacturer instructions for best adhesion and longevity.
How Many Coats: And Drying Times to Expect
When painting a stone exterior, plan on at least two coats for even coverage and durability, with a third coat sometimes needed on highly porous or rough stone.
You’ll assess porosity, paint texture, and color matching early so coats build consistently.
Allow proper drying between coats: usually 4–8 hours for latex, 24 hours for acrylics in cool or humid conditions.
Avoid rushing; tacky paint traps dirt.
- First coat soaks in, seals pores and evens tone.
- Second coat provides full coverage and uniform finish.
- Optional third coat smooths texture differences and deepens color.
Maintaining Painted Stone and Extending Life
After your final coat has cured, a simple maintenance routine will keep the painted stone looking fresh and lasting longer. Inspect annually for chips, clean gently with mild detergent, and touch up small areas to preserve historical preservation and weather resistance. Use breathable sealers only if compatible.
| Task | Frequency | Tools |
|---|---|---|
| Visual inspection | Annually | Ladder, flashlight |
| Cleaning | Twice yearly | Soft brush, soap |
| Touch-ups | As needed | Matching paint, brush |
| Sealer check | Every 3–5 years | Manufacturer’s sealer, applicator |
Document changes and act quickly to prevent moisture damage.
Common Problems After Painting and Fixes
After painting your stone exterior, you might run into peeling or flaking paint that signals adhesion problems, and efflorescence or staining caused by moisture and salts.
You’ll want to inspect the surface, identify whether the issue is paint failure or underlying moisture, and choose fixes like proper cleaning, vapor-permeable primers, or removing salt deposits.
Addressing the root cause quickly will keep repairs minimal and your finish lasting longer.
Peeling And Flaking
Why is paint peeling or flaking off your stone exterior so soon? You’re likely facing peeling issues from poor surface prep, moisture intrusion, or incompatible paint. Address Flaking causes by identifying adhesion failure and trapped water.
- Blistered patches where paint lifts from dust, dirt, or previous coatings.
- Powdery crumbling where moisture pushed paint away from mortar joints.
- Large sheets separating after freeze/thaw or improper primer.
You should remove loose paint, clean and dry the stone, use a masonry primer, and choose breathable exterior masonry paint. Fix underlying moisture before repainting to prevent recurrence.
Efflorescence And Staining
When water moves through stone and evaporates at the surface, it can leave behind mineral salts that show up as white, powdery efflorescence or cause rusty, colored staining—both can mar fresh paint and signal ongoing moisture issues. You should diagnose the source—rising damp, leaks, or poor drainage—before painting.
For efflorescence removal, brush and wash with a mild acid solution or commercial cleaner, rinse thoroughly, and allow full drying. Apply breathable masonry primer and paint to reduce trapped moisture.
For staining prevention, fix water entry, use rust inhibitors on metal nearby, and maintain gutters and grading.
Cost Estimate: Materials, Labor, Lifespan
Curious how much painting stone will set you back? You’ll weigh cost considerations and material options: primers, breathable masonry paints, and sealers vary in price and performance.
Curious how much painting stone costs? Consider primers, breathable masonry paints, sealers, and labor for lasting results.
Labor raises costs—prep, patching, and application take time—while lifespan depends on exposure and product quality. Expect trade-offs between upfront spend and longevity.
- Materials: primers, masonry paint, sealant — budget vs. premium.
- Labor: prep-intensive jobs cost more; inexperienced work shortens lifespan.
- Lifespan: 5–15 years typical; better materials and conditions extend it.
Plan for contingencies and prioritize breathable products to protect stone integrity.
DIY vs. Hiring a Pro: When to Call an Expert
After you’ve balanced materials, labor, and lifespan, the next decision is whether to tackle the job yourself or hire a pro. You’ll save money DIYing smaller, straightforward areas, especially if you’re confident with prep and mixing Color palettes. Call an expert for large surfaces, tricky heights, or when historical accuracy matters to preserve value and avoid damage.
| Situation | Recommendation |
|---|---|
| Small wall, low height | DIY |
| Large facade | Hire pro |
| Complex detailing | Hire pro |
| Tight timeline | Hire pro |
| Budget-focused | DIY |
Get quotes, check references, and weigh risk vs reward.
Alternatives to Painting: Stains, Limewash, Sealers
If you want to change your stone’s look without committing to paint, consider stains, limewash, or clear sealers—each offers a different balance of color, texture, and protection. You can pick options that preserve texture and respect historical accuracy or introduce subtle color contrast.
Stains penetrate and offer long-lasting tint; limewash gives a chalky, breathable finish suited to older masonry; clear sealers protect moisture and enhance natural tones.
Stains tint deeply and last; limewash offers a chalky, breathable look; clear sealers protect and enrich natural tones.
Consider:
- Semi-transparent stain for a uniform yet natural hue
- Limewash to soften color while maintaining breathability
- Clear sealer to deepen tones without hiding texture
Choose by desired appearance and maintenance.
How Painting Affects Resale and Historic Homes
How will painting your stone exterior affect resale value and the appeal of a historic home? You’ll influence curb appeal, buyer perception, and preservation concerns.
Thoughtful color choices—guided by color psychology and local market tastes—can modernize a façade or harmonize with period details. Consult preservation guidelines; inappropriate paint may reduce value or trigger compliance issues.
Use samples and consider how exterior hues interact with interior design themes to create a cohesive experience. If you’re unsure, opt for reversible treatments like breathable paints or limewash.
Document choices and permits to reassure buyers and protect historic integrity.
Frequently Asked Questions
Will Painted Stone Attract Mold or Mildew More Than Unpainted Stone?
Painted stone can attract mold growth more than unpainted stone if paint traps moisture; you’ll reduce risk by using breathable paint and proper surface sealing, maintaining ventilation, and addressing water sources to prevent mildew buildup.
Can I Paint Exterior Stone During Cold or Wet Weather?
You shouldn’t paint exterior stone during cold or wet weather. You’ll delay until dry, warmer conditions; weather considerations and surface preparation matter — clean, repair, and guarantee stone is fully dry before applying paint for proper adhesion and longevity.
How Long Before I Can Hang Fixtures on Freshly Painted Stone?
You can hang fixtures after about 48–72 hours, though full cure may take 7–30 days depending on paint, temperature, humidity; test adhesion first. Use painting techniques and thorough surface preparation to guarantee durability and safe mounting.
Are There Environmental or VOC Concerns With Painting Stone Exteriors?
Yes — you’ll face VOC risks and environmental impacts, so choose eco friendly paints, guarantee proper surface preparation techniques, ventilate, use low‑VOC primers, contain runoff, and follow disposal rules to minimize harm and exposure.
Does Painted Stone Change the Property’s Fire Resistance?
Generally no — painted stone doesn’t ensure fire resistance if you properly handle surface preparation and use durable, noncombustible or fire-rated coatings. You’ll want paint durability and manufacturer specs to guarantee no unexpected flammable additives.
Conclusion
You can paint stone, but think of it as gently dressing your home rather than changing its character. When you choose paint—or opt for stain, limewash, or a clear sealer—you’re nudging the surface toward a refreshed, more guarded future. Prep, porosity, and past coatings quietly dictate success, and sometimes a pro’s touch keeps the promise. Weigh cost, curb appeal, and history, then pick the gentlest path that honors the stone’s story.