Can You Use Interior Paint on Exterior Door
You can use leftover interior paint on an exterior door for a short-term fix, but it won’t hold up like exterior-grade paint. Interior formulas lack UV stabilizers, flexible binders, and mildewcides, so expect faster fading, cracking, and moisture issues unless you prep, prime, and recoat soon. Match primer to the door material, apply thin coats in good weather, and plan to switch to proper exterior paint for lasting protection — keep going if you want step-by-step guidance.
Can You Use Interior Paint on an Exterior Door?
You can technically use interior paint on an exterior door, but it’s not advisable for long-term protection. If you choose interior paint, expect faster color fading from UV exposure and weather, and shorter overall durability.
Interior formulas often lack flexible binders and UV blockers, so the finish can crack or peel under temperature swings.
Interior paints often lack flexible binders and UV protection, so finishes can crack or peel with temperature changes.
Moisture can seep in, promoting swell or rot on wooden doors.
Metal components risk hardware corrosion if paint doesn’t seal properly or traps moisture around screws and hinges.
For short-term touch-ups it’s fine, but for lasting performance you’ll want exterior-grade products.
Short Answer and Quick Steps
If you’re short on time and just want the bottom line: don’t use interior paint for a long-term exterior door finish—pick exterior-grade paint instead.
Short answer: interior paint can work temporarily if the door’s sheltered, but it won’t hold up.
Quick steps: clean the door, sand glossy surfaces, prime with an exterior primer, choose an exterior paint that offers weather resistance, and apply thin, even coats.
Pay attention to color matching if you need to replicate an existing hue, and test a small area.
This preserves finish durability and aesthetic appeal while avoiding early peeling and maintenance headaches.
How Interior and Exterior Paint Formulations Differ (UV, Flexibility, Mildewcides)
Because exterior surfaces face sunlight, moisture, and temperature swings, exterior paint is formulated differently than interior paint and won’t perform the same on an outside door long-term. You’ll notice key formulation differences that affect color fading and paint adhesion: exterior paints include UV stabilizers, flexible binders, and mildewcides.
- UV stabilizers reduce color fading from sun exposure.
- Flexible binders prevent cracking as temperatures expand and contract the door.
- Mildewcides inhibit mold and mildew in damp conditions.
Use the right type so your door lasts.
Choosing exterior-grade paint preserves finish and function; interior formulas lack these protections.
Why Weather Demands Different Paint
When you use interior paint outside, it won’t hold up to rain, humidity, or condensation the way exterior formulas do because they lack the same moisture resistance.
You’ll also see fading, chalking, or cracking faster since exterior paints are made to withstand constant UV exposure and wide temperature swings.
That’s why you need a coating engineered for those stresses rather than one meant only for indoor conditions.
Moisture Resistance Needs
Why does exterior paint need to resist moisture differently than interior paint? You’re protecting a door that faces rain, humidity, and condensation, so moisture resistance matters for durability, color selection, and hardware compatibility. Choose formulations that block water, prevent swelling, and stop mildew.
- Pick paints with tight film formation to keep water out.
- Use mildew-resistant additives so seals and hinges don’t corrode.
- Seal edges and joints; water often sneaks in at seams.
If you ignore moisture specifics, paint can peel, wood can rot, and hardware can seize. Use exterior-grade products for real protection.
UV And Temperature Stress
Moisture isn’t the only threat; sunlight and temperature swings put very different stresses on exterior paint than indoor conditions do. You’ll notice color fading from UV exposure and cracking from thermal expansion. Interior paints lack UV blockers and flexible binders, so they lose gloss retention and chip faster. Choose exterior formulations that resist UV and tolerate freeze-thaw cycles.
| Stressor | Effect | Exterior Paint Feature |
|---|---|---|
| UV | Color fading | UV stabilizers |
| Heat/Cool | Cracking | Flexible binders |
| Moisture | Peeling | Waterproof resins |
Use paint designed for outdoors to protect appearance and durability.
Which Door Materials Matter: Wood, Metal, Fiberglass
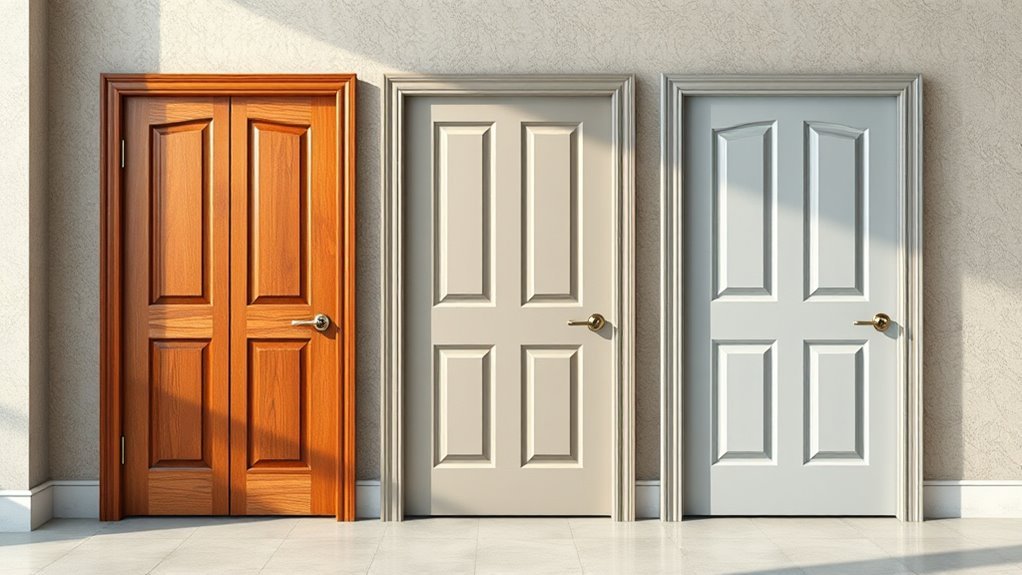
Although all exterior doors get painted, the material — wood, metal, or fiberglass — changes what prep and paint will stick and how long the finish lasts. You’ll care about color matching and paint texture differently depending on the substrate. Choose primer and finish for adhesion and durability, not just looks.
- Wood: sands well, absorbs stain, needs sealing; you’ll focus on grain and paint texture.
- Metal: requires rust treatment and bonding primer; gloss choices affect protection.
- Fiberglass: often already finished; scuff, use bonding primer, then flexible exterior paint.
Match product to material for best longevity.
How Each Material Reacts to Outdoor Paint
You’ll see wood absorb and swell if it’s not properly primed and sealed, so prep matters.
Metal tends to hold up well but can chip and rust at edges unless you use a rust-inhibiting primer and durable topcoat.
Fiberglass is the most forgiving, resisting moisture and cracking, though it may need specific primers for good adhesion.
Wood Door Response
How will your wood door hold up when you paint it for outdoor use? You’ll face moisture, UV exposure, and temperature swings that can cause peeling, cracking, and color fading if you use interior paint.
Proper prep and exterior-grade finish help, and watch hardware corrosion at the hinges and lock if solvents or trapped moisture react with metal.
- Seal end grains and joints to prevent swelling and rot.
- Choose exterior primer and topcoat designed for UV and moisture resistance.
- Refinish or touch up periodically to maintain protection and appearance.
Metal Door Durability
Switching from wood to metal doors changes the challenges you’ll face with outdoor paint: metals react differently to moisture, temperature swings, and UV than wood does, and they demand specific prep and coatings.
You’ll need to remove rust, sand glossy factory finishes, and apply a metal primer to guarantee adhesion and prevent corrosion.
Use exterior-grade enamel or acrylic latex formulated for metal rather than interior decor paint; interior paint lacks flexibility and corrosion inhibitors.
Pick a durable paint color resistant to fading and chalking.
With proper prep and the right exterior coating, your metal door will maintain appearance and function outdoors.
Fiberglass Door Behavior
Because fiberglass combines a gel coat surface over a reinforced core, it reacts to exterior paint differently than wood or metal: you’ll get the best results when you choose coatings and prep methods that respect its nonporous, UV-sensitive finish.
You should sand lightly, clean thoroughly, and use a primer made for gel coats to avoid paint peeling.
Exterior-grade acrylic or urethane topcoats resist UV better, reducing color fading.
Pay attention to seams and edges where adhesion fails first.
- Sand with fine grit and wipe clean
- Use a gel-coat-compatible primer
- Pick high-UV acrylic or urethane paint
Pros and Cons of Using Interior Paint Outdoors
Curious whether you can get away with interior paint on an exterior door? You’ll weigh aesthetics and durability. Color psychology and historical significance matter if you want a welcoming, period-appropriate entrance, but interior formulas lack UV and moisture protection.
| Pros | Cons |
|---|---|
| Better finish options | Poor weather resistance |
| Easier application | Fades, cracks faster |
| More color variety | Less mildew protection |
You can choose interior paint for short-term looks, but expect maintenance and repainting sooner. For lasting performance, pick exterior-grade paint designed for sunlight, temperature swings, and rain.
When Leftover Interior Paint Might Work Temporarily
If you’ve got leftover interior paint and need a quick fix, it can offer short-term weather protection on an exterior door if the climate’s mild and you apply it well.
It’s best used on a low-traffic door where exposure to moisture, sun, and wear is limited.
Remember this is a temporary measure, not a substitute for proper exterior-grade paint.
Short-Term Weather Protection
When you’re caught without exterior paint, leftover interior paint can provide brief weather protection for an exterior door—good for a few weeks to a couple of months depending on conditions—by sealing exposed wood and slowing moisture absorption until you can apply proper exterior paint.
You’ll want to sand, clean, and apply thin coats; interior paint lacks UV resistance and flexible binders.
Consider:
- Use satin or semi-gloss for easier cleaning and better shedding of water.
- Test a small area for color matching under interior lighting to avoid surprises.
- Recoat with exterior-grade paint as soon as possible to ensure long-term protection.
Low-Traffic Door Use
Wondering whether leftover interior paint will do for a door you rarely use? If the door stays mostly closed and sheltered, you can temporarily use interior paint for quick fixes or to maintain interior decor continuity.
Make sure the surface is clean and primed, and keep expectations realistic: interior formulas lack the UV, moisture, and abrasion resistance of exterior paints.
For a short-term solution, focus on proper color matching and thin, even coats to avoid peeling.
Monitor the door for wear, and plan a proper exterior-grade repaint when exposure increases or long-term durability becomes important.
Best Exterior Paint Types: Latex vs Oil
Choosing between latex and oil paint for an exterior door comes down to your priorities: durability, finish, drying time, and maintenance.
You’ll prefer latex if you want quick drying, easier cleanup, and better resistance to color fading over time.
Oil works if you need a hard, smooth coat that helps with texture matching on repaired wood, though it takes longer to dry and needs solvents.
- Choose latex for flexibility and mildew resistance.
- Choose oil for a tougher surface and smoother repairs.
- Consider climate and how often you’ll repaint to guide your choice.
Which Sheen for Doors: Gloss, Semi-Gloss, Satin
If you want a door that’s easy to clean and stands out, go with a gloss or semi-gloss; satin works better when you prefer a softer look that hides imperfections. You’ll pick sheen based on durability, maintenance, and your color palettes and aesthetic choices. Gloss gives crisp highlights and resists scuffs; semi-gloss balances shine and subtlety; satin softens flaws and suits muted schemes. Match sheen to style: contemporary often favors gloss, traditional leans semi-gloss, and cottage or rustic prefers satin.
| Sheen | Finish Level | Best For |
|---|---|---|
| Gloss | High | Trim, bold colors |
| Semi-gloss | Medium-High | Front doors |
| Satin | Low-Medium | Subtle, textured doors |
Best Primers When You Must Use Interior Paint
If you have to use interior paint on an exterior door, start with a high-adhesion primer so the coating sticks and resists peeling.
For metal doors or hardware-prone areas, use a rust-inhibiting primer to prevent corrosion from creeping through the finish.
These primers give you the best chance of longer-lasting protection even when the topcoat isn’t formulated for outdoors.
Choose High-Adhesion Primer
When you must use interior paint on an exterior door, start with a high-adhesion primer designed for difficult-to-stick surfaces. It creates a stable bond that prevents peeling and improves topcoat durability.
You’ll cut risks of paint peeling and slow color fading by choosing primers labeled “bonding” or “adhesion.” Apply per instructions, sand lightly between coats, and let dry fully.
Pick formulas compatible with your topcoat (water- or oil-based).
- Look for “bonding” or “universal” on the label.
- Check compatibility with your interior paint type.
- Prefer quick-dry options if you need faster recoating.
Use Rust-Inhibiting Primer
Alongside a bonding primer, you’ll also want a rust-inhibiting primer for any exterior door with metal components or exposed fasteners. It protects bare metal from corrosion and gives your interior topcoat a stable base.
You’ll prep by removing loose rust, sanding to bright metal, and cleaning residues. Apply a thin, even coat designed for exterior conditions so paint adheres and paint durability improves.
Pick a primer that accepts your chosen topcoat and allows for easy color matching if you plan to blend onto surrounding surfaces. Proper priming avoids future flaking and preserves both appearance and function longer.
Do You Need Primer on an Exterior Door?
Curious whether you need primer on an exterior door? You usually do—primer improves adhesion, seals old finishes, and helps your chosen paint color look true, which matters if exterior style ties into interior design. Skipping primer risks peeling, uneven coverage, and color shift.
You usually need primer on an exterior door—it improves adhesion, seals old finishes, and prevents peeling or color shift
- Use primer when changing finish or covering bare wood.
- Choose a primer compatible with your topcoat and weather exposure.
- Prime to ensure the paint color stays consistent and durable.
If the door already has sound, glossy exterior-grade paint, you might scuff and topcoat without primer, but priming is the safer, longer-lasting choice.
Surface Prep Checklist Before Painting a Door
Now that you’ve decided whether to prime, get the surface ready—proper prep makes the paint stick and last. Inspect the door for dirt, grease, and loose finish; clean with a mild detergent, rinse, and let dry.
Remove hardware or mask it, and sand glossy areas lightly to promote adhesion. Fill small gaps with exterior-grade caulk and sand smooth once cured. Wipe away dust with a tack cloth.
Plan color coordination with the house and any decorative accents so masking lines are precise. Gather primer, paint, brushes, rollers, sandpaper, and drop cloths before you start.
How to Remove Old Paint and Repair Door Damage
Before you strip paint or make repairs, assess the door carefully to determine what method and materials you’ll need. Check for loose layers, rot, and dents.
Use a heat gun or chemical stripper for stubborn old paint, sanding between passes.
Replace rotten sections, fill chips with exterior-grade wood filler, and sand smooth.
Consider color matching if you plan partial repairs, and note paint branding for touch-up consistency.
- Remove hardware and label screws.
- Work outside or in a well-ventilated area.
- Test filler and primer on a hidden spot.
Prime repaired areas before finishing to guarantee durability.
How to Paint Wood Doors Correctly
Start by prepping and sanding the door thoroughly so paint will stick and the surface is smooth.
Pick a primer made for exterior wood to block stains and improve adhesion.
Then apply several thin, even coats of paint, letting each dry fully before the next.
Prep And Sand Properly
Although it might seem tedious, proper prep and sanding are the steps that determine whether your paint job looks professional and lasts, so take the time to do them right. You’ll strip loose paint, clean grime, and sand evenly to smooth imperfections and reduce color fading over time.
Mask hardware or remove it for hardware protection, and work grain with a sanding block. Follow this simple checklist:
- Remove or mask hardware to prevent scratches and paint buildup.
- Sand progressively: 120 grit, then 220 for a smooth finish.
- Wipe dust with a tack cloth before painting.
Choose Appropriate Primer
When you want a durable, professional-looking finish on a wood door, pick a primer that matches the wood type and topcoat you’ll use.
Choose oil-based or stain-blocking primer for tannin-rich woods to prevent bleed-through and color fading.
Use bonding primer on slick or previously painted surfaces so the topcoat adheres well.
Apply primer carefully around edges and joints to seal grain and resist moisture.
Mask and remove or shield hardware to guarantee hardware protection and avoid primer buildup.
Let the primer dry fully and sand lightly for a smooth base before you proceed to the topcoat.
Apply Thin, Even Coats
Because thin coats build up a smoother, more durable finish than heavy ones, you should apply several light layers instead of trying to cover in a single pass. Start with a well-primed door, keep a wet edge, and sand lightly between coats.
Thin layers prevent drips, guarantee even paint texture, and help with color matching as you adjust tone.
- Use a high-quality brush or foam roller for control.
- Wait recommended dry times; rushing causes tackiness.
- Lightly scuff between coats for adhesion.
Finish with a final light coat, inspect under different light, and correct imperfections promptly.
How to Paint Metal and Fiberglass Doors Correctly
If your door’s metal or fiberglass, you’ll get the best results by using the right prep, primer, and paint rather than treating it like wood. These materials need degreasing, light sanding, and a compatible primer to guarantee adhesion and durability.
You should clean thoroughly with a degreaser, sand lightly to scuff the surface, and remove dust before priming.
Use a primer formulated for metal or fiberglass, then choose exterior-grade paint compatible with that primer.
For repairs, blend new paint with color matching and paint blending techniques so touch-ups are invisible.
Allow proper drying times and cure fully before reinstalling hardware.
Best Application Methods: Brush, Roller, Spray
Although each tool has strengths, choosing between a brush, roller, or sprayer comes down to the door’s material, profile, and the finish you want. You’ll pick a brush for edges and panels, a roller for flat areas, or a sprayer for smooth, fast coverage.
Consider color matching and paint pigmentation—thicker pigmentation can hide flaws but may require thinning for a sprayer. Prep, thin, and practice on scrap.
- Brush: control for trim and details.
- Roller: efficient for flat sections, avoids brush marks.
- Sprayer: fastest, best for uniform finish; mask surroundings.
Drying and Curing Times for Exterior vs Interior Products
When you compare exterior and interior paints, drying and curing behave differently because exterior formulations must resist UV, moisture, and temperature swings.
So, they often feel dry faster but take longer to fully cure. You’ll notice interior paints dry to the touch quickly in controlled conditions, letting you recoat sooner. However, they lack the extended curing that grants outdoor paint long-term paint durability.
If you’re matching color coordination between inside and out, plan longer wait times for exterior-grade finishes to achieve full hardness. That patience prevents scuffs, improves adhesion, and preserves the designed sheen and color over time.
How Weather Affects Paint Adhesion and Durability
Because weather dictates how well paint bonds and how long it lasts, you should plan your exterior painting around temperature, humidity, and exposure conditions.
You’ll find adhesion falters in cold or damp air, while intense sun speeds skin formation and reduces flow. Consider how wind drives dust and how salt air accelerates breakdown.
Balance Color matching with surface prep; beware that fading varies by pigment. During Paint mixing, follow manufacturer ratios and avoid adding water in high humidity.
Quick checks help:
- Paint will cure slower in cool, wet conditions.
- Hot sun can cause uneven sheen.
- Wind increases particle contamination.
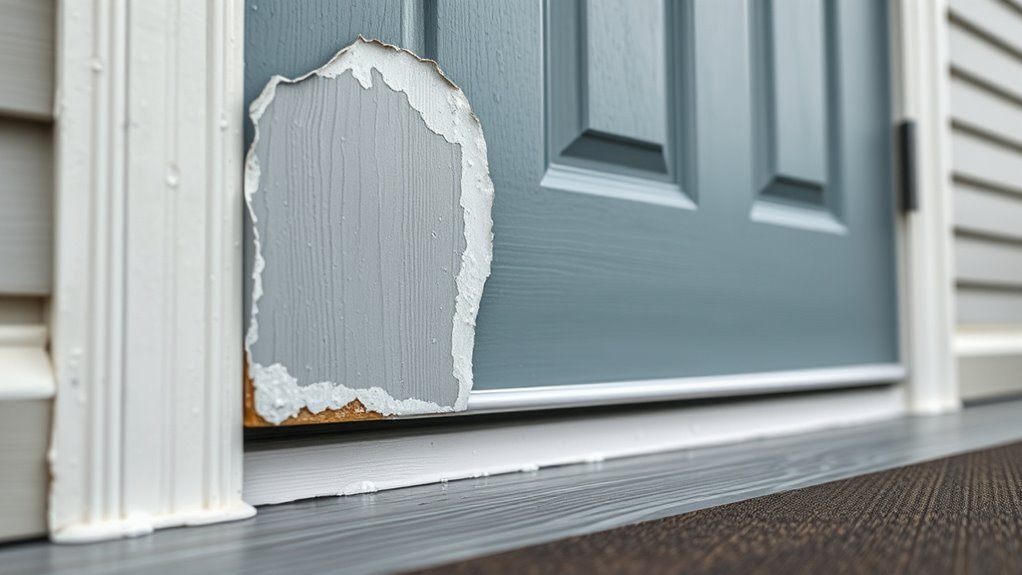
How to Prevent Peeling, Blistering, and Chalking
Weather and prep affect paint performance, but preventing peeling, blistering, and chalking comes down to controlling moisture, surface cleanliness, and proper product choice.
You should remove loose paint and chalk with a stiff brush, sand glossy areas, and clean with a TSP substitute so new coats bond.
Seal exposed wood and gaps with exterior-grade primer and caulk to block moisture that causes paint peeling and blistering.
Choose exterior-formulated paint for UV resistance to reduce color fading.
Apply thin, even coats in recommended conditions, allow full dry times, and maintain seals to extend finish life and prevent problems.
How to Test Leftover Paint on a Small Outdoor Spot
Pick a discreet spot on the door or frame where a small test won’t be obvious. Prep the surface by cleaning and lightly sanding so the sample will stick like it would on the rest of the door.
Check the patch over several days for adhesion, color change, and weathering before committing to a full coat.
Choose A Discreet Area
When you’re ready to test that leftover interior paint outdoors, find a small, out-of-the-way spot—like the underside of the door sill or the back edge of a trim piece—so you can check adhesion and color without creating an eyesore. Pick a discreet area that won’t affect curb appeal or interior design harmony if the color matching isn’t perfect.
Label the sample and note conditions. Try spots that receive varying sun and moisture exposure to see real-world wear.
- underside of door sill
- back trim edge
- inside top corner of threshold
Check after 24–72 hours for flaking and fading.
Prepare The Surface
Before you apply a test patch, clean and dry the spot thoroughly so the paint can bond and you’ll get an accurate read on adhesion and color. Use a mild detergent, rinse, and let it cure fully. Apply a small swatch from leftover paint, noting Color choices and surface texture. Label the sample with paint date and location to track Paint storage effects.
| Patch ID | Paint Type | Notes |
|---|---|---|
| A | Interior | Sun-exposed |
| B | Interior | Shaded area |
Keep the test area small and reversible.
Observe Over Several Days
Although the spot will look dry in a few hours, give it at least three to seven days of regular checks so you can judge true adhesion, color shift, and weather resistance under real conditions. Check daily after rain and sun exposure. Note any peeling, tackiness, or fading that affects color matching and assess Paint durability against temperature swings. Mark observations in a simple log and compare to the rest of the door.
- Day 1–2: surface feel and initial gloss changes.
- Day 3–5: look for edge lifting or micro-cracks.
- Day 6–7: evaluate long-term adhesion and true color.
Using Leftover Interior Paint Safely on a Sheltered Door
If your door sits under a deep porch or eave, you can often use leftover interior paint safely—provided you take a few precautions to address durability and moisture resistance. You’ll check Color matching and test a small area first. Sand, clean, and prime with a bonding primer to improve interior durability outdoors. Apply two thin coats, allow full curing, and avoid severe weather for a week.
| Step | Product | Tip |
|---|---|---|
| Prep | Degreaser/abrasion | Remove gloss |
| Prime | Bonding primer | Thin coats |
| Paint | Interior paint | Test patch first |
How Sheen Affects Longevity and Cleaning for Entry Doors
When you pick a sheen for an entry door, you’re choosing a trade-off between durability and appearance. Higher sheens resist scuffs and clean easily; lower sheens hide imperfections. Consider color coordination with surrounding trim and porch finishes, and remember paint fumes if you repaint indoors or in enclosed porches.
Choosing a door sheen balances durability and appearance—higher sheens clean easily, lower sheens hide flaws; consider color and fumes.
- High-gloss: best for frequent cleaning, shows flaws, withstands cleaners.
- Satin/semi-gloss: balanced durability and soft look, common for entry doors.
- Eggshell/flat: hides flaws but resists cleaning poorly; not ideal for busy entries.
You’ll match sheen to traffic, maintenance habits, and overall style.
Color Selection Tips for Sun Exposure and Fading
Now that you’ve considered sheen, also think about how sun exposure will affect your door’s color over time. You’ll want UV-resistant pigments or lighter tones on south- and west-facing doors to minimize visible fading and heat absorption.
Test small swatches in direct light for several weeks to judge change. Coordinate with interior decor and nearby wall textures so progression feels intentional if the door’s color shifts.
Matte finishes hide minor fade but show stains; semi-gloss resists dirt. Plan for periodic touch-ups rather than one-time perfection, and choose colors that age gracefully with sun exposure instead of demanding constant maintenance.
Staining vs Painting Wood Exterior Doors: When to Choose Each
Deciding whether to stain or paint your wood exterior door comes down to the look you want and how much maintenance you’re willing to do.
Choose stain to highlight natural grain and get easier touch-ups.
And pick paint for a uniform color and stronger UV protection.
We’ll compare durability, maintenance, and visual effects so you can pick the best option.
When To Stain
Wondering whether to stain your wood exterior door or paint it? You’ll stain when you want to showcase natural grain, match indoor decor continuity, or maintain a rustic vibe that paint color can’t recreate.
Stain preserves texture and soaks into wood for durability without hiding character. Choose stain if the door has pleasing grain, you prefer low-maintenance aging, or you want warm tones that complement interior blending.
- Keep the finish transparent or semi-transparent to reveal grain.
- Pick exterior-grade stain with UV protection and water repellency.
- Test stain on a hidden area to confirm tone before finishing.
When To Paint
If you want to hide imperfections, match a bold exterior palette, or create a low-maintenance surface, paint is the better choice. You’ll choose paint when you need uniform coverage, vibrant color options, or strong weather resistance.
Pick high-quality exterior paint with UV inhibitors to minimize color fading. Use a primer to seal tannins and improve adhesion.
Paint also helps with hardware protection—seal around locks and hinges to prevent rust and moisture intrusion.
If you repaint every few years rather than refinish, painting saves time. Apply proper prep and maintenance, and paint will keep your door looking consistent and durable.
How Moisture and Temperature Affect Paint Performance
Because exterior doors see wide swings in humidity and temperature, moisture and heat directly shape how paint cures, adheres, and lasts. You’ll notice issues quickly: high humidity slows drying and raises the risk of paint peeling, while intense sun accelerates color fading and film breakdown. Aim to paint when conditions are moderate and drying will be steady.
Consider these practical effects:
- Damp conditions: longer cure times, softer finish, and more chance of adhesion failure.
- Cold snaps: incomplete curing, brittle coats, and poor bonding.
- Heat and sun: faster skin formation, trapped solvents, and UV-driven color fading.
How to Protect Hardware and Weatherstripping While Painting
Moisture and temperature can wreck a paint job, but mechanical damage and stray paint splatters are just as likely to ruin your door’s hardware and weatherstripping if you don’t protect them. Before painting, remove knobs, locks, and kick plates when possible; store screws labeled.
If you leave hardware, wrap tightly with painter’s tape and mask fragile weatherstrips with low-tack tape or plastic sheeting. Use door-edge shields to prevent drips.
Choose tape colors that help with color coordination and tie into overall design accents so protection doesn’t confuse your vision. Work patiently to avoid nicking finishes or compressing seals.
Maintenance Tips to Extend an Exterior Paint Job
When you finish painting, plan a simple maintenance routine to keep the door looking great and extend the life of the finish. Check monthly for chips, dirt, and moisture buildup; wipe with mild soap and water, then dry. Keep an eye on edges and thresholds where wear shows first.
Consider how the door complements interior decoration and furniture matching when choosing touch-up paint so repairs stay seamless.
- Clean gently every month to remove grime.
- Touch up small chips promptly to prevent peeling.
- Lubricate hinges and check weatherstripping for tight seals.
Regular care preserves appearance and performance.
Common Mistakes That Ruin Door Paint Jobs
You’ll ruin a door paint job if you skip proper prep like sanding and priming.
Using the wrong paint—interior formulas on an exterior door—will peel and weather poorly.
And don’t ignore weather conditions, because high humidity or extreme temps wreck adhesion and drying.
Skipping Proper Preparation
If you skip proper prep—rushing straight to the brush or sprayer—you’re setting yourself up for drips, peeling, and a finish that won’t last. You’ll also miss chances to improve color coordination and hardware selection impact. Do this right: clean, sand, and prime where needed so paint adheres and looks professional.
- Remove or mask hardware to avoid smudges and guarantee even edges.
- Sand glossy spots and wipe dust so coats bond and colors stay true.
- Prime bare wood or repaired areas to prevent tannin bleed and uneven sheen.
Prep saves time, prevents rework, and keeps your door looking sharp.
Using Wrong Paint Type
Good prep sets the stage, but choosing the wrong paint will undo a lot of that work. If you use interior paint on an exterior door, it won’t resist moisture, UV, or temperature swings, leading to color fading and peeling faster than you’d expect.
Interior formulas often lack UV inhibitors and tougher binders, so finish durability suffers. You should pick a paint labeled for exterior use and compatible with your door material.
Also, avoid getting generous coats on hardware—mask hinges and knobs for hardware protection. The right product saves you time, prevents frequent repainting, and keeps the door looking sharp.
Ignoring Weather Conditions
When you paint a door without checking the forecast, moisture, temperature swings, or high humidity can ruin the job before the primer dries. You’ll notice blistering, poor adhesion, or uneven sheen if you ignore local weather patterns. Plan timing, storage, and drying to protect paint durability and avoid rework.
- Paint in stable temperatures to prevent cracking.
- Keep humidity low during drying to stop cloudiness.
- Don’t coat outdoors before rain or heavy dew.
If you follow conditions and let materials acclimate, your finish will last. Skipping this step wastes time and reduces the life of the coat.
How to Handle Extreme Climates and Coastal Salt Exposure
Because extreme temperatures and salty air attack paint differently than mild climates, you’ll need specific prep and product choices to keep an exterior door looking great and functioning well.
Extreme heat, cold, or salty air demand tailored prep and products to protect and preserve exterior doors.
In hot or cold regions pick flexible, UV-resistant exterior paint to limit color fading and use primers designed for thermal movement.
At the coast choose marine-grade coatings and stainless or coated hardware to resist hardware corrosion; seal edges and undersides with marine sealant.
Sand, clean salt deposits, and allow full drying between coats.
Recoat sooner than inland recommendations and inspect regularly for peeling, blistering, or rust so you catch problems early.
Cost Comparison: Use Leftover Interior Paint vs Buy Exterior Paint
If you’re tempted to save money by using leftover interior paint on an exterior door, weigh the upfront savings against long-term costs: interior formulations often lack UV resistance, flexibility, and weatherproof binders, so they can crack, fade, or peel sooner—meaning more frequent repainting, repairs, and possibly hardware or door damage that erase any initial savings.
Consider these practical points:
- Short-term cost: leftover interior paint is cheap now but risks color fading and premature failure.
- Long-term cost: repeated maintenance and replacement eats savings.
- Primer necessity: using a proper exterior primer helps, but buying exterior paint is usually wiser.
Eco and VOC Considerations for Exterior Door Paint
While choosing paint for your exterior door, consider how VOCs and eco-friendly labels affect indoor air quality, outdoor emissions, and long-term environmental impact. You’ll want low-VOC or zero-VOC exterior formulas to limit fumes that drift inside when you open the door.
Check certifications and ingredient lists rather than relying on green marketing. If you’re tempted to use leftover interior paint, remember interior decor formulations prioritize appearance and may lack weatherproofing or durable resins.
Avoid improvised paint mixing that dilutes protective properties. Pick a purpose-made low-VOC exterior product to balance aesthetics, health, and environmental responsibility.
Quick Fixes vs Long-Term Solutions for Door Protection
When you’re weighing quick fixes against long-term solutions for protecting an exterior door, think about what each approach actually buys you. You can patch chips with interior paint as a stopgap, but that won’t resist weather like exterior-grade coatings.
Consider how color psychology influences curb appeal now versus durability over years; matching historical styles might demand specific finishes.
Quick fixes:
- Touch-up with matching interior paint for immediate aesthetics.
- Apply a clear exterior sealer to extend lifespan slightly.
- Replace or add weatherstripping to prevent water intrusion.
Choose based on budget, exposure, and how long you need protection.
Checklist to Make Leftover Interior Paint Work Outdoors
Before you slap leftover interior paint on an exterior door, check the surface prep—clean, sand, and prime any problem spots so the paint will stick.
Boost durability by thinning or mixing with a compatible additive and sanding between coats for better adhesion.
Finish by sealing edges and adding a weatherproof topcoat or clear sealer to protect against moisture and UV.
Check Surface Preparation
Wondering whether that leftover interior paint can survive on an exterior door? Check surface preparation first: a clean, sound substrate determines success more than Color matching or paint branding.
You’ll want to remove dirt, chalk, and peeling layers, sand glossy spots, and guarantee bare wood is sealed.
- Wash with mild detergent, rinse, and let dry thoroughly.
- Sand or scrape to create a keyed surface; wipe off dust.
- Prime any exposed wood or metal and spot-prime stains.
Do these steps carefully so your interior paint has the best chance outdoors without relying on formulation alone.
Improve Paint Durability
Now that you’ve prepped the surface, focus on boosting the paint’s weather resistance so that leftover interior paint actually lasts outdoors.
Start by mixing a compatible exterior additive or acrylic binder into your interior latex to increase flexibility and UV resistance. Thin and stir thoroughly, testing a small panel for adhesion and color shift.
Choose pigments mindful of color psychology—darker tones absorb heat, lighter hues reflect it—to reduce thermal stress.
Match finish and accents to historical styles if your home demands authenticity, but prioritize durability: use proper primers, thin coats, and extended cure times to keep that repurposed paint performing.
Weatherproofing And Sealing
How do you make leftover interior paint stand up to rain, sun, and temperature swings? You’ll need a tight weatherproofing routine to slow color fading and prevent paint peeling.
Clean and sand the door, then apply exterior-grade primer that bonds to interior paint.
Seal seams and edges with a high-quality exterior caulk.
Finish with a protective topcoat—marine varnish or UV-resistant satin—applied in thin, even layers.
Pay attention to hardware and thresholds.
- Prep: clean, sand, prime.
- Seal: caulk joints, gasket thresholds.
- Protect: UV topcoat, regular inspections.
Follow this checklist and you’ll extend the finish’s life outdoors.
Decision: Use Leftover Interior Paint or Buy Exterior Paint?
Should you use leftover interior paint on your exterior door, or spend money on exterior-specific paint? You’ll weigh color matching and paint durability against cost and convenience.
If the leftover matches perfectly and the door’s sheltered, interior paint might hold short-term, but it won’t resist UV, moisture, or temperature swings like exterior formulations.
If the color matches and the door is protected, interior paint can work briefly—but it won’t stand up to sun, moisture, or temperature changes.
For long-lasting protection, buy exterior paint—it’s engineered for expanding, contracting, and weather exposure.
Consider primers, finish gloss, and warranty when choosing.
In most cases, investing in exterior paint saves time and maintenance later; use interior paint only for temporary, low-risk situations.
Frequently Asked Questions
Can Interior Paint Void a Door’s Warranty if Used Outdoors?
Yes — using interior paint outdoors can void a door’s warranty if the manufacturer required exterior-grade coatings. You should consider paint durability and proper surface preparation, follow specs, and document choices to avoid disputes.
Will Interior Paint Affect Fire-Rating on Exterior Doors?
No — interior paint won’t change a door’s fire-rating. Picture a flame test: color durability and paint adhesion matter for appearance and longevity, but fire-resistance relies on core materials and construction, not typical interior coatings.
How Does Paint Choice Impact Door Insulation/R-Value?
Paint choice barely changes a door’s insulation/R-value; you’ll rely on core materials. Still, pick high paint durability to protect surfaces and resist color fade, which preserves appearance though not significant thermal performance.
Can Interior Paint Attract Pests or Insects on an Exterior Surface?
Yes — interior paint can increase pest attraction and insect infestation risks on exterior surfaces if it’s porous, scented, or degrades; you’ll want durable, exterior-grade coatings and proper sealing to reduce smells, moisture, and crawling insects.
Are There Building Code or HOA Restrictions on Paint Type/Colors?
Yes — you’ll often face building code or HOA restrictions on color schemes and approved paint durability; check guidelines before painting, submit selections if required, and pick durable finishes that meet local rules to avoid fines or repainting.
Conclusion
You can use leftover interior paint on an exterior door in a pinch, but it’s not ideal long-term. Interior paint lacks UV stabilizers, flexible binders and mildewcides, so it can peel, fade or crack faster; studies show exterior-grade coatings can last 2–3 times longer outdoors. If you go this route, prep thoroughly, apply a primer, and add extra topcoats. For best durability and lower maintenance, buy paint formulated for exterior use.