Do You Need to Prime Exterior Wood Before Painting
You usually should prime exterior wood before painting to seal porous or weathered boards, block tannin and resin stains, and guarantee long-lasting adhesion; prime bare, pressure‑treated, cedar, knotty, or previously stained wood. You can skip primer only when the surface is clean, sound, and already has a well‑adhered, compatible finish, and you prep and test small areas first. Follow product compatibility and weather guidance, and keep going to learn specific checks and techniques.
Quick Decision Guide: Do You Need Primer?
Wondering whether you really need primer before painting your exterior wood? You’ll decide quickly by checking surface condition, previous finish, and desired outcome.
Wondering if you need primer for exterior wood? Check the surface, previous finish, and your desired result.
If wood’s bare, chalky, or stained, primer blocks tannins and guarantees adhesion.
If you’re repainting a compatible existing finish and want identical color matching and paint sheen, you might skip primer after light sanding and cleaning.
Use primer when switching from oil to latex or covering drastic color changes.
When in doubt, test a small area: coat, dry, and inspect adhesion and uniformity. That simple test saves time and prevents costly recoats later.
When Priming Exterior Wood Is Essential
If the wood is bare, weathered, stained, or showing tannin bleed, you should always prime before painting to guarantee proper adhesion and long-term protection. You’ll prime when boards are new, patched, or previously painted with failing coats.
Primer seals porous surfaces, blocks stains, and creates a uniform base so exterior finishes bond evenly. You’ll also prime pressure-treated lumber and cedar to aid paint hold and support wood preservation against moisture and rot.
Choose a primer formulated for exterior use and compatible with your topcoat. Proper priming saves time and money by preventing peeling, discoloration, and premature maintenance.
When You Can Skip Primer and Still Be Safe
Although you’ll usually prime exterior wood, you can skip it when the surface is clean, sound, and already has an adherent, compatible finish—such as intact, well-bonded oil or latex paint—because a new topcoat will bond to a stable substrate without the extra layer.
You can safely omit primer on smooth, previously painted garage doors or consistent exterior trim that’s been well maintained. Also consider interior trims that will receive the same paint type; skipping primer saves time if adhesion, color coverage, and weather exposure are acceptable.
Test a small area, clean thoroughly, and use proper preparation to avoid failures.
Assessing Wood Condition to Decide on Priming
Before you decide on primer, check the wood for rot or structural damage so you know if repairs are needed first.
Feel the surface and tap questionable areas—soft spots mean the primer won’t fix underlying decay.
Also evaluate the existing finish; a stable, glossy coating may need sanding rather than a full primer.
Check For Rot Or Damage
When you inspect exterior wood, look closely for soft spots, crumbling fibers, and discolored areas that signal rot or structural damage. Probe suspect areas with a screwdriver; if it sinks or wood flakes, you’ve found decay. Check along joints, ends, and where water pools.
Examine wood grain for separation or raised fibers and watch for paint peeling that hides deeper issues. Small, dry checks can be repaired, but extensive rot means you’ll need to splice or replace sections before priming.
Fix structural damage, verify the surface is sound and dry, then choose an appropriate primer for durable paint adhesion.
Evaluate Existing Finish
If the wood still has its original finish, take a close look at adhesion, gloss, and surface build to decide whether you need to strip, scuff, or prime directly. You’ll inspect how the finish follows the wood grain and whether cracking, peeling, or raised edges demand removal.
Check paint sheen variety across boards; inconsistent sheen often signals poor adhesion. Make choices based on condition, not habit:
- Peel or flake: strip to bare wood.
- Smooth, intact finish: scuff and prime.
- Patchy adhesion: spot-prime after sanding.
- High-gloss old coat: degloss before priming.
That approach saves work and improves longevity.
Testing Existing Wood: Quick Checks Before Priming
As you get ready to prime, run a few simple checks to confirm the wood’s condition and avoid surprises that could ruin the finish.
Inspect wood grain for raised fibers or loose boards; run your hand along surfaces to feel roughness. Tap or press to find soft spots indicating rot. Check for paint peeling—lift edges with a putty knife to see if old paint bonds or flakes away.
Run your hand over the grain, tap for soft spots, and lift paint edges to check bonding and rot.
Smell for mildew and look for stains that bleed through primer. Measure surface flatness and note gaps at joints.
Document findings so you can decide cleaning, sanding, or spot priming before painting.
How Moisture and Weathering Affect Primer Choice
You’ve checked for rot, loose paint, and surface stains; now consider how moisture and weathering will dictate the primer you choose. You’ll pick primers that repel water, bond to aged wood, and work with weather resistant finishes. Match primer to exposure: high humidity, driving rain, or UV. Think about layers: primer plus moisture barriers where needed.
- For damp climates, use a high-build, water-repellent primer.
- For sun and wind, pick UV-stable, flexible primers.
- For mixed exposure, use a breathable primer that sheds water.
- For endgrain and joints, apply dedicated moisture barriers first.
Which Exterior Woods Bleed Tannins or Pitch
When choosing a primer, remember that certain exterior species are prone to tannin or pitch bleed and will stain primer and paint if you don’t block them first.
You’ll commonly see tannin bleeding from cedar, redwood, oak, and mahogany; these woods release dark water-soluble compounds that can leach through coatings.
Softwoods like pine, fir, and Douglas fir often show resin seepage—sticky pitch that can ooze and discolor finishes.
If you’re working with reclaimed lumber, tropical hardwoods, or knotty boards, assume higher risk.
Use a stain-blocking primer formulated for tannins and resins to prevent staining before topcoating.
How Tannins and Pitch Damage Paint
Knowing which species bleed helps explain how tannins and pitch actually damage paint. You’ll see stains, adhesion loss, and blistering when Tannin bleeding or Wood resin migrate through coatings.
You can prevent many failures by priming and managing moisture, but understand the mechanisms first.
- Tannins leach with water, staining topcoats and undermining gloss.
- Wood resin (pitch) softens film, causing tacky spots and spots that repel paint.
- Migrating extractives break primer–paint bonds, leading to peeling at seams.
- Heat and sun speed movement, pushing stains through even cured finishes.
Recognize signs early so you treat substrate before repainting.
Choosing Between Oil-Based and Latex Primers
You’ll want to weigh oil-based versus latex primers by their basic chemistry and how each bonds to wood.
Consider durability and flexibility—oil often seals tannins better, while latex resists cracking with seasonal movement.
Also think about application and drying time, since oil takes longer to cure and latex lets you finish coats sooner.
Oil Versus Latex Basics
If you’re deciding between oil-based and latex primers, focus on the surface you’re sealing and the conditions it’ll face. You’ll pick oil for stain blocking and tight grain sealing, or latex for easy cleanup and breathability.
Consider color matching and brush selection to get smooth, even coverage.
- Oil blocks tannins and deep stains better.
- Latex dries faster and handles moisture well.
- Oil needs mineral spirits; latex cleans with soap and water.
- Latex often accepts topcoats sooner for quicker projects.
Choose based on substrate and project pace; both work if matched to the job.
Durability And Flexibility
Once you’ve picked a primer based on stain blocking or drying time, think next about how the coating will handle movement and wear over time. You want a primer that flexes with wood as seasons change, so choose latex for greater elasticity on porous boards and trim with varied surface textures.
Oil primers stubbornly resist abrasion and can seal tannins, but they’re less forgiving when the substrate expands. Also check paint compatibility: some topcoats stick better to oil-based primers, others to latex.
Match primer flexibility to your wood’s movement and the finish paint to avoid cracking, peeling, or premature failure.
Application And Drying
Because application technique and drying behavior directly affect how well primer bonds and how soon you can topcoat, pick oil or latex by considering ease of use, environmental conditions, and schedule.
You’ll find oil primers flow smoothly, resist bleed-through, and suit stubborn tannin stains, while latex dries fast and cleans up with water.
Match primer to your paint sheen goal and surface porosity. Consider color matching needs: tint latex for quicker visual checks; oil accepts deeper tints for uniform coverage.
Choose based on:
- Dry time relative to humidity and temperature
- Tool preference: brush, roller, or sprayer
- Cleanup and odor tolerance
- Long-term adhesion requirements
Primer Types: Bonding, Sealer, Stain-Blocker, Mildew-Resistant
When you’re prepping exterior wood, choosing the right primer type matters because each formula solves a different problem—bonding primers grab slick or weathered surfaces, sealers lock out tannin and moisture, stain-blockers hide knots and bleed-through, and mildew-resistant primers keep fungal growth at bay.
You’ll pick a bonding primer if old paint or smooth trim resists adhesion, and a sealer when sap or tannins threaten finish integrity. Stain-blockers stop discoloration from knotty wood grain, preserving uniform paint sheen.
Use mildew-resistant primers in damp climates. Match primer to substrate and finish to ensure durable, even topcoats.
Best Exterior Wood Primers for Cedar and Redwood
If you’re painting cedar or redwood, pick a primer that tames tannins, resists pitch bleed, and bonds to porous, resinous grain; oil-based or high-quality latex bonding primers are typically the best choices. You’ll want stain-blocking strength, mildew resistance, and good adhesion so topcoats perform.
Consider Color matching if you’re switching dramatic hues, and weigh Budget considerations against longevity.
- Oil-based stain-blockers for heavy tannin control
- Acrylic latex bonding primers for easier cleanup
- Alkyd-modified primers for pitch resistance
- Tintable options to assist Color matching before topcoat
Choose based on exposure and maintenance plans.
Best Primers for Pine, Fir, and Other Softwoods
Cedar and redwood demand primers that block tannins and resist pitch, but pine, fir, and most other softwoods have different challenges—higher resin content in knots, variable grain absorption, and a tendency to raise the nap. You’ll pick primers that seal uneven wood grain, control absorbency, and create a uniform base for your chosen paint sheen. Use a liquid or shellac-modified primer for fast sealing; acrylic primers work for flexibility. Sand between coats to smooth raised fibers.
| Primer Type | Benefit | Best Use |
|---|---|---|
| Acrylic | Breathable, flexible | Siding |
| Oil | Seals well | Trim |
| Shellac-mod | Fast seal | Knots |
| Latex | Easy cleanup | Panels |
Primers That Block Knots and Resin Stains
Because knots and resin can bleed through paint and ruin a finish, you’ll want a primer that specifically blocks tannins and oils while adhering to oily or resin-rich wood.
Because knots and resin can bleed through paint, use a tannin- and oil-blocking primer that adheres to resin-rich wood.
You’ll choose a stain-blocking primer formulated for exterior use to preserve wood grain clarity and guarantee consistent paint sheen. Apply according to label, especially over knotty areas.
- Use oil-based or shellac-based primers for severe bleeding.
- Test a small section to confirm adhesion and color holdout.
- Sand lightly between primer and topcoat to keep wood grain visible.
- Allow full cure before applying your chosen paint sheen for best results.
Primers That Prevent Mold, Mildew, and Rot
When you’re protecting exterior wood from mold, mildew, and rot, choose a primer that contains mildewcide and a fungicidal biocide so it actively inhibits microbial growth rather than just covering it.
You’ll want a primer formulated for exterior moisture exposure and wood decay resistance; check labels for ASTM or EPA claims.
Apply to clean, dry surfaces after removing any existing growth.
Color matching still matters—pick a tint that aids topcoat coverage and hides imperfections.
For application, use proper brush selection: a high-quality synthetic bristle brush for waterborne primers and a natural-bristle for oil-based products to ensure full penetration and adhesion.
Low‑VOC and Eco-Friendly Primer Options
If you want protection against mold and rot without bringing harsh chemicals into your yard or home, low‑VOC and eco‑friendly primers give you options that balance performance with environmental and health concerns. You’ll find Eco friendly alternatives that still block tannins, seal wood, and promote strong paint adhesion.
Look for VOC free primers or those labeled low‑VOC, water‑based, or plant‑derived. Consider:
Seek VOC‑free, low‑VOC, water‑based, or plant‑derived primers for safer, low‑odor protection.
- Acrylic water‑based primers for fast drying and low odor
- Shellac alternatives with low‑toxicity formulas for sealing
- Plant‑based binders that resist moisture and mildew
- Certifications like GreenGuard to confirm low emissions
Choose based on surface and climate.
How to Prep Weathered or Gray Wood for Primer
Start by evaluating the wood for rot, loose fibers, and deep staining so you know whether it can be restored or needs replacement.
Use a stiff brush or power washer to remove the gray, weathered surface and follow with a brightener or oxalic acid for stubborn stains.
Once the surface is clean and dry, sand or abrade as needed and then apply an appropriate exterior primer.
Assess Wood Condition
Although weathered or gray wood can look stubborn, you can restore its surface enough for primer to bond well by evaluating and addressing rot, loose fibers, and deep staining.
Inspect for soft spots and probe suspect areas; replace rotten boards. Check wood grain direction and sanding needs to avoid tear-out.
Test for surface contamination that affects paint compatibility. Note any old finishes or epoxy repairs.
- Probe for softness and measure repair scope
- Sand along wood grain to smooth raised fibers
- Spot-treat deep stains or tannin bleed-through
- Verify substrate firmness and evenness before priming
Remove Gray Surface
When wood has grayed from sun and moisture, you’ll need to strip that degraded layer so primer can adhere to fresh fibers. Gentle abrasion, chemical brighteners, or pressure washing are your primary tools depending on how deep the weathering is.
Start by testing a small area to see if the gray surface lifts with sanding or a brightener. Use coarse-to-fine sanding to remove loose fibers, rinse thoroughly after chemical treatment, and let the wood dry fully.
Address stubborn surface discoloration with a second treatment or higher-pressure wash, but avoid over-sanding which can gouge the wood’s grain.
Prep For Primer
With the degraded surface removed and the wood clean and dry, you’re ready to prepare it for primer so the coating bonds and performs.
Sand smoothly to feather edges and open grain; dust off with a tack cloth.
Check for remaining stains or tannins and spot-prime as needed.
Consider color matching if you’ll use a tinted primer to reduce topcoat coats.
Keep tool maintenance in mind: clean blades and pads to avoid scratches.
- Sand with progressive grits for a uniform surface
- Wipe, vacuum, and tack to remove all dust
- Address stains before priming
- Inspect and maintain tools before use
Clean and Degrease Wood Before Priming
Why start by cleaning and degreasing? You’ll remove dirt, mildew, oils, and old contaminants that hide in wood grain and cause poor primer contact. Use a mild detergent or a dedicated wood cleaner, rinse thoroughly, and let the surface dry completely.
For greasy spots, apply a degreaser or trisodium phosphate substitute, scrub gently, then rinse until residues are gone. Cleaning prevents paint peeling by ensuring primer bonds to raw wood instead of contaminants.
Work section by section, wear gloves, and avoid soaking the wood. A clean, oil-free surface gives primer the best chance to adhere and protect.
Sand Wood for Better Primer Adhesion
Before you prime, sand the wood to open the grain and create a slightly rough, uniform surface that lets primer grip better. You’ll work with the wood grain, not against it, using progressive grit to control surface texture and remove mill glaze or rough spots. Sanding guarantees even primer absorption and reduces blistering.
- Start with medium grit to level imperfections.
- Follow with fine grit for a consistent finish.
- Wipe dust between passes to check progress.
- Lightly scuff hard-to-reach areas for uniform adhesion.
You’ll save time later by preparing the substrate properly, improving primer performance and paint longevity.
Dealing With Old Paint Before Priming
Before you prime, check the existing paint by pressing and tapping to see if it’s firmly adhered or starting to lift.
If paint flakes or peels, chip away loose layers with a scraper or a stiff brush until you reach stable material.
Don’t skip this step—priming over failing paint will cause the new finish to fail sooner.
Assess Paint Adhesion
If your home has existing paint, check how well it’s sticking before you prime—loose, peeling, or chalky paint will sabotage any new coating. Run a fingernail over suspect areas, inspect along wood grain for lifting, and note inconsistent paint sheen that signals wear.
You’ll want to determine whether the surface needs cleaning, sanding, or spot priming.
- Test adhesion with a fingernail or tape
- Look for chalky residue after rubbing
- Sand glossy patches to dull the sheen
- Clean dirt and mildew before assessing
Make repairs or targeted prep until the surface feels sound and keyed for primer.
Remove Flaking Layers
Want to get your new paint to last? Remove flaking layers with a scraper, wire brush, or power sander until edges are feathered smooth. You’ll inspect paint texture and decide where primer’s needed; rough spots need more attention. Clean dust and loose particles, then spot-prime bare wood to guarantee adhesion and consistent color matching later. Replace rotten boards before painting.
| Tool | Purpose |
|---|---|
| Scraper | Removes big flakes |
| Wire brush | Clears residue |
| Sander | Smooths feathered edges |
| Vacuum/wipe | Cleans dust |
Finish by checking surface uniformity before priming.
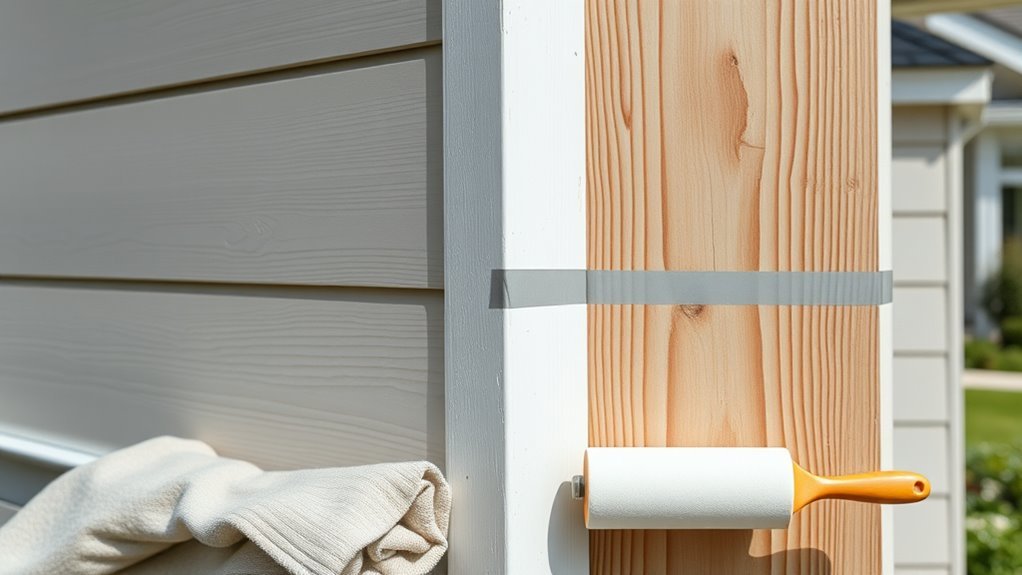
How to Prime Siding, Trim, and Fascia
When you’re priming siding, trim, and fascia, work systematically from top to bottom so you catch drips and guarantee even coverage. Begin by cleaning surfaces, sanding rough spots to reveal fresh wood grain, and masking adjacent areas. Choose a primer compatible with your topcoat’s paint sheen and exterior conditions. Use brushes for corners and a roller for flats, maintaining a wet edge.
Work top to bottom: clean, sand, mask, and prime with compatible products—brush corners, roll flats, keep a wet edge.
- Apply thin, even coats
- Feather edges to avoid lap marks
- Check joints and seams for proper adhesion
- Allow full dry time per label
Finish by lightly sanding between coats and inspecting for missed areas.
How to Prime Knotty and Resin-Rich Boards Safely
When you prime knotty or resin-rich boards, start by sealing knots with a shellac- or oil-based knot sealer to prevent stains from bleeding through.
After that, apply a resin-blocking primer over the entire surface to stop sap migration.
Take care to follow product instructions and allow proper drying between coats.
Seal Knotty Areas
How do you keep knotty, resin-rich boards from bleeding tannins and sap through your new paint? You’ll seal knotty areas to stop resin bleed and protect the finish. Use a targeted approach: clean, dry, then treat knots so primer sticks and stain won’t reappear.
- Sand knots smooth, removing loose resin.
- Apply a solvent wash to dissolve surface sap.
- Use a shellac-based or stain-blocking primer on knots.
- Feather primer into surrounding wood for uniform adhesion.
Work quickly on warm, dry days. Recheck treated knots before topcoating; seal again if any bleed reappears.
Block Resin Bleed
Although resin can sneak through fresh paint and ruin a job, you can stop it by priming knotty, resin-rich boards with the right prep and products. Start by sanding knots lightly and wiping away dust; solvents remove surface sap.
Apply a shellac-based or oil-modified blocking primer to seal knots and block resin bleed effectively. Work along the wood grain appearance to avoid streaks and match texture.
Let the primer cure fully before topcoating; check for bleed-through and spot-prime again if needed. Use breathable exterior topcoats so trapped moisture escapes without lifting the primer or altering the wood grain appearance.
Tools & Techniques for Fast, Even Exterior Priming
Looking for a way to prime exterior wood fast and evenly? You’ll work smarter with the right tools and technique: choose primers with good adhesion, consider color matching to your topcoat to reduce coats, and prioritize proper brush selection for edges.
- Use a high-quality angled sash brush for trim.
- Roll broad surfaces with a long-nap roller for texture.
- Back-brush freshly rolled primer to even it out.
- Use a pump sprayer for speed, then tip with a brush.
Work in mild temperatures, keep a wet edge, and sand between coats lightly to guarantee uniform adhesion and finish.
Spot-Priming vs Full-Surface Priming: When to Use Each
When deciding between spot-priming and priming the whole surface, think about the condition and porosity of the wood. If you’ve got isolated knots, repairs, or bare spots, spot-priming saves time and addresses those trouble areas directly.
Choose spot treatment when the rest of the siding shows uniform, sound paint. Go full-surface when the wood varies in porosity, has widespread damage, or you want consistent sheen and adhesion.
Match priming techniques to the primer and final paint — make certain paint compatibility to avoid peeling or uneven color. Inspect, test a small area, then commit to the appropriate approach.
How Many Primer Coats Do Exterior Wood Surfaces Need?
How many primer coats you need depends on the wood species and condition—soft, porous woods usually need more buildup than dense, smooth woods.
One coat often suffices for previously primed or smooth hardwoods, while new, bare, or knotty wood may call for two coats.
Match the coat count to the surface to guarantee proper adhesion and weather protection.
Surface Type Matters
Because exterior wood varies so much in species, age, and exposure, the number of primer coats you need depends on the surface type. You’ll assess and treat each surface differently: untreated softwood soaks up primer, old painted boards may need sealing, and dense hardwoods resist penetration.
Consider texture and damage before priming, and plan for color matching where repairs or patching show. Keep your brushes and sprayer in good tool maintenance to guarantee even application.
- New cedar or redwood: use a penetrating primer.
- Weathered clapboard: clean and seal.
- Repaired areas: spot-prime.
- Exotic hardwoods: test adhesion.
Primer Coat Count
Now that you’ve assessed the wood type and surface condition, decide how many primer coats to apply based on those findings.
If the wood is bare, porous, or weathered, you’ll usually need one full coat plus a second spot coat on knots and end grain.
Previously painted or smooth boards often require a single coat unless the old finish is failing.
Use a primer that aids color matching when switching to a much lighter or darker topcoat.
Adjust for surface texture: rough or cupped boards may absorb more, so plan extra coverage.
Always follow manufacturer drying times before topcoating.
How Long to Wait Between Primer and Topcoat
Once the primer feels dry to the touch, you’ll want to wait the manufacturer’s recommended recoat window before applying your topcoat to guarantee proper adhesion and finish.
You’ll also watch for full cure so the wood grain won’t telegraph through and the paint sheen stays consistent. Factors like temperature, humidity, and primer type change timing, so check the label.
Follow these practical cues:
- Touch test: no tackiness after labeled wait
- Visual: even primer film with no streaks
- Climate: extend time in cool or humid conditions
- Sanding: light scuff before topcoat if recommended
How Primer Affects Paint Coverage and Final Color
When you prime exterior wood, you’ll notice your topcoat covers more evenly and needs fewer coats.
A good primer also stabilizes the substrate and prevents the paint’s color from being absorbed or altered by the wood. That means truer final color and more consistent coverage across the whole surface.
Primer Improves Coverage
Because primer seals and evens out the surface, it helps your topcoat go on more smoothly and with fewer coats, improving coverage and bringing out the true color you expect. You’ll save paint and time on siding, trim, outdoor furniture, or interior walls by starting with a proper primer.
Benefits include improved adhesion and reduced blotchiness, so the finish looks uniform.
- Reduces the number of topcoats needed
- Prevents uneven absorption on porous wood
- Enhances hiding power of colored paint
- Saves money and labor over repaint cycles
Choose a primer suited to the substrate for best results.
Primer Stabilizes Color
Primer doesn’t just improve coverage — it locks in a consistent base that keeps your topcoat color true. When you apply primer, you’re creating primer consistency across wood that varies in grain, age, and porosity. That uniform surface prevents blotchy spots and uneven absorption so the finish shows the pigment you chose.
Color stabilization means fewer coats of colored paint and more predictable results in sunlight and over time. You’ll notice truer hues immediately and less fading or patchiness later.
For reliable exterior results, prime first: it saves paint, effort, and delivers the color you expect.
Primer Selection for Bright or Dark Final Paint Colors
If you’re heading for a bright or dark final color, choose a primer that matches the paint’s tinting needs and the wood’s condition so you get true color and uniform coverage. You’ll control color contrast and anticipate how finish sheen affects appearance.
Pick primer type for stain blocking or adhesion, then test a small area.
Consider these quick checks:
- Use a tinted primer for deep hues to reduce coats.
- Choose a high-hide primer for bright whites or saturated colors.
- Match oil or acrylic base to your topcoat for compatibility.
- Sand and spot-prime knots to prevent bleed-through before topcoating.
How to Prime in Cold, Hot, or Humid Conditions
When you prime in cold weather, pick a fast-curing, low-temperature primer and give yourself extra drying time.
In hot or humid conditions, work in the coolest part of the day, thin the primer slightly if recommended, and watch tack times to avoid trapping moisture.
Adjust your schedule and product choices so the primer fully adheres and dries before topcoating.
Cold-Weather Priming Tips
Although cold weather can slow drying and affect adhesion, you can still prime exterior wood successfully by choosing the right products and adjusting your process. You’ll prep surfaces, check moisture, and pick a low-temperature primer that respects wood grain and won’t alter paint sheen.
Work during warmer daylight hours and keep materials warm before use.
- Store primer and brushes indoors so they aren’t chilled.
- Use a primer labeled for low temperatures and extended flash time.
- Apply thin coats to promote curing and avoid trapping moisture.
- Shield the work with a temporary tent or heat source to maintain minimum temperature.
Humidity And Heat Strategies
Because moisture and high temperatures change how primer bonds and dries, you’ll need to adjust prep, product choice, and timing to get a reliable finish in humid or hot conditions. Work during cooler parts of the day, early morning or late afternoon, to slow curing.
Wipe dry wood grain and allow moisture readings below manufacturer specs before priming. Choose a fast-drying, humidity-tolerant exterior primer and avoid oil-based formulas that trap moisture.
Thin coats dry more evenly and preserve paint sheen. Use fans or shade to control heat, and don’t rush recoats—verify full dry time to prevent peeling and blistering.
Troubleshooting Primer Adhesion Problems
If your primer isn’t sticking, you’ll want to diagnose the cause before applying more product — peeling or bubbling usually points to surface contamination, moisture, or incompatible coatings.
Start by inspecting Wood texture and previous Paint color that might indicate old film or tannin bleed. Test adhesion with a tape pull and check moisture with a meter. Then address the root problem before re-priming.
- Clean mildew, dirt, and oils with appropriate cleaners.
- Sand glossy or rough areas to a uniform profile.
- Confirm wood is dry and protected from rain.
- Match primer type to existing coating for compatibility.
Common Priming Mistakes That Cause Failure
When priming exterior wood, you’ll usually fail because of a few predictable mistakes — skipping proper surface prep, using the wrong primer, applying it in poor weather, or ignoring moisture and tannin issues.
You’ll also mess up by not sanding to follow the wood grain, leaving dust or old finish that blocks adhesion. Choosing a primer incompatible with your topcoat alters paint sheen and performance.
Don’t apply in high humidity, direct sun, or freezing temps. Skipping stain-blocking primer on tannin-rich species invites bleed-through.
Finally, don’t thin excessively or spread too thinly—coverage and film thickness matter.
When Warranties Allow Skipping Primer
Although skipping primer usually raises red flags, some warranties explicitly allow it under specific conditions, and you should know what those are before cutting corners. Read the warranty fine print: manufacturers sometimes permit no-primer applications when criteria are met.
Skipping primer often alarms inspectors, but some warranties permit it—check the fine print for exact conditions first.
Look for clauses about substrate type, new wood treatments, and approved topcoats.
Verify color matching and paint sheen requirements — matching formula and sheen can be a condition.
Confirm application methods and environmental limits.
- Manufacturer-approved topcoat specified
- Exact Color matching to supplied formula
- Required Paint sheen listed and followed
- Certified applicator or method mandated
Quick Checklist: Decide Whether to Prime Exterior Wood
Even if a warranty lets you skip primer under narrow conditions, you should run a quick checklist before deciding on a project-by-project basis. Inspect wood for bare spots, knots, or tannin bleed; if present, prime. Check previous finish—well-bonded, glossy paints may only need deglossing; flaking surfaces require stripping and priming.
Consider moisture content and rot; replace or treat damaged areas first. For porous items like outdoor furniture or garden decor, primer improves adhesion and durability. Match primer type to paint (oil vs. latex) and wood species.
When in doubt, prime: it’s cheaper than early repainting.
Frequently Asked Questions
Can Primer Alter the Wood’s Natural Texture or Grain Appearance?
Yes — primer can slightly alter the wood surface and grain appearance, but you’ll control the effect by choosing translucent or sanding primers, applying thin coats, and testing on a scrap to preserve texture while sealing and smoothing imperfections.
Will Primer Affect the Flexibility of Painted Trim in Winter?
Like a snug coat against winter’s bite, primer won’t make trim brittle; you’ll retain flexibility while improving primer adhesion and weather resistance, so joints move and paint stays put rather than cracking under cold stress.
Can Primer Interfere With Exterior Wood Stains Instead of Paint?
Yes — primer can interfere if it’s incompatible with stains; you should test and follow primer compatibility and surface preparation guidelines so the stain adheres and soaks properly, avoiding film-forming primers that block penetration.
Do Primers Attract Insects or Pests to Exterior Wood?
Like a glossy lure, primers rarely cause insect attraction; you’ll usually not invite pests if you choose low-odor, non-toxic formulas and dry surfaces promptly. Proper application supports pest prevention and won’t attract bugs to wood.
Is Priming Necessary for Painted Wood Repairs After Rot Replacement?
Yes — you should prime repaired wood before painting. You’ll follow wood preparation steps, choose appropriate primer types (oil, latex, or bonding) to seal, promote adhesion, and prevent moisture, ensuring durable, paint-ready repaired surfaces.
Conclusion
Decide with care, act with confidence: prime when wood’s bare, weathered, stained, or patched; skip when factory-primed, in perfect condition, and your paint and warranty allow it. Test adhesion, prep surfaces, and fix problems before you paint. Don’t rush, don’t guess, don’t cut corners. Choose the right primer, apply it correctly, and protect your work—so your siding looks better, lasts longer, and gives you the peace of mind you deserve.