How Do I Get Dried Paint off Hardwood Floors
Start by testing a hidden spot to ID the paint—warm soapy water softens latex, mineral spirits affect oil, and denatured alcohol dissolves shellac. Gently soften spots with appropriate solvent, blot with a microfiber cloth, then lift flakes with a plastic scraper or putty knife. For stubborn bits, spot-sand and feather edges before applying matching finish. Work carefully, vent the area, and wear gloves; follow-up steps will show how to match sheen and fully restore the floor.
Quick Start: What to Try First
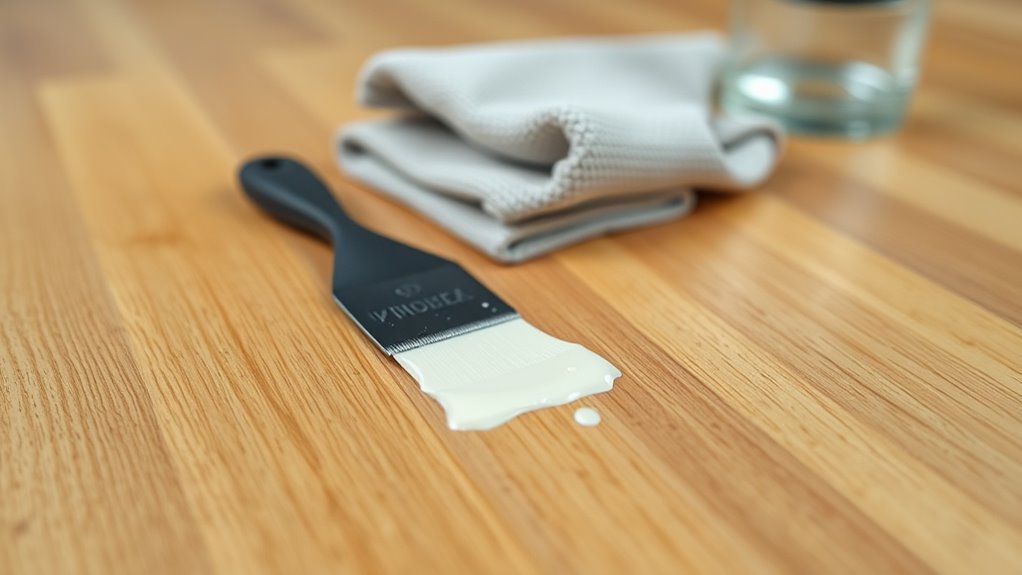
Wondering where to begin? You’ll start gently: scrape softened paint with a plastic putty knife, avoiding gouges, then blot residue with a damp microfiber so you don’t abrade finishes.
Test a small spot with warm, soapy water before stronger steps.
Use mineral spirits sparingly on oil-based spots, wiping along the grain and drying thoroughly to aid hardwood surface preservation.
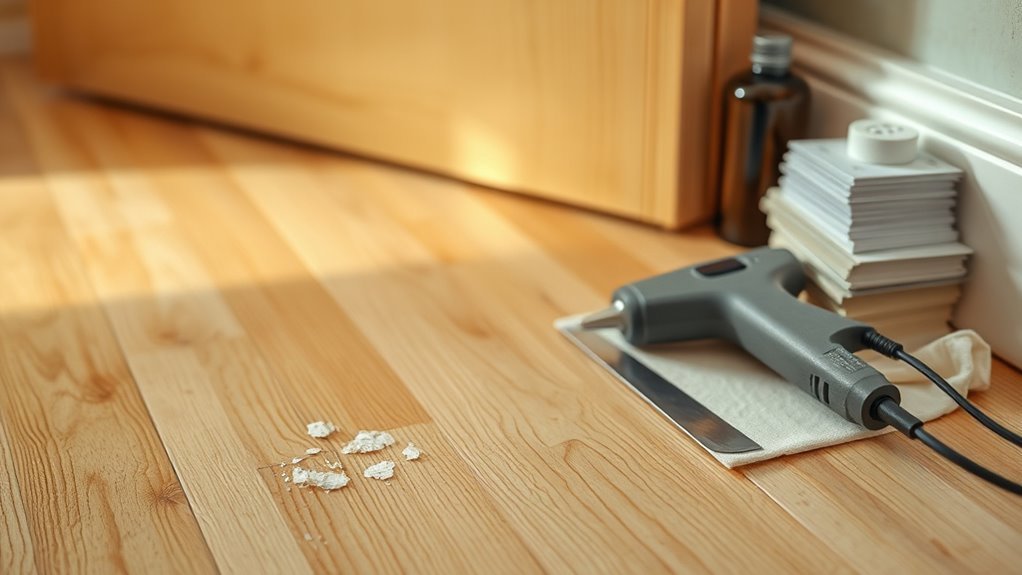
For stubborn bits, try a heat gun on low or a commercial adhesive remover designed for floors.
Keep creative painting techniques in mind to prevent future messes—drop cloths, painter’s tape, and working from the edges inward.
Identify the Paint on Your Hardwood
Before you start removing dried paint, figure out what kind of paint you’re dealing with—latex, oil-based, or something else—since that guides which solvents will work.
Check how old the paint is, because fresh splatters come off much easier than paint that’s been baked on for months or years.
Always test your chosen remover in an inconspicuous spot to make sure it won’t damage the finish.
Determine Paint Type
To remove paint safely, you first need to know what kind of paint you’re dealing with—water-based (latex) or oil-based—since each reacts differently to solvents and scrapers.
Examine a small spot: water will soften latex; mineral spirits affect oil paint. Note paint color only to avoid staining when testing solvents.
Observe finish sheen—flat, satin, semi-gloss or gloss—because higher sheen often means tougher finish and stronger adhesion.
Use a fingernail or scraper on an inconspicuous area to see if flakes lift.
If unsure, test a solvent patch and wait for reaction before proceeding with removal.
Check Paint Age
Now that you’ve identified whether the paint is water- or oil-based, figure out how long it’s been on the floor—age affects how firmly it bonds and what removal methods will work.
Check for recent splatters versus fully cured, cracked patches; fresh paint often softens with mild solvents, while older layers may resist and need mechanical action.
Note environmental factors—sunlight, heat, and humidity speed curing. Document age roughly (hours, days, months, years) to choose an approach that balances effective paint removal with Hardwood safety.
Older, stubborn paint calls for gentler, gradual techniques to avoid sanding through the finish.
Test Inconspicuous Area
Because paint types and finishes react differently, start by testing a small, hidden spot to identify what you’re dealing with.
Gently scrape a tiny sliver of dried paint with a plastic scraper, then dab mineral spirits on a cloth and blot—watch for finish softening, color lift, or grain damage.
Note whether the paint flakes, gels, or dissolves; that tells you if it’s latex, oil, or shellac and informs your method.
Consider nearby Creative painting techniques or Historical hardwood finishes that might need preservational care.
Record results before treating visible areas so you won’t harm the floor’s finish or patina.
Test if the Paint Is Latex, Oil, or Shellac
Start by rubbing a small spot with warm water—if the paint softens or lifts it’s likely latex.
If water doesn’t work, wipe a hidden area with mineral spirits; a reaction usually means oil-based paint.
If neither helps, try denatured alcohol, which will remove shellac.
Rub With Warm Water
Before you scrub, dampen a cloth with warm water and rub a small, inconspicuous spot to see whether the paint softens—this simple test tells you if it’s water-based (latex) or if it resists and might be oil- or shellac-based.
If the paint softens or smears, it’s likely latex and can often be lifted with gentle rubbing and more warm water during hardwood cleaning. Work with the grain and avoid soaking the floor.
If the spot barely budges, stop; that resistance suggests oil or shellac, and you’ll need different solvents or professional paint removal to avoid damaging the finish.
Test With Mineral Spirits
If rubbing with warm water didn’t loosen the paint, grab a small amount of mineral spirits on a clean, white cloth and gently rub a hidden edge of the dried spot to see whether the paint softens or lifts. You’ll identify latex (softens), oil (smears), or shellac (dissolves). Work sparingly; ventilate and protect finishes. Mineral spirits can be part of creative removal while you prioritize eco friendly solutions elsewhere. If you see softening, proceed cautiously; if nothing changes, stop. Below is a simple comparison to help visualize results.
| Paint Type | Reaction | Next Step |
|---|---|---|
| Latex | Softens | Blot |
| Oil | Smears | Wipe |
| Shellac | Dissolves | Rinse |
| Unknown | No change | Stop |
Try Denatured Alcohol
If mineral spirits didn’t give a clear result, try denatured alcohol to further identify the paint type: it will lift latex, do little to oil-based paint, and aggressively attack shellac.
Dampen a white cloth with denatured alcohol, blot a discreet dried paint spot, and watch for softening. If paint beads or wipes away, it’s likely latex; if nothing happens, it’s probably oil; if it dissolves quickly and smells strong, suspect shellac.
Use gloves, ventilate, and avoid prolonged rubbing to protect the finish. This quick test complements Creative painting tips and practical Hardwood cleaning techniques when restoring floors after mishaps.
When to Call a Pro
When the paint’s stuck deep in the grain, has bubbled or cracked the finish, or covers a large area, you should call a pro—trying DIY methods can make the damage worse and raise repair costs.
When paint soaks into the grain, bubbles, cracks, or spans a large area, call a pro—DIY can worsen damage.
If you’ve used creative painting techniques that splattered or layered paints, a pro will assess finish depth and matching needs.
Call help when sanding risks exposing veneer, when solvent reactions are unclear, or when water damage accompanies paint.
A professional will advise on refinish versus spot repair, preserving your hardwood floor maintenance schedule and warranty.
Don’t wait—early expert intervention limits cost and irreversible harm.
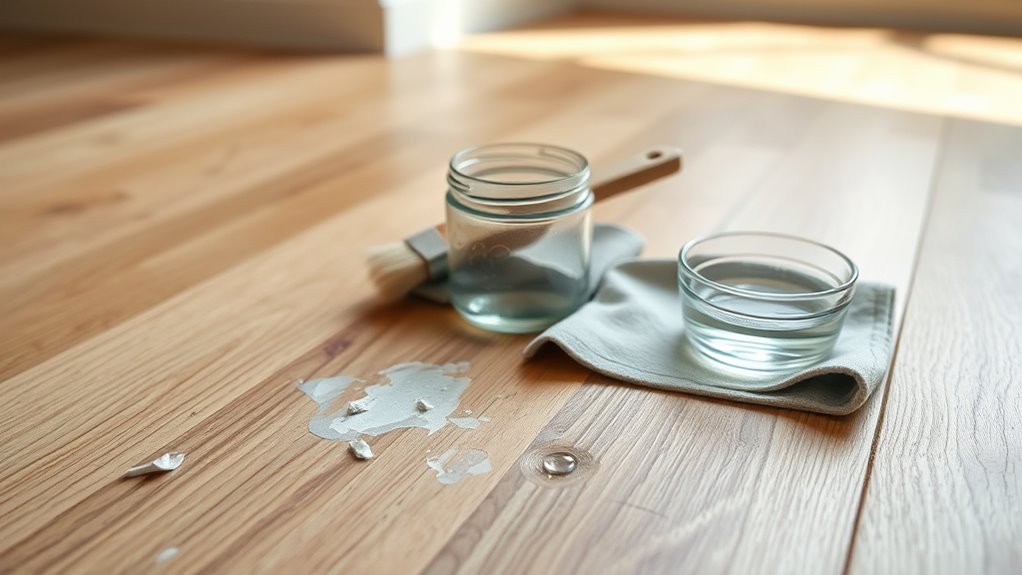
Tools and Supplies to Gather First
Before you start removing dried paint yourself, gather the right tools and supplies so you don’t worsen the finish or waste time. You’ll need a plastic scraper, razor blade (angled, used carefully), soft microfiber cloths, a putty knife with rounded edges, and fine-grit sanding pads for stubborn spots.
Keep a small bucket, warm water, and gentle dish soap plus Eco friendly cleaning solutions like vinegar diluted or citrus-based removers. Have painter’s tape and drop cloths ready to isolate work areas.
Consider gloves, safety glasses, and a test patch kit to preserve the hardwood when using creative painting techniques nearby.
Protect Surrounding Floors and Baseboards
Though you’ll focus on the paint spots, protect surrounding floors and baseboards so cleanup doesn’t create new problems. Lay drop cloths and low-tack painter’s tape to shield trim; this prevents solvent transfer during Paint removal and supports Hardwood preservation. Work outward from spots to avoid spreading debris. Check tape adhesive on a hidden area first. Keep a damp cloth and plastic scraper nearby for accidental drips.
| Item | Purpose |
|---|---|
| Drop cloth | Catch flakes |
| Painter’s tape | Protect trim |
| Plastic sheet | Cover large area |
| Damp cloth | Wipe drips |
| Barrier | Contain mess |
Stay careful to preserve finish.
Safely Scrape Dried Paint Without Scratching
Now that the area is protected, you can focus on removing dried paint without damaging the finish. Work slowly: soften edges with a damp cloth or approved eco-friendly removers, then use a plastic scraper or putty knife held at a shallow angle. Keep the blade flat to avoid gouging the wood.
Test a hidden spot first to check for finish lifting and color matching needs later. Wipe residue with a microfiber cloth and mild cleaner. If tiny spots remain, gently roll a rubber eraser over them.
Dry thoroughly and inspect under good light to confirm the floor’s finish is intact.
If Scraping Fails: Escalation Plan
If scraping doesn’t lift the paint, don’t keep forcing the blade — switch to a more measured escalation plan that protects the wood and your time.
First, test milder removers on an inconspicuous spot; you want products that respect your hardwood surface preparation and finish.
Use a plastic scraper and a soft-bristled brush to coax flakes free.
For stubborn areas, try a gentle chemical gel formulated for hardwoods, following label instructions and ventilating the room.
Avoid aggressive sanding that conflicts with creative painting techniques or damage refinishing.
If unsure, consult a pro to prevent costly refinishing or voiding warranties.
Soften Latex Paint With Warm Water on Hardwood
If scraping hasn’t worked, you can soften dried latex paint by applying a warm soak to the area and letting it sit for several minutes.
Use a damp cloth or sponge with warm water to loosen the paint, then follow with gentle scraping using a plastic putty knife to avoid gouging the wood.
Repeat the soak-and-scrape cycle as needed until the paint lifts.
Warm Soak Technique
When latex paint’s still relatively fresh on your hardwood, a warm soak can loosen it without sanding. You’ll need a microfiber cloth, bowl of warm (not hot) water, and mild dish soap.
Dip the cloth, wring so it’s damp, press onto the paint for several minutes to soften the film. Repeat with fresh warmth until the paint blisters and lifts.
Gently blot and lift softened spots—avoid scrubbing hard to protect finish. This method suits minor splatters from creative painting sessions and supports routine hardwood maintenance.
Dry the area thoroughly and inspect for any remaining residue.
Gentle Scrape Methods
Although latex paint softens with warm water, you’ll still want to remove it with care to protect the hardwood finish. You’ll dampen the spot, wait a few minutes, then gently lift softened paint with a plastic scraper or old credit card to avoid scratching. For stubborn edges, use a soft-bristle brush and repeat warm applications.
- Start small: test in an inconspicuous area to preserve finish and apply warm water sparingly.
- Scrape gently: use plastic tools and steady pressure to follow grain direction.
- Finish: wipe dry and consider buffing for Historical hardwood preservation.
These steps suit Creative painting techniques cleanups.
Use Soap and Scrubbing Techniques Safely
Because soap loosens dried paint without harsh chemicals, you can often remove spots with just warm water, a mild dish soap, and a bit of elbow grease.
Dampen a soft cloth or nylon brush, apply soap, and rub gently along the grain. Test a hidden area first to avoid finish damage.
For stubborn bits, mix soap with a little baking soda to create a mild abrasive; don’t scrub too hard.
Use Eco friendly solvents sparingly and only if soap fails, or try DIY removal kits designed for finished wood.
Rinse, dry thoroughly, and reapply finish touch-up if needed.
Remove Oil-Based Paint With Mineral Spirits
If the dried paint is oil-based, you’ll want to try mineral spirits as a solvent.
First, test a small, hidden area to make sure it won’t damage your finish.
Then gently rub the spot with a cloth dampened (not soaked) in mineral spirits until the paint loosens.
Test Mineral Spirits First
Before using mineral spirits across a large area, test them on a hidden spot to make sure they won’t dull or discolor your hardwood’s finish. You’ll check compatibility, smell tolerance, and drying time before committing.
Consider environmental impact and any concerns for historical preservation if your floor is antique.
- Apply a small dab, wait 10 minutes, blot and inspect for finish change.
- Note odor strength and ventilate; strong fumes mean choose an alternative.
- If the finish softens, darkens, or loses sheen, stop and consult a conservator or use a less aggressive solvent.
Gently Rub With Cloth
When mineral spirits proved safe on your test spot, dampen a clean, lint-free cloth and gently rub the oil-based paint in small, circular motions to lift it without harming the finish.
Use a soft cloth folded for control, applying minimal solvent so the wood isn’t saturated. Keep movements steady and stop if the finish dulls.
Wipe away loosened paint with a fresh section of the cloth, then switch to a dry soft cloth to remove residue.
After paint is gone, let the area air for a few minutes, then buff gently to restore sheen and inspect for any remaining spots.
Apply Acetone or Rubbing Alcohol for Small Spots
Though acetone and rubbing alcohol are strong, you can safely remove small paint spots from hardwood by using them sparingly and with care. Test an inconspicuous area first to check finish reaction. Dampen a cotton swab, not a soaked rag, and work gently until the paint lifts. Wipe residue immediately and neutralize with a damp cloth.
- Use acetone for stubborn spots; use rubbing alcohol for lighter splatters.
- Protect surrounding floor with painter’s tape and blot, don’t rub aggressively.
- Finish with hardwood cleaning solution to restore sheen and remove solvent traces.
Dissolve Shellac and Lacquer Safely
If acetone or alcohol didn’t remove the paint because it’s mingled with shellac or lacquer, you’ll need stronger, specific solvents and a careful approach. For shellac removal use denatured alcohol; for lacquer safety use specially formulated lacquer thinner. Test in an inconspicuous spot, work minimal amounts, and blot—don’t rub—to avoid finish damage. Wear gloves, eye protection, and ventilate. Neutralize residues per product instructions and clean with mild detergent afterward.
| Solvent | Best for | Safety tip |
|---|---|---|
| Denatured alcohol | Shellac removal | Test first |
| Lacquer thinner | Lacquer | Ventilate |
Use a Heat Gun Without Harming the Finish
Because paint softens quickly under direct heat, you’ll want to control temperature, distance, and movement so the finish beneath doesn’t blister or scorch. Use low heat, keep the gun moving, and test a hidden spot first. Practice Heat gun safety: wear gloves, eye protection, and work in a ventilated area to avoid fumes.
Use low heat, keep the gun moving, and test a hidden spot—wear gloves, eye protection, and ventilate to avoid fumes.
- Hold the gun 6–8 inches away, sweeping slowly to warm the paint, then scrape gently.
- Use a lower temperature setting for thin finishes; higher heat risks burning.
- Cool and clean the blade between passes to prevent dragging or re-smearing.
These Paint removal techniques protect your floor.
Use Commercial Paint Removers on Hardwood
Looking for a faster way to remove stubborn dried paint? You can use commercial paint removers designed for hardwood, but choose products labeled for floors. Test a small, hidden spot first to check finish compatibility.
Apply remover per directions, work gently with a plastic scraper, and wipe residue with a damp cloth.
Prioritize eco friendly solvents when possible to reduce fumes and VOC exposure. Always wear gloves, eye protection, and guarantee ventilation—paint removal safety matters.
After treatment, neutralize per instructions and restore the finish with recommended cleaner or polish to blend treated areas with the surrounding floor.
Remove Paint From Grooved or Textured Boards
When paint settles into grooves or textured boards, you’ll need a gentler, more detailed approach than for flat surfaces. You’ll work slowly to avoid damaging edges or finishes, especially during vintage restoration.
Try Eco friendly solvents first, applied sparingly with a soft nylon brush to loosen paint from crevices. For stubborn spots, use a plastic scraper at a shallow angle, following the grain. Finish by wiping with a damp cloth and drying promptly.
- Test solvent in an inconspicuous spot.
- Work small sections, brushing into grooves.
- Rinse residue and inspect under good light.
Lift Paint From Waxed or Oiled Hardwood Finishes
First, you’ll check whether the floor is waxed or oil-finished and identify the paint type so you choose a safe removal method.
Next, you’ll spot-test a gentle solvent in an inconspicuous area to make sure it won’t damage the finish.
Once the paint’s gone, you’ll clean the area and reapply wax or oil to restore protection and appearance.
Assess Finish And Paint Type
Curious which cleaning method will protect your finish? You’ll first identify the finish and paint type to guide safe paint removal and Hardwood preservation. Check sheen, age, and feel; waxed or oiled boards behave differently than polyurethane.
- Examine sheen and texture: wax feels soft, oil soaks in; note surface resistance.
- Identify paint type: water-based flakes soften with moisture, oil-based chips resist water.
- Test a hidden area for adhesion and finish reaction to mild agitation.
Knowing finish and paint helps you choose techniques that remove paint without damaging hardwood.
Gentle Solvent Test
Although solvents can be risky on waxed or oiled floors, you can safely test small areas to see whether a mild solvent will lift paint without harming the finish. Choose an inconspicuous spot near a baseboard. Note the paint color and the finish sheen so you can compare before and after.
Dampen a cotton swab with mineral spirits or a commercial citrus-based cleaner, blot excess, then gently rub a tiny area for ten seconds. Wipe dry with a clean cloth and inspect.
If the finish softens, darkens, or loses sheen, stop. If paint lifts and the finish looks unchanged, proceed cautiously.
Remove And Rewax Area
If the solvent test showed the finish won’t hold up, you’ll need to remove the paint and refinish that spot rather than risk further damage. Work carefully: wear gloves and a mask, follow safety precautions, and use recommended cleaning solutions sparingly. Lift softened paint with a plastic scraper, then lightly sand the area to blend edges. Clean dust completely before applying wax or oil.
- Strip remaining paint with safe solvent per product instructions.
- Sand progressively (120→220 grit) until smooth.
- Reclean, apply matching wax or oil, buff to blend.
Handle Paint Soaked Into Unfinished Wood
When paint soaks into unfinished wood, you’ll have to act differently than you would on sealed floors: sanding and targeted solvent work are usually the most effective ways to lift pigment and binders from the open grain without spreading the stain. You’ll start with gentle scraping, test eco friendly solutions on a scrap, and prioritize DIY safety with gloves and ventilation. Work small, blot rather than rub, and alternate solvent application with light sanding to avoid glazing the wood.
| Step | Action |
|---|---|
| 1 | Test solvent |
| 2 | Blot paint |
| 3 | Light sand |
Strip Stubborn Paint With Spot Sanding
After loosening surface film and lifting as much wet pigment as you can with solvents and blotting, spot sanding will remove the stubborn residue that won’t come off by hand. You’ll focus on tiny patches, preserve surrounding finish, and address drips from creative painting techniques without overworking the floor. Follow a steady, light touch and check progress frequently.
- Clean area, tape perimeter, and use a sanding block for control.
- Sand until paint edges feather into the finish, then vacuum and tack cloth.
- Refinish only the sanded spot to match sheen, keeping hardwood floor maintenance routine to prevent future buildup.
Choose Sandpaper Grit for Patch Sanding
Because the right grit both removes stubborn paint and protects the surrounding finish, pick sandpaper that balances aggressiveness with control. You’ll start coarse to lift paint, then progress finer to smooth the patch without scarring the floor. For spot sanding, use 60–80 grit for thick layers, 100–120 grit for light residue, and 150–220 grit to refine before finish. These Paint removal techniques pair with careful Hardwood cleaning to avoid scratching during prep. Use a sanding block for even pressure and test on an inconspicuous spot first.
| Grit | Use | Result |
|---|---|---|
| 60 | Heavy build | Fast removal |
| 100 | Moderate | Controlled |
| 180 | Finish prep | Smooth |
Blend Repaired Areas With the Existing Finish
When you’re ready to blend repaired spots, start by matching the sheen of the surrounding finish so the patch doesn’t stand out.
Feather the edges of your repair smoothly into the existing surface to avoid visible ridges or abrupt shifts.
If you used stain, tweak the tone until it matches nearby boards for a seamless look.
Match Sheen Levels
Matching the sheen of your repaired spot to the surrounding floor makes the fix virtually invisible, so test finishes on a scrap or hidden area first to find the closest match. You’ll focus on sheen matching and minor gloss adjustment, choosing a finish level (matte, satin, semi-gloss) that mirrors the floor.
Apply thin coats, let dry fully, and re-evaluate under room lighting.
- Clean and prep the repaired area; remove dust and oils.
- Apply a small amount of finish, allow full cure, then compare sheen.
- Increase or decrease gloss gradually until it matches the surrounding surface.
Feather Edges Smoothly
To blend a repaired spot into the surrounding finish, gently feather the edges so the shift disappears under normal viewing distances.
After paint removal and surface prep, lightly sand the repair with fine-grit paper, working outward in diminishing pressure to avoid a hard line. Use feathering edges technique with a sanding block or pad, keeping motions parallel to grain.
Clean dust, test finish compatibility, then apply thin coats of finish, overlapping minimally onto surrounding floor. Let each coat dry fully, then reassess.
If a visible edge remains, repeat subtle sanding and finish application until the repair visually dissolves.
Blend Stain Tones
Although you can sand and feather the repair to match profile, blending stain tones takes deliberate color adjustment so the patched area disappears into the surrounding floor. You’ll test stains on scrap or hidden spots, refine mixes, and work fast before finish dries.
Focus on color matching and stain blending techniques: dilute, layer, then adjust.
- Start with a light stain wash to gauge undertone and grain response.
- Build color in thin layers, wiping excess to avoid blotches.
- Match sheen and apply finish only after stain hue matches the adjacent floor exactly.
Refinish a Patch Versus Replace an Entire Board
When deciding whether to refinish a small paint spot or swap out an entire board, weigh how deep the damage goes and how visible the repair will be.
If the paint only sits on the surface and sanding won’t hit tongue or groove, you can refinish a patch: sand, clean with eco friendly solvents, stain and seal. Match stain carefully—color matching is critical—test on scrap or hidden area.
Replace the board if paint penetrated, the board is warped, or seams won’t align after sanding. Replacement gives a seamless long-term result but requires skill and may need plank sourcing to match grain.
Remove Paint Drips From Polyurethane Finishes
Start by evaluating the finish damage to determine whether the paint is just on the surface or has etched into the polyurethane.
Use gentle solvents like mineral spirits or a commercial adhesive remover on a cloth to lift drips without stripping the finish.
If the solvent dulls the sheen, lightly blend the area with fine-grit sandpaper and recoat with a matching polyurethane.
Assess Finish Damage
Before you begin removing paint drips from a polyurethane finish, check how deeply the paint has bonded to the surface and whether the finish itself is scratched, cloudy, or intact. For effective paint removal and Hardwood cleaning, inspect closely under good light and use a magnifier if needed. Note whether the paint flakes off, sits on top, or embeds in scratches.
- Surface-level: paint rubs off with gentle scraping; finish looks glossy.
- Embedded: paint sits in pores or scratches; finish may be scratched.
- Coating damage: cloudy or dull areas indicate finish compromise needing repair.
Use Gentle Solvents
Although the polyurethane finish is delicate, you can usually dissolve or soften dried latex or acrylic paint with mild, non-damaging solvents so the drips come off without sanding.
Test a cotton swab in an inconspicuous spot using denatured alcohol or a commercial water-based remover recommended for polyurethane; let it sit briefly, then wipe.
Work gently with plastic scrapers and microfiber cloths to avoid scratching.
Ventilate and wear gloves—consider environmental impact when choosing products and dispose of waste per local rules.
Prioritize paint safety: avoid methylene chloride or harsh strippers that can damage finish and harm your health.
Blend And Recoat
When a few stubborn paint drips remain after cleaning, you can blend and recoat the area to restore the polyurethane’s sheen without sanding the whole floor. You’ll gently lift spots with eco friendly removers or a plastic scraper, then feather the edge so the repair won’t show. Use creative blending to match gloss and color before recoating.
Follow these steps:
- Clean area, remove residue, and dry thoroughly.
- Apply a thin coat of compatible polyurethane, feathering outward for an invisible gradation.
- After curing, lightly buff and apply a second thin coat if needed for uniform sheen.
Clean Solvent Residue and Paint Dust After Removal
After you’ve removed the bulk of the paint, you’ll still need to clear away solvent residue and fine paint dust to protect the finish and indoor air quality. Use a damp microfiber cloth and a mild, pH-neutral cleaner; for vintage paint removal, consider eco friendly solvents sparingly and ventilate well. Vacuum with a HEPA filter to capture dust, then wipe again. Test a hidden spot before any solvent.
| Task | Purpose |
|---|---|
| HEPA vacuum | Remove fine dust |
| Microfiber wipe | Lift residue without scratching |
| Mild cleaner | Neutralize solvent traces |
| Ventilation | Protect air quality |
Test Color and Sheen Match Before Refinishing
Before you refinish, test small patches of stain and topcoat in an inconspicuous area so you can confirm both color and sheen will match the surrounding floor. You’ll avoid surprises by checking color matching and sheen consistency under the room’s normal light. Use scrap wood or a hidden corner, let samples dry fully, and compare at different times of day.
Consider these quick steps:
- Apply candidate stains in thin coats, label each.
- After drying, add the desired topcoat to check sheen consistency.
- Photograph samples and view them from standing height to confirm a seamless blend.
Apply Stain and Finish to Repaired Spots
Once you’ve confirmed the repair blends with the surrounding wood, apply the chosen stain in thin, even coats to the patched areas so the color integrates smoothly. Work with a small brush or rag, wiping excess and checking color matching between coats; let each coat dry per manufacturer instructions.
When satisfied, apply a clear finish—polyurethane or water-based—matching sheen to adjacent floor. Brush or roll thin layers, sanding lightly between coats for adhesion.
Keep ventilation steady and protect adjacent flooring with paper or tape for surface protection. Allow full cure before walking to guarantee durability and a seamless appearance.
Avoid Mistakes That Cause Discoloration
If you want the repaired spot to blend in, don’t rush into staining or finishing without testing first. Mismatched products, improper prep, and skipping compatibility checks are the main causes of discoloration. You’ll avoid obvious mistakes by confirming product compatibility and evaluating results under the room’s light.
Pay attention to paint mixing ratios and allow samples to cure so color matching is accurate. Don’t assume brand A stain behaves like brand B.
- Test small samples after full cure.
- Use consistent paint mixing and thinners per manufacturer.
- Sand and clean thoroughly before applying stain or finish.
Minimize Odor and Ensure Proper Ventilation
Because solvents and finishes can release strong fumes, you’ll want to control airflow and limit exposure while you work. Open windows, run fans toward outdoors, and use an exhaust fan or box fan at a doorway for Ventilation improvement. Wear a respirator if fumes are strong. For Odor control, place bowls of white vinegar or activated charcoal nearby and change them daily until smell fades.
| Action | Tip |
|---|---|
| Open windows | Create cross-breeze |
| Use fans | Exhaust toward outside |
| Wear protection | NIOSH-rated respirator |
| Odor absorbers | Vinegar or charcoal bowls |
Dispose of Paint Scraps and Solvents Safely
How should you handle leftover paint and solvent-soaked rags to keep your home and neighborhood safe? You’ll treat them as potential hazardous waste: never pour solvents down drains or toss soaked rags in regular trash. Use sealed, labeled containers and follow local disposal rules for eco-friendly disposal. Contact your municipal hazardous waste facility or scheduled collection for drop-off.
Treat leftover paint and solvent-soaked rags as hazardous: never pour or toss—seal, label, and use your municipal hazardous waste drop-off.
For small amounts, let water-based paint dry fully before discarding. For oil-based or solvent wastes, store securely until proper disposal.
Always wear gloves, keep away from heat, and never leave rags bunched—air them flat to prevent impromptu combustion.
- Check local hazardous waste guidelines.
- Seal and label containers.
- Use municipal drop-off or collection.
Estimate Time and Cost for DIY Removal
After you’ve dealt with leftover paint and solvents responsibly, take a moment to estimate how much time and money you’ll need for DIY paint removal on hardwood floors.
Count spots and assess paint type; small drips take minutes each, large flakes or multiple layers take hours.
Budget for tools—plastic scrapers, gentle solvents, microfiber cloths—and optional items like a heat gun or sanding pads.
Factor in time for testing methods to protect hardwood finish preservation.
If you use creative painting techniques in future repairs, plan costs for matching finishes.
Add contingency for unexpected repairs; modest jobs often cost under $50, complex ones more.
Prevent Future Paint Spills on Hardwood
To avoid future messes, lay down quality drop cloths and secure them so paint can’t seep underneath. Keep lids on paint cans when you’re not using them and transfer small amounts into a sealed container for easy handling.
These simple steps will cut down spills and make cleanup much easier.
Use Drop Cloths
When you’re painting, lay down quality drop cloths over all hardwood surfaces so stray drips and splatters never reach the floor; they’re your first line of defense and make cleanup far easier. Use sturdy, non-slip fabric or canvas drop cloths for reliable paint protection and to avoid tripping hazards. Secure edges with low-tack tape and overlap seams to prevent seepage.
Move furniture onto cloths before starting to avoid shifting.
- Choose heavy-duty canvas for durability and reusability.
- Anchor edges and overlap seams to stop bleed-through.
- Keep extra cloths handy to cover newly exposed areas.
Keep Paint Containers Sealed
If you want to prevent spills on hardwood, keep paint cans tightly sealed and stored upright on a stable surface. You should clean rim drips before closing lids, press the lid evenly, and tap edges with a rubber mallet to create a snug seal.
Consider sealing techniques like foil liners or plastic wrap under the lid for extra protection. Label cans with date and color, then use designated container storage—an elevated shelf or spill tray—to avoid tipping.
Keep lids facing up, separate full and empty containers, and check seals periodically so accidental spills never reach your floors.
Protect Floors During Painting Projects
Although it might seem tedious, protecting your hardwood before you paint saves time and prevents costly damage. Start by clearing the room, sweeping thoroughly, and laying down a breathable, non-slip drop cloth or rosin paper, taping seams with painter’s tape so dust and spills can’t reach the wood. Use low-tack tape near finishes and keep traffic controlled.
Consider eco-friendly solvents for cleanup to avoid finish harm. Keep a small kit for quick DIY repair tips if a drip occurs.
- Cover vents and trim edges.
- Anchor cloths with weights, not nails.
- Wipe spills immediately with a damp cloth.
Special Care for Historic or Delicate Hardwood
If your floors are historic or have a well‑worn patina, first identify the finish so you don’t strip away character.
You’ll want to stick to the gentlest, pH‑neutral cleaners and soft tools to loosen dried paint.
When in doubt, test a small hidden spot or consult a conservator before using stronger methods.
Assess Finish And Patina
Before you touch the paint, take a close look at the floor’s finish and patina so you don’t strip or dull irreplaceable character. You’ll note paint color contrast, age-related wear, and subtle finish sheen variations—these guide your approach. Document areas with photos and short notes.
- Identify finish type (shellac, varnish, oil) by testing an inconspicuous spot and noting sheen.
- Check patina depth: light surface marks versus deep, worn layers that contribute value.
- Match repair intent: preserve original look when possible, avoid aggressive removal where patina is historically significant.
When unsure, consult a conservator.
Use Gentle, PH‑Neutral Methods
When you’re dealing with historic or delicate hardwood, choose PH‑neutral, low‑abrasion cleaners and soft tools so you don’t strip the finish or disturb the patina. You’ll test a hidden spot, use a wooden scraper at a shallow angle, and try creative alternatives like diluted castile soap or eco friendly solutions such as vinegar-free enzymatic cleaners. Work gently, blotting rather than scrubbing, and stop if finish softens. If paint resists, consult a conservator. Visualize approach:
| Tool | Cleaner | Action |
|---|---|---|
| Soft cloth | PH‑neutral soap | Blot |
| Wooden scraper | Diluted castile | Lift |
| Soft brush | Enzymatic | Agitate |
| Sponge | Microfiber | Dab |
| Conservator | N/A | Advise |
Remove Paint From Hardwood Stair Treads
Because stair treads get constant foot traffic, you’ll want to remove paint carefully to avoid gouging the wood or creating a slip hazard. Start by debunking paint removal myths: aggressive scraping or harsh solvents can harm finish and grain. Focus on small sections, test solvents in hidden spots, and prioritize hardwood maintenance to preserve strength and appearance.
- Use a plastic scraper and mild solvent, working with the grain.
- Lightly sand edges with fine-grit paper, then clean dust thoroughly.
- Refinish only worn spots and let cured finish dry fully before walking.
Take your time; stairs demand careful, controlled work.
Final Inspection Checklist: How to Know It’s Done
Once you’ve removed paint, repaired finish, and cleaned the area, walk the floor and inspect each repaired spot up close and from a few feet away to confirm color match, smoothness, and sheen consistency. Check for residue, tackiness, or uneven edges. Turn lights on at different angles. Test in high-traffic paths and under furniture. If touch-ups are needed, sand lightly and recoat. Compare to unrelated chores—Lawn maintenance and Car detailing both require the same final-eye scrutiny. Use this quick checklist:
| Item | Status |
|---|---|
| Color match | |
| Smoothness | |
| Sheen consistency | |
| No residue/tack |
Frequently Asked Questions
Can Dried Paint Damage Underlayment or Joists Beneath Hardwood Floors?
Yes — if paint penetration is deep or solvent removal soaks through, you can harm underlayment integrity and even promote moisture trapping that affects joists; you should act carefully and test removers in small areas first.
Will Pets or Children Be Harmed by Removal Chemicals or Residues?
Yes — you should avoid strong solvents near kids and pets because pet safety risks arise from inhalation, skin contact, or swallowing chemical residues; you’ll use mild removers, ventilate, and clean thoroughly to protect them.
Can Floor Warranties Be Voided by DIY Paint Removal Methods?
Yes — you can void warranties: think of DIY techniques as a curious apprentice whose mistakes anger the master; if you use improper solvents or sand wrong, professional removal or manufacturer-approved methods may be required to keep coverage.
How Do Humidity and Seasonal Changes Affect Paint Removal and Refinishing?
You’ll notice paint adhesion weakens in high humidity and during seasonal expansion, so you’ll schedule removal and refinishing for stable, moderate conditions; you’ll control moisture, allow proper drying, and accommodate wood movement to avoid failures.
Are There Eco-Friendly or Low-Voc Alternatives to Common Solvents?
Yes — you can choose eco friendly solvents and Low VOC alternatives like citrus-based cleaners, soy or coconut-derived solvents, and water-based removers; they’ll reduce fumes, work gently on finishes, and fit green cleaning practices.
Conclusion
You’ve tried gentler tricks first, tested whether it’s latex, oil, or shellac, and only called a pro when the stubborn spot resisted—so imagine the floor as a calm lake where each swipe lifts a ripple of color away. You’ll gather the right tools, shield surrounding boards, and treat historic planks with the care they deserve. When stair treads gleam and the final inspection checks out, the room feels like it’s returned to its original light.