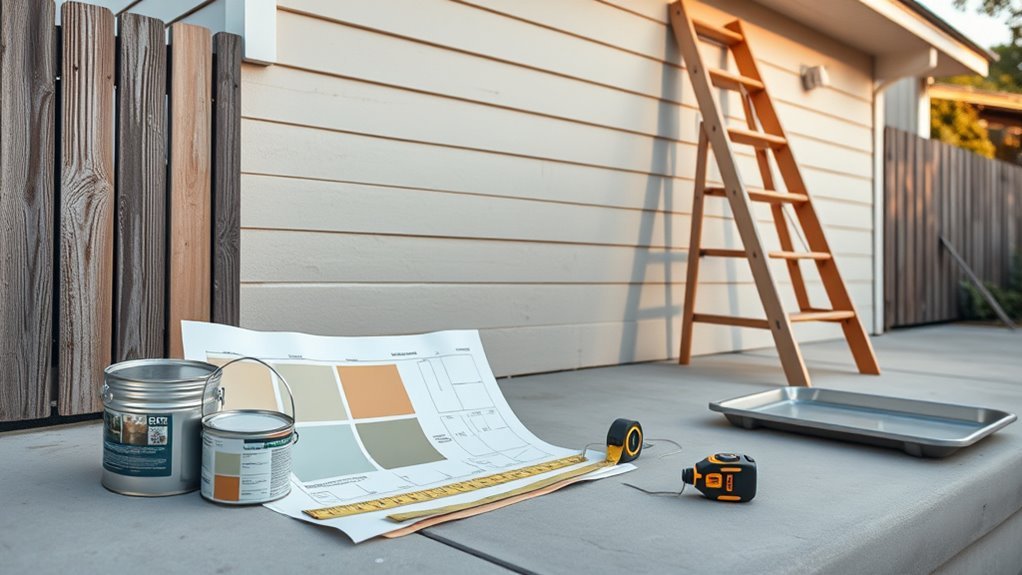
How to Figure Paint Needed for Exterior Walls
Measure each wall’s width and height and add areas, then subtract doors and windows. Include gables, trim, soffits and irregular shapes; record each measurement. Check paint can coverage (sq ft/gal), adjust for surface texture, porosity, color change and number of coats, and add 10–20% for waste and touchups. Factor primer where needed and round up to practical can sizes. Keep some leftover for repairs—keep going for tips on storing and precise calculations.
Quick Formula: Estimate Exterior Paint in 3 Steps
When you’re ready to estimate paint for exterior walls, follow three clear steps: measure the surface area, subtract openings like doors and windows, and divide the net area by the paint’s coverage per gallon.
First, record wall dimensions and total them to get gross area. Next, remove area for doors and windows to reach net area.
First measure each wall to find gross area, then subtract doors and windows to get the net area.
Finally, use the paint’s listed coverage to calculate gallons, rounding up for coats and waste.
Choose Paint color early to confirm finish and required coats, and plan brush selection for trim versus broad surfaces so you buy enough material and the right tools.
Measure Wall Surface Area
First, measure each wall’s height and width and multiply them to get the surface area.
Then add the areas of all walls to find the total.
Finally, subtract the square footage of doors and windows so you only paint actual wall surface.
Measure Wall Dimensions
Before you buy paint, measure each wall’s width and height so you can calculate the surface area accurately. Use a tape measure, record dimensions in feet (or meters), and multiply width by height for each wall. Note tall gables separately.
Add up wall areas to get total square footage. This helps with color coordination decisions and guarantees you buy enough for anticipated paint durability—especially if you choose a thicker, longer-lasting formula.
Double-check measurements and round up slightly to cover cutting in and touch-ups. Keep a simple chart: wall name, width, height, area, and running total for easy reference when ordering.
Account For Openings
How do you handle doors, windows, and other openings when calculating wall surface area? You subtract each opening’s area from the total wall area: measure height and width of doors and windows, multiply for area, and add any other openings like vents.
For irregular shapes, approximate with rectangles or triangles.
Track openings measurement separately so you don’t double-count when totaling walls.
Remember trim and shutters may need paint—decide whether to include them. Your paint color selection won’t change math, but darker colors may require extra coats; factor coat count into coverage estimates after deducting openings.
Subtract Doors and Windows From Your Total Area
Once you’ve measured the full wall areas, subtract the square footage of doors and windows so your paint estimate matches only the surfaces you’ll coat. Use door measurements and window framing sizes, deducting standard areas (e.g., 21 sq ft for doors) or your actual measurements. Measure height × width for each opening, record totals, and subtract from wall area before calculating paint needed. Be precise: include transoms, sidelights, and built-in shutters only if they won’t be painted.
| Opening | Height (ft) | Width (ft) |
|---|---|---|
| Door 1 | 7.0 | 3.0 |
| Window 1 | 4.0 | 3.0 |
| Window 2 | 4.0 | 3.0 |
| Door 2 | 7.0 | 3.0 |
Measure and Estimate Paint for Trim, Soffits & Fascia
When you account for trim, soffits, and fascia, measure each component separately and estimate coverage based on their shape and exposure so your paint quantities aren’t short.
Calculate linear feet for trim, square feet for soffits/fascia, then convert to gallons using the paint’s stated coverage.
Choose paint color early to estimate coats for opacity; factor in primer if substrate varies.
Match brush selection to detail work—angled sash brushes for trim, larger rollers for soffits.
Don’t forget touch-up stock.
- Measure linear feet of all trim
- Measure soffit/fascia surface area
- Note exposed versus sheltered areas
- Account for two coats
- Add 10% extra for waste
Choose the Right Exterior Paint Type
Now that you’ve measured trim, soffits, and fascia and figured coat counts, pick the exterior paint type that matches your surfaces and climate.
Choose acrylic latex for siding and trim where freeze-thaw and UV exposure matter; it offers great paint durability and easy cleanup.
Acrylic-latex is ideal for siding and trim—durable against freeze-thaw and UV, with easy cleanup.
Use oil-based or alkyd primers for metal or previously painted glossy surfaces to improve adhesion.
For stucco or masonry, select breathable elastomeric or masonry paints to prevent trapped moisture.
Consider color selection carefully—lighter hues reflect heat, darker ones hide imperfections—and always match sheen to location for weather resistance and maintenance.
Find Your Paint’s Coverage (Spread Rate Per Gallon)
Before you buy gallons, figure the paint’s spread rate so you know how much each coat will actually cover. Check the label for coverage (sq ft/gal) — manufacturers list ideal spread rates. Test a small area to confirm real-world coverage, since texture and porosity change results.
Consider color matching needs: darker or drastically different colors may need extra coats. Also account for paint durability; higher-quality formulations often cover better and last longer. Record your measured spread rate to guide purchases and reduce waste.
- Read the technical data sheet
- Test a patch on your wall
- Note surface porosity
- Factor color matching
- Prefer durable formulas
Calculate Gallons Needed for One Coat
First, you’ll measure the total exterior surface area by multiplying wall widths by heights and subtracting windows and doors.
Then, compare that net area to your paint’s coverage rate (square feet per gallon) listed on the can.
Divide the area by the coverage rate to get the gallons needed for one coat.
Measure Surface Area
Once you’ve measured each wall’s height and width, multiply those figures to get the square footage for every flat surface you’ll paint.
Add and subtract openings (doors, windows) to refine totals, and note areas needing extra coats for color matching or where paint durability matters.
Record each wall separately so you can sum later.
- Measure height × width for every wall
- Subtract window and door areas
- Include trim and soffits if you’re painting them
- Note rough or porous surfaces needing attention
- Total all adjusted areas to get your final square footage
Determine Coverage Rate
After you’ve totaled the square footage, divide that number by the paint’s coverage rate (usually listed on the can as square feet per gallon) to find how many gallons you’ll need for a single coat; round up to the nearest whole gallon and account for any extra coats on rough or porous areas. You’ll factor in windows and doors as deductions, and add for trim, texture, or touch-ups related to color matching. Consider paint durability when choosing higher-quality products that may cover better. Use the table below to organize measurements and calculations.
| Area | Sq Ft | Gallons |
|---|---|---|
| Walls | ||
| Trim | ||
| Extras | ||
| Total |
Decide How Many Coats to Plan For
Because the number of coats affects coverage, durability, and final color, you should decide up front how many layers to plan for.
Decide up front how many paint layers you’ll need—coverage, durability, and final color all depend on it.
Two coats are typical: the first for adhesion and base, the second for uniform color matching and enhanced paint durability.
Primer can replace the first coat on bare wood or repaired areas.
Dark-to-light changes may need extra coats.
High-traffic or severe weather zones benefit from additional protective layers.
- Start with primer when needed
- Count two coats as standard
- Add coats for drastic color shifts
- Increase coats in exposed areas
- Inspect after drying for missed spots
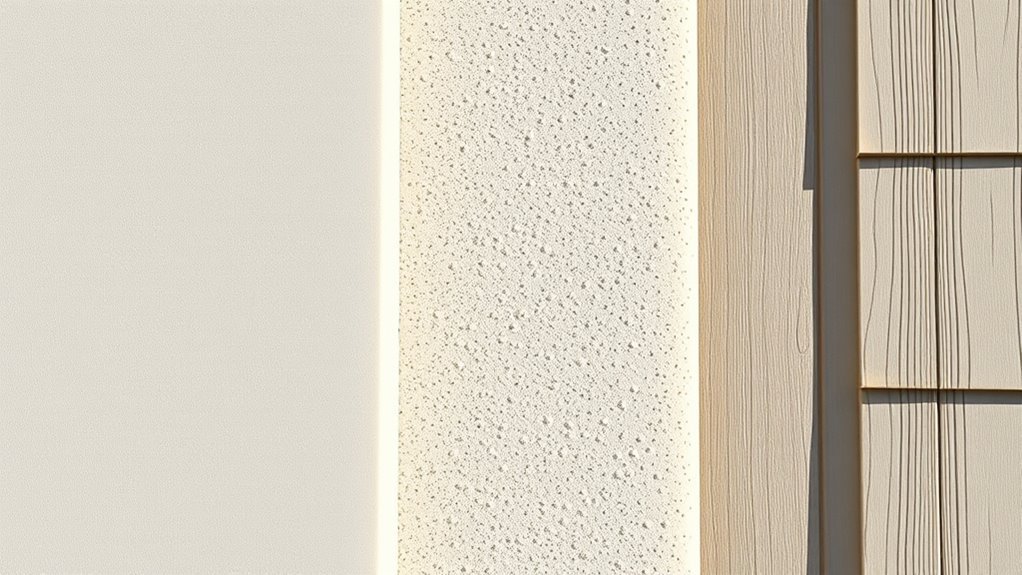
Adjust for Surface Texture (Smooth vs Rough)
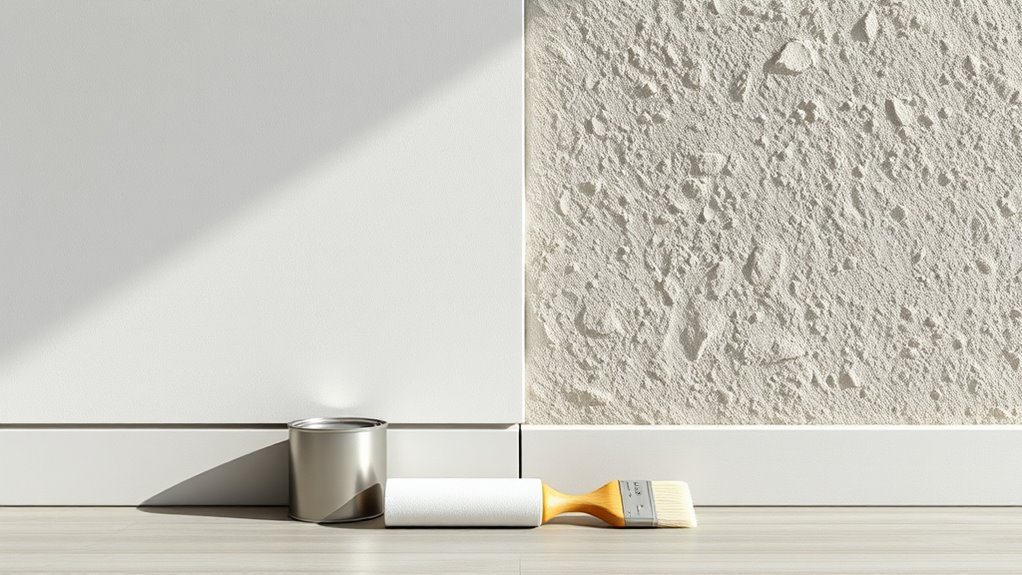
If your exterior walls are rough or textured, you’ll need more paint and a different approach than you’d for smooth surfaces. Roughness increases surface area and soaks up more product.
Measure area normally, then add 10–25% extra to account for surface texture. Test a small section to check coverage and adjust estimates.
Use thicker-nap rollers or sprayers to reach crevices, and choose primers or primers/sealers that improve paint adhesion on uneven substrates.
Smooth walls need less volume and shorter nap rollers.
Always factor in manufacturer coverage rates and real-world test results when finalizing quantities.
Increase Quantities for Porous or Repaired Walls
When walls are porous or have fresh repairs, plan on using noticeably more paint and primer than your basic calculations, since those surfaces will absorb product and reduce coverage. You’ll increase quantities for porous surfaces and repaired walls to avoid thin spots and extra touch-ups.
Estimate an additional 20–50% depending on porosity and repair extent, test a small area, and track absorption. Use consistent application methods and note drying times to judge if another coat’s needed.
- Inspect repaired walls for texture variations
- Test coverage on a small patch
- Add 20–50% extra paint
- Keep matching batches handy
- Track coats applied
Primer: When to Use It and How Much to Buy
Wondering whether you really need a primer for your exterior walls? You should use primer when surfaces are bare, patched, stained, or very porous; it improves paint adhesion and paint durability.
Primer also evens out porosity so your chosen color applies uniformly, helping with color selection accuracy.
For quantity, calculate primer coverage per product (sq ft per gallon) and divide total wall area by that number, rounding up for absorption and touch-ups.
Use one coat for most situations; apply two on heavy stains or drastic color changes.
Buying slightly more than calculated prevents mid-job runs to the store.
Convert Liters and Quarts to Gallons
Before you head to the store or start mixing paint, you’ll need to convert any metric or quart measurements into gallons so your totals match the product labels and coverage figures.
Before you shop or mix paint, convert liters or quarts to gallons so coverage matches product labels.
You’ll use simple math: 1 gallon ≈ 3.785 liters and 1 quart = 0.25 gallon. Convert liters or quarts to gallons, then multiply by the coverage per gallon listed by paint brands.
This keeps estimates accurate whether matching paint colors or swapping brands.
- Note the label’s coverage (sq ft/gal)
- Convert liters ÷ 3.785
- Convert quarts × 0.25
- Adjust totals per coat
- Compare paint brands’ yields
How Much Extra Paint to Buy (Round Up Rules)
You should plan for some paint loss from spilling, rolling thick coats, and touch-ups, so add a wastage buffer to your estimate.
Round up based on the paint’s stated coverage per gallon rather than trying to hit the exact square footage.
That extra can save you a trip to the store and make certain of consistent color between batches.
Account For Wastage
Because paint gets used up by drips, roller nap, touch-ups, and trims, plan to buy more than the strict square-foot calculation suggests.
You’ll factor in paint color changes and paint texture needs—textured surfaces absorb more and darker colors may need extra coats. Aim for practical overage rather than guessing.
- Add 10% for smooth walls and minimal trimming.
- Add 15% for rough or textured siding.
- Add 20% if you’re changing to a much darker or lighter paint color.
- Reserve one extra quart for touch-ups.
- Keep a full unopened can for future repairs.
Round Up Coverage
Now that you’ve factored in wastage and special conditions, it’s time to round up coverage to practical can sizes. You’ll convert your calculated liters or gallons to available can sizes, buying slightly more to cover touch-ups and uneven absorption.
Add 5–15% extra depending on surface porosity and complexity. Choose the larger can when close to the next size to simplify color matching and maintain paint durability—same batch avoids subtle shifts.
Keep a labeled leftover for future repairs. Don’t overbuy drastically; store sealed cans in a cool, dry place and note batch codes for consistent results.
Plan for Touch-Ups and Future Maintenance
When a portion of your exterior paint chips or fades, having a touch-up plan makes repairs quick and seamless. Keep a small sealed can of your original paint and record the batch number for color matching. Note environmental factors like sun exposure and humidity that affect fading so you can schedule touch-ups before damage spreads.
Inspect annually, clean surfaces, and sand rough spots before painting. Use compatible primer and finish, store tools and leftover paint properly, and document dates and products used.
- Keep sealed sample can and batch number
- Inspect and clean yearly
- Sand and prime problem areas
- Consider sun and moisture exposure
- Record dates and products
Estimate Paint for Multi‑Story and High Areas
If you’re tackling multi‑story or high exterior walls, plan for extra paint and special access considerations up front. Measure wall area floor by floor, add 10–20% for waste and vertical losses.
Factor in primer for porous surfaces and extra coats where sunlight bleaches high exposures. Account for scaffolding, lifts, or safety gear time—these can impact how much paint you buy per visit.
Coordinate with roof maintenance to avoid spills and guarantee flashing and gutters are prepped.
Consider landscaping integration when protecting plants and planning drop cloth placement. Keep a small reserve for future touch-ups after final inspection.
Calculate Paint for Accent Walls and Trim Separately
Start by measuring the linear footage of all trim—corners, window and door casings, and fascia—so you can convert that into paintable square footage.
Calculate the area of each accent wall separately instead of folding it into your overall exterior wall measurements.
Then factor in the number of coats you plan to apply and add a small percentage for waste and touch-ups to get a final paint quantity.
Measure Trim Linear Footage
Although trim covers a small area compared with walls, you’ll need to measure its linear footage separately so you can calculate paint for accent walls and trim accurately.
Start by walking each edge: count windows, doors, corners, and eaves; measure lengths with a tape; record totals per elevation.
Use those totals to estimate gallons, remembering primer and coverage differences from a paint brand comparison.
Also consider color coordination when choosing trim vs. wall shades to avoid surprises.
- Walk each wall and note trim runs
- Measure around windows and doors
- Add corner and fascia lengths
- Sum all linear feet
- Convert feet to paint gallons
Calculate Accent Wall Area
When you calculate accent wall area, measure only the surfaces you’ll paint a contrasting color so you don’t overbuy paint for the rest of the house.
Measure width and height of each accent wall, subtract windows and doors, and record net square footage. Keep accent walls separate from trim calculations to track coverage precisely.
Consider color coordination when choosing a hue—darker shades may need more coats but don’t account for coats here.
Note paint durability for exterior exposure; pick finishes rated for weather resistance.
Convert total net square footage to gallons using the paint’s stated coverage to determine needed quantity.
Account For Coats And Waste
Because accent walls and trim often require different numbers of coats and different application methods, calculate them separately so you don’t under- or overbuy paint. You’ll estimate area, choose finish, and factor coats plus 10–20% waste for touchups and mistakes.
Historical colors may need more coats for true coverage; eco friendly finishes sometimes need additional primers. Measure trim linear feet; convert to square feet for coverage. Note sprays or brushes change waste rates.
- Measure accent wall square footage precisely
- Count trim linear feet and convert
- Add coats per manufacturer guidance
- Add 10–20% waste buffer
- Adjust for historical colors and eco friendly finishes
Use Sample Patches to Refine Coverage Estimates
If you want a reliable estimate, paint a few small sample patches on different wall areas and measure how much paint they actually use; this lets you account for real-world variables like surface texture, previous coatings, and porosity.
Choose representative spots—siding, trim, patched areas—and apply one coat, then a second where needed. Track area covered and paint consumed to calculate actual coverage rate.
Use swatches to confirm color matching and observe paint durability over a few days. Adjust your total gallon estimate based on these figures, and factor in extra for touch-ups rather than relying solely on manufacturer coverage numbers.
How Weather and Climate Affect Paint Coverage
When you’re planning paint quantities, remember that temperature affects drying time and how many coats you’ll need.
High humidity can slow drying and make surfaces soak up more paint, changing your coverage per coat.
Factor both temperature and humidity into your estimates so you don’t run short.
Temperature And Drying Time
Although paint chemistry sets the rules, temperature and humidity largely decide how fast your exterior paint dries and how well it covers. You’ll notice temperature effects immediately: cold slows curing, heat speeds it but can cause flashing and poor leveling.
Plan coatings when temperatures are within the paint’s recommended range to guarantee consistent drying time and film formation. If you’re repainting multiple coats, allow proper recoat windows; rushing wastes paint and reduces coverage.
Monitor forecasts and pick mornings or evenings as needed to avoid extremes.
- Check product temperature range
- Avoid painting near freezing
- Watch for quick heat spikes
- Space coats per recoat time
- Use slow-dry formulas
Humidity And Surface Absorption
Temperature and drying cues lead naturally into humidity and surface absorption, because moisture in the air and in the substrate changes how paint wets, soaks in, and ultimately covers.
You’ll notice high humidity slows drying and raises absorption on porous siding, so you’ll need more coats and sometimes a primer. Check weather forecasts and delay work when humidity’s high; apply paint when surfaces are dry after proper surface preparation.
Use dehumidifiers or heaters in enclosed spaces and choose formulas suited to damp climates. Good moisture control reduces wasted paint and guarantees your coverage estimates stay accurate.
Account for Color Change and Coverage Differences
Because darker or bolder hues often need more coats to hide the underlying surface, you should factor color change into your paint calculation from the start. You’ll assess color contrast between old and new shades, test samples, and note how paint sheen affects perceived coverage.
Use small test panels to count coats needed and adjust totals accordingly.
- Test a representative wall area
- Record coats required per sample
- Note high contrast requires extra primer
- Factor different paint sheen coverage
- Adjust total gallons for trim and edges
This keeps your estimate accurate and avoids mid-job surprises.
Bulk Cans vs Small Cans: Cost and Waste Tradeoffs
When you’re choosing between bulk gallons and small cans, weigh the upfront savings of larger tins against the risk of leftover paint and storage hassles. You’ll save per gallon with bulk, but plan usage so paint doesn’t sit long—oxidation harms paint durability and can complicate future touch-ups.
Small cans reduce waste and make color matching easier if you need more later, since remixes drift. If your job’s size and timeline justify bulk, buy quality sealable containers and label batches.
For uncertain projects, favor smaller cans to limit spoilage, simplify storage, and guarantee consistent finishes.
Track Paint On-Site: Quick Measurement Tricks
When you’re on-site, use quick wall area estimates—measure height and width in feet and multiply to get square footage.
For openings, measure windows and doors fast and subtract their areas from the total.
These simple tricks keep your paint calculations accurate without slowing the job down.
Quick Wall Area Estimates
If you need a quick on-site paint estimate, use a few fast measurement tricks to track wall area without slowing the job. You’ll pace rooms, note heights, and mark totals. Keep color matching and paint sheen notes separate so finish choices don’t confuse surface measurements. Focus on gross wall area first, then subtract major features later.
- Walk each elevation, counting 1-foot-wide steps to estimate width.
- Use a handy laser for quick height checks.
- Multiply average height by width for each wall.
- Round totals to the nearest 10 sq ft for buffer.
- Record totals on a clipboard for easy referencing.
Measure Openings Fast
Because openings like doors and windows can eat into your paint total, you’ll measure them quickly and subtract their areas from the gross wall figure. Use a tape, note width and height, and multiply; round to neat fractions. Track each opening on-site, tag measurements for color matching, and mark paint storage needs per door or window. Quick sketches prevent re-measure. Use the table below to list typical openings and areas.
| Opening | Width (ft) | Height (ft) |
|---|---|---|
| Standard door | 3 | 7 |
| Double door | 6 | 7 |
| Window | 4 | 5 |
Common Measurement Mistakes and Fixes
Mistakes in measuring exterior walls usually come from rushing or assuming, but you can avoid big errors by checking a few key points. You’ll want accurate totals for wall area, subtracting windows and doors, and noting texture changes that affect coverage. Also plan for color matching touch-ups and consider eco friendly paints’ coverage notes.
Avoid rushing: measure each wall, subtract openings, note texture, and allow 5–10% extra for touch-ups.
- Double-check your tape start and end points.
- Measure each wall separately; don’t average lengths.
- Record opening dimensions and subtract precisely.
- Note wall texture and surface condition.
- Add a small contingency (5–10%) for waste and touch-ups.
3 Quick Formulas and Free Calculators to Use
You can start by noting the coverage per gallon listed on paint cans and how that translates to the square footage you’re working with.
Use a simple formula—surface area divided by coverage per gallon—to estimate how many gallons you’ll need.
Remember to convert units if you measured in meters or square feet.
Free online calculators can handle the conversions and do the math for you, saving time and reducing errors.
Coverage Per Gallon
Most paints list coverage per gallon on the label, but actual coverage varies with surface texture and application—so use quick formulas or a free calculator to turn that number into how many gallons you’ll need.
You’ll enter labeled coverage (often 350–400 sq ft), then adjust for rough siding, primer, and coats.
Consider color coordination when estimating extra coats for drastic color changes, and account for paint durability recommendations that may call for heavier application.
Double-check waste and touchups. Use calculators to avoid buying too little.
- Note labeled coverage
- Adjust for texture
- Add coats needed
- Factor color change
- Include waste margin
Surface Area Conversion
Wondering how to turn your wall measurements into paintable square footage? Convert feet to square feet by multiplying height by width for each wall, subtract window and door areas, then sum totals.
Divide that number by coverage per gallon to estimate gallons, rounding up. Use quick formulas or free online calculators—enter dimensions, openings, and coats for instant results.
Remember color mixing can affect how many coats you need; drastic color changes may require primer or extra paint, influencing paint durability.
Keep a small extra amount for touch-ups and waste; note surface texture and porosity will alter final usage.
When to Call a Pro for an Accurate Estimate
If your walls have extensive damage, complex trim, or multiple stories, call a pro for an accurate paint estimate; they’ll account for repairs, surface prep, and access challenges that DIY calculators often miss. You’ll also get expert advice on exterior color choices and paint durability to match climate exposure.
A pro measures voids, assesses substrates, and recommends primers or sealers, so your coverage estimate is realistic.
- Detailed surface inspection
- Complex trim and architectural features
- Height and scaffold needs
- Hidden rot or moisture repair
- Climate-driven product recommendations
After the Job: Storing Leftover Exterior Paint
After a pro helps you wrap up repairs and recommends the right products, you’ll likely end up with leftover exterior paint—so store it properly to keep it usable for touch-ups and future projects.
Seal cans tightly, press a layer of plastic over the opening, and hammer the lid closed to prevent air. Label each can with the date, location, and finish to simplify future color matching.
Seal cans tightly, cover the opening with plastic, hammer the lid closed, and label with date, location, and finish for easy touch-ups.
Store cans upright in a cool, dry spot away from temperature extremes and direct sunlight.
For partial cans, transfer paint to a smaller airtight container to minimize trapped air and extend usability.
How Much Leftover Paint to Keep for Repairs
Because small chips and weathered spots pop up over time, you should keep a modest amount of leftover exterior paint for touch-ups. Aim to save at least one pint per consistently painted elevation or 10% of total gallons—whichever’s larger—to simplify color matching later. Seal cans well and follow paint storage tips to preserve finish and prevent skinning. Label each container with date, location, and sheen.
- Keep one pint per elevation or 10% of gallons saved.
- Store cans upright in a cool, dry place.
- Note batch number for color matching.
- Transfer to smaller sealed containers if needed.
- Inspect before use; stir well.
Final Pre-Purchase Paint Quantity Checklist
Before you buy, run through a concise checklist to confirm coverage, sheen, color match, and contingency supplies so you won’t face delays or mismatches mid-job.
Verify square footage and coat count to calculate gallons, allowing a 10–15% overage for cuts and touch-ups.
Confirm color coordination with trim and accents using swatches under real light.
Match sheen across all cans and note batch numbers for future buys.
Factor in primer, sealers, and higher-quality options for improved paint durability.
Buy a small extra can for repairs, store it labeled and sealed, and record purchase details for fast reorders.
Frequently Asked Questions
How Do Seasonal Humidity Shifts Affect Drying Time and Recoat Windows?
Seasonal humidity fluctuations slow or speed drying rate, so you’ll adjust recoat windows accordingly; higher humidity extends dry times and widens recoat windows, while low humidity shortens them, so you’ll monitor conditions before recoating.
Can Paint Color Temperature (Warm Vs Cool) Alter Perceived Coverage?
Yes — color temperature can trick your eyes: warm hues seem to hug surfaces, cool ones recede. You’ll notice color perception and temperature effects altering perceived coverage, so plan coats accordingly and test samples in sunlight.
How Do Protected Eaves or Recessed Walls Change Paint Needs?
Eaves protection and recessed walls reduce weather exposure, so you’ll need less frequent repainting and may cut required primer/coat thickness; you’ll still measure surface area, adjust for texture, and account for touch-up and shaded drying differences.
Do Local VOC Regulations Limit Exterior Paint Choices and Quantities?
Yes — VOC regulations can limit your paint selection and quantities, like a leash on a soaring bird; you’ll need low-VOC or compliant formulas, check local limits, and plan purchases to meet volume and disposal rules.
What Are Best Practices for Painting Historic Masonry Exteriors?
You should prioritize historic preservation: assess and repair masonry, use gentle masonry preparation, choose breathable, lime-based paints, test patches, match historic colors, use skilled contractors, and avoid impermeable coatings that trap moisture and damage surfaces.
Conclusion
You’ve got this — measuring walls, subtracting windows and doors, and adding trim is practically a paint-by-numbers miracle. Don’t freak if estimates wobble; pick the right exterior paint, stash a little extra (not a swimming-pool’s worth, calm down), and call a pro when numbers start behaving like wild art. Keep a small can for touch-ups, note the batch, and you’ll breeze future repairs like a paint ninja.