How to Get Dried Paint Off Trim (Step-by-Step Guide)
Start by identifying trim material and paint type, then test an inconspicuous spot. For fresh flakes try warm soapy water and a soft cloth; for latex use rubbing with a damp cloth, for oil/enamel try mineral spirits sparingly. Use a plastic scraper, nylon brush, low heat, or a mild chemical stripper as needed, always wearing gloves, goggles, and ventilating. Clean, lightly sand glossy spots, and refinish or touch up. Keep going for step-by-step tips and safety details.
Quick Guide: Which Method to Try First
If the paint is fresh and flaking, start with the gentlest option: warm soapy water and a soft cloth.
You’ll try progressively stronger techniques: scraping with a plastic putty knife, gentle sanding with fine-grit paper, and targeted solvent use only when needed.
Prioritize painting safety — wear gloves, eye protection, and ventilate the area before solvents.
Test methods on an inconspicuous spot to avoid damaging trim.
Keep tool maintenance in mind: clean blades and brushes after use, replace dull scrapers, and store sandpaper dry.
Move cautiously, pausing to reassess so you remove paint without harming the finish.
How to Tell If Paint Is Latex, Oil, or Enamel
Once you’ve tried gentler removal methods and still aren’t sure what you’re up against, identifying the paint type will help you choose the right solvent and technique.
Test a discreet spot: rub with a rag dampened with water—latex softens; if not, try mineral spirits—oil or enamel will soften.
Test a small area: water will soften latex; if it resists, try mineral spirits for oil or enamel.
Smell gives clues: oil/enamel smell stronger.
Appearance: latex often has a matte or satin finish, oil/enamel more glossy and hard.
Use a small scraping test with a utility blade to see flexibility.
Prioritize paint safety: ventilate, wear gloves and a respirator.
Note brush types used previously—synthetic for latex, natural for oil.
Inspect Your Trim: Wood, Metal, or Plastic
Before you start scrubbing or scraping, check what your trim is made of—wood, metal, or plastic—because each material reacts differently to solvents, heat, and abrasive tools.
Look closely: wood may show grain and can dent or absorb chemicals; metal is smooth, cold to touch, and resists swelling; plastic flexes and can melt or warp.
Test an inconspicuous spot to gauge paint adhesion and how the surface reacts.
Note previous finishes, seams, or damage that affect removal.
Recording the trim material and observed paint adhesion helps you choose appropriate methods later and avoid irreversible harm.
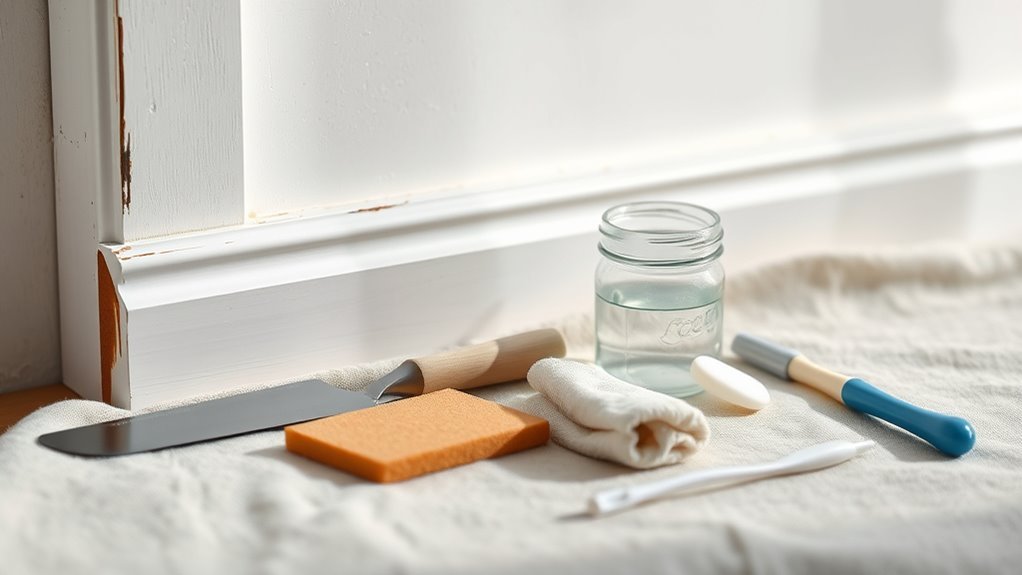
Gather Tools and Protective Gear
Before you start scraping, put on safety gear like gloves, goggles, and a mask to protect your hands, eyes, and lungs.
Pick the right tools for the trim material—plastic-safe scrapers, fine steel wool for metal, or a heat gun and putty knife for wood.
Having the proper gear and tools ready will make the job faster and safer.
Safety Gear Essentials
If you’re tackling dried paint on trim, gear up with the right protective equipment to keep yourself safe and the work area clean. Start with basic safety gear: gloves (nitrile or heavy-duty), safety glasses, and a respirator or mask rated for fumes if using solvents.
Wear long sleeves and old clothing to protect skin. Use knee pads or a cushion for low trim. Keep a well-ventilated workspace and lay down drop cloths to catch debris.
Have a first-aid kit and a fire extinguisher nearby when working with flammable removers. Inspect gear before starting and replace damaged items.
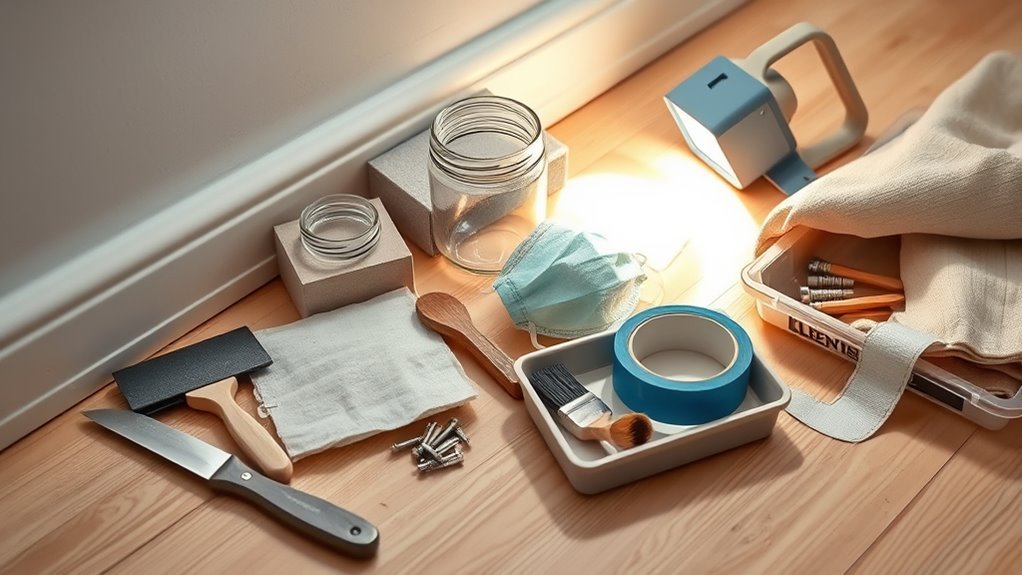
Tool Selection Guide
When you gather tools and protective gear, focus on quality and purpose. Choose a plastic scraper, microspatula, fine steel wool, and a stiff-bristled brush for controlled paint removal. Add a putty knife for stubborn spots and a heat gun or hair dryer if trim tolerates heat.
Wear gloves, goggles, and a respirator; lay down drop cloths to protect floors. Keep small containers for solvent and clean rags handy.
Inspect tools before use and follow basic tool maintenance—clean blades, oil moving parts, and store dry—to extend life and guarantee safe, efficient paint stripping.
Test a Hidden Spot Before Using Solvents
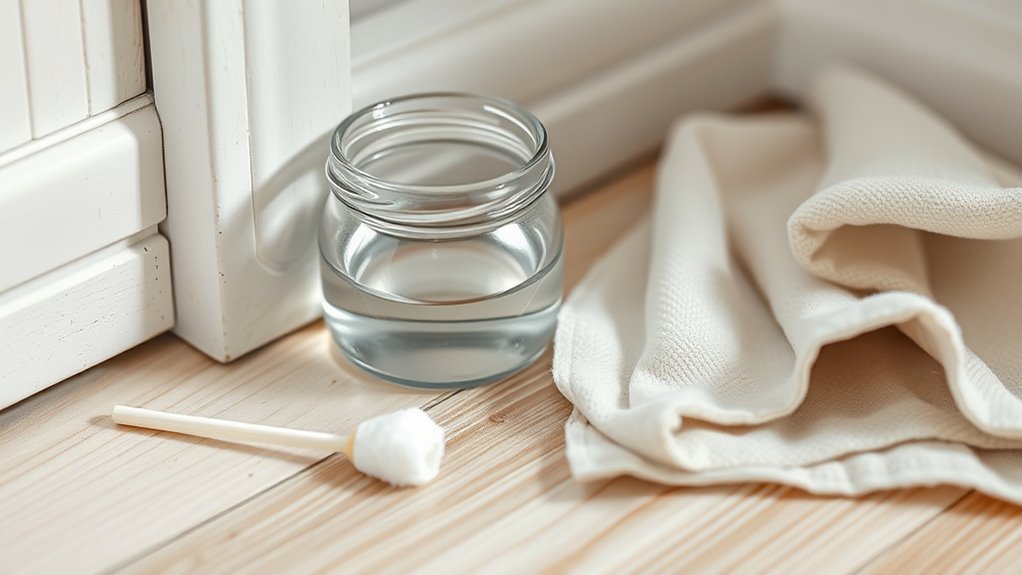
Although solvents can remove stubborn paint, you should always test one on a hidden spot first to check for finish damage or color change. You’ll protect trim by doing simple paint testing before committing.
Always test solvents on an inconspicuous spot first to ensure no finish damage or color change.
Choose a small, inconspicuous area—inside a closet, behind molding, or under the sill—and follow these steps:
- Clean the area so results aren’t skewed.
- Apply a dab of solvent with a cotton swab.
- Wait the manufacturer’s recommended time.
- Wipe and inspect for finish dulling, discoloration, or finish removal.
If the hidden spots show damage, stop and try a milder method to avoid ruining the trim.
Start With Warm Soapy Water for Fresh Flakes
Now that you’ve confirmed a solvent won’t harm the finish, start with warm soapy water for any fresh paint flakes—you’ll remove most water-based splatters without harsh chemicals.
Dampen a soft cloth or sponge, work gently in small areas, and rinse frequently to avoid dragging softened paint across the trim.
For tight corners, use a cotton swab moistened with soapy water.
If you’ve been cleaning brushes nearby, clean them before they dry to prevent transfer.
These gentle steps often beat stronger methods and are similar to precautions you’d take when removing wallpaper paste—patience and gentle agitation save the finish.
Use a Plastic Scraper and Nylon Brush Safely
Pick a soft plastic scraper and a nylon-bristled brush that match the trim’s profile so you won’t gouge the surface.
Use short, gentle strokes at a low angle to lift paint without stressing the finish.
Protect the trim by testing on an inconspicuous spot and stopping if you see scratches or finish dulling.
Choose The Right Tools
Once you’ve softened the paint, reach for a plastic scraper and a nylon-bristled brush to remove flakes without gouging the trim. Choose tools that suit the trim profile and finish, and always wear protective gear.
Keep a small palette knife for tight seams and a stiff toothbrush for crevices. Consider color matching touch-up paint nearby to assess how much removal is acceptable.
- Pick a thin plastic scraper for delicate edges.
- Use a nylon brush with firm but flexible bristles.
- Have rags and a mild solvent ready.
- Keep protective gloves and eye protection on hand.
Gentle Scraping Technique
Although it takes patience, gentle scraping with a thin plastic scraper and a nylon brush will lift softened paint without damaging the trim’s surface. You’ll work from the softened edge toward intact trim, keeping the scraper flat and using short, controlled strokes. Test a small area first, and don’t force stubborn spots—reapply heat or an eco friendly solvent sparingly. Ignore paint removal myths that push aggressive tools. Finish by brushing away residue, not gouging.
| Tool | Pressure | Tip |
|---|---|---|
| Plastic scraper | Light | Flat angle |
| Nylon brush | Moderate | Bristles forward |
| Solvent | Minimal | Spot test first |
Protect Trim And Finish
After you’ve loosened and lifted most of the paint, focus on protecting the trim and its finish as you finish the job. Use a plastic scraper and nylon brush gently to avoid gouges; keep scraping shallow and work with the grain. Test a hidden spot first. If you damage paint, you can touch up later using Paint mixing tips and careful color matching to blend repairs.
- Remove debris with soft strokes
- Hold the scraper at a low angle
- Rinse the brush often to avoid dragging dried flakes
- Use minimal solvent; blot, don’t soak
Finish with a light polish to restore sheen.
Remove Small Latex Spots With Rubbing Alcohol
If you spot small latex paint specks on your trim, rub them gently with isopropyl rubbing alcohol on a soft cloth or cotton swab to dissolve the paint without damaging the finish.
First, test a hidden area to confirm the finish won’t dull. Work slowly, blotting rather than scrubbing, and replace the swab as paint transfers.
Test an inconspicuous spot first; blot gently with a fresh swab as paint lifts to avoid dulling the finish.
After removal, wipe the area with a damp cloth and let it dry. This quick spot treatment supports proper surface preparation for any future touch-ups and avoids disturbing surrounding paint or paint adhesion.
Finish by polishing the trim to restore sheen.
Use Mineral Spirits for Oil‑Based Paint on Durable Trim
Wondering how to tackle dried oil‑based paint on resilient trim? You can use mineral spirits safely on durable trim surfaces if you prioritize Trim protection and test a hidden spot first. Work deliberately: ventilate, wear gloves, and use a soft cloth.
Follow these steps:
- Dampen a cloth with mineral spirits; don’t soak the wood.
- Gently rub the paint spot, using short strokes to loosen paint.
- Wipe residue away and repeat until paint removal is complete.
- Clean the area with mild soap and water, then dry to restore finish.
Stop if finish softens; consult a pro to avoid damage.
Apply Adhesive Remover for Stubborn Paint Blobs
When mineral spirits won’t budge dried paint spots, reach for a solvent-based adhesive remover made for painted surfaces and trim. Test a small hidden area to confirm the existing finish won’t soften.
Put on gloves and ventilate the room, then apply a small amount of adhesive remover to a cloth or cotton swab. Gently work the solvent into paint blobs, letting it sit briefly to loosen the film.
Wipe away softened paint with a clean rag, repeating as needed. Rinse the area with a damp cloth to remove residue, then dry and inspect for any remaining spots before refinishing.
Soften Thick Paint With a Heat Gun Safely
Though a heat gun can be the quickest way to soften thick, dried paint on trim, you’ll need to use it carefully to avoid scorching the wood or damaging surrounding finishes. You’ll position the gun 6–8 inches away, move constantly, and stop when paint softens. Scrape gently with a putty knife, not a chisel, to prevent gouges. Keep ventilation on and wear eye and heat-resistant gloves.
- Test on an inconspicuous area first.
- Use low heat; increase only if needed.
- Protect nearby surfaces with foil or wet rags.
- Pause frequently to check varnish and wood.
This method aids controlled paint removal with a heat gun.
Use Chemical Stripper for Heavy or Multilayer Paint
When heat won’t remove multiple paint layers, use a chemical stripper suited to your trim material and the paint type.
You’ll want gloves, eye protection, good ventilation, and drop cloths to protect floors and moldings.
Test the stripper on a small hidden spot first and follow the manufacturer’s instructions carefully.
Choose Appropriate Stripper
If layers of paint are thick or have been built up over many years, you’ll want a chemical stripper to get down to the bare trim quickly and with less scraping.
Choose a stripper based on paint removal techniques and the trim material: solvent-based for stubborn oil paints, caustic for heavy lead-containing layers, and bio-based for easier cleanup.
Consider Protective gear options when selecting a product.
Compare cure time, ease of neutralizing, and residue cleanup.
Test a small area first.
Practical factors to weigh:
- Speed versus gentleness
- Compatibility with wood or metal
- Cleanup requirements
- Disposal rules
Safety And Preparation
Because chemical strippers can be powerful and hazardous, you need to prepare carefully before you touch a brush or scraper. Wear chemical-resistant gloves, eye protection, and a respirator rated for organic vapors.
Work with windows open and fans positioned to guarantee proper ventilation; avoid enclosed spaces.
Cover floors and furniture with plastic sheeting and tape seams to contain drips.
Test a small hidden area to confirm effectiveness and timing.
Keep a neutralizing agent and cleanup materials handy.
Follow local disposal guidelines for used rags, stripper residues, and containers—don’t pour leftovers down drains.
Stay alert and take breaks to reduce exposure.
Sand Wood Trim Without Harming Profiles
Start by securing the trim and evaluating the profile so you can remove paint without rounding edges or flattening details. You’ll work with the wood grain, not against it, to preserve profiles and maintain paint adhesion later.
Secure the trim and follow the grain to remove paint without rounding edges or losing detail.
Use fine tools and light pressure; patience beats aggressive sanding.
- Use a sanding sponge for curves and a folded sandpaper strip for crevices.
- Try a micro-grit or 120–220 grit depending on paint thickness.
- Keep a soft brush handy to clear dust from details as you go.
- Test finish compatibility on an inconspicuous section before refinishing.
Remove Paint From Metal Trim Without Causing Rust
When you’re removing paint from metal trim, pick a stripper that’s labeled safe for metal and won’t leave bare steel exposed.
Work in small sections, rinse or neutralize the stripper per instructions, then dry the metal thoroughly.
Finish by applying a rust inhibitor or primer to seal the surface and prevent corrosion.
Choose Rust-Safe Strippers
If your trim is metal, pick a paint stripper formulated to neutralize or resist corrosion so you won’t trade old paint for new rust. You want products that balance rust prevention with effective paint removal to preserve paint durability for refinishing.
Read labels for “rust-inhibiting” or “non-corrosive” claims and choose water-based or inhibited solvent formulas when possible. Test a small area first.
- Choose “rust-inhibiting” or “non-corrosive” formulas
- Prefer inhibited solvents or water-based strippers
- Check compatibility with the metal type
- Keep tools and contact time minimal to reduce exposure
Apply carefully and rinse thoroughly.
Clean And Protect Metal
You’ve picked a rust-safe stripper—now focus on cleaning and protecting the metal so removing paint doesn’t leave you with corrosion.
Immediately neutralize residue per product instructions, rinse thoroughly, and dry with a clean cloth to prevent flash rust.
Lightly scuff surfaces with a fine abrasive to promote paint adhesion for future coatings.
Apply a metal-preserving primer or corrosion inhibitor designed for trim; thin, even coats work best.
Seal edges and joints with a compatible sealant where water can collect.
Inspect regularly after work to spot early rust and touch up primer to maintain long-term metal preservation.
Strip Paint From Plastic Trim Without Warping
Because plastic trim can warp or melt under heat or harsh solvents, you’ll need a gentler, controlled approach to remove paint without damaging the material. Focus on safe paint removal and trim protection by testing methods on an inconspicuous spot first. Use tools and cleaners that won’t deform the plastic.
- Use a plastic scraper or nylon brush to lift flakes gently.
- Try a mild, plastic-safe citrus remover; rinse thoroughly after.
- Apply rubbing alcohol or isopropyl pads for small spots, blot don’t rub.
- Protect surrounding areas with painter’s tape and soft cloths during work.
Finish by rinsing and drying the trim.
How Long Each Method Takes and Effort Involved
When you choose a method, expect wide variations in time and effort. A razor or scraper is fast for small spots—minutes to an hour—but needs steady hands and careful trim protection to avoid gouges.
Chemical strippers work over hours; you’ll apply, wait, and wipe multiple times, requiring ventilation and cleanup.
Heat guns speed softening in tens of minutes but need skill to prevent burns or warped trim.
Sanding can take hours for large areas and produces dust, so mask up and protect surrounding surfaces.
Choose based on paint removal scope, your patience, and how much trim protection you’ll enforce.
Cost & Time Estimates for Common Methods
You’ll get quick time estimates for each removal method so you can plan your project schedule.
I’ll also break down average costs for supplies and tools, plus point out budget-friendly options that still work.
With those numbers you can choose the fastest or cheapest approach that fits your trim and your wallet.
Time Estimates Per Method
Different methods for removing dried paint from trim take very different amounts of time, so pick an approach that fits your schedule and patience. If you’re into creative decorating or working on historical preservation, timing matters to avoid damage.
Quick solvent wipes: 10–30 minutes per small section.
Heat gun and scraper: 20–60 minutes, faster but needs care.
Chemical strippers for thick layers: 1–3 hours plus dwell time.
Sanding and repainting: several hours to a day depending on drying.
- Small touch-ups: under 30 minutes.
- Medium areas: 1–3 hours.
- Whole room trim: half to full day.
- Complex detail: multiple sessions.
Average Cost Breakdown
Expect to spend anywhere from a few dollars to several hundred depending on the method you pick and the size of the job.
Small touch-ups with a plastic scraper, rubbing alcohol, or citrus remover will cost $5–$20 in supplies and take under an hour.
Heat guns, chemical strippers, or power sanding run $30–$150 for tools and materials, plus 1–4 hours labor.
Hiring a pro can climb to $200–$500 for complex jobs.
Factor in painting safety gear—gloves, mask, goggles—and potential repairs to maintain trim durability; that adds $10–$50 but protects your finish and health.
Budget-Friendly Options
If you’re watching costs from the average breakdown, there are several low-cost methods that handle most dried-paint on trim without special tools. You can choose based on time, budget, and whether you prefer eco friendly alternatives or must honor historical preservation constraints.
Quick options save time but may need touch-ups; gentler approaches cost less but take longer.
- Warm soapy water + cloth: $0–$5, 10–30 minutes
- Vinegar or citrus solvent (eco friendly alternatives): $3–$10, 15–45 minutes
- Heat gun on low: $15–$40 (tool cost), 5–20 minutes
- Manual scraping with plastic putty knife: $0–$5, 20–60 minutes
Clean Residue and Degrease for Repainting
Before you repaint, remove any dusty or oily film—cleaning and degreasing the trim guarantees new paint will adhere and look smooth. Wipe with a mild detergent solution, then rinse and dry.
For stubborn residue, use a TSP substitute or a dedicated degreaser, following safety instructions and ventilating the room.
Lightly scuff glossy areas with fine sandpaper to promote adhesion, then vacuum or tack cloth to remove grit.
If you’ll be doing paint mixing or color blending later, label and protect surrounding surfaces now to avoid contamination.
Let the trim fully dry before priming to ensure an even, durable finish.
Match Touch‑Up Paint and Feather Repairs
You’ll want to match touch-up paint to the existing trim so the repair blends in, testing on a hidden spot first to confirm the color and sheen.
For small chips, feather the edges by sanding lightly and applying thin, overlapping coats to avoid a visible ridge.
If the repaired area still stands out, scuff-sand the surrounding paint and repeat thin coats until the finish is seamless.
Color Matching Tips
When matching touch-up paint or feathering repairs, start by comparing samples in the same light where the trim will be seen so you can spot subtle hue or sheen differences. You’ll use color matching and careful paint blending to hide repairs. Test small swatches, let them dry, then evaluate at different times of day.
Keep adjustments minimal and document mixed ratios.
- Start with the original can label and photo.
- Mix tiny batches, record proportions.
- Sand lightly between coats for seamless gradation.
- Use a magnifier to compare texture and sheen.
Trust your eyes; small tweaks beat big corrections.
Feathering Repair Technique
Although feathering takes a bit of patience, you can make touch-ups virtually disappear by blending new paint into the existing finish with thin, controlled layers.
Begin by lightly sanding the dried drip or nick until edges are smooth, wiping dust away.
Use a small, high-quality brush and practice brush techniques like long, tapering strokes that reduce visible overlaps.
Thin your touch-up paint slightly if needed to match sheen and improve paint adhesion, but don’t over-thin.
Apply several translucent layers, letting each cure fully, and inspect under good light.
Finish by feathering the final stroke outward to blend seamlessly.
Seal or Refinish Wood Trim After Removal
After you strip the paint and clean the trim, decide whether to seal or refinish based on the wood’s condition and how it’ll be used. You’ll assess for damage from paint removal and plan any wood reinforcement or patching.
Choose a clear sealer to show grain, or stain and topcoat for durability in high-traffic areas. Follow proper drying times and sand between coats for a smooth finish. Protect corners and joints with appropriate sealant.
- Inspect for gouges and loose joints
- Fill and reinforce weak spots
- Sand progressively finer grits
- Apply sealer or finish per label instructions
Prevent Paint on Trim: Masking and Tool Tips
If you want crisp, paint-free trim, prep it before you open a can: use high-quality painter’s tape, low-tack edging, and thin plastic or paper drop cloths to protect surfaces. Press tape edges firmly with a putty knife or credit card to seal gaps.
Plan your work sequence so paint mixing happens away from trim; mix over a drop cloth and keep lids closed.
Sanding trim before you tape improves adhesion if you’ll repaint later, but wait until masking is removed to avoid clogging tape.
Use angled brushes, a mini-roller near edges, and a steady hand to avoid bleed and drips.
When to Call a Pro Instead of DIY
You can handle most small paint mistakes on trim with the masking and careful brushing described above, but some situations call for a pro. If you’re unsure, consider hiring someone to avoid costly DIY pitfalls and to benefit from professional expertise.
- Extensive damage to historic or ornate trim
- Large areas of stubborn or multiple-layer paint
- Complex color-matching or custom finishes
- Time constraints or lack of proper tools
You’ll save time and protect trim value by calling a pro when restoration is delicate, the job risks more harm, or your skill set and equipment won’t guarantee a clean, lasting result.
Safety Checklist for Solvents, Heat, and Sanding
When working with solvents, heat, or sanding around trim, take clear safety steps so you don’t harm yourself or the wood. Wear gloves, eye protection, and a respirator rated for solvents; guarantee good ventilation and a fire extinguisher nearby.
Test heat tools at low settings and keep them moving to avoid scorching.
Contain dust with plastic sheeting and use a vacuum with a HEPA filter during and after sanding.
Follow label instructions for solvent handling, store solvents in sealed containers, and never smoke nearby.
Keep a first-aid kit accessible and stop immediately if you feel dizzy, nauseous, or irritated.
Frequently Asked Questions
Can Dried Paint Damage Door Hardware or Hinges?
Yes — dried paint can damage door hardware or hinges if left, so you should act carefully. Use paint-safe solvents and gentle scraping for removal, prioritizing paint safety and hardware preservation to avoid scratches or binding.
Will Paint Removal Affect Nearby Wallpaper or Delicate Finishes?
Like walking on eggshells, you’ll protect wallpaper safety and practice delicate surface care by testing removers, using gentle solvents, masking edges, and working slowly—don’t tug; you’ll prevent lifting, staining, or finish damage near delicate areas.
Can I Remove Paint From Painted-Over Trim Without Repainting Whole Room?
Yes — you can remove paint from painted-over trim without repainting the whole room. Use gentle paint removal methods, focused trim restoration, and touch-up only affected areas so surrounding finishes stay intact and seamless.
How Do Pets or Children Affect Choice of Removal Method?
If your home’s a zoo, you’ll pick gentler methods: prioritize Pet safety and Child protection by avoiding toxic strippers, using water-based removers, ventilating, blocking access, and wearing gloves—those precautions keep curious paws and hands safe.
Are There Eco-Friendly Alternatives to Chemical Strippers?
Yes — you can use Eco friendly solvents and Natural paint removers like citrus-based gels, soy or biodegradable poultices, and heat or mechanical methods; you’ll protect kids, pets, and the environment while effectively removing dried paint.
Conclusion
You’ve got the tools and know-how, so tackle dried paint on trim methodically and confidently. Start small, test solvents, and match your approach to the paint and trim material; treat wood gently and refinish it like a fresh canvas. Use heat or sanding only when safe, mask future projects, and call a pro for large or delicate jobs. With patience and the right precautions, your trim will look smooth and clean again.