How to Paint Bricks Exterior Without Damage
You can safely paint exterior brick without damage by fixing moisture and mortar problems first, using breathable masonry paints or mineral coatings, and prepping surfaces thoroughly—clean, remove loose mortar, repair cracks, and let everything dry. Avoid impermeable paints, paint in mild, dry weather, and test a small area for adhesion and color. Use appropriate primers and tools for mortar joints and textured faces, protect landscaping, and follow manufacturer instructions to guarantee long-lasting results; keep going to learn the detailed steps.
Quick Answer: Should You Paint Exterior Brick?
Wondering whether you should paint your exterior brick? You can, but weigh pros and cons first. Painting updates curb appeal and helps with color matching to trim or accents, yet it masks natural brick texture that gives character.
You’ll want to inspect for damage and guarantee proper cleaning and priming so paint adheres to uneven surfaces. If you cherish low maintenance and a cohesive palette, painting makes sense.
If you prefer historic authenticity or worry about future repainting, leave it natural. Decide based on aesthetic goals, maintenance commitment, and whether hiding texture is acceptable.
How Paint Changes Brick Moisture and Breathability
When you paint exterior brick, you change how moisture moves through the wall. Most paints slow evaporation and can trap moisture inside the masonry if you choose the wrong type. You’ll want breathable, vapor-permeable paints or mineral-based coatings that let moisture escape while shedding rain.
Choosing impermeable latex or oil paints can increase freeze-thaw damage and efflorescence. Also consider brick color impacts heat absorption; darker paints warm faster, driving internal moisture movement.
If you’re working on historic structures, historical preservation guidelines often require breathable finishes to protect original fabric. Always match coating permeability to the brick’s condition and local climate.
Signs Brick Needs Repair Before Painting
Before you reach for paint, inspect the brick and mortar for clear signs of damage. Look for crumbling mortar joints, spalled or powdery faces, and hairline to wide cracks that run through bricks or along mortar lines.
Note mismatched brick color or sudden texture variation—these often indicate previous repairs or deteriorated units. Bulging walls, loose bricks, and efflorescence (white salt streaks) signal deeper issues.
Tap suspect bricks; hollow sounds mean voids. Address structural faults and replace or repoint compromised bricks before painting, or the finish won’t adhere and you’ll trap underlying problems.
How to Test Brick for Moisture Problems

Before you paint, you’ll want to check the brick for moisture with a quick visual inspection and a couple of simple tests. Look for dark stains, efflorescence, or crumbling mortar.
Then tape a plastic sheet over a section to see if condensation forms inside after 24 hours.
You can also use a handheld moisture meter or press your palm to suspect areas to confirm wetness before you proceed.
Visual Moisture Inspection
If you suspect moisture issues in your brickwork, start with a careful visual inspection to catch obvious signs before doing any tests. Walk the perimeter and look for efflorescence, dark stains, spalling, or mortar loss.
Check under sills, around flashings, and near downspouts where water pools. Note paint blisters or peeling if you’re considering color options, since trapped moisture affects adhesion.
For older buildings, consider historical preservation—document findings and avoid aggressive cleaning that could harm fabric. Photograph problem areas, record locations, and prioritize repairs.
A thorough visual survey guides whether you need further moisture testing or professional help.
Simple Moisture Tests
After your visual survey, run a few quick, low-cost moisture checks to confirm whether repairs or drying are needed before painting.
First, tape a 12×12-inch clear plastic sheet to brick with duct tape, seal edges, and leave 24 hours. If condensation forms or the brick darkens, moisture’s present.
Next, use a small pinhole in mortar to test with a moisture meter probe or a simple infrared thermometer after sun exposure to spot damp areas.
Note wet zones before choosing brick color or paint sheen—darker hues and glossy sheens can hide or amplify problems if moisture isn’t resolved.
Spotting Efflorescence and What It Means
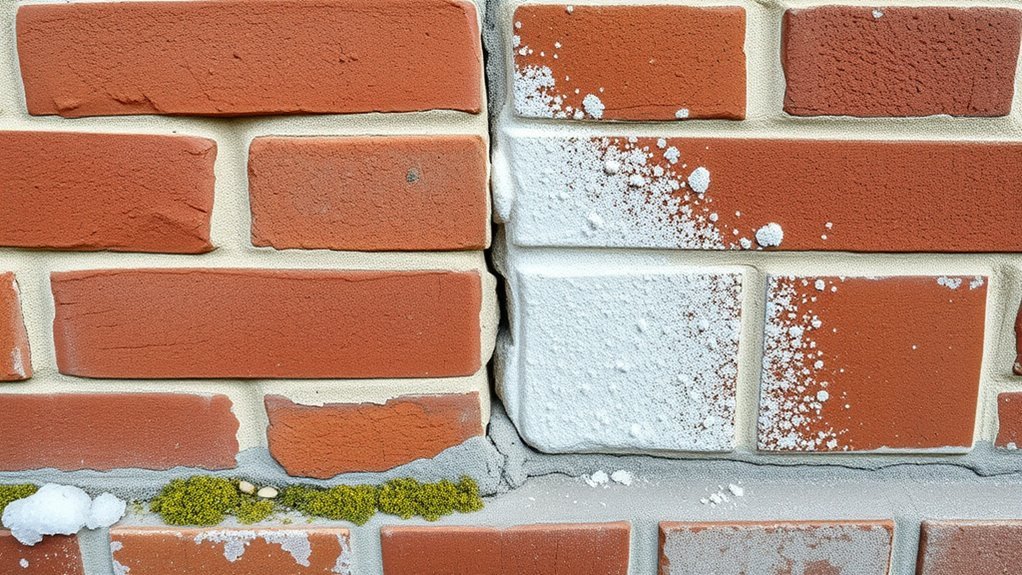
While you’re inspecting the brick, watch for a powdery white crust or streaks—this is efflorescence, a salt deposit left when water evaporates from the masonry. You should note efflorescence causes and how it leads to visible brick staining; it signals moisture movement through the wall. Don’t ignore it—address the source before painting.
- Check for leaks or rising damp that transport salts.
- Scrub loose salts with a dry brush, then test for recurrence.
- Use a masonry-compatible cleaner if salts persist and allow full drying.
If efflorescence returns, resolve moisture paths before applying any paint.
When Not to Paint: Red Flags After Inspection
If you see visible structural cracks, don’t paint until a structural engineer reviews them, because paint won’t fix shifting or settling.
If moisture keeps returning—stains, damp mortar, or mold—you’ll trap water behind the paint and make the problem worse.
And if previous coatings are peeling or failing, you’ll need to remove or repair them before applying a new finish.
Visible Structural Cracks
When you see long, widening cracks that run through mortar and brick—not just hairline surface crazing—that’s a clear sign to stop and reassess before painting. You’ll want to confirm visible cracks affect structural integrity and aren’t merely cosmetic. Painting over them hides problems and traps moisture.
- Photograph and measure crack length/width to track change.
- Consult a structural engineer or mason before any paint or repair.
- Prioritize stabilizing foundations, lintels, or bowed walls over cosmetic work.
Don’t paint until repairs are certified complete; otherwise you’ll mask damage and risk unsafe, short-lived results.
Persistent Moisture Problems
Because moisture keeps working beneath paint, you shouldn’t paint brick that shows ongoing damp signs until you fix the source. If you see efflorescence, peeling mortar, blistering, or mold, stop — those are active leaks or high indoor humidity issues.
Trace water entry: roof, flashing, gutters, grading, or plumbing. Test with a moisture meter and address ventilation to reduce indoor humidity before painting.
Once dry and repaired, evaluate breathability and choose breathable paints or stains; consider brick color options that suit your wall’s condition.
Painting over unresolved moisture will trap water, cause failure, and force costly rework.
Failed Previous Coatings
Although peeling, extensive cracking, or multiple layers of old paint might look like a quick cover-up job, those are clear signs you shouldn’t repaint yet. You need to assess prior coatings before proceeding, especially if the wall has historical preservation concerns or shows attempts at experimental artistic techniques.
Consider these steps:
- Test adhesion and remove loose layers to reveal substrate condition.
- Check for incompatible previous coatings (oil over latex, heavy elastomerics).
- Consult conservation pros when historic finishes or decorative faux methods are present.
If failures are systemic, repair or strip fully; don’t just paint over problems.
Inspecting Mortar Joints and Deciding on Repointing
If your mortar joints crumble under a fingernail or show deep gaps and shrinkage, you’ll need to assess whether repointing is required before painting. Sound, intact mortar can usually be painted without intervention.
Walk the wall, probe joints, and note areas of loss, hairline cracks, or soft spots. Consider how mortar condition affects brick texture and the final appearance.
If minor pockets exist, you might delay full repointing but record them. Also think about color matching—new mortar can contrast sharply, altering the look after paint.
Decide based on safety, longevity, and the visual impact on your painted finish.
Repoint Mortar the Right Way for Paint
When mortar’s deteriorated, repointing it correctly is the best way to guarantee your paint adheres and the wall stays watertight. Start by removing only the loose or crumbling material to a consistent depth, usually about twice the joint width. You’ll match new mortar to existing texture and strength so the substrate won’t fail after you choose Brick color and finish.
Follow these steps:
- Clean joints, dampen, and pack mortar firmly to avoid voids.
- Tool joints to match profile and ensure consistent adhesion.
- Cure properly, then prime before painting to maximize paint durability.
Work neat; avoid overfilling or fast drying.
Repairing Cracks and Spalled Brick Before Painting
Before you paint, fix cracks and spalled brick so the surface will look good and stay weatherproof. Small repairs stop moisture from undermining your new finish.
Before painting, repair cracks and spalled brick so the surface looks good and stays weatherproof.
Inspect for hairline cracks, loose mortar, and flaking faces. Remove deteriorated material, brush away dust, and dampen surfaces before applying patching mortar that matches brick color and texture.
For spalled units, consider consolidants or replace entire bricks to maintain structural integrity and appearance.
Blend repairs subtly to respect historical preservation if your building is old.
Let patches cure fully, then recheck for stability and uniformity before priming and painting.
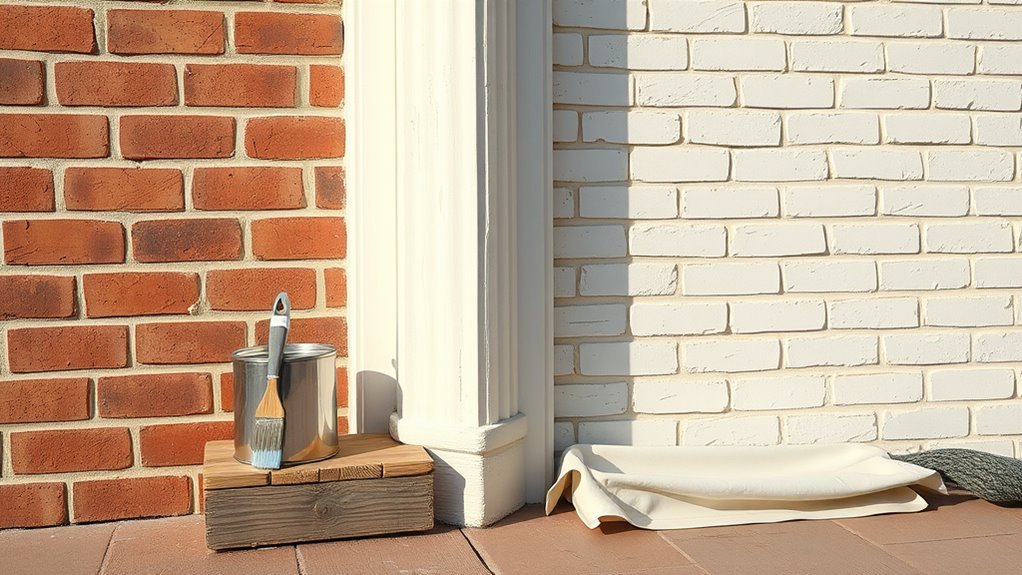
Tools and Materials You’ll Need
Now that your repairs are sound and cured, gather the right tools and materials so the painting goes smoothly and the finish lasts. You’ll need masonry primer, breathable exterior paint rated for brick, a stiff brush, rollers with a nap for rough surfaces, caulk, and a respirator.
Consider Color choices carefully—pick breathable colors that respect thermal properties and any historical preservation guidelines for period homes. Protect surrounding areas with drop cloths and painter’s tape. Check weatherproofing products and masonry cleaner.
- Primer and breathable masonry paint
- Brushes, rollers, and safety gear
- Cleaners, caulk, and protection materials
Safe Ladder and Scaffold Setup for Exterior Walls
Although working on uneven ground can feel manageable, securing your ladder or scaffold properly is critical to prevent falls and protect the brickwork you’re about to paint.
Check ladder safety by placing it on firm, level ground, using anti-slip feet, and locking spreaders or rung locks.
Place ladders on firm, level ground, fit anti-slip feet, and lock spreaders or rung locks for safety
Angle the ladder at roughly 75 degrees and tie or brace the top to the wall.
For scaffold stability, assemble on a level base with adjustable jacks, guardrails, and planked platforms rated for your load.
Inspect all components, secure wheels, and don’t overload.
Use a spotter and follow manufacturer instructions to avoid damage and injury.
Clean Brick Before Painting
Before you paint, you’ll want to remove loose debris like dirt, spider webs, and flaking mortar with a stiff brush or low-pressure wash.
After that, scrub the brick with a mild detergent solution to lift grime and stains so paint will adhere properly.
Let the wall dry completely before applying primer or paint.
Remove Loose Debris
Once you’ve cleared loose dirt and cobwebs, sweep or brush the brick with a stiff nylon or natural-bristle brush to remove remaining flakes, mortar dust, and peeling paint. You’ll work methodically, avoiding aggressive scraping that can gouge mortar or harm finishes important for historical preservation and artistic techniques. Focus on loose material only; don’t wet or apply cleaners yet. Use these steps:
- Start at the top and work down to catch falling debris.
- Tap mortar joints gently to dislodge crumbs without chipping.
- Collect debris in a tarp or bucket and dispose properly.
Inspect as you go; repeat brushing until no loose particles remain.
Deep Clean With Detergent
Now that loose flakes and dust are gone, you’ll need to deep clean the brick with a mild detergent to remove grime, mildew, and salts that can prevent paint from adhering. Mix detergent and warm water, scrub with a stiff brush, rinse thoroughly, and let dry completely. Test a small area first to protect historical preservation details. Cleaning also reveals true tones, helping you choose paints with proper color psychology impact. Wear gloves, eye protection, and avoid high-pressure washing on fragile mortar. Follow with masonry primer for best adhesion.
| Task | Tip |
|---|---|
| Mix | Use mild detergent |
| Scrub | Stiff brush |
| Rinse | Gentle water |
| Test | Small area |
| Dry | Fully before primer |
Removing Mold, Mildew, and Efflorescence Safely
If brick shows dark streaks or white powdery deposits, you’ll want to tackle mold, mildew, and efflorescence before painting so the finish will adhere and look right.
If your brick has dark streaks or white powder, treat mold, mildew, and efflorescence before painting for proper adhesion.
You’ll clean gently to protect brick texture and guarantee paint matching later. Follow a safe sequence:
- Scrub affected areas with a mild bleach solution (1:3 bleach to water), rinse thoroughly.
- Use a specialized efflorescence remover per label, neutralize, and rinse; don’t scrub aggressively.
- Allow full drying time and inspect for recurring moisture sources before priming.
Wear gloves, eye protection, and test a small area first to avoid staining.
Using Pressure Washers Without Harming Mortar
After cleaning away mold, mildew, and efflorescence, you’ll often use a pressure washer to remove dirt and loose paint.
But you must protect the mortar joints from damage. Use a wide fan nozzle, keep pressure under 1,200 psi, and hold the wand at a 45-degree angle at least 12–18 inches away.
Test a small area first to preserve brick texture and avoid gouging mortar.
Shield joints with painter’s tape or a soft brush while rinsing.
Work systematically, rinse from bottom to top to prevent streaks, and let the wall dry fully before evaluating color matching and repairs.
Choosing Breathable Paint for Exterior Brick
When painting brick, you’ll want a vapor-permeable masonry paint that lets moisture escape rather than trap it.
Check the paint’s breathability rating or perm value to make certain it’s suitable for exterior masonry.
Choosing a high-breathability product helps prevent blistering and mortar damage over time.
Use Vapor-Permeable Masonry Paint
Because moisture always needs a way out, choose a vapor-permeable masonry paint that lets trapped water vapor escape while still protecting the brick from rain and UV. You’ll preserve mortar and avoid blistering while keeping color contrast consistent. Breathable paint also supports historical preservation by preventing trapped moisture that damages old masonry.
When selecting and applying:
- Pick a labeled vapor-permeable masonry paint formulated for exterior brick.
- Test a small area to confirm adhesion and desired color contrast before full coverage.
- Apply in recommended thickness and conditions so vapor can move freely and the finish lasts.
You’ll protect brick without sealing moisture in.
Check Breathability Ratings
If you want your painted brick to last without trapping moisture, check the paint’s breathability ratings before you buy: look for water vapor transmission (permeability) values, vapor diffusion-equivalent air layer (Sd) or perm ratings, and any manufacturer claims about breathable or vapor-permeable formulations.
You’ll compare numbers: higher permeability or lower Sd means moisture can escape through the paint. Match ratings to your climate and the brick texture; rough, porous surfaces need more breathable coatings.
Choosing correctly preserves paint durability and prevents blistering, efflorescence, and freeze damage. Always test a small area and follow manufacturer substrate-prep guidelines.
Elastomeric vs Breathable Coatings for Exterior Brick
Although both elastomeric and breathable coatings protect brick, they work very differently and choosing the wrong one can trap moisture or crack over time. You’ll weigh flexibility against vapor movement: elastomeric fills hairline cracks and stretches, while breathable coatings let trapped moisture escape.
For historical restoration and artistic techniques you’ll often prefer breathable finishes to preserve original masonry and detailing. Consider these quick points:
- Elastomeric: great for sealing and bridging cracks, but can trap moisture if substrate’s damp.
- Breathable: allows vapor transmission, safer on older brick and lime mortar.
- Application: surface prep and ambient conditions determine success.
Picking the Right Primer for Masonry
Which primer you choose will make or break your exterior brick paint job, so pick one that matches the brick type, mortar, and coating system you’ll use.
Select a masonry-specific primer: breathable for older, porous brick; alkyd or bonding primer for sealed or smooth surfaces. Consider stain-blocking if tannins or efflorescence are present.
Use a masonry-specific primer—breathable for porous brick, alkyd/bonding for sealed surfaces, with stain-blocking as needed.
Match primer color slightly toward your topcoat to improve coverage and exploit color psychology—warmer undercoats enhance depth, cooler ones mute brightness.
For historic buildings, choose formulations approved for historical preservation to avoid trapping moisture or altering masonry.
Always follow manufacturer compatibility guidelines.
How to Prime Brick for Lasting Adhesion
Before you apply any paint, make sure the brick is clean, dry, and solid so the primer can bond properly and prevent peeling. You’ll prep by removing efflorescence and loose mortar, then let the surface fully dry.
Use a masonry primer designed for vapor permeability to maintain color consistency and boost paint durability. Apply evenly with a brush for mortar joints and a roller for faces. Focus on coverage and soak-in rather than thickness.
- Clean: pressure wash lightly; scrub stains.
- Seal cracks: use masonry caulk or mortar repair.
- Prime: two thin coats, tack-free between layers.
Best Weather and Timing to Paint Exterior Brick
If you want your paint to cure properly and stick for years, pick dry, mild weather—ideally temperatures between 50°F and 85°F with low humidity and no rain in the forecast for at least 24–48 hours after painting. Plan during spring or fall when conditions are steady. Morning starts let paint dry before evening dew. Consider Color trends if updating aesthetics, but balance them with historical authenticity on period homes. Avoid painting in direct, hot sun or freezing conditions. Use a short checklist:
| Condition | Ideal Range | Note |
|---|---|---|
| Temp | 50–85°F | Stable |
| Humidity | <60% | Low |
| Rain | 48 hrs clear | Forecast-dependent |
Masking and Protecting Landscaping and Fixtures
Before you paint, protect nearby plants and topsoil by wetting and covering them with breathable fabric or plastic sheeting so roots don’t get coated in paint.
Cover fixtures and hardware—lights, mailboxes, and door handles—with painter’s tape and plastic to prevent drips and staining.
Secure drop cloths with weights or stakes and overlap seams to keep paint out of landscaping and stop cloths from blowing away.
Protect Plants And Soil
How will you keep your garden safe while painting bricks? Focus on plant preservation and soil protection by acting deliberately. Shield shrubs and beds, avoid runoff, and minimize dust.
- Remove potted plants or wrap foliage with breathable fabric; tie loosely to prevent rubbing.
- Lay heavy-duty plastic or canvas over soil, weighted at edges; create barriers to divert paint-laden runoff away from roots.
- Rinse covered areas gently after painting fades, and avoid harsh cleaners that harm microbiology.
Check coverings frequently during work, patch tears, and water plants sparingly to prevent chemicals from soaking into the substrate.
Cover Fixtures And Hardware
When you’re ready to paint, protect doorknobs, light fixtures, vents, and outdoor outlets with tight-fitting covers, painter’s tape, and temporary shields so paint won’t stain or infiltrate moving parts.
Cover metalwork and glass with plastic sheeting secured by tape, and use breathable fabric over delicate fixtures to prevent trapped moisture.
Remove removable hardware when possible and label pieces for reinstallation.
Shield nearby shrubs and pathways without touching roots.
Match paint color options to existing trim and consult local guidelines for historical preservation before altering original finishes.
Work methodically, checking seals frequently to avoid overspray and accidental drips.
Secure Drop Cloths Properly
Start by laying heavy-duty drop cloths or contractor-grade plastic over paths, planted areas, and beneath fixtures, then anchor edges with bricks, sandbags, or landscape pins so wind and foot traffic can’t shift them. You’ll want secure placement to protect landscaping and hardware while you paint.
Follow these steps:
- Position drop cloths to overlap seams by at least 6 inches.
- Anchor edges at high-traffic points with weights or landscape pins.
- Tape and seal around fixtures, trimming excess to avoid tripping hazards.
Check placement periodically, especially after wind or heavy work, and replace torn sections immediately to prevent stains.
Preparing Trim, Windows, and Adjacent Surfaces
Before you paint the brick, protect and prepare the trim, windows, and any nearby surfaces so your work looks crisp and the finish lasts. Remove hardware, caulk gaps, and sand flaking paint on trim; patch and prime bare wood.
Tape window frames and glass with low-tack painter’s tape, cover sills and landscaping with drop cloths, and secure plastic sheeting for doors and vents.
Choose trim colors that respect color psychology and historical authenticity for curb appeal.
Keep a clean edge by cutting in with a brush before rolling.
Inspect seals and ventilation to prevent trapped moisture after painting.
Testing Paint Color and Adhesion on a Small Patch
Now that trim and adjacent areas are secured, test the paint on a small, inconspicuous brick patch to confirm both color and adhesion. You’ll learn how the hue reads in sunlight and whether the surface accepts the coating without flaking.
Consider color psychology and how tones affect curb appeal versus preservation of historical brick styles.
Think about color psychology—choose hues that enhance curb appeal while respecting historic brick character.
Follow this quick checklist:
- Clean a 6×6 inch area, apply primer if required, then one coat of your chosen paint.
- Let it cure 48–72 hours, inspect adhesion and color shift in different light.
- Record results and adjust color or prep before committing to larger areas.
How to Apply Paint With Brushes, Rollers, and Sprayers
Choose the right brushes, rollers, or sprayers for masonry so your paint bonds and lasts. I’ll explain the proper technique for each tool—brushing into mortar joints, rolling with a nap that reaches textured surfaces, and spraying with even passes.
Follow simple precautions like testing pressure, avoiding overspray, and using thin, even coats to prevent damage.
Choosing The Right Tools
Wondering which tool will give you the cleanest, most durable finish on exterior brick? You’ll choose based on surface texture, coverage needs, and accessibility, while considering color symbolism and historical significance if preserving character matters. Match tool to task:
- Brush — precise edging and mortar work, good for detail.
- Roller — efficient for broad, even coverage on flat brick faces.
- Sprayer — fastest for rough textures and large areas, needs masking.
Pick quality nylon/bristle brushes, a thick-nap roller, and an HVLP or airless sprayer if you’re comfortable.
Prioritize maintenance: clean tools promptly to keep results consistent.
Technique For Each Tool
While brushes, rollers, and sprayers each have strengths, your technique makes the difference between a patchy job and a lasting finish. Use a steady, methodical approach tailored to each tool to get smooth, even coverage without damaging the brick or mortar.
With a brush, cut into mortar lines, work small sections, and feather edges for precise color matching.
Use a thick-nap roller to push paint into pores, rolling in multiple directions to boost paint durability.
With a sprayer, keep consistent distance, overlap passes, and back-roll lightly to avoid runs.
Clean tools promptly and inspect coverage before the next coat.
Preventing Paint Damage
Before you start, prep the surface and tools so every stroke or pass prevents damage. You’ll use brushes for edges, rollers for field, sprayers for large areas—each needs technique to protect brick and mortar while respecting color psychology and historical preservation. Clean, mask, and test before full application. Follow this quick checklist:
- Use soft-bristle brushes for mortar seams; feather edges.
- Roll with a nap suited to rough brick; avoid overloading.
- Adjust sprayer pressure and distance; back-brush immediately to ensure adhesion and avoid buildup.
Work methodically, check for runs, and correct them fast to prevent lasting harm.
Coating Techniques That Prevent Trapped Moisture
If you want your paint job to last and your brick to breathe, choose coatings that let moisture escape rather than trap it. Apply them with attention to penetration and even coverage.
Use breathable masonry paints or silicate-based sealers that bond without forming a nonporous film.
Test small areas and consider brick staining where appropriate to preserve texture and mortar lines, especially in historical preservation projects.
Work with rollers for flats and brushes for joints, keeping coats thin and consistent.
Make sure substrates are fully dry before coating, and avoid impermeable primers or heavy sealants that can lock in moisture.
How Many Coats Do Painted Bricks Need?
First, you’ll check the brick’s porosity—more porous bricks soak up paint and may need extra coats.
You’ll almost always apply a primer coat to seal the surface and promote adhesion.
Finally, plan for one or two finish coats depending on coverage and the look you want.
Assess Brick Porosity
Because brick soaks up paint unevenly, you’ll need to assess its porosity to know how many coats are necessary. You’ll check brick texture and consider historical preservation when planning so you don’t obscure character or trap moisture.
Use a simple water test: splash, time, observe.
- Drip 1 teaspoon of water onto several bricks; note fast absorption (high porosity).
- Wait 10–15 seconds: slow absorption means lower porosity.
- Inspect mortar joints and sheltered vs. exposed faces for variation.
Count coats based on highest-porosity areas; document findings before purchasing paint or sealing products.
Primer Coat Necessity
Wondering whether you need a primer before painting brick? You usually do. Primer seals porous brick, promotes adhesion, and prevents uneven absorption so your chosen color lays true.
One coat of high-quality masonry primer suffices for most bricks; very porous or previously stained surfaces may need a second coat.
Primer choice can affect how color trends read on textured surfaces and helps preserve historical styles when you want authentic tones.
Skip primer only if a paint-manufacturer explicitly says it’s not required for their product and your brick is nonporous.
Always follow product instructions and test a small area first.
Finish Coat Quantity
How many finish coats you need depends on the paint type, the brick’s texture, and the look you want. Most exterior brick jobs require two coats of a quality masonry or exterior acrylic paint to achieve uniform coverage and durability.
You’ll often apply a second coat after the first dries to even out absorption and hide brush or roller marks. Consider color matching for touch-ups and test sections.
Use paint additives sparingly to improve flow or extend drying time. Assess porosity and exposure; add a third coat only for deeply pitted brick or dramatic color shifts.
- Two standard coats
- Optional third for porosity
- Spot touch-ups
Drying Times, Recoat Windows, and Rain Safety
While paint typically feels dry to the touch within a few hours, you’ll need to follow the manufacturer’s recommended recoat and full-cure times to avoid lifting or trapping moisture in the brick. Check labels for recoat windows—often 4–24 hours between coats; full cure can take weeks.
Plan around weather: avoid painting when rain is forecast within 48 hours of application and when humidity is high. Use tarps and temporary covers if sudden showers threaten.
Consider how exterior color choices influence interior decor and color psychology through reflected light. Respect curing times to prevent peeling, efflorescence, or trapped moisture.
Painting Corners and Mortar Lines Neatly
When you tackle corners and mortar lines, work deliberately with the right tools so paint stays where it belongs: use a sash brush or angled brush for edges, a narrow pointing brush for mortar joints, and low-pressure strokes to avoid overloading the bristles. You’ll steady the line, preserve texture, and respect color psychology and historical authenticity when choosing tones.
Follow a simple routine:
- Tape sharp corners, feather paint toward brick faces.
- Paint mortar lines with short, controlled strokes, wiping excess immediately.
- Step back often, correct tiny errors with a damp cloth before paint skins.
Finish edges before moving to large surfaces.
Dealing With Uneven or Porous Brick Surfaces
If your brick is uneven or highly porous, you’ll need to prepare the surface more thoroughly so paint goes on smoothly and lasts. You’ll clean, fill deep pits with compatible mortar repair, and sand high spots so the brick texture is consistent. Use a masonry primer that soaks into pores, and test a small area to respect historical preservation concerns. Work in small sections, brushing primer into crevices. Consider microfibers or stipple rollers for texture. Monitor absorbed areas and reapply primer where needed.
| Step | Tool | Result |
|---|---|---|
| Clean | Brush/washer | Debris-free |
| Fill | Mortar patch | Smooth surface |
| Prime | Masonry primer | Sealed pores |
| Test | Small patch | Preservation-safe |
Avoid Peeling, Blistering, and Flaking on Painted Brick
To prevent peeling, blistering, and flaking, you’ll want to start with thorough surface preparation so paint bonds well to the brick.
Choose a breathable masonry paint that lets trapped moisture escape instead of pushing it under the finish.
Also locate and fix any moisture sources—like leaks or poor grading—before you paint.
Proper Surface Preparation
Although paint can make brick look fresh, proper surface preparation is what prevents peeling, blistering, and flaking down the line. You’ll start by removing dirt, efflorescence, and loose mortar with a stiff brush and mild detergent; pressure-wash gently if needed.
Address any structural cracks and repoint where mortar’s failing. Test a small area to assure adhesion and consider color psychology when choosing a hue that suits the home’s era and complements neighbors. Respect historical preservation guidelines if applicable.
Finish with a masonry primer suited to the substrate, following manufacturer drying times before painting.
- Clean
- Repair
- Prime
Use Breathable Masonry Paint
When you pick paint for exterior brick, choose a breathable masonry formula so trapped moisture can escape through the surface instead of forcing paint to lift and peel.
You’ll protect the substrate by selecting silicate or vapor-permeable acrylic masonry paints that let water vapor pass while shedding rain. Breathable finishes reduce blistering and flaking, extending maintenance intervals and supporting historical preservation goals where original materials matter.
They also maintain texture preservation, keeping mortar joints and brick faces looking authentic. Follow manufacturer instructions for application over clean, dry masonry, and avoid impermeable coatings that trap moisture and cause premature failure.
Control Moisture Sources
Choosing breathable masonry paint helps, but you still need to control external and internal moisture sources so paint won’t peel, blister, or flake. You should inspect and fix leaks, improve drainage, and vent humid areas before painting. Address rising damp and damaged mortar to preserve brick texture and adhesion.
Consider breathable sealers only when needed; non-breathable coatings trap moisture. Match paint porosity when color matching so finish behaves like the brick.
Follow this quick checklist:
- Repair gutters, downspouts, and flashing.
- Repoint mortar and fix cracks.
- Add ventilation to crawlspaces and attics.
Managing Efflorescence After Painting
If white, powdery deposits appear on your painted brick, they’re likely efflorescence—mineral salts pushed to the surface by moisture—and you should tackle it quickly to protect the paint and masonry.
First, identify and fix moisture sources: leaks, poor drainage, or rising damp.
Gently brush deposits with a stiff brush, then wash with a mild vinegar solution; rinse thoroughly and let fully dry.
Repaint only after remediation using breathable masonry paint so salts can escape.
Consider how color psychology affects perception of stains and maintain historical authenticity when choosing finishes for older buildings.
Monitor regularly to prevent recurrence.
How to Test Adhesion and Catch Failures Early
Before you paint the whole wall, you’ll want to run small panel trials on inconspicuous areas to see how the paint bonds and ages.
Use a simple tape test—pressing and peeling strong tape over a cured patch—to check adhesion and spot any immediate failures.
If the trial shows peeling or chalking, stop and adjust your prep or product before continuing.
Tape Test Method
When you want to be sure the paint will stick, use a simple tape test to check adhesion and catch failures early. You’ll confirm surface readiness without risking damage, keeping color psychology goals and historical preservation concerns in mind.
Clean, dry the brick, then apply paint and cure per instructions. Perform the tape pull after proper drying to avoid false failures.
- Press heavy-duty tape to painted area and smooth firmly.
- Rip tape off quickly at a 90° angle.
- Inspect for flaking, lifting, or residue; document results.
If paint fails, strip and prep again before repainting.
Small Panel Trials
Want to be absolutely sure your chosen paint and prep will hold up? Set aside small panels on different brick areas—sunny, shaded, porous—and mark them. Clean, prime, and apply your selected color schemes and coatings exactly as planned.
Label each panel with date and conditions. Inspect daily for the first week, then weekly for a month, checking adhesion, flaking, efflorescence, and color shift.
If a failure appears, adjust prep or material and retest until results are stable. This minimizes large-scale mistakes and supports historic preservation by proving compatibility before altering the entire exterior.
Maintenance Routine to Keep Painted Brick Healthy
If you want your painted brick to stay vibrant and protected, adopt a simple, regular maintenance routine that checks for dirt, moisture, and surface wear. You’ll preserve the color choices tied to interior design and the exterior’s color psychology by preventing buildup and water damage.
Do quick inspections monthly, clean gently, and address causes of dampness promptly. Focus on breathable cleaners and soft brushes; avoid pressure washing that forces moisture into mortar.
Follow a seasonal checklist:
- Monthly visual inspections for stains, efflorescence, or mold.
- Quarterly gentle wash and gutter/downspout check.
- Annual masonry mortar and seal evaluation.
Touching Up and Repairing Painted Brick Over Time
Because painted brick will weather and chip over time, you’ll need a straightforward plan for touch-ups and repairs to keep the finish intact and the masonry healthy. Inspect annually for chips, flaking, or thin spots.
Clean areas, remove loose paint, and sand gently. For color selection, compare swatches in daylight and make small test patches. Match primer type and use breathable masonry paint.
For mortar or surface damage, patch with compatible mortar or filler before painting. Practice texture matching by feathering edges and stippling with a brush or sponge to blend repairs into surrounding brick. Seal as needed.
Signs Paint Is Hiding Structural or Moisture Issues
After you’ve kept up with touch-ups, watch for signs that paint might be masking deeper problems. You’ll want to inspect regularly for indicators that go beyond aesthetics and threaten structure or moisture control. Consider these red flags:
- Bubbling, peeling, or flaking paint that returns quickly — often hiding dampness or active water intrusion.
- Staining or uneven color contrast where paint darkens near joints — suggests trapped moisture or efflorescence beneath the surface.
- Cracks in mortar or bricks visible under thin paint layers — may signal settling or structural movement that compromises historical authenticity.
If you spot these, investigate before repainting.
How to Remove Paint From Brick If You Must Revert
When you decide to revert painted brick, plan carefully so you don’t damage the masonry. You’ll test small areas, choose low-impact methods, and respect historical preservation guidelines. Use chemical strippers rated for brick, gentle pressure washing below 500 psi, or manual scraping with masonry-safe tools. Consider color theory when matching reclaimed or repointed areas. Protect mortar, rinse thoroughly, and let bricks dry fully before sealing or leaving natural. Hire a conservator for historic façades. Document before-and-after conditions for permits. Monitor for efflorescence or spalling and address moisture sources promptly.
| Method | Best use |
|---|---|
| Chemical stripper | Stubborn layers |
| Low-pressure wash | Large areas, gentle |
Cost Breakdown and Budgeting for a Brick Paint Job
Once you’ve decided whether to keep or strip painted brick, you’ll need a clear budget for the paint job itself. Estimate materials (paint, primer, sealant), tools (rollers, sprayer rental), and prep (cleaning, minor mortar repair).
Factor in color psychology if you choose bold or muted hues—some finishes need extra coats. Consider historical preservation: protected facades may need specific products or approvals that raise costs.
- Materials and supplies: quantify gallons and primers.
- Prep and patching: cleaning, repointing, scaffolding.
- Contingency: 10–20% for surprises.
Track expenses and compare quotes to stay on budget.
Hiring a Pro: What to Ask, and What to Verify
When hiring a pro, make sure they’re licensed and carry liability and workers’ comp insurance so you’re protected.
Ask exactly what prep steps they’ll take on your brick—cleaning, mortar repair, and primer—and confirm the materials they plan to use.
Get a written timeline and warranty for the work so you know how long the paint and repairs are guaranteed.
Verify License And Insurance
Because a pro’s credentials protect both you and your home, always check their license and insurance before you sign a contract. You’ll want proof they’re qualified for exterior brick work, sensitive to historical preservation concerns, and able to advise on color selection that won’t damage masonry.
Ask to see:
- State contractor license and specialty endorsements.
- Current liability insurance and worker’s compensation certificates.
- References and prior job photos showing brick care and approved finishes.
Confirm coverage limits, expiration dates, and that you’re listed as an additional insured when required.
Don’t hire anyone who can’t produce verifiable documents on request.
Ask About Prep Steps
If you’re hiring a pro, ask exactly what surface-prep steps they’ll take so you know your brick won’t be harmed by shortcuts. Request a step-by-step rundown: cleaning method (low-pressure wash, chemical cleaners), mortar joint inspection, loose mortar repair, efflorescence removal, and appropriate primer for masonry.
Ask which products they’ll use and why, and verify they’ll test a small area first so color palettes look right on your brick. If your home has period features, insist they respect historical accuracy in prep and finish choices.
Get clear, written confirmation of each prep action before work begins.
Confirm Warranty And Timeline
After you’ve nailed down prep details, get the project’s warranty and timeline in writing so there’s no ambiguity later. You’ll confirm what’s covered, for how long, and who handles touch-ups if paint fails. Ask for specifics on materials, cure times, and exclusions. Use warranty verification and timeline planning as your checklist items. Insist on a signed document before work begins and note penalties for missed milestones.
- Request written warranty verification with coverage limits and start date.
- Get a detailed timeline with prep, application, and completion dates.
- Define remedies and communication protocols for delays or defects.
Eco-Friendly, Low-VOC Paint Options for Brick
Want a durable, attractive finish that’s kinder to the planet and your health? Choose eco friendly alternatives like water-based acrylic masonry paints and mineral silicate coatings that bond to brick without trapping moisture.
You’ll get good coverage, long wear, and easier cleanup while supporting VOC emission reduction to protect indoor air and local neighbors. Look for third-party low-VOC certifications, read technical data sheets for breathability, and confirm compatibility with your primer and sealer.
Test a small area and let it cure fully before evaluating. With careful selection and proper prep, you’ll preserve brick integrity and reduce environmental impact.
Seasonal Planning and Timelines for Exterior Brick Painting
Because exterior brick painting depends on temperature, humidity, and drying time, plan your project around predictable weather windows so coatings set properly and you avoid damage. You’ll time prep, primer, and topcoat steps during mild, dry periods; consider historical preservation rules and color psychology when scheduling so approvals and sampling don’t delay curing.
Plan exterior brick painting around mild, dry weather windows; time prep, primer, and topcoats to ensure proper curing and approvals.
Follow this seasonal timeline:
- Spring: clean, repair, and test samples when nights stay above freezing.
- Summer: paint early mornings or evenings to avoid heat stress and rapid drying.
- Fall: finish topcoats six weeks before first frost to ensure full cure.
Common Mistakes Homeowners Make When Painting Brick
If you rush into painting without proper prep, you’ll likely create problems that cost time and money to fix. You might skip cleaning, which traps dirt and causes poor adhesion, or ignore mortar joints and cause peeling.
Don’t choose a brick color without testing in different light; a wrong shade alters curb appeal. Avoid using interior paints or the wrong primer—pick breathable, masonry-specific products to prevent trapped moisture.
Overbrushing or heavy coats hide natural texture enhancement and lead to cracking. Finally, don’t neglect ventilation or weather windows; paint in appropriate conditions to *guarantee* a durable, attractive finish.
Final Checklist to Finish Your Exterior Brick Paint Project
When you’re ready to wrap up, run a final inspection checklist so nothing gets missed. Walk the perimeter, note drips, missed spots, and mortar joints to protect historical preservation. Verify paint adhesion and touch up where needed.
- Check color matching under natural light, adjust small areas to ensure uniformity.
- Inspect seals, caulking, and flashing for weatherproofing; replace as needed.
- Clean tools, remove drop cloths, and document completed areas for future maintenance.
Sign off with photos and a brief maintenance plan. That way you preserve brick integrity, respect historical preservation, and keep color matching consistent.
Frequently Asked Questions
Will Painting Brick Change My Home’s Insurance or Warranty Coverage?
Yes — painting brick can affect insurance implications and warranty concerns; you should check your policy and any builder or product warranties, since alterations may void coverage or claims if they cause moisture or structural issues.
Can Painted Exterior Brick Affect Indoor Air Quality or Allergens?
Absolutely — painted exterior brick won’t magically choke your home, but it can slightly affect indoor air quality if you use high-VOC paints; you’ll limit indoor allergens by choosing low-VOC, breathable masonry paints and proper curing.
How Does Painting Brick Impact Historic Preservation Rules or Local Permits?
You’ll need to check historic regulations and local permit requirements before painting brick; they can restrict alterations, require approvals or specific materials, and impose penalties if you proceed without documentation, so secure permits and comply with guidelines.
Are There Long-Term Color-Fading Considerations for Sun-Exposed Brick?
Studies show UV exposure can reduce paint vibrancy by up to 30% in five years. You’ll want paints with high UV resistance and proven color retention, and you’ll need periodic touch-ups to maintain true hue.
Can Painting Brick Alter Thermal Performance or Energy Efficiency?
Yes — painting brick can slightly change thermal insulation, depending on paint type and breathability; you’ll see minimal energy savings unless you use specialized insulating coatings, but improper coatings can trap moisture and reduce durability.
Conclusion
You can paint exterior brick without harming it, but you’ll need to prep, test for moisture, and pick breathable, low-VOC products—so don’t skip the inspection. If you worry paint will trap moisture and ruin the brick, choose a vapor-permeable masonry paint and fix cracks or efflorescence first; that prevents damage and lasts longer. Follow seasonal timing and the checklist, and you’ll get a fresh look that protects rather than harms your home.