How to Paint One Wall a Different Color Stylishly
Decide the wall’s purpose—accent, depth, or focal point—and pick the natural focal wall that complements sightlines and furniture. Test paint swatches at different times to see undertones in your light, then choose an approach: bold contrast, soft tone-on-tone, or textured finish. Prep by patching, sanding, priming, and protecting floors and trim. Cut in with a sash brush, roll in W-patterns, and apply two thin coats. Keep cleaning and touch-ups in mind if you want pro tips and extras.
Decide Your Goal: Accent, Depth, or Focal Point
Before you pick a color, decide why one wall will differ: do you want an accent that pops, added depth that makes the room feel larger, or a clear focal point that draws the eye.
You’ll consider color psychology to set mood — calming blues for relaxation, warm tones for energy, or muted shades for subtlety.
Think about how wall texture will interact with light; a matte finish soaks up color, while a satin or textured surface reflects highlights and boosts depth.
Choose purpose first, then palette and finish so the single wall feels intentional, not accidental.
Find the Natural Focal Wall
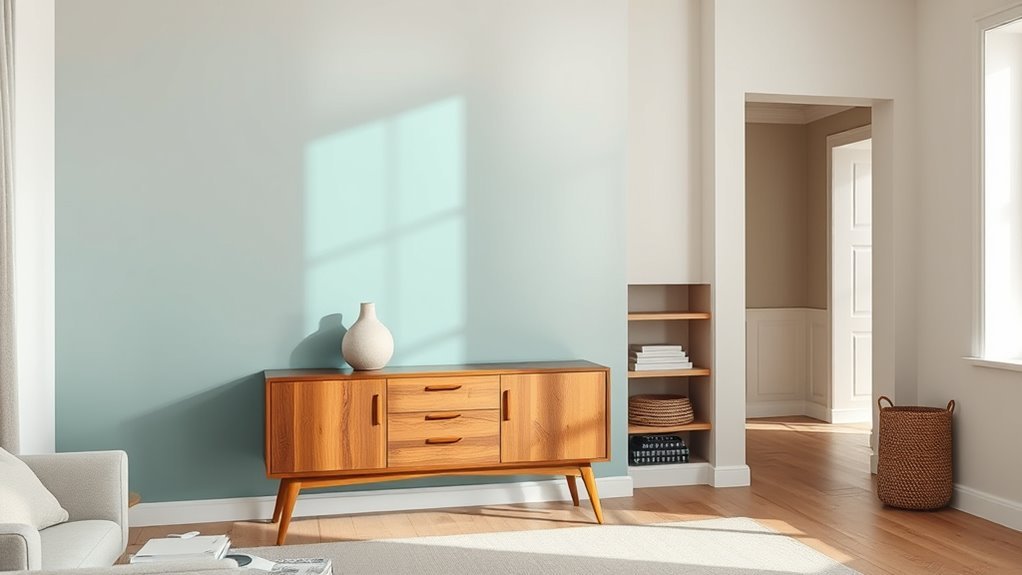
Once you know the purpose of a single-color wall, find the natural focal wall—the one your eye lands on first when you enter the room. Walk in, pause, and note how natural lighting highlights features and how wall texture plays with shadow. Choose the wall that anchors sightlines—often behind a sofa, fireplace, or bed. Favor a wall that complements furniture and circulation, not one cluttered or awkward. Use the table below to evoke how the wall feels and guide your choice.
| Calm | Bold | Cozy |
|---|---|---|
| Fireplace | Sofa | Bed |
| Window | Artwork | Niche |
| Smooth | Textured | Patterned |
Test Light First: Check Undertones and Direction
Because paint looks different under every light, test swatches on the wall where they’ll live and observe them at several times of day. You’ll spot warm or cool undertones that a sample card hid, and notice how morning sun, midday glare, and evening lamps shift hue and value.
Track lighting effects and natural direction to predict how the room will read. Consider color psychology: cooler tones calm, warmer tones energize, but lighting can flip those impressions.
Move swatches around, view from common seating, and photograph them under each light to compare before committing to a final shade.
Choose a Color Strategy: Accent, Contrast, or Tone-on-Tone
If you want the wall to make a statement, decide whether you’ll use it as an accent, a contrasting focal point, or a subtle tone-on-tone backdrop—each approach changes how the room feels and how other elements read.
Choose an accent to highlight furniture or art; pick saturated hues when color symbolism matters, like calming blues or energizing reds.
Use contrast to define architecture and add drama, letting neutrals recede.
Tone-on-tone creates cohesion, layering shades for depth without competing.
Consider the emotional impact you want—stimulating, soothing, or refined—and let that guide your hue and placement for maximum effect.
Match Paint Finish to Room Use
How will the room be used? Consider activity levels, moisture, and traffic when choosing finish.
If you want a calm space, soft matte supports color psychology by muting reflections, creating a cozy backdrop.
For high-traffic areas or kids’ rooms, pick satin or eggshell to boost paint durability and allow easy cleaning.
Bathrooms and kitchens demand semi-gloss or gloss on single accent walls to resist moisture and scuffs.
Remember sheen affects perceived color intensity, so test swatches in different light.
Match finish to function: it preserves the look, makes maintenance simpler, and reinforces the mood you’re aiming for.
Pick Hues That Work With Existing Furniture and Textiles
Start by evaluating the room’s existing color palette so your accent wall complements rather than competes with what you already own. Pay attention to fabric undertones—whether warm or cool—and how they shift under different light.
Then test a few temporary samples against furniture and textiles to see which hue truly works in the space.
Assess Existing Color Palette
Begin by surveying the room’s dominant colors—your larger pieces of furniture, rugs, and curtains—so you can choose a wall hue that ties everything together rather than clashes. Note which shades repeat and whether they feel warm, cool, muted, or vivid.
Use color psychology to decide mood: calming blues, energizing yellows, or grounding earth tones. Reference historical palettes for cohesion if your decor leans vintage or period-specific.
Test small swatches near key furnishings to confirm harmony. Aim for one accent that complements dominant tones and a secondary neutral to bridge contrasts without overwhelming the room.
Consider Fabric Undertones
When you’re choosing a wall color, pay close attention to the undertones in your upholstery, curtains, and rugs—those subtle warm (gold, red) or cool (blue, green) hints will determine which hues will harmonize rather than fight for attention.
Look at fabrics in natural light and note whether their fabric undertones lean warm or cool. Pick a paint tone that echoes those hints to create textile harmony across the room.
If a sofa has warm beige, choose a warm accent; if curtains read cool gray, opt for a cool accent. This keeps the single painted wall feeling intentional and cohesive.
Test With Temporary Samples
Wondering how a swatch will actually read in your room? Use temporary samples—large paper or peel-and-stick swatches—placed on the wall at different times of day. You’ll see how light, shadows, and nearby textiles shift tones.
Move samples near sofas, curtains, and rugs to compare undertones against existing furniture. Take photos at morning and evening light for accurate reference.
During color testing, stand across the room and up close to judge depth and warmth. If a hue clashes, try a lighter or muted version. This hands-on approach guarantees costly mistakes and ensures the painted wall complements your décor.
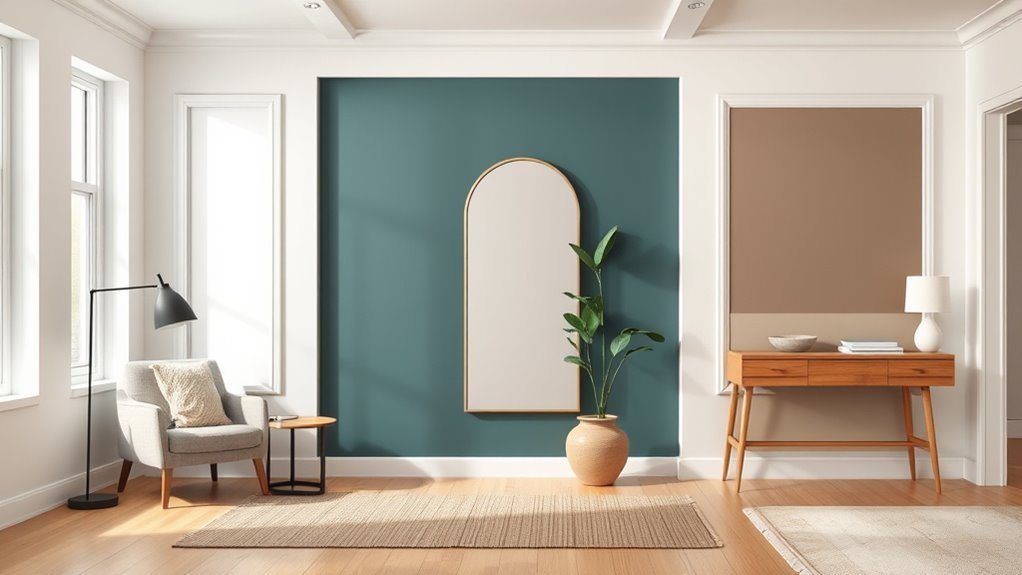
Choose Trim and Ceiling Colors for the Accent Wall
If you want your accent wall to feel polished, pick trim and ceiling colors that either frame it or let it stand alone—think crisp white for contrast, a muted version of the wall color for cohesion, or a soft neutral that keeps focus on the accent.
You’ll decide whether bold trim colors will outline the feature or subtle trim colors will blend it into the room. For ceiling choices, lighter tones open the space while a slightly darker ceiling adds intimacy.
Match sheen levels for clean progressions, and consider existing finishes like woodwork or moldings so the accent wall feels intentional.
How to Test Paint Samples and Swatches
How do you know a color will really work in your space? Test samples on large poster boards and place them around the room at different heights. Observe in morning, afternoon, and evening light to judge true tone and color psychology effects—does it energize or soothe?
- Paint two coats on cardboard and move through the day.
- View from seating and standing positions to assess balance.
- Note how furnishings and metallics alter perception.
- Consider small test areas for paint durability under typical contact.
Record impressions and photos to compare before committing to the full accent wall.
Prep the Wall: Clean, Patch, and Sand
Before you paint, clean the wall to remove dust, grease, and stains so the new color sticks properly.
Patch any holes or cracks with spackling and smooth them flush with the surface.
Finish by sanding for an even, paint-ready texture.
Clean The Surface
Want the new color to look crisp and last? Start with proper surface preparation: remove dust, grease, and cobwebs so paint adheres evenly. Use mild detergent or trisodium phosphate for stubborn grime, wiping top-to-bottom. Rinse and let fully dry. Test for lingering stains that need sealing before priming. Wear gloves and ventilate the room.
- Vacuum and dust high-to-low.
- Degrease kitchens with targeted clean techniques.
- Rinse with clean water; dry completely.
- Inspect under good light for missed spots.
These steps guarantee a clean, stable base so your accent wall stays vibrant.
Patch Holes Smoothly
Now that the wall’s clean, you’ll want to fix any holes or dents so the paint lays smooth and looks professional. Press out loose debris, then fill small holes with premixed spackle using a putty knife. For larger gouges, use patching compound and mesh tape.
Feather the edges so the repair follows the existing wall texture without obvious ridges. Let the patch fully dry.
Apply a thin primer over repairs to equalize absorption and help paint sheen match surrounding areas. You’ll avoid visible spots and guarantee the new color integrates seamlessly with the rest of the wall.
Sand For Evenness
Once the patches are dry, sand the repaired areas and surrounding surface so everything sits flush and your new paint goes on evenly. Use a fine-grit sanding block, light pressure, and circular motions to achieve consistent sand smoothness.
Wipe dust with a damp cloth and let dry before priming. Check edges and progressions by running your hand across the wall; feel for bumps or dips and resand if needed. Final prep guarantees crisp color and professional-looking results.
- Remove loose material
- Sand toward uniform texture
- Clean residue thoroughly
- Inspect by touch and sight
Protect Floors, Fixtures, and Adjacent Walls
How will you keep paint where it belongs? Lay down floor protection—drop cloths or rosin paper—secured with low-tack tape so edges won’t shift. Move small furniture out; cover remaining pieces completely.
For lights, switches, and vents use fixture masking: tape and plastic sheeting prevent splatters and dust from settling. Remove switch plates and cover exposed wiring.
Run tape precisely along baseboards and adjacent walls to create a crisp boundary without relying on heavy-handed brushwork. Check edges after priming; touch any gaps before rolling.
Working methodically keeps clean lines and avoids time-consuming correction later.
Tools and Materials for a Clean Edge
Before you cut in, gather the right tools so you can work quickly and get a sharp line. You’ll need precise items and correct paint selection; choosing satin or eggshell helps hide imperfections. Practice brush techniques on scrap to control pressure and angle. Tape quality and a steady hand matter more than expensive rollers. Prepare surfaces and keep supplies within reach to avoid drips.
Before cutting in, gather quality tools, choose satin or eggshell, and practice brush control for crisp lines.
- Angular sash brush — for controlled edges and consistent stroke.
- Painter’s tape — clean removal, crisp boundary.
- Small roller — fill between cut lines without overload.
- Drop cloths & tray — protect and organize.
Step-by-Step: Paint One Wall
With your tools laid out and the wall prepped, start by cutting a clean outline around trim, ceiling, and corners using the angular sash brush — hold it at a slight angle and use short, steady strokes.
Next, load a roller evenly and work in vertical W-patterns, blending edges into the cut lines while keeping a wet edge.
Apply two thin coats rather than one heavy coat, letting adequate drying time between.
Step back occasionally to assess coverage and balance against your room’s color psychology and overall paint palette.
Finish by removing tape carefully and inspecting seams for uniformity.
Fix Streaks, Lap Marks, and Drips
If you spot streaks, lap marks, or drips, act quickly while the paint is still tacky: smooth out small drips with a clean, wet brush or roller and feather the edges to blend them into the surrounding finish. You’ll want steady brush techniques and mindful drying tips to avoid rework. Work one small area at a time, keeping a damp cloth handy for tiny fixes.
If marks have dried, sand lightly, wipe, and repaint thinly. Follow this concise checklist:
- Check lighting to spot imperfections.
- Use consistent stroke direction.
- Sand and clean dried flaws.
- Apply thin, even touch-ups.
When to Add Stripes, Panels, or Geometric Accents
When you want to make a bold statement or subtly boost depth, add stripes, panels, or geometric accents after the base coat has fully dried and you’ve fixed any surface flaws. That timing guarantees clean lines and prevents tape pull or paint lifting.
Choose Stripes patterns for height or width illusions, using high-quality painter’s tape and a level. Apply panels to frame focal areas, measuring and priming trim first.
Reserve Geometric designs for modern energy—sketch shapes, use low-tack tape, and paint in stages. Let each layer cure before removing tape.
Test samples on scrap drywall to confirm color and edge crispness.
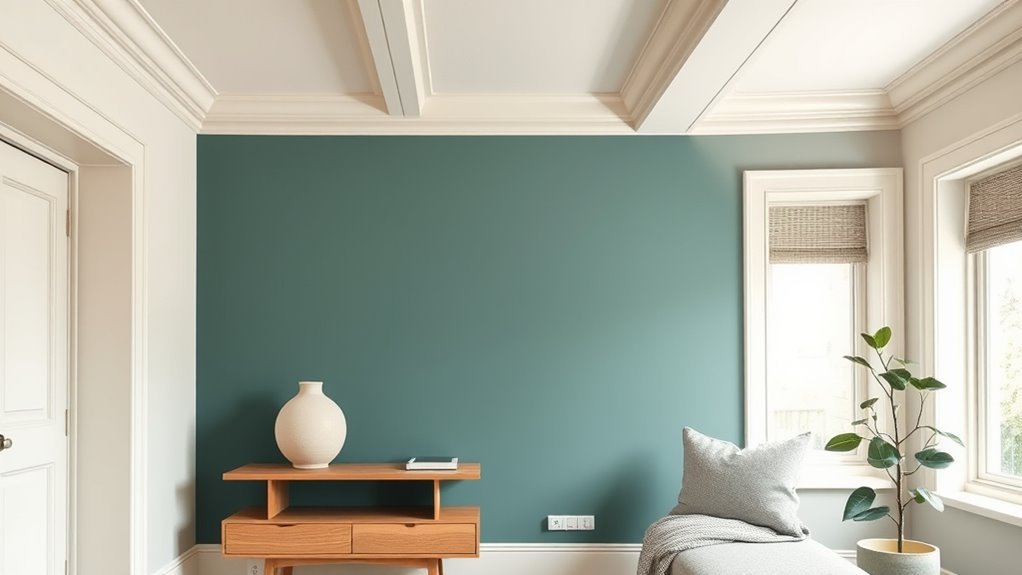
Style Furniture and Art for Your Accent Wall
Because an accent wall already anchors the room, style furniture and art to complement rather than compete—place larger, low-profile pieces like a streamlined sofa or console to balance the color. Hang art slightly off-center for a relaxed look, and use lighting and layered accessories to tie the wall into the rest of the space.
Because an accent wall anchors the room, style low-profile furniture, off-center art, and layered lighting to complement it.
You’ll focus on furniture pairing and art placement to enhance scale, rhythm, and mood. Keep proportions right, choose contrast or harmony, and let negative space breathe. Use cohesive textures and a limited palette so the accent wall feels intentional, not overpowering.
- Scale items to wall size
- Align focal points
- Layer lighting
- Edit accessories
Budget-Friendly Alternatives to Painting
Although you might love the look of a painted accent wall, you don’t have to commit to paint to get big visual impact—there are several budget-friendly options that give color, texture, and personality without the cost or effort of a full paint job.
Try removable wallpaper or large-scale decals for instant pattern. Hang a colorful tapestry, gallery cluster, or fabric panel to add hue and softness.
Use peel-and-stick tiles or adhesive wood planks as affordable alternative finishes that mimic real materials.
Even strategically placed shelving, mirrors, or a vibrant rug hung vertically work as clever budget swaps to transform the focal wall.
When to Hire a Pro: Tricky Walls and Textures
If your wall has uneven plaster, heavy texture, or intricate trim, call in a pro—these conditions demand specialized tools and techniques to get a smooth, durable finish. You’ll save time and avoid costly mistakes when a painter with professional expertise evaluates adhesion, priming needs, and whether skim-coating or sanding is required.
Textured surfaces often need specific rollers, spray equipment, or hand tools to keep pattern integrity while achieving coverage. Consider hiring when patterns are historic, surfaces crumble, or lines must be crisp around moldings.
Trusting a pro preserves the surface and guarantees a long-lasting, stylish accent.
Trust a pro to protect your walls and deliver a durable, stylish accent that lasts.
- Safety
- Assessment
- Technique
- Warranty
Maintain Your Accent Wall: Cleaning and Touch-Ups
Keep your accent wall looking sharp with a quick weekly dusting to remove dirt and prevent buildup.
For fingerprints or smudges, spot-clean gently with a soft cloth and mild detergent, testing an inconspicuous area first.
If paint chips appear, do small touch-ups with matching paint and a fine brush to blend repairs seamlessly.
Weekly Dust And Dirt
Want to keep that accent wall looking fresh all week? You’ll want a quick routine to prevent weekly dust and stop dirt buildup from dulling color. Use gentle tools, stay consistent, and check problem spots regularly. Focus on proactive care so touch-ups stay minimal.
- Vacuum with a soft brush attachment weekly to remove surface dust.
- Microfiber-dust the wall top-to-bottom to catch lingering particles.
- Keep vents and windows screened to reduce incoming dirt buildup.
- Rotate furniture and décor occasionally to prevent uneven fading and grime.
Stick to this plan, and your accent wall will keep its impact.
Spot Cleaning Techniques
When a splash or smudge appears on your accent wall, act quickly with the right method so stains don’t set or spread. Start by identifying the paint finish and testing your cleaner on an inconspicuous spot.
For latex or washable finishes, dampen a microfiber cloth with mild dish soap and water, blotting gently from edges inward. For stubborn marks, use a diluted vinegar solution or a melamine sponge sparingly to avoid dulling sheen. Always rinse and dry the area to prevent residue.
For delicate or flat paints, stick to dry erasers or light blotting.
Regular spot cleaning preserves color and avoids bigger repairs.
Small Paint Touch-Ups
If a nick or chip appears on your accent wall, don’t ignore it—small touch-ups are quick to do and prevent the blemish from becoming an eyesore. You’ll want matching paint, a fine brush, and a steady hand.
Clean the area, sand lightly, and apply thin layers, letting each dry. Small repairs preserve paint durability and reinforce the color psychology you chose to influence the room’s mood.
Follow these focused steps:
- Clean and inspect the damage.
- Sand and prime if needed.
- Apply matching paint in thin coats.
- Blend edges and let cure fully.
Frequently Asked Questions
Can an Accent Wall Affect My Home’s Resale Value?
Yes — it can. You’ll influence buyers with color psychology and current interior design trends; bold or outdated accents might deter some, while tasteful, neutral choices can boost appeal and resale value across broader markets.
How Do I Transition Accent Wall Color Between Connected Rooms?
Like a ribbon tying rooms together, you’ll use color coordination and subtle shift techniques: choose a shared undertone, paint a thin border or half-wall, or add trim and decor to blend hues so spaces feel seamless and intentional.
Will Painting One Wall Impact Room Acoustics?
Yes — painting one wall can slightly change acoustics: matte paint and textured finishes improve acoustic dampening, while glossy surfaces increase sound reflection. You’ll notice subtle differences, especially in smaller or highly reflective rooms.
Can I Use Wallpaper Instead of Paint on the Accent Wall?
Yes — you can use wallpaper instead of paint; you’ll get texture and pattern, but consider wallpaper alternatives and color shift techniques to blend edges, manage scale, and guarantee cohesive flow with adjoining painted walls and room decor.
How Long Before Hanging Art or Shelves on Freshly Painted Wall?
Like watching paint breathe, wait 24–48 hours before hanging art or shelves; full cure can take up to 30 days. You’ll speed things by using proper wall preparation techniques and following paint drying time on the can.
Conclusion
You’ve learned how to pick the right wall, test light, and choose finish and color, but here’s a theory worth checking: painting one wall actually makes rooms feel smarter, not bigger. Try it—pick a wall, test swatches at different times, and live with it a week. If the room feels sharper and your furniture pops, the theory’s true for you. If not, tweak tone or try a tone-on-tone fix. Small change, big personality.