How to Paint Over Holes in Wall (Easy Fix Guide)
You can quickly fix and paint over most wall holes by matching patch method to size: use lightweight spackle for nail holes, premixed patching compound for medium dents, and a mesh-backed drywall patch with setting compound for large gaps. Sand smooth, remove dust, prime the patched area, then feather your paint outward with a brush or mini-roller, matching sheen and texture. Allow proper drying between coats to avoid shrinkage, and keep going to learn pro tips for seamless blending.
Quick Fix: When You Can Paint Over Holes Without Plastering

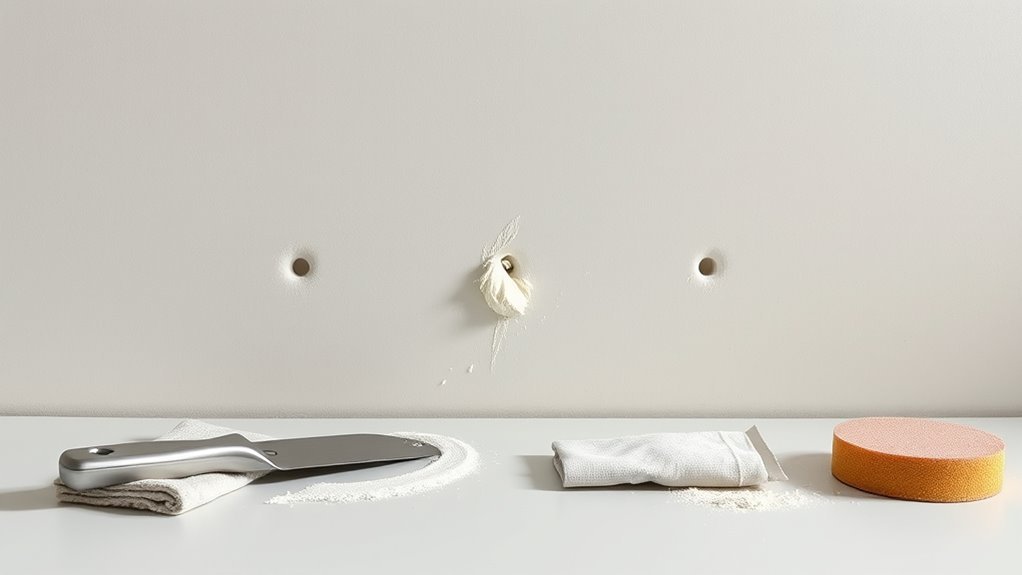
If the hole is small—think nail or screw holes up to about 1/4 inch—you can skip plastering and paint right over a simple repair. You’ll clean the area, apply a dab of spackling with a putty knife, let it dry, then sand smooth and prime before painting.
This fast approach preserves wall decoration and won’t disrupt nearby furniture placement. Use matching paint and feather edges so the patch blends.
For grouped tiny holes, fill them all at once to save time. Don’t skip priming on bare spots; it keeps sheen and color consistent.
How to Identify Hole Size and Type
Wondering whether that wall damage needs a quick dab of spackle or a bigger repair? First, measure the hole: coin-sized or smaller is simple; fist-sized or larger needs patching.
Check depth—surface chip, puncture through drywall, or missing backing—so you know if you’ll need backing support.
Examine wall texture around the hole; matching texture matters for a seamless repair. Note paint sheen nearby—matte hides imperfections better than glossy, which highlights edges.
Finally, inspect for moisture, crumbling paper, or electrical/plumbing nearby. Those indicate a more involved fix or professional help before you paint.
Essential Tools and a 5-Minute Grab-List
Before you start patching, gather the basic tools you’ll need so the job goes fast and clean. Keep a quick 5-minute grab-list handy—sandpaper, spackle, putty knife, primer, paint, and a small roller or brush cover most fixes.
With those items ready, you can move from prep to paint without interruption.
Tools You’ll Need
While you don’t need a truckload of gear, having the right tools makes patching and painting holes quick and clean — and you’ll want a small kit ready before you start. Consider basics plus items to judge Color theory and match paint to wall textures so repairs disappear. You’ll need tools for prep, patching, sanding, and finishing.
| Tool | Purpose |
|---|---|
| Putty knife | Apply and smooth filler |
| Sandpaper | Blend repairs with texture |
| Spackle/patch | Fill holes |
| Paint + brush/roller | Match color and finish |
Keep things simple and organized for efficient, neat results.
Quick Grab-List
If you only have five minutes, grab a basic kit that covers prep, patching, sanding, and touch-up so you can stop a small hole from becoming a bigger headache.
In your quick grab-list include: a spackling compound or patch, a putty knife, fine-grit sandpaper, a small paintbrush or roller, painter’s tape, a damp cloth, and a disposable tray.
Keep a few extra items handy for styling: a sample of wall paint and a mounting patch if you plan creative wall art or to adjust furniture placement later.
Store this compact kit near your entry or toolbox for fast fixes.
Which Patching Compound to Use for Small, Medium, and Large Holes
When you’re choosing a patching compound, match the product to the hole size and the surface so the repair stays strong and invisible.
For tiny nail or pinholes, use lightweight spackling; it dries fast and sands smooth, letting you match wall texture and paint sheen quickly.
For tiny nail or pinholes, use lightweight spackling — dries fast, sands smooth, and matches texture and sheen.
For medium holes (about dime to tennis-ball size), use premixed patching compound or vinyl spackle; apply in thin layers, sand, and feather edges.
For large holes, use a setting-type joint compound or patching plaster with backing (mesh or drywall patch) to restore structure before finishing.
Always read cure times and sand between coats.
Patch Nail and Screw Holes in One Minute
You can fix nail and screw holes in about a minute with a couple quick prep steps: wipe away dust and gently widen the hole with a screwdriver tip.
Then use a fast-setting spackling product or a squeeze-tube filler and press it in, scraping off the excess with a putty knife or a credit card.
Let it set briefly, sand smooth if needed, and it’s ready for paint.
Quick Prep Steps
Since small nail and screw holes can ruin a fresh paint job, grab lightweight spackling, a putty knife, and a damp cloth to patch them fast.
Work in a well-lit area so you can spot holes among decorating ideas and wall patterns before you start.
Lightly sand any rough edges, wipe dust away with the damp cloth, and verify the surface is dry.
Use the putty knife to press a small amount of spackling into each hole, smoothing flush with the wall.
Let it dry per directions, then sand lightly for a seamless base ready for primer and paint.
Fast Fill Technique
Although it sounds too good to be true, you can patch most nail and screw holes in about a minute using the fast-fill technique. You’ll need spackle or lightweight joint compound, a putty knife, and a damp sponge.
Press spackle into the hole, wipe excess flush with the wall, and feather edges for a smooth finish. Let it dry briefly—many fast-fill products set quickly—then sand lightly if needed.
Match wall textures by dabbing with a sponge or stipple brush before it fully sets. These decorating tips help blend repairs seamlessly so paint covers without obvious touch-ups.
Fix Small Dents and Furniture Dings Fast
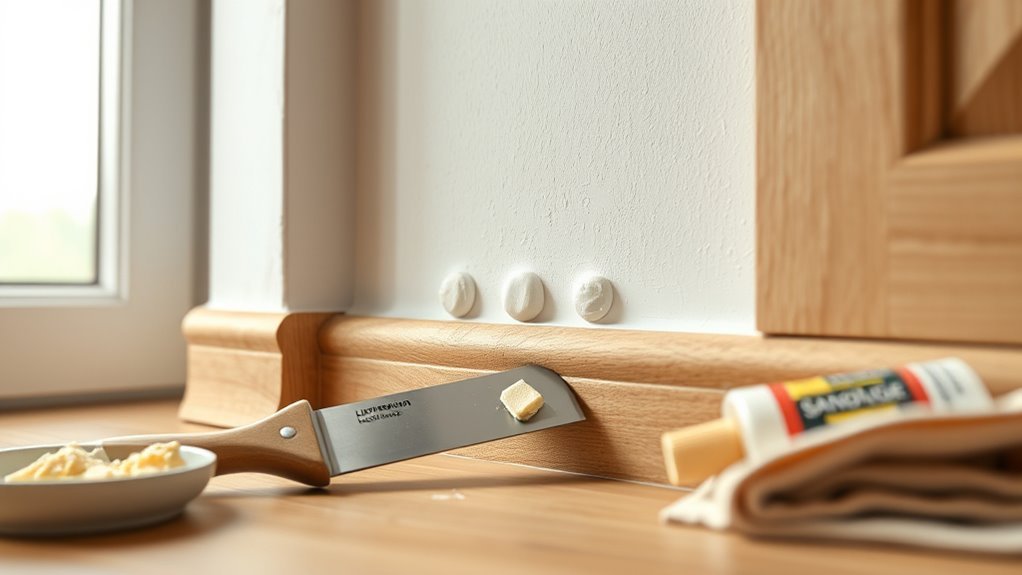
When a chair leg or table edge leaves a shallow dent, grab lightweight spackle and a flexible putty knife to restore the surface quickly. Clean the area, remove loose paint, and slightly roughen glossy spots so filler bonds.
Press spackle into the ding, smooth flush with the wall, and feather edges for an invisible blend. Let it dry fully, sand lightly with fine-grit paper, then wipe dust away.
Prime the repair spot before painting to match sheen. Consider adjusting furniture arrangement or wall art placement to prevent repeats and protect freshly fixed areas from future knocks.
Repair Medium Drywall Holes With Mesh and Putty
If you’ve got a medium-sized hole—from a doorknob mishap or a misplaced anchor—repairing it with self-adhesive mesh and joint compound is straightforward and durable.
Clean edges, press mesh over the hole, then apply a thin layer of putty with a drywall knife. Let it dry, sand smooth, and repeat two thin coats to build strength without altering drywall texture.
Feather edges so the surface blends; sand again. Prime the patch, match paint sheen, and paint.
You’ll get a seamless repair that holds up to traffic and won’t show once the finish matches surrounding wall surfaces.
Patch Large Holes With a Backing Patch or Drywall Piece
Medium repairs with mesh and compound work well for holes up to a few inches, but larger breaches need more structure to hold the patch and support the finish.
For big holes, cut a square around the damage, insert a backing patch or screw a small wood brace behind the opening, then fit a drywall piece to the hole.
Tape seams, apply joint compound in thin layers, and sand smooth.
Match wall texture before paint blending by using the right texture tool or spray.
Prime the repaired area, then paint, feathering edges so the patch disappears into the surrounding wall.
How Long Each Patching Method Takes to Dry
Because drying times vary by material and conditions, you’ll want to plan repairs around the product you use and the room environment.
Lightweight spackle usually dries to the touch in 30 minutes and is paintable in 1–2 hours; it’s great for small dents and preserves delicate wall textures.
Lightweight spackle dries to the touch in about 30 minutes and can be painted within 1–2 hours.
All-purpose joint compound needs 24 hours or more for thicker fills, and setting-type compounds cure in 20–90 minutes depending on the formula.
Patch kits with premixed compounds follow manufacturer times.
Humidity, temperature, and ventilation affect curing and subsequent color matching when comparing paint, so let each layer fully dry before repainting.
How Much to Sand Before Painting Patched Holes
You’ll want to sand the patch until the surface is smooth and flush with the surrounding wall so the paint lays evenly.
Feather the edges gently so there’s no visible ridge where the patch meets the existing finish.
Wipe or vacuum away all dust before priming or painting to guarantee proper adhesion.
Surface Smoothness Level
When you’re prepping patched holes for paint, aim to sand just enough to make the repair flush with the surrounding wall without digging out the filler; keep passes light and check frequently. You want a smooth, even plane so surface durability isn’t compromised and paint adhesion is reliable.
Use fine-grit sandpaper and a sanding block to control pressure; remove dust with a damp cloth before priming.
If the patch still shows low spots, add thin filler and sand again lightly. Avoid over-sanding hard edges or the surrounding paper layer, which can weaken the wall and create visible defects.
Feathering The Edges
As you finish sanding the patch, feather the edges so the repair slopes gently into the surrounding wall rather than ending abruptly. You want subtle Feathering edges for good Surface blending; sand progressively lighter toward the wall so the joint disappears. Test by running your hand over the area; it should feel smooth and level. Avoid over-sanding which creates depressions. Use a fine-grit block and wrap to control pressure. If needed, apply a thin skim, let it dry, and sand again until seamless. Below is a quick guide:
| Step | Action |
|---|---|
| 1 | Sand center |
| 2 | Feather out |
Dust Removal Needs
Before you paint, remove all sanding dust so the repair bonds and the finish looks smooth; even a thin film can prevent primer and paint from adhering evenly.
Lightly sand patched areas until they’re flush with surrounding drywall or plaster, then vacuum with a brush attachment and wipe with a damp microfiber cloth.
Check for remaining particles by running your hand over the surface—no grit should transfer.
Match sanding level to wall textures to avoid flattening raised patterns.
Once dry, apply tack cloths if needed.
Final cleaning guarantees consistent primer absorption and uniform paint sheen across repaired and original surfaces.
Sanding Tips for a Smooth, Invisible Surface
If you want an invisible repair, sand the patched area with a light, consistent touch using fine-grit sandpaper (120–220 grit) and a sanding block to keep the surface flat. Work in small circles, check edges for feathering, and remove dust between passes. Focus on texture matching so the patch reads like the wall, and consider nearby patterns before finishing. For color blending, keep edges smooth to avoid visible ridges that catch paint. Use a clean cloth to wipe residue and inspect under angled light.
| Step | Tool | Goal |
|---|---|---|
| 1 | Sandpaper | Smooth edges |
| 2 | Block | Even surface |
| 3 | Cloth | Dust-free finish |
When and How to Prime Patched Areas
You should prime patched areas once the filler is fully dry and sanded smooth to seal the porous surface and guarantee even paint adhesion.
Use a stain-blocking or all-purpose primer and apply a thin, even coat with a brush or roller, feathering into the surrounding wall.
Let the primer dry completely before painting to avoid texture or sheen differences.
When To Prime
Although a small patch might look ready, you should prime any repaired area that’s been sanded, filled, or exposed to drywall paper—priming seals porous surfaces and helps paint adhere evenly so the finish won’t soak in or show patch outlines. You’ll follow a priming schedule: prime after final sanding, once dust is removed and filler fully cured. For priming importance, choose a stain-blocking or drywall primer for visible repairs. Prime small spots before full-wall painting to blend sheen. See quick reference:
| Stage | When | Primer type |
|---|---|---|
| Fresh patch | After cure | Drywall primer |
| Sanded patch | Dust-free | Stain-blocking |
| Large repair | Before topcoat | High-build primer |
How To Prime
Once the filler’s fully cured and you’ve removed all dust, go ahead and prime the patched area to seal it and promote even paint adhesion. Choose a stain-blocking or all-purpose primer that suits your wall finish.
Use a brush for edges and a small roller for flat spots, applying thin, even coats. Allow recommended drying time between coats.
Sand lightly with fine grit if the primer raises texture, then wipe clean.
For porous repairs, two thin coats improve coverage.
These priming techniques guarantee uniform sheen and strong paint adhesion, preventing flashing or color shift when you topcoat.
Match Paint Color Without a Tint Run
When matching paint without a tint run, start by taking a small, flat sample—like a paint chip or a trimmed piece from inside a closet—to the store so the color analyzer gets a true reading. You’ll also bring a photo of the wall under natural light to confirm hues.
Ask the clerk to batch-mix a small test can and request clear notes on the formula for future touch-ups. Test the sample on your wall, let it dry fully, and view at different times of day.
Prioritize color matching and tint consistency over brand; subtle sheen differences matter, too.
Best Brushes and Rollers for Painting Over Patched Holes
When you’re covering patched holes, choosing the right brush makes crisp edges and blends the repair into the wall. You’ll want a high-quality angled brush for trim and a soft-bristled sash brush for feathering around the patch.
For larger areas, pick a short-nap roller that matches your wall texture to avoid leaving roller marks.
Choosing The Right Brush
Although picking a brush might seem minor compared with prepping and patching, the right tools make blending patched areas into the surrounding wall far easier. Choosing the right brush depends on paint type and the wall texture you’re matching.
For small repairs, use a sash brush for control.
For slightly larger areas, choose a 2–3″ angled brush to feather edges.
Natural bristles suit oil-based paints; synthetic works for latex.
Keep bristles clean and slightly damp for smoother application.
Test on a scrap before finishing to confirm blend and stroke direction.
- Sash brush (small detail)
- 2–3″ angled brush (feathering)
- Synthetic bristles (latex)
Picking The Best Roller
If you want a seamless finish over patched holes, pick a roller that matches the wall’s texture and the paint type—smooth walls need a short-nap roller (1/4″–3/8″) for even coverage.
Lightly textured or orange-peel surfaces benefit from a 3/8″–1/2″ nap to carry enough paint into crevices.
For heavy texture, use a 3/4″ nap.
Choose synthetic fibers for latex and natural fibers for oil-based paints.
Match the roller width to the area: 9″ for walls, 4″ for touch-ups.
Prioritize consistent roller density to avoid stippling.
Test on a scrap patch for color matching and preferred roller selection before finishing.
How to Blend Paint Into Textured Walls
Want your repair to disappear into the wall instead of standing out like a patch? You’ll need precise texture matching and careful color blending.
First, recreate the wall’s texture with compound—dab, swirl, or stipple to match grain. Next, sand lightly once dry so the surface reads consistently under paint. Then prime the patch to equalize sheen and porosity before painting.
Recreate the texture with compound, sand lightly when dry, then prime to equalize sheen and porosity before painting.
When you paint, feather edges and use thin layers, matching sheen and sheen direction. Finally, compare in different light and add tiny adjustments.
Follow these steps and your fix will blend seamlessly into textured walls.
- Match texture
- Prime patch
- Feather paint
Quick Touch-Up Technique for Flat and Eggshell Finishes
When you need a fast, nearly invisible repair on flat or eggshell walls, work quickly with thin layers and the right tools to avoid lap marks and sheen differences. Start by sanding the patch flush and wiping dust away.
Test color matching by dabbing a small swatch from your touch-up paint; let it dry to judge true tone. If you’re covering bare joint compound, use a thin coat of appropriate primer types—stain-blocking for discoloration, bonding primer for porous spots—then feather paint outward with a small brush or mini-roller.
Build thin coats, letting each dry fully before evaluating blend.
Painting Over Repaired Areas on Semi-Gloss and High-Gloss Walls
Switching from flat or eggshell to semi-gloss and high-gloss finishes requires a different approach because these sheens highlight imperfections and brush marks. You’ll need careful color matching and texture blending to make repairs disappear.
Sand repaired spots smooth, feather edges, then use a quality primer designed for glossy surfaces. Apply thin coats, allowing full drying and light sanding between coats to reduce brush strokes.
- Use primer suited for gloss.
- Match paint sheen and color precisely.
- Sand lightly between thin topcoats for even texture blending and a seamless finish.
How to Prevent Cracks and Shrinkage After Repair
Because patched drywall and filler can settle as they dry, you’ll want to take a few preventive steps to stop cracks and shrinkage before you paint. Use thin, even coats of joint compound, allow full drying between layers, and sand lightly. Apply a quality primer to seal pores, reducing movement and assisting in Preventing mold by blocking spores. Control humidity and Handling moisture around the repair—fix leaks, ventilate, and avoid painting during damp conditions. Reinforce larger patches with tape or mesh to distribute stress.
| Step | Action | Timing |
|---|---|---|
| 1 | Thin coats | Between coats |
| 2 | Primer | After sanding |
| 3 | Ventilate | Before painting |
Common Mistakes That Make Patches Obvious: And How to Avoid Them
If you rush, skip sanding, or use the wrong primer, patched spots will stand out no matter how neatly you filled them. You’ll also make patches obvious by mismatching paint sheen, overloading filler, or ignoring surface texture. Focus on color matching and texture blending before you paint. Prep carefully, feather edges, and use the right primer.
- Don’t overfill — level the patch to the surrounding plane.
- Don’t skip sanding — smooth transitions hide repairs.
- Don’t ignore sheen and texture — match finish and reproduce wall texture.
Take time on these steps and your repair will blend seamlessly.
Troubleshooting: Paint Still Shows the Repair-What to Try Next
When paint still reveals the repair, don’t assume it’s hopeless—there are targeted fixes you can try to make the patch disappear.
First, check surface prep: sand feathered edges and remove dust so paint sits evenly.
If color looks off, redo Paint color matching—use a sample pot or get a professional match; test on a scrap and view in different light.
For visible seams, focus on Wall texture blending: replicate surrounding texture with joint compound, a sponge, or stipple brush, then prime.
Finally, apply thin, even coats and let them dry fully between layers for a seamless finish.
Frequently Asked Questions
Can I Paint Over Holes on Plaster Walls Versus Drywall?
Yes—you can paint over holes in plaster or drywall after proper surface preparation; you’ll patch, sand, prime, then paint. Make sure you’re doing paint matching so the repaired area blends with the surrounding wall finish.
Will Humidity Affect the Adhesion of Patching Compounds and Paint?
Yes — because humidity impact is real, it can sabotage your patience: you’ll notice adhesion problems when compounds cure slowly or paint won’t bond. Work in low humidity, use proper primers, and follow makers’ drying times.
Can I Use Leftover Paint From Another Room for Touch-Ups?
Yes, you can use leftover paint from another room for touch-ups, but you’ll need good color matching and proper prep; otherwise paint durability and finish may vary, so test a small area and consider tinting or a fresh can.
Are There Pet-Safe or Low-Odor Patching and Painting Options?
Good news: you won’t need heavy chemicals. You can choose pet safe options like water-based spackle and low odor patching compounds, plus zero-VOC paints, so you won’t disturb pets or linger with harsh smells.
How Long Before Hanging Pictures on a Newly Patched and Painted Area?
Wait at least 24–48 hours before hanging pictures so the patch and paint fully cure; smoother wall texture and higher paint sheen can dry faster, but heavier frames need longer cure time and firmer anchor installation.
Conclusion
You’ve followed each quick step, smoothed the patch, and let it dry—now step back and squint. Does the wall look whole, or does your eye snag on a ghosted outline? If it’s seamless, you’re done; if not, don’t panic. Sand a hair fine, feather more compound, or add a thin glaze of paint to blend edges. Keep adjusting until the patch vanishes—then stand back and let the room pretend it was never marred.