How to Paint Part of a Wall (Accent Wall Guide)
Pick a focal wall, test colors in the room, and measure the area you want to paint. Prep: clean, patch, sand, and prime any repairs. Use level lines and painter’s tape for crisp edges, paint with a roller and cut in with a brush, apply two thin coats, then remove tape carefully. Touch up, style with furniture and lighting, and follow safety and cleanup steps. Keep going for tips on finishes, textures, and pro vs. DIY choices.
What You’ll Learn
What’ll you learn? You’ll get practical steps to paint part of a wall, choose colors that complement interior lighting, and position painted sections to enhance furniture arrangements.
You’ll learn prepping surfaces, selecting tape and trims, cutting clean lines, and blending coats for even coverage. You’ll discover simple color theory to pick hues that read well in daylight and artificial light, plus tips for sampling swatches.
You’ll also learn how to scale painted areas to room size, protect floors and fixtures, and troubleshoot common issues like bleed-through and uneven sheen so your partial wall looks intentional and polished.
Is an Accent Wall Right for Your Room?
Wondering if an accent wall will work in your room? Think about mood, function, and scale. You want a change that complements existing furniture and lighting, not competes.
Use color psychology to match intent: calming blues for bedrooms, energizing yellows for kitchens, or grounding neutrals for living spaces. Consider traffic flow and sightlines so the accent doesn’t overwhelm daily use.
If your room already has bold patterns or limited space, a full reframe might be too busy. An accent wall should enhance the room’s purpose and feel—subtle enough to harmonize, bold enough to bring focus.
Choose the Best Wall for Impact
Pick the wall that naturally becomes the room’s focal point—where your eye lands first or where furniture clusters. Consider how light hits that wall at different times of day and how the painted section will affect traffic flow and sightlines.
Choosing a spot with good natural light and clear visibility will maximize the impact of your paint.
Focal Point Selection
Which wall will naturally draw the eye when you walk into the room? You’ll pick a focal wall that complements furniture, highlights architecture, and respects color psychology and wall durability. Choose a wall with minimal clutter and easy access for painting; avoid obstructed or high-traffic surfaces that need frequent touch-ups. Consider where you want attention to land—art, fireplace, or TV—and guarantee the surface condition suits your finish choice.
| Feature | Why it matters |
|---|---|
| Sightline | Directs attention |
| Surface | Affects prep time |
| Function | Matches use |
| Contrast | Enhances focus |
Light And Flow
How does natural and artificial light shape the way a painted wall reads in your room? You’ll pick the best wall by watching light flow through windows and fixtures at different times.
Position an accent where morning or evening sun enhances texture and hue, or where your lighting design highlights color without glare.
Consider traffic patterns so the wall greets people and anchors movement.
Use color psychology to match mood—calming tones near restful areas, energizing shades where activity happens.
Test samples under real light, then stand back and watch how light and flow decide the wall’s true impact.
Pick a Color to Get the Effect You Want
When you choose a color for a wall accent, think about the mood and visual effect you want—deep blues and charcoals add drama and depth, while pale shades and soft hues make a space feel larger and airier.
Pick tones that support your room’s purpose: energizing colors for activity zones, soothing shades for bedrooms.
Use color psychology to guide choices—warm colors advance, cool colors recede.
Consider existing furnishings and natural light so the accent complements rather than clashes.
Test samples on the wall, observe at different times, and commit once the hue delivers the mood enhancement you *desired*.
Best Finishes and Textures for Accent Walls
You’ll want to weigh finish choices like matte versus eggshell since they change how color reads and hides imperfections.
Textured paints can add depth and interest if you want a tactile focal point.
For a bold, modern look, consider a high-gloss accent to reflect light and make colors pop.
Matte Vs. Eggshell
Although both matte and eggshell finishes can suit an accent wall, they behave differently under light and wear.
You’ll choose a matte finish when you want a velvety, low-reflection look that hides wall imperfections and creates depth. It’s forgiving but harder to clean, so avoid high-traffic areas.
An eggshell sheen offers a soft luster with slightly better durability and washability, making it practical for living rooms and hallways. You’ll notice eggshell reflects light subtly, which can brighten color and reveal texture.
Match finish to room use: pick matte for mood and concealment, eggshell for easy maintenance and subtle glow.
Textured Paint Options
If you want an accent wall that adds tactile interest as well as color, textured paints give you a range of finishes—from subtle sand and suede to bold knockdown and Venetian plaster—that change how light and shadow play across the surface.
Choose textured paint for camouflage of imperfections or to create depth; apply with trowels, rollers, or specialty brushes for varied effects.
Consider decorative finishes like metallic glazes or ragging for subtle sheen without high gloss.
Test samples on poster board, view them at different times of day, and seal porous textures with a compatible clear coat to protect your accent wall.
High-Gloss Accent Ideas
When you want an accent wall that reads sleek and modern or boldly reflective, high-gloss finishes deliver maximum depth and light play. You’ll love how color psychology shifts with sheen: saturated hues feel more intense, neutrals gain polish.
Consider lighting effects—natural or layered artificial light amplifies gloss, creating dramatic reflections and perceived space.
Prep carefully: smooth surface, fine sanding, and proper primer ensure flawless shine.
Try contrast trims or matte furnishings to balance glare.
Pick durable, washable gloss for high-traffic rooms.
- Deep jewel tones for drama
- Pale gloss for subtle expansion
- Metallic-infused gloss for shimmer
- Two-tone gloss and matte combo
How Much Paint and Supplies You Need
Because you’ll want to avoid trips to the store mid-job, figure out paint and supplies before you open a can. Measure the accent area’s square footage, account for two coats, and check the paint’s coverage per gallon. Consider color psychology when choosing finish and hue—darker shades may need extra coats.
Prioritize paint durability for high-traffic zones; tougher formulas mean fewer touch-ups. Calculate primer if you’re covering strong contrast or raw drywall. Add a bit extra (10–15%) for touch-ups.
Don’t forget consumables: drop cloths, tape, rollers, brushes, trays, and replacement roller covers for even application.
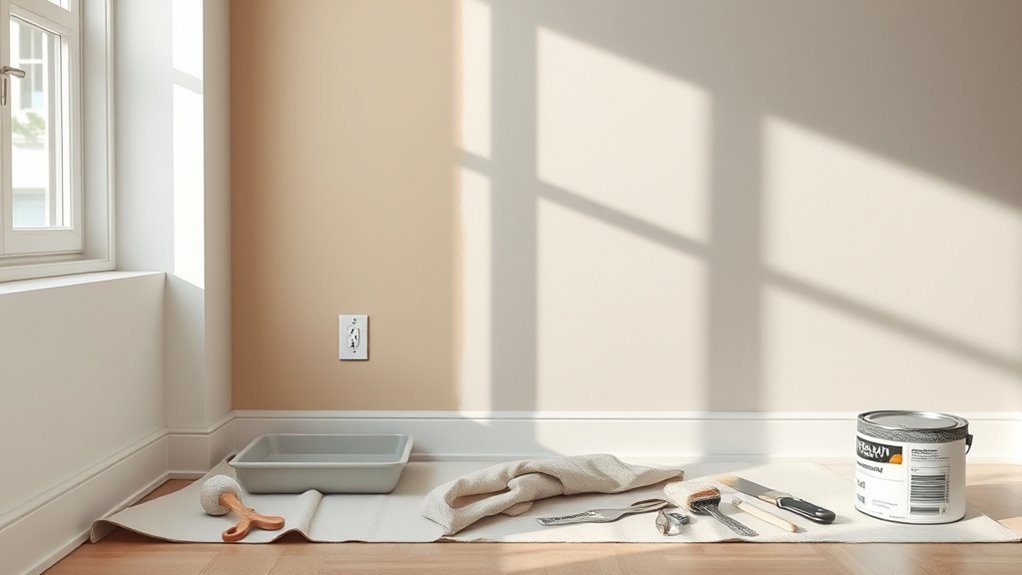
Tools and Materials Checklist
Before you start painting, make a clear checklist of essential tools like brushes, rollers, a tray, and drop cloths so you won’t stop mid-job.
Pick the right paint type and calculate quantities based on your measured area and the paint’s coverage.
Don’t forget surface prep supplies—sandpaper, patching compound, primer, and masking tape—to guarantee a smooth, lasting finish.
Essential Painting Tools
If you want clean, efficient results, gather the right tools and materials before you open a paint can. You’ll want tools that help execute color psychology choices and protect finishes so paint durability isn’t compromised. Choose quality over shortcuts to save time and avoid touch-ups.
- High-quality angled brush for cutting edges and trim.
- Roller frame and appropriate nap roller for smooth coverage.
- Painter’s tape, drop cloths, and corner guards to protect adjacent surfaces.
- Sandpaper, spackling knife, and a good putty to prep and smooth before painting.
Paint Types And Quantities
When you pick paint, match the formula to the room’s needs—latex for easy cleanup and durability in living spaces, oil-based for trim and high-traffic areas that need extra hardness, and specialty paints (mildew-resistant, low-VOC, or primer-plus-paint) where specific performance matters.
Choose finish by function: flat hides flaws, eggshell and satin balance washability and subtle sheen, semi-gloss or gloss suit trim.
Consider color psychology when selecting accent hues to set mood.
Calculate quantity: measure square footage, subtract doors and windows, and plan two coats plus touch-ups.
Buy a little extra to guarantee consistent color and paint durability.
Surface Prep Supplies
Since prep makes the difference between a crisp edge and a sloppy finish, gather the right tools and materials before you open a can of paint. You’ll need supplies to clean, repair, mask, and protect surfaces—especially if you’re removing wallpaper patterns or touching areas near vents where wall insulation shows. Check for nails, loose trim, and dust.
- Sandpaper, spackle, putty knife, and scraper
- Painter’s tape, drop cloths, and plastic sheeting
- Primer suited for patched areas and seams
- Vacuum, tack cloths, and a damp sponge
Organize everything so you won’t interrupt your workflow.
Prep: Clean, Repair, and Prime the Wall
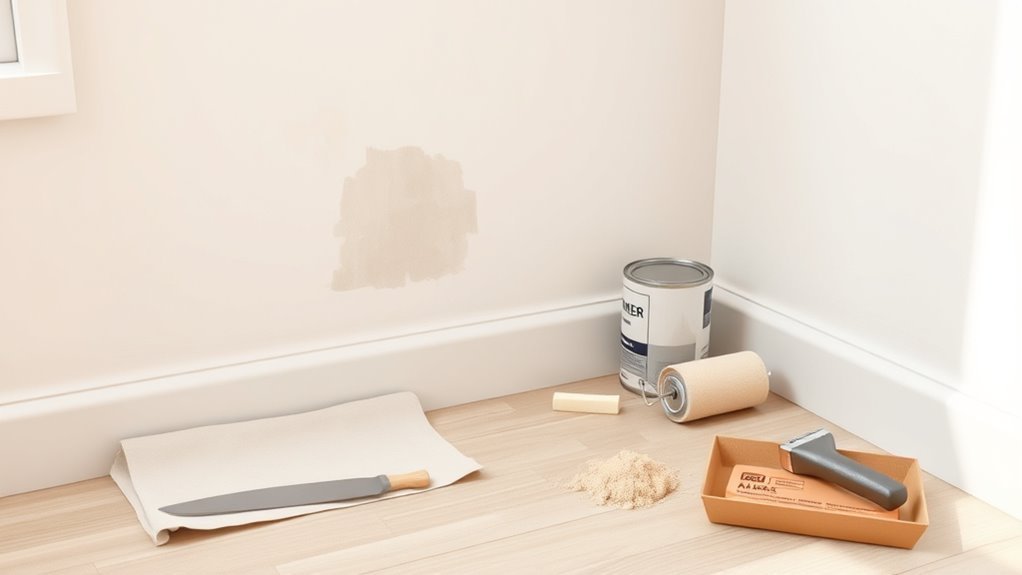
Although it might seem tedious, prepping the wall—cleaning, repairing, and priming—makes the paint job look professional and last longer. You’ll remove dust, grease, and loose paint, patch holes, sand smooth, and choose primer suited to wall material and desired finish. Consider color psychology when selecting primer tint or base for richer tones. Follow manufacturer drying times and sand between coats for best adhesion.
| Task | Tool | Tip |
|---|---|---|
| Clean | Mild detergent | Rinse well |
| Repair | Spackle | Sand after dry |
| Prime | Roller/brush | Use compatible primer |
| Inspect | Light | Fix imperfections |
Measure and Mark the Accent Area Accurately
Before you start cutting or taping, measure and mark the accent area precisely so your lines end up straight and the proportions look intentional. Use a tape measure and level to establish reference lines, noting ceiling height and baseboard offsets. Consider wall texture when choosing measurement points so marks sit on peaks or valleys consistently. Mark lightly with a pencil at intervals and snap chalk lines for longer runs.
Account for paint sheen differences near edges; glossy areas show imperfections more. Follow these steps:
- Measure overall wall width and height.
- Divide for centered or offset placement.
- Transfer marks to corners.
- Snap level lines.
Masking Tips for Razor-Sharp Edges
Before you tape, make sure the surface is clean, dry, and free of loose paint so the tape will stick properly.
Use painter’s tape applied in a single smooth strip, press the edges firmly, and run a plastic card along it to seal.
After the paint dries to the touch, score the tape with a fresh blade and pull it back slowly for a razor-sharp cut.
Surface Prep First
When you want razor-sharp edges, prep the surface and tape precisely so paint can’t bleed under the mask. Start by cleaning the wall—dust, grease, and flaking paint wreck adhesion and surface maintenance. Check for dents or gaps near trim; fill and sand for a smooth edge.
Consider how wall insulation affects temperature and humidity, which influence drying and tape performance. Prime patched spots before taping.
- Wipe down with a mild detergent and dry thoroughly.
- Sand glossy areas until dull for better tape hold.
- Fill holes, sand, and prime repairs.
- Use a lint-free cloth to remove residue before taping.
Tape Technique Tricks
Once your surface is clean, smooth, and primed, masking is where razor-sharp edges get made or lost; pick a high-quality painter’s tape, press it down firmly along the cut line, and work from the center toward the edges to remove any air pockets. Choose tape width to match detail, avoid wrinkling near corners, and test adhesion on scrap. Consider color psychology when placing accent zones so edges highlight mood under different wall lighting. Remove tape at a 45° angle while paint is tacky for best edge. Quick tips:
| Task | Tool | Timing |
|---|---|---|
| Apply tape | Painter’s tape | Before painting |
| Firm press | Smoothing tool | Immediately |
| Seal edge | Clear glaze | Before topcoat |
| Remove | Pull slow | Tacky paint only |
Clean Cut With Blade
Although masking tape lays the foundation, you’ll get truly razor-sharp edges by cutting with a fresh utility blade—hold the knife at a low, steady angle and score firmly along the tape’s exposed edge so paint can’t bleed under.
You’ll improve Blade precision and lock in clean edges by prepping properly, keeping the blade new, and cutting in one smooth pass. Work slowly, feel the tape give, and avoid digging into drywall.
After painting, remove tape at a 45° angle while paint’s tacky.
Follow these quick steps:
- Clean surface.
- Apply tape straight.
- Score once smoothly.
- Remove at 45°.
Painting a Solid-Color Accent Wall
If you want a bold focal point, painting a solid-color accent wall is a quick way to transform a room without repainting everything. Choose a hue using color psychology to set mood—calming blues, energizing yellows, or dramatic deep tones. Test samples on the wall at different times of day.
Prepare surfaces: clean, sand, and prime for even coverage and improved paint durability. Use a roller for large areas and a steady brush for edges, keeping a wet edge to avoid lap marks.
Apply two thin coats, inspect in natural light, and touch up trim for a polished result.
How to Paint Stripes, Blocks, and Geometric Shapes
When you want to add pattern and personality without overwhelming the room, painting stripes, blocks, or geometric shapes gives clean, modern impact with relatively simple steps. You’ll plan layout, choose colors guided by color psychology and historical trends, tape precisely, and use a roller or brush for crisp edges. Measure twice, mark lightly, and apply thin coats for even coverage. Finish with touch-ups and sealant if needed.
- Sketch design and grid the wall.
- Pick palette; test swatches.
- Use high-quality painter’s tape and level.
- Paint edges, remove tape when damp.
Faux Textures: Glaze, Sponge, and Layering Techniques
Because layered glazes, sponges, and strategic brushwork mimic depth without costly materials, you can give a plain wall rich, tactile character with surprisingly simple steps. You’ll pick a base coat, mix a translucent glaze, and apply with a sponge or soft brush in irregular motions. Work wet-to-wet for smooth blends or layer for contrast. Practice on cardboard to balance pressure and color. Use sealant for durability. Faux textures and decorative finishes let you suggest stone, plaster, or fabric without heavy materials; they save time and expand style options.
| Technique | Effect |
|---|---|
| Glaze | Subtle depth |
| Sponge | Organic texture |
| Layering | Rich complexity |
Troubleshooting Common Painting Problems
Although tackling paint problems can feel frustrating, you can fix most issues with a few straightforward checks and the right techniques. Inspect for drips, uneven coverage, or brush marks before they dry. Match sheen and primer, and consider how color psychology affects perception—darker accents hide flaws, lighter shades reveal texture.
Move items away; proper furniture placement prevents scuffs and lets you inspect edges. Clean tools and sand glossy spots lightly.
- Smooth brush marks: sand, then reapply thin coat.
- Drips: scrape gently, sand, spot-paint.
- Bleeding: use painter’s tape and primer.
- Patch peeling: remove, prime, repaint.
When to Apply a Second Coat and Do Touch-Ups
Fixing problems like brush marks or drips gives you a clear view of the true coverage, so you can decide whether a second coat is needed. Wait the recommended dry time on the can, then inspect in natural light for streaks, thin spots, or flashing.
If wall texture hides imperfections, gently sand high spots and feather edges before touching up. Match the original paint color and sheen; test a small patch to confirm blend.
Use thin, even coats rather than heavy layers to avoid drips. Finish touch-ups with a mini roller for uniform texture, then let everything cure fully.
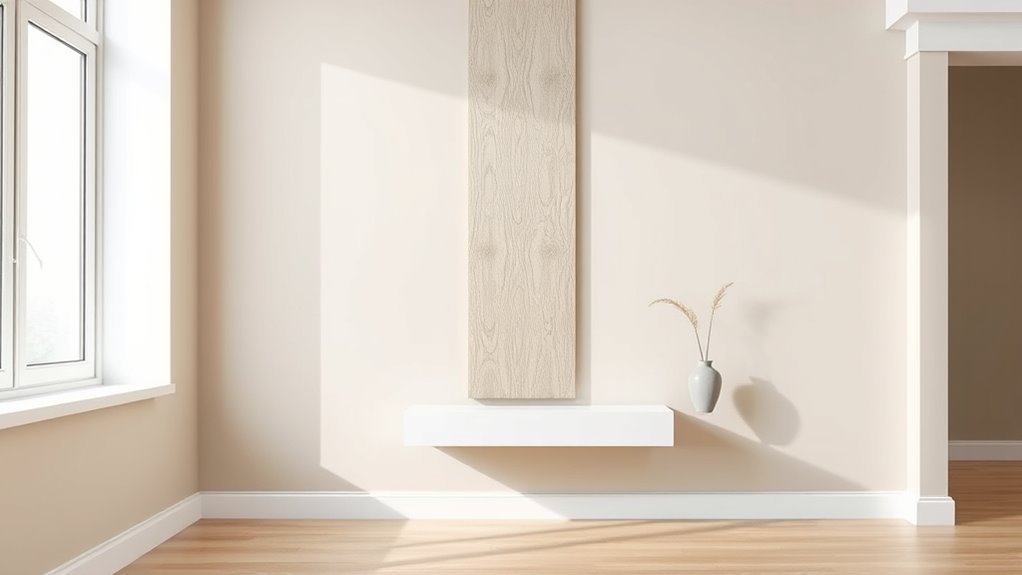
Style and Furnish to Showcase Your Accent Wall
Once your accent wall’s color and finish are set, plan furniture and decor to make it the room’s focal point. You’ll balance scale, texture, and function so the wall shines without overwhelming the space. Consider contrast, symmetry, and movement when arranging pieces. Use furniture arrangement to guide sightlines and leave breathing room.
- Anchor with a sofa or console that complements hue and scale.
- Add layered lighting to highlight color and create depth.
- Place curated wall art to echo tones and add personality.
- Use rugs and accessories to connect the accent wall to the rest of the room.
Safety, Cleanup, and Storing Leftover Paint
Before you put away your brushes, take steps to protect yourself and your home: wear gloves and a mask when sanding or handling solvent-based paints, ventilate the room, and cover floors and furniture with drop cloths to catch drips.
Follow safety precautions: keep paints away from children and pets, store cans upright with tight lids, and label mixes and date them.
For cleanup tips, rinse water-based rollers and brushes immediately; use proper solvent and ventilated space for oil-based tools.
Wipe splatters promptly with a damp cloth.
Seal leftover paint in small airtight containers to extend life and avoid waste.
Save on an Accent Wall: DIY vs. Hiring a Pro
You can save a lot on an accent wall by weighing DIY labor against professional rates. Consider the upfront cost of supplies and the time you’ll spend versus a pro’s speed and guaranteed finish.
That comparison helps you decide whether the money saved is worth the effort.
Cost Comparison
While an accent wall can dramatically change a room, choosing between DIY and hiring a pro mostly comes down to time, skill, and cost — and the numbers usually make the difference clear.
You’ll weigh cost factors and budget considerations: materials, tools, prep, and finish quality. DIY cuts labor costs but you’ll buy supplies and possibly redo mistakes.
Pros charge more upfront but deliver speed, expertise, and warranty.
Compare quotes, factor hidden costs, and decide what you value—savings or guaranteed results.
Use this quick checklist to guide your choice:
- Materials cost estimate
- Labor quote
- Hidden fees
- Value of finish
Time And Effort
If you tackle an accent wall yourself, expect to invest several weekends learning prep, painting, and cleanup. Hiring a pro, on the other hand, trades those hours for a faster, hands-off experience.
You’ll weigh time investment against money: DIY stretches tasks across weekends but saves labor costs, while pros finish in a day or two.
Do an honest effort estimation—include moving furniture, taping, priming, touch-ups, and drying time.
If you’re short on free time or want flawless results, hire help.
If you enjoy projects and have patience, DIY gives control and lower expense.
Frequently Asked Questions
Can I Paint an Accent Wall With Wallpaper Underneath?
You can, but you’ll usually need wallpaper removal first because paint adhesion suffers on paper-backed surfaces; if wallpaper’s firmly glued and sealed, prime with a strong bonding primer, then paint for best, lasting results.
Will Accent Wall Paint Fade in Direct Sunlight?
Yes, it can: Sunlight fading happens, sunlight fading reduces vibrancy; you’ll notice reduced color over time. You can slow it with UV-resistant finishes, quality pigments, and regular touch-ups to improve paint longevity and preserve appearance.
Can I Use Leftover Wall Paint for Furniture Touch-Ups?
Yes — you can often use leftover wall paint for furniture touch ups, but test compatibility first. You’ll preserve your furniture restoration work by checking sheen, adhesion, and color match, and sanding or priming when necessary.
How Long Before Rehanging Artwork After Painting?
About 24 hours; 90% of paints cure enough to hang art by then. You’ll want to guarantee paint removal smudges aren’t present and that wall prep was thorough, so adhesives or hooks adhere properly without damaging finish.
Are Acoustic Panels Compatible With Painted Accent Walls?
Yes — you can mount acoustic panels on painted accent walls; you’ll preserve appearance while improving acoustic treatment. Use adhesive strips, cleats, or screws depending on paint type and soundproofing options, and avoid wet adhesives on fresh paint.
Conclusion
You’ve picked the wall, color, and finish — now pause. Before the roller hits, imagine the reveal: furniture shifted, light catching the new hue, guests’ surprised smiles. You’ll feel a flicker of doubt, then the room will pull itself together around that single bold choice. Roll the first coat, watch it transform, and keep a touch-up brush handy for the final flourish. Ready? The moment you step back, you’ll know it was worth it.