How to Paint Primer on Walls the Right Way
Start by cleaning, repairing, and sanding the wall so primer bonds well, then choose a primer matched to the surface and stains (latex for drywall, oil or shellac for heavy stains). Use an angled brush for edges and a roller with the right nap for texture, work in overlapping “W” patterns, keep a wet edge, and allow full drying under recommended temperature and humidity. Follow tinting and stain‑blocking advice for tough spots — keep going to learn pro tips.
Which Primer to Use: Quick Decision Guide
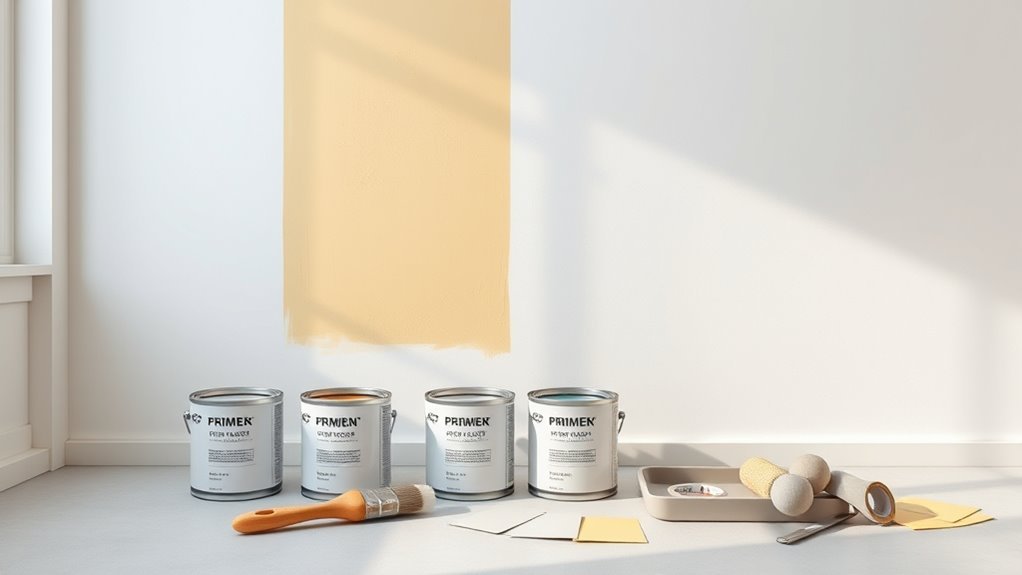
Because the right primer solves most painting problems before they start, pick one based on your wall material and the issue you’re fixing.
You’ll choose latex for drywall and stained areas, oil-based for knots and heavy stains, and shellac when sealing severe water or smoke damage.
For bold color matching, use a high-hiding primer designed to block previous hues.
If you want texture enhancement, pick a primer with slight body that fills minor imperfections before skim-coating.
For mold-prone rooms, use a mildew-resistant formula.
Match primer finish to topcoat and follow product instructions for drying times and recoating.
Choosing the Right Primer for Your Wall Material
When you’re matching primer to the wall material, focus on adhesion and compatibility first so the topcoat performs well. You’ll assess surface type, previous finishes, and any stains or residue from wallpaper removal.
Choose primers formulated for drywall, plaster, masonry, or patched surfaces, and consider stain-blocking where needed. Think about color coordination if you’re switching from dark to light or planning translucent glazes. Use the right primer to avoid peeling and guarantee uniform sheen.
- Drywall: high-porosity primers for even absorption.
- Plaster/masonry: bonding and alkali-resistant primers.
- Previously painted or repaired walls: stain-blocking primers.
Oil-Based vs Water-Based Primer: Key Differences
If you need maximum stain-blocking and adhesion on tricky surfaces, oil-based primers deliver long-lasting sealing and leveling that water-based primers often can’t match. You’ll choose oil when you face tannin bleed, rust, or uneven old finishes because its primer chemistry penetrates and bonds differently, enhancing surface adhesion.
Water-based primers dry faster, emit fewer fumes, and clean up with soap, so they’re ideal for low-odor projects and porous surfaces where flexibility matters. Match primer type to substrate, ventilation, and topcoat compatibility.
Test a small area if unsure, and always follow product instructions for best results.
Primers for New Drywall and Fresh Plaster
When you’re working with new drywall, you’ll want to sand seams, remove dust, and apply a drywall primer to create an even, absorbent surface.
For fresh plaster, seal it first with a mist coat or PVA primer so the surface doesn’t suck up paint unevenly.
Choose a primer formulated for the substrate—drywall primers for gypsum and specific sealers or plaster primers for new plaster—to guarantee proper adhesion and coverage.
Preparing New Drywall
Because new drywall and fresh plaster soak up paint unevenly, you should always prime them before topcoating. Prep by sanding joints lightly, removing dust, and wiping surfaces so primer bonds. Choose a drywall primer that supports color coordination with your topcoat and helps texture enhancement where needed.
- Spot-treat seams and fasteners with a drywall primer-sealer.
- Apply a thin, even coat with a roller for uniform absorption.
- Let primer dry fully, then inspect for sheen or texture inconsistencies.
You’ll get truer color, easier coverage, and a consistent surface that reduces wasted paint and touch-ups.
Sealing Fresh Plaster
New drywall prep sets you up for success, but fresh plaster needs a different approach to lock in its porosity and prevent uneven sheen. You should let plaster cure fully, then lightly sand imperfections and remove dust.
Apply a clear or tinted sealer with a roller suited for smooth surfaces, working in thin, even coats to avoid lap marks. Match sealer tint to your planned topcoat for better color matching and to reduce extra coats.
Pay attention to texture patterns—seal ridges and shallow valleys uniformly so finish coats lay flat. Allow recommended dry times before painting.
Choosing Proper Primer
Which primer should you reach for first? You’ll pick a drywall or plaster-specific primer that evens porosity, boosts primer durability, and reduces color contrast when you topcoat. Use products labeled “high-hide” for strong coverage on fresh plaster.
- Oil-based: Excellent sealing, superior primer durability, but slower drying.
- Water-based (acrylic): Fast drying, low odor, good for drywall and many plasters.
- Bonding primer: Choose when plaster is powdery or glossy; it ensures adhesion and prevents flash-through.
Test a small area to confirm adhesion and hide before committing to the whole wall.
Stain‑Blocking Primers for Smoke or Water Damage
When you’re dealing with smoke or water stains, pick a true stain‑blocking primer formulated for those specific problems.
Prep the surface by cleaning, sanding away loose material, and letting everything dry so the primer can bond.
Apply the primer evenly and seal any edges or repaired areas to prevent bleed‑through before topcoating.
Choose The Right Primer
Dealing with smoke or water stains? You’ll want a stain‑blocking primer that masks marks and boosts primer durability while helping with color coordination for your finish coat. Pick oil‑based or shellac primers for severe stains; they seal odors and tannins.
Choose water‑based stain blockers for mild cases where easy cleanup matters.
- Match primer type to stain severity and final color goals.
- Verify VOC, dry time, and adhesion—these affect primer durability and topcoat appearance.
- Test a small patch to confirm color coordination before committing to full walls.
Prep Surfaces Thoroughly
Before you prime, clean and repair the surface so the stain‑blocking primer can do its job: wash away soot or mildew with an appropriate cleaner, sand any peeling paint or blistered areas, scrape loose material, and spot‑fill holes or cracks so the primer seals consistently. After cleaning, let surfaces dry fully.
Test a small area to confirm stains won’t bleed through. Use appropriate stain‑blocking formulas for smoke or water damage.
While prepping, think ahead to color coordination so undertones won’t surprise you after topcoat. Practice proper brush techniques for edges and patched spots to confirm even absorption and a smooth base.
Apply And Seal Properly
If smoke or water has stained your walls, choose a true stain‑blocking primer and apply it so stains can’t bleed through the finish coat; prep by cleaning and addressing odor. You’ll want to seal affected areas thoroughly, especially after wallpaper removal or patching. Use a brush for edges, a roller for large areas, and follow dry times.
- Spot‑prime stains first, feathering outward for even coverage.
- Apply a full coat over repaired drywall or plaster to guarantee consistent color matching.
- Finish with a quality topcoat once the primer’s cured to lock in protection and appearance.
Primers for Glossy or Previously Painted Surfaces
Having trouble getting new paint to stick to slick, previously painted walls? You’ll want a bonding primer formulated for glossy surfaces—shellac or high-adhesion latex—after cleaning and lightly sanding to scuff the sheen.
Test adhesion in an inconspicuous spot before committing. Match primer choice to interior textures so smooth and textured areas accept topcoat evenly.
Use tinted primer when shifting color families; this supports color psychology by reducing undertone surprises and improving final depth.
Apply thin, even coats, let dry fully, and sand between coats if needed. Proper primer prevents peeling and guarantees a uniform finish on challenging surfaces.
Covering Dark Colors: Primer Strategies
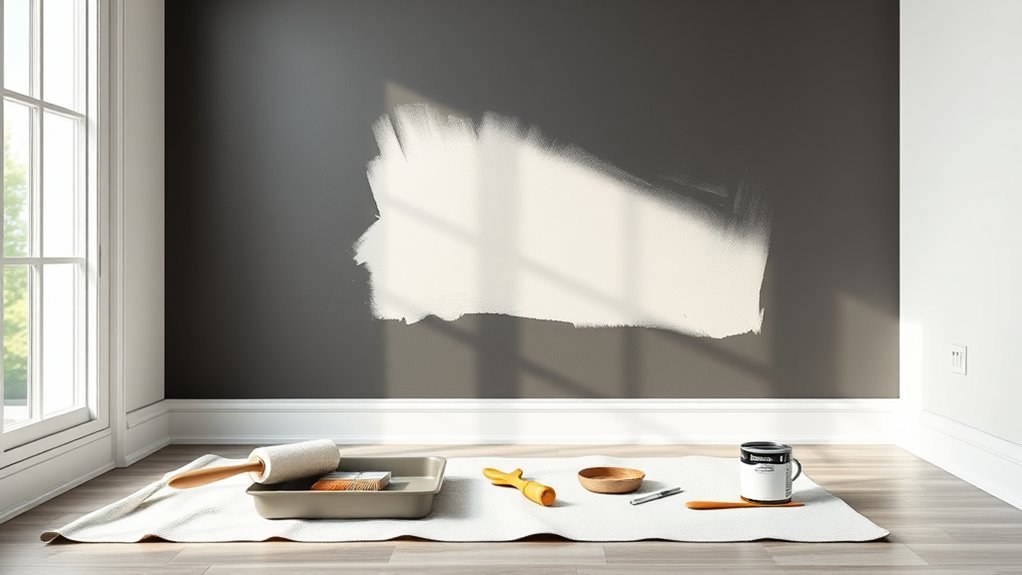
Struggling to cover a dark wall? You’ll need the right primer strategy to avoid extra coats and uneven color blending. Start by cleaning and sanding to promote adhesion and texture enhancement, then choose a high-hide, tinted primer matched toward your topcoat.
Struggling with dark walls? Clean, sand, then use a high-hide, tinted primer matched to your topcoat.
- Use a gray or tinted primer to neutralize deep hues and reduce topcoat layers.
- Apply a high-build primer where stains or uneven texture appear; it smooths surface variations for consistent paint laydown.
- Spot-prime stubborn areas, then roll full walls with a quality nap roller for even coverage and efficient hiding.
Estimating How Much Primer You’ll Need
Because primer coverage varies with surface texture, porosity, and coat thickness, you’ll want to calculate needs before you open a can. Measure wall square footage (height × width), subtract windows and doors, then divide by the primer’s coverage rate on the label to get gallons required.
Add 10–15% for waste and touch-ups. For heavy stains or porous surfaces, plan an extra coat.
If you’re color matching to hide a bold hue, factor in primer labeled for stain-blocking or tinted options, which may affect coverage.
Keep ventilation tips in mind while working and storing extra primer safely.
Tools and Supplies for Priming Walls
Before you start priming, gather the essential painting tools—roller, brushes, tray, drop cloths, sandpaper, and a sturdy ladder—so you won’t stop mid-job.
You’ll also want a clear primer and a simple supply checklist to confirm you’ve got tape, rags, gloves, and a stir stick.
With everything organized, you’ll work faster and avoid common mistakes.
Essential Painting Tools
You’ll need a compact set of reliable tools to get primer onto walls quickly and neatly: quality brushes for cutting in, a roller and tray for large areas, drop cloths to protect floors, painter’s tape for clean edges, sandpaper and a sanding block for surface prep, plus a sturdy ladder or step stool for higher spots.
Choose brushes carefully—brush selection affects finish and control. Consider color matching for trims or touch-ups so primer doesn’t contrast awkwardly.
Keep tools clean and ready to avoid soggy edges and streaks.
- Brushes and rollers
- Sanding tools
- Protection and tape
Primer And Supply Checklist
Now that you’ve got the basic tools lined up, it helps to check off a focused primer and supply list so nothing halts your progress. Gather primer, rollers, brushes, trays, painter’s tape, drop cloths, sandpaper, patching compound, and a respirator. Think about color matching if you’ll topcoat soon and include samples. Do budget planning up front: buy quality where it matters, reuse or rent extras. Keep a small repair kit handy for touch-ups.
| Item | Purpose |
|---|---|
| Primer | Seals surface |
| Roller & Brush | Apply evenly |
Preparing Walls: Cleaning and Degreasing
When walls look clean but still hold grease or dust, they’ll keep primer from adhering properly, so you should clean and degrease thoroughly before you paint.
You’ll start by removing surface grime with a mild detergent, rinse well, and let walls dry. Tack cloths pick up fine dust. Proper cleaning helps with eventual color matching and guarantees your brush selection isn’t ruined by contaminants.
- Use warm water with trisodium phosphate substitute for greasy areas.
- Rinse twice and dry fully to avoid trapped moisture.
- Wipe with tack cloth before priming to capture remaining particles.
Removing Wallpaper and Surface Contaminants
Before priming, you’ll need to remove any wallpaper carefully to avoid damaging the drywall underneath. Use a scoring tool and a wallpaper stripper or warm water to loosen the paste, then peel slowly and patch any nicks.
Afterward, wipe the wall to remove adhesive residue, dust, and other contaminants so the primer adheres properly.
Remove Wallpaper Carefully
Wondering how to strip wallpaper without damaging the drywall? You’ll approach wallpaper removal with patience and care to protect the substrate and guarantee proper surface preparation before priming. Follow these focused steps:
- Score and soften: Lightly score paper, wet with a steamer or solution, and peel sections to avoid gouging the wall.
- Use proper tools: Employ a plastic scraper and sharp utility knife for stubborn seams; work at low angles to prevent gouges.
- Inspect and repair: After removal, check for adhesive residue, paper fragments, or minor paper tears and patch as needed before priming.
Clean Surface Contaminants
Although removing wallpaper was a big step, you still need to clear any leftover glue, dust, grease, or mildew so primer will bond properly. You’ll inspect walls, scrape residue, and test for stains. Use proper cleaning techniques: a mild detergent wash, TSP for heavy grease, and a bleach solution for mildew. Rinse, dry, and sand glossy spots. Address surface contaminants promptly to ensure adhesion and a uniform finish.
| Task | Solution | Tip |
|---|---|---|
| Glue | Scraper + solvent | Work small areas |
| Grease | TSP wash | Rinse well |
| Mildew | Bleach mix | Ventilate room |
Patching Holes and Filling Cracks
If you see nail holes, dents, or hairline cracks in the drywall, patching them first gives the primer a smooth, even surface to bond to. Use spackling for small blemishes and joint compound for larger gaps, matching texture patterns to the surrounding wall so repairs blend.
Consider color matching only after primer and paint are applied. Work efficiently, pressing compound into cavities, then wiping excess.
- Clean holes, apply compound, press firmly.
- Overfill slightly, let dry fully.
- Trim or feather edges to follow wall grain before priming.
Sanding for a Smooth Primer Base
Ready to get a truly smooth base? You’ll sand patched areas and the whole primed surface lightly with fine-grit paper, removing ridges, dust nibs, and brush marks so topcoat sheen reads consistently.
Work in even strokes, keep the pad flat, and vacuum or tack-cloth between passes so particles won’t telegraph through paint.
Consider color coordination when planning final coats—smoother primer helps colors lay true.
Check under different lighting effects as you go; shadows and glare reveal imperfections.
Don’t oversand; stop when surface feels uniformly smooth. Proper sanding saves time and produces a professional finish.
Taping and Protecting Trim, Floors, and Fixtures
Before you start brushing primer, protect everything you don’t want painted: cover floors with drop cloths, mask trim with painter’s tape, and remove or wrap fixtures and outlet covers. You’ll work efficiently and avoid cleanup headaches.
Use low-tack tape on delicate trim, secure drop cloth edges, and label removed hardware. Be mindful if you’ll later do decorative stenciling or texture application—mask edges tightly so patterns stay crisp.
- Tape trim edges precisely to prevent bleed.
- Cover floors and large furniture with weighted cloths.
- Wrap or remove lights, switches, and vents for safe priming.
When and How to Apply a Stain‑Blocking Primer
If you’re dealing with stains from water, smoke, or tannin bleed, you’ll want to use a stain‑blocking primer before painting. Choose the right type—shellac‑based for tough stains, oil‑based for moderate ones, or high‑quality latex blockers for milder discoloration—and follow the manufacturer’s instructions.
Apply in thin, even coats, allow proper drying time between coats, and spot‑test if you’re unsure.
When To Use
Wondering when to reach for a stain‑blocking primer? You want it whenever stains, tannin bleed, smoke, or water marks threaten your finish. It improves color matching by preventing discoloration under new paint and boosts primer durability for long‑lasting results.
- After water damage: dry, clean, then seal stains so topcoat color stays true.
- On nicotine or smoke‑stained walls: block odors and yellowing before repainting for consistent color matching.
- Over knotty or tannin‑rich wood: prime to stop bleed‑through and ensure primer durability under your chosen topcoat.
Types Of Stain Blockers
Now that you know when to use a stain‑blocking primer, you’ll want to pick the right type for the job. Choose oil‑based primers for severe stains like water, smoke, or tannin bleed; they seal and block effectively.
Shellac primers work fast and stick to tricky surfaces, so use them for heavy nicotine or pet odors.
Water‑based stain blockers suit light stains and are low‑odor for occupied rooms where color coordination and furniture placement are already set.
Match primer type to stain severity and surface: heavier stains need stronger chemistry, lighter issues can use milder products to preserve existing décor.
Application Best Practices
Because stain‑blocking primers lock in discoloration and odors, you should apply them after you’ve cleaned and repaired the surface but before any finish coats go on.
Prep matters: sand glossy spots, remove dust, and patch holes so the primer adheres and supports texture matching. Apply in even strokes, keep a wet edge, and follow drying times — don’t rush finish coats.
Consider color coordination: choose a primer tint close to your topcoat to reduce paint layers. For tough stains, use two coats. Check compatibility with your paint.
- Clean and sand.
- Use even strokes; maintain wet edge.
- Tint primer for color coordination.
Thinning and Mixing Primer Properly
If your primer’s too thick it won’t level properly or penetrate surface imperfections, so you’ll often need to thin it to the manufacturer’s recommended viscosity before application. Check the label for solvent type and ratios, add small amounts, and stir thoroughly—don’t guess.
Use a viscosity cup or test on a scrap board to confirm flow. Mix only what you’ll use, label and seal cans to maintain primer storage life, and note batch info for color matching later.
Stir periodically while working to keep consistency, and never dilute beyond recommendations to avoid adhesion or coverage problems.
Rolling Techniques for Even Primer Coverage
Pick a roller with the right nap for your wall texture so the primer lays down evenly.
Start with a “W” pattern to spread primer broadly, then fill in without lifting the roller.
Keep a wet edge by working in overlapping sections so you don’t get lap marks.
Choose The Right Roller
1 good roller can make the difference between streaky primer and a smooth, ready-to-paint surface; choose one with the right nap length for your wall texture and a comfortable handle so you can maintain steady pressure.
Pick a roller nap: short for smooth walls, medium for light texture, long for rough surfaces.
Consider color selection only for trim or specialty primer to avoid cross-contamination.
Use a quality frame and replace the cover when it sheds.
Keep windows open and follow ventilation tips to dry primer evenly and reduce fumes.
Clean or dispose properly to prevent lint and streaks.
- Short nap: smooth walls
- Medium nap: light texture
- Long nap: rough walls
Master The ‘W’ Pattern
When you start rolling, paint a large, loose “W” on the wall, then fill it in without lifting the roller—this spreads primer evenly and prevents lap marks so you get smooth, consistent coverage across the whole section.
Use steady pressure and short overlapping strokes to blend each “W” into the next, keeping coverage uniform.
Pay attention to color coordination when changing between walls or accents so primer tone stays consistent under your topcoat.
Roll with the nap direction suited to your finish to aid texture enhancement, and reload the roller before it dries out to avoid streaks and uneven build.
Maintain Wet Edges
Although you’ll want to work steadily, keep a wet edge by rolling in contiguous sections so each pass overlaps the last before the primer skins over; this prevents lap marks and guarantees a uniform film.
You’ll control drying, preserve color matching, and support texture enhancement by keeping a consistent roller load and pace. Focus on edges and gradual shifts, and don’t pause between adjacent panels.
- Reload the roller often to avoid dry streaks.
- Work from a corner toward the exit, overlapping each strip.
- Lightly feather edges with the roller tip for seamless blending.
Stay steady and finish each wall while wet.
Spraying Primer: Setup and Best Settings
Thinking about spraying primer? You’ll set up outdoors or in a ventilated space, mask and cover floors and trim, and thin primer per manufacturer guidelines.
Test spray on cardboard to judge color contrast and adjust gun distance. Start with low pressure and 6–8-inch overlapping passes; increase if atomization’s poor.
Monitor primer thickness—too heavy causes runs, too light needs extra passes. Keep the nozzle perpendicular and move steadily to avoid splotches.
Clean filters and strain primer before use. Between passes, wait recommended flash time.
Practice on a scrap panel to dial in settings before tackling walls.
How Many Primer Coats Do You Really Need?
Before you start priming, assess the wall’s condition—chips, stains, or repairs may mean you need more than one coat.
Consider the paint type you’ll use, since high-hide or stain-blocking primers can cut down on coats compared with standard primers.
Also factor in coverage per coat and drying time so you know when a second coat is actually necessary.
Surface Condition Assessment
When you’re sizing up a wall, focus on its porosity, stains, and previous finishes to decide how many primer coats it really needs. You’ll assess surface flaws and test paint compatibility by touching, tapping, and inspecting for peeling or efflorescence.
Prioritize areas that absorb more or show stains; they often need extra priming.
- High-porosity drywall or new plaster: one to two coats, spot-check absorption.
- Stained or nicotine-yellowed surfaces: seal with a stain-blocking primer, then evaluate for a second coat.
- Glossy or oil-based remnants: roughen, clean, and use a bonding primer—often one thorough coat suffices.
Paint Type Considerations
Although primer choice often feels secondary, the paint you plan to use directly affects how many primer coats you’ll need. If you’re switching between starkly different colors, or moving from glossy to matte finishes, you’ll likely need an extra primer coat for proper color coordination and adhesion.
Oil-based paints may require a specific bonding primer, while high-hide latex primers work with most water-based topcoats. Consider your brush selection for primer application—natural-bristle for oil, synthetic for latex—to achieve a smooth base.
Assess substrate porosity and existing stains; typically one coat suffices, but two guarantee uniformity for dramatic color changes.
Coverage And Drying Time
Because primer coverage and drying times vary by product and conditions, you’ll want to plan how many coats you’ll apply rather than guessing. You’ll assess stains, surface texture, and your color selection to decide if one coat suffices or if two are necessary. Faster-drying primers let you recoat sooner; high-build primers cover in fewer passes. Humidity and temperature change cure time, so follow manufacturer guidelines and test a small area.
- Inspect: note porous spots, repairs, and texture.
- Test: apply one coat, check hide and tack-free time.
- Decide: add coat if stains show or color shift remains.
Drying Times and Ideal Conditions Before Painting
If you want reliable results, let primer fully dry and cure before you roll on paint. Check the can for tack-free time, but wait the full recommended cure if possible—usually 24 hours.
Work when humidity is below 60% and temperature is within the primer’s specified range; use fans and dehumidifiers to speed drying safely.
Work in low humidity and recommended temperatures; use fans or dehumidifiers to speed safe drying.
Touch a hidden spot to confirm dryness. Proper curing improves color matching and supports texture enhancement, so paint adheres evenly and shows true hue and finish.
Rushing can cause peeling, blotches, or uneven sheen, so be patient for professional results.
Spot‑Priming vs Full‑Wall Priming: Choose Smart
When should you spot-prime and when should you prime the whole wall? You’ll spot-prime for small repairs, stains, or paint touchups; it saves time and primer when color contrast is minimal.
Prime the whole wall when previous color is dark, uneven, or when primer adhesion might vary across surfaces. Decide based on surface condition and desired finish.
- Spot-prime: isolated stains, patched drywall, or minor scuffs.
- Full-wall: big color contrast, extensive repairs, or soot/odor issues.
- Hybrid: spot first, then full coat if coverage or adhesion still looks uneven.
Tackling Corners, Ceilings, and Tight Areas
How do you get clean, even primer lines where walls meet ceilings, trim, and inside corners? Start with sharp-edged painter’s tape for trim and use a steady-handed angled sash brush to cut in.
For corner detailing, load the brush sparingly and work from the corner outward, blending with short, controlled strokes.
Roll primer up to taped edges without overlapping taped lines.
Inspect ceiling imperfections before priming and spot-sand or fill small dents so primer sits smooth.
Use a small foam brush or mini-roller for tight gaps.
Remove tape while primer’s slightly tacky to preserve crisp lines and avoid tearing.
Preventing Lap Marks and Uneven Sheen
To avoid lap marks and patchy sheen, keep a wet edge as you work and roll with steady, even pressure.
Use thin, uniform coats rather than heavy layers and let each coat dry fully before recoating.
Those steps will give you a smooth, consistent primer finish.
Maintain Wet Edge
Ever wonder why some primer jobs show streaks or dull patches even after careful brushing? You can prevent lap marks by keeping a wet edge—work in sections, overlap damp areas, and blend quickly so Color matching stays seamless and Texture enhancement is uniform. Follow these steps:
- Start near a corner and move steadily across a 3–4 foot panel, keeping edges wet.
- Feather the last pass into the next wet area to avoid hard lines and sheen differences.
- Reload often so coverage stays even; thin drying edges cause visible laps and inconsistent finish.
Use Consistent Roller Pressure
When you keep steady, even pressure on the roller, the primer lays down uniformly and you’re far less likely to get lap marks or patchy sheen; you control coverage and avoid streaks. Match pressure to wall texture for consistent color coordination and subtle texture enhancement. Practice short, overlapping passes and feel the roller load. If a section looks glossy or dull, adjust pressure immediately rather than reworking later. Use a light touch near edges and slightly firmer in open areas to balance absorption. Refer to the table for quick pressure cues.
| Area | Suggested Pressure |
|---|---|
| Edges | Light |
| Flat field | Moderate |
| Rough spots | Slightly firmer |
Thin Coats, Adequate Drying
Though it might feel faster to load the roller, you should work in thin, even coats and let each layer dry fully so you don’t get lap marks or uneven sheen. You’ll notice thinner coats level better; they reduce pooling and help with color matching between sections.
Let primer dry per instructions, then inspect under good light. Use proper brush techniques at edges to blend into rolled areas before drying. If sheen still varies, sand lightly and apply another thin coat. Follow these steps:
- Roll thin passes, feather wet edges.
- Brush cut-ins with light, consistent strokes.
- Wait full drying time.
Sanding Primer Between Coats Without Damage
If your primer feels rough or shows brush marks after drying, sanding between coats smooths the surface and helps the next layer adhere—without stripping the primer off if you use the right tools and technique. You’ll sand lightly with 220–320 grit, keep pressure even, and use a sanding block or fine mesh pad. Wipe dust with a damp cloth before recoating. For Color blending and Texture matching, feather edges and test a small patch. Avoid aggressive sanding that exposes substrate.
| Tool | Grit | Purpose |
|---|---|---|
| Sanding block | 220 | Even surface |
| Mesh pad | 320 | Fine smoothing |
| Vacuum brush | N/A | Dust removal |
| Tack cloth | N/A | Final wipe |
Fixing Problems: Bubbling, Peeling, and Blisters
Because primer can trap moisture or lose adhesion, you’ll sometimes see bubbles, peeling, or blisters appear—each needs a specific fix to stop further damage and guarantee a smooth topcoat. Inspect and test: probe loose areas, mark blisters, and check substrate moisture.
Use proper repair steps:
- Remove damaged primer, sand edges, dry thoroughly, and apply a compatible primer; consider color matching for even coverage.
- For peeling, scrape to sound substrate, feather edges, sand, then re-prime and topcoat.
- Address moisture sources, improve ventilation tips, and allow full cure before repainting to prevent recurrence.
Dealing With Persistent Stains and Tannin Bleed
When tannin-rich wood, smoke damage, or rust keeps bleeding through your paint, you’ll need a stain-blocking strategy before priming so the discoloration doesn’t reappear under the topcoat. You’ll clean the area, let it dry, then apply a dedicated stain treatment or shellac-based primer to stop tannin bleed. Oil-based or shellac primers seal stubborn stains; water-based stain blockers work for milder cases. Test a small patch, sand lightly after drying, then prime the whole area. Monitor for reappearance; if stains return, repeat with a stronger sealant. Proper stain treatment saves repainting time and frustration.
| Problem | Solution |
|---|---|
| Tannin bleed | Shellac primer |
| Smoke stains | Oil-based sealer |
| Rust | Rust inhibitor |
| Ink/markers | Specialty stain blocker |
Low‑VOC Primers: Eco‑Friendly Options for Walls
Curious which primers give you good sealing power without the harsh fumes? You’ll find low‑VOC primers that seal stains, promote adhesion, and support eco friendly finishes. Choose formulas with natural pigments or water‑based resins to reduce odor and toxins.
Consider these options:
- Acrylic latex low‑VOC primer — fast drying, excellent adhesion, compatible with most topcoats.
- Shellac alternative low‑odor primer — good for sealing light stains, low emissions.
- Mineral‑based primer with natural pigments — breathable, durable, and compostable‑friendly packaging.
Test a small area first, follow manufacturer VOC ratings, and ventilate while you work.
How Primer Affects Final Paint Color and Sheen
Choosing a low‑VOC primer was a smart move for indoor air quality, but you should also think about how that primer will change your final color and sheen.
You’ll notice primer effects vary with tint, opacity, and base—white or tinted primers can mute or brighten your topcoat.
High‑hide primers prevent blotchiness on porous surfaces, preserving true color, while glossy primers can increase final sheen slightly.
Test with swatches: apply primer, then your chosen paint and let it dry to evaluate hue and gloss.
If the result’s off, adjust tinting or pick a primer specifically matched to your topcoat.
Cost‑Saving Tips and When to Hire a Pro
If you want to save money without sacrificing quality, focus on smart prep, materials, and scope control. You can cut costs by buying mid‑grade primer, testing small color palettes, and moving furniture strategically.
Know when to hire a pro: complex textures, high ceilings, or time constraints.
- Buy quality primer in the right amount to avoid repeats.
- Use simple tools and correct tape; plan furniture placement to protect pieces.
- Hire a pro for tricky surfaces, large rooms, or if finish perfection matters.
Be realistic about time vs. cost; a pro can be worth the investment.
Common Primer Mistakes and How to Avoid Them
Because primer sets the foundation for your paint, skipping steps or cutting corners here leads to visible problems later. Don’t rush prep — clean, sand, and repair to avoid peeling or uneven adhesion. Apply primer evenly; thin spots derail color blending and force extra coats.
Avoid overloading rollers, which creates drips and masks subtle texture enhancement you want to keep. Don’t paint in extreme temperatures or high humidity; drying issues cause bubbles and poor coverage.
Use the right primer for stains or new drywall. Test a small area, correct mistakes early, and you’ll save time and achieve professional results.
Frequently Asked Questions
Can Primer Be Used to Create a Textured Finish Instead of Paint?
Yes — you can use primer as a base for texture enhancement, but it won’t replace paint’s durability; you’ll add decorative finishes like joint compound or textured additives, then seal and paint for lasting, finished appearance.
Will Primer Adhere to Treated or Pressure‑Treated Wood Panels?
Yes—primer will adhere to treated or pressure‑treated wood panels if you prep them: clean, sand, and let the wood treatment cure fully. Use a high‑quality exterior primer formulated for primer adhesion on treated lumber.
Can Primer Be Applied Over Lead‑Paint‑Containing Surfaces Safely?
About 70% of U.S. homes built before 1978 contain lead paint, so you shouldn’t sand or primer over it without safety precautions; you’ll need testing, certified abatement or encapsulation products, HEPA cleanup, and protective gear.
How Long Can Partially Used Primer Be Stored After Opening?
You can usually store partially used primer for 1–2 years if sealed well; for Primer storage, keep cans airtight, in a cool dry place, and avoid freezing or contamination so the Partially used primer stays usable.
Can Primer Be Tinted to Match Light Wall Colors Before Painting?
Yes — you can tint primer to match light wall colors; think of it as seasoning soup: subtle Tinting options let you achieve better color matching, and you’ll save coats while getting truer, more even paint coverage every time.
Conclusion
You’ve got the know‑how now, so roll up your sleeves and get started — measure twice, paint once. Pick a primer that matches your wall material, stains, and indoor air needs; apply evenly and sand between coats when needed. Primer saves you time and money by ensuring better coverage, truer color, and longer‑lasting results. If the job’s large or the damage extensive, don’t hesitate to call a pro for best results and peace of mind.