How to Paint Vertical Stripes on Wall (Perfect Lines)
You can get perfect vertical stripes by measuring and marking consistently, using a level or laser to snap straight lines, and applying high-quality painter’s tape along the edges; press the tape firmly, paint a thin seal coat of the base color, then roll your stripe colors in even coats, removing tape while paint is slightly wet for crisp edges. Choose stripe width to suit the room and finish sheen to hide flaws, and keep going to learn tips for tricky spots and styling.
Why Paint Vertical Stripes?
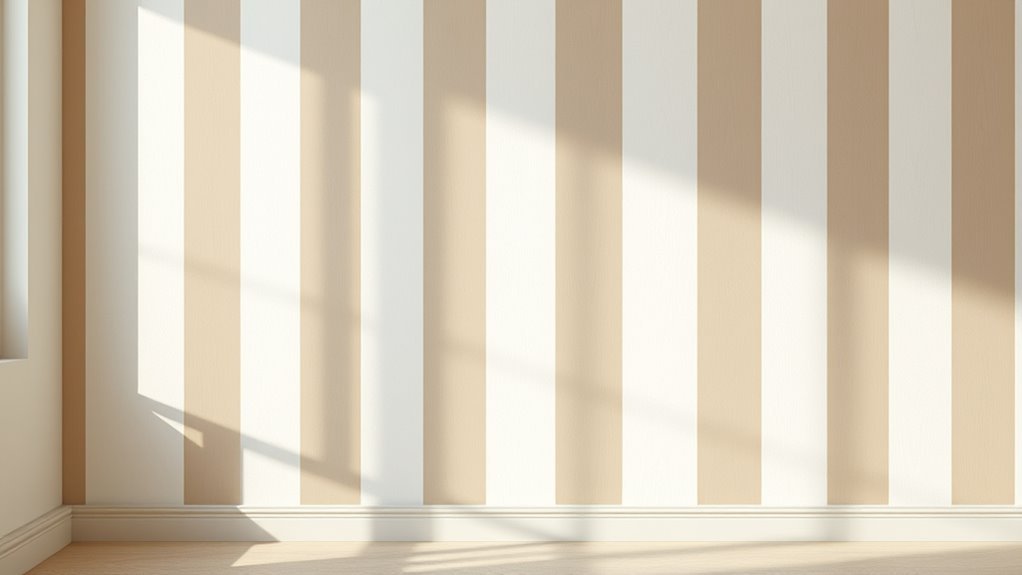
Why consider vertical stripes? You’ll add height and rhythm to a room while guiding the eye upward. Vertical stripes can mask uneven wall texture when you pick colors and widths that distract from bumps.
You’ll control perceived proportions: narrow stripes make ceilings seem taller, wider bands feel more grounded. With the right contrast, stripes interact with natural and artificial lighting effects, creating depth as light grazes the surface.
You’ll also refresh a space without heavy remodeling, balancing pattern and simplicity. Plan stripe scale, color contrast, and finish to harmonize with existing trim and fixtures for a cohesive look.
Rooms That Benefit From Vertical Stripes
Where should you use vertical stripes to make the biggest impact? Think entryways, narrow halls, and small bedrooms — spaces that need height and drama.
In a living room you can frame a focal wall like a wall mural without overwhelming the room. Kid’s rooms handle bold, playful bands that coordinate with furniture.
Dining areas benefit when stripes connect to a refined ceiling design, drawing eyes upward for a cohesive look.
Avoid cluttered, patterned rooms; instead use stripes where furniture is simple and architecture is visible. You’ll create balance, elongation, and a tailored backdrop for art or shelving.
How Stripes Solve Design Problems
Because vertical stripes guide the eye upward, they’re a simple tool you can use to fix common layout and proportion issues—making low ceilings seem taller, narrow rooms feel more balanced, and cluttered walls appear calmer.
You can mask uneven wall texture by aligning stripes with flaws so attention follows pattern, not imperfections. Use contrasting colors to define architectural elements and draw focus where you want it.
Consider how paint sheen changes perception: matte minimizes flaws while satin or eggshell reflects light, brightening stripes. Thoughtful placement of color and finish helps you correct scale, hide blemishes, and create a more cohesive, intentional space.
Choosing Stripe Width for Your Room
When you pick stripe widths, think about the room’s size and the visual rhythm you want—narrow stripes add texture and subtle height in small spaces, while wider stripes make a bold statement and suit larger rooms.
Choose widths that complement your color psychology decisions: soft pastels with thin bands feel calming, while high-contrast wide stripes energize.
Consider sight lines and furniture placement so stripes don’t clash with large pieces or cut through focal areas awkwardly. Test with painter’s tape, stepping back to judge balance.
Keep scale consistent with trim and architectural details for a cohesive, intentional look.
Stripe Spacing Examples and Formulas
If you want consistent, pleasing stripes without guesswork, use simple spacing formulas based on wall width and chosen stripe count. Measure your wall length, subtract trim margins, then divide by the number of stripes to get equal stripe spacing.
For alternating widths, decide a repeat unit (for example 2 narrow + 1 wide) and divide wall width by units to determine each stripe’s width—this keeps pattern repetition exact.
For centered layouts, find the midpoint and mirror stripe edges outward using your calculated spacing. Mark with a level and pencil, then apply painter’s tape precisely along those measurements.
Choosing Colors for Vertical Stripes
Although vertical stripes draw the eye up or across, your color choices determine the room’s mood and perceived proportions, so pick hues that match the effect you want. You’ll use color psychology to influence height, warmth, and atmosphere: cool tones recede and widen, warm tones advance and cozy up a space.
For subtlety, choose low-contrast stripe patterns with adjacent shades; for bold impact, select high-contrast pairs or a neutral with a saturated accent. Consider natural light, existing furnishings, and ceiling color.
Test samples on the wall, view them at different times, and commit once the balance feels right.
Using Texture, Metallics, and Gloss as Accents
You can use metallics to highlight a single stripe or a band of stripes so the light catches them without overwhelming the room. Consider pairing a subtle textured paint or plaster with satin or high-gloss sheens to contrast matte stripes and add dimension.
Place glossy or metallic accents on focal walls or trim where they’ll reflect light and emphasize the vertical lines.
Metallic Accent Placement
Want to make your stripes pop? Place metallic accents sparingly along one edge of a stripe or as a thin border between colors to catch light without overwhelming the pattern. You’ll highlight focal stripes near architectural features—doorways, mantels, or windows—so reflections feel intentional. Test placement on a cardboard sample to confirm sightlines.
Use metallics where furniture or lighting will enhance them, and avoid continuous bands that dominate the wall. Combine metallic accents with subtle texture enhancements only where they won’t compete; let sheen be the highlight, not the whole show.
Step back and adjust until balance feels right.
Texture And Sheen
Those metallic accents you planned can do double duty when paired with subtle texture and selective gloss—the right combo adds depth and guides the eye without stealing the show.
You’ll balance wall texture by choosing where to add a low-relief plaster or a smooth stripe, then highlight edges with a narrow metallic line. Use sheen variations to create contrast: matte fields recede, satin or eggshell stripes read softly, and targeted gloss trims catch light.
Test samples side-by-side, view at different times, and keep metallics minimal. This controlled approach guarantees stripes stay crisp while texture and sheen enrich the room.
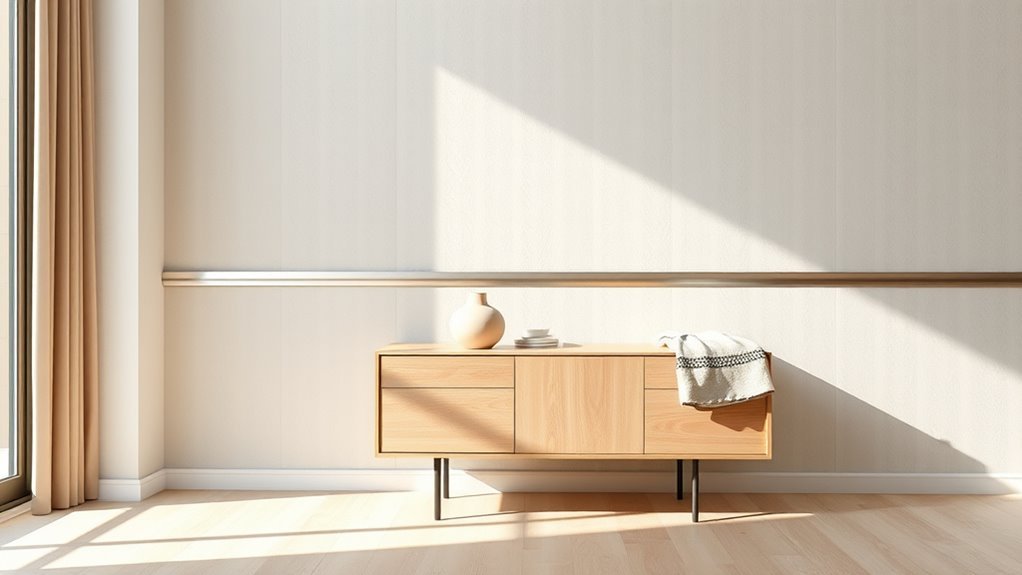
Best Paint Finishes for Vertical Stripes
Although finish choice might seem minor, it has a big impact on how crisp and durable your vertical stripes look, so pick wisely. You’ll use satin or eggshell for balance: they hide imperfections yet keep edges sharp. For high-traffic areas choose semi-gloss for cleanability. Matte masks flaws but can make lines look softer. Consider historical context and modern paint technology when matching sheen to style.
| Finish | Best Use |
|---|---|
| Matte | Low-traffic, classic rooms |
| Eggshell | Living areas, moderate durability |
| Satin | Hallways, crisp edges |
| Semi-gloss | Trim, high-traffic |
| Gloss | Accent stripes, bold contrast |
Estimating Paint Quantity for Stripes
When you plan vertical stripes, start by measuring wall height and total linear feet so you can calculate square footage for each color; this prevents running short mid-project.
Next, determine stripe width and count to split total area between paints. Check paint coverage per gallon on the can, factor two coats, and add 10% for touch-ups and edges near trim.
Decide stripe widths and count, calculate each color’s area, check gallon coverage, plan two coats plus 10% for touch-ups.
Consider color psychology: lighter tones may need fewer coats over primer, while deep hues often require extra.
Also think about furniture placement—avoid mid-project gaps where pieces block access.
Finally, buy slightly more than calculated to keep finish consistent.
Tools You Need for Perfect Stripes
Before you start taping and cutting in, gather a few essential tools that’ll make crisp, even vertical stripes possible. You’ll need a quality level and laser line for straight guides, painter’s tape designed for clean edges, a 2–3 inch angled sash brush for cutting, and a mini roller with a smooth nap for even coverage.
Have a paint tray, extension pole, and drop cloths ready. Include sandpaper and a putty knife for minor fixes.
Consult color psychology to choose stripe hues, and do a paint brand comparison to pick finish and coverage. Keep tools organized for efficient, accurate work.
Preparing Walls Before Striping
Because clean, well-prepared walls are the foundation of crisp stripes, take time to repair, sand, and prime any problem areas before you tape.
First, clear dust and grease with a mild detergent; rinse and let dry completely.
Inspect wall textures—smooth, orange peel, or heavy texture affect tape choice and paint adhesion.
Lightly sand glossy spots so primer and your chosen Paint brands bond properly.
Spot-prime repaired areas to prevent bleed-through.
Use a high-quality primer compatible with your topcoat.
Finally, let the primer cure fully; properly prepped surfaces ensure straighter lines and reduce touch-ups after you stripe.
Fixing Common Wall Imperfections
If your wall has dents, nail holes, cracks, or uneven texture, address them now so your stripes sit flat and look crisp. Fill holes and cracks with lightweight spackle, let it dry, then sand smooth so the wall texture matches surrounding areas.
For larger gouges, use patching compound and a thin skim coat. After sanding, wipe dust with a damp cloth.
Check for low spots by grazing a light across the surface. Match paint sheen when blending repaired spots so stripes reflect consistently; use the same sheen as your base coat to avoid visible patch outlines before taping and painting.
Priming for Two‑Tone Stripes
When you’re planning two-tone stripes, prime the wall with a high-quality primer that blocks stains and evens porosity so both colors lay down uniformly and the tape seals cleanly. Choose a primer suited to your topcoats—latex for latex, bonding primer for slick surfaces—and apply two light coats for even absorption. Let each coat dry fully before taping to prevent lift.
Consider how color psychology affects final contrast; muted primers can soften bright hues, while a true white keeps colors vivid. If you’re covering historical wallpaper remnants, seal them thoroughly or remove them before priming to avoid bleed-through.
Protecting Floors and Furniture
Now that your wall’s primed and ready, protect the surrounding room before you start painting your stripes. Move or cluster furniture arrangement toward the center, cover with drop cloths, and wrap delicate pieces in plastic. Remove lamps and small items from surfaces; tape cords up and out of the way.
Lay heavy-duty paper or plastic on the floor, overlapping seams and taping edges to baseboards to prevent paint bleed. Use painter’s tape on trim and windowsills. Keep a small tray with rags and a damp sponge handy for drips.
Check lighting considerations so you can spot missed spots and dry edges.
How to Measure and Mark Stripe Locations Accurately
Before you start taping, measure the wall and plan your stripe widths so they’re consistent and centered. Use a tape measure and mark the centerline, then divide the remaining space to determine each stripe or gap.
Before taping, measure and mark the centerline, then divide the wall for evenly spaced, centered stripes.
Work left to right, marking edge lines with a pencil at the top and bottom every few feet. Use a level to connect marks with faint lines so you’ll tape accurately without relying on guesswork.
Label alternating stripes on the wall so painters know which color to apply.
Consider color psychology and furniture coordination when choosing stripe widths and placement to guarantee the room feels balanced.
Using a Plumb Line for Straight Verticals
Grab a plumb line and check the cord and weight so it hangs freely without twists.
Hang it at your marked points to create a true vertical reference from ceiling to baseboard.
Keep the line steady while you transfer the alignment to the wall so each stripe stays perfectly vertical.
Preparing The Plumb Line
Want perfectly straight vertical stripes? Start by assembling a plumb line: a weight (plumb bob) on sturdy string or a chalk line reel. Choose a fine, non-stretch cord so gravity gives true verticals despite slight wall texture or draft. Tie securely, test for wobble, then shorten so the weight clears baseboards and obstacles.
If you’ll use chalk, select a color that contrasts without staining the paint sheen. Practice dropping the line a few times to confirm repeatable placement. Store spare string and a level for cross-checks. Keep everything clean to avoid marking freshly primed surfaces.
Marking Vertical Reference
How will you transfer the plumb line’s true vertical to the wall? You’ll mark reference points from ceiling to baseboard, ensuring stripes respect color psychology and don’t distort perceptions. Use a pencil lightly so paint durability isn’t compromised by heavy erasing.
- Anchor the plumb at ceiling trim, let it settle.
- Mark top and bottom points; snap a light chalk line if needed.
- Measure and mark stripe widths from that vertical, keeping consistent spacing.
- Label each stripe for color sequence and finish.
These steady marks give you a reliable guide for taping and painting, preventing slanted stripes before you tape.
Maintaining True Alignment
With your reference marks in place, keep that plumb line as your steady guide while you tape and paint so each stripe stays perfectly vertical. You’ll stand back, sight along the line, and adjust tape so edges align with the string; re-tension the plumb if it drifts.
Work top to bottom, pressing tape firmly to prevent bleed. Paint one stripe at a time, remove tape while paint is tacky for crisp edges.
Consider color psychology when choosing stripe hues and plan furniture placement around focal stripes to enhance balance. Regularly recheck alignment to maintain straight, professional-looking verticals.
Transferring Measurements Across a Whole Wall
Once you’ve marked the first stripe, you’ll use a consistent reference line and simple tools—tape measure, level, and chalk or pencil—to carry those measurements across the entire wall. Start from that reference, measure stripe widths, and snap vertical chalk lines at each interval.
Work outward in stages, rechecking with the level to keep lines plumb. Consider color psychology when choosing stripe width and how stripes interact with furniture placement to guide sightlines.
Use this checklist as you transfer marks:
- Measure twice, mark once at floor and ceiling
- Use a laser level for long runs
- Space marks evenly with a story pole
- Reconfirm at corners and outlets
Planning Patterns With Mockups and Templates
Before you start taping, decide on the scale of your pattern so the stripes suit the room’s size and furniture.
Make simple paper templates of a single stripe width to test spacing and visual rhythm on the wall.
Tape or hold the templates up in different arrangements until the pattern looks balanced from several viewing points.
Choose Pattern Scale
Want bold, subtle, or somewhere in between? You’ll pick stripe width based on room size, furniture scale, and desired impact. Test small mockups to see how color combinations read from different angles and how stripes offer texture enhancement under lighting.
Consider these quick guidelines:
- Narrow (2–4″) for subtle rhythm and visual texture.
- Medium (5–8″) for balanced interest with most furnishings.
- Wide (9–18″) for bold statements and architectural emphasis.
Mix widths sparingly to avoid visual clutter; keep scale proportional to ceiling height.
Measure, photograph, and live with samples before committing so the pattern fits your space.
Make Paper Templates
When you’re ready to translate measurements into a real-world pattern, cut paper templates for each stripe width so you can tape them to the wall and visualize spacing, shifts, and how colors interact across the room.
Test full-height strips and alternate arrangements, stepping back to assess rhythm and sightlines. Use templates to try color psychology combinations—cool tones to widen, warm tones to cozy—before committing paint.
Mark edges and overlap allowances, noting where wall-mounted decor will sit so stripes align or avoid focal points. Adjust widths quickly, photograph layouts, and refine until the mockup matches your design intent.
Creating Repeatable Stencil Guides
Once you’ve marked your stripe layout, create a reusable stencil guide so you can reproduce those lines accurately across the whole wall.
Cut a rigid template from foam board or MDF sized to your stripe width; mark registration notches so you align edges consistently. This helps you test color psychology effects at scale and echo historical trends in stripe spacing without re-measuring.
Use the stencil to mask edges, paint, lift, and move down the wall.
- Score registration notches for fast alignment
- Reinforce edges with thin scrap wood
- Label orientation and sequence
- Keep one clean spare for touch-ups
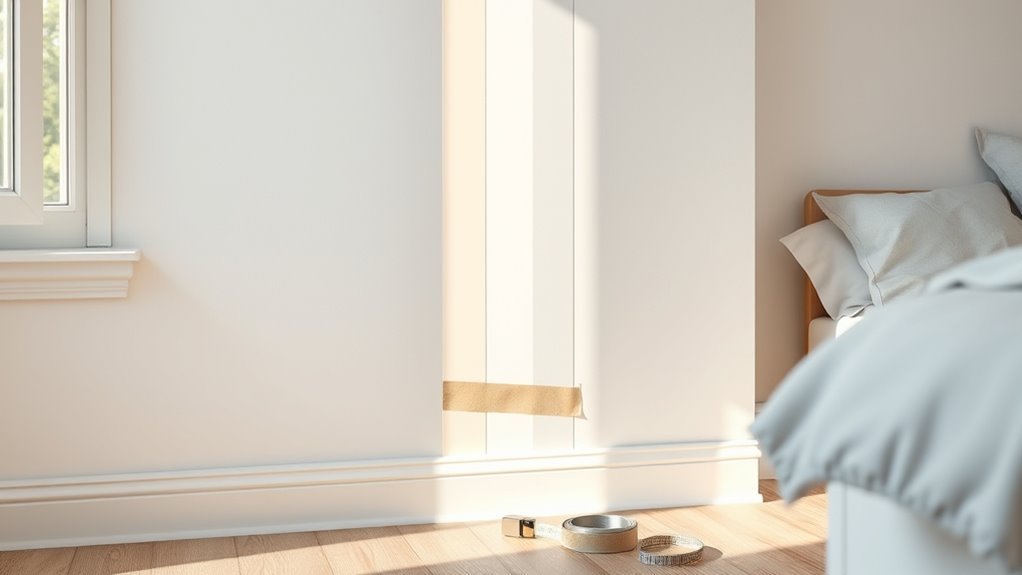
Choosing Painter’s Tape for Crisp Lines
You’ll want tape with the right adhesion strength so it sticks without peeling paint when you pull it off. Pick tape widths that match the stripe sizes you’re planning to paint for cleaner edges and fewer cuts.
Remove the tape at the proper time—usually just after the paint’s set but not fully cured—to avoid jagged lines or ripped paint.
Tape Adhesion Strength
How firmly you press your painter’s tape matters, but choosing the right adhesion level matters more—pick a tape that’s strong enough to seal paint edges yet gentle enough to remove without tearing drywall or stripping previous coats.
You’ll balance clean lines with substrate safety: delicate primers need lower tack, textured walls may require medium tack, and painted stripes near moldings call for careful testing.
Consider color psychology when planning stripe contrast and how furniture placement will hide minor imperfections.
Test a small strip, wait for paint to cure partially, then remove slowly.
- Low tack: fragile surfaces
- Medium tack: general use
- High tack: rough surfaces
- Test first: avoid surprises
Tape Width Selection
Pick tape widths that match the stripe size and the level of precision you want—narrow tapes (1/4″–1″) give you sharp, thin lines and flexibility for complex patterns, while wider tapes (1 1/2″–3″) speed up marking long, bold stripes and reduce seams to manage. You’ll pick narrow tape for delicate color psychology effects and fine stripe pattern symmetry, wider tape for bolder contrasts. Consider edge quality, wall texture, and paint bleed risk. Compare options:
| Tape Type | Best Use |
|---|---|
| 1/4″–1″ | Fine lines, detailed symmetry |
| 1 1/2″–3″ | Bold stripes, faster layout |
Removal Timing Tips
When you remove painter’s tape at the right moment, you’ll get the cleanest possible edges without pulling fresh paint or leaving jagged lines. Wait for paint to dry to the touch but not fully cured; that balance prevents lifting. Consider how stripes interact with wallpaper patterns and nearby furniture arrangements before peeling.
- Peel slowly at a 45° angle for control.
- Remove tape while paint is slightly tacky for smoother breaks.
- Score tape with a utility knife on delicate surfaces.
- Test a corner first to confirm timing.
Keep a damp cloth nearby to clean tiny smudges immediately.
How to Tape Vertical Stripes Without Gaps
Before you run the tape, make sure the wall’s surface is clean and flat so the adhesive seals evenly; any dust, uneven texture, or old paint ridges will create gaps.
Measure and mark vertical guides with a level, then apply painter’s tape along those lines, pressing firmly with a plastic card to guarantee full contact.
Overlap tapes slightly at joins, but avoid trapping air. Keep tape edges parallel for consistent stripes; consider how color psychology and lighting effects will interact with stripe width and placement.
Work in sections, checking adhesion as you go, and avoid stretching the tape to prevent lifting.
Sealing Tape Edges to Prevent Bleed‑Through
After you’ve pressed the tape down and smoothed out any gaps, seal the edges to stop paint bleed-through. You’ll want crisp stripe edges that respect your chosen color psychology and the wall texture. Run a thin layer of base wall color or clear acrylic sealant along both tape edges, letting it dry before applying the stripe color.
Press edges again if needed.
- Use a foam brush for control
- Apply sealant sparingly to avoid ridges
- Check seams against light to spot gaps
- Remove tape at a 45° angle while paint’s tacky
This prevents feathering and keeps stripes sharp.
Taping Around Windows, Doors, and Trim
Before you tape your stripes, prep the trim and surrounding surfaces by cleaning, sanding any rough spots, and applying a little primer where needed.
Use painter’s tape to mask around windows, doors, and baseboards, pressing the tape firmly to get a tight seal.
For openings, also cover glass and hardware with plastic or paper so paint stays only on the wall.
Prep Trim And Surfaces
When you’re ready to paint vertical stripes, tape off windows, doors, and trim carefully so paint lines stay crisp and clean; prep trim and surfaces first to guarantee sharp edges. Clean, sand, and prime any scuffed trim.
Match tape choice to wall texture and paint sheen to prevent bleed. Fill gaps with caulk and let it cure.
- Wipe dust from trim and jambs.
- Lightly sand glossy surfaces for adhesion.
- Use low-tack painter’s tape on delicate finishes.
- Remove loose paint and recaulk gaps.
Work methodically so your stripes meet trim with professional, even results.
Masking Around Openings
If you want crisp vertical stripes, tape carefully around windows, doors, and trim to prevent paint bleed and keep edges straight.
Measure and mark stripe lines, then apply high-quality painter’s tape along trim edges, pressing firmly into corners and any grooves to account for wall texture. Use a putty knife for tight adhesion where trim meets wall.
For windows and glass, mask edges and remove excess tape after the paint’s tacky, not fully dry. Match tape choice to paint sheen to avoid lifting finish.
Remove tape slowly at a 45° angle for clean lines and minimal touch-ups.
Continuing Stripes Across Molding and Baseboards
Although molding and baseboards interrupt the plane of your wall, you can carry vertical stripes over them smoothly with the right prep and tape placement. Prep by cleaning and sanding trim, and consider matching Vintage patterns by aligning stripe centers. Use low-tack painter’s tape and press edges firmly to prevent bleed. Choose Eco friendly paints for durability and low odor.
- Tape the wall first, then wrap tape over trim edges.
- Use a putty knife to seal tape against grooves.
- Trim excess tape for neat corners.
- Remove tape while paint is tacky for clean edges.
Work patiently for seamless continuity.
Painting the Base Coat Between Tape Lines
Start by pressing the tape edges firmly so you seal them against the wall to prevent bleed-through.
Apply the base coat in thin, even layers rather than one heavy coat so the paint won’t seep under the tape.
Once the paint’s tacky but not fully dry, remove the tape carefully at a 45-degree angle for crisp lines.
Seal Tape Edges
Want crisp, leak-free stripe edges? Seal tape edges by running a thin bead of your base coat along the tape line, then smooth it into the tape with a brush to block bleed-through. This sealing edges step acts like surface priming over the exposed wall texture. Do this before applying your stripe color.
Tips:
- Press tape firmly with a plastic scraper or credit card
- Apply base coat into the gap, not over it
- Wipe excess immediately with a damp cloth
- Let the seal dry fully before painting stripes
That preventative step keeps your vertical stripes sharp and professional-looking.
Use Thin Paint Layers
When you’re ready to paint between the tape lines, apply thin, even layers so the paint won’t puddle or seep under the edges. Multiple light coats give better coverage and crisper lines than one heavy coat.
Work methodically, rolling or brushing from top to bottom in smooth strokes, and wait between coats until the surface feels dry. Check paint container labels for recommended dry times and thinning instructions to avoid gloss or color shifts.
Think about color psychology as you layer—subtle variations build depth without overwhelming the room.
Clean tools between coats to maintain edge quality and consistent texture.
Remove Tape Carefully
After the base coat feels dry to the touch, peel the tape back slowly and steadily at a 45-degree angle to avoid pulling fresh paint away from the edge. Go light and deliberate, and stop if you see wet paint lifting. You’ll prevent jagged lines and minimize touch-ups.
Use gentle, consistent pressure and work in short sections. After removal, inspect the stripe edges and address any bleed with a fine brush while the paint is still workable. Keep tape removal tools handy, and finish with simple Wall cleaning to remove dust and smudges.
- Pull at 45° for best results
- Remove tape when slightly tacky
- Tidy bleed spots immediately
- Use mild Wall cleaning
Cutting In Stripe Edges With a Brush
Before you paint the stripe with a roller, cut in the edges with a steady brush so the lines stay crisp and the roller won’t push paint under your tape. You’ll work from top to bottom, using a high-quality angled sash brush and light, confident strokes along the tape edge.
Keep a small brush cup nearby to check color mixing consistency and prevent drips. Load the brush moderately—too much causes bleeding. Wipe excess on the tray edge and feather strokes toward the center of the stripe.
Store leftover paint properly in airtight cans for paint storage between sessions. Take steady, patient passes for best results.
Rolling Paint Inside Taped Stripes Evenly
Now that the stripe edges are neatly cut in, load a quality roller with a moderate nap and work from the top downward to fill the stripe evenly. Roll with light pressure, using smooth, overlapping strokes to avoid ridges. Don’t press paint under the tape; keep a consistent rhythm and remove excess on a tray edge.
Pay attention to how color psychology alters room mood while you step back and inspect.
- Use vertical strokes, not horizontal
- Feather near tape without breaching it
- Watch for drips at the baseboard
- Consider furniture placement when choosing stripe height
Finish by letting it level before touching.
When to Apply a Second Coat on Stripes
If a stripe looks thin or streaky after your first pass, you’ll want to think about a second coat.
Wait until the first coat is fully dry, then check coverage in natural light and touch up any spots that need more paint.
Apply the second coat only to areas that still show the wall or have uneven texture for a smooth, consistent finish.
When Paint Feels Thin
When the color looks patchy or the base shows through, you’ll know it’s time to think about a second coat on your stripes. Check the paint texture and how it sits against wall patterns before deciding. Lightly run your hand to feel for thin spots and look from various angles in natural light. If coverage is uneven, prep and recoat.
- Thin sheen or streaks across a stripe
- Base color visible at tape edges
- Brush or roller marks showing texture
- Contrast between adjacent stripes
Apply a thin, even second coat rather than heavy layers to preserve crisp lines.
After First Coat Dries
Once the first coat has dried to the touch and you’ve inspected for thin spots and tape bleed, decide whether and where a second coat is needed. You’ll weigh visibility, Color blending at stripe edges, and any Texture contrast between stripes. If stripes read even and edges stay sharp, you might skip a full second pass; otherwise, prioritize full strips over edges to avoid swelling lines.
| Area | Action |
|---|---|
| Full stripe | Recoat if uneven |
| Edge near tape | Light pass after tape removal |
| Contrast zones | Match texture |
| Primer-show-through | Full coat |
| Final check | Drying time before touch |
Spot Touching And Coverage
Although the first coat may look acceptable from across the room, you’ll want to inspect each stripe up close for thin spots, visible primer, or uneven texture before deciding where to apply a second coat. Run your hand lightly to feel texture differences and view stripes under different lighting effects to reveal translucence.
Consider how color psychology influences perceived depth—darker stripes may hide flaws, lighter ones reveal them. Target only flawed areas rather than recoating everything. Use a mini roller or angled brush for neat edges and feather into surrounding paint for seamless coverage.
- Check for primer bleed-through
- Look at sheen consistency
- Test in daylight
- Fix ghost lines
Removing Tape Without Tearing Paint
If you want clean, crisp stripes, peel the tape slowly and at a sharp angle while the paint’s still slightly tacky rather than fully cured.
Keep a steady, confident motion so you don’t jerk and lift edges. If paint begins to lift, press tape back down and score along the edge with a razor, then continue.
Use a low-tack painter’s tape suited to your wall finish; different surfaces—like textured walls or those with wallpaper patterns or elaborate ceiling treatments—need appropriate tape and timing.
Finish by gently wiping the edge with a damp cloth to remove any residue before it fully dries.
Touching Up and Sharpening Stripe Edges
If you spot paint bleeds along your stripe edges, gently scrub them with a damp cloth or a fine-grit sanding sponge to clean the area before repainting.
Feather the edges of the clean spot by thinning a bit of paint and blending outward so the repair doesn’t read as a patch.
Then use a steady hand and a small artist’s brush to repaint the stripe, keeping strokes parallel to the stripe for a crisp finish.
Clean Up Paint Bleeds
Once the main stripes are dry, you’ll spot small bleeds and uneven edges that need fixing; addressing them now keeps the pattern crisp. Match your paint color and examine wall texture to decide correction tools. Use a steady hand and minimal paint.
- Scrape away raised blisters with a razor, then sand smooth.
- Thin a fingertip of trim brush and run along the edge to reclaim a sharp line.
- Use a cotton swab dampened with mineral spirits for tiny smudges (test first).
- Re-tape narrow gaps and touch in with the base or stripe color, pressing tape edge firmly.
Work in small sections for best control.
Feather And Repaint
After cleaning up bleeds and smoothing the surface, you’ll move into feathering and repainting to sharpen stripe edges and blend repairs. Use feathering techniques with a slightly damp brush to soften gradual changeovers where tape lifted paint; lightly drag bristles outward from the stripe edge to thin excess paint. Match original finish and load minimal paint for control.
For repainting tips, work in thin layers, feathering each coat until edges read crisp from a distance. Let each coat dry fully, remove any stray hairs, then step back and inspect under good light.
Final touch: seal with a clear matte if needed.
Repairing Accidental Splatters on Striped Walls
While you work carefully, splatters can still happen, and addressing them promptly keeps your stripes crisp and clean. If you spot a splatter cleanup need or an accidental smudge, act fast: blot wet paint with a damp cloth, don’t smear.
For dried spots, gently sand the tiny bump, then touch up with matching paint using a fine brush. Protect surrounding stripes with painter’s tape before repainting.
If multiple splatters occur, step back to assess pattern disruption and correct systematically.
- Blot immediately
- Sand dried specks
- Use fine brush touch-ups
- Re-tape before painting
How to Refinish or Repaint Stripes Later
If splatters or wear have left your stripes uneven, you’ll want to refinish or repaint sections to restore a crisp look. Match original paint and clean edges with fine brushes or an angled brush for hairline repairs. Use light sanding, spot priming, then feather new paint to avoid harsh seams; practice color blending at the join. Maintain pattern contrast by repainting full stripes when damage is extensive. Use low-tack tape for crisp borders. Track progress and touch adjacent stripes to balance sheen.
| Step | Tool | Tip |
|---|---|---|
| Prep | Sand/Primer | Feather edges |
| Paint | Brush/Roller | Match sheen |
| Finish | Seal | Inspect light |
Removing Old Stripes and Restoring a Plain Wall
Although removing old stripes can seem intimidating, you can strip them cleanly and restore a plain wall by working methodically.
Prep: move furniture, cover floors, and test paint stripper or sanding on a small area. Remove trim if needed, sand seams, then prime to hide pigment bleed.
Repaint with even strokes and consider color psychology when choosing the new neutral to suit mood and room function.
Reposition furniture placement after paint cures to avoid scuffs and to evaluate the room’s balance.
Tips:
- Use a mild stripper for latex paint
- Feather edges with fine sandpaper
- Spot-prime stained areas
- Allow full dry time
Maintaining Painted Stripes for Long‑Lasting Color
Once your stripes are dry and cured, you’ll keep them vibrant by adopting a simple maintenance routine that prevents dirt, fading, and chips. Wipe gently with a soft cloth and mild detergent, spot-cleaning stains promptly to avoid permanent marks.
Once dry and cured, maintain vibrant stripes by gently wiping with a soft cloth and mild detergent, spot-cleaning stains promptly.
Touch up chips with matched paint and feather edges to blend. Protect against UV exposure using curtains or UV-blocking window film to slow fading.
Rotate wall decor and furniture to distribute wear evenly. Note historical influences and cultural symbolism when choosing touch-up colors so repairs respect original intent.
Regular inspections every few months catch issues early and preserve crisp lines.
Painting Stripes on Textured or Popcorn Walls
When working with textured or popcorn walls, you’ll need different tools and techniques than you’d on smooth surfaces to get crisp, even stripes without damaging the texture.
Start by testing paint adhesion and practice stripe edges on a scrap board.
Use a thick-nap roller, angled brush for edges, and flexible painter’s tape pressed into the crevices.
Seal tape edges with a thin coat before rolling.
- Choose high-viscosity paints to avoid drip pooling
- Press tape gently, don’t flatten texture
- Feather edges with a dry brush if needed
- Consider Faux finishes or Wall murals to complement stripes
Work patiently for best results.
Stripes for High, Sloped, or Vaulted Ceilings
When tackling stripes on high, sloped, or vaulted ceilings, you’ll want to measure the ceiling angles carefully so your lines stay straight across changing planes.
Use a reliable scaffold or tall ladder and secure it properly before you start painting to keep yourself steady.
Planning your measurements and safety setup first will make the striping go much smoother.
Measure Ceiling Angles
If your ceiling isn’t flat or sits higher than a standard room, you’ll need to measure its angles before laying out stripes so they read straight from the floor.
Check ceiling texture first; bumps or beams change how light reflection plays across stripes.
Use a laser level or long straightedge to project plumb lines from ceiling to floor, noting high and low points.
Measure at multiple locations and record angles in degrees.
- Mark apexes and shifts
- Note beam offsets and soffits
- Measure distance from top plate to floor
- Sketch a scaled elevation
Adjust stripe layout to the recorded angles.
Secure Scaffolding Safely
Now that you’ve mapped ceiling angles and noted beams or shifts, secure scaffolding before you paint to keep your work steady and safe on high, sloped, or vaulted ceilings. You’ll inspect components, lock braces, and use levelers so platforms sit flat against uneven floors.
Anchor scaffolding to studs or use weighted outriggers where allowed, and keep tools tethered to prevent falls. Check ladder stability when accessing the platform; extend ladders correctly and tie them off.
Wear a harness if required and follow manufacturer load limits. Maintain clear communication with helpers and recheck connections throughout the job for consistent scaffolding safety.
Stripes Around Windows, Doors, and Corners
Because edges and openings demand extra care, plan how your stripes will meet windows, doors, and corners before you paint. You’ll align stripe edges with window trim and door framing so progressions look intentional. Measure from a reference line, mark edges lightly, and use painter’s tape stretched taut.
At corners, butt tape into the angle to prevent bleed and peel back slowly after the topcoat’s tacky stage. For tight areas, use a sash brush to cut in precisely.
Consider these tips:
- Match stripe width to trim proportions
- Seal tape edges with base color
- Paint inward from openings
- Sand between coats
Continuing Stripes Across Cabinets and Furniture
When your stripes cross cabinets and furniture, plan their path so patterns stay consistent and hardware doesn’t interrupt the visual flow. You’ll align stripe edges with cabinet frames for cabinet continuity, snapping chalk lines and using low-tack painter’s tape.
Remove or mask hardware, paint across recessed panels carefully, and feather edges to avoid buildup.
For furniture coordination, extend the wall pattern onto cabinet doors or leave a border to frame pieces—choose one approach and stick with it. Test a small section first so shift looks intentional.
Clean tape lines before the paint fully dries for crisp results.
Bold Color‑Block Vertical Stripes
Ready to make a bold statement, you’ll start by picking a high-contrast color palette that suits the room’s scale and light.
Use precise tape and a measured layout to map each vertical block before you paint.
Finish with sharp edges and careful touchups so the color fields read crisp and professional.
Choosing Bold Color Palette
Looking for a palette that makes vertical stripes pop? You’ll choose colors that balance mood and contrast: use color psychology to set tone and consider stripe symbolism for meaning. Pick a dominant hue, an accent, a neutral, and a trim color to keep stripes bold but grounded.
- High-contrast pairs (navy + mustard) for energy
- Monochrome variations for subtle depth
- Accent pops (teal or coral) to draw the eye
- Soft neutrals to rest the space
Test samples on the wall in different light, imagine furniture interplay, and commit once you’re sure the palette reads strong and intentional.
Tape And Layout Techniques
Because neat, bold color‑block stripes start with careful planning, you’ll want to map and mask your wall before you paint. Measure and mark stripes with a level, then apply low‑tack tape; press edges firmly to prevent seepage. Plan color blending zones and stagger swatches to test Pattern contrast. Work one stripe at a time, removing tape while paint’s tacky. Use a straightedge for long runs and a small roller near taped edges. Keep a clean rag and small brush for quick fixes. Trust the layout rhythm; accurate tape and measured spacing make crisp, bold verticals every time.
| Measure | Tape | Paint |
|---|---|---|
| Level | Low‑tack | Roller |
| Mark | Press | Brush |
Clean Edges And Touchups
When the paint’s mostly dry but still slightly tacky, peel the tape back at a 45° angle to reveal the clean, crisp lines you planned—do it slowly so you don’t lift the new paint.
Check edges for tiny bleeds and account for wall texture when deciding if a light touch-up is needed. Match paint sheen and color for seamless fixes. Use a small brush and feather outward from the stripe.
- Dab excess with a damp cloth
- Fill pinholes with thin paint
- Sand microscopically once cured
- Re-tape for larger corrections
Stand back, inspect, and enjoy your bold stripes.
Subtle Tonal Stripes for a Soft Look
If you want a soft, sophisticated effect, subtle tonal stripes add depth without shouting for attention. You’ll choose shades close in value so the wall reads calm yet textured. Consider color psychology when selecting hues to evoke warmth or serenity, and plan furniture coordination so sofas and art sit harmoniously against stripes. Use low-contrast pairs, precise tape lines, and a steady brush to keep edges crisp but understated. Test samples on the wall at different light times.
| Hue Pair | Mood |
|---|---|
| Warm beige + cream | Cozy |
| Pale gray + dove | Calm |
| Muted sage + mint | Fresh |
Alternating Narrow and Wide Stripe Layouts
When you choose alternating narrow and wide stripes, plan exact widths so the pattern feels balanced across the wall. Measure and mark each stripe carefully, accounting for trim, corners, and any outlets.
Use a consistent sequence (for example, 4″ narrow, 8″ wide) and double-check spacing before taping.
Planning Stripe Widths
Although a consistent rhythm helps the eye, alternating narrow and wide stripes lets you add visual interest without overwhelming the room, so start by deciding the exact widths you want for each stripe and how many repeats will fit your wall.
You’ll balance color blending with stripe symmetry to keep the pattern cohesive. Sketch scaled versions, test samples on poster board, and note shifts where moldings or outlets interrupt stripes.
Consider traffic flow and sightlines.
- Choose a dominant width and a contrasting narrow width
- Keep a repeat pattern for symmetry
- Test paint swatches together
- Account for trim and fixtures
Measuring For Alternation
Ready to get precise? Measure your wall width, note any irregularities from wall texture, and decide on a repeat pattern: narrow-wide-narrow-wide.
Mark a baseline at floor and ceiling, then divide total width by the sum of one narrow plus one wide unit to get the unit width.
Multiply for each narrow and wide stripe, transferring marks with a level or plumb line.
Account for trim, corners, and door openings.
Consider paint sheen differences—glossier sheens highlight imperfections—so adjust stripe placement to minimize attention to rough areas.
Double-check measurements before taping to avoid cumulative error.
Metallic or Glossy Stripe Accents
If you want to add a touch of glam or a sleek modern edge, metallic or glossy stripe accents will make your wall pop without overwhelming the room. You’ll use Metallic finishes and Glossy textures sparingly to highlight key stripes.
Prep with precise taping and a smooth base coat, then apply thin, even layers. Consider scale and light to avoid glare.
- Choose metallic paint or high-gloss enamel for contrast
- Test swatches under room lighting before committing
- Use a fine brush or small roller for clean edges
- Seal metallics with appropriate clear coat for durability
Creating an Ombré Vertical Stripe Effect
When you want a soft, blended shift down a wall, an ombré vertical stripe effect gives you color depth without hard lines. Start by marking stripe widths and taping Decorative borders where you need crisp edges.
Choose three to five tint variations of the same hue for smooth Color blending. Apply the lightest at the top, darkest at the bottom, working wet to wet.
Use a dry brush or sponge to feather graduations—lift excess paint, then blend horizontally across the seam. Remove tape while paint is tacky to avoid tearing.
Finish with a light glaze if you want greater subtlety.
Estimating Time and Budget for a Stripe Project
Before you pick up the tape, map out both the time and money you’ll need so the job doesn’t stretch or overspend—estimate surface prep, priming, painting coats, drying times, and cleanup.
Include supplies like tape, rollers, paint, and any specialty tools.
Decide on labor: DIY or pro, factoring pace and interruptions.
Account for sample swatches to test color psychology effects and reference historical context for authentic palettes if relevant.
Budget for extras: wasted paint, replacement blades, touch-ups.
Plan a timeline with buffer days for drying and corrections.
- Materials list with prices
- Hourly task breakdown
- Contingency fund (10–20%)
- Drying/curing schedule
Avoiding and Fixing Tape Bleed‑Through
While you’re taping stripes, press the edges firmly and seal them with a putty knife or your fingernail so paint can’t creep under; that upfront care prevents most bleed‑through and saves you tedious touch‑ups later.
If small seepage occurs, wait until paint skins over, then gently sand and repaint the stripe with a thin coat to preserve crisp edges and paint durability.
For heavier bleed, apply a glazing wash of the base color across the tape edge to lock stray pigment, let it dry, then repaint the stripe. This method controls color blending at seams and keeps stripes looking professional.
Correcting Wavy or Uneven Stripe Lines
If your stripes look wavy, first recheck the tape placement and press edges firmly to the wall so the lines stay straight.
For any paint bleed along the tape, scrape or sand the excess lightly and touch up with a small brush.
Work slowly and use short, controlled strokes to correct uneven areas without creating new mistakes.
Check Tape Placement
Want crisp, straight stripes? Check your tape placement before you paint. Proper alignment and firm adhesion prevent waviness and uneven lines. Press tape edges down with a flat tool for consistent edge sealing. If lines look off, reposition rather than force paint over gaps.
- Align tape to a plumb line or level.
- Smooth edges with a plastic card for tight adhesion.
- Use high-quality painter’s tape suited for your wall finish.
- Remove and reapply tape on any uneven sections.
Take a moment now to perfect placement; it’s the simplest step to flawless vertical stripes.
Fix Paint Bleed
How do you stop paint from bleeding under the tape and restore crisp, straight stripes? You’ll remove wavy edges by sanding tiny ridges, sealing tape edges with the base color, and using a foam roller for touch-ups. Blend corrections with subtle faux finishes if needed so repairs match the pattern and respect color psychology—contrast intensity affects perception of flaws. Work wet-edge to avoid lap marks and peel tape slowly at a 45° angle.
| Problem | Fix | Tool |
|---|---|---|
| Bleed | Seal with base | Small brush |
| Ragged edge | Sand & feather | Fine sandpaper |
| Mismatch | Faux finish blend | Sponge |
Common Stripe Problems and Quick Fixes
Although vertical stripes can transform a room, small mistakes like paint bleed, uneven edges, or misaligned tape lines can quickly ruin the effect. The good news is you can fix most problems without repainting the whole wall.
Start with spot fixes: use a small brush for bleed and check color mixing to match touch-ups. Light wall sanding smooths ridges before repainting edges.
For misaligned tape, lift and re-tape carefully.
- Bleed: scrape and touch with matched paint
- Jagged edge: sand, re-tape, paint
- Color mismatch: test swatches
- Texture issues: feather with roller
Adapting Techniques for Rental Units
Before you start, get landlord permission so you don’t risk your deposit. Consider removable paint or peel-and-stick wallpaper for bold stripes you can undo later.
Protect trim and original surfaces with tape and drop cloths to guarantee everything can be restored.
Landlord Permission First
If you rent, get your landlord’s written permission before you start painting stripes so you don’t risk losing your deposit or facing a lease violation. Ask about restrictions, timeline, and whether patching is required at move-out. Mention your pet policy if pets affect wall care or access. Request permission in writing and keep copies tied to your lease and lease renewal discussions.
Explain colors, stripe width, and location.
Offer to repaint to original color at move-out.
Agree on approved paints and primers.
Confirm inspection timing and deposit impact.
Keep communication clear to avoid surprises.
Removable Paint Alternatives
When you can’t or don’t want to alter the walls permanently, several removable options let you get the vertical-stripe look without risking your deposit: peel-and-stick wallpaper, temporary wall decals, adhesive-backed fabric panels, and magnetic strips paired with thin metal sheets or paintable metal primer.
You can align peel-and-stick panels like painted stripes, trim edges with a decorative border, or layer wall decals for narrower lines. Adhesive fabric hides texture and peels off cleanly.
Magnetic systems let you change colors fast. Test adhesion on a hidden spot, follow manufacturer removal instructions, and store pieces flat for reuse in your next rental.
Protecting Original Surfaces
Because rentals often come with rules and security deposits at stake, you’ll want strategies that protect original surfaces while still letting you create vertical stripes. Assess wall texture and choose low-tack painter’s tape; test a small patch to confirm tape won’t pull paint or alter paint sheen. Use removable primers or temporary wallpaper for bolder colors, and apply thin coats to reduce edge bleed. Clean and dry surfaces first.
Consider these steps:
- Test tape on an inconspicuous area for adhesion and finish impact
- Use an angled brush for crisp edges
- Apply caulk to seal gaps before taping
- Peel tape slowly after drying
Hiring a Pro for Stripe Painting: What to Ask
Before you hire someone for stripe painting, know which questions will reveal their skill, reliability, and attention to detail.
Ask about experience with color psychology and how they select contrasting hues that suit your room’s mood, plus examples of projects—especially vintage styles or modern looks—to confirm versatility.
Inquire about their process for measuring, taping, and cutting clean edges; request a timeline and daily work habits.
Confirm license, insurance, and references, and ask for a written estimate with paint brands and prep work listed.
Finally, clarify warranty on paint and touch-ups so you’re protected after completion.
Photographing and Styling a Room With Stripes
Once you’ve nailed the stripe layout with a pro or on your own, think about how photography and styling will showcase that work. You’ll want photos that highlight scale, rhythm, and texture while conveying mood through color psychology and nods to historical patterns.
Shoot during soft daylight, use a tripod for straight lines, and style with minimal furniture to keep focus. Consider these styling tips:
- Place a single statement piece to show scale.
- Use fabrics that echo stripe colors for cohesion.
- Angle shots to emphasize verticality and ceiling height.
- Include a human element for warmth and context.
Frequently Asked Questions
Can Vertical Stripes Make a Small Room Feel Taller at Night?
Yes — you can make a small room feel taller at night by using vertical stripes combined with strategic lighting effects and balanced color contrast; you’ll enhance perceived height if lights emphasize stripe direction and avoid harsh shadowing.
Can Wallpaper Stripes Be Matched to Painted Stripes Seamlessly?
Yes — you can match wallpaper stripes to painted stripes seamlessly if you align stripe patterns, measure precisely, and use paint color coordination to mix or tint paints to the wallpaper hues, then carefully blend seams and overlap edges.
Will Vertical Stripes Hide or Highlight Imperfect Corners?
They’ll mostly highlight imperfect corners, but you can use corner disguising techniques to soften them; vertical stripes create visual elongation that draws eyes up, so minor flaws become less obvious if stripes are aligned thoughtfully.
How Do Stripes Affect Resale Value of a Home?
You’ll often boost appeal if stripes use neutral palettes; color psychology and design coordination matter. Buyers’ll notice style and coherence—bold or mismatched stripes can deter, while subtle, well-coordinated stripes can increase perceived value.
Can Vertical Stripes Be Applied Over Heat-Sensitive Surfaces (Radiators)?
You can’t paint directly on active radiators; you’ll need radiator coverage and heat resistant paint applied only when cool. Remove or mask parts, use proper primer, and follow temperature-rated product instructions for safe, lasting stripes.
Conclusion
So you followed every painstaking step to paint perfect vertical stripes — and now the room looks taller, more polished, and strangely like a showroom you swore you’d never become. Congrats: your wall went from “oops” to “architect’s Instagram.” You’ll obsess over one tiny wobble no one else will notice, then invite everyone over anyway. Enjoy that smug satisfaction; you earned it with tape, patience, and the quiet terror of the first unsteady brushstroke.