How to Paint Walls With Sprayer (Fast & Smooth)
Use an airless or HVLP sprayer for large interior walls, prep surfaces well, cover trim and floors, and thin paint per manufacturer directions; work in steady, overlapping passes, keep the nozzle 8–12 inches from the wall, and practice trigger control to avoid drips and orange peel. Tape edges and back-roll or feather at trim for a seamless finish, clean equipment thoroughly, and inspect for missed spots—keep going for detailed tips on sprayer types, setup, and common pitfalls.
How to Decide Whether to Spray, Roll, or Hire a Pro
When you’re planning a paint job, weigh speed, finish, and cost to decide whether to spray, roll, or hire a pro. You’ll assess time, skill, and surface complexity: spraying saves time on large, smooth areas, rolling suits small patches and textured walls, and a pro handles tricky prep, high ceilings, or trim.
Factor equipment rental, learning curve, and cleanup when comparing costs. Ask about color matching if you need an exact hue, and consider eco friendly paints for low-VOC options.
Choose the method that meets your budget, timeline, and desired finish without compromising quality.
Why Spraying Is Faster and Smoother Than Rolling
When you use a sprayer, you cover more surface with each pass, so large walls go up in minutes instead of hours.
You’ll get an ultra-smooth coat because the fine mist levels out without the texture a roller leaves.
That even finish means fewer touch-ups and a more professional result.
Faster Coverage Per Pass
Why does spraying cover more ground with each pass? You push a uniform fan of fine droplets that lay down consistent film thickness, so you move faster without sacrificing color matching or paint durability. Spraying reduces overlap fuss and minimizes rework, letting you finish large surfaces quickly.
- You coat wide swaths in one sweep, not small roller circles.
- You avoid nap drag that slows rollers and traps lint.
- You maintain a consistent wet edge, reducing touch-ups.
- You control flow and pattern to match surface texture.
- You spend less time refilling and more time progressing across walls.
Ultra-Smooth, Even Finish
Because a sprayer atomizes paint into uniform, fine droplets and lays them on in a thin, consistent film, you’ll get a smoother, more even finish than rolling can deliver. You’ll notice fewer brush marks, no roller stipple, and seamless progressions between passes when you control speed and overlap.
Adjust pressure and tip size for the paint and surface, and test on cardboard to confirm spray pattern and color selection before committing.
Mask trim, vents, and use extensive furniture protection to catch overspray. With practice you’ll achieve fast, professional-looking walls that need minimal touch-ups and less sanding afterward.
Which Paint Sprayer Type Is Best for Interior Walls?
If you want smooth, efficient coverage on interior walls, choose the sprayer that matches the scale of your job and the paint you’re using. You’ll consider room size, finish level, and whether you’re using waterborne or thicker eco-friendly paints.
Think about prep time, overspray control, and how color theory affects perceived texture and coverage.
- Small rooms: handheld for touch-ups and tight spots.
- Large rooms: larger-capacity sprayer to save time.
- Textured walls: adjust tip size for even laydown.
- Trim and ceilings: use a lower-pressure setting.
- Finishes: pick a sprayer that handles your chosen sheen.
Comparing HVLP, Airless, and Handheld Paint Sprayers
When you’re choosing between HVLP, airless, and handheld sprayers, focus on control, speed, and the type of paint you’ll use. HVLP gives fine control and smoother finishes for thinner paints and detailed trim; it helps with consistent color mixing but runs slower.
Airless excels at speed and thicker paints, covering large wall areas quickly but producing more overspray.
Handheld units suit small touch-ups and tight spots, are easy to clean, and limit waste in paint storage.
Match sprayer to project scale, viscosity, and finish expectations, and factor cleanup, tip size, and maintenance into your decision.
Room Size and Layout: Choosing the Right Paint Sprayer
Although sprayer choice often comes down to paint type and finish, room size and layout should guide which unit you pick. You’ll assess access, ceilings, and obstructions, and think about Color matching stations and Ventilation planning to keep overspray controlled.
Match hose length and flow to room scale, favor portable units for tight spaces, and choose higher-capacity sprayers for large open areas. Consider extension wands for high walls and adjustable nozzles for trims.
- Small bedroom: compact handheld
- Large living room: airless with big capacity
- High ceilings: extension wand
- Narrow hallways: lightweight unit
- Poor ventilation: low-overspray model
What Paint Types Work Best With Wall Sprayers
You’ll find that water-based latex and acrylic paints spray smoothly for most interior walls and dry fast, making them a go-to choice.
If you need tougher, glossy finishes for trim or high-traffic areas, oil-based enamels spray well but need proper thinning and ventilation.
Also consider specialty primers and coatings—sprayers handle them efficiently when you match viscosity and tip size to the product.
Latex And Acrylic Paints
Because latex and acrylic paints balance flow, coverage, and durability, they’re the go-to choices for most wall sprayer jobs. You’ll get smooth color blending, quick dry times, and reliable paint durability without thinning much. They clean up with water, reduce overspray issues, and suit most interior walls.
- Use high-quality latex for even coverage and fewer passes.
- Choose acrylic for improved adhesion on tricky surfaces.
- Thin slightly only if your sprayer’s manual recommends it.
- Test on a scrap panel to dial in atomization and pattern.
- Maintain tip size and pressure for consistent finish and fewer runs.
Oil-Based Enamels
When you need a hard, glossy finish that stands up to wear, oil-based enamels are a strong choice for wall sprayers. You’ll get durable, smooth coverage that resists scuffs, making Oil based Enamel paints ideal for high-traffic areas. Thin properly for your sprayer, ventilate well, and expect longer drying times than latex. Clean equipment with appropriate solvent. Test spray on scrap to dial in tip size and pressure.
| Feature | Benefit | Note |
|---|---|---|
| Durability | Resists wear | Great for trim |
| Finish | High gloss | Shows imperfections |
| Dry time | Slower | Plan longer |
| Cleanup | Solvent required | Protect surfaces |
Specialty Primer Coatings
Although primers don’t get the spotlight, choosing the right specialty primer makes spraying easier and gives paint a truer, longer-lasting finish. You’ll pick primers based on substrate, gloss level, and whether you’ll hide stains or seal porous surfaces.
Specialty primers help smooth wall texture, improve adhesion for oil or enamel topcoats, and prevent bleed-through from tannins. They also let you layer decorative patterns cleanly.
Consider these options before you spray:
- Stain-blocking primer for knots and tannins
- High-build primer to even rough wall texture
- Bonding primer for slick surfaces
- Shellac primer for severe stains
- Acrylic primer for general use
Read Paint Labels: Key Terms for Sprayer Use (VOC, Solids, Thinning)
If you want a smooth, trouble-free sprayer session, start by reading the paint label carefully—those small terms (VOC, solids, thinning instructions) directly affect sprayability and finish.
Check VOC limits for ventilation and legal compliance; low-VOC formulas spray differently and may need slower passes.
Check VOC limits for ventilation and legal compliance—low‑VOC paints spray differently and often require slower, more deliberate passes.
Note solids percentage—higher solids give better coverage per pass and influence how much you’ll need.
Follow thinning guidelines precisely; don’t guess ratios (next section covers technique).
Also confirm color matching and paint branding to guarantee consistency and warranty support.
Keep the label handy during setup so you’ll adjust pressure and tip choice correctly.
How to Thin Paint for Your Specific Sprayer
Before you thin anything, check your sprayer’s manufacturer specs for recommended thinner type and max viscosity.
Then test the paint’s viscosity and flow with a cup or viscosity meter, adjusting in small increments until it sprays smoothly.
Keep notes on ratios so you’ll get consistent results next time.
Check Sprayer Manufacturer Specs
When you’re prepping your sprayer, check the manufacturer’s specs so you know exactly how much to thin the paint and which thinners are approved. Following their guidelines prevents clogs, protects seals, and keeps your warranty intact.
You’ll follow manufacturer guidelines for viscosity limits, compatible solvents, and pressure ranges to guarantee proper sprayer calibration and reliable performance. Ignore vague advice—use the spec sheet for clear limits. If something’s unclear, contact support before mixing.
Quick checklist:
- Note recommended thinning ratios
- Confirm approved solvent types
- Record max/min pressure settings
- Verify nozzle size compatibility
- Save the spec sheet for reference
Test Viscosity And Flow
Although thinning can feel fiddly, you’ll want to test viscosity and flow to match your sprayer’s requirements precisely. Mix small batches using the manufacturer’s recommended thinner, then measure with a viscosity cup or flow gauge.
Spray test panels at different dilutions, noting atomization, coverage, and run tendency. Record successful ratios for future use.
Paint storage and label containers clearly.
If you see spitting or heavy droplets, add small increments of thinner; if misting or overspray increases, reduce it.
Clean and inspect filters between tests as part of sprayer maintenance to ensure results reflect paint consistency, not clogged components.
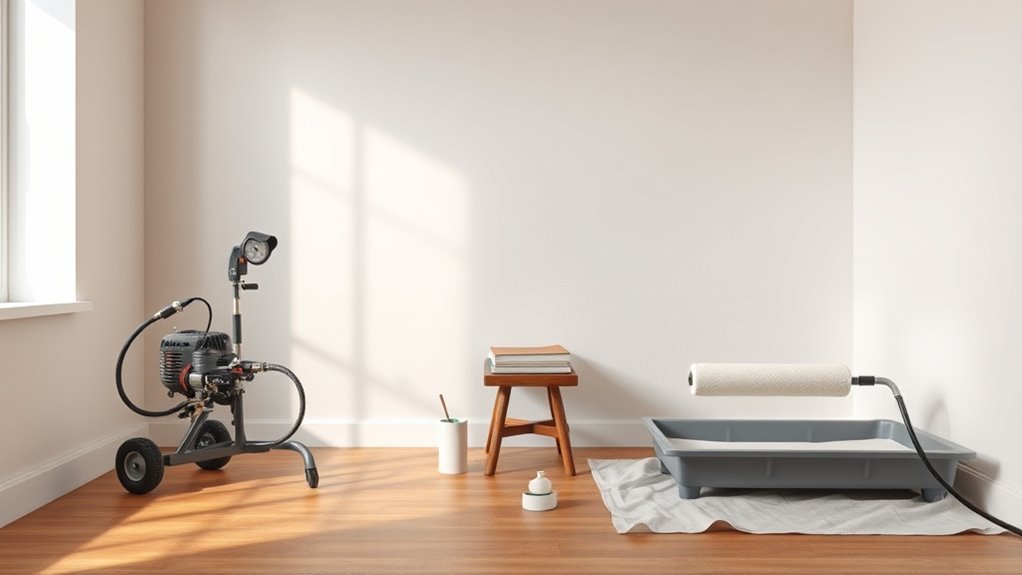
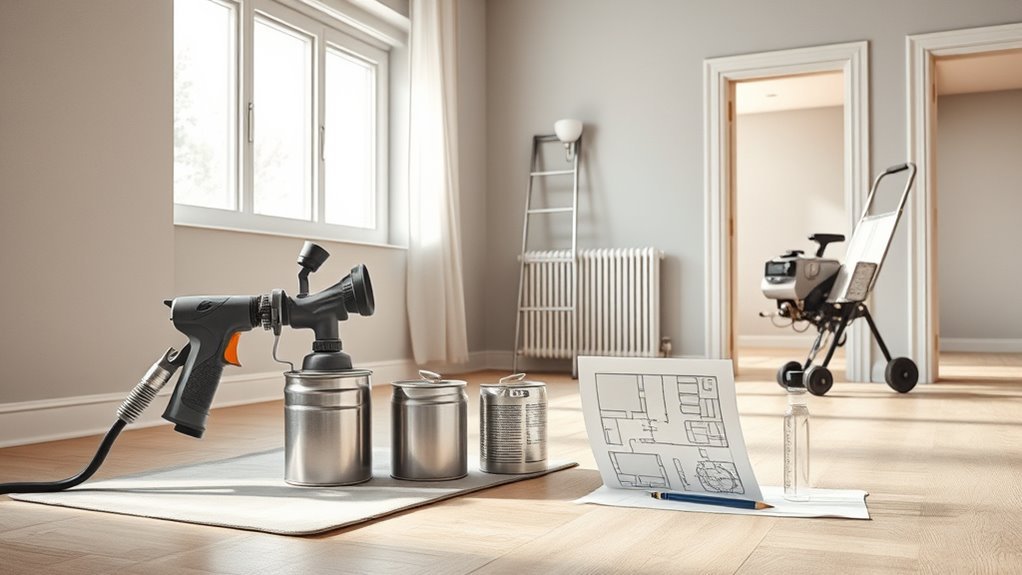
Tools and Supplies to Gather Before You Start
Since a good finish depends on preparation, gather the right sprayer, extension wand, masks, drop cloths, and paint first so you won’t interrupt the job to hunt for tools. You’ll also confirm color selection and complete paint mixing before you start.
Collect items that save time, protect surfaces, and guarantee even coverage.
- Masking tape and plastic sheeting for edges and furniture
- Sandpaper and tack cloth for surface prep
- A quality sprayer with filters and an extension wand
- Respirator mask and safety goggles
- Drop cloths and a paint bucket with strainer
Have these ready, then you can spray confidently.
How to Estimate Paint Quantity for Spraying
Before you start spraying, measure the total wall surface area by multiplying height by width for each wall. Subtract the areas of windows and doors from this total.
Use that square footage and the paint’s coverage rate to calculate how many gallons you’ll need per coat.
Always round up for wasted paint and plan for at least two coats unless the manufacturer or a test patch says otherwise.
Measure Surface Area
Wondering how much paint you’ll need for spraying? Measure each wall’s height and width, subtract doors and windows, and note textured areas. Accurate surface area helps with color mixing decisions and avoids extra cans in paint storage.
- Measure wall height × width for every wall.
- Subtract openings (doors, windows) from totals.
- Add 10–15% for texture or waste.
- Record ceilings and trim separately.
- Label measurements with room names and finish type.
With clear area totals, you’ll plan coats and keep leftover color mixing samples organized in storage for touch-ups.
Calculate Paint Needed
Now that you’ve totaled each wall and accounted for openings and texture, you can calculate how much paint the sprayer will actually use. Divide your total square footage by the paint’s coverage per gallon (check the can), then multiply by coats—usually two for an even finish.
Add 10–15% for overspray and touchups when using a sprayer. If you plan decorative techniques or heavy textures, add another 10–20% depending on porosity.
For color matching, buy a bit extra from the same lot or note the batch number. Keep a small reserve can for repairs and precise matching later.
Calculating Coverage: Walls Versus Ceilings
When you calculate coverage for walls versus ceilings, remember ceilings usually need more paint per room because they take more spray overlap and often require extra coats for even finish. You’ll measure surface area, factor texture, and account for windows and doors. Include color matching allowances and plan tool maintenance to keep spray patterns consistent.
- Measure wall height × length, then subtract openings
- Add ceiling square footage and increase by 10–20% for overlap
- Bump up for textured or popcorn ceilings
- Reserve extra for touch-ups and color matching trials
- Schedule quick tool maintenance between rooms to avoid clogs
How to Plan a Spraying Sequence for One Room
After you’ve calculated coverage and set aside extra paint, map out the spraying order to work efficiently and avoid re-spraying wet areas. Start with ceilings or highest walls, then move clockwise so drying edges stay untouched. Consider Color selection roomwide so touch-ups blend, and factor Lighting considerations—natural light highlights flaws. Plan doors and windows last on each wall to keep edges crisp. Use a timer for consistent passes and let each coat tack slightly before the next. Stay mindful of airflow to control dry time.
| Calm | Confident |
|---|---|
| Focused | Ready |
| Steady | Proud |
| Patient | Done |
How to Protect Floors, Trim, and Fixtures From Overspray
Want to keep overspray off floors, trim, and fixtures? Prep smart: remove small items, cover larger pieces, and set up work zones so paint storage and color mixing cans aren’t in the spray path. Use drop cloths and low-tack painter’s tape on trim edges. Work from top to bottom and spray away from protected areas. Clean spills immediately.
- Lay down heavyweight canvas or plastic droppers
- Tape paper along baseboards, not directly on delicate trim
- Bag light fixtures and fasten with twist ties
- Move furniture to center and cover
- Keep paint storage sealed and labeled
How to Mask Windows, Outlets, and Vents Quickly
Start by protecting window glass with low-tack painter’s tape and thin plastic sheeting so you won’t get overspray on the panes.
For outlets, snap on reusable outlet covers or tape a folded piece of plastic over the faceplate to save time.
Finally, seal air vents with light tape and paper or removable vent covers to keep paint out while you spray.
Protect Window Glass
Masking windows, outlets, and vents protects glass and hardware from overspray and keeps cleanup minimal, so gather painter’s tape, plastic sheeting, and a sharp utility knife before you begin.
For window protection and glass masking, press tape along sash edges, smooth plastic over panes, and trim excess with the knife. Work from the inside out, check seals, and avoid stretching tape so it releases cleanly.
- Tape along frame seams first
- Cover entire glass with lightweight plastic
- Fold edges for neat corners
- Use continuous lengths of tape
- Label taped windows for quick removal
Cover Outlets Fast
When you’re painting with a sprayer, cover outlets quickly to prevent overspray and save cleanup time; use painter’s tape and pre-cut plastic or foam outlet covers so you can work efficiently. Press tape firmly around plates, tuck plastic edges under baseboards, and label covers if you’re switching colors during color mixing tests.
Keep a small kit—tape, covers, scissors—near your paint storage area so you grab what you need between coats. For stubborn outlets, remove plates and mask openings with tape and foam.
Work methodically across the wall, removing covers only after paint cures to avoid smudges and rework.
Seal Air Vents
After you’ve handled outlets, tackle air vents with the same quick, methodical approach to stop overspray and keep airflow clear. You’ll want to seal vents temporarily while preserving air circulation where needed. Use low-tack tape and paper or plastic, remove grille screws when possible, and cover ducts from inside rooms. Don’t block HVAC permanently; mark covers for easy reinstallation.
- Remove vent covers and tape edges
- Use plastic bags for deep ducts
- Apply low-tack tape to avoid paint peel
- Label each cover for location and orientation
- Reinstall covers after paint dries
This keeps paint off vents and maintains proper air circulation.
How to Prepare Walls: Cleaning and Repairing Surface Flaws
Before you spray, thoroughly clean and fix the wall so the finish lays down smoothly and lasts. Remove dust, grease, and cobwebs with a mild detergent; rinse and let dry.
Scrape loose paint and pop out nails, then fill holes and cracks with appropriate filler. Feather edges so repairs sit flush.
Check for mold or efflorescence and treat appropriately. Inspect for loose drywall or plaster and secure it.
While choosing colors, remember color psychology and historical trends to guarantee repairs won’t show through chosen shades.
Wipe again before proceeding to sanding and priming.
How to Sand and Prime for an Even Sprayed Finish
Since an even sprayed finish depends on smooth, well-sealed surfaces, sand all repaired and glossy areas lightly to blend edges and create tooth, then remove dust completely before priming.
You’ll choose grit 120–220 depending on repair size, wipe with tack cloth, and spot-prime patched areas first.
Use a high-build primer for inconsistent porosity, and let it cure fully before sanding primer scuff.
Consider “brush alternatives” like foam rollers for trim touch-ups when spraying isn’t ideal.
Mind “Color mixing” when tinting primer to match topcoat, ensuring uniform coverage and avoiding visible flash.
Apply thin, even primer coats.
- Sand repaired spots smooth
- Wipe dust thoroughly
- Spot-prime patches
- Tint primer for color mixing
- Use brush alternatives for small areas
Set Up and Test Your Sprayer Safely
When you’re ready to spray, don’t rush the setup—get organized and work methodically so the machine runs safely and efficiently.
Check hoses, fittings, and filters for damage, and wear eye, respiratory, and skin protection.
Position drop cloths and mask vents to control overspray; consider color psychology when planning test patches so you evaluate hue and contrast under room light.
Use eco-friendly paints if desired, but verify sprayer compatibility.
Run the sprayer with water or manufacturer test fluid, adjusting pressure and tip size until you get a consistent fan and atomization.
Clean spills and store equipment per instructions.
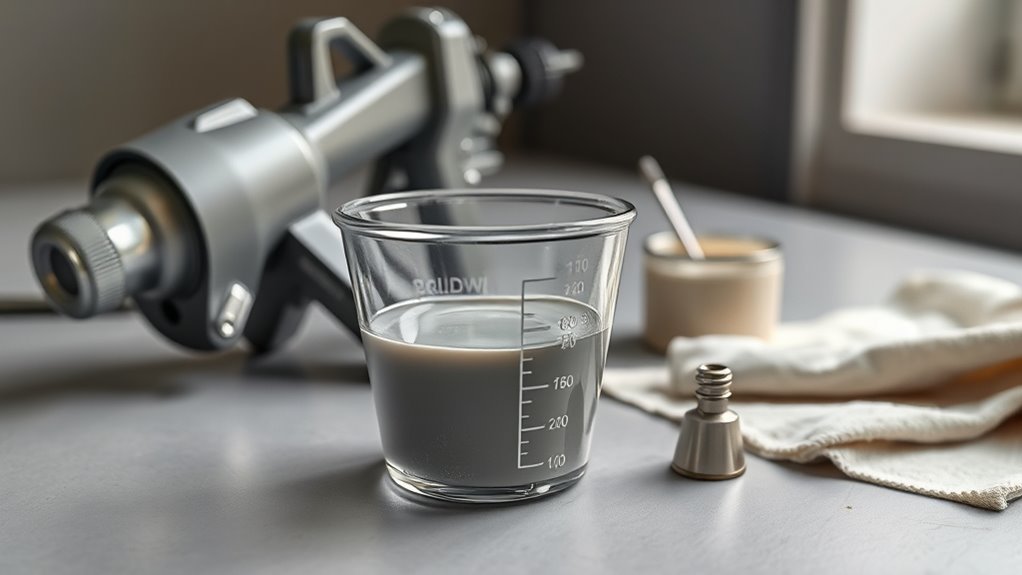
How to Mix Paint, Strain It, and Load the Sprayer
Although you’ve already tested the sprayer, now you’ll focus on getting the paint ready: measure and mix to the manufacturer’s recommended viscosity, strain out any skin or debris, and load the material into the sprayer’s cup or hopper without spilling.
You’ll do color mixing carefully, record ratios, and follow equipment calibration notes so flow is consistent.
Strain with a fine mesh or disposable filter, wipe the container rim, and pour slowly. Keep thinner or reducer handy for small adjustments, but add sparingly. Clean tools between colors to avoid contamination.
- Label cans with ratios
- Use steady, slow pours
- Filter every batch
- Keep rag nearby
- Check seals before loading
How to Adjust Spray Pattern, Pressure, and Tip Size
Now that the paint’s mixed, strained, and loaded, you’ll fine-tune the sprayer so the finish goes on evenly: adjust the tip size for the coating’s viscosity, set the pressure for atomization without overspray, and shape the pattern to match the surface width. Choose a finer tip for thin primers and a larger tip for heavy acrylics; lower pressure reduces bounce-back on trim or accent walls. Test spray on cardboard, check edge feathering, and tweak. Consider color theory when layering—lighter coats first. Use this quick reference:
| Surface | Tip size | Pressure |
|---|---|---|
| Primer | 0.015 | 1500 |
| Latex | 0.017 | 1800 |
| Heavy enamel | 0.021 | 2000 |
| Trim/accents | 0.011 | 1200 |
How to Hold and Move the Sprayer for Consistent Coverage
Keep the sprayer at a steady distance from the wall—usually 6–12 inches—so your coat stays even.
Move in smooth, parallel strokes at a consistent speed, and don’t stop mid-pass.
Overlap each pass by about 50% to avoid stripes and guarantee uniform coverage.
Maintain Constant Distance
When you hold the sprayer at a steady distance—typically 10 to 12 inches from the wall—you’ll get even coverage and avoid runs or dry spots; keep that gap as you move so finish stays uniform. Maintain consistent posture and pace, and check your distance with a light guide mark. Good color mixing and proper paint storage beforehand help the spray behave predictably.
- Anchor your elbow and move your wrist, not your whole arm.
- Use a small piece of tape as a visual spacer.
- Pause briefly at corners to overlap evenly.
- Recheck distance after ladders or obstacles.
- Practice on scrapboard first.
Use Smooth, Even Strokes
Although you’ve set the distance, you’ll get the best finish by moving the sprayer in smooth, even strokes—hold the gun steady, start the trigger before passing the surface and release it after, and overlap each pass about 50% so coverage stays uniform. Keep your wrist locked, move from the shoulder, and pace yourself to avoid runs. Watch edges and corners; pause for touch-ups rather than speeding. Maintain color coordination by spraying consistent amounts per zone. Regular tool maintenance guarantees no sputters that ruin the finish. Use the quick reference below.
| Motion | Speed | Tip |
|---|---|---|
| Horizontal | Medium | Steady |
| Vertical | Slow | Controlled |
| Detail | Light | Precise |
Overlap Each Pass
Because overlapping each pass guarantees uniform coverage and prevents streaks, hold the sprayer level and move it in a steady, measured arc so each new pass covers about half of the previous one. You’ll keep speed and distance consistent, watching for drips and thin spots. Check your work by eye and touch up immediately.
- Keep wrist steady, hinge from elbow, not shoulder.
- Maintain 6–12 inches from surface; adjust for nozzle.
- Work in sections to avoid lap marks.
- Stir paint for proper color mixing before refills.
- Label cans and rotate stock for smart paint storage.
How to Maintain Correct Distance and Overlap While Spraying
If you keep the sprayer the right distance from the wall and overlap each pass consistently, you’ll get an even, professional finish without runs or thin spots. Hold the gun 10–12 inches away, move at steady pace, and overlap about 50%. Practice on cardboard to nail rhythm. Remember color mixing impacts coverage; keep cans labeled and follow paint storage tips to maintain consistency. Check for drips, adjust speed or distance, and let each coat tack before recoat.
| Calm | Confident | Proud |
|---|---|---|
| Steady | Precise | Smooth |
| Bright | True | Finished |
| Relief | Joy | Home |
How to Spray Corners and Edges Without Cutting In
When you want crisp corners and smooth edges without taping or cutting in, aim the tip so the spray fans just past the corner at a low angle and use short, controlled bursts while keeping the gun moving. You’ll feather edges by stopping the trigger slightly before the gun passes the corner, then overlap minimally on the adjacent wall.
Practice decorative techniques and subtle color blending on scrap before committing. Keep distance steady and hands relaxed to avoid splatter.
- Start slow and steady
- Use short, overlapping passes
- Control pressure for thin coats
- Adjust angle, not distance
- Practice on scrap panels
How to Spray Around Trim, Doors, and Windows Cleanly
When you’re spraying near trim, doors, and windows, the right tools make clean edges simple. Grab a precision nozzle, painter’s tape, and plastic sheeting.
Prep surfaces by wiping dust and sanding rough spots.
Work slowly and test spray on scrap to confirm your settings before you start.
Tools For Precise Edging
Although spraying speeds up coverage, getting clean edges around trim, doors, and windows still depends on the right tools and steady technique. You’ll want equipment that gives control for straight lines and adapts to decorative patterns or varied wall textures without splatter.
- Brush and angled sash brush for touch-ups and tight corners.
- Small foam roller for smooth blending near trim.
- Slim-line edger attachment for the sprayer to limit overspray.
- High-quality painter’s tape designed for delicate surfaces.
- Microfiber rags and a small putty knife for immediate cleanup.
Use steady strokes, keep consistent distance, and practice on scrap pieces first.
Masking And Surface Prep
Now that you’ve got the edging tools and steady technique down, prep and masking will make sure your spray stays where it belongs. Start by cleaning trim, doors, and sills; remove dust and grease so tape adheres.
Use low-tack painter’s tape along edges, overlap plastic or paper for larger areas, and protect hardware with taped bags. Feather tape at corners to avoid ridges.
For windows, mask glass with craft paper, keeping vents clear.
Match spray pressure to wall textures to avoid overspray settling in grooves.
Remove tape while paint’s tacky.
Avoid stenciled areas—remove decorative stencils before spraying.
How to Spray Ceilings and High Walls Safely
Because ceilings and high walls put you out of the usual reach, you’ll need the right gear and techniques to spray them safely—secure a stable platform, use extension wands, wear eye and respiratory protection, and plan your spray pattern to avoid overwork and accidents.
Consider ceiling height and inspect ladders or scaffolding before starting. Use proper safety equipment and keep a helper nearby to steady gear and monitor surroundings. Move the platform as you go, avoid overreaching, and work in controlled passes. Clean and check the sprayer often to prevent surprises.
- Inspect supports before use
- Use extension wands
- Wear PPE
- Work with a partner
- Maintain controlled passes
How to Manage Paint Buildup and Avoid Runs and Drips
To prevent buildup and runs, start by adjusting your spray gun settings so the pattern and flow match the paint and surface.
Keep a consistent distance from the wall and move at an even speed to avoid heavy spots.
Overlap each pass by about 30–50% with controlled, steady strokes to blend edges without adding extra paint.
Adjust Spray Gun Settings
If you want smooth, even coverage without runs or heavy buildup, dial in the spray gun settings before you begin. Start with medium fluid, fan, and air pressure; test on cardboard. Fine-tune until mist lays flat without pooling. Remember color mixing affects viscosity, so match thinner amounts across batches.
Treat the sprayer like a brush alternatives decision—settings replace brush pressure and stroke.
- Test pattern and adjust fluid control
- Narrow fan for trim, wider for walls
- Lower pressure to reduce overspray
- Keep trigger rhythm steady to avoid drips
- Wipe tip often to prevent clog buildup
Maintain Proper Distance
After you’ve fine-tuned your spray settings and tested the pattern, keep a consistent distance from the wall—typically 10–12 inches for handheld HVLP sprayers or 6–8 inches for higher-pressure units—to control paint buildup and prevent runs.
Hold the gun steady and move at even speed; too close deposits thick coats, too far causes thin, uneven coverage.
Watch edges and corners where buildup gathers; back off slightly near trim and use brush techniques for tight spots.
Plan color coordination so you don’t overwork areas correcting overlap mistakes.
Stop and wipe the tip if splattering or drips start forming.
Use Controlled Overlaps
When you overlap each pass by about 30–50% and keep your strokes even, you’ll lay down smooth, consistent coverage while minimizing buildup that causes runs and drips. You’ll control film thickness by pacing, keeping the gun moving, and watching edges.
In tight spots, feather with lighter passes. If you’ve done color mixing, remember different tints hide differently—adjust overlap slightly. A spray booth mindset helps: treat each wall like a panel, steady rhythm, consistent distance.
- Keep gun perpendicular and steady
- Use short test passes first
- Pull slower on verticals
- Wipe excess immediately
- Inspect under good light
How to Apply Thin, Even Coats for a Smooth Finish
Although spraying can cover large areas fast, you’ll get the smoothest finish by applying several thin, even coats rather than one heavy pass. Start with light, consistent strokes, keep the gun moving, and maintain a steady distance.
Although spraying covers areas quickly, use multiple thin, even coats with light, steady strokes for a flawless finish
Adjust your technique to the room’s color palette and check how lighting effects reveal texture. Aim for uniform coverage without runs or drips; thin layers level better and hide imperfections.
Overlap each pass by about 30% and vary direction between coats for full coverage. Clean the tip regularly to prevent spitting.
Inspect under different light angles to guarantee an even, professional-looking surface.
How Long to Wait Between Coats When Spraying?
How long you wait between coats depends on factors like paint type, temperature, and humidity that affect drying time.
Most latex paints can be recoated in 1–4 hours, while oil-based or low-VOC paints often need 24 hours.
Always follow the manufacturer’s recommended recoat interval and touch a hidden spot to confirm dryness before spraying the next coat.
Drying Time Factors
Because spray application lays down much finer, wetter coats than brushing or rolling, you’ll need to factor in product type, ambient conditions, and film thickness to decide how long to wait between passes. You should check manufacturer dry times, but also adjust for temperature, humidity, airflow, and the porosity created by wall texture techniques.
Paint color combinations can influence perception of dryness—darker shades may show wet sheen longer. Monitor tackiness and edge curing rather than clock time alone.
- Product type (latex, acrylic, oil)
- Temperature and humidity
- Air movement/ventilation
- Film thickness from overlap
- Surface porosity and texture
Recommended Recoat Intervals
When you spray paint walls, plan your recoat timing around the paint’s tack-free and dry-to-touch windows rather than a fixed clock time, since sprayed coats are thinner yet wetter and can sag or lift if recoated too soon.
Check the manufacturer’s recoat interval, then test a small area: if it’s no longer tacky and the film resists light fingernail pressure, you can recoat.
Warm, low-humidity conditions shorten times; cool, humid ones lengthen them.
Maintain good ventilation tips to speed drying and avoid seams.
Stir properly during color mixing and follow thinner or reducer recommendations to ensure proper film build before recoating.
How to Identify and Fix Common Spraying Defects
Although spraying can speed up your paint job, you’ll still run into runs, orange peel, overspray, and dry spray — and each defect has a clear cause and fix. You spot issues by inspecting under good light, testing adhesion, and considering color matching and paint durability when recoating.
Troubleshoot quickly: check thinning, tip size, pressure, technique, and environment. Fixes range from sanding and re-spraying to adjusting solvent or pressure.
- Runs: sand level, reduce flow, lighten passes
- Dry spray: increase flow or humidity, slow motion
- Overspray: mask better, lower pressure
- Blotchiness: stir, strain paint
- Poor adhesion: clean, primer, correct temp
How to Deal With Orange Peel, Fisheye, and Sags
If you spot orange peel, fisheyes, or sags, you can usually correct them without ripping out the whole job by diagnosing the cause and taking targeted steps.
First, sand orange peel lightly with fine-grit paper, wipe clean, and re-spray thin, even coats to restore smoothness and maintain paint durability.
For fisheyes, clean the surface thoroughly and remove contaminants; use a fisheye eliminator or primer before repainting to ensure good color matching.
For sags, sand the drips level, feather edges, and apply a thin, balanced pass.
Always test a small area first and allow full cure between coats.
How to Troubleshoot Poor Atomization or Spitting
Because a sprayer that spits or fails to atomize properly can wreck an otherwise good finish, you’ll want to diagnose the cause quickly and methodically. Start by checking thinning, nozzle condition, and pressure; poor atomization often stems from wrong viscosity, a clogged tip, or low pump output.
Because a spitting sprayer ruins a finish, quickly check viscosity, tip condition, and pump pressure to diagnose atomization.
Clean filters and needle, test with water, and swap tips if needed. Keep a record so color matching and decorative accents stay consistent after fixes.
- Verify paint thinning per manufacturer
- Inspect and clean tip/nozzle
- Check hose and fittings for air leaks
- Replace worn needle/seat
- Test pressure and pump function
How to Avoid and Control Overspray in Adjacent Rooms
When you’re spraying indoors, stop overspray from drifting into adjacent rooms by sealing doorways and vents, setting up plastic sheeting with painter’s tape, and running exhaust fans or a box fan to pull air toward the work area.
Tape off trim and thresholds, cover floors and furniture protection with drop cloths or plastic, and create a zipper door for access.
Turn off nearby HVAC to prevent spread, and isolate vents.
Keep electrical safety in mind: cover outlets, switches, and unplug or switch off circuits near the spray zone.
Work from clean to dirty areas and check seals periodically to maintain control.
How to Ventilate and Manage Fumes During Spraying
You’ve sealed off adjacent rooms and controlled overspray, now focus on ventilation and fumes to protect yourself and the space. Open windows and doors to create cross-ventilation. Position box fans to push air out, and run a portable air filtration unit near the work area.
Use a respirator rated for paints and ensure fume extraction from the source when possible. Monitor odor and take breaks in fresh air.
- Wear proper respirator and eye protection
- Set up cross-ventilation with fans
- Run air filtration continuously
- Use local fume extraction for heavy coats
- Pause if fumes feel intense
How to Clean the Sprayer Quickly After Each Use
If you want to keep your sprayer working reliably, clean it right after each use before paint dries in the tip and hoses. Flush with water or the solvent recommended for your paint—use warm water for water-based and the proper thinner for oil-based.
Remove and soak the tip, nozzle, and filters, brushing gently to dislodge residue. Rinse hoses until clear, then run cleaner through the pump briefly.
Wipe external surfaces and let parts air dry on a protected surface. When switching to eco-friendly paints or matching historical color schemes, clean thoroughly to avoid contamination and color shifts.
How to Store Leftover Paint and Sprayer Parts Safely
Because proper storage preserves both paint quality and your sprayer’s performance, seal leftover paint tightly and stow parts carefully right after cleaning. Label cans with Paint color, date, and project notes. Use airtight lids, press plastic wrap over the opening, and store cans upside down to prevent skinning.
Rinse spray accessories, dry them fully, and keep small parts in a labeled container.
Store everything in a cool, dry place away from heat or freezing.
- Seal cans and label clearly
- Wrap lids with plastic for extra protection
- Dry and bag spray accessories
- Keep small parts organized
- Store in a temperature-controlled area
How to Maintain Tips, Filters, and Seals for Longevity
You should clean spray tips after each use to prevent clogs and maintain spray pattern consistency.
Replace or clean filters regularly to keep flow steady and avoid motor strain.
Inspect seals for wear and lubricate them as needed to stop leaks and extend the sprayer’s life.
Clean Tips After Each Use
When you’re done spraying, clean the tip, filters, and seals right away to prevent dried paint from clogging parts and shortening the sprayer’s life. You’ll protect performance and avoid contaminating future jobs—especially when switching wall color psychology experiments or eco-friendly paint options.
Rinse with recommended solvent, gently scrub tip openings, and wipe seals dry.
- Flush the system until solvent runs clear.
- Remove and inspect the tip for nicks or buildup.
- Brush mesh filters lightly, not aggressively.
- Wipe seals and O-rings, then lubricate sparingly.
- Reassemble and test spray on scrap material before storing.
Replace And Clean Filters
Although regular cleaning keeps most parts working, replacing and properly cleaning filters is the single best step you can take to prevent clogs, guarantee even spray patterns, and extend your sprayer’s life.
You should inspect intake and inline filters after every large job, removing debris and replacing torn or compressed elements. Rinse reusable screens with solvent compatible with your paint, dry fully, then reinstall.
Keep spare filters on hand and follow the manufacturer’s schedule for replacement to support consistent flow. Good filter maintenance helps stabilize pressure and makes sprayer calibration more reliable, so your finishes stay smooth and predictable.
Inspect And Lubricate Seals
Because seals wear from friction and solvent exposure, inspecting and lubricating them regularly keeps your sprayer leak-free and performing consistently. You should perform a seal inspection every few uses, checking for cracks, flattening, or hardened rubber. Remove seals gently, clean residue, and reassemble with proper lubricant.
Lubricant application prevents drying and eases assembly, but use only manufacturer-recommended greases to avoid swelling.
- Check O-rings for cuts or deformation
- Wipe mating surfaces before reinstallation
- Apply a thin, even coat of lubricant
- Replace seals showing any irregularity
- Test spray at low pressure after servicing
Regular care protects performance and lifespan.
Plan: Finishing a Room in One Day Versus Multiple Days
Decide whether you’ll tackle the whole room in a single day or spread the work over several days by weighing factors like room size, prep needs, drying time, and your stamina.
If you go one-day, plan early start, streamline prep, and move or cover furniture with attention to furniture placement so you won’t waste time shifting pieces mid-job.
For multi-day, schedule primer, first coat, and final coat with proper drying windows, using color coordination decisions beforehand to avoid repainting.
Consider noise, ventilation, and fatigue: do shorter sessions if you’re less experienced, or push through if you can maintain consistent quality.
How to Estimate Time Savings Versus Rolling or Brushing
When you compare sprayers to rollers or brushes, think in terms of coverage rate, setup/cleanup time, and the number of passes required for full opacity—sprayers can lay down paint far faster per square foot but demand more prep and masking.
So your actual time saved depends on room complexity, paint type, and your familiarity with the equipment. Estimate surface square footage, typical gallons per coat, and realistic prep/cleanup minutes.
Factor Cost analysis and Equipment maintenance into total project time versus money.
- Measure walls and ceilings before starting
- Count doors, trim, and fixtures to mask
- Note paint viscosity and coats needed
- Add prep and cleanup buffer
- Track learning curve time
How to Choose Between DIY Rental and Hiring a Pro
Decide whether to rent a sprayer or hire a pro by weighing cost, your skill and available time, and how complex the job is.
If you’re short on time or the space has tricky trim, a pro may save money by avoiding mistakes.
For simple rooms and a weekend you’re confident in, renting and doing it yourself can cut costs.
Cost Comparison
If you’re weighing whether to rent a paint sprayer and do the job yourself or hire a pro, focus on total cost, time, and the quality you want. Do a quick cost analysis and budget planning: include rental or labor, paint, prep materials, cleanup, and potential touch-ups.
Compare hourly vs. flat rates and factor in convenience.
- Rental fee plus filters and hoses
- Paint and masking supplies
- Possible damage or rework costs
- Professional labor and warranty
- Time savings and scheduling convenience
Add contingencies to your numbers so your final choice matches money and expectations.
Skill And Time
Cost and convenience matter, but your skill level and available time often determine whether renting a sprayer or hiring a pro makes sense.
If you’ve sprayed before and understand color theory basics and paint chemistry—how pigment load, viscosity, and thinning affect coverage—you’ll handle a rental confidently.
Renting saves money if you can prep, mask, and practice quickly; expect setup, cleanup, and possible mistakes to eat hours.
Hire a pro when deadlines are tight, you lack spray experience, or you want guaranteed finish quality.
Pros troubleshoot nozzle clogs, adjust spray patterns, and optimize mix ratios for consistent results.
Project Complexity
When your project involves simple, single-room walls, you can usually rent a sprayer and handle it yourself. But for complex jobs—multiple surfaces, high ceilings, textured finishes, or intricate trim—you’re better off hiring a pro who knows how to adapt technique and equipment on the fly.
You’ll weigh budget, timeline, and desired finish. Consider color psychology for mood, and environmental impact from overspray and cleanup. If you lack experience, a pro prevents costly mistakes.
- Budget constraints vs. quality expectations
- Time availability and disruption
- Access to specialized gear
- Finish consistency and color accuracy
- Waste reduction and proper disposal
What to Ask When Evaluating Rental Paint Sprayers
Before you commit to a rental paint sprayer, figure out the job’s scope, the sprayer’s capabilities, and any hidden requirements so you won’t be surprised on project day.
Ask about horsepower, nozzle sizes, and compatible paint types — thicker eco-friendly finishes need larger tips.
Confirm warranty, pickup/dropoff times, and whether filters or hoses are included.
Check spray pattern control, adjustable pressure, and cleanup ease.
Ask if staff can advise on surface prep and how finish choices affect coverage and color psychology when scaling samples.
Get a clear rental rate, deposit, and charges for damage or extra time.
How to Price a Professional Spray Job for Your Room
If you’re pricing a professional spray job for a room, start by measuring the space and calculating paintable square footage so your estimate reflects labor, materials, and prep work accurately.
Consider surface condition, number of coats, and desired finish; factor in time for color combinations testing and any furniture rearrangement.
Include masking, patching, and cleanup.
- Measure walls, ceilings, and trim
- Estimate gallons based on coverage and coats
- Add hours for prep and repairs
- Price labor per hour plus equipment rental
- Include contingency for unexpected issues
Present a clear written quote with timelines and payment terms.
Painting Drywall, Plaster, and Masonry With a Sprayer
Before you spray drywall, plaster, or masonry, you’ll want to clean, patch, and sand surfaces so the finish goes on smoothly and adheres well.
Use the right tip size, maintain consistent distance and speed, and overlap passes to avoid runs and uneven coverage.
I’ll walk you through the exact prep steps and sprayer techniques for each material.
Surface Preparation Steps
When you’re spraying drywall, plaster, or masonry, thorough surface prep makes the difference between a smooth, durable finish and a job full of imperfections. Start by cleaning, repairing, and priming so the paint can bond evenly.
You’ll assess color history, remove dust, scrape loose material, and address uneven texture so the sprayer lays paint uniformly. Use appropriate primers for porous masonry and patched plaster. Mask trim and cover floors. Sand feathered repairs smooth and tack cloth before priming.
- Clean surfaces thoroughly
- Patch cracks and holes
- Sand and remove dust
- Apply compatible primer
- Mask and protect adjacent areas
Sprayer Technique Tips
Although the technique changes a bit with surface type, learning a steady, overlapping spray pattern and proper gun setup will get you an even, professional-looking coat on drywall, plaster, or masonry.
Start by testing spray width and pressure on cardboard, then adjust nozzle and tip size for texture.
Hold the gun perpendicular, keep a consistent 6–12 inch distance, and overlap passes by about 50%.
Thin coats prevent runs; use proper color mixing and strain paint to avoid clogs.
Wear recommended safety equipment—respirator, goggles, and coveralls—and ventilate the area.
Clean the sprayer promptly after use to maintain performance.
How to Handle Textured or Popcorn Ceilings When Spraying
If you’re spraying a room with textured or popcorn ceilings, you’ll need to adjust technique and equipment so you don’t ruin the finish or create excessive overspray. You’ll work carefully to protect textured surfaces and avoid flattening texture. Use lower pressure, wider fan pattern, and keep more distance. Mask thoroughly and cover furniture. Practice on scrap to match flow.
- Test spray on cardboard to gauge coverage
- Reduce PSI to prevent texture blowout
- Use tip designed for heavy-bodied paints
- Hold gun perpendicular and move steadily
- Tape and plastic to catch bounce-back particles
Finishing Sprayed Walls: Blending Into Trim and Cabinetry
After protecting textured ceilings, the next step is blending sprayed walls into trim and cabinetry so the finish looks seamless. Lay clean painter’s tape against trim edges and use a thin foam roller to feather spray edges, matching color matching by testing swatches near cabinets.
If trim will remain painted, mask it fully; if you’re refinishing cabinetry, spray from a consistent distance to keep paint sheen uniform. Work in controlled passes, overlapping slightly and keeping panels wet to avoid lap marks.
Remove tape while paint’s tacky for crisp lines, and ventilate the room to speed curing.
How to Inspect the Final Finish and Touch Up Spots
When the paint feels dry to the touch and the room is well lit, walk the walls slowly and scan for thin spots, drips, orange peel, and any missed edges so you can spot problems before they set; use a bright, angled light or a handheld LED to reveal subtle sheen differences.
Perform a Final inspection methodically, marking flaws with light pencil ticks. For Spot touch up, feather edges with a fine brush or light spray, match sheen, and let dry before re-checking. Keep tools, a small roller, and matching paint handy.
- Mark flaws as you find them
- Blend edges gently
- Thin coats for fixes
- Check from different angles
- Clean tools after use
How to Prevent Long-Term Issues Like Peeling or Yellowing
Now that you’ve inspected and touched up the finish, take steps to prevent long-term problems like peeling or yellowing by focusing on surface preparation, proper product choice, and appropriate application. You’ll guarantee peeling prevention by cleaning, deglossing, and using a quality primer matched to the substrate. For yellowing control, pick non-yellowing, water-based topcoats and avoid solvent-rich enamels in low-ventilation areas. Apply even, thin coats with proper flash times and recommended dry times. Monitor humidity and temperature during curing. Use the table below for quick checks.
| Check | Action |
|---|---|
| Surface | Clean & prime |
| Paint | Use non-yellowing |
| Application | Thin coats |
| Environment | Control humidity |
How to Clean Up and Restore the Room After Spraying
Because you’ve finished spraying, focus first on ventilating the room and securing any overspray before you touch tools or surfaces. Open windows, run fans, and let room ventilation clear fumes while you don protective gloves and masks.
After spraying, ventilate the room, secure overspray, and don gloves and masks before handling tools or surfaces.
Clean spray gun parts promptly to prevent clogs and damage. Wipe drips from trim and floors, then inspect walls for touch-ups.
- Rinse and disassemble cleaning tools immediately.
- Bag and launder drop cloths separately.
- Use a tack cloth for fine dust.
- Check vents and change filters if needed.
- Store leftover paint sealed and labeled.
This restores the room safely and readies tools for next use.
Frequently Asked Questions
Can I Spray-Painted Walls in Cold or Very Humid Weather?
You shouldn’t spray-painted walls in cold or very humid weather; Temperature considerations matter because low temps slow curing and can gum the sprayer, and Humidity effects cause poor adhesion, longer dry times, and potential finish problems.
Is Spraying Suitable Over Existing Glossy Enamel Without Sanding?
About 60% of paint failures stem from poor prep — so no, you shouldn’t spray directly over a glossy finish without surface prep. You’ll need deglossing or sanding first, or adhesion primer, to guarantee lasting results.
How Do I Handle Paint Allergies or Asthma During Spraying?
You should stop if symptoms start, seek medical advice, and use Paint allergy management techniques: choose low-VOC paints, seal off the area, run ventilation, and wear Respiratory protection like an NIOSH-rated respirator with proper filters to reduce exposure.
Can I Spray Over Wallpaper or Should It Be Removed First?
You should remove wallpaper first in most cases; you’ll get better adhesion and finish. Wallpaper removal and surface preparation prevent bubbling, trapped moisture, and texture issues, so you’ll prep, repair, sand, prime, then spray for best results.
What Insurance or Permits Are Needed for Rental Sprayer Use?
Boldly be aware: you’ll likely need liability insurance and to follow local insurance requirements; check the permit process with municipal offices, as some areas require permits for rental sprayer use — you’ll confirm coverage and compliance.
Conclusion
You’ve weighed pros and cons, picked a sprayer, and practiced edge blending—so it’s no coincidence that your walls look pro-level. When you step back, the smooth finish and fast coverage won’t just save time; they’ll make the room feel like it was always meant to be this fresh. Keep tabs on prep, drying, and cleanup, and you’ll avoid peeling or yellowing—then enjoy the surprisingly satisfying reveal of a job done right.