How to Prepare Walls for Painting After Wallpaper
You’ll need to strip all wallpaper and adhesive thoroughly, wash the walls to remove dirt and paste, and let them dry completely. Fill gouges, seams, and embossed areas with joint compound, sand smooth with fine-grit paper, and remove dust. Prime any stained or patched spots with the right primer for your surface, then do a final wipe-down. Protect floors and trim during the process, and keep going to learn tips on damage, mold, and best primers.
Quick Checklist: Prepare Walls for Paint After Wallpaper
Before you grab paint, run through this quick checklist to make sure your walls are truly ready: remove any leftover paper and paste, wash the surface, repair gouges or seams with joint compound, sand smooth, prime stained or patched areas, and wipe away dust.
You’ll want to note areas where historical wallpaper styles left adhesive or embossed patterns; those spots may need extra sanding or skim-coating to avoid telegraphing under new finish.
If you plan creative wall textures, decide now whether to apply them over a fully smoothed base or to integrate texture to mask minor imperfections before priming.
Remove Wallpaper: When to Stop and Inspect for Damage
As you peel away wallpaper, stop whenever you see bubbling, tears, or exposed drywall paper.
Inspect those spots for mold, adhesive residue, or gouges that need repair before priming.
Addressing hidden damage now saves time and prevents paint failures later.
When To Stop
If the paper won’t peel cleanly or you see plaster crumbling, stop and take a closer look—forcing removal can cause bigger repairs. You’ll want to pause so you can assess whether the wall texture will survive and whether old adhesive has altered the paint sheen.
Don’t keep tugging; instead evaluate edges, seams, and substrate adherence.
- Jagged paper edges lifting around a seam, suggesting deeper bond issues.
- Flaky plaster or soft spots that dent when pressed.
- Areas where adhesive stains change the wall texture or create glossy patches.
Pause, document, then decide the safest next step.
Inspect For Hidden Damage
When you hit stubborn paper or soft spots, stop and pull back a section to check for hidden damage—don’t assume what’s underneath is sound. Lift enough paper to expose seams, backing, and drywall or plaster joints. Look for mold, crumbling gypsum, or delaminated plaster; press gently to test firmness.
Note how repairs will affect wall texture and whether skim-coating is needed to match surrounding surfaces. Check previous paint sheen for evidence of oil-based coatings that resist adhesion; strip or sand them before priming.
Document damaged areas, measure their extent, and plan appropriate repairs before continuing removal or painting.
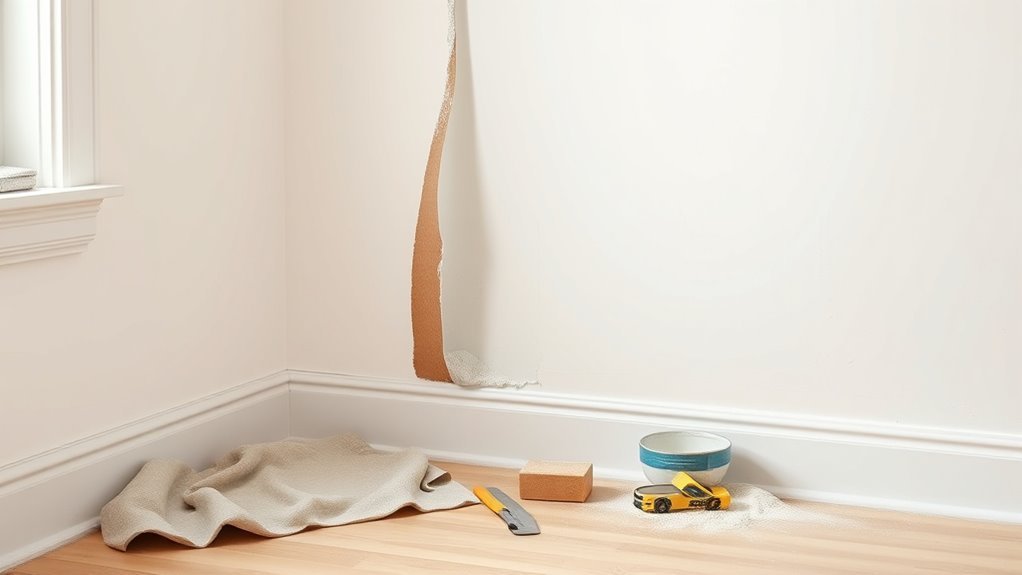
Protect Floors, Trim, and Electrical Outlets
Wondering how to keep your floors and trim spotless while you paint? You’ll prep by removing furniture or moving it to the center, using drop cloths and considering color trends so new hues won’t stain upholstery.
Tape baseboards and window trim with painter’s tape; wrap doorknobs and vents. Shut power at the breaker, then remove outlet covers or mask them with tape and plastic to avoid splatter.
- Heavy canvas drop cloths over floors
- Foam or plastic corner guards for trim
- Zip-top bags and tape over outlets
Prioritize furniture protection and clear walkways before you begin painting.
Identify Your Wall Type: Drywall vs. Plaster
Because drywall and plaster respond differently to removal, repairs, and priming, you should identify which you have before you start prepping or painting.
Check edges near outlets or baseboards: drywall has paper-faced gypsum and a uniform wall texture, while plaster feels hard, may be lath-backed, and often shows irregularities or thin cracks.
Tap the wall—drywall sounds hollow between studs; plaster is denser.
Knowing this guides repair methods: joint compound for drywall, patching plaster or replacing loose sections for plaster.
Choose surface priming accordingly—use a high-adhesion primer for plaster and a standard drywall primer for gypsum.
Spot Water Damage and Mold Behind Wallpaper
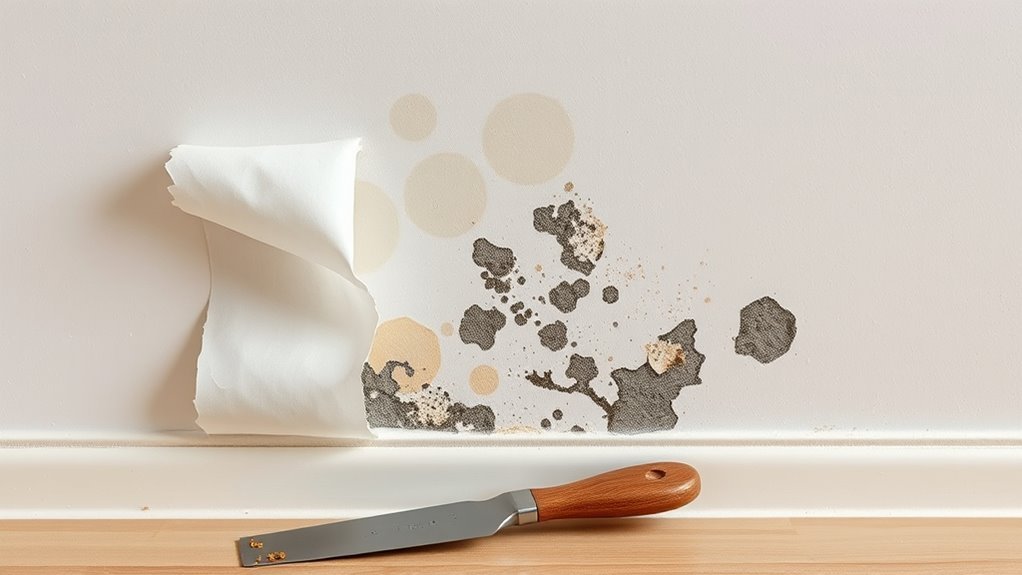
Peel back a corner and check for staining that hints at past leaks.
Press gently to find any soft spots that mean the wall’s been compromised.
If you spot discoloration or a musty smell, test for mold growth before you proceed.
Check For Staining
If water ever reached the wall before the wallpaper went up, you’ll want to spot it now — damp patches, dark halos, or textured discoloration can hide underneath and promote mold growth.
Check visible staining across wall texture and note how old stains might alter paint sheen after priming. Lightly clean suspected spots with a mild detergent and a mold-killing solution; rinse and dry thoroughly.
If stains persist, use a stain-blocking primer before repainting.
Visual cues to watch for:
- Brownish rings spreading from corners or seams
- Fuzzy dark specks clustered in a pattern
- Subtle color shifts where wallpaper seams rested
Look For Soft Spots
After checking for stains, move on to feel and probe the wall for soft spots that can indicate water damage or hidden mold behind the paper. Run your hand slowly across the surface, pressing gently to detect spongy areas or indentations. Tap lightly; hollow sounds can signal compromised drywall or plaster. Mark any soft spots and note surrounding wallpaper seams or joints—these often betray leaks.
Assess wall stability by pressing at several heights and along baseboards; unstable sections may need patching or replacement before painting. Remove loose material, dry the area thoroughly, and consult a pro if structural decay seems extensive.
Test For Mold Growth
Because moisture often hides behind wallpaper, you should test for mold growth before you strip paper or paint, since disturbing a moldy surface can release spores into the air. You’ll inspect visually for staining, musty odors, and soft spots.
If you suspect mold, wear protection, open windows, and consider professional Mold testing to confirm species and severity. Poor remediation can worsen Air quality, so don’t skip proper containment.
After removal, dry the wall thoroughly and treat with an appropriate fungicide or primer designed for mold inhibition.
- dark stains along seams
- persistent musty smell in the room
- peeling or bubbling wallpaper
How to Tell If Adhesive Remains on the Wall
When you run your hand across the wall, sticky or tacky spots usually mean adhesive remains, and spotting them early saves time later. Check visually for glossy patches and uneven wall texture where paper once sat.
Rub a damp sponge over suspect areas; if residue lifts or turns cloudy, you’ve got adhesive residue to remove. Smell can help too—old paste often has a faint sour scent.
Tap the wall; hollow sounds may signal remaining backing or paste pockets. Mark affected zones so you can address them systematically before sealing, priming, or painting for an even finish.
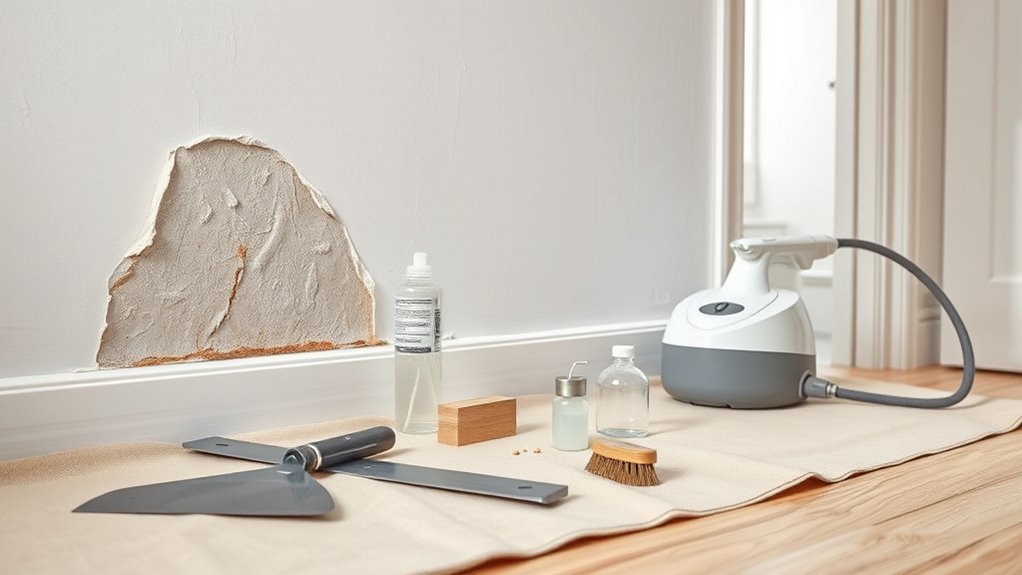
Tools to Have Before You Start Scraping
Before you pick up a scraper, gather the right tools so the job goes faster and cleaner. You’ll want sturdy scrapers, scoring tools, and a variety of sandpaper grits so you can remove paper and smooth residue without guessing.
Keep drop cloths and plastic sheeting ready to protect floors and aid furniture placement planning.
Knowing color theory beforehand helps you anticipate primer and paint choices once walls are prepped.
Wear gloves and eye protection, and have a bucket, sponge, and mild detergent for cleanup.
Organize tools on a rolling tray so you won’t interrupt momentum once scraping begins.
- Metal and plastic scrapers
- Sandpaper assortment
- Drop cloths and plastic sheeting
Safe Ways to Remove Stubborn Wallpaper Bits
If stubborn bits of wallpaper won’t budge, tackle them with patience and the right techniques to prevent damaging the wall underneath. Work small areas, gently scoring remaining paper with a scraper at a shallow angle.
When wallpaper resists, work slowly—score gently with a shallow scraper and tackle small sections to protect the wall.
Use a damp sponge to soften tiny fragments, blotting rather than rubbing to protect wall texture. For adhesive spots, apply a mild detergent solution and wait before scraping.
Take care around decorative accents and trim; use a utility knife to lift edges without gouging. Finish by sanding very lightly and vacuuming dust.
Inspect surfaces carefully to ensure they’re smooth and ready for priming.
Soften Paste With a Wallpaper Steamer
A wallpaper steamer can loosen stubborn paste quickly, but you’ll want to follow safety tips like wearing gloves and keeping vents open.
Use steady, overlapping strokes and don’t over-saturate the wall to avoid damage.
After steaming, scrape residual paste and wash the surface so it’s ready for priming.
Steamer Safety Tips
When you run a wallpaper steamer, keep safety front and center: the steam gets hot enough to cause serious burns and can damage electrical surfaces, so wear heat-resistant gloves, eye protection, and avoid pointing the steamer at people or outlets.
You’ll focus on steamer safety and wallpaper preservation while minimizing hazards. Unplug and cover nearby outlets, test steam temperature on a scrap, and keep a wet rag handy to cool accidental contact.
Work with a partner when ladders are involved and ventilate the room to reduce humidity.
Stop immediately if wiring or plaster softens unexpectedly and consult a professional.
Proper Steam Technique
Although steam can loosen paste quickly, you should move deliberately and keep the steamer head flat against the paper to avoid glazing or tearing.
Work in small sections, holding the head for 10–20 seconds depending on adhesive age. Peel gently at a corner with a scraper, angling it to lift paper without gouging drywall.
Follow wallpaper patterns to find seams and easier release points. If paste resists, reapply steam rather than forcing removal.
For textured wall coverings, soften thoroughly before scraping to prevent ripping the substrate. Keep a damp sponge handy to manage loosened paste as you proceed.
Post-Steam Cleanup
Want the paste to come off cleanly? After steaming, let the wall cool briefly, then scrape softened paste with a plastic scraper; work with the grain of wallpaper patterns to avoid gouging. Test patches reveal which adhesive types remain stubborn so you can switch to a stronger remover or repeat steaming.
Wipe residue with a sponge and warm water, then neutralize any cleaner per label instructions. Inspect seams and corners for hidden glue, and sand spots lightly once dry.
- Damp sponge lifting faint adhesive
- Scraper following wallpaper patterns
- Small bucket with neutralizer for different adhesive types
When to Use Chemical Removers Safely
If mechanical methods can’t remove stubborn adhesive or multiple wallpaper layers, you’ll need a chemical remover—but only after confirming the wall material, paint or primer compatibility, and proper ventilation.
You’ll prioritize chemical safety: read labels, wear gloves, goggles, and a respirator rated for vapors. Test a small area to check substrate reaction and drying time.
Follow manufacturer removal techniques—apply sparingly, wait the recommended dwell time, then scrape gently. Neutralize residues if instructed, rinse thoroughly, and allow full drying before priming.
Dispose of waste per local regulations and keep children and pets away until the room’s odor dissipates.
Remove Adhesive With Household Products
You can often get leftover paste off with simple household solutions instead of harsh chemicals. Start with warm soapy water for light residue.
Try a 1:1 vinegar-and-water mix for stubborn spots.
Use a baking soda paste to gently scrub away gummy adhesive.
Test a small area first and rinse well before priming or painting.
Warm Soapy Water
Looking for a simple, low-cost way to dissolve leftover wallpaper paste? You can use warm soapy water to soften adhesive without harsh chemicals. Apply with a sponge, work in small sections, and avoid over-saturating delicate wall textures or lifting paint beneath intricate wallpaper patterns.
After softening, gently scrape and rinse.
- Sponge warm, sudsy water onto adhesive until it loosens.
- Use a plastic scraper and repeat wetting for stubborn spots.
- Rinse with clean water and blot dry to prevent dampness.
This method’s gentle approach preserves underlying surfaces, helping you prep walls efficiently before sanding or priming.
Vinegar And Water
When wallpaper paste won’t budge, mix equal parts white vinegar and warm water to break down the adhesive without harsh chemicals. You’ll test a small area first, then apply the solution with a sponge, letting vinegar application sit briefly to loosen residue.
Use gentle scrubbing to avoid gouging drywall, reapplying as needed. Rinse thoroughly with clean water to remove acidity and sticky remnants; water dilution prevents damage while keeping the mix effective.
Dry the wall fully, then inspect for stubborn spots and repeat targeted applications. This method’s simple supplies and controlled technique make cleanup straightforward and safe.
Baking Soda Paste
If vinegar and water didn’t fully lift the paste, try a baking soda paste to tackle stubborn adhesive. You mix baking soda with warm water to a spreadable cream, apply with a sponge, and let it sit a few minutes. Scrub gently to avoid damaging wall texture or embedding particles into grooves left by wallpaper patterns. Rinse with clean water and blot dry. Repeat on stubborn spots, then sand lightly if needed. Test a small area first.
- Thick paste clings to embossed wallpaper patterns.
- Soft brush reaches recessed wall texture.
- Damp cloth removes residue cleanly.
Commercial Adhesive Removers: Pros and Cons
Although commercial adhesive removers can dramatically speed up cleanup, you should weigh their benefits against drawbacks before using one. You’ll get fast softening of paste and less scraping, but many formulas emit strong fumes and can damage drywall or paint if misused. Look for eco friendly solvents or chemical alternatives when sensitivity or ventilation is an issue. Test a small patch, follow PPE recommendations, and rinse thoroughly. Choose water-based removers for milder action or solvent-based for stubborn glue, balancing efficacy with safety.
| Benefit | Drawback |
|---|---|
| Fast action | Strong fumes |
| Less scraping | Possible surface damage |
| Variety of formulas | Cost |
Neutralize Leftover Glue Before Priming
Since leftover wallpaper glue can interfere with primer adhesion, you should neutralize any residue before priming to guarantee a smooth, durable finish. You’ll tackle adhesive removal by washing walls with a mild solvent solution or enzyme cleaner, rinsing thoroughly and letting surfaces dry.
Test a small area first to avoid damage. After cleaning, apply a pH-balancing conditioner or dilute vinegar rinse for glue neutralization, then dry and sand lightly where needed.
Finally, vacuum and tack cloth the wall before priming.
- enzymatic cleaner loosens old paste
- vinegar rinse balances residue
- light sanding smooths stubborn patches
Deal With Embossed or Textured Wallpaper Shadows
When embossed or textured wallpaper leaves shadows or relief after removal, you’ll need to level those areas before priming so paint lays flat and shadows don’t show through. Start by sanding high spots with a pole sander, then vacuum dust.
For small depressions and embossed shadows, apply a lightweight spackle or joint compound with a broad knife, feathering edges to blend. Let it dry fully, sand smooth, and repeat as needed.
For larger texture smoothing, use a skim of joint compound over targeted areas rather than a full coat. Finish with a stain-blocking primer to guarantee even paint coverage.
Smooth Wallpaper Impressions Without a Full Skim Coat
If you want to erase wallpaper impressions without committing to a full skim coat, you can target shallow embossing with spot repairs and light sanding to save time and material.
Start by removing loose paper and any adhesive residue with a sponge and mild solvent, then let walls dry.
Sand gently over raised wallpaper patterns with fine-grit paper to blend edges.
Fill low areas with thin joint compound, feathering wider than the blemish, then sand smooth.
Prime patched spots before painting to equalize sheen.
Work room by room, checking progress under angled light to catch subtle shadows.
- sponge and solvent
- fine-grit sanding
- thin compound feathering
When Paste Has Permanently Stained the Wall
Because wallpaper paste can soak into drywall paper and leave brownish halos, you’ll need to treat stained areas before painting to prevent bleed-through. You’ll spot stains under wallpaper patterns or where adhesive brands left residues. Clean gently with a trisodium phosphate solution, rinse, let dry, then apply a shellac-based primer to seal stains. Test a small area first to ensure adhesion. If stains persist, recoat the primer. Protect surrounding trim and use light sanding only if paper surface is intact. Expect subtle color shifts; sealing prevents ugly bleed-through and restores confidence before repainting.
| Feel | Memory | Resolve |
|---|---|---|
| Frustration | Old patterns | Action |
| Relief | Removed paste | Seal |
| Pride | Smooth wall | Paint |
| Calm | Clean surface | Finish |
| Confidence | Ready room | Newstart |
Repair Torn or Gouged Drywall Paper
While you’re stripping wallpaper, tears and gouges in the drywall paper can happen, and you’ll want to address them before priming so paint lays down smoothly. Remove loose paper fibers, sand edges lightly, and clean dust.
While stripping wallpaper, remove loose fibers, sand edges, and clean dust before repairing and priming for smooth paint.
For small tears, apply a thin layer of ready-mixed joint compound, feathering edges. For larger gouges, embed paper tape then skim-coat. Let each layer dry and sand smooth.
Match texture to surrounding wall so wallpaper patterns’ remnants or wall texture don’t telegraph through paint. Finally, prime repaired areas and consider uniform paint sheen to avoid noticeable differences.
- scrape loose fibers
- tape and skim-coat
- sand and prime
Patch Plaster Cracks and Hairline Fractures
Start by identifying whether the cracks are hairline surface fractures or deeper plaster splits so you know how much repair is needed.
For hairline cracks, you’ll typically use a thin, flexible filler.
For wider or structural cracks, apply a bonding plaster or joint compound after widening and cleaning the gap.
Match the compound to the crack type and sand smooth before priming.
Identify Crack Types
When you inspect walls after removing wallpaper, you’ll quickly notice two common crack types: patch plaster cracks, which are wider and usually follow the edges of previous repairs, and hairline fractures, which are fine, spiderweb-like lines in the surface paint or thin plaster.
You should assess depth, direction, and whether cracks show signs of crack expansion or just surface crazing. Wider patch plaster cracks often indicate movement or failed prior work; hairlines are usually cosmetic.
Document locations, photograph patterns, and decide whether crack sealing is needed before further preparation.
- Linear gaps along old patches
- Fine spiderweb surface lines
- Corner or seam concentrations
Apply Appropriate Compound
Now that you’ve identified and documented the crack types, it’s time to choose and apply the right compound so repairs hold up and look smooth.
For hairline fractures, use a lightweight spackling or acrylic filler. For wider plaster cracks, pick a setting-type joint compound.
Clean dust from the area, widen tiny cracks slightly with a utility knife, and dampen the plaster before applying.
Press the compound in, level with a flexible putty knife, and feather the edges to blend with the surrounding texture so wallpaper patterns won’t telegraph through.
Sand lightly after drying, prime the patched areas, and match your paint color carefully to guarantee seamless, durable results.
Fill Larger Holes With Joint Compound
If you’re dealing with larger holes left by anchors or torn drywall paper, use joint compound to build a solid, smooth repair that won’t sag or crack. You’ll first clean edges, remove loose paper, and apply a backing if needed. Then layer the compound, let it dry, and sand between coats.
Match surrounding wall texture so decorative accents blend; feather edges for invisibility. Prime repaired spots before painting.
Blend textures and feather edges for a seamless finish; always prime repaired areas before painting.
- Use a mesh or paper patch for deep voids.
- Apply thin, even coats to prevent shrinkage.
- Sand lightly to match wall texture before priming.
When to Replace a Damaged Drywall Panel
If you spot visible structural damage, large missing sections, or persistent moisture stains, you should consider replacing the drywall panel rather than patching it.
You’ll save time and avoid future problems by swapping out panels that compromise the wall’s integrity or show ongoing water damage.
In the next part we’ll cover how to assess the extent of damage and remove a panel safely.
Visible Structural Damage
When should you replace a damaged drywall panel rather than patch it? You’ll replace panels when visible structural damage compromises safety or finish.
If the stud attachment, joint integrity, or overall flatness is lost, patching won’t restore structural stability or allow proper wall reinforcement. Replace the panel to prevent future cracks, sagging, or fastener failure.
- Large cracks radiating from studs or seams indicating movement
- Soft, crumbling gypsum around fasteners or along edges
- Distorted or bowed panels that don’t sit flush with adjacent drywall
Replacing guarantees a sound substrate for primer, paint, and long-term durability.
Large Missing Sections
How big does the hole have to be before you replace the drywall panel outright? If you’re dealing with large missing sections—holes bigger than a few square feet or damage that compromises studs—replace the panel.
Small repairs suit wall patching, but when seams, insulation exposure, or multiple breaks exist, a full panel swap restores structural integrity and smoothness for painting.
Cut back to solid framing, fit a new sheet, tape and mud joints, sand, and prime. Replacing the panel saves time versus endless patching and prevents future failures, giving you a stable substrate for paint and finish.
Persistent Moisture Stains
Wondering whether moisture stains mean you must replace a drywall panel? You’ll inspect for softness, crumbling paper, or mold; if the core breaks when pressed or seams fail, replace the panel.
Minor surface stains can often be sealed and painted, but deep saturation alters wall texture and may hide rot. Remove damaged drywall, treat framing for mold, and install a new panel matched to surrounding decorative accents and texture.
Don’t skimp on backing or sealing—moisture returns fast. Consider professional help for widespread damage or structural concerns.
- Soft, sagging section near baseboard
- Visible black mold behind wallpaper
- Compromised seam integrity
Use a Skim Coat to Level Uneven Walls
If your wall still shows seams, gouges, or minor texture after stripping wallpaper, apply a thin skim coat to create a smooth, paint-ready surface. You’ll mix joint compound to a creamy consistency, spread it with a wide drywall knife, and work in long, even strokes.
Focus on low spots and lightly embed compound over texture for effective wall leveling. Let it dry fully, sand with fine-grit paper to remove ridges, and vacuum dust before priming.
For large areas, consider two thin passes rather than one thick layer to prevent cracking and guarantee a uniform finish.
Feather Repair Edges So Seams Disappear
When you’ve skim-coated or filled seams, feather the repair edges so they blend seamlessly into the surrounding wall; you’ll work toward invisible joins by tapering compound thinly outward. Use a wide drywall knife, apply thin overlapping strokes, and keep compound level with the wall. Feather edges to reduce ridges and create smooth gradations for paint.
Focus on seam blending, wiping excess with a damp sponge as you go. Let it dry fully before the next pass.
- Spread thin, wide strokes outward from the seam.
- Smooth gradations with light pressure and overlapping passes.
- Finish by checking for ridges in raking light.
Sanding Basics: Grits, Tools, and Safety
Before you start sanding, gather the right grits and tools and protect yourself—choosing the wrong paper or skipping safety gear will undo your prep work.
Use 120–150 grit to level joint compound and 180–220 grit for final smoothing; coarser grits remove fast but leave scratches.
Pick a sanding block for flats and a detail pad for corners and texture patterns.
Consider a random-orbit sander for large areas, with dust collection.
Wear a respirator, goggles, and coveralls.
Lightly sand glossy spots to reduce paint sheen for adhesion, then clean dust away before priming and painting.
How Long to Wait for Repairs to Dry Before Sanding
Although drying times vary with compound type and room conditions, you should never sand until the repair is fully dry and hard to the touch. Check edges and center; press lightly—if it dents or feels cool, wait longer.
Factors like humidity, temperature, and joint compound thickness change cure times. While you wait, plan color schemes and furniture arrangements so painting follows smoothly.
Typical guide:
- Small patch: 1–4 hours for lightweight spackle in warm, dry rooms.
- Medium repair: 24 hours for standard joint compound at normal conditions.
- Large fill or multiple layers: 48–72 hours, or until completely hard.
Dust Control While Sanding
Because sanding sends fine dust everywhere, you’ll want to contain and capture it before you start—seal off the room, cover vents and floors, and set up a HEPA-equipped vacuum or dust extractor to pull particles at the source. You’ll minimize dust accumulation by using wet sanding where appropriate, low-dust sanding discs, and a sander with a sealed shroud. Work top to bottom and pause to vacuum frequently. Wear a fitted N95 mask and goggles. Monitor cleanup with tack cloths. Plan airflow so dust exits sealed areas without spreading to other rooms.
| Tool | Benefit | Use |
|---|---|---|
| HEPA vacuum | Captures fine dust | At source |
| Wet sponge | Reduces airborne dust | Frequently wipe |
| Tack cloth | Picks residue | Final pass |
| N95 mask | Protects lungs | Always wear |
| Low-dust discs | Less dust | With sander |
Test Adhesion With a Tape Pull Test
You’ll want to pick a strong adhesive tape—like painter’s or duct tape—so the test actually stresses the wall surface.
Perform several pulls in different spots and directions to get a reliable sense of how well the existing surface is bonded.
If the tape rips off paper or leaves residue, you’ll know there’s poor adhesion that needs fixing before you paint.
Choose Proper Tape
When prepping walls after stripping wallpaper, pick a tape that sticks well without pulling paint or leaving residue — and confirm it with a simple tape pull test. You’ll assess adhesion quickly so you can plan for priming, sanding, and choosing colors around areas where tape lifted any loose finish.
Consider wall texture when choosing tape: smoother walls need less aggressive adhesive, textured walls may need stronger hold.
- Test a small scrap of tape on an inconspicuous patch.
- Pull sharply at a 90-degree angle after 10 seconds.
- Note any paint lift, residue, or adhesive transfer.
If issues appear, switch to gentler or specialty tape.
Perform Multiple Tests
Now that you’ve checked a single tape sample, expand your checks across the room by performing multiple tape pull tests. Work methodically: mark a grid covering high, low, and corner areas plus seams and shifts behind radiators or trim.
Press the same tape type firmly, wait the same interval, then pull at a steady angle. Note how wallpaper patterns affect adhesion—raised or heavily textured patterns may release differently.
Record results and locations so you’ll know where extra prep is needed before applying primer or selecting paint color. Repeat until you’ve sampled a representative set of surfaces throughout the space.
Interpret Pull Results
After pulling your tape samples, examine each spot for three quick signs: whether the paper came off clean, left adhesive or backing, or damaged the wall surface. You’ll judge adhesion and plan next steps based on those results.
Good pulls mean you can sand and prime; adhesive residue needs solvent and scraping; damaged areas require patching. Check tests under interior lighting and with furniture placement in mind so repairs won’t be hidden or highlighted later.
Note variations across the room and prioritize problem zones. Use consistent tape pressure and label spots to track which treatment worked best.
- Clean paper removal: smooth, intact wall
- Adhesive left: tacky, discolored residue
- Surface damaged: gouges, paper fibers embedded
Choose the Right Primer After Wallpaper Removal
Because removing wallpaper can leave everything from adhesive residue to uneven porosity, you’ll want a primer that addresses those specific issues rather than just covering the wall. You should pick a high-build primer for uneven wallpaper texture, and a primer formulated to seal adhesive residue so paint bonds evenly. Test a small area, sand lightly if needed, then re-prime. Consider oil-based or shellac for stubborn spots, latex for general use. Use compatible primers with your chosen topcoat.
| Primer Type | Best For | Notes |
|---|---|---|
| High-build | Texture smoothing | Fills small flaws |
| Shellac | Adhesive residue | Strong sealant |
| Latex | General | Easy cleanup |
Bonding Primer vs. Stain-Blocking Primer: When to Use Each
When you strip wallpaper, you’ll often need a bonding primer to help paint stick to any leftover glue or glossy spots.
If you see tannin stains, water marks, or other discoloration, use a stain-blocking primer to seal and prevent bleed-through.
Choosing the right one up front saves you time and prevents finish problems later.
Bonding Primer Purpose
If you’ve stripped wallpaper or sanded glossy surfaces, you’ll often need a bonding primer to give new paint something secure to grab onto. You’ll apply it when surfaces are slick, patched, or uneven so paint won’t peel.
Bonding primer helps bridge differences in wall texture and creates a uniform base that improves adhesion and finish consistency. Use it on previously coated walls, glossy trims, or skim-coated areas before topcoating.
- slick, sanded drywall spots that resist paint
- repaired seams and joint compound areas
- smooth or varied wall texture gradations that need bonding
Stain-Blocking Uses
Although both bonding and stain-blocking primers help paint stick, they serve different jobs: bonding primers focus on adhesion to slick or patched surfaces, while stain-blocking primers seal out discoloration from water, smoke, tannin, or grease so stains don’t bleed through your topcoat.
When you remove wallpaper patterns, inspect for adhesive residue and any staining beneath. Use a stain-blocking primer over yellowed glue marks, water rings, smoke haze, or tannin bleed from wood trim.
Reserve bonding primer where surface texture or remaining paste prevents reliable adhesion. For mixed issues, apply stain-blocking primer first, then a bonding coat if needed.
Spot-Prime Stains, Tannins, and Water Marks
Before you paint, address any stains, tannin bleed, or water marks so they don’t ruin your new finish; these blemishes can reappear through paint if you skip spot-priming.
You’ll identify isolated discoloration left by leaks, adhesive, or wood tannins and treat them before full priming. Use a stain-blocking primer on affected spots, feathering into surrounding wall textures so gradations aren’t visible against nearby wallpaper patterns or repaired areas.
Let primer dry fully, then inspect under good light. If stains persist, repeat spot-priming until sealed.
- Yellowed tannin streak near a window
- Round water halo under a leak
- Small adhesive discoloration
Apply Primer to Repaired Drywall and Plaster
Once repairs are fully dry and sanded smooth, you’ll apply a quality primer to seal patched drywall and plaster so paint adheres evenly and hides texture differences.
Choose a stain-blocking, latex or shellac-based primer suited to your substrate and any residual adhesive. Work in thin, even coats with a roller and angled brush for corners and trim.
Feather primer into surrounding areas to blend wall textures and avoid visible shifts, especially where decorative finishes once drew the eye.
Allow recommended dry times, inspect for pinholes or sheen variations, and sand lightly before proceeding to topcoat preparation.
How Many Primer Coats Do You Need?
How many primer coats you need depends on the condition of the wall, the type of primer, and the paint color you’re using. Start with one coat for clean, even drywall; inspect for stains, adhesive residue, or uneven texture.
How many primer coats depends on wall condition, primer type, and paint color—start with one on clean, even drywall.
Use a second coat when you need better color matching or to smooth texture blending between patched areas. For dark-to-light color changes or stubborn stains, apply a third coat or a stain-blocking primer.
Let each coat dry fully and sand lightly between coats where texture differs.
- One coat: minor repairs, light colors
- Two coats: most situations, improved uniformity
- Three coats: heavy stains, dramatic color shifts
Seal Old Gloss Paint Under Removed Paper
If the wallpaper came off and left glossy paint exposed, you’ll need to dull and seal that surface so new primer and paint adhere properly.
Lightly sand gloss with fine-grit paper to remove shine and any remaining adhesive removal residue from seams or corners.
Clean the wall with trisodium phosphate or a mild detergent, rinse, and let dry.
Spot-prime bare or rough areas with a bonding primer formulated for glossy surfaces.
Roll a full coat of primer over the wall, feathering into edges where wallpaper patterns once met paint.
Once sealed and dry, your topcoat will stick and look uniform.
Choose Paint Finish After Wallpaper Removal
Wondering which paint finish will hide old seams and suit your room? You’ll pick based on room use, light, and texture. Matte and eggshell hide imperfections; satin and semi-gloss offer easier cleaning. Consider color coordination with trim and furnishings, and prioritize paint durability where walls see traffic.
Pick a finish by room use, light, and texture: matte or eggshell to hide seams, satin for durability.
- Matte/flat: masks seams, soft look, best for low-traffic rooms
- Eggshell: subtle sheen, balances concealment and cleanability
- Satin/semi-gloss: durable finish for high-use areas, reflects light and highlights texture
Test samples on repaired patches, view them at different times of day before committing.
Best Undercoats for High-Humidity Rooms
If your room stays damp, you’ll want a moisture-resistant primer to block water vapor and improve paint adhesion.
Pair that with a mildew-inhibiting sealer to prevent mold growth on newly prepped walls.
Choosing both will give you a durable base before applying your finish coat.
Moisture-Resistant Primer
Why choose a moisture-resistant primer for bathrooms and kitchens? You’ll create moisture barriers that protect newly exposed drywall after wallpaper removal and support mold prevention without adding heavy coatings. Apply primer evenly, let it fully dry, and inspect for soft spots to repair before topcoating.
Choose products labeled for high-humidity use and follow manufacturer recoat times.
- Smooth, sealed surface ready for paint
- Reduced risk of damp-related paint failure
- Better adhesion in steamy environments
You’ll save time and avoid future repairs by using a quality moisture-resistant primer that’s compatible with your finish paint.
Mildew-Inhibiting Sealers
Moisture-resistant primers help, but in kitchens and bathrooms you’ll also want a sealer that actively resists mildew growth on the undercoat. You’ll choose products labeled for mildew prevention and follow sealing techniques: clean, dry, spot-treat, then apply thin, even coats. Use antimicrobial sealers where needed and ventilate while curing. Maintain humidity control after painting to protect the finish.
| Emotion | Choice | Result |
|---|---|---|
| Relief | Antimicrobial sealer | Fewer stains |
| Confidence | Proper sealing techniques | Longer life |
| Calm | Controlled humidity | Peace of mind |
| Pride | Clean prep | Lasting finish |
Tools and Accessories for a Professional Finish
When you’re preparing walls after removing wallpaper, the right tools make the difference between a quick touch-up and a professional finish. You’ll choose items that address remaining adhesive, uneven wall textures, and traces from wallpaper patterns so paint lays smooth. Use quality tools to match repair needs and speed work.
- Flexible joint compound knife for feathering seams and smoothing textures
- Fine- and medium-grit sanding blocks to level ridges left by wallpaper patterns and repair patches
- High-quality angled brushes and rollers to reach corners and replicate wall textures before priming
Select durable accessories to reduce rework and guarantee consistent results.
Proper Ventilation and Personal Protective Equipment for Wall Prep
Because paint strippers, adhesives, and dust can build up quickly, make sure you ventilate the room and wear proper PPE before you start prepping walls. You’ll open windows, run fans to exhaust air, and seal doorways to direct airflow — Ventilation safety reduces fumes and airborne particles.
For Protective gear, put on a respirator rated for organic vapors and particulates, safety goggles, disposable coveralls, and nitrile gloves. Use knee pads if you’ll crouch.
Replace filters and clean equipment after work. Monitor symptoms like dizziness or throat irritation; stop and get fresh air if you feel unwell.
Project Timing: Ideal Sequence and Schedule
Start by outlining the sequence of prep tasks — wallpaper removal, adhesive cleanup, repairs, sanding, priming — so you can work efficiently and avoid redoing steps.
Assign realistic time estimates for each phase based on room size and wallpaper condition, and build in dry times for adhesives and primers.
With a clear schedule you’ll know when it’s smart to tackle multiple rooms or pause for proper curing.
Sequence Of Prep Tasks
Although the exact timing depends on room size and wall condition, follow a logical sequence so you don’t backtrack. Start by removing wallpaper patterns and old adhesive, then clean and dry walls. Repair gouges, fill seams, and sand smooth. Prime patched areas to unify porousness and improve paint adhesion. Consider paint color coordination now so trim and accent decisions match.
- Remove wallpaper and adhesive thoroughly.
- Repair, sand, and vacuum dust.
- Apply primer to patched and bare areas.
Work methodically from top to bottom and one wall at a time to keep progress steady and efficient.
Realistic Time Estimates
Now that walls are clean, patched, and primed where needed, plan a realistic schedule so you know how long each step will take and when you can finish.
Estimate 1–2 hours for final sanding and dust removal per room, longer for textured walls.
Allow 2–4 hours for taping, masking, and furniture protection, plus drying time.
Primer and paint coats each need 2–6 hours drying depending on product and humidity; factor cure time before moving furniture back.
If you’re doing color matching or testing samples, add an extra day for swatches to dry and for adjustments.
Buffer at least one contingency day.
Budgeting for Repairs, Materials, and Labor
- Plaster patches, joint repair
- Primer, paint, tools
- Contingency, unexpected fixes
Decide: DIY vs. Hire a Pro – Quick Checklist
If you’re weighing whether to tackle the wall repairs and painting yourself or hire a pro, start by listing the scope, your skill level, and the time you can commit.
Complex plaster work, large surface areas, or tight deadlines usually favor hiring a professional, while small patches and a few rooms can be practical DIY projects.
Check these quick criteria: assess damage severity, measure square footage, estimate hours, and note any specialty finishes tied to current wallpaper trends or planned interior design.
Factor budget, tool access, and comfort with sanding/taping.
If unsure, get one pro estimate before deciding.
Common Mistakes That Ruin Paint Adhesion
If you leave wallpaper glue on the wall, your new paint won’t stick properly and will likely peel.
Don’t skip a primer coat—primer seals any remaining residue and creates a uniform surface for paint to bond.
Addressing glue removal and priming first saves you from costly touch-ups later.
Improper Glue Removal
When you scrape or peel wallpaper without fully removing the old adhesive, that stubborn glue can prevent new paint from sticking evenly, causing bubbling, flaking, or obvious sheen differences. You need to identify adhesive types and how wallpaper patterns trapped paste in seams or textured surfaces. Test small areas with warm water, a scraper, or a mild solvent suited to the paste. Don’t assume visible clean walls are residue-free.
- Paste left in embossed wallpaper grooves creates raised spots.
- Vinyl-backed paper often hides stronger, water-resistant glue.
- Layered patterns can trap glue between layers, undermining coatings.
Skipping Primer Coat
Because old wallpaper and residual paste create uneven porosity and staining, skipping a primer before painting almost guarantees poor adhesion and visible defects. You’ll see patchy sheen, peeling, and stains bleeding through if you rely on paint alone.
Primer skipping saves time now but costs longevity and finish quality. For reliable results, clean and repair surfaces, then apply a suitable primer for the substrate—stain-blocking or high-adhesion formulas as needed.
Proper wall priming seals porous areas, evens absorption, and promotes paint bonding. Don’t skip this step: it’s the difference between a short-lived job and a professional, durable finish.
Troubleshoot Peeling or Bubbling After Painting
Though you took care removing wallpaper and priming, peeling or bubbling can still show up after painting—here’s how to diagnose what went wrong so you can fix it right.
Inspect for remaining adhesive, incompatible wallpaper textures and uneven paint sheen.
Lightly press bubbles: if adhesive gives, you’ll need to remove and re-prime; if paint film lifts, sanding and proper primer are required.
Check humidity and drying times too.
- Raised seams where wallpaper residue remained
- High-gloss areas showing different paint sheen
- Wet or humid spots that trapped moisture
Address root cause before repairing to prevent recurrence.
Touch Up Small Repaired Areas After the Final Coat
After the final coat dries, step back and scan the walls for small repairs that need touch-ups so your finish looks seamless. Use a bright light at an angle to reveal low spots, nail holes, or texture mismatches from wallpaper removal.
Clean dust, then lightly scuff glossy patches and feather edges of joint compound with fine sandpaper. Match wall texture by stippling or smoothing before paint if needed.
Use the same paint and a small brush or mini-roller, applying thin layers and blending into surrounding areas. Let each layer dry fully, then reassess to guarantee an even, professional-looking surface.
Care for Newly Painted Walls After Wallpaper Removal
If you’ve just painted walls after removing wallpaper, give the new finish time and gentle treatment to fully cure—avoid hanging heavy items, leaning furniture, or vigorous cleaning for at least 7–30 days depending on the paint type.
You’ll want to protect the fresh surface from scuffs and moisture while the solvent off-gases and the film hardens. Keep humidity moderate and avoid direct sunlight that can highlight lingering wallpaper patterns or uneven wall texture until cured.
Light dusting is fine; delay deep cleaning. Consider temporary corner guards and soft pads under furniture legs to prevent dents.
- Soft microfiber dusting
- Felt pads on furniture
- Indirect lighting only
Maintenance Tips to Avoid Future Wallpaper Issues
When you want wallpaper to look good and come down cleanly in the future, stick to a few simple maintenance habits.
You should control humidity with vents or a dehumidifier so adhesive won’t loosen, and avoid direct sunlight that fades wallpaper patterns.
Clean gently using a soft cloth and mild cleaner to prevent damaging the paper or altering wall texture.
Inspect seams and repair lifting edges promptly with adhesive.
When moving furniture, protect walls to prevent tears.
Rotate rugs and change room layout occasionally to reduce uneven fading.
These steps help preserve appearance and make future removal predictable and easier.
Eco-Friendly Products and Wallpaper Waste Disposal
When you’re stripping wallpaper, pick eco-friendly adhesive removers to cut harsh fumes and chemical runoff.
Check which wallpaper materials can be recycled and separate vinyl from paper-backed sheets before disposal.
For scraps that are compostable, compost them safely, and take non-recyclable waste to a proper facility to avoid landfill contamination.
Eco-Friendly Adhesive Removers
Because you’ll want to protect your indoor air and local waterways, choose eco-friendly adhesive removers that break down residue without harsh chemicals. You’ll use products labeled for Eco friendly adhesives or make a mild citrus or enzyme solution for Sustainable wallpaper removal.
Apply gently, let dwell per instructions, then scrape with a plastic tool to avoid damaging drywall. Rinse with clear water and blot dry.
- A biodegradable enzyme spray that loosens paste
- A citrus-based gel that clings to vertical surfaces
- Soft scrubbing pads and plastic scrapers for gentle removal
Recycling Wallpaper Materials
After you’ve removed paste and residue with eco-friendly products, think about how to handle the leftover wallpaper and scraps. Sort usable sections by wallpaper patterns and size; donate intact pieces to schools, theater groups, or craft centers.
Small offcuts make good packing material or art supplies rather than landfill. Before recycling or repurposing, inspect for stubborn adhesive residue; lightly wash or scrape treated areas so adhesives won’t contaminate recycled paper streams.
Label bundles clearly and contact local recycling centers to confirm acceptance rules. You’ll reduce waste, extend materials’ life, and support creative reuse without touching on disposal or composting specifics.
Safe Disposal And Composting
If you’re aiming to minimize environmental impact, plan disposal and composting before you start removing wallpaper so you can separate materials properly and avoid contaminating waste streams. You’ll sort paper-backed, vinyl, and adhesive residue: paper-backed can go to curbside recycling if clean, vinyl requires safe disposal at a municipal facility, and heavily glued scraps belong in trash. Consider local guidelines and drop-off programs.
For composting methods, only compost plain, uncoated paper in small amounts; shred to speed breakdown. Use eco-friendly strippers to reduce chemical contamination. Check community compost sites before adding any wallpaper material.
- Shred plain paper scraps
- Drop vinyl at special collection
- Keep adhesives out of compost
When to Reconsider Removal and Choose Wall Coverings Instead
When wallpaper’s adhesive or substrate would damage the drywall, you should consider covering rather than stripping it. If wallpaper removal risks tearing paper-thin drywall, exposing plaster lath, or creating deep gouges, choose a covering approach.
Assess wall texture and surface irregularities; heavy textures may hide seams and reduce prep. Use plywood, drywall overboard, or skim-coat-ready panels to provide a stable base. Install new wallcoverings or paint-ready panels that match room use and humidity.
Covering saves time, reduces repair costs, and prevents further damage. You’ll still inspect for mold, loose substrate, and structural issues before sealing and finishing.
Final Prep Checklist Before Painting
Because the wall’s surface determines paint performance, you should walk through a concise final checklist before you open a can. Inspect for remaining adhesive, loose plaster, and nail pops; sand smooth and spot-prime stains. Clean the wall of dust and grease so primer bonds well. Protect trim, floors, and fixtures with tape and drop cloths. Consider how decorative accents and lighting options will affect sheen and color choice.
- Fill cracks and sand for a uniform surface
- Apply primer where needed, focusing on repaired areas
- Test paint near accents and under actual lighting options
Frequently Asked Questions
Can I Paint Over Remaining Thin Wallpaper Without Removing It?
You can, but you shouldn’t; thin remaining wallpaper often hinders paint adhesion. You’ll need to assess adhesion, fix loose edges, sand and prime with a bonding primer, or consider full wallpaper removal for best, long-lasting results.
How Do I Handle Wallpaper Seams That Telegraph Through Paint?
You’ll fix telegraphing seams by using wall seam repair: scrape loose paper, apply seam sealer or joint compound with a taping knife, sand smooth, and repeat seam sealing techniques until the surface’s invisible before priming and painting.
Will Self-Priming Paint Hide Adhesive Residue Completely?
No, it won’t miraculously erase your sins; self-priming paint can’t fully hide adhesive residues. You’ll need proper primer application and surface cleaning first, or those sticky ghosts will sneak through and ruin your polished look.
Can Wallpaper Removal Damage Electrical Wiring Inside Walls?
Yes, you can damage wiring if you’re careless; pry tools or water can harm insulation or junctions. Prioritize electrical safety, shut power, inspect for wall damage, and call a pro if wiring’s exposed or suspect.
How Do I Salvage Original Decorative Plaster or Moldings After Stripping Wallpaper?
Imagine rescuing a weathered statue; you gently brush, mend chips, and seal its beauty. You’ll document damage, use gentle cleaners, consolidate loose plaster, fill gaps with compatible materials, and prioritize wall restoration and decorative preservation.
Conclusion
Now that you’ve stripped, inspected, and primed, your wall’s ready—like a blank stage after the set’s taken down, waiting for its cue. You’ll patch, sand, and seal any scars, protect trim and floors, and choose eco-friendly disposal like a thoughtful director. When paint goes on, it’ll stick and sing. Trust the prep you’ve done; paint finishes the story, but the careful backstage work is what makes the final act unforgettable.