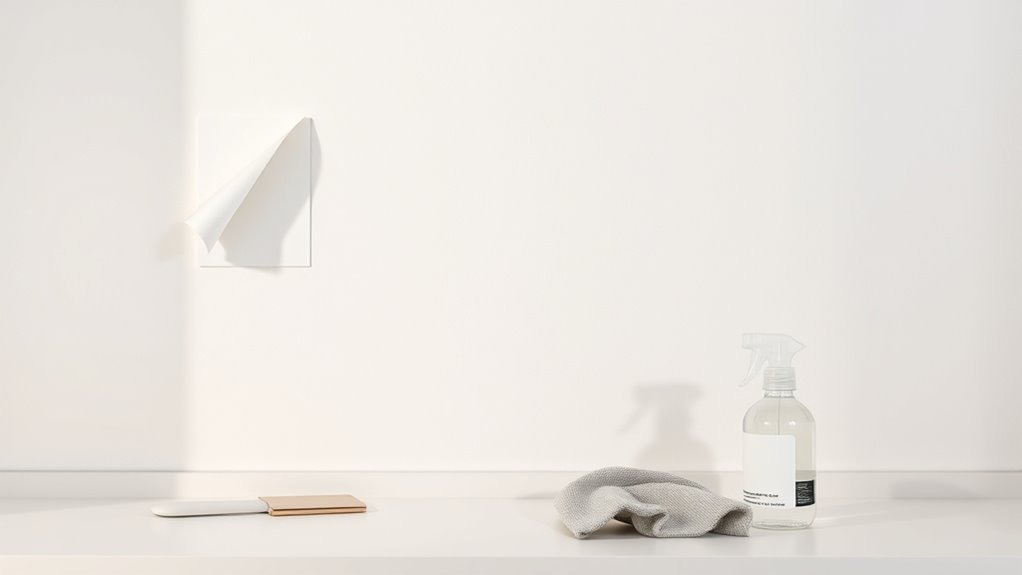
How to Remove Stickers From Wall Without Removing Paint
You can remove stickers without stripping paint by testing a hidden spot, then softening the adhesive with low heat from a hair dryer or warm soapy water; lift a corner gently with your fingernail or a plastic card and peel at a low angle. Use rubbing alcohol, oil, or a mild commercial remover for residue, always testing first and wiping gently. Work slowly, protect nearby surfaces, and stop if paint lifts — continue for tips on tricky finishes and repairs.
Start Here: Quick Sticker-Removal Steps
Before you start, gather a hair dryer, a plastic scraper or old credit card, a soft cloth, and rubbing alcohol or mild soapy water—having everything ready makes the job faster and reduces the chance you’ll damage the paint.
Heat the sticker gently to soften adhesive, keeping the dryer moving and a safe distance.
Gently warm the sticker with a hair dryer, moving it steadily and holding at a safe distance.
Peel slowly at a low angle; stop if paint lifts.
For residue, dampen the cloth with alcohol or soapy water and rub lightly, testing a hidden spot first.
On creative wallpaper or textured walls, avoid scrubbing—dab and lift instead, preserving both wall texture and finish.
Decide: Remove Now or Wait
You’ve prepped your tools and know how to soften and lift a sticker, but now decide whether to remove it immediately or wait. Consider Sticker Design: intricate decals or layered pieces can tear, so you might prefer waiting until adhesive is warmed gently.
Simpler vinyls often come off cleanly now. Factor Wall Textures — smooth surfaces release stickers more readily than rough or porous ones, where adhesive clings in crevices.
Also weigh timing: humidity, recent painting, and room use affect success. If in doubt, test a small corner now; otherwise wait for ideal conditions to minimize paint risk.
How to Tell If Paint Is Fragile or Durable
When you’re deciding whether a sticker can come off cleanly, check the paint’s resilience by looking for key signs that suggest it’s fragile or durable.
Gently press a fingernail into an out-of-sight spot; fresh, firm paint resists scratching, indicating good paint durability, while flaky or powdery surfaces signal wall fragility.
Tap the surface—solid sound suggests well-bonded layers; hollow or crumbling sounds warn of poor adhesion.
Look for bubbling, peeling, or visible brush strokes from prior repairs.
Older, matte paints often lift more easily than high-gloss finishes.
These quick tests help you judge risk before attempting sticker removal.
Essential Tools for Safe Removal
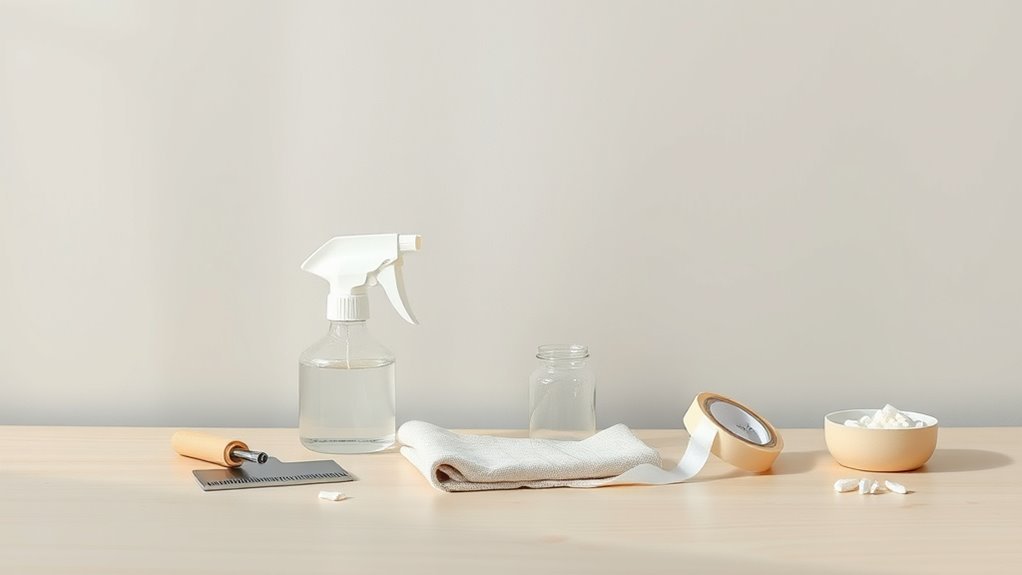
Before you start, gather a soft plastic scraper, a safe heat source like a hair dryer or heat gun on low, and gentle cleaning supplies such as mild soap, a microfiber cloth, and rubbing alcohol.
You’ll use the scraper to lift edges, heat to soften adhesive, and cleaners to remove residue without damaging paint.
Keep everything within reach so you can work steadily and stop if the paint shows stress.
Soft Plastic Scraper
If a sticker’s edges won’t lift, reach for a soft plastic scraper to pry it off without gouging the paint. You’ll hold the plastic scraper at a shallow angle, sliding gently under the sticker to lift adhesive layers.
Work slowly from one corner, easing forward as the bond weakens. If bits remain, use the scraper’s flat edge to coax off sticker residue, then wipe with a mild cleaner.
Avoid sharp metal blades or aggressive scraping, which can nick finish. Rinse the tool and repeat cautiously on stubborn spots until the wall looks smooth and undamaged.
Heat Source Options
Because heat softens adhesive, you’ll want a gentle, controlled source to loosen stickers without blistering paint. You can use a hair dryer on low to medium, a heat gun set to its lowest setting with caution, or a warm cloth repeatedly applied.
Choose tools that let you stay a few inches away and move continuously. Test a hidden spot first. Use heat techniques that focus on short bursts rather than sustained high temperatures.
For safety, wear gloves, avoid steam that soaks paint, keep children and pets away, and follow Safety precautions on the device’s manual.
Gentle Cleaning Supplies
When you’re ready to lift adhesive without damaging paint, gather a few gentle, effective supplies: a soft microfiber cloth, a plastic scraper or old credit card, mild dish soap, rubbing alcohol (isopropyl, diluted to 70% or less), and a commercial adhesive remover formulated for painted surfaces (test first).
You’ll work slowly, using the cloth dampened with soapy water to soften edges, then the scraper at a low angle.
Use diluted alcohol for stubborn spots, or try DIY natural remedies like oil or vinegar blends for eco friendly cleaning.
Always test an inconspicuous area before full application.
Household Solvents That Work
You can often lift sticker residue with common household solvents without harming paint. Try rubbing alcohol for quick adhesive breakdown, a vinegar-and-water mix for a gentler option, or a commercial “Goo Gone” alternative if you need more power.
Test any solvent in an inconspicuous spot first to make sure your paint won’t react.
Rubbing Alcohol Benefits
Although it’s a mild solvent, rubbing alcohol works surprisingly well to dissolve sticker adhesive without harming most paints, so you can remove residue quickly and safely. You’ll dab alcohol onto a cloth or cotton ball, test a hidden spot for colorfastness, then gently rub along the sticker edge.
Consider sticker placement and wall texture: smooth painted walls respond best, while textured surfaces need a softer touch to avoid lifting paint.
- Use 70–90% isopropyl alcohol for effective breakdown.
- Work in small sections, don’t soak the wall.
- Wipe clean with a damp cloth and dry promptly.
Vinegar And Water
If you mix equal parts white vinegar and water, the mild acid helps break down sticker adhesive without damaging most paint finishes. You’ll dampen a cloth, press it over the sticker for a few minutes, then gently peel. Try vinegar recipes with a few drops of dish soap for stubborn residue, but rinse well. Be mindful of water conservation—use only what’s needed and blot rather than flood. Test a hidden spot if paint’s delicate.
| Step | Time | Tip |
|---|---|---|
| Soak | 3–5 min | Use cloth |
| Peel | Slow | Angle flat |
| Rinse | Light | Blot dry |
Goo Gone Alternatives
When vinegar doesn’t lift stubborn adhesive, several common household solvents can step in as effective Goo Gone alternatives. You’ll want to test a hidden spot first and use gentle pressure to avoid paint damage. Consider eco friendly alternatives and basic DIY removal tips below:
- Rubbing alcohol — Dab, wait, then wipe; great for light residue.
- Cooking oil (olive or coconut) — Soften adhesive, then clean with mild soap.
- Baking soda paste — Scrub gently to lift sticky bits without harsh chemicals.
Work slowly, rinse thoroughly, and touch up paint if needed to keep your walls looking fresh.
Commercial Adhesive Removers: What to Choose
Picking the right commercial adhesive remover matters because products vary widely in strength, safety, and paint compatibility. You’ll want one that’s powerful enough to dissolve residue but gentle on your finish.
Look for water-based or citrus formulas labeled safe for painted surfaces, and balance efficacy with low VOCs if you prefer eco-friendly methods over harsh solvents.
Consider gel formulas for vertical surfaces and sprays for quick coverage.
Read labels for substrate warnings and choose brands with clear instructions.
If you lean toward DIY solutions, test compatibility and follow dilution guidance, wearing gloves and ventilating the room.
Test First: Try Methods on an Inconspicuous Spot
Because paints and adhesives react differently, always try your chosen removal method on an inconspicuous spot first to make sure it won’t damage the finish. You’ll learn how sticker patterns and wall texture interact with cleaners, solvents, and tools before risking visible damage. Test using the same pressure and timing you’ll use on the sticker.
- Try a corner area behind furniture to check for color shift.
- Note how sticker patterns lift and whether residue changes the sheen.
- Inspect wall texture for swelling, softening, or paint loss after drying.
If any change appears, stop and choose a gentler technique.
Remove Fresh Stickers (Easy Peel)
Now that you’ve tested a hidden spot and confirmed the paint holds up, you can tackle fresh stickers that peel off easily. Gently lift a corner with your fingernail or a plastic card, pulling slowly at a low angle to protect the wall color and avoid gouging. If the sticker design resists, apply a tiny amount of warm soapy water to the edge, wait 30 seconds, then peel. Clean residue with a damp microfiber cloth. Use the table below to guide pressure and tools for different sticker types.
| Sticker Type | Recommended Tool |
|---|---|
| Paper decal | Fingernail |
| Vinyl sticker | Plastic card |
| Thin label | Soapy water |
| Glitter decal | Microfiber cloth |
Remove Old Stickers With a Hair Dryer
If an old sticker won’t budge, warm the adhesive with a hair dryer on low to soften it.
Once the glue feels tacky, lift an edge and peel gently toward the center to avoid damaging the paint.
Wipe any remaining residue with a mild cleaner or oil to remove it safely.
Warm Sticker Adhesive
Want an easy way to loosen old sticker adhesive without scrubbing? Use a hair dryer to warm the residue gently, protecting paint and respecting sticker design and wall texture. Aim for low heat and steady motion.
- Hold dryer 6–8 inches away, moving in circles to soften glue.
- Test a small area to confirm paint won’t bubble or discolor.
- Once tacky, wipe with a microfiber cloth or peel residue with a plastic card.
Work patiently; overheating can damage paint. If adhesive remains, reheat briefly and repeat until the surface is clean and smooth.
Peel Gently From Edge
After you’ve softened the adhesive with low heat, lift a corner and peel gently from the edge while keeping the hair dryer moving to maintain warmth.
Work slowly, following the sticker design so printed areas don’t catch and tear.
Angle the strip low and pull parallel to the wall to reduce stress on paint.
If you hit resistance, pause heating and try a smaller tug rather than yanking.
For textured walls, move more gradually—the wall texture can hold edges tighter.
Keep the dryer in motion to avoid overheating paint.
Stop when the sticker comes off cleanly and inspect the surface for remaining bits.
Remove Residue Safely
How do you get sticky residue off without harming the paint? Use a hair dryer on low, keeping it moving to warm adhesive and test a small area first to judge sticker durability and wall texture. You’ll avoid peeling paint when you work gently.
- Warm: Hold dryer 6–8 inches away until adhesive softens.
- Lift: Gently peel with a plastic scraper or fingernail; reheat stubborn spots.
- Clean: Wipe residue with a microfiber cloth and mild soapy water, then dry.
If residue remains, try a tiny amount of rubbing alcohol, testing inconspicuously for safety.
Using a Heat Gun Safely
If you choose to use a heat gun, keep it on a low setting and move it continuously so you don’t overheat the paint beneath the sticker.
You’ll follow heat safety principles: keep a safe distance, avoid focused heat on one spot, wear gloves and eye protection, and ventilate the room.
Warm air softens adhesive chemistry, loosening the bond so you can peel gently with a plastic scraper or thumb.
Test a hidden area first to confirm paint tolerance. Stop if paint blisters or discoloration appears.
After removal, cool the area, clean residue with a mild solvent, and dry thoroughly.
Lift Stickers With Dental Floss or Fishing Line
You can slide dental floss or thin fishing line under a sticker and use it like a fine saw to separate adhesive from paint.
Move the floss gently back and forth while keeping it flush to the wall so you don’t scrape the surface. If the edge starts to tug, pause and warm the area or add a little soapy water to protect the paint.
Use Floss Like Saw
When stickers are flat and their edges won’t peel, slide a length of dental floss or thin fishing line behind the sticker and saw gently back and forth to separate the adhesive from the paint. You’ll limit stress on paint while accounting for sticker durability and varying wall textures. Work slowly, keeping the line close to the surface.
- Hold floss taut and move in short, controlled strokes.
- Angle the line to follow the sticker’s edge, adjusting for bumps or texture.
- Remove residue with a soft cloth and mild cleaner if needed.
Stop if you feel resistance to prevent paint lifting.
Protect Paint With Care
Because delicate paint can lift easily, take care to lift stickers using dental floss or thin fishing line as a gentle saw that stays close to the wall surface. Hold the floss taut, slide it slowly behind the sticker at a low angle, and keep pressure focused on the adhesive, not the paint.
Work in short strokes, rotating the floss as it dulls. Test a small area first to gauge how your wall texture and paint durability react. If paint flakes or texture distorts, stop and switch to heat or adhesive remover.
Clean residue gently with a damp microfiber cloth afterward.
Use a Plastic Scraper Without Gouging Paint
Although a plastic scraper won’t remove stubborn adhesive as fast as metal, it lets you lift stickers without gouging the paint—if you use the right angle and gentle pressure. You’ll protect wall color and avoid damaging sticker design edges by working slowly. Keep the blade flat, don’t pry upward, and stop if paint peels.
- Start at a corner, slide blade under at 15–30°.
- Use short, even strokes, keeping pressure light.
- Warm stubborn adhesive slightly, then repeat scraping.
If residue remains, switch to a mild adhesive remover tested on an inconspicuous spot.
Use a Credit Card or Putty Knife Safely
If the plastic scraper isn’t available or the sticker’s edges are too tight, try a stiff credit card or a thin putty knife used gently; these give you a firmer edge while still spreading pressure so paint stays put.
Hold the card at a shallow angle and slide under an edge, using small, steady motions—Credit card tips include bending slightly to increase leverage without sharp force.
For a putty knife, choose one with a rounded, flexible blade and keep movements parallel to the wall—Putty knife safety means never jab or pry upward.
Work slowly, reheat adhesive if needed, and stop at any paint lift.
Remove Residue With Warm Soapy Water
Want an easy, low-risk way to lift leftover adhesive? Use warm soapy water to soften residue without harming paint. Wet a soft cloth in a mixture of mild dish soap and warm water, wring until damp, and gently blot the residue. Adjust pressure based on wall texture to avoid sanding paint.
For stubborn bits, let the damp cloth rest five minutes to loosen adhesive, then rub in small circles.
- Test small area for sticker design edges and paint reaction.
- Repeat dampening rather than scrubbing hard.
- Dry thoroughly to prevent water marks.
Use Rubbing Alcohol Safely on Paint
After softening residue with soapy water, rubbing alcohol can tackle stubborn adhesive without stripping paint when used carefully. Test a hidden spot first to check paint durability; glossy and oil-based finishes resist solvents better than flat latex.
Dampen a microfiber cloth—don’t soak—and gently rub the sticky area in small circles. Work slowly, rechecking the finish and letting the wall dry between passes. If paint softens, stop immediately and switch methods.
Ventilate the room and wear gloves to follow solvent safety; keep alcohol away from flames. Finish by wiping with a damp cloth and drying to restore the surface.
Use Vegetable or Coconut Oil for Glue
When a solvent feels too harsh or the paint seems delicate, try soaking the adhesive with a little vegetable or coconut oil and let it sit for 10–15 minutes. The oil will penetrate and loosen the glue so you can wipe it away with a soft cloth.
You’ll test gently first on an inconspicuous patch. Assess sticker texture and adhesive strength before applying more oil.
Use a soft cloth and mild soap to remove residue, drying the area afterward.
- Apply oil sparingly to edges.
- Wait, then rub gently.
- Clean residue and dry.
Use White Vinegar to Dissolve Adhesive
If oil doesn’t do the trick, try white vinegar to break down sticker adhesive without harming most paints. You’ll dampen a cloth with white vinegar, press it onto the sticker art for a few minutes, then peel gently. For stubborn wall decals, reapply vinegar and use a plastic scraper at a low angle. Rinse with water and pat dry to avoid streaks.
| Step | Action |
|---|---|
| Prep | Test hidden spot |
| Apply | Soak cloth, press 5–10 min |
| Remove | Peel, scrape gently |
| Finish | Wipe, rinse, dry |
Work patiently to protect paint.
Select Solvents by Paint Type
Since different paints react differently to chemicals, match your solvent to the paint type before you start. You’ll assess sticker durability and paint compatibility to avoid damage. Test a small hidden spot first.
- For flat/matte paint: use mild solutions (warm soapy water or vinegar) to protect finish and account for lower abrasion resistance.
- For eggshell/satin: try isopropyl alcohol diluted with water; it balances adhesion break without harming sheen.
- For gloss/semi-gloss: stronger solvents like rubbing alcohol or commercial adhesive removers work, but spot-test for gloss preservation.
Proceed slowly, rechecking paint compatibility as you go.
Remove Vinyl Stickers From Gloss and Semi-Gloss Paint
Before you start, test your solvent or method on a hidden spot to make sure the gloss won’t dull or lift.
Use gentle heat from a hair dryer to soften the vinyl edge, then lift slowly with a plastic scraper.
If any adhesive remains, remove it carefully with a mild solvent and a soft cloth to avoid marring the finish.
Test Hidden Area First
When tackling vinyl stickers on gloss or semi-gloss paint, always test a hidden spot first to make sure your removal method won’t dull or strip the finish. You’ll confirm how wall texture and paint sheen react before proceeding.
Pick an inconspicuous area, like behind trim or inside a closet, and try your chosen cleaner or solvent lightly.
- Clean a tiny area, wait, and inspect for softening or discoloration.
- Try gentle rubbing to see if the coating lifts or if gloss changes.
- Note drying behavior and any residue so you can adjust technique confidently.
Use Gentle Heat
If the test spot looked good, gently warming the sticker will soften the adhesive so you can peel it without harming gloss or paint—use a hair dryer on low to medium heat and keep it moving to avoid overheating one spot. Aim from about 6–8 inches away, warming for 20–30 seconds, then lift an edge with your fingernail or a plastic scraper. Work slowly across the decal. Decorative wall decals respond well to steady warmth during sticker art removal on gloss and semi-gloss finishes.
| Tool | Distance | Time |
|---|---|---|
| Hair dryer | 6–8 in | 20–30 s |
| Scraper | edge only | slow |
Remove Residue Carefully
Because some adhesive will usually stay behind, you’ll want to remove residue carefully to protect gloss and semi-gloss paint. Work slowly, testing any solvent on a hidden patch so sticker patterns or wall texture won’t lift or dull. Use minimal pressure and blot rather than rub.
- Apply a dab of mild solvent (soapy water, rubbing alcohol) and wait 30–60 seconds.
- Gently lift residue with a soft cloth or plastic scraper, keeping strokes parallel to the surface.
- Rinse with clean water, dry, and inspect for sheen changes or trapped debris.
If damage appears, stop and consult a pro.
Remove Paper Stickers From Flat or Matte Paint
Though flat or matte paint resists shiny patches, you can still lift paper stickers without stripping the finish by working gently and using the right tools.
Start by softening adhesive with a hair dryer on low, keeping the nozzle several inches away and moving constantly.
Soften the sticker’s adhesive with a hair dryer on low, keeping the nozzle several inches away and moving constantly.
Peel from an edge at a shallow angle using your fingernail or a plastic scraper.
If residue remains, apply a damp microfiber cloth with a small amount of mild dish soap, blotting rather than rubbing.
Rinse with plain water and pat dry.
Consider sticker alternatives for future wall decoration like removable decals or low-tack painters’ tape.
Remove Bumper Stickers and Heavy Adhesives
For tough bumper stickers and heavy adhesives, you’ll want to warm the area with a hair dryer or heat gun to soften the glue before you peel.
Work slowly and lift an edge with a plastic scraper so you don’t gouge the paint.
After removing the sticker, use a mild adhesive remover or rubbing alcohol to wipe away residue without harming the finish.
Heat And Peel
When stickers are old, thick, or covered in heavy adhesive, heat and peel is the quickest way to lift them without stripping paint. You’ll use gentle warmth to soften glue, then peel slowly to protect your Creative wall art or DIY decor finish. Follow these steps:
- Use a hair dryer on low heat, holding 6–8 inches away for 30–60 seconds.
- Begin at a corner with a plastic scraper or fingernail; lift gradually, reheating as needed.
- Stop if paint softens; let cool and try a different angle.
Work patiently—rushing pulls paint.
Adhesive Residue Removal
If a bumper sticker or heavy adhesive leaves gummy residue behind, you’ll want to dissolve the glue without damaging paint by using gentle solvents and soft tools.
Test a mild solvent—soapy water, rubbing alcohol, or citrus-based cleaner—on an inconspicuous spot to verify it won’t affect sticker design colors or finish.
Apply solvent with a microfiber cloth, let it sit briefly, then wipe along the wall texture to lift residue.
For stubborn spots, use a plastic scraper at a shallow angle and repeat solvent application.
Rinse with clean water, pat dry, and inspect; repeat only as necessary to protect paint.
Remove Decals From Textured or Popcorn Walls
Because textured and popcorn surfaces grab edges and adhesive more tightly, you’ll need a gentler, patient approach to lift decals without damaging the finish. Treat a decor wall as delicate: test a small area, warm the decal with a hair dryer on low, and peel slowly at a shallow angle to follow the textured surface.
Textured or popcorn walls need a gentle, patient touch: warm, test a small spot, and peel slowly at a shallow angle.
- Soften adhesive: warm briefly, avoid soaking the textured surface.
- Lift carefully: use a plastic scraper or fingernail to follow bumps, working from one corner.
- Clean residue: dab with mild soapy water or adhesive remover safe for textured surface, rinse gently and pat dry.
Remove Stickers From Painted Trim and Moldings
Although trim and moldings look sturdy, their thin paint layers chip easily, so you’ll need a careful, low-abrasion approach.
Begin by testing a small spot to gauge sticker texture and adhesive properties. Use a hair dryer on low heat or a warm, damp cloth to soften adhesive; don’t overheat or soak the wood.
Peel slowly at a low angle, supporting the trim to prevent stress. If residue remains, apply a few drops of mild citrus-based adhesive remover or rubbing alcohol on a cloth, rub gently, then wipe clean.
Finish by buffing with a soft cloth to restore shine.
Remove Stickers From Drywall Without Damage
Trim handled, you’ll want a gentler plan for drywall since its paper surface tears and dents more easily. Work slowly: heat the sticker with a hair dryer on low, peel from an edge, and stop if you see lifting paint. If adhesive remains, apply a tiny dab of vegetable oil or adhesive remover, let sit, then wipe gently.
- Use heat, patience, and a plastic scraper.
- Clean residue with mild soap and water.
- Spot-prime any bare spots before touching up paint.
You can preserve Creative wall art and keep DIY wall repairs minimal by avoiding aggressive tools.
Remove Stickers Around Outlets and Switches
How do you tackle stickers that sit snugly around outlets and switches without risking a shock or chipping paint? First, turn off power at the breaker and test the switch to be sure. Peel gently from an edge with a fingernail or plastic scraper, keeping pressure away from the plate.
Use a hair dryer on low to soften adhesive, watching wall texture so you don’t overheat paint. For stubborn residue, apply a cotton swab with mild adhesive remover around the edges, not into the socket.
Replace cover plates if warped. Note sticker patterns to avoid tearing and repeat gently as needed.
Handle Stickers on Wallpaper and Specialty Finishes
After you’ve handled outlets and switches safely, turn your attention to wallpaper and specialty finishes, which need a gentler approach because adhesives and textures vary widely. You’ll want to preserve wallpaper patterns and delicate coatings, so proceed slowly and test first.
- Use a soft plastic scraper and warm soapy water on a hidden area to see if the finish reacts.
- Apply a dab of oil or adhesive remover to a corner; blot, don’t rub, then lift gently if safe.
- For heavily textured specialty finishes, work in short strokes and stop if paint or paper softens.
If unsure, consult the manufacturer before continuing.
Protect Nearby Surfaces While You Work
Before you start, cover nearby furniture with drop cloths or old sheets so adhesive remover or loosened pieces don’t stain upholstery.
Tape paper or painter’s tape along baseboards and trim to protect paint and create a clean edge.
That simple prep will save you time and prevent accidental damage while you work.
Cover Adjacent Furniture
While you work, keep nearby furniture shielded to prevent drips, adhesive residue, or tool marks from causing damage. Assess sticker placement and wall texture so you can choose barriers that won’t rub paint. Drape protected pieces loosely to allow air circulation and avoid pressure on delicate finishes.
- Use drop cloths or old sheets to cover seats and tabletops.
- Secure edges with low-tack painter’s tape so covers stay put but won’t peel paint.
- Keep tools and solvents on a tray away from covered items; wipe spills immediately.
Check covers periodically and replace any contaminated fabric to protect surfaces.
Mask Baseboards And Trim
Now that nearby furniture is covered, protect baseboards and trim so cleaning solutions or scraping won’t nick paint or stain. Use painter’s tape along edges where wall meets baseboard and around molding, pressing firmly to seal gaps.
Lay down a thin plastic strip or paper drop cloth against the floor to catch drips.
For delicate finishes, add a foam barrier under the tape.
When doing trim cleaning, avoid soaking edges; apply solvent to a cloth and test a hidden spot first.
Remove tape while adhesive is tacky to prevent peeling paint, and dispose of contaminated materials safely.
What to Do If Paint Starts Lifting
If the paint starts lifting when you peel a sticker, don’t keep pulling — stop and assess the damage so you can fix it without making things worse. Gently press the loose paint back to the wall; use a soft cloth and minimal pressure so you don’t tear more. Consider the sticker design and nearby wall color to plan discreet repairs.
- Clean: remove adhesive with mild soapy water, blot dry.
- Secure: use painter’s tape to hold edges flat while drying.
- Protect: avoid heat or solvents that strip more paint; wait before repainting.
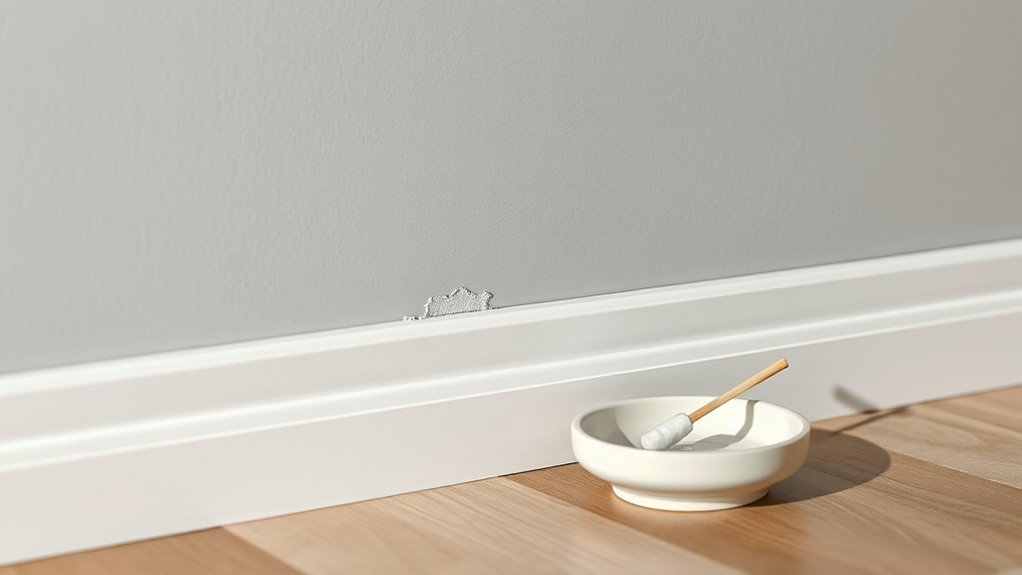
Fix Small Paint Chips After Removal
When small chips appear after you remove a sticker, repair them promptly to prevent moisture and dirt from making the damage worse.
Clean the area gently with a damp cloth, matching the room’s sticker design color if needed.
Lightly sand rough edges to blend with the wall texture, then wipe away dust.
Use a small brush or toothpick to apply spackle into the chip, smoothing flush with the surface.
Let dry, sand smooth, and prime tiny spots if the paint is glossy.
Touch up with matching paint in thin layers, feathering outward to hide the repair.
Remove Residue From Freshly Painted Walls
After you’ve fixed chips and touched up paint, check the area for any leftover adhesive or sticky residue that can attract dirt and ruin the fresh finish. You’ll want to remove residue gently so sticker durability and wall texture aren’t compromised. Try these steps:
- Use a soft cloth and mild dish soap solution to blot residue, testing a hidden spot first.
- For stubborn bits, apply a tiny amount of isopropyl alcohol or adhesive remover on the cloth, rubbing lightly along the texture.
- Wipe with clean water, dry immediately, and inspect for sheen changes or paint lift.
How Long to Wait After Painting Before Sticker Removal?
You should wait until paint is fully cured before removing stickers to avoid lifting or smudging.
Drying times vary by paint type—latex often feels dry in a few hours but can take up to 30 days to cure, while oil-based paints cure more slowly.
Also factor in temperature and humidity, since warm, dry conditions speed curing and cold, damp ones slow it down.
Drying Time Guidelines
If the paint’s still tacky, wait—peeling a sticker too soon can lift or mar the finish; aim for the paint to feel dry to the touch and cure enough to resist gentle pressure before you try removing stickers.
Consider wall texture and paint finish when timing removal: rougher textures and matte finishes often need longer to settle.
Follow these practical guidelines:
- Wait 24–48 hours for light coats on smooth surfaces before testing a corner.
- Allow 72 hours for textured walls or thicker applications; test gently.
- For best results, give paint one week to cure fully in humid or cool conditions.
Paint Type Differences
Because different paint formulas cure at different rates, you’ll need to adjust how long you wait before removing stickers based on the paint type. Latex and water-based paints generally set faster than oil-based enamels, while specialty finishes like latex-satin, high-gloss, and alkyds can vary.
You should wait at least 24–48 hours for standard latex on smooth walls, longer for textured surfaces where adhesive hides in crevices. High-gloss and alkyds may need a week to avoid lift.
Test a small corner first, checking paint sheen and adhesion. If doubt remains, wait longer to protect the finish.
Environmental Factors
Different paint types set at different speeds, but environmental conditions can speed up or slow that cure—and they affect how long you should wait before peeling stickers. You should consider humidity, temperature, and ventilation to avoid lifting paint or trapping solvents.
High humidity prolongs cure; heat and airflow shorten it. Also weigh Environmental impact when choosing removal timing and products; pick Eco friendly alternatives like low-VOC cleaners or adhesive remover pads.
- Humidity: wait longer in damp rooms.
- Temperature: warmer speeds cure, reduce wait.
- Ventilation: improves drying, lowers solvent risk.
Speed Up Removal When Short on Time
When you’re pressed for time, focus on high-impact shortcuts that remove stickers quickly without risking the paint. Assess sticker design and wall textures to pick a method: smooth walls tolerate gentle heat from a hair dryer to soften adhesive, while textured surfaces need careful peeling from an edge first.
Use a plastic scraper or old credit card at a low angle to lift stickers steadily. Apply a small amount of rubbing alcohol or a citrus-based adhesive remover to stubborn spots, blotting rather than scrubbing.
Work in short bursts, testing paint compatibility, and wipe residue away with a damp microfiber cloth.
Remove Stickers Safely in Rental Units
Worried about losing your security deposit? You can remove stickers safely in rental units by using gentle methods that respect paint and wall texture. Test a small hidden spot first.
Follow these targeted decorating tips:
- Peel slowly at a low angle; use dental floss or fishing line to lift adhesive gently.
- Warm stubborn stickers with a hair dryer on low, keeping it moving to avoid heat damage.
- Use a mild adhesive remover (like diluted dish soap) applied with a soft cloth; blot, don’t scrub.
If unsure, check lease rules or ask your landlord before major removal tasks.
Clean and Restore the Finish After Glue Removal
Once the glue’s gone, gently remove any residue with a soft cloth and mild cleaner so you don’t harm the paint.
If the texture looks uneven, feather in touch-ups to match the surrounding finish.
Finally, protect your work with a clear sealant or topcoat to keep the repaired area from standing out.
Remove Residue Gently
After you’ve lifted the sticker and softened the adhesive, gently remove any leftover tackiness without scrubbing—use a soft cloth dampened with a mild cleaner or a little rubbing alcohol, testing an inconspicuous spot first to make sure the finish won’t dull. Focus on preserving sticker design edges and matching your wall color’s sheen.
- Blot residue with the damp cloth, moving outward from the center.
- For stubborn bits, apply a dab of oil (cooking or baby oil), let sit, then wipe gently.
- Rinse with a clean damp cloth and dry immediately to avoid streaks.
Finish by inspecting in good light for uniformity.
Match Paint Texture
Before you repaint or patch, clean the area thoroughly and let it dry so you can accurately match the surrounding texture.
Inspect the surface under good light and compare sticker patterns and finish—glossy, eggshell, or matte—to the wall color and texture nearby.
Use fine sandpaper to feather edges, then apply a thin skim of joint compound or texture mix matching the existing pattern.
Let it cure, sand lightly, and test with a small swatch of matching paint.
Blend edges carefully so repaired area follows sticker patterns and wall color, making the repair visually seamless without overworking the surface.
Protect With Sealant
Because residual glue and cleaning can dull or weaken the paint surface, you’ll want to seal and restore the finish to protect your repair and blend it with the surrounding wall.
After surface preparation, pick a clear, compatible sealant—matte for flat paint, satin for eggshell or semi-gloss—to match sheen and guarantee Sealant protection.
Apply thin, even coats, letting each dry per instructions. Avoid overworking edges.
Finish with a light feathering to blend.
- Choose sealant based on paint sheen and compatibility.
- Apply thin coats, drying fully between layers.
- Inspect and touch up texture or sheen as needed.
Prevent Common Mistakes That Strip Paint
If you want to remove stickers without peeling paint, work slowly and choose gentle methods—rushing or using harsh tools will do more harm than good.
Check sticker durability before you start: fragile labels need extra care; heavy-duty adhesives may require heat or oil.
Assess sticker strength first—delicate labels demand gentleness; stubborn adhesives might need heat or oil.
Test paint compatibility in an inconspicuous spot so solvents or heat won’t discolor or lift finish.
Use a plastic scraper, warm soapy water, or a low-heat hairdryer; avoid metal blades, abrasive pads, and high heat.
Peel at a shallow angle, support surrounding paint with your other hand, and stop if you see lifting.
Stop Stickers From Sticking Permanently
When you want stickers to come off without bonding forever, act quickly and create a barrier between adhesive and paint. You’ll limit sticker durability by choosing temporary adhesives and by protecting the surface before application. Consider testing Adhesive types on a hidden spot to spot-treat potential problems.
- Use low-tack labels or painter’s tape under stickers to reduce long-term bonding.
- Apply a thin coat of clear removable sealant or wax where stickers will go.
- Rotate or replace decals regularly; prolonged exposure increases permanent adherence.
These steps preserve finish and make future removal predictable without harsh treatments.
Safety Tips for Using Solvents and Heat
When you use solvents or a heat gun to loosen stickers, wear protective gloves to keep chemicals and hot surfaces off your skin.
Open windows or run a fan so fumes don’t build up and you can breathe easily.
Test any heat source on a hidden patch first to make sure it won’t damage the paint.
Wear Protective Gloves
Although gloves might seem like an extra step, you should always wear chemical-resistant gloves whenever you use solvents or apply heat to remove stickers, since they protect your skin from burns, irritation, and toxic absorption. You’ll add an essential layer of protective gear and follow basic safety precautions.
Pick gloves that resist solvents and heat, check for tears, and replace them if contaminated. Follow these quick steps:
- Choose nitrile or butyl gloves rated for chemicals.
- Inspect and fit gloves before starting.
- Dispose or decontaminate gloves after use, avoiding skin contact during removal.
Ensure Proper Ventilation
Because solvents and heat can release fumes and vapors that irritate your eyes and lungs, make sure the room is well ventilated before you start. Open windows and doors to create a cross-breeze and position a fan to boost air circulation away from you.
The ventilation importance can’t be overstated: it reduces inhalation risk and helps solvents evaporate faster, lowering lingering odors. If possible, work during daylight when you can keep openings unobstructed.
Pause if you feel dizzy, nauseous, or experience throat irritation, and leave the area until fresh air restores comfort. Keep children and pets out while you work.
Test Heat Sources
Now that the room’s aired out, check heat sources on an inconspicuous spot before applying heat or solvents to the whole sticker area. You want to confirm paint durability and avoid blistering or discoloration. Test each method briefly, wait, then inspect.
- Use a hair dryer on low for 10–15 seconds; check paint durability.
- Try a warm cloth for the same time; look for softening without shine change.
- Apply a dab of solvent on a cotton swab; wipe gently and observe any finish loss.
If any test damages paint, stop and choose a gentler removal method.
How to Document Wall Condition (Landlords/Resale)
Before you remove any stickers, take clear photos and notes of the wall so you can prove its pre-cleaning condition later. Photograph the entire wall, close-ups of each sticker, and any existing scuffs, documenting wall texture and paint durability.
Note lighting, date, and camera used. Record measurements and sticker positions relative to outlets or corners.
If you’re a renter, email the landlord your photos and notes to create a timestamped record.
For resale, save images in a folder labeled by room. Keep originals unedited and back up copies to cloud storage for easy retrieval during disputes or inspections.
Dispose of Removed Stickers and Solvents Safely
After you peel off stickers, bag them and toss them in the trash so adhesive residue doesn’t spread.
If you used solvents, follow the product label for disposal — don’t pour them down drains or into soil.
Check local regulations or take leftover solvents to a household hazardous waste drop-off to avoid fines and environmental harm.
Safe Disposal Of Stickers
Wondering what to do with the peeled-off stickers and the solvents you used? You’ll want to separate stickers from solvent-soaked materials and handle each responsibly. Keep stickers dry for reuse or disposal, and avoid tossing adhesive waste loosely.
- Reuse: If stickers are intact, save for DIY projects like sticker art or creative displays; store flat in a sealed envelope.
- Trash: For damaged stickers, wrap adhesive side inward in paper, then place in regular trash to prevent sticking.
- Recycling check: Remove backing and consult local rules—many sticker materials aren’t recyclable, so follow municipal guidance.
Proper Solvent Disposal
If you kept solvent-soaked rags or jars from removing stickers, you’ll need to handle them differently than the dry scraps — solvents can be flammable, toxic, or regulated, so don’t just toss them in the trash or pour leftovers down the drain.
Store used solvents in labeled, sealed metal containers away from heat and children. Don’t mix chemicals; keep sticker design adhesives separate from paint-safe cleaners.
For rags, lay them flat outdoors to dry, then dispose per local hazardous-waste rules. Check municipal guidelines or take materials to a household hazardous waste facility so you protect your home and preserve wall texture.
When to Call a Professional
When the sticker or adhesive has damaged the paint, covered a large area, or resisted several safe removal attempts, call a professional—you’re more likely to avoid further harm and get a clean finish. You should also weigh Legal considerations and DIY risks before proceeding. A pro can assess substrate damage, match paint, and use specialized tools.
If stickers or adhesive have damaged paint, cover a large area, or resist removal, call a professional for assessment and repair.
- Cost vs. damage: estimate repair and compare to DIY attempts.
- Safety: avoid hazardous solvents or structural risks.
- Warranty and records: keep receipts and notes if you need insurance or landlord approval.
Choose a licensed contractor and get written estimates.
Quick Checklist: Step-by-Step Removal Plan
Before you start fiddling with tools or chemicals, run through a short checklist so you don’t damage paint or waste time. Inspect sticker edges, note paint type and sheen, and test a hidden spot with warm soapy water.
Gather soft plastic scraper, hair dryer, microfiber cloths, rubbing alcohol or adhesive remover labeled safe for paint, and painter’s tape.
Start low-heat and peel slowly; apply solvent sparingly if residue remains. Reassess after each step to avoid overworking the surface.
Patch tiny scuffs with matching touch-up paint.
Keep notes for future Creative wall art placement and DIY wall repairs planning.
Further Resources and Testing Templates
Since you’re likely to try a few approaches, bookmark a short list of reliable resources and print a couple of simple testing templates to guide each trial.
Use templates to note surface type, product, time, and outcome so you compare methods quickly.
Include DIY wall repairs sources and inspiration for Creative wall art if patching is needed.
- Template: surface, method, time, result
- Resource list: safe solvents, heat tools, patching supplies
- Notes: photos, risks, follow-up steps
Keep templates simple, test inconspicuous spots first, and update resources based on what actually works for your walls.
Frequently Asked Questions
Can Stickers Transfer Color or Ink Onto Paint When Removed?
Yes—you can get color transfer, depending on sticker types and removal techniques you use. If adhesive or ink’s strong, it’ll smear; you’ll avoid most issues by heating, peeling slowly, and using adhesive removers suited to painted surfaces.
Will Sunlight Exposure Make Sticker Adhesive Harder to Remove?
Yes — prolonged sunlight exposure can make sticker adhesive harder to remove; sunlight effects like UV and heat speed adhesive curing, so you’ll often face a tackier, more bonded residue that resists simple peeling or gentle solvents.
How to Remove Sticker Residue From Painted Furniture Edges?
A friend once softened stubborn edge residue with warm soapy water; you’ll use sticker removal techniques like gentle heat, rubbing alcohol or a citrus-based paint safe solution, testing first on an unseen spot to avoid damage.
Are There Child- and Pet-Safe Adhesive Removers for Sensitive Homes?
Yes — you can use non toxic solutions and natural remedies like warm soapy water, white vinegar diluted, or coconut oil; you’ll gently soften adhesive without harsh fumes, keeping children and pets safe while protecting painted surfaces.
Can Stickers Be Removed From Painted Ceilings Without a Ladder?
Yes — you can, if you use an extendable pole with a soft scraper or heat gun attachment; you’ll protect wall texture and account for sticker durability, moving slowly to avoid tearing or gouging paint on the ceiling.
Conclusion
You’ve got the tools and know-how to remove stickers without wrecking paint, so go slowly and test first. Treat fragile finishes like fine china—gentle, patient, and deliberate—and use heat, oil, or a mild solvent only after patch-testing. If the sticker resists or paint peels, stop and call a pro. Dispose of residues safely, and keep this checklist handy so future sticker battles stay quick, clean, and worry-free.