How to Remove Wall Paint From Wood Without Damage
You can safely remove wall paint from wood by softening it with a mild paint remover or gentle heat, then scraping carefully with a low‑angle plastic scraper to avoid gouging the grain. Work in small sections, ventilate the area, and test the method in a hidden spot first. Wipe remaining residue with a soft cloth and mild solvent, check for thin spots, and plan for touchups or refinishing; keep going for tips on tools, safety, and when to call a pro.
Quick Three‑Step Method to Remove Paint From Wood
If the paint’s partly loose or you’re short on time, try this quick three‑step method: soften the finish, scrape gently, then clean the wood.
You’ll apply a mild softener or heat briefly to loosen paint without harming grain. Next, use a plastic scraper at low angle to lift flakes, preserving texture preservation and avoiding gouges.
Finish by wiping with a gentle solvent and soft cloth, removing residue so new coatings adhere. Inspect for thin spots and plan future color matching if you’ll repaint.
Work in small sections, ventilate well, and test an inconspicuous area first.
When You Should Remove Wall Paint From Wood
You should remove wall paint when it’s visibly aged, flaking, or discolored so the wood can breathe and be protected.
Strip paint before refinishing to guarantee a smooth, stain- or varnish-ready surface.
And if paint was accidentally spilled, act promptly to prevent permanent staining or finish damage.
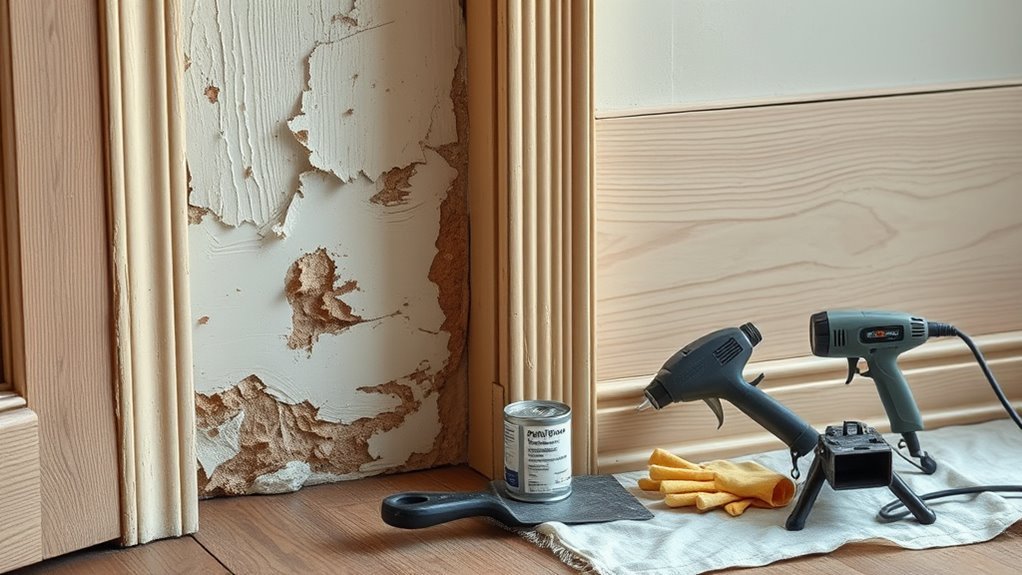
When Paint Ages
When paint starts to crack, flake, or peel away from wood, it’s time to contemplate removal rather than repainting over it. You’ll spot aging paint and clear signs of paint deterioration: loss of adhesion, discoloration, and raised edges. Remove compromised layers to prevent trapping moisture or hiding structural issues. Test small areas to gauge effort, and choose gentle methods for older wood. Below is a quick reference to help decide.
| Condition | Action |
|---|---|
| Fine hairline cracks | Monitor |
| Flaking | Remove |
| Bubbling | Inspect moisture |
| Chalky surface | Strip surface |
| Deep peeling | Full removal |
Before Refinishing Wood
- Flaking or bubbling
- Obscured grain or color mismatch
- Preservation or documentation needs
After Accidental Spillage
Caught paint on your wood floor or trim after a spill? Act fast: fresh paint wipes up with a damp cloth and mild soap, reducing staining and long-term removal work.
If it’s dried, gently loosen edges with a plastic scraper, then use a solvent recommended for your finish—test in an inconspicuous spot first. Work carefully to avoid sanding through varnish.
Consider environmental concerns when choosing removers and dispose of waste per local guidelines.
For antique or significant wood, prioritize historical preservation: consult a conservator before aggressive cleaning to avoid irreversible damage.
Keep records of methods and products used.
Do You Need Full Paint Removal Or Spot Repair?
If paint is limited to a few small spots, you can often repair them without stripping the whole surface; but extensive coverage, multiple layers, or paint that’s bonded into the grain usually means you’ll need full removal to get a consistent finish.
You should assess whether color matching is feasible and whether paint adhesion to the wood is compromised. Check these points, then decide:
- Size: tiny chips or drips → spot repair with sanding and touch-up.
- Depth: surface film → light removal; paint in grain → full strip.
- Consistency: many spots or uneven sheen → full removal for uniform finish.
When to Call a Professional for Paint Removal
When should you call a professional? If paint covers delicate or antique wood, or the finish’s integrity is uncertain, seek a professional consultation.
Call when large areas, multiple layers, or stubborn coatings resist DIY methods. You should also get an expert assessment if you suspect lead paint, extensive damage beneath the paint, or if repair requires stripping to bare wood.
Professionals’ll prevent further harm, match historic finishes, and save time on complex projects. If your timeline’s tight or you lack tools and experience, hiring pros is smarter than risking costly mistakes.
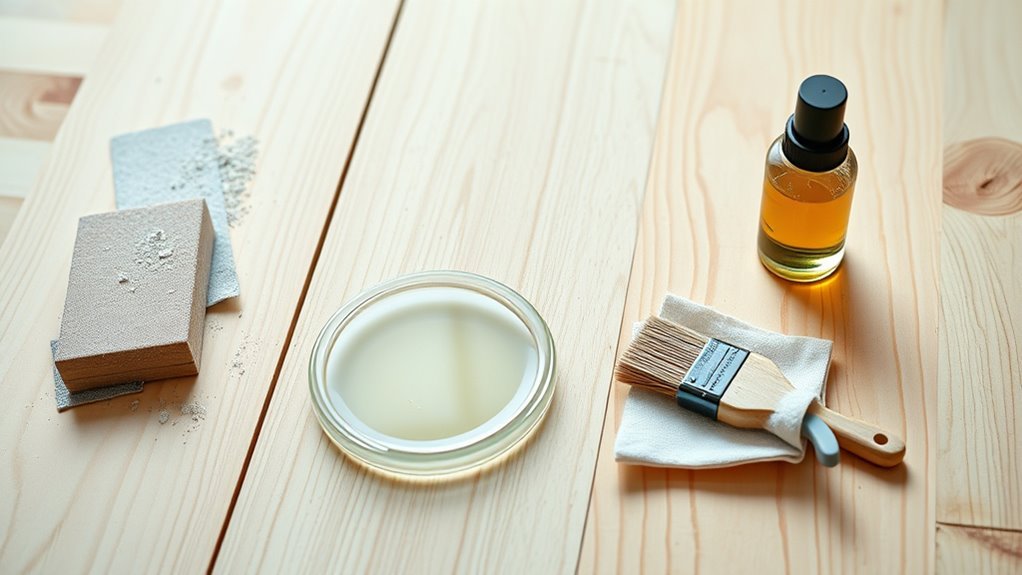
Essential Safety Gear for Paint Removal
Before you start stripping paint or calling in pros, gear up to protect yourself and the wood. You’ll need reliable protection to avoid dust, solvent splashes, and fumes while keeping finish edges intact.
Before stripping paint, suit up—protect yourself and the wood from dust, splashes, and fumes.
Key items include:
- Safety goggles that seal well to prevent particles or liquid from hitting your eyes.
- A certified respirator mask rated for paint fumes and particulates; change filters as recommended.
- Nitrile gloves and a disposable coverall to protect skin and prevent oils from transferring to wood.
Work in ventilated areas, check gear fits, and inspect equipment before use to stay safe and preserve the wood’s surface.
Protect Floors, Furniture, and Nearby Walls
Since paint removal can get messy, cover floors, furniture, and nearby walls thoroughly to prevent stains and chemical damage. Lay drop cloths or plastic sheeting for reliable floor protection, taping seams and edges so dust and liquids can’t seep underneath.
Move small items out; wrap larger pieces in breathable covers to support furniture preservation and avoid trapping moisture.
Use painter’s tape to protect adjacent walls and trim, and create a barrier around vents and outlets.
Keep a dedicated trash bin and clean rags handy for spills.
Inspect coverings periodically and replace any contaminated layers to maintain a safe, tidy workspace.
How to Test a Small Patch First
Want to make sure your chosen removal method won’t damage the wood? Test a small patch first to check paint peeling and surface adhesion before proceeding. Pick an inconspicuous area and follow these steps:
Test a small, hidden spot first—clean, apply remover, scrape, and check for peeling or wood damage before proceeding
- Clean the spot, apply your remover or tool, wait the recommended time, then gently scrape.
- Observe whether paint peeling occurs cleanly or lifts substrate finish; note any softened, discolored, or roughened wood.
- Sand lightly if needed to assess adhesion and finish reaction; if wood fibers fray or finish dulls, stop and try a gentler method.
Record results and proceed only when the test shows safe removal.
How to Identify the Paint Type on Wood
Start by looking at the surface finish—glossy, satin, or chalky textures can hint at the paint type.
Try a small chemical spot test (denatured alcohol for latex, lacquer thinner or acetone for solvent-based) to confirm the binder.
Also check for multiple paint layers that may need different removal methods.
Examine Paint Surface Finish
Before you scrape or strip, take a close look at the paint’s surface finish—its sheen and texture tell you whether you’re dealing with oil-based, latex, or a specialty coating and guide your removal method. You’ll assess paint texture and finish gloss to choose safe techniques. Check for smooth, glossy surfaces that resist scuffing, or matte, porous layers that absorb solvents differently. Note brush marks, raised edges, or powdery wear.
Then use these quick observations:
- Glossy, hard finish: likely oil-based or varnish.
- Satin/semi-gloss: usually latex or enamel.
- Flat/matte: may be latex or chalky primer.
Perform Chemical Spot Test
How can you quickly confirm whether paint on wood is oil-based or water-based? Dampen a cotton swab with denatured alcohol and rub an inconspicuous spot; water-based finishes will soften or lift with minimal effort.
If alcohol does nothing, try a solvent like mineral spirits—an evident chemical reaction (softening or smearing) suggests oil-based paint.
Always test a tiny hidden area and wait between attempts to see lasting effects. Wear gloves, eye protection, and ventilate the room; follow safety precautions on solvent labels.
Record results before proceeding so you choose the gentlest safe removal method for that wood surface.
Check For Paint Layers
Because different layers can hide older coatings, you’ll want to inspect the wood carefully to see how many paint strata you’re dealing with. Start by examining edges and joints where paint thickness changes and surface adhesion varies. Use a utility knife to score a small area and peel gently to reveal layers. Consider a microscope or loupe for close inspection.
- Scrape lightly to compare paint thickness visually.
- Sand a tiny spot to expose layer order and adhesion quality.
- Note colors and brittleness to infer age and type.
Document findings before choosing a removal method.
Identify the Wood Species and Existing Finish
Want to know what you’re working with? Inspect the wood grain to distinguish species: tight straight lines suggest oak or maple, wider patterns point to pine or cedar. Lightly sand a hidden area to reveal color and pore structure.
Check the existing finish—varnish, lacquer, shellac, or polyurethane—by testing a small spot with denatured alcohol and acetone. Alcohol removes shellac; acetone softens lacquer.
Note how paint adhesion varies with finish and grain: slick finishes reduce adhesion, porous grain holds paint. Record species and finish before you remove paint so you choose compatible, non‑damaging removal methods.
Why Oil‑Based Paint Needs a Different Approach
Although oil-based paints adhere more tenaciously and form harder films than water-based finishes, you’ll need different solvents and techniques to break that bond without damaging wood.
You’ll recognize oil based paint by its stronger paint adhesion and hardened surface; that means gentler mechanical action and solvent choice matter.
- Use a slow-acting solvent or soy-based stripper to soften the film without raising grain.
- Test small areas and scrape with a plastic scraper to avoid gouging the wood.
- Neutralize and clean residue, then lightly sand with fine grit to restore smoothness before refinishing.
Why Latex Paint Is Usually Easier to Remove
Because latex paint is water‑based, you’ll often soften it with a simple solvent like water or mild detergent rather than harsh chemicals.
It also tends to form a thinner film on wood, so it lifts or sands off more readily.
That combination makes cleanup quicker and less messy when you’re removing it.
Water-Based Solvent Release
Why does latex paint usually come off wood more easily than oil-based formulas? You’ll find that water based latex undergoes solvent release: water softens the binder, letting paint swell and lift without harsh chemicals. That makes mechanical or mild chemical removal kinder to wood.
- Wetting: water penetrates and weakens adhesion, so paint blisters.
- Softening: the film becomes pliable, so you can scrape or peel more gently.
- Rinse: water aids cleanup, reducing residue and solvent exposure.
Use minimal force, work with damp cloths, and test a hidden spot before full removal to avoid damage.
Thinner Film Formation
The water in latex not only softens the binder but also encourages a thinner film during application and wear, which makes removal easier.
When you apply latex, water reduces surface tension so film formation spreads more uniformly and stays less bulky than oil-based coats.
That thinner layer lowers paint adhesion to wood grain peaks, so flakes and edges lift with less force.
You’ll see fewer deep interlocking bonds into pores, which helps when you need to lift paint without sanding into the substrate.
Understanding how film formation and adhesion differ guides your removal approach and helps preserve the wood beneath.
Easier Cleanup Process
When you’re tackling latex on wood, cleanup is usually quicker and less messy since water-soluble binders let you lift fresh or tacky paint with just soap, water, and a scrub pad instead of harsh solvents. You’ll save time and avoid lingering chemical smells, making eco friendly options practical for routine jobs.
For older or sensitive pieces where historical preservation matters, test a small area first.
Follow this quick routine:
- Blot loose paint with a damp cloth.
- Use mild detergent and a soft scrub pad, rinsing frequently.
- Dry and inspect; repeat only if necessary to protect wood.
Which Method to Choose: Chemical, Heat, or Manual
If you’re deciding between chemical strippers, heat tools, or manual removal, match the method to the paint’s condition, the wood’s finish, and your safety tolerance. Consider paint color and wood grain visibility: thin, intact paint and delicate grain favor manual sanding or scraping; thick, multiple layers often need heat or chemical help. Heat works fast but risks scorch marks; chemicals remove stubborn coats but require ventilation and care. Use this quick comparison to pick a balanced approach.
| Method | Best for | Caution |
|---|---|---|
| Manual | Light coats, visible grain | Labor-intensive |
| Heat | Thick layers | Burn risk |
| Chemical | Multiple coats | Fumes, cleanup |
Pick a Safe Chemical Stripper for Removing Paint From Wood
Since chemical strippers handle stubborn, multi-layer paint that manual methods can’t, you’ll want to choose one that balances effectiveness with safety for both you and the wood. Consider product labels, active ingredients, and compatibility with finish types before buying.
- Pick low-VOC, water-miscible formulas to reduce chemical safety risks and fumes.
- Match stripper strength to paint layering — light for single coats, stronger for heavy buildup.
- Avoid methylene chloride and choose biodegradable options when possible to protect wood and indoor air.
Always test a small area, wear gloves and goggles, and ventilate the workspace.
How to Use a Low‑Odor Water‑Based Stripper
Although water-based, low-odor strippers still need care, you can apply them confidently by following the manufacturer’s directions and working methodically from small sections.
Although water-based, low-odor strippers still require care—follow directions, test first, and work methodically in small sections.
Wear gloves, eye protection, and a respirator if recommended.
Test a hidden area to confirm compatibility and drying time.
Apply a thin, even coat with a synthetic-bristle brush or roller, let it dwell as directed, then lift softened paint with a plastic scraper or nylon pad.
Wipe residue with damp cloths and neutralize per instructions.
Dispose of waste responsibly.
These eco-friendly solvents suit sensitive spaces and support historical preservation when used gently and documented.
Safely Apply a Caustic (Lye) Stripper
Before you start, put on heavy gloves, eye protection, and a respirator—lye can severely burn skin and fumes can irritate lungs.
Apply the caustic stripper in small sections, follow the manufacturer’s dwell time, and rinse thoroughly with water as you work.
Once the paint lifts, neutralize the wood with a mild acidic rinse (like diluted vinegar), then clean and dry the surface completely before refinishing.
Safety Precautions First
Because caustic strippers are corrosive and generate strong fumes, you’ll need to take specific safety steps before you start work. You’re using Safety gear and Personal protection to prevent burns and inhalation—don’t skip this.
- Wear chemical-resistant gloves, goggles, and a long-sleeve apron.
- Use an N95 or chemical respirator and open windows for cross-ventilation.
- Keep a bucket of water, neutralizer (per label), and emergency contacts handy.
Test ventilation, read the product label, and keep children and pets away.
Move slowly, avoid splashes, and never mix with acids.
Neutralize And Clean
Once the stripper has softened the paint and you’ve scraped off as much as possible, you’ll need to neutralize the lye to stop the chemical reaction and prevent lingering causticity.
Rinse the area with water, then apply a recommended neutralizing agent—white vinegar diluted 1:1 or a commercial neutralizer—following label directions.
Work in small sections, brushing to lift residue until the paint consistency no longer changes when probed.
Rinse thoroughly, blot with clean towels, and allow the wood to dry fully.
Dispose of waste per local regulations.
Test the surface pH if unsure; it should read near neutral before sanding or refinishing.
How Long to Leave a Stripper On
When you apply a chemical stripper, check the manufacturer’s recommended dwell time and then monitor the paint’s response—don’t just leave it on for a set number of minutes. You’ll judge by lift, blistering, and how the finish reveals the wood grain.
Consider paint durability and adjust: older, brittle paint flakes faster; flexible coatings may need longer.
- Test a small area first and note time to lift.
- Reapply briefly if paint resists, avoiding saturation that can swell wood.
- Stop once paint lifts easily and work with a scraper or brush promptly to prevent damage.
Remove Stripper Residue Without Harming Wood
How do you remove stripper residue without damaging the wood? Wipe excess with a plastic scraper, then rinse the area with a damp microfiber cloth and mineral spirits if the stripper was solvent-based.
Test a small spot to verify the original paint color or underlying stain won’t lift. Work along the wood grain to avoid abrasion, changing cloths frequently until residue lifts.
Neutralize alkaline strippers with the recommended solution, rinse thoroughly, and dry with a soft towel.
Finish by sanding lightly with fine-grit paper only if needed, following grain direction to preserve texture and appearance.
Choose the Right Heat Tool for Paint Removal
Before you pick a heat tool, match its power and tip to the job—low-wattage heat guns work for thin, brittle paint and delicate trim, while high-wattage models or a heat plate suit thick, stubborn layers on flat surfaces.
Match the heat tool to the job: low-wattage for delicate trim, high-wattage or heat plate for thick, flat layers.
Choose Heat tools based on surface size, paint age, and paint formulations: older lead-based layers need more controlled, slower heating; modern acrylics soften quickly.
Consider these options:
- Small heat gun with narrow nozzle for trim and corners.
- Medium gun with adjustable temperature for mixed surfaces.
- Heat plate or high-wattage gun for broad, thickly coated areas.
Test on scrap before proceeding.
Use a Heat Gun Without Scorching the Wood
Set your heat gun to a low-to-medium temperature so you soften paint without burning the wood.
Keep the gun moving in slow, steady passes to avoid concentrating heat in one spot.
Shield nearby surfaces with drop cloths or foil to prevent accidental scorching or smoke damage.
Choose The Right Temperature
When you use a heat gun to strip paint, pick a temperature that softens the paint without scorching the wood beneath it. Start low (around 450–600°F / 230–315°C for most guns) and increase only if the paint won’t bubble or soften after a few seconds.
You’ll rely on temperature control and careful heat application to protect grain and finish. Test a hidden spot, watch for bubbling, and adjust.
Follow this quick checklist:
- Begin at low setting and test for 3–5 seconds.
- Raise temp incrementally if paint resists.
- Stop immediately if wood darkens or smells burned.
Keep The Gun Moving
Although you’ll want concentrated heat, keep the gun moving to avoid charring. Slide the nozzle in steady passes, never holding it on one spot longer than a few seconds. Watch the finish closely; when paint softens, pause and scrape gently.
Practice proper gun safety: wear gloves, eye protection, and keep a fire extinguisher nearby. Maintain a safe distance—usually 2–4 inches depending on heat—and adjust motion speed to match temperature.
If wood darkens or smokes, back off immediately. Keep moving until all paint releases, then let the surface cool before sanding or refinishing to prevent hidden damage.
Protect Surrounding Surfaces
Because heat can travel and damage nearby finishes, you’ll want to shield floors, trim, and hardware before you start—lay down fire-resistant drop cloths or sheets of heavy-duty foil and tape off adjacent woodwork with heat-resistant painter’s tape. Protect vents and fabrics, and work in a well-ventilated area so fumes from old paint branding don’t concentrate. Keep a wet rag and a fire extinguisher nearby. Follow these steps:
- Mask off edges and decorative trim to preserve any color matching and original finish.
- Cover nearby furniture and floors with foil or fireproof pads.
- Remove or shield hardware to prevent warping or staining.
When to Use a Heat Plate or Infrared Tool
If your goal is to lift multiple layers of paint quickly without sanding or harsh chemicals, reach for a heat plate or infrared tool — they soften paint uniformly so you can scrape it away with minimal fiber-raising. Use heat application when paint is thick, stubborn, or when chemical strippers aren’t suitable for nearby finishes or vents.
Infrared tools heat through coatings without open flame, reducing scorch risk and odor. Test a small area to confirm adhesion breakdown and wood tolerance. Maintain steady movement, moderate temperature, and protective gloves.
Avoid on delicate veneers, thermoplastics, or thin trim where heat could warp or blister.
Scrape Paint by Hand Without Gouging
Pick a scraper with a sharp, thin blade and a comfortable handle so you can work precisely without tiring your hand.
Soften stubborn paint first with heat, solvent, or a damp cloth to reduce the force needed and avoid gouging.
Protect the wood by holding the scraper at a low angle and using a shim or putty knife as a buffer where the surface is delicate.
Choose Proper Scraper
Want to avoid gouging the wood while scraping paint by hand? Choose a scraper that matches the job and respects the surface—you’re protecting grain and any Historical preservation concerns while considering future choosing paint colors. Follow these compact tips:
- Use a flexible putty knife (1–2 inches) for delicate trim and curved profiles.
- Pick a 3–4 inch scraper with a sharpened, replaceable blade for flat boards; hold at a low angle.
- For stubborn paint, select a bladed scraper with a comfortable grip and thin blade to control pressure.
Test on an inconspicuous spot first to prevent damage.
Soften Paint First
Before you start scraping, soften the paint so the blade lifts it cleanly without digging into the wood; warm or chemically loosened paint comes off in thin strips, reducing the risk of gouges. You’ll heat with a low-temp heat gun or apply a manufacturer-recommended remover for latex or oil-based finishes. Test a corner to avoid paint peeling that pulls wood fibers. Work slowly, scraping with the grain to prevent wood staining. Clean residue with a mild solvent and a soft cloth.
| Method | Tool | Tip |
|---|---|---|
| Heat | Low-temp gun | Keep moving |
| Chemical | Remover | Follow label |
| Steam | Steamer | Short bursts |
| Solvent | Mild cleaner | Blot, don’t rub |
| Test | Scrap piece | Check finish |
Protect Wood Surface
How do you keep the wood intact while you scrape? You’ll protect the wood grain and minimize damage by working patiently and observing paint adhesion. Follow these focused steps:
- Use a sharp, flexible scraper at a low angle, supporting the blade with your free hand to avoid gouging.
- Lay thin masking tape along edges and resistant grain areas; this prevents lift where paint adhesion is weak.
- Lightly sand with fine-grit paper along the grain after scraping to smooth raised fibers and blend any tiny nicks.
Stay gentle, check progress often, and stop if you see tear-out before proceeding.
Best Scrapers and Blades for Wood Trim
When you’re tackling paint on wood trim, choosing the right scraper and blade makes the job faster and reduces damage to the profile. Pick tools that match the trim’s contours and the paint’s adhesion.
Use slim putty knives for flat surfaces and flexible, rounded scrapers for ogee or bead molding.
Keep a selection of razor, hooked, and carbide-tipped blades to handle thick enamel, loose flakes, or stubborn edges without gouging.
Practice brush techniques afterward to remove residue before refinishing, and consider color matching when planning touch-ups so repaired areas blend seamlessly with the original finish.
When to Sand : And How to Avoid Over‑Sanding
You should sand only after paint removal when the surface needs smoothing or a new finish.
Check hardness by pressing a fingernail or using a coin to see if the wood dents or the paint flakes—soft wood needs a lighter touch.
To prevent over-sanding, work with progressively finer grit and stop as soon as the surface feels uniformly smooth.
When To Sand
Before you reach for the sander, check the surface: if paint flakes, bubbles, or feels uneven to the touch, sanding’s needed to create a smooth base and guarantee new finish adheres properly.
You’ll sand when loose paint, drips, or texture prevent a flat finish; vintage techniques or artistic applications may need selective sanding to preserve character.
Avoid over‑sanding by using light passes and appropriate grit.
Follow these steps:
- Start with 120–150 grit for spot correction.
- Move to 180–220 grit for blending.
- Finish with fine sanding by hand to check smoothness.
Stop when surface feels uniform.
Surface Hardness Check
Having checked for visible flaws and smoothed irregularities, test the wood’s hardness to decide how aggressively to sand; press a fingernail or coin to gauge resistance and note paint adhesion. If the surface dentifies easily, you’ll use gentle sanding; if it resists, you can be firmer. Record spots that vary in hardness so you adjust grit locally.
| Test | Result | Action |
|---|---|---|
| Fingernail | Soft | Light 220–320 |
| Coin | Medium | 150–220 |
| Screech | Hard | 80–120 |
Work with the grain, stop frequently, and recheck surface hardness.
Preventing Over‑Sanding
While sanding’s the quickest way to smooth paint edges and blend patches, stop often to avoid eating into the wood—sand only until paint edges feather and the surface feels uniform, not until it looks brand-new. You’ll want to preserve thickness for color matching and to prevent new paint peeling. Use light pressure, test with your fingertip, and switch to finer grit as edges soften.
Follow this quick checklist:
- Start with medium grit, feather to edges.
- Check thickness and run a fingertip test.
- Finish with fine grit and inspect under raking light.
If doubt remains, sand less and retouch.
Hand‑Sanding Painted Wood Safely
When you start hand‑sanding painted wood, work methodically and stay mindful of dust and finish levels so you don’t damage the grain or spread contaminants. Use a sanding block with fine‑to‑medium grit, following paint patterns and the wood grain to lift paint without gouging.
Keep light, even pressure and check progress frequently; change grit rather than force. Collect dust with a vacuum or tack cloth as you go to avoid recontamination. Protect yourself with a mask and eye protection.
If stubborn spots remain, switch to a scouring pad or chemical remover in small areas, then re‑sand gently to blend.
Use an Orbital Sander Without Flattening Trim
When you use an orbital sander near trim, fit a sanding block to reach tight edges without rounding them off.
Stick to fine-grit pads to remove paint gently and avoid gouging the wood.
Tape or paper the adjacent surfaces so you don’t accidentally scar or sand areas you want to keep intact.
Sanding Block For Edges
If you need clean edges without sanding down your trim, use a sanding block for tight spots and an orbital sander only on flat surfaces—keep the sander off the trim to avoid flattening profiles. You’ll do targeted edge sanding with a small block so decorative molding stays crisp. Block smoothing gives control near corners, crevices, and paint lines.
Follow this simple approach:
- Hold a firm sanding block at a shallow angle and sand toward the paint, not along the profile.
- Use light pressure and short strokes to prevent gouging.
- Frequently clean the block and check progress visually.
Use Fine Grit Pads
Although an orbital sander speeds paint removal, you’ll protect trim profiles by switching to fine-grit sanding pads and keeping the sander on flat surfaces only. Use 220–320 grit to reduce surface abrasion and avoid aggressive cuts that cause paint peeling at edges.
Hold the sander flat, move with the grain, and use short, controlled passes. When you near profiles, stop the sander and finish by hand with a small pad or sanding block to preserve contours.
Inspect frequently for gloss changes that signal paint removal. Patience and gentle pressure prevent gouges while delivering a smooth, ready-to-finish wood surface.
Protect Adjacent Surfaces
You’ll want to protect nearby woodwork and floors before you break out the orbital sander so the tool doesn’t flatten trim or spread grit and dust. Lay drop cloths and painter’s tape to shield moldings, vents, and flooring; that’s key to proper surface preparation.
Keep the sander off trim—use a sanding block near edges.
Seal off the room briefly to limit dust migration and protect adjacent painted surfaces for later paint priming.
- Tape edges tightly.
- Use thin foam between sander and trim.
- Vacuum dust frequently to avoid contamination.
Remove Paint From Carved or Detailed Woodwork
When paint gets into the grooves and flourishes of carved or detailed woodwork, you’ll need a gentler, more precise approach than sanding with a block. Start by studying carving techniques and wood grain direction so you lift paint without gouging.
Use soft-bristled brushes, wooden picks, and a dental pick for tiny crevices; work along grain and contours. Warm water with mild detergent can soften latex paint; blot, don’t scrub.
For stubborn spots, use a plastic scraper or fine brass-bristle brush, testing first in an inconspicuous area. Wipe clean with a lint-free cloth and let the wood dry before refinishing.
Apply Chemical Gels on Intricate Surfaces
If scraping and gentle brushing can’t fully lift paint from carved details, chemical gels let you soften and remove stubborn coatings without aggressive abrasion. You’ll rely on controlled chemical reactions to break paint bonds while minimizing harm to delicate profiles.
If scrapers and soft brushes fail, use a wood-safe chemical gel to gently soften and lift stubborn paint.
Test first in an inconspicuous spot, follow label directions, and wear gloves and eye protection. Apply gel with a small brush, let it dwell until the paint wrinkles, then gently pick away residue with wooden picks.
- Choose a gel formulated for wood and low penetration.
- Neutralize per instructions to stop reactions.
- Rinse and dry to restore surface adhesion.
Use Steam to Lift Stubborn Paint Spots
Although steam sounds aggressive, it softens old paint without sanding and lets you lift flakes and blistered spots with minimal scraping. You’ll use a handheld steamer or steam iron at safe distance, direct short bursts, then gently lift softened stubborn paint with a plastic scraper to avoid gouging wood. Keep the wood dry between passes and test an inconspicuous area first. Steam cleaning reduces aggressive chemicals and preserves detail on trim. Monitor heat and moisture to prevent swelling; blot with a soft cloth after each pass. Work patiently; repeat until the area’s clean and smooth.
| Tool | Purpose |
|---|---|
| Handheld steamer | Soften paint |
| Plastic scraper | Lift flakes |
| Cloth | Blot moisture |
| Heat shield | Protect finish |
| Masking tape | Define edges |
Dissolve Small Paint Spots With Alcohol or Citrus Solvents
Before you use alcohol or a citrus solvent, test it in an inconspicuous spot to make sure it won’t damage the finish.
Dab the solvent on a cotton swab and apply it to the paint spot.
Gently rub until the paint lifts, reapplying solvent as needed.
Test Solvent Inconspicuously
When tackling small paint spots, start by testing your chosen solvent in an out-of-the-way area so you don’t damage visible wood. You’ll confirm finish compatibility through solvent testing in an inconspicuous area before wider use. Follow these quick steps:
- Dab a tiny amount of alcohol or citrus solvent on an unseen corner and wait a few minutes.
- Check for discoloration, finish softening, or grain raising; if any appear, stop and choose a gentler option.
- If it’s safe, proceed slowly and keep a clean cloth and mild cleaner nearby to neutralize residue.
This protects the visible wood while you remove paint.
Apply With Cotton Swab
Once you’ve confirmed the solvent won’t harm the finish, use a cotton swab to target small paint spots so you avoid spreading solvent over the wood. Dip the swab lightly in alcohol or citrus solvent, tap off excess, and apply with steady, controlled motion. You’ll appreciate the precision application for edges, grooves, and near trim. Replace swabs as they pick up paint to prevent re-depositing residue. Wipe nearby areas with a damp cloth and dry promptly. Monitor the finish and stop if it dulls; test again if needed. Small, careful steps protect the wood while removing spots.
| Tool | Solvent | Action |
|---|---|---|
| Cotton swab | Alcohol | Dab |
| Cotton swab | Citrus | Target |
| Cloth | Water | Wipe |
Gently Rub Until Lifted
If small paint spots remain after spot-treating, gently rub them with a cotton swab or soft cloth dipped in alcohol or a citrus solvent until the paint softens and lifts. Work lightly, testing an inconspicuous area first to ensure finish safety.
Aim to preserve grain and avoid overworking, which complicates color blending and texture matching. Follow these steps:
- Dab solvent, wait 10–20 seconds, then roll the swab to lift softened paint.
- Switch to a clean cloth as the spot fades; don’t scrub vigorously.
- Rinse residue with a damp cloth and dry, then assess for touch-up.
Lead Paint: How to Test and When to Stop?
How do you know whether old paint on wood contains lead and when it’s time to stop sanding or scraping? You should prioritize lead testing and paint safety before aggressive removal. If you suspect pre-1978 paint, pause work, isolate the area, and avoid dry sanding. Use professional testing kits or hire a certified inspector; if results are positive, stop and follow abatement guidance to prevent exposure.
| Indicator | Action |
|---|---|
| Age of paint (<1978) | Consider testing |
| Chipping/peeling | Avoid dry scraping |
| Positive test | Stop work |
| Uncertain | Hire professional |
Test Wood for Lead Paint at Home (Step‑By‑Step)
Before you start scraping or sanding, test the wood for lead paint so you know what precautions to take and whether to stop work. You’ll do simple lead testing and basic wood identification to decide next steps. Gather a lead test kit, gloves, goggles, a clean cloth, and note wood type.
Before sanding, test wood for lead paint—use a kit, PPE, note wood type, and stop if positive.
- Clean a small area; follow kit directions and apply swab.
- Wait required time; read result color change and record.
- If positive, stop and seek professional abatement; if negative, proceed with normal paint removal.
Keep records of tests and photos for accountability and future reference.
Contain and Dispose of Lead‑Contaminated Waste
Once you’ve confirmed lead presence, contain and dispose of contaminated waste carefully to protect yourself and others. You should seal chips, dust, and used PPE in heavy-duty, labeled bags, wet-clean surfaces, and avoid sweeping. For Lead safety, wear protective gear and keep others away. Follow local Waste disposal rules; contact your municipal hazardous-waste facility if unsure. Record collection dates and handling steps.
| Item | Action | Destination |
|---|---|---|
| Paint chips | Double-bag, label | Hazardous facility |
| Used rags/PPE | Seal, label | Hazardous facility |
| Contaminated soil | Collect, bag | Approved disposal site |
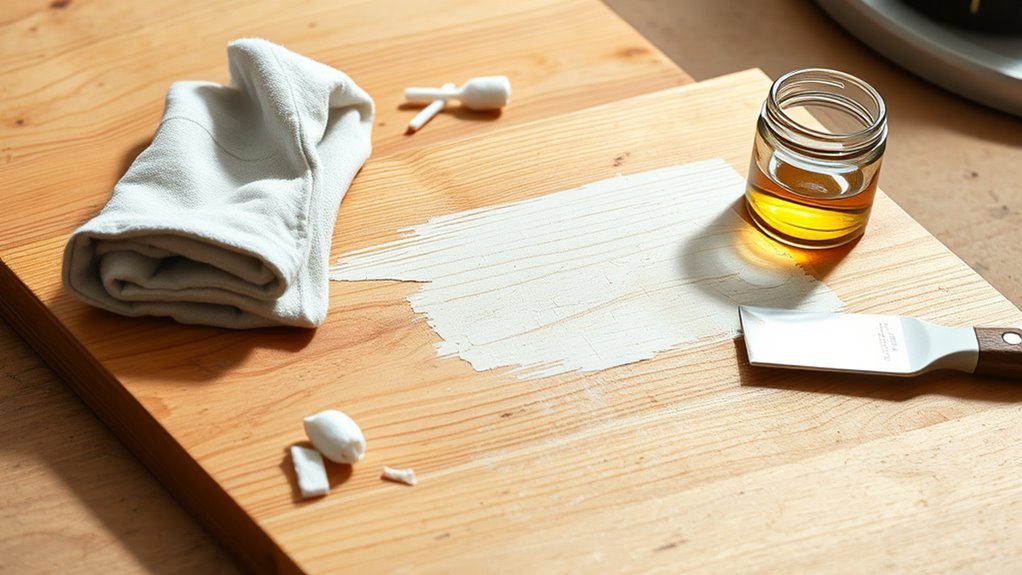
Repair Minor Wood Damage After Paint Removal
Once the paint’s gone, check the wood for scratches, gouges, or soft spots so you know what needs fixing.
Sand any rough areas smooth, starting with coarse grit and finishing with fine grit to match the surrounding surface.
Use a wood filler for holes or gouges, then sand and blend it flush before refinishing.
Assess Surface Damage
Not sure how bad the surface looks? You’ll begin with a quick surface assessment to guide repair choices. Perform a focused damage evaluation: identify gouges, loose fibers, and paint residue pockets. Then follow these steps:
- Inspect visually and by touch for soft spots or raised grain.
- Probe shallow dents with a fingernail; mark areas needing filler.
- Check joints and edges for separation or splinters.
Record findings and choose appropriate filler and glue. Keep repairs minimal and compatible with the wood species. Don’t proceed to smoothing or sanding until fillings cure and your damage evaluation is complete.
Sand And Smooth
How do you get the surface ready for finishing? You sand gently with a fine-grit block following the grain to remove raised fibers and feather edges where paint was lifted.
Light sanding evens small gouges and scuffs without over-thinning the wood. Wipe dust with a tack cloth and inspect under good light; repeat light passes where needed.
Proper smoothing promotes consistent paint adhesion and prevents finish layering from building unevenly. Keep edges gradual and surface uniform so primers and topcoats lay down smoothly.
You’re preparing the wood for the next steps while preserving its profile and structural integrity.
Fill And Blend
After you’ve sanded and removed loose paint, fill small gouges, nail holes, and thin scraped areas with a wood filler that matches the grain and hardness of the original wood. Press filler firmly, overfill slightly, and let it cure fully. Once dry, sand flush and blend edges to the surrounding surface so repairs aren’t obvious.
Focus on color matching before final finish and test a small area. Good blending improves paint adhesion for touch-ups.
- Select filler and apply smoothly.
- Sand progressively to feather edges.
- Prime repaired spots to guarantee consistent paint adhesion and long-lasting results.
Fill Gouges and Dents Without Hiding the Grain
Want to keep the wood’s grain visible while smoothing out gouges and dents? You can. Use a color-matched, water-based wood filler or a clear epoxy that accepts stain; these limit paint discoloration and avoid plasticized patches.
Work the filler sparingly into damage with a small palette knife, following grain direction so wood grain filling stays natural. Let it cure fully, then sand gently with fine-grit paper, feathering edges to blend.
Clean dust, inspect for low spots, and repeat tiny fills if needed. Finish with a thin coat of compatible sealer that won’t obscure the grain.
Match Wood Stain After Paint Removal
Once you’ve removed paint down to bare wood, pick a stain that matches the original tone and undertone—test several on scrap or an inconspicuous spot first so you can see how the wood absorbs color and reacts to light. Focus on wood grain visibility and stain matching, not just color.
After stripping to bare wood, test stains on scrap to match tone, undertone, and grain under real light.
Prepare small test patches, note drying changes, and compare in different lighting. Try these steps:
- Sand a tiny area and apply stain sample.
- Wipe excess, let dry, evaluate grain contrast and undertone.
- Adjust with toner or choose a different stain until the match feels natural.
Refinish Bare Wood for a Smooth Result
Now that the paint’s off, you’ll sand the bare wood smooth and level any raised grain or gouges so the stain takes evenly.
Wipe away dust, choose a stain that matches your tone, and test it on a scrap before applying.
Finish with your chosen sealer or topcoat to protect the wood and bring out the color.
Sanding For Evenness
Before you refinish bare wood, sand it to an even, smooth surface so stains and finishes will lay down consistently. You’ll remove paint ridges and feather edges from old painting patterns, revealing grain for better color matching. Work with progressive grits: start coarser to remove buildup, then refine.
- Start 80–100 grit to level high spots.
- Move to 120–150 grit to blend transitions.
- Finish 180–220 grit for a smooth, receptive surface.
Keep strokes with the grain, check for dips with a straightedge, and clean dust between grits. Don’t skip steps or over-sand thin areas.
Preparing Stain And Finish
With the surface uniformly sanded and dust-free, get your stain and finish materials ready so application goes smoothly and gives predictable results.
Test stains on scrap or hidden areas to verify color theory in practice; lighting changes perceived tone.
Conditioners help even absorption on softwoods.
Choose a finish compatible with the stain and designed for the specific purpose—satin hides flaws, gloss emphasizes grain and paint sheen differences.
Stir, don’t shake, and strain to remove skin or debris.
Use quality brushes or lint-free cloths, apply thin coats, and follow manufacturer dry times.
Sand lightly between coats for a smooth, durable result.
Prime and Paint Reclaimed Wood Correctly
Prepping reclaimed wood properly gives you a smooth, durable finish that hides imperfections and prevents bleed-through from old stains or tannins. You’ll sand, clean, and apply a stain-blocking primer before painting. Use tack cloths and keep plant care and furniture polishing routines nearby to avoid contamination.
- Sand to 120–150 grit, remove dust, and degrease.
- Apply a high-quality oil- or shellac-based primer for tannin control; let dry fully.
- Use thin, even coats of paint, sanding lightly between coats for adhesion.
Seal with clear topcoat suited to planned use; let cure before handling.
Protect Adjacent Painted Walls During Work
When you’re working on reclaimed wood near existing painted walls, protect those surfaces with proper barriers and careful taping to prevent splatters, drips, and scuffs. Lay drop cloths and use painter’s plastic to shield large areas; secure edges with low-tack painter’s tape so you won’t peel paint or damage wall texture.
Mask trim and outlets precisely, and create a temporary shield with cardboard for nearby furniture or features influenced by decorating trends. Work from top to bottom to catch falling debris, and check tape seals frequently.
If using solvents, ventilate and keep them away from protected walls to avoid discoloration.
Clean Up Safely After Paint Removal
After you’ve removed the paint, gather and contain debris immediately to prevent dust and chips from spreading. Wear gloves and a mask, dampen residues to limit airborne particles, and separate paint flakes from general trash to reduce environmental impact, especially near drains. Treat antique trims gently to support historical preservation.
- Vacuum with HEPA filter, then wipe with a damp microfiber cloth.
- Bag chips in sealed containers and label if lead is suspected.
- Clean tools outdoors or over a drop cloth, then wash and dry them away from storm drains.
Inspect the area for missed spots before finishing.
Dispose of Chemical Strippers and Solvent Rags
Because chemical strippers and solvent-soaked rags can ignite or contaminate soil and water, you should never toss them in regular trash or pour leftover solvent down drains. Take used rags to an approved hazardous-waste site, follow local Chemical disposal rules, and air out small quantities outdoors before transport. For Rag cleaning, use manufacturer guidance; many recommend disposal rather than laundering. Seal containers, label contents, and keep away from children and pets.
| Feeling | Action | Outcome |
|---|---|---|
| Alarm | Stop | Safety |
| Sorrow | Dispose | Relief |
| Responsibility | Label | Control |
| Urgency | Transport | Protection |
Fix Sticky or Gummy Paint Residues
If paint feels tacky or leaves a gummy residue, you can usually restore the wood by removing the excess and neutralizing any remaining stickiness before refinishing. Start by testing a small hidden area to see how the surface reacts.
If paint feels tacky, test a hidden spot, remove residue, neutralize stickiness, then refinish carefully.
- Gently scrape softened gummy residue with a plastic scraper, then wipe with mineral spirits to remove oils.
- Clean the area with a mild detergent solution, rinse, and let fully dry to prevent trapped moisture.
- Lightly sand with fine grit to promote paint adhesion; vacuum and tack cloth before applying primer or finish.
Work patiently to avoid gouging the wood.
Speed Up Multi‑Day Paint Removal Projects
When you’re tackling a multi‑day paint removal job, plan and batch tasks so you keep momentum and reduce downtime: strip or soften paint on one section, let removers work overnight, and move to a fresh area the next morning while the first dries or cures. You’ll schedule drying, testing with eco friendly solvents, and protect areas of historical preservation. Rotate helpers, prep tools, and ventilate spaces. Use small goals to measure progress.
| Day | Task | Outcome |
|---|---|---|
| 1 | Strip | Softened paint |
| 2 | Test | Clean wood |
| 3 | Sand | Smooth finish |
| 4 | Inspect | Preservation ready |
| 5 | Touch‑up | Complete |
Estimate Time and Cost for a DIY Paint Removal Job
Start by estimating how long each method will take—chemical strippers, sanding, and heat guns all move at different speeds depending on layer thickness.
Add up material and tool costs (rentals, replacement sandpaper, stripper, safety gear) so you can compare that total to hiring a pro.
That lets you decide if the time you’ll spend is worth the DIY savings versus paying for labor.
Time Estimates Per Method
For a DIY paint-removal job you’ll want realistic time and cost estimates up front so you can plan work sessions, buy supplies, and set a budget. Your method choice affects labor and finish — heat or chemical strippers take hours per square foot; sanding is slower but lets you control color matching and preserve varied paint sheens.
- Heat gun: 1–3 hours for a small room, faster on thick layers.
- Chemical stripper: 2–6 hours including dwell and cleanup.
- Sanding: 6–15 hours depending on detail.
Schedule breaks, curing time, and disposal into your plan.
Material And Tool Costs
You’ll usually spend between $30 and $300+ on materials and tools for a DIY paint-removal job, depending on the method and the scope of the work.
Estimate material costs for solvents, stripper gel, sanding discs, rags, gloves, and drop cloths at $20–$100 for small to medium jobs.
Tool expenses vary: a hand scraper and sanding block cost little, while an orbital sander, heat gun, or chemical-safe sprayer raises costs to $100–$250+.
Rent options can lower upfront Tool expenses.
Always budget extra for replacement discs, PPE, and waste disposal so surprises don’t halt your project.
Labor Vs DIY Comparison
Now that you’ve accounted for material and tool costs, weigh the time and labor trade-offs between handling the job yourself and hiring a pro. You’ll save on labor but spend more time and need the right Skill level to avoid damage.
For a DIY job, estimate prep, stripping, sanding, and finish—plan 1–3 days for a single room. Pros often finish in hours.
- DIY: lower upfront Cost comparison, higher time; risk if Skill level is low.
- Pro: higher cost, faster, guaranteed finish.
- Hybrid: DIY prep, pro final touch—balanced cost and quality.
Common Mistakes That Damage Wood : And How to Avoid Them
Although it’s tempting to rush, a few common mistakes—like using harsh scrapers, over-sanding, or applying the wrong solvents—can permanently harm wood; knowing what to avoid will save you time and money.
You shouldn’t strip historic trim without considering historical preservation standards; test a small area and consult guides for period pieces.
Don’t substitute aggressive chemicals when eco-friendly solutions work; plant-based gels and gentle citrus removers often protect grain.
Avoid metal blades gouging softwoods, high-heat guns that scorch, and sanding too deep.
Work slowly, use appropriate tools, and stop to reassess rather than forcing progress.
Quick Tips: Interior Vs Exterior Wood Projects
When tackling paint removal, remember interior and exterior wood behave differently, so pick methods that match the setting. You’ll protect finishes and health by choosing the right tools and cleaners for Interior decor or Exterior maintenance tasks.
- For indoor trim, work gently with a plastic scraper, mild stripper, and ventilation. Avoid harsh heat to protect nearby finishes.
- For outdoor siding, use sturdier scrapers, a biodegradable stripper, and pressure washing cautiously to balance paint removal with wood integrity.
- Always test a small area, wear PPE, and follow manufacturer guidance for stripper and sealant choices.
Final Checklist to Make Wood Look Like New
Before you seal or refinish, run through a quick checklist to make certain the wood’s surface is clean, smooth, and free of old paint, dust, and contaminants so your final coat adheres properly.
Inspect for leftover paint flakes from wallpaper removal or scraping; remove them with a gentle scraper and a soft brush.
Sand progressively with fine grit, wipe with a tack cloth, and check for dents or gouges to fill.
Test adhesion in an inconspicuous spot.
Confirm hardware is clean or removed for furniture restoration.
Allow the wood to fully dry, then apply primer or finish per product instructions.
Frequently Asked Questions
Can I Use a Pressure Washer on Exterior Wood Trim?
Yes — you can, but you should be careful. You’ll use pressure washing for exterior cleaning sparingly, with a wide nozzle and low PSI, keeping distance to avoid tearing wood, stripping paint, or forcing water into joints.
Will Vinegar Remove Paint Without Harming Wood or Finishes?
A homeowner tried diluted white vinegar on a painted pine chair and saw light softening but no full removal. You’ll find vinegar effectiveness limited; it’s gentle for wood safety but won’t strip stubborn latex or oil paints fully.
How Do I Prevent Mold After Using Water-Based Strippers?
Dry thoroughly and ventilate immediately to prevent mold; you’ll wipe away stripper residue with clean water, then use a dehumidifier or fans, apply mold-resistant primer if needed, and monitor moisture levels regularly to avoid regrowth.
Can I Refinish Previously Painted Wood With Polyurethane Directly?
You can’t usually apply polyurethane over old paint without prepping; you’ll need to sand, clean, and prime to guarantee wood prepping is thorough so paint adhesion holds, otherwise the finish will peel or look uneven.
Are There Eco-Friendly Disposable Options for Paint‑Soaked Rags?
Yes — you can: start simple. Seek biodegradable wipes for small spills, stash reusable cloths for wet scrubbing, and seal saturated disposables in labeled, leakproof bags for proper hazardous disposal to protect people and planet.
Conclusion
Removing paint from wood doesn’t have to be scary — 90% of DIYers report success with just three steps: soften, scrape, and finish. Stick to spot repairs when possible, suit your safety gear to the job, and avoid overly aggressive tools that gouge. If a project’s large, lead-painted, or you’re unsure, hire a pro. Follow the checklist, take your time, and you’ll restore wood beauty without damage.