How to Sand Wall Before Painting (Step-by-Step Guide)
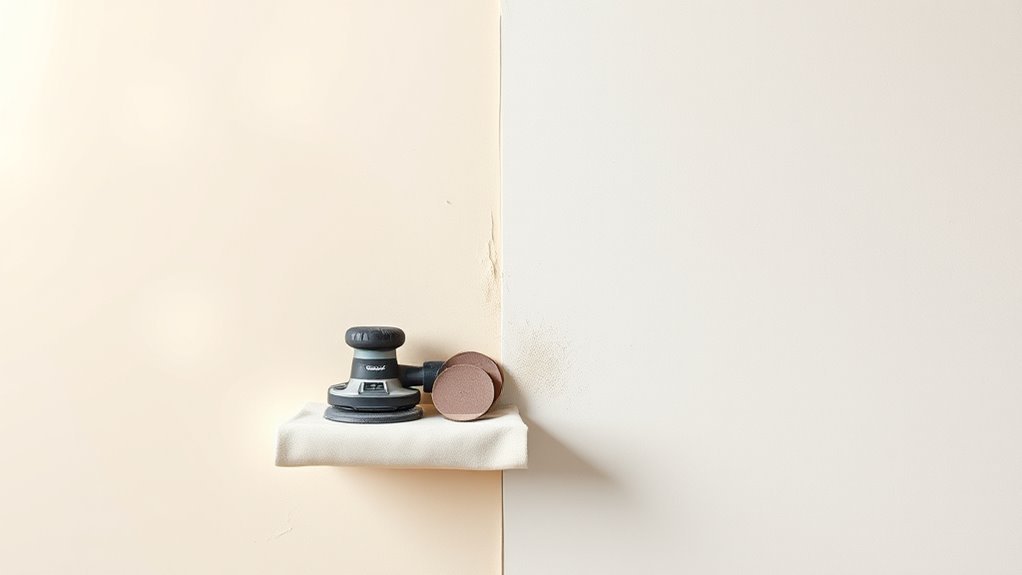
You’ll start by clearing the room, removing fixtures, and masking trim and floors. Inspect for cracks, nail pops, and glossy patches, then fill and sand repairs smooth. Use a sanding block or orbital sander with progressively finer grit (start ~100–120, finish ~180–220), control dust with plastic sheeting and a HEPA vac, then wipe surfaces damp and prime bare spots. Follow with a light scuff before painting to guarantee great adhesion—keep going to learn full tips and safety.
What This Guide Helps You Accomplish: A Flawless Painted Wall

Before you pick up a brush, this guide shows you how to prepare walls so paint goes on smooth, sticks well, and looks professional for years. You’ll learn to remove defects, level surfaces, and create the right profile for primers and topcoats.
Proper sanding and cleaning prevent peeling and highlight your chosen color, letting decorative patterns and artistic finishes read clearly instead of hiding flaws. You’ll get practical steps to inspect, repair holes, and choose abrasives so coatings adhere uniformly.
Follow this guide, and you’ll reduce rework, extend finish durability, and achieve a flawless, showroom-quality wall.
Quick Sanding Workflow: Prep, Sand, Clean, Prime
When you follow a simple four-step routine—prep, sand, clean, prime—you’ll cut work time and get a consistently smooth base for paint.
Start by removing fixtures, taping trim, and filling holes so sanding targets only problem areas.
Remove fixtures, tape trim, and fill holes first—then sand only the problem areas for faster, cleaner prep.
Sand with appropriate grit in even strokes; don’t buy into sanding myths that say more aggression equals better adhesion.
Wipe walls with a damp cloth or tack cloth to remove dust completely.
Apply a suitable primer for your surface and planned finish to lock in repairs and aid color matching.
That sequence keeps the job efficient and guarantees a uniform, paint-ready wall.
When You Must Sand a Wall Before Painting
If your walls show gloss, rough patches, peeling paint, or uneven repairs, you should sand them before painting to guarantee new paint adheres and looks smooth.
You must sand when surfaces are glossy, patched, or flaking; these conditions prevent proper bonding. Sanding also evens varied wall texture so finishes read uniformly.
Perform paint removal where loose layers exist, and feather edges around repairs to avoid visible seams.
Skip heavy sanding on intact matte finishes.
Test a small area: if primer or new coat skips, sand more.
Clean dust thoroughly before priming or repainting to ensure success.
How Sanding Improves Paint Adhesion and Finish
Sanding helps your new paint stick by removing dust, loose particles, and glossy sheen so the primer and paint can form a stronger bond.
It also evens out bumps and minor imperfections, creating a consistently smooth texture that needs less paint and shows fewer brush marks.
Improved Paint Bonding
Although it can seem like a small step, prepping the wall by abrading its surface makes paint grip much better and gives a smoother final finish. You’ll remove loose particles and glossy sheen so primer and paint can chemically and mechanically bond to the substrate.
That stronger adhesion reduces peeling, flaking, and uneven wear, preserving your chosen color schemes over time. Sanding also helps paint conform to varied wall textures without lifting.
Use appropriate grit, clean dust thoroughly, and inspect for missed spots before priming. Proper sanding means fewer touch-ups, longer-lasting coverage, and a professional-looking result you’ll appreciate.
Smoother Surface Texture
Because a wall’s tiny highs and lows catch light and show every brushstroke, you’ll want to level those imperfections before painting. Sanding evens the surface so textured finishes read deliberately rather than accidentally. You remove nibs, drips, and sanding dust, creating a uniform profile that accepts primer and paint consistently.
That uniformity controls paint sheen, preventing blotchy gloss or dull spots where coats lay differently. Use progressively finer grits and a light touch near edges to avoid creating new ridges. When the wall feels smooth and looks even under varied light, your topcoat will sit truer and last longer.
Tools You Need for Sanding Walls
Before you start, gather a few essential tools so the job goes quickly and the finish looks professional. You’ll need sandpaper (80–220 grit), sanding blocks, a pole sander for high areas, a detail sander for corners, and a shop vacuum or vacuum attachment for dust containment. Include tack cloths and drop cloths to protect floors. Prioritize sanding safety by choosing the right grit and tool for the wall surface to avoid gouges.
| Tool | Purpose |
|---|---|
| Sandpaper | Remove paint/rough spots |
| Sanding block | Even pressure |
| Pole sander | Reach high areas |
| Detail sander | Corners/edges |
| Vacuum | Dust containment |
Personal Protective Gear to Stay Safe and Dust‑Free
Now that you’ve picked the right sandpaper and tools, protect yourself from the fine dust and particles sanding kicks up. For personal safety, wear a NIOSH-rated N95 or better respirator; goggles that seal around the eyes; and hearing protection if power sanders are used.
Use disposable or washable coveralls and gloves to keep skin and clothes dust-free. Seal hair with a cap.
Wear disposable or washable coveralls and gloves, and tuck hair under a cap to keep dust off.
Combine PPE with dust management: connect sanders to a vacuum with HEPA filtration, run a room air purifier, and mist lightly to reduce airborne dust.
Clean up with a damp cloth and dispose of waste safely.
How to Choose the Right Sandpaper Grit
When you pick sandpaper, match the grit to the job so you remove defects without creating new scratches. You’ll choose grit by defect size, final smoothness, and material. Combine proper Sanding techniques with attention to Sandpaper durability to avoid changing the wall surface.
- 40–60 grit: remove heavy texture or flaking paint quickly
- 80–120 grit: smooth rough spots and feather edges
- 150–220 grit: prep for primer; creates an even tooth
- 320+ grit: final fine sanding between coats
Test a small area first, replace worn paper, and progress from coarse to fine for best results.
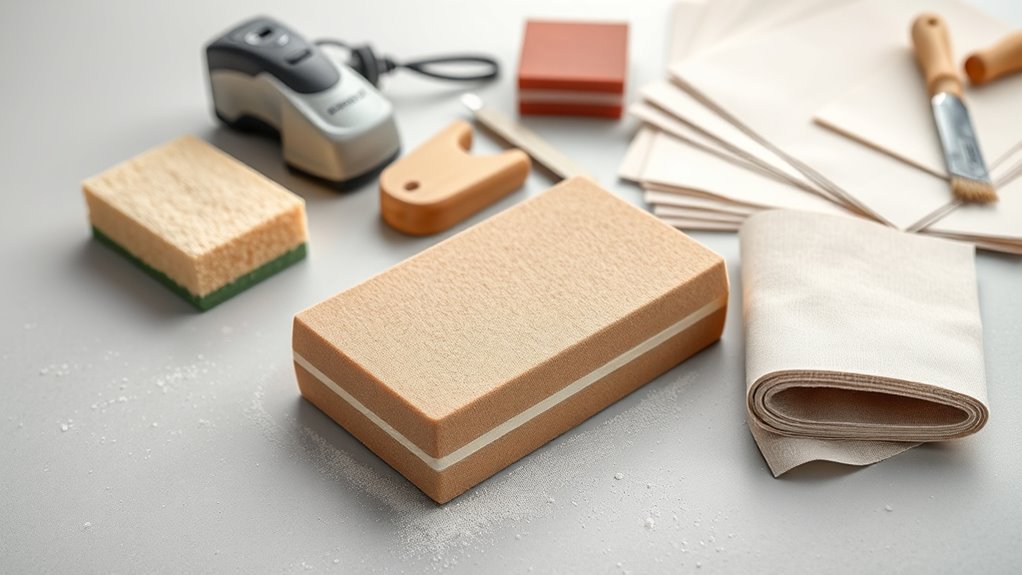
Choose Sanding Block vs. Sanding Sponge
You’ll want to weigh a sanding block’s firm, even pressure against a sanding sponge’s flexibility for contours and corners.
Use a block for flat walls and a sponge for textured or curved areas where you need to follow shapes.
Choosing the right tool for each task will save time and give a smoother finish.
Sanding Block Advantages
Although both sanding blocks and sponges can smooth walls, a sanding block gives you firmer control, more even pressure, and a flatter surface for larger, flat areas. You’ll find a sanding block helps keep grit uniform, prevents finger marks, and speeds up flattening seams or primer ridges.
Choose one with a comfortable grip and replaceable sandpaper for efficiency. Dust containment improves when you use a block with a vacuum attachment or work methodically to limit airborne particles.
Consider these practical benefits:
- Consistent pressure across the surface
- Better edge and corner control
- Faster removal of high spots
- Easier attachment to dust collection tools
Sanding Sponge Benefits
Because they flex to match contours, sanding sponges help you quickly smooth textured areas, trim edges, and work into corners that a rigid block can’t reach. You’ll find sanding sponge benefits include better surface smoothing on irregular drywall and gentler pressure on trim. They’re washable, reusable, and reduce gouging. Use different grits for coarse shaping or fine finishing. They conform to profiles, so you’ll keep even pressure and consistent abrasion. Below is a quick comparison to highlight how sponges stack up for handling complex surfaces.
| Feature | Benefit |
|---|---|
| Flexibility | Conforms to contours |
| Reusable | Washable, cost-effective |
| Grits | Multiple finish options |
When To Use Which
Sanding sponges work great on contours, but there are times a sanding block is the smarter choice—especially when you need perfectly flat, even pressure across a large, smooth wall. You’ll pick based on surface, finish goals, and how much correction you need.
Use a block for leveling and consistent grit contact; use a sponge for curves and textured patches. Consider Color matching when blending repairs, since uneven sanding shows under new paint.
Think about Wall textures: sponges follow patterns, blocks flatten them.
- Flat, smooth drywall: sanding block
- Curves, trim, niches: sanding sponge
- Blending spots: sponge then block
- Heavy sanding: block
Why Power Sanders Speed Up Prep and When to Avoid Them
When you need to strip old paint, smooth joint compound, or tackle large surfaces, power sanders cut hours off prep time by removing material quickly and evenly. With power sanding you’ll finish broad areas fast and achieve consistent feathering around repairs.
Choose random-orbit or palm sanders for walls; belt sanders are too aggressive. Keep dust control in mind: use vacuums, sealed sanders, and masks to limit airborne grit.
Avoid power tools on delicate trim, thin plaster, or near electrical outlets and wiring, where gouging or sparks are risks. When precision, minimal dust, or small touch-ups matter, hand-sanding wins.
How to Prepare the Room for Dust Control
Before you sand, seal off the room with plastic sheeting and tape to keep dust contained.
Cover floors and furniture with drop cloths or plastic and secure edges so they don’t shift.
Use a box fan in a window or a HEPA-equipped shop vac to direct and capture airborne dust.
Seal Off The Area
Although you’re about to create a lot of dust, you can keep it contained by sealing off the work area. Seal off doorways and vents with plastic sheeting and painter’s tape to maintain effective dust containment. Close HVAC vents or block them temporarily.
Use a zipper-door or overlap sheets for easy access so you won’t track dust elsewhere.
- Hang plastic sheeting over door frames.
- Tape seams and edges firmly to prevent gaps.
- Cover door thresholds with overlapping plastic.
- Use a portable fan with a HEPA filter at the work opening.
Check seals periodically and repair any gaps immediately.
Protect Floors And Furniture
Now that the room’s sealed off, protect floors and furniture to keep dust and grit from spreading and damaging surfaces. Start by laying down heavy-duty drop cloths or contractor plastic, taping seams so grit won’t sneak underneath. Wrap furniture in plastic and secure with painter’s tape, leaving vents uncovered only if you plan to filter air later.
Use cardboard or rosin paper in high-traffic paths to prevent tracked dust. Remove small items and store electronics in sealed bins. Keep a dedicated broom, vacuum with HEPA filter, and microfiber cloth nearby to gently clean before you test wall texture or check paint sheen.
Control Dust With Ventilation
Because sanding throws fine particles into the air, set up ventilation to move dust out of the room and protect your lungs and gear. Open windows, position a box fan to push air outward, and seal doorways with plastic sheeting. Use a HEPA air purifier and wear a respirator when tackling decorative finishes or smoothing wall textures.
Keep tools connected to vacuums and clean filters often.
- Place exhaust fan in window facing outside
- Seal vents and doors to prevent spread
- Run HEPA purifier during and after sanding
- Empty vacuum canister outside to avoid recirculation
How to Protect Trim, Floors, and Fixtures From Dust
Want to keep dust off your trim, floors, and fixtures while you sand? Use drop cloths and painter’s tape to seal baseboards and cover decorative accents; protect light fixtures and vents with plastic sheeting. Work top-to-bottom so dust falls onto covered areas. For varied wall textures, sand gently and vacuum frequently with a HEPA shop vac to minimize airborne particles. Remove small items from the room and wrap furniture in plastic. After sanding, wipe trim and fixtures with a damp cloth before removing coverings.
| Area | Protection | Tip |
|---|---|---|
| Trim | Tape + paper | Seal edges |
| Floors | Drop cloths | Overlap seams |
How to Inspect Walls and Mark Sanding Targets
Before you start sanding, walk the room slowly and scan the walls from several angles to spot imperfections like loose paint, nail pops, dents, and glossy patches that need scuffing.
Note areas of paint peeling and uneven wall texture; shine a light parallel to the surface to reveal low spots and bumps.
Mark targets with small, removable painter’s tape or a pencil dot, prioritizing obvious defects and high-visibility zones.
Create a brief checklist so you don’t miss anything:
- Loose or flaking paint
- Nail pops and holes
- Dents and bumps in wall texture
- Glossy patches that need scuffing
Sanding New Drywall: What to Focus On
When you’ve finished taping and mudding new drywall, sanding is about refining joints and feathering compound so seams disappear under paint. You’ll focus on smooth transitions at seams, consistent surface angles, and avoiding gouges that ruin decorative finishes or emphasize wall textures. Use light pressure, long strokes, and check with raking light. Don’t over-sand—leave slight build where needed to match surrounding drywall. Wear protection and clean dust between passes. Finish by wiping with a damp cloth and letting dry before priming.
| Feeling | Action |
|---|---|
| Calm | Sand slowly |
| Confident | Check seams |
| Frustrated | Step back |
| Satisfied | Prime soon |
| Careful | Protect surfaces |
Sanding Patched Areas and Joint Compound Correctly
Before you sand, make sure patched surfaces are fully dry and the compound is flush with the surrounding wall.
Use a sanding block or sponge with fine-grit paper to feather the edges and keep pressure even.
Work patiently so the joint compound blends smoothly without gouging the wall.
Prepping Patched Surfaces
Although it’s tempting to rush, properly sanding patched areas and joint compound is what makes repairs disappear under paint. You’ll start by checking dryness, then feather edges so the patch blends with surrounding wall texture and aids color matching later. Work gently to avoid gouging. Use light passes, inspect frequently, and vacuum dust before priming.
Follow these steps:
- Confirm compound is fully cured and firm.
- Use a sanding block with fine grit for control.
- Blend edges until smooth but textured like the wall.
- Wipe and vacuum to remove dust before priming and painting.
Sanding Joint Compound
Now that your patch is dry and feathered, sanding joint compound properly will make the repair disappear and give paint a smooth, even finish. Begin with medium-grit sandpaper (120–150) to level high spots, then switch to fine grit (180–220) for a seamless blend.
Use a sanding block or pole sander for flat areas and a sponge for contours. Work lightly across the edges to match surrounding wall textures, checking frequently with raking light.
Vacuum or brush dust away, then wipe with a damp cloth. Proper sanding techniques prevent ridges and guarantee primer and paint bond evenly.
How to Feather Edges for an Invisible Repair
When you sand the patch, taper the joint compound smoothly into the surrounding wall so the shift disappears once painted. Work light, keep edges thin, and match surface profile to avoid a visible ridge.
Taper the joint compound smoothly into the surrounding wall—work lightly, keep edges thin, and match the surface to avoid a ridge.
Check color selection and wall textures when prepping to guarantee repair won’t stand out after priming and painting.
Use fine-grit sanding and feather outward in overlapping strokes, keeping dust minimal. Finish by wiping clean and inspecting under angled light.
- Use a sanding block for control.
- Sand progressively finer grits.
- Blend beyond the compound edge.
- Prime before final paint to test blend.
Sanding Over Old Gloss Paint: The Right Approach
If you’re working over old gloss paint, start by thoroughly cleaning and sanding to remove grease and shine so new paint will stick.
Use a medium-grit sandpaper (around 120–150) to scuff the surface, then follow with a finer grit for a smoother finish.
After sanding, wipe away dust and apply a suitable primer to guarantee proper adhesion and an even topcoat.
Prepare The Surface
Although glossy paint looks durable, it resists new coatings and must be properly abraded before you repaint. You’ll clean, degloss, and protect areas so new paint adheres and color coordination stays true.
Assess wall texture and note repairs; smooth high spots, fill cracks, and sand edges for even sheen. Wear protection and ventilate.
- Remove switch plates and cover fixtures.
- Wash walls with degreaser and rinse thoroughly.
- Repair and prime bare spots to match surrounding texture.
- Tape trim and lay drop cloths to protect floors.
Prep this way and sanding will be quicker, safer, and more effective.
Choose The Right Grit
Wondering which sandpaper grit will give you the best base for new paint? Start with 120–150 grit for glossy surfaces to dull the sheen without deep scratches.
If the old gloss is very smooth, use 100 grit to scuff it more aggressively, then move to 150 for a finer finish.
For minor imperfections or final smoothing, finish with 220 grit.
Match your sanding to the wall texture—smooth walls need finer grits, textured walls tolerate coarser grit.
Light sanding preserves existing color matching cues; heavy sanding may reveal primer or bare drywall, so adjust grit accordingly.
Prime After Sanding
Now that you’ve scuffed the old gloss to a consistent dullness, prime the surface to guarantee new paint sticks and hides sanding marks. You’ll choose a bonding primer for slick finishes and spot-prime any bare patches. Match primer technique to wall texture so it levels pores without flattening detail.
Let it cure fully before sanding fine or applying topcoat; this preserves adhesion and true paint color.
- Use a high-adhesion primer for glossy enamel
- Thin coats prevent texture loss
- Sand lightly between primer coats if needed
- Confirm manufacturer dry times for best results
Dealing With Lead Paint Risks and Testing
Because lead paint can create serious health hazards when disturbed, you should confirm whether your walls contain it before you sand or scrape.
Confirm whether your walls contain lead paint before sanding or scraping to avoid serious health hazards.
You’ll start by reviewing the home’s age and records, then use EPA-recognized testing procedures: a certified inspector or laboratory test is best; home test kits give preliminary results but aren’t definitive.
If tests indicate lead, follow local regulations for work practices, notifications, and disposal.
Wear appropriate PPE, contain dust with plastic sheeting, and avoid dry sanding.
Stop and consult certified abatement professionals for guidance rather than attempting intrusive removal yourself.
How to Remove Loose or Flaking Paint Safely
Before you start sanding, remove all loose or flaking paint to prevent large chips and dust from spreading; work from top to bottom so gravity doesn’t undo your progress. Wear a respirator and goggles, and protect floors and furniture. Test a small area to see how the existing paint colors react.
- Use a putty knife or paint scraper at a shallow angle to lift flakes gently.
- For stubborn spots, soften with a heat gun on low or a commercial remover following instructions.
- Vacuum dust with a HEPA vacuum after scraping.
- Wipe surfaces with a damp cloth and let dry.
Check how removal affects wall texture before proceeding.
Sanding Textured Walls: Options and Trade‑Offs
After you’ve removed loose paint and cleaned the surface, decide whether to sand the texture at all. Sanding can smooth high spots for a flatter finish but may damage or remove decorative patterns you want to keep.
For textured walls, you can spot-sand raised areas with a sanding block, use a pole sander for broader smoothing, or abrade gently with fine-grit sanding screens. Vacuum frequently and wear a mask.
Consider skim-coating if you want an even plane without aggressive sanding. Balance effort, appearance, and preservation of pattern when choosing sanding options so you get the finish you want without unnecessary damage.
How to Sand Popcorn or Knockdown Texture Before Painting
If you’re working with popcorn or knockdown texture, know that aggressive sanding can strip the pattern, create lots of dust, and sometimes reveal underlying damage, so approach it conservatively and with the right tools.
When sanding popcorn or knockdown texture, be gentle—scuff high spots, avoid stripping the pattern, and control dust.
You’ll aim to lightly scuff high spots, remove loose material, and preserve decorative wall finishes or support historical texture restoration.
Wear PPE, test a small area, and consider alternatives like spot scraping or skim coating.
- Use a vacuum‑attached pole sander with fine abrasive.
- Test for asbestos before disturbing old texture.
- Feather edges with hand sanding.
- Clean thoroughly before priming.
Sanding Plaster Walls Without Causing Damage
Working on plaster requires a gentler touch than sanding drywall or textured finishes, so shift your approach to preserve the plaster’s integrity while smoothing imperfections. Use fine-grit sandpaper (220–320) and a sanding block or soft sanding sponge to avoid gouges. Sand lightly, following the wall texture, and stop frequently to check progress.
Fill cracks with a compatible plaster filler, then sand once dry with fine grit. After sanding, wipe dust with a damp cloth. Test the surface under your desired light to assess uniformity and paint sheen.
When in doubt, sand less—plaster repairs are easier than replacing damaged areas.
How to Sand Corners, Edges, and Trim Details
When you sand corners, edges, and trim details, switch to smaller tools and finer grits so you can control pressure and avoid rounding profiles or cutting into moulding. Use a sanding sponge, folded paper, or micro-detailed files for corner detailing and edge smoothing. Work light, follow contours, and check frequently.
- Use 120–220 grit for paint edges and 320+ for bare wood.
- Fold sandpaper into tight creases for inside corners.
- Protect adjacent surfaces with low-tack tape.
- Sand trim along the grain, not across profiles.
Finish by wiping dust with a tack cloth before priming or painting.
Sanding Ceilings: Tips for Safety and Efficiency
After you’ve finished the fine work on corners and trim, move on to ceilings with safety and efficiency in mind. Prepare by removing fixtures, covering floors and furniture, and wearing eye protection, a dust mask, and a hardhat or bump cap.
Use a pole sander with fine-grit paper for flat surfaces. For rough or popcorn ceiling texture, test a small area first to avoid damage. Work in overlapping strokes, keep the pole at a low angle, and avoid pressing hard.
Clean dust frequently with a vacuum attachment. Take breaks to check for missed spots and guarantee even surface readiness before priming and painting.
How to Use Orbital and Detail Sanders Effectively
Pick an orbital sander for large flat areas and a detail sander for trim and tight corners so you get even sanding without gouges.
Move the orbital sander in slow, overlapping passes and use light pressure to avoid swirl marks.
Switch to the detail sander or sanding by hand at corners, following edges gently to preserve profiles.
Choosing The Right Sander
Although sanding might seem simple, choosing between an orbital and a detail sander changes how quickly and cleanly you’ll prep your walls. You’ll pick based on wall texture and the paint sheen you plan to apply.
Use an orbital for broad, flat areas and faster material removal. Use a detail sander for edges, trims, and tight spots.
Match grit to finish: coarse for repair, fine for final smoothing before sheen-sensitive paints. Consider weight, dust collection, and pad size when buying.
- Orbital: fast, even on smooth surfaces
- Detail: precise in tight areas
- Dust collection matters
- Match grit to finish
Technique For Corners
When you reach corners, slow your orbital sander and let a detail sander finish the tight spots so you don’t gouge edges or round off trim profiles.
Work along the joint with light passes, matching pressure to the wall texture so you preserve subtle patterns. Use finer grit near trim to avoid rounding; switch to a 220 or higher for smooth progression if you plan a high paint sheen.
For inside angles, sand vertically with the detail tool, then feather outward to blend.
Clean dust, inspect under good light, and repeat sparingly until corners look seamless and ready for primer.
Hand‑Sanding Techniques for a Smooth Finish
Before you start, gather a sanding block, a selection of grits (100–220 for most walls), and a clean tack cloth so you can work methodically and avoid gouges. You’ll use the block to keep pressure even and the finer grits to blend edges and feather repairs for a uniformly smooth surface.
You’ll sand in light, circular strokes, then smooth with long, even passes parallel to the wall. Keep dust down to protect surfaces and aid color matching; cover floors and do furniture protection.
Tips:
- Start with coarser grit on repairs
- Finish with 220 for a soft feel
- Check with your hand
- Wipe often
How to Block‑Sand for Flat, Level Surfaces
Because block‑sanding keeps pressure consistent across the surface, you’ll get flat, level walls without the ridges hand sanding can leave. Start by attaching medium‑grit sandpaper to a sanding block. Work in long, overlapping strokes, maintaining the block flat to preserve wall texture and avoid gouges.
Check progress frequently under angled light, smoothing edges of patched areas so smoothness matches surrounding surfaces. Switch to finer grit for final passes to control paint sheen and promote adhesion.
Clean dust with a microfiber cloth or vacuum before priming. Replace paper when it clogs to keep pressure even and results uniform.
Wet Sanding: When to Use It and How to Do It
Use wet sanding when you need a super-smooth finish or when working with glossy paints and joint compound that clogs dry paper.
Gather fine-grit waterproof sandpaper, a sanding block, a bucket of clean water, and a sponge or cloth to wipe residue.
Work wet, keep the paper clean, sand gently in even strokes, and pat the surface dry to check progress.
When To Choose Wet
Wondering when wet sanding makes sense? You’ll pick wet over dry when you need smoother finishes, less dust, or finer control on glossy or repaired areas. Choosing Wet contrasts with Dry Techniques: know what each gives.
- When surfaces are already nearly smooth and need polishing
- When dust control matters (indoors, finished rooms)
- When working on glossy, sealed, or patched spots
- When you want to reduce visible scratches before priming
You’ll use lighter pressure, frequent rinsing, and inspect wet to avoid over-sanding.
Switch to dry methods for heavy material removal or quick rough shaping.
Proper Materials Needed
When you’re wet sanding, gather the right materials so the job goes smoothly and you avoid unnecessary rework. You’ll need fine-grit waterproof sandpaper (400–800 grit), a sanding block or sponge, a clean bucket, lint-free cloths, and a spray bottle or misting tool.
Use mild detergent for degreasing and a shop vacuum or tack cloth for dust control after drying. For delicate decorative finishes or pronounced wall textures, test a small area to avoid damage.
Wear nitrile gloves and eye protection, and have drop cloths ready to protect flooring and adjacent surfaces.
Step-By-Step Technique
With your materials ready and the surface degreased, wet sanding is the next option when you need a super-smooth finish, remove brush marks, or knock down slight imperfections without creating airborne dust.
You’ll pick fine-grit (320–600) sandpaper, a sanding block, sponge, and clean water. Keep the surface lightly misted, sand gently in circular motions, rinse often, and dry thoroughly before testing paint sheen.
Use wet sanding sparingly near fresh paint and consider color coordination when prepping edges or gradual changes.
Tips to follow:
- Test on a hidden spot first
- Replace paper if clogged
- Work evenly across panels
- Wipe residue with a lint-free cloth
How to Remove Sanding Dust Before Priming
Before you prime, remove every trace of sanding dust so the primer can bond properly; otherwise tiny particles will create fisheyes, poor adhesion, or a gritty finish.
Before priming, clear every trace of sanding dust—tiny particles cause fisheyes, poor adhesion, and a gritty finish.
Start by vacuuming with a brush attachment, working top to bottom, focusing on trim and corners where sanding produced the most debris.
Wipe walls with a slightly damp microfiber cloth or tack cloth, rinsing frequently.
For removing paint flecks, use a soft scraper then vacuum again.
Set up dust containment—plastic sheeting and passive filters—to stop dust spreading to other rooms.
Let surfaces dry fully before you touch primer or tape edges.
Choosing the Right Primer After Sanding
Now that the wall’s clean and smooth, you’ll need to pick a primer that matches the surface and your finish—latex, oil-based, or a bonding primer. Each have specific uses.
Check how well the primer adheres to your repaired or sanded areas to guarantee long-lasting paint adhesion.
Finally, consider coverage and dry time so you can plan how many coats you’ll need and when you can repaint.
Primer Type Selection
Which primer will give you the best adhesion, stain blocking, and finish for your freshly sanded walls? For primer selection after surface preparation, pick a type that matches the wall material and condition. Consider stain-blocking needs, moisture, and topcoat compatibility.
Choose one of these options:
- Latex acrylic: quick-dry, low odor, good for clean drywall.
- Oil-based: strong stain blocking, use on repaired or porous areas.
- Shellac-based: excellent for heavy stains and odor sealing.
- Bonding primer: for slick or previously painted surfaces.
Match primer properties to the wall state so your paint lays down evenly and lasts.
Adhesion And Bonding
You’ve picked a primer that suits the wall condition, but adhesion and bonding determine whether that primer—and the topcoat—will stay put. Test adhesion by scuffing small areas, then press a strip of tape; clean, dry, and roughed surfaces bond best. Choose primers formulated for your substrate: high-adhesion for glossy spots, bonding primers for patchy repairs. Match primer properties to paint for color matching and guarantee texture blending where repairs meet original finish. Follow manufacturer instructions for application and cure before sanding lightly.
| Surface Type | Recommended Primer |
|---|---|
| Glossy paint | Bonding primer |
| Drywall | Latex primer |
| Plaster | Alkyd primer |
| Patch areas | High-adhesion primer |
Coverage And Dry Time
How quickly do you need to paint over the primer, and how thoroughly will it hide the surface beneath? You’ll perform a Coverage analysis: check label spread rate and opacity to know how many coats mask sanding marks or stains. Consider Drying duration—some primers set in 30 minutes, others need 24 hours. Match primer type to your timeline and topcoat compatibility so adhesion and finish aren’t compromised.
- Use high-hide primer for patched or stained areas.
- Pick fast-dry acrylic if you’re on a tight schedule.
- Allow full cure before sanding between coats.
- Test a small area to confirm coverage and dry time.
How to Spot‑Prime Repaired Areas
After repairs are dry and sanded smooth, spot‑prime those patched areas to seal the joint compound and help paint adhere evenly. Use a small brush or roller to apply a thin coat of primer only over the patches, feathering edges into surrounding paint.
Allow full drying, then inspect for differences in wall texture and sheen. If primer highlights texture or color matching issues, apply a second thin coat or adjust texture before priming again.
Choose a stain‑blocking or drywall primer for best adhesion. Spot‑priming prevents flashiness and guarantees your topcoat covers uniformly without overspreading into intact surfaces.
Common Sanding Mistakes and How to Avoid Them
When you’re sanding walls, a few predictable mistakes can turn a quick prep job into extra work, so it’s worth knowing what to watch for—over-sanding, using the wrong grit, skipping dust control, and neglecting feathering are the usual culprits. You should avoid common errors and ignore Sanding myths that promise shortcuts. Focus on technique and dust management from the start.
Quick remedies:
- Don’t use overly coarse grit; start finer for finished surfaces.
- Don’t press too hard; let the abrasive do the work.
- Control dust with a vacuum or damp cloth as you go.
- Feather edges smoothly to blend repairs.
How to Tell When Sanding Is Finished (Visual & Tactile Tests)
If you want a paint-ready surface, stop sanding as soon as the repairs and surrounding area look and feel uniform. Visually, check for smooth progressions: no ridges, shiny spots, or obvious swirl marks.
Run your palm and fingertips lightly over the area; they’ll catch bumps your eyes miss. Use a damp cloth to reveal remaining imperfections.
Lightly run your palm and fingertips over the repair; a damp cloth will show any lingering bumps.
Don’t buy into sanding myths that bigger or longer always equals better—over-sanding damages drywall or filler.
Compare your result to adjacent untouched wall texture. Remember, historical techniques were simple tactile checks; modern abrasives just speed the same final judgment: evenness by sight and touch.
How Much Time to Budget for Sanding Per Room
Knowing when sanding is finished helps you estimate how long the job will take, but actual time per room varies with size, wall condition, and the number of repairs.
Plan by evaluating surfaces first: smooth, well‑primed walls take less time than textured or patched ones. Don’t fall for Sanding myths that promise a fixed hourly rate; DIY sanding speed depends on skill and tools.
Typical rough estimates:
- Small bedroom (single coat, minimal repairs): 1–2 hours
- Standard living room (some patches): 2–4 hours
- Large room or heavy repairs: 4–8 hours
- Ceiling or textured surfaces: add 50–100%
Budget accordingly.
Cost‑Saving Tips for Sanding Supplies
Because you’ll likely reuse many sanding tools, you can cut costs without cutting corners by choosing durable basics and buying consumables smartly. Pick a handful of high-quality sanding blocks, a palm sander if you’ll do several rooms, and reusable dust masks.
Buy sandpaper in packs sized for your project; coarse for stripping, fine for finishing. Look for multi-purpose budget brushes for cleanup and trim work rather than specialty sets.
Rent or borrow paint sprayers for large jobs instead of purchasing. Compare prices online, use coupons, and avoid buying duplicates—plan tools by task to save money and time.
Decide When to Call a Pro for Sanding
When a wall has extensive damage, tricky textures, or requires structural prep you’re not equipped for, call a pro—doing it yourself could cost more in repairs and time.
You should hire help if the job needs scaffolding, lead paint expertise, or electrical/structural fixes beyond basic sanding. Pros also know when to challenge sanding myths and when to use or avoid historical techniques on older surfaces.
- Unsafe heights or unstable surfaces
- Suspected lead, asbestos, or mold issues
- Complex textures like Venetian plaster
- Large commercial or multiroom projects
Get quotes and ask about containment and disposal.
How to Handle Stubborn Stains and Bleed‑Throughs
First, identify whether the mark is water, smoke, grease, or tannin so you know what treatment will work.
If the stain might bleed through, apply a stain-blocking primer to seal it before you sand.
Once sealed and dry, sand lightly and recoat with your finish paint.
Identify Stain Type
How can you tell what’s causing that stubborn mark on your wall? Inspect color, texture, and smell—oil, water, smoke, or tannin stains behave differently and guide stain removal choices. You’ll also test a discreet spot with water and mild cleaner to see if it lifts.
- Water stains: often brown, soft edges, may indicate leak.
- Oil/grease: dark, repels water, needs solvent treatment.
- Smoke/nicotine: yellowish, pervasive odor.
- Tannin/wood bleed: brown circles from knots or bare wood.
Knowing the type helps protect finish durability and choose the correct prep steps before sanding.
Apply Primer Barrier
Although stubborn stains can seem permanent, a quality primer barrier will lock them in and prevent bleed‑through so your topcoat looks even and lasts longer. You’ll clean the surface, sand feathered edges, and choose a stain‑blocking primer suited for the stain type.
Apply primer liberally to problem areas, extending slightly beyond the stain to blend tone. For severe tannin or smoke stains, use shellac‑based primers; for water marks, an oil‑based or high‑adhesion latex primer works.
Be mindful of applying texture if the wall finish needs matching. Check around wall insulation seams where stains often migrate, then let the primer cure fully.
Sand And Recoat
When a primer shows through or a stain still peeks after curing, sand the area smooth and recoat to lock it in for good. You’ll remove high spots, feather edges, and prep a clean surface.
Don’t fall for sanding myths that push aggressive grit—start with fine and adjust. Consider eco friendly abrasives to reduce dust and waste.
Follow this quick process:
- Lightly sand stained spots and feather surrounding paint
- Clean dust with a tack cloth or damp rag
- Spot-prime using a stain-blocking primer and let cure fully
- Repaint thin coats, inspecting between layers for bleed-through
Sanding for Specialty Paints (Enamel, High‑Gloss)
Because enamel and high‑gloss paints show every imperfection, you’ll need to sand more carefully and use finer grits than for flat finishes. Start with 220–320 grit to level flaws, then finish with 400–600 grit for a glassy surface.
Enamel and high‑gloss require careful sanding: begin 220–320 grit, finish 400–600 for a glassy, flawless surface.
Use a light touch and a sanding block or fine abrasive pad to avoid swirl marks. Don’t buy into Sanding myths that coarser grit speeds the job; it creates visible scratches under shiny coats.
Follow Safety precautions: wear a respirator, eye protection, and vacuum dust between passes.
Clean with a tack cloth before priming or topcoating for a spotless result.
How Humidity and Temperature Affect Sanding and Paint
You’ll want to watch temperature because it controls how quickly primer and paint dry, which affects how and when you should sand between coats.
High humidity makes sanding messier by causing dust to clump and can slow drying.
Very low humidity can create brittle dust that sands differently.
Aim to sand in mild, dry conditions—typically around 60–75°F and 40–50% humidity—for the most predictable results.
Temperature’s Impact On Drying
If you sand and paint in the wrong conditions, the results can look rough and fail prematurely. You need consistent temperatures for proper paint curing; temperature fluctuations slow cure or trap solvents, ruining finish. Work when the room sits within the paint manufacturer’s recommended range.
Warm, steady air speeds drying; cold or variable temps extend tack time and attract dust. Control indoor climate with heating or fans, but avoid direct hot blowers.
- Check thermometer before sanding.
- Schedule painting during stable weather.
- Use space heater cautiously.
- Allow extra cure time in cool temps.
Humidity Effects On Dust
Along with temperature, humidity directly changes how sanding dust behaves and how paint cures, so check both before you start.
You’ll notice humidity effects cause dust to clump when moisture is high, reducing airborne particles but increasing surface residue that sticks to primer.
Low humidity keeps dust dry and airborne, boosting cleanup needs and potential inhalation risk.
Control ventilation and use a vacuum with a HEPA filter while you sand to limit dust accumulation.
After sanding, wipe walls with a slightly damp cloth to remove stubborn residue, then allow the surface to fully dry before applying any paint or primer.
Optimal Conditions For Sanding
Because temperature and humidity directly change how sanding dust behaves and how paint and primer cure, you should plan sanding for stable, moderate conditions—ideally 50–70°F (10–21°C) with relative humidity around 40–60%.
You’ll get cleaner sanding, predictable grit performance, and proper primer adhesion when you respect these ideal conditions.
Monitor environmental factors and avoid sanding during rapid swings or high humidity. Use HVAC, fans, or dehumidifiers to stabilize the room.
Consider postponing work if conditions are extreme.
- Check temperature and humidity before starting.
- Control airflow to remove dust.
- Use a dehumidifier in damp weather.
- Wait for stable conditions before priming.
Post‑Sanding Cleanup Checklist
Ready to make your walls dust-free and paint-ready? You’ll first reduce sanding noise by turning off fans and closing windows so dust containment works.
Wear a mask and goggles, and vacuum the walls with a brush attachment from top to bottom. Wipe remaining residue with a damp microfiber cloth, rinsing frequently.
Sweep and vacuum floors, then mop to pick up fine particles. Empty and seal the vacuum bag or canister outside.
Check vents, light fixtures, and baseboards for settled dust and clean them.
Let the room dry fully before priming or painting to guarantee adhesion.
Tools and Sandpaper Maintenance Tips
Before you start, make sure you’ve got the essential sanding tools—sanding block or pole sander, assorted grit sandpaper, and a vacuum or tack cloth.
Use the right grit sequence (coarse to fine) for patching, smoothing, and finishing so you don’t overwork the surface.
I’ll also cover simple care tips to keep your sandpaper and tools effective and long‑lasting.
Essential Sanding Tools
When you’re prepping walls for paint, having the right sanding tools and keeping abrasive pads in good shape makes the job faster and gives you a smoother finish.
Choose a mix of handheld and powered tools to match decorative finishes and textured surfaces without overworking them. Essential items include:
- Sanding block for flat areas and edges
- Detail sanding sponge for corners and trim
- Random-orbit sander for larger patches and smoothing
- Pole sander for ceilings and high walls
Keep pads clean by tapping dust off, replacing worn abrasives, and storing sheets flat to maintain consistent performance.
Sandpaper Grit Guide
Although you’ll switch grits as you go, start by matching sandpaper to the task: use coarse grits (40–80) to strip paint or level deep imperfections, and medium grits (100–150) to smooth patched areas.
Fine grits (180–220) are used for feathering edges and prepping for primer or paint. Choose open-coat for paint removal and closed-coat for finishing.
For final sanding before choosing paint color, test a small area to guarantee smoothness. Use a sanding block or pole sander to keep pressure even.
Change worn sheets promptly; dull grit causes gouges. Follow proper sanding techniques for consistent results.
Caring For Equipment
After you’ve finished choosing grits and sanding technique, take a few minutes to care for your tools so they’ll perform reliably next time. You’ll extend tool life and keep results consistent by following simple equipment maintenance steps.
Clean dust from sanders, backs, and clamps after each session. Store sandpaper flat and dry to avoid curl and loss of abrasiveness. Replace worn discs or sheets promptly to maintain effective sanding techniques and avoid gouging.
- Wipe tools with a dry cloth and compressed air
- Knock dust from sanding pads before storing
- Organize grits in labeled folders
- Inspect cords and replace damaged parts promptly
Disposing of Sanding Dust and Used Materials Safely
Because sanding creates fine, often toxic dust and generates used materials that can ignite or contaminate, you should handle disposal carefully to protect yourself and the environment. Wear a respirator and wet down dust before sweeping into heavy-duty bags.
Seal bags and label them if lead or asbestos is suspected; follow local hazardous-waste rules. For general dust and used sandpaper, double-bag and dispose with regular trash only if allowed.
Consider eco-friendly disposal through community recycling or hazardous-waste events. Store leftover materials in metal containers with lids and keep storage solutions away from heat or open flames until legally cleared for disposal.
Quick Troubleshooting: Fixes for Common Sanding Problems
When sanding throws up problems—like blotchy spots, clogged grit, or gouges—you can usually fix them quickly with the right steps and a bit of patience. Check causes, then apply targeted fixes: don’t over-sand, replace dirty paper, or rush repairs. Remember Sanding myths—like “more pressure equals smoother finish”—and prefer controlled strokes.
When sanding goes wrong—identify causes, use targeted fixes, avoid over-sanding, and work with controlled strokes
Briefly consider historical techniques for smoothing edges when modern tools aren’t available.
- Blotches: feather with fine grit and clean dust.
- Clogged grit: switch paper, clean with a brush.
- Gouges: fill, sand level, recheck.
- Uneven texture: re-sand with light, even passes.
Next Steps: Paint Selection and Application After Sanding
Ready to pick paint and apply it? You’ve prepped and sanded; now choose color schemes that match lighting and room function. Test swatches on the wall, view at different times, and narrow choices. Decide paint sheen—flat hides flaws, eggshell balances durability, satin or semi-gloss suits trim and high-traffic areas. Use quality primer where needed, stir paint thoroughly, and cut edges before rolling. Work in consistent sections, maintain a wet edge, and apply recommended coats with proper drying times. Clean brushes and rollers promptly. Refer to the quick table below for a simple selection guide.
| Use | Recommendation |
|---|---|
| Walls | Eggshell or satin |
| Trim | Semi-gloss |
Frequently Asked Questions
Can I Sand Walls in Cold Weather Without Compromising Results?
Yes — you can, but colder temperatures slow drying and affect sanding results. You’ll need painting preparation adjustments and safety precautions: heat the room, control humidity, use proper masks and goggles, and allow longer cure time before painting.
How to Sand Walls Adjacent to Active Mold or Mildew?
About 60% of homes have detectable indoor mold, so don’t sand near active mold without protection. You’ll wear an N95, contain the area, do mold removal first, then resume sanding for proper surface preparation.
Are There Eco‑Friendly Sandpaper Brands or Biodegradable Options?
Yes — you can buy Eco friendly abrasives and biodegradable sandpaper from specialty brands; you’ll find plant‑based backings and natural mineral grits, reducing landfill impact while still giving durable, effective sanding for prep and finish work.
Can Pets Remain in the House During Sanding and Cleanup?
Yes — but you shouldn’t keep them nearby; like a lighthouse guarding a storm, you’ll prioritize Pet safety and dust containment by relocating pets, sealing rooms, using HEPA vacuums, and waiting until cleanup’s complete before letting them return.
How to Sand Walls With Integrated LED or Recessed Fixtures Safely?
You’ll mask integrated fixtures, shut power, and use low-dust sanding tools with HEPA vacuuming; follow safety precautions like eye, respiratory protection, and fire-safe debris management, avoiding contact with recessed wiring or delicate trim.
Conclusion
Think of your wall like a garden bed: sanding is the tilling that loosens compacted soil, removing bumps and old paint so new seeds — your paint — can take root. You’ve prepped, smoothed, and cleaned; now you’re ready to plant. Treat priming and painting like watering and tending: consistent care brings a lush, even finish. Follow the steps, stay patient, and you’ll harvest a room that looks refreshed and thrives for years.