How to Tape a Wall Before Painting Like a Pro
You’ll get razor‑sharp lines by prepping, choosing the right tape, sealing edges, and removing tape at the right time. Clean and sand surfaces, fill and prime any imperfections, then wait until everything’s fully dry. Pick low‑tack tape for delicate surfaces or medium/high adhesion for trim and textured walls. Press tape down firmly, burnish the edge, seal with the base color or caulk, paint, and pull the tape back at a 45° angle while tacky for best results — keep going to learn full step‑by‑step tips.
Quick Answer: Tape a Wall Like a Pro in Five Steps
If you want crisp paint lines without fuss, follow these five straightforward steps: prepare the surface, measure and mark, apply painter’s tape with firm pressure, seal the tape edge, and remove it at the right time.
You clean and sand, choosing eco-friendly materials where possible, so paint adheres. Measure carefully and mark straight lines.
Apply tape smoothly, pressing edges down firmly. Seal the tape edge with a thin coat of the base color to prevent bleed.
Paint confidently, mindful of color psychology when selecting hues. Remove tape at a 45° angle while paint is tacky, not fully dry.
Sample Taping Workflow for a 12×12 Room
When you’re tackling a 12×12 room, a clear, step-by-step taping workflow saves time and gives consistently sharp lines. Begin by cleaning trim and baseboards, then press painter’s tape along edges, overlapping corners. Tape windows and switch plates next, smoothing with a plastic card to prevent seepage.
Run a thin bead of caulk where needed, let it dry, and seal tape edges. For ceilings, work clockwise so you finish at the door. Remove tape while paint is tacky to avoid peeling.
Choose finishes and hues thoughtfully—color psychology guides mood—and pair with eco-friendly paints for safer indoor air.
Why Proper Taping Matters for a Professional Paint Job
When you tape carefully, you get clean edges that stop paint bleed and make the finish look professional.
That precision also cuts down on touch-ups, so you save time during the job.
Fewer fixes mean lower costs for materials and labor, giving you a more efficient project overall.
Clean Edges Prevent Bleed
Why do crisp lines matter so much? You want clean edges to prevent bleed, ensuring your paint looks professional. Use proper tape pressure and removal angle, prioritize taping safety, and consider environmental impact by choosing recyclable tape. Small mistakes create visible flaws; precise taping avoids sanding and touch-ups.
| Tool | Action | Result |
|---|---|---|
| Painter’s tape | Press firmly | Seal edge |
| Putty knife | Smooth tape | No gaps |
| Solvent | Clean surface | Better adhesion |
| Removal angle | Pull slowly | Crisp line |
| Disposal | Recycle if possible | Less waste |
Save Time And Money
Because precise taping stops costly rework before it starts, you’ll save both time and money on a professional paint job. When you tape edges cleanly, you avoid touch-ups that eat hours and cans of paint, keeping color schemes crisp and intentional.
Proper taping reduces accidents during wallpaper removal, protecting fresh drywall and preventing extra prep. You’ll work faster because you won’t wait for corrections or repeated masking.
Invest a few extra minutes applying high-quality tape and smoothing it; the payoff is fewer mistakes, fewer materials wasted, and a finished result that looks deliberate and professional without the hidden costs.
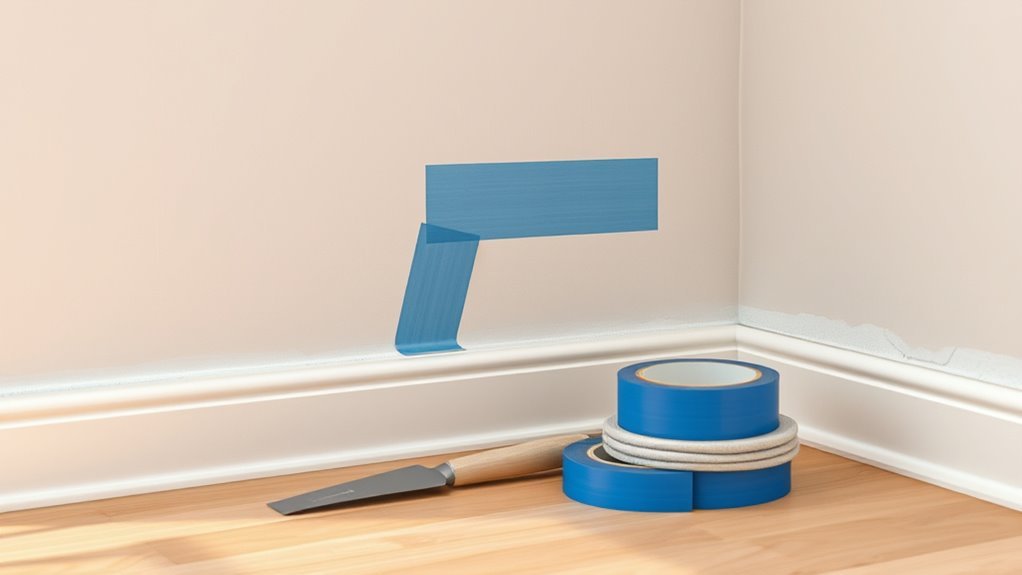
Essential Masking and Taping Tools You Need
Before you start taping, gather the right tools so the job goes quickly and the paint lines stay clean. You’ll need quality painter’s tape, a tape dispenser or handy roll, a sharp utility knife for trimming, a corner tool or plastic putty knife to burnish edges, and a step ladder for high spots.
Add drop cloths, a paintable caulk and caulk gun for gaps, microfiber cloths for dust, and a small brush for touch-ups. Consider color selection and wall textures when prepping—different surfaces and paint colors affect adhesion and reveal flaws, so adjust your tools accordingly.
Choose the Right Painter’s Tape for Each Job
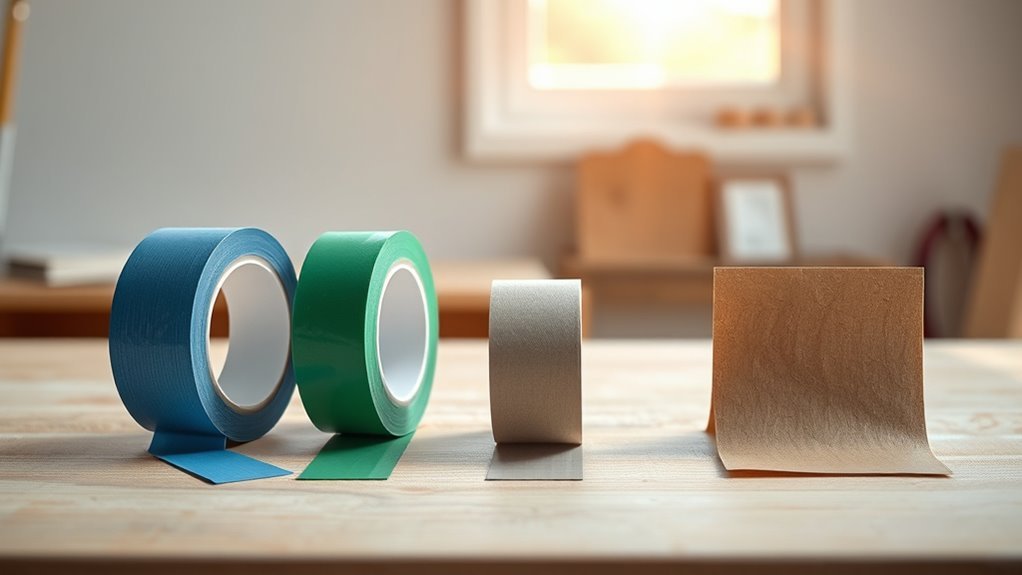
When you pick painter’s tape, match its adhesive strength and edge type to the surface and paint—use delicate-surface tape for freshly painted or textured walls, medium-adhesion tape for standard drywall, and high-adhesion tape for rough or exterior surfaces so you get crisp lines without damaging the substrate.
Check tape width: narrow for trim, wide for large areas. Look for UV-resistant options if you’ll leave tape for days.
Test a short strip to confirm clean adhesive removal and no paint lift.
After the job, follow local tape disposal rules; roll used tape sticky-side-in to minimize mess.
How Tape Adhesive Levels Affect Paint Bleed
Think about how tape adhesive strength changes how paint can bleed under the edge. You’ll need lower-tack tape on delicate surfaces and stronger adhesive on rougher ones to prevent lifting or residue.
Also match tape choice to your paint type—thin or water-based paints may seep more under high-tack tape than thicker, oil-based formulas.
Tape Adhesive Strength
How sticky should your painter’s tape be to keep paint lines crisp? You want tape adhesive strength that sticks firmly without peeling paint or leaving residue.
Choose medium-adhesion tape for clean edges on finished surfaces; high-adhesion works for rougher areas but risks surface damage. Press tape edges down firmly to seal and prevent bleed, then paint in thin layers to reduce seepage.
Remove tape at a 45-degree angle while paint is still slightly tacky for the cleanest line. Practice tape removal techniques on a hidden spot first so you learn timing and reduce mistakes.
Surface Compatibility Issues
Although different tapes can look similar, their adhesives behave very differently on surfaces, and that interaction determines how much paint bleeds. You’ll check surface compatibility before applying tape: smooth drywall, textured plaster, and trim need different material adhesion for a clean line. Test a small strip, press firmly, and remove after your paint’s tack time to see if seal holds.
Poor adhesion lets paint seep; too aggressive adhesive can peel finishes. Choose tape rated for the substrate and remove at the correct angle.
- Test adhesion on an inconspicuous patch
- Match tape to substrate porosity
- Remove slowly to avoid peel-through
Paint Type Interactions
When you pair tape with paint, the adhesive’s aggressiveness and the paint’s viscosity determine whether you’ll get a sharp edge or bleed. High-tack tape can lift delicate finishes, while low-tack tape can let wet paint wick underneath. You should test combinations on a scrap: glossy enamel and thin tape often peel, while latex with medium-tack tape gives cleaner lines.
Account for wall texture—rough surfaces need flexible, higher-adhesion tape to prevent seepage into crevices. Think color coordination: darker paints show bleed more, so choose tape and paint thickness accordingly.
Press tape edges firmly, paint in thin coats, remove at an angle.
Pick Tape Width for Trim, Baseboards, and Ceilings
Picking the right tape width matters because it determines how much protection you get and how clean your lines will be. Choose narrower tape for tight trim and wider tape for baseboards and ceilings to cover more area quickly.
You’ll match tape width to the job: 1/2″ or 3/4″ for delicate trim, 1″–1.5″ for standard trim, and 2″–3″ for baseboards and ceilings.
Consider color coordination to spot taped areas and check paint sheen — higher sheens show edges more, so tape choice affects cleanup.
Test on scrap wood, press edges firmly, and remove tape at a 45° angle.
Surface Prep: Cleaning Walls Before Taping
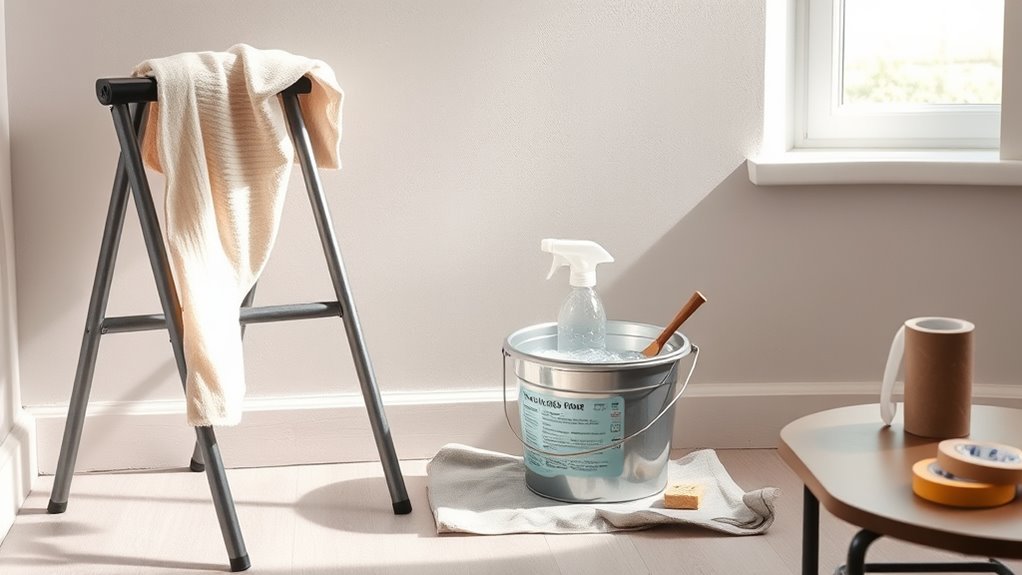
After you’ve chosen the right tape width and applied a few test strips, clean the walls so the tape will stick and your paint lines stay sharp.
Start by dusting with a microfiber cloth or dry broom to remove loose grit that ruins adhesive contact. Wipe stained areas with a mild detergent solution, rinse with clean water, and let dry fully.
For glossy paint sheen, use a degreaser sparingly to avoid dulling finish. For rough wall texture, brush gently to get into crevices.
Avoid wetting drywall seams; dry thoroughly before taping so the tape adheres evenly and prevents bleed.
Repair Cracks and Dents Before You Tape
Before you apply tape, find and clean any cracks or dents so the filler will adhere properly.
Use a suitable patching compound to fill imperfections, then sand smooth once it’s dry.
Finally, prime patched areas so the tape and paint stick evenly.
Identify And Clean Damaged Areas
Once you’ve decided where to tape, take a close look for cracks, dents, and loose paint so you can fix them first; these small flaws will telegraph through tape and paint if you skip repairs.
You should remove dust, cobwebs, and flaking bits so patches adhere and color blending stays consistent with the surrounding wall texture. Wipe with a damp cloth, use a soft brush in crevices, and let surfaces dry completely before taping.
Focus on edges and corners where tape meets the wall.
- Remove loose paint and debris
- Clean dust from crevices
- Check surface dryness before taping
Fill, Sand, And Prime Surfaces
Now that the surface is clean and dry, repair any cracks and dents so tape and paint sit smoothly. Scrape loose bits, especially after wallpaper removal, then apply lightweight spackling with a putty knife. Let it dry fully, following product instructions.
Sand feathered edges until flush, wiping dust with a damp cloth. For larger gouges, use joint compound in layers, sanding between coats.
Prime patched areas to seal and match absorbency, which helps with color blending when you paint. Prime prevents tape from peeling patched spots and guarantees an even final finish.
Proceed to tape only when primer is dry.
When and Why to Prime Before Taping
If your wall has raw drywall, patched areas, or stains, prime it before you tape so the joint compound and tape adhere consistently and you don’t trap moisture or contaminants under the tape.
You’ll see priming benefits immediately: uniform porosity, better adhesion, and reduced finish issues. Choose the right primer and plan your primer application for the surface type.
Apply thin, even coats and let them dry fully before taping. Prep and priming save time and rework.
- Improved tape adhesion
- Even joint compound drying
- Fewer stain bleed-throughs
Tape only after primer cures to touch and handle.
How Temperature and Humidity Affect Tape Performance
Priming sets the stage for good tape adhesion, but environmental conditions play a big role in whether that adhesion actually holds. You’ll want consistent temperature control: tapes stick best between about 50–90°F (10–32°C). Too cold makes adhesive stiff and peel; too hot can ooze adhesive or leave residue.
Monitor humidity levels, too — high humidity can weaken adhesion and lift tape, while very dry air can make edges brittle. Apply tape after surfaces reach stable room conditions and avoid rapid temperature swings.
For best results, wait until both temperature control and humidity levels remain steady during application and cure.
Protect Floors and Furniture With Drop Cloths and Plastic
Pick the right drop cloth material for the job—canvas for durability, plastic for lightweight coverage.
Secure cloth edges with painter’s tape so they don’t shift as you work.
Run plastic or cloth up and over furniture edges and tape seams to prevent splashes and dust from getting underneath.
Choose Drop Cloth Material
When you’re about to paint, choosing the right drop cloth material makes cleanup easier and protects floors and furniture from splatters and spills. You’ll pick based on surface, traffic, and how messy your project gets.
Canvas is durable and absorbs paint drips; plastic sheeting blocks moisture and’s great for furniture; paper or rosin paper is lightweight for low-risk areas. Match material to task so you don’t track paint or damage flooring.
Lay cloths flat, overlap edges, and smooth wrinkles to prevent trips. Consider reusable options for frequent projects to save money and reduce waste.
- Canvas for durability
- Plastic for moisture
- Paper for light jobs
Secure With Tape
Before you start painting, secure your drop cloths and plastic sheeting with painter’s tape so they won’t shift, curl, or let paint sneak underneath. Press tape firmly along baseboards and around furniture feet, overlapping seams to create a continuous barrier.
Use heavier cloths where traffic or drips are likely, and clear plastic where color contrast helps you spot stray paint.
When taping across changeovers, keep edges smooth to avoid tripping hazards.
After the final coat slightly dries but isn’t fully cured, peel tape back at a 45° angle for clean lines and easier tape removal without pulling paint or adhesive residue.
Protect Furniture Edges
Want to keep your floors and furniture spotless while you paint? You’ll protect furniture edges by moving pieces away from walls, covering legs and tabletops with drop cloths or plastic, and securing coverings with painter’s tape for reliable edge masking.
Focus on furniture protection at corners and raised edges where paint splatters snag. Use lightweight cloths for breathability and plastic for high-drip tasks, taping seams so nothing shifts.
For delicate finishes, add a layer of cardboard where tape might pull varnish. Check coverings periodically and replace damp or paint-soaked material to avoid stains and trapped moisture.
- Move and cover
- Tape seams tight
- Inspect often
Tape Straight Lines Along Ceilings and Crown Moulding
If you’re aiming for crisp paint lines at the ceiling or around crown moulding, proper taping is the key to a professional result. Start with a clean, dust-free surface and choose painter’s tape suited to wall texture to avoid tearing or seepage.
Press the tape firmly along the moulding edge with a plastic scraper for full adhesion. Mask off any adjacent fixtures.
When painting, roll away from the tape to minimize bleed. Remove tape while paint is tacky, pulling at a 45° angle to reveal a sharp line that complements the room’s paint sheen and overall finish.
Taping Baseboards for Crisp Lower Edges
Before you tape, wipe the baseboards to remove dust, grease, and loose paint so the tape will stick.
Apply painter’s tape along the top edge and press it down firmly, running a putty knife or your fingernail to seal the edge. That sealed edge keeps paint from bleeding and gives you a crisp lower line when you pull the tape.
Prep And Clean
Because crisp lower edges make a room look finished, you’ll want to tape your baseboards carefully before painting—clean them first with a damp cloth to remove dust, grime, and pet hair, then dry and inspect for loose caulk or chipped paint that’ll need repair. Prepare the surface so tape adheres and your color contrast and paint finish pop.
Remove outlet covers, sand rough spots lightly, and vacuum crevices. Wipe again if sanding created dust. Use a tack cloth for a final pass.
Apply painter’s tape only when fully dry to prevent lifting and guarantee sharp lines.
- Remove hardware and debris
- Sand and vacuum
- Final tack cloth pass
Seal The Tape Edge
Once the tape’s in place, seal its outer edge to prevent paint bleed and guarantee a razor-sharp line. Press firmly with a plastic putty knife or your fingernail, then run a damp finger or a coat of clear acrylic sealer along the edge to lock it down. This step controls color mixing at the boundary and improves paint durability where walls meet baseboards. Work in short sections, removing excess sealer quickly. Test on scrap to match techniques to your paint type.
| Tool | Method | Result |
|---|---|---|
| Putty knife | Press edge | Tight seal |
| Damp finger | Smooth | Clean line |
| Sealer | Brush on | Durable edge |
Mask Windows and Window Trim Without Damage
Want to protect your windows and trim without peeling paint or sticky residue? You’ll prep surfaces by cleaning dust and loose paint, then use low-tack window masking tape along glass edges and trim joints.
Apply decorative tape sparingly for visual guides, not as a sole seal. Press tape firmly without stretching to avoid lifting finish. For sealed corners, fold a small tab for easy removal later.
Remove tape within an hour of paint drying to prevent residue.
- Use low-tack window masking for painted trim
- Test decorative tape on an inconspicuous spot
- Pull tape back at a 45° angle slowly
Tape Around Door Frames and Hinges Cleanly
Before you tape, prep the hinges and surrounding trim by cleaning and, if possible, loosening the hinge screws so tape can lay flat.
Use short strips of painter’s tape and press them down firmly along the frame, smoothing toward the gap to seal paint out.
Protect the door edges by folding tape over thinly or using removable edge guards so paint won’t catch on the swing.
Prep Hinges And Surrounding Trim
When you’re taping around door frames and hinges, work deliberately to protect hardware and create sharp paint lines without removing every piece. You’ll prep hinges and surrounding trim by cleaning surfaces, checking trim alignment, and applying Hinge protection before tape.
Peel back paint build-up at joints so tape seats flat. Use short tape strips on hinges and longer ones along trim edges; press edges firmly. Mask recessed areas with folded tape for neat crossovers.
Remove loose caulk and re-caulk gaps that would show through paint. After painting, pull tape at a 45° angle while paint’s still slightly tacky.
- Clean surfaces first
- Check alignment
- Protect hinges
Use Painter’s Tape Technique
If you want crisp paint lines without removing hardware, use painter’s tape strategically around door frames and hinges. Press tape firmly along trim edges, folding small reliefs at hinge screws so paint won’t seep but you can still access screws if needed.
Run short strips perpendicular to hinges for extra coverage; remove any loose paper backing. Choose tape compatible with your finish and consider eco-friendly materials to reduce waste.
Think of color theory when planning contrast: tape placement preserves clean separations between trim and wall hues. Peel tape slowly at a 45° angle while paint is tacky to avoid lifting.
Protect Door Edges Carefully
You’ve already learned how to protect trim with painter’s tape; now focus on the door edges and hinges where paint mistakes are most visible. Tape door edges tightly, wrap hinge leaves, and use a thin putty knife to press tape for good surface protection. Peel slowly at a 45° angle after paint dries to avoid lifting. Remove hardware if possible, or cover with low-tack tape.
- Tape edges flush with the door jamb
- Mask hinge seams and screws carefully
- Check for gaps and re-tape as needed
Follow these steps and you’ll keep door edges clean and professional.
Tape Electrical Outlets, Switches, and Plates Safely
Before you start painting, turn off power at the circuit breaker and cover outlets, switches, and plates with painter’s tape to keep paint out of crevices and prevent accidental shorts.
You’ll prioritize electrical safety by using quality tape and checking that power is truly off with a tester.
Remove bulky outlet covers if you plan to paint behind them; label screws and keep outlet covers in a safe place.
For switches, leave a small tab of tape to allow easy removal.
Press tape firmly around edges, trim excess with a utility knife, and replace covers only after paint is fully dry.
Mask Complex Trim and Millwork Without Gaps
When masking complex trim and millwork, plan your approach and work in small sections so tape follows every contour without gaps. You’ll inspect profiles, remove dust, and choose narrow painter’s tape for tight joins. If old wallpaper removal left residue, clean thoroughly so tape bonds.
Press tape into grooves with a plastic putty knife, overlap ends slightly, and avoid stretching on curved sections. Protect adjacent surfaces from paint bleed while respecting delicate finishes and varied wall texture.
- Use low-tack tape for delicate moldings.
- Seal miters by burnishing tape edges.
- Replace tape before long jobs to maintain adhesion.
Taping Textured Walls vs. Smooth Walls
Masking detailed trim taught you to press tape into grooves and avoid stretching; textured and smooth walls demand similarly different handling. You’ll adapt pressure, tape type, and removal angle to the surface. Textured finishes need flexible, low-tack tape pressed into valleys to seal around decorative patterns; smooth walls accept standard medium-tack tape applied flat.
| Surface | Best Tape |
|---|---|
| Textured | Low-tack, flexible |
| Smooth | Medium-tack, standard |
| Decorative patterns | Conformable tape |
| Flat paint | Standard tape |
Test a scrap, press into texture, avoid pulling tape taut, remove slowly for clean edges.
Techniques for Inside Corners and Outside Corners
When you tape inside corners, press the tape firmly into the angle and smooth it toward the corner to prevent gaps.
For outside corners, fold or use corner tape to wrap the edge cleanly and protect the corner profile.
Both approaches keep paint lines sharp and reduce touch-ups.
Inside Corner Techniques
Although inside corners can seem tricky, you can get a crisp, paint-free edge by planning your tape placement and tool sequence. Position tape 1/16″ from the corner on the side you’ll paint, then press firmly with a plastic putty knife.
Use a folded paper towel to burnish the inner edge; that prevents bleed for sharp lines around wall patterns and coordinating color schemes.
Cut tape at the corner, overlap minimally, and avoid stretching.
Paint the taped side first, then remove tape while paint is tacky.
Practice on scrap boards to refine pressure and timing for reliable, professional results.
- Clean surface
- Firm burnish
- Remove while tacky
Outside Corner Methods
Inside corners demand careful taping, but outside corners call for a different approach to get clean, paint-free edges where two walls meet on the outside. You score the tape, fold it over the corner, and press firmly so paint won’t creep. Use a corner shield or flexible tape for sharp lines. Consider outdoor lighting when painting exterior corners, and protect nearby furniture placement inside to avoid drips.
| Tool | Action | Tip |
|---|---|---|
| Corner shield | Hold flush | Prevents bleed |
| Flexible tape | Fold over | Conforms to edge |
| Utility knife | Trim excess | Clean cut |
Work steadily, remove tape while paint’s tacky.
Join Tape Runs for Long Walls Seamlessly
If your wall is longer than a single roll of tape, overlap the ends by about 1/8 to 1/4 inch and press them down firmly so the seam stays invisible under paint.
When you join runs, align edges so patterns match, especially near decorative patterns or textured finishes, and avoid stretching tape. Smooth joints with a plastic card, then burnish toward the paint side to seal.
- Align overlaps to keep lines straight
- Trim excess with a sharp blade at a shallow angle
- Check alignment from different angles before painting
Work steadily; neat joins save touch-ups later.
Use Caulk and Back-Rolling to Prevent Paint Bleed
When you want crisp paint lines and no seepage, run a thin bead of paintable caulk along gaps between trim and wall, then smooth it with a wet finger or a caulk tool so it fills voids completely.
After the caulk dries, tape as usual, but focus on caulk application where gaps remain; it seals uneven surfaces that tape can’t.
When you paint, cut in with a brush then use the back rolling technique: roll lightly over brushed areas to force paint into texture and against tape edges, reducing the chance of bleed.
Let each coat dry fully before removing tape for best results.
Press Tape Edges for a Perfect Seal
After you’ve applied the tape, smooth along the edge with your fingertips or a plastic tool to seat it against the wall.
Press firmly and move steadily so the adhesive bonds evenly without gaps.
That even pressure is what prevents paint from bleeding under the tape.
Smooth Along Edge
Because paint will seep under any loose edge, press the tape down firmly along the length of the seam to create a tight, protective barrier. You’ll focus on edge smoothing and tape alignment as you run your fingertip or a plastic tool along the tape’s edge, removing air pockets and ensuring the adhesive contacts the surface completely.
Work from the center outward in short strokes, checking alignment against trims or corners. If the tape lifts, reposition and reseal immediately. Keep edges straight and taut so paint won’t bleed under them.
- Use a fingernail or plastic card
- Check alignment visually
- Smooth toward the edge only
Apply Even Pressure
Now press the tape edges evenly along the seam so you create a continuous, airtight bond that keeps paint from sneaking underneath. Use your thumb or a plastic putty knife, working from the middle outward in short strokes to avoid ripples.
Apply steady, consistent pressure—too light and paint bleeds, too hard and you risk stretching delicate decorative tape. Check corners and joints, pressing into gaps.
Let the adhesive set a few minutes before painting for a stronger seal. When paint’s dry to the touch, remove tape slowly at a 45-degree angle to ensure clean lines and smooth tape removal without tearing.
When to Remove Tape for the Cleanest Line
If you want the sharpest paint line, pull the tape while the topcoat is still slightly tacky—usually within 30 to 60 minutes of finishing—so the paint separates cleanly instead of peeling with the tape. You’ll reduce bleed and get clean lines by removing tape before full cure.
Score stubborn edges with a razor and lift slowly at a 45-degree angle. Keep consistent timing across walls to standardize Tape removal.
- Lift tape at a steady 45-degree angle
- Score if paint has set around edges
- Remove in sections to control tension
Finish any touch-ups once paint fully dries.
Remove Painter’s Tape Without Peeling Paint
You should pull tape off while the paint’s still slightly tacky to reduce the chance it comes away with the tape.
If the edge feels fully dry, score along the painted line with a utility knife before removing the tape to break the bond.
Move slowly and hold the tape back on itself at a low angle for the cleanest result.
Remove Tape While Slightly Wet
When the paint is still slightly tacky, pull the tape off at a 45-degree angle in a slow, steady motion so it separates cleanly from the wall without lifting paint.
You’ll use tape removal timing tied to a wet application: don’t wait until fully dry, or the edge can tear; don’t remove too wet, or paint strings.
Move slowly, keep the tape close to the surface, and stop if you feel resistance.
- Pull at a steady 45-degree angle
- Keep fingers clean to avoid smudges
- Remove within the wet application window for best results
Practice on a scrap surface to build confidence.
Score Along Painted Edge
Although it’s tempting to pull tape straight off, scoring the paint line first prevents the dried film from lifting and gives you a clean break between the wall and the tape.
You’ll run a sharp utility knife or single-edge blade along the tape’s painted edge, holding the blade at a shallow angle to follow wall texture without gouging. Work in short, controlled strokes and replace dull blades.
Score just before tape removal so the cut severs the dried paint film. Peel tape back slowly at a 45-degree angle.
Proper scoring makes tape removal predictable, protecting crisp lines and the underlying surface.
Fix Common Tape-Related Problems and Scuffs
If tape lifts paint or leaves sticky residue, don’t panic—most tape-related problems and scuffs are fixable with a few simple steps. You’ll assess damage first: check color contrast to see if underlying primer shows or paint pulled away, then choose repair method.
For residue, warm soapy water or a mild adhesive remover usually works; for lifted paint, gently sand the edge and feather with light pressure. When removing fresh tape, pull slowly at a 45° angle.
Prevent future issues by using the right tape and removing it within recommended time.
- Clean residue with warm soapy water
- Sand and feather lifted edges
- Use proper tape and timing
Quick Touch-Up Tricks After Tape Removal
Because tape removal can reveal tiny nicks or uneven edges, you’ll want a few fast touch-up tricks ready to restore a seamless finish.
First, lightly sand any raised ridges, wipe dust, and apply a thin coat of matching paint with a fine brush for precision.
For small gaps, use a paintable caulk sparingly, then smooth with a damp finger.
Blend edges by feathering paint outward to avoid stark color contrast.
Work quickly in consistent environmental factors—temperature and humidity affect drying.
Check results under natural light, and reapply a second thin coat only where needed for an invisible repair.
Best Practices for Two-Tone Walls and Sharp Color Breaks
Before painting a two-tone wall, you should thoroughly prep the surface by cleaning, sanding rough spots, and fixing any imperfections so the tape can stick evenly.
Press the tape down firmly and seal the edge with a thin line of the base color or clear caulk to prevent bleed-through.
Once the seal’s dry, paint the contrasting color with steady strokes for a crisp, sharp break.
Prep The Surface
When you’re aiming for two-tone walls or a crisp color break, prep the surface like you mean it: clean, repair, sand, and prime where needed so tape and paint can bond properly. Remove dust, grease, and loose paint; fill holes and sand edges smooth so your line reads sharp.
Consider color psychology when choosing hues—contrast and mood affect placement. If you prefer eco friendly paints, confirm adhesion on primed patches first.
Tape sticks best to a dry, even surface. Follow with careful layout and straight guides before applying tape.
- Clean and degrease surfaces
- Patch and sand transitions
- Prime glossy or repaired areas
Seal The Tape Edge
Once your surface is clean, smooth, and taped, seal the tape edge to keep paint from bleeding under the tape and to get a razor-sharp line. Press the tape firmly with a plastic putty knife or your fingernail so the adhesive bonds to the wall profile.
For two-tone walls, paint a thin coat of the base color over the tape edge, let it dry, then apply the contrasting color — the dried base seals gaps.
When removing tape, pull slowly at a 45° angle.
Store leftover rolls properly to avoid contamination; proper tape storage preserves tack and simplifies adhesive removal later.
Taping Around Wallpapered or Delicate Surfaces
If you’re working near wallpaper or other fragile finishes, take extra care with masking so you don’t tear paper or lift adhesive. Use low-tack painter’s tape, test a small hidden spot, and work slowly along seams.
When painting near wallpaper, use low-tack tape, test a hidden spot, and work slowly to avoid lifting.
If wallpaper removal is planned later, avoid aggressive adhesives now; label taped edges for easy pull.
For porous or patched areas, consider surface priming before painting to reduce soak-in and allow gentler tape removal.
- Choose low-tack tape and press gently along edges.
- Remove tape at a 45° angle while paint is slightly tacky.
- Keep seams protected with thin paper or plastic between taped sections.
Tape Strategies for Spray Painting vs. Rollers
When you’re prepping for spray painting versus using rollers, you’ll need different surface prep steps to control overspray and achieve clean lines.
Choose tape types that match the method—finer-edge or low-tack tapes for spray, and sturdier painter’s tape for rollers—and compare their adhesion and removal on your wall.
Focus on edge protection techniques like sealing tape edges and using drop cloths or masking paper to keep surrounding areas safe.
Surface Prep Differences
Because spray and roller application put paint on the wall in different ways, you’ll need different taping strategies. You should prep surfaces based on surface texture and paint compatibility: smooth walls need tighter seals for sprays, textured walls demand flexible tape to follow contours, and oil- or latex-based paints affect adhesive choice. Test a small patch to confirm adhesion and removal won’t harm the finish.
- Clean and dry the area thoroughly before taping.
- Press tape edges firmly for rollers; use overlapping barriers for sprays.
- Remove tape at a 45° angle while paint is tacky, not fully cured.
Tape Types Comparison
Although spray and roller jobs both need clean edges, you’ll choose different tapes: painter’s masking tape and low-tack film work best for rollers where you need crisp, straight lines and easy removal, while high-performance, flexible tapes and specialized spray mask films are better for sprays because they resist overspray and conform to contours. You should weigh Tape durability against ease of Adhesive removal: rollers favor lower tack to prevent paint bleed and residue; sprays need stronger hold and contouring. Match tape to surface and paint method, test a small area, and remove tape promptly after paint skins over.
| Tape Type | Best Use |
|---|---|
| Masking tape | Rollers |
| Low-tack film | Rollers |
| High-performance tape | Sprays |
| Spray mask film | Sprays |
Edge Protection Techniques
If you’re spraying, beef up your edges with high-hold tapes and overlap protective film; if you’re rolling, stick with low-tack tapes and straight-edge guides to avoid lift and bleed. You’ll choose based on paint delivery, wall textures, and selected color schemes.
For spray jobs, seal seams, brace corners with folded tape, and use heavier masking to stop mist.
For rollers, press tape firmly, score edges after drying, and remove slowly at a 45° angle. Match tape type to substrate—smooth, textured, or delicate—and test a small area to prevent damage and color bleed.
- Use high-hold for mist-heavy sprays
- Score edges on painted rollers
- Test on texture and color schemes
Eco-Friendly Masking Options and Cost-Saving Tips
When you’re prepping a room, choosing eco-friendly masking options saves money and reduces waste. You can use reusable drop cloths, low-VOC painter’s tape, and biodegradable masking paper to cut disposables.
Look for Eco friendly adhesives that stick well but peel cleanly to avoid repainting and material loss. Buy tape in bulk or offcuts from suppliers as Cost effective alternatives to single-use kits.
Reuse folded paper and clean tools after each job. Label and store leftover materials properly so you won’t repurchase supplies.
These small choices lower expenses and keep your project greener without sacrificing results.
Pro Tips for Working Alone vs. With a Helper
Whether you’re tackling a small touch-up or repainting an entire room, planning how you’ll work alone versus with a helper changes your approach. You’ll adjust tape placement for complex color schemes and account for different wall textures.
Working solo, prepare tools within reach, use longer tape strips, and plan breaks; you control pacing.
With a helper, assign one person to measure and mask while the other seals edges and checks alignment, speeding the job without sacrificing quality.
- Keep communication clear and concise.
- Use consistent tape tension for straight lines.
- Inspect seams together before painting.
Time-Saving Taping Tricks Pros Use
Because pros know tape is as much about technique as timing, they’ll use a few smart shortcuts to cut hours from a job without sacrificing precision. You’ll pre-measure runs, use multi-roll dispensers, and mask large sections first, saving re-taping. Pair tape choice with color psychology decisions and eco friendly paints to minimize touch-ups. Work from top down, press edges with a putty knife, and overlap tape at seams for faster removal.
| Task | Tool | Benefit |
|---|---|---|
| Long runs | Dispenser | Faster laydown |
| Corners | Pre-folded tape | Neat turns |
| Edges | Putty knife | Tight seal |
| Seams | Overlap | Clean pull |
| Cleanup | Microfiber | Quick finish |
Common DIY Taping Mistakes to Avoid
Although it seems simple, tape errors can ruin a paint job fast, so learn to spot and fix the usual mistakes before you start. You’ll avoid peeling paint by pressing tape firmly, aligning edges straight, and removing tape at the right angle while paint’s tacky.
Watch for gaps near trim, paint seepage, and uneven adhesion caused by dusty surfaces or wrong tape choice. Consider primer selection effects and how color matching behind trim can reveal mistakes if tape lifts.
Practice clean, consistent application and quick removal to protect crisp lines and save time.
- Gaps at corners
- Seepage under tape
- Tape lifting revealing mismatch
How to Test Tape on a Small Area First
Before you tape an entire wall, try a small, inconspicuous patch to confirm adhesion, paint compatibility, and easy removal. Choose a corner or behind furniture, press the tape firmly, then wait the manufacturer’s recommended dwell time.
Check tape durability by gently rubbing and stretching the edge; it should hold without tearing or lifting. Paint over the tape if you plan to and allow the paint to dry partially before removal.
Remove slowly at a 45-degree angle to evaluate adhesive removal—no residue or paint lift. If you see issues, switch tape type or surface prep before proceeding.
Storing and Reusing Leftover Painter’s Tape
If you’ve got leftover painter’s tape, don’t toss it—store and reuse it properly to save money and reduce waste. You’ll keep Tape durability high by protecting edges from dust and sunlight. Peel off any dried paint, press ends together to prevent unraveling, and label rolls by type and width.
Don’t toss leftover painter’s tape—clean edges, press ends, label rolls, and store upright to keep adhesive reliable.
Store them upright in a cool, dry box with other Decor storage items so adhesive stays reliable.
- Keep rolls sealed with a clip
- Separate delicate tapes from heavy-duty types
- Rotate older rolls forward to use first
Tool Checklist: What to Buy for Your First Taping Project
Now that your leftover tape is stored and ready, gather the right tools so your first taping job goes smoothly. You’ll need painter’s tape (choose quality for crisp lines), a utility knife with fresh blades, a 2–3″ angled sash brush, a plastic putty knife, and a microfiber cloth.
Add a short-handled roller and tray if you’ll paint large areas. Consider a small level or laser line for precision. Think about color psychology when selecting paint and tape visibility during prep.
Pick eco-friendly materials and reusable tools to reduce environmental impact. Keep purchases focused and practical for efficient work.
Estimate How Much Tape and Masking Material You Need
When you measure the room and plan each taped edge, you can quickly calculate how much painter’s tape and masking material you’ll need—measure windows, trim, door frames, and any areas you’ll protect. Add a few inches for overlaps and mistakes, then total the lengths to estimate rolls and sheets.
Then factor in drop cloths for floors and plastic sheeting for large furniture.
Consider extra tape if you need sharp lines for color blending or textured areas that demand more adhesion because of paint texture. Buy one extra roll and a spare sheet per room to cover touch-ups and errors.
- Measure every edge
- Add 10–15% spare
- Account for texture
When to Hire a Pro for Taping and Masking
Although you can handle basic taping on your own, hire a pro when complexity, tight schedules, or high-stakes results are on the line—think intricate trim, multiple colors with crisp lines, textured surfaces that need special tape, or rooms where mistakes mean costly repairs.
You’ll also want pros if the job pairs with wallpaper removal, extensive furniture moving, or structural fixes that complicate masking. A pro minimizes downtime, protects finishes, and guarantees straight seams and clean edges under pressure.
If you’re unsure about adhesion, paint bleed risk, or coordinating trades, bring in a pro to avoid costly touch-ups later.
Taping Cost Factors: DIY vs. Hiring Out
Because tape jobs vary so much in scope and skill, the price you’ll pay depends on more than just square footage. You’ll weigh labor, time, and materials: DIY saves money but costs your time and learning curve; pros charge for speed, expertise, and cleaner lines.
Consider complexity—trim work, multiple colors, and delicate surfaces increase costs. Also factor in color coordination planning and extra steps for furniture protection when painting near belongings.
- Complexity: intricate trim or multiple paint colors
- Time: your availability vs. pro efficiency
- Materials: specialty tapes and protective covers
Troubleshooting: Quick Fixes for Unexpected Issues
If you run into issues while taping before painting, don’t panic—most problems have quick fixes you can do yourself.
If tape wrinkles, smooth it with a plastic card and reapply small strips; replace sections that won’t lie flat.
If tape wrinkles, smooth it with a plastic card and patch with small strips; replace stubborn sections.
For paint bleed, lift tape slowly while paint is tacky and press a clean putty knife along the edge next time.
Fix gaps near trim with a thin bead of caulk and smooth it.
Match adjacent wall color coordination by testing swatches before sealing edges.
Choose eco-friendly masking tapes to reduce residue and protect surfaces without harsh removers.
Final Checklist Before You Start Painting
Once you’ve handled any tape wrinkles, paint bleed, or gaps, take a moment to run through a focused final checklist before you start painting. Confirm your tape edges are sealed, dust and debris are wiped away, and the surface texture is consistent so paint lays evenly.
Check paint is mixed for proper color blending and you’ve got test swatches ready. Make sure drop cloths, tools, and ventilation are positioned. Verify lighting to spot flaws as you work.
- Inspect taped seams and corners
- Test a small patch for color and texture
- Secure tools and safety gear
Frequently Asked Questions
Can I Tape Over Fresh Caulk or Should I Wait Longer?
Wait longer; you shouldn’t tape over fresh caulk. You’ll respect caulk curing time to avoid pulling or staining. For tape adhesion tips, press gently and test a small area once fully cured to guarantee clean removal.
Will Tape Adhesive Discolor Newly Painted Surfaces Long-Term?
You shouldn’t panic: you’ll usually avoid long-term surface discoloration if you remove tape promptly and use quality tape. Adhesive residue can occur, but gentle solvent or heat will lift it without harming the finish.
How Do I Tape Around Recessed Lighting or Ceiling Fixtures?
You’ll protect lighting fixtures by masking edges with thin painter’s tape, cutting precisely around fixtures, and using foil or paper shields. Peel tape removal slowly at a 45° angle after paint’s dry to avoid lifting or residue.
Is It Okay to Paint Tape Edges With the Same Paint for Extra Hold?
Yes—you can paint tape edges with the same paint for extra hold, but don’t overdo it; testing shows paint tape durability improves slightly. Use careful tape removal techniques—pull slowly at a 45° angle while paint’s tacky, not fully cured.
Can I Use Regular Household Tape in an Emergency Instead of Painter’s Tape?
You can, but regular household tape’s adhesive can bleed and peel paint; use it only as an emergency DIY shortcut. Test a small area, remove quickly, and prefer painter’s tape or alternative tapes designed for clean removal.
Conclusion
Think of your taped wall like a ship’s hull—every seam sealed keeps water (or paint) from seeping where it shouldn’t. You’ve measured, chosen the right tape, smoothed edges, and patched gaps; now your vessel’s ready to sail. As you lift the tape and admire clean lines, remember care and patience chart the course to a pro finish. Keep this routine, and every room you paint will weather the test.