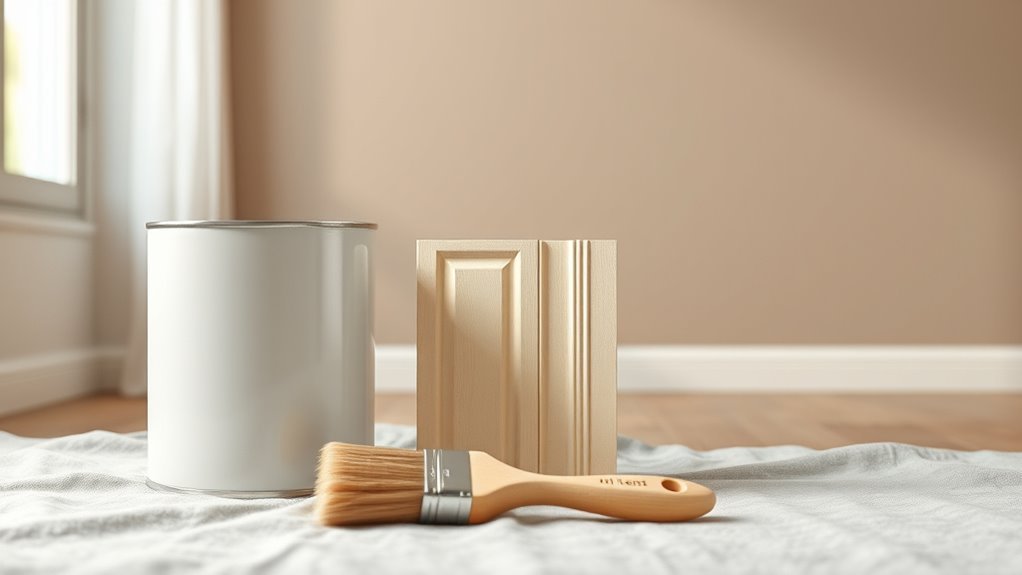
Is Interior Paint Latex or Oil Based?
Most interior paint today is latex (water‑based): it dries faster, cleans up with soap and water, and has much lower VOCs than traditional oil‑based options. You’ll usually pick latex for walls and ceilings because it hides imperfections, resists yellowing, and lets you repaint sooner. Choose oil‑based for trim, doors, or high‑wear surfaces when you need a harder, glossier finish. Keep going and you’ll find tips on testing, prep, and choosing the right product.
Quick Decision Guide: Latex vs Oil-Based Paint
If you want a fast, low-fuss choice for most interior walls, go with latex.
If you need a tough, smooth finish for trim or high-moisture areas, pick oil-based.
You’ll find latex dries quickly, resists yellowing, and cleans with water, making it ideal for frequent updates and following current color trends.
Oil-based gives that hard, durable surface for doors and cabinets but needs mineral spirits for cleanup and ventilated application.
Consider eco-friendly options: low-VOC latex formulas and improved oil-base alternatives reduce fumes.
Match performance to location, maintenance willingness, and environmental priorities before you start painting.
How to Choose: When to Pick Latex or Oil-Based?
When deciding between latex and oil-based paint, start by matching the paint’s strengths to the surface and your priorities. Consider durability, finish, and cleanup to suit your project and color palettes.
- Choose latex for quick drying, easy cleanup, and better flexibility on walls and ceilings; it’s ideal when you want varied paint textures without long waits.
- Pick oil-based for trim, high-wear areas, or when you need a hard, smooth finish that levels well; expect stronger fumes and longer curing.
- Match sheen to use: satin or eggshell for walls, semi-gloss for trim and moisture-prone rooms.
What Is Latex Paint and How It’s Made
When you hear “latex” paint, it just means the finish uses synthetic polymers rather than natural oils. It’s a water‑based formula where pigments, binders, and additives are suspended in water for easy application and quick drying.
Manufacturers mix and mill these components, then adjust viscosity, color, and performance with stabilizers and preservatives before packaging.
What “Latex” Means
Though the term “latex” might make you picture rubber gloves, in paint it refers to water-based formulations that use synthetic polymers—like acrylic or vinyl—as binders rather than natural latex. These polymers form a flexible film as the water evaporates, locking pigment and filler onto the surface.
You’ll notice how color theory and paint texture interact: pigments disperse in the binder, and sheen affects perceived hue.
Think about practical traits:
- Easy cleanup with water and lower VOCs.
- Faster drying and flexible film reducing cracks.
- Good adhesion on many substrates, but specific primers may be needed.
Water-Based Composition
You’ve seen that “latex” really means a water-based paint built on synthetic polymers; now let’s look at what those ingredients are and how they work together. You’ll find a binder (acrylic or vinyl acrylic) that forms the film, pigments that provide color and opacity, and additives that control flow, drying, and durability.
Water acts as the carrier, thinning the mix for application and evaporating as the paint cures. Because water-based formulas emit fewer VOCs and clean up with soap and water, they’re often considered more eco friendly than oil alternatives while still delivering strong adhesion and flexibility.
Manufacturing Process Overview
How’s latex paint actually made, and what steps turn raw chemicals into a ready-to-use can? You’ll see a controlled sequence: polymerizing binders, dispersing pigments, and adding additives for performance.
Manufacturers mix resin, water, and surfactants, then grind pigments for even color blending and opacity. They adjust viscosity and include agents for texture enhancement or flow.
Quality checks confirm pH, particle size, and sheen. Finally they filter, tint to specification, and package.
- Raw polymer and pigment mixing
- Additives, grinding, and quality tests
- Tinting, filtering, and canning
What Is Oil-Based Paint and How It’s Made

Now let’s look at oil-based paint and how it’s made. You’ll learn that it’s built on drying oils mixed with pigments and binding resins.
Manufacturers grind and mill those ingredients before blending in solvents and additives.
I’ll also explain common solvents and additives that control drying time, flow, and durability.
Oil Paint Composition
When you look closely at oil-based paint, you’ll find it’s a blend of pigment, drying oil, solvents and additives that together determine color, gloss, drying time and durability. You’ll notice pigments provide paint color and opacity, drying oils (like alkyds) form the durable film, and solvents control viscosity for application techniques.
Additives tweak flow, leveling, and mildew resistance. Consider these core components:
- Pigments — color, hiding power, UV stability.
- Oils & binders — film formation, hardness, yellowing potential.
- Solvents & additives — thinning, drying rate, brushability.
You’ll select formulations based on surface and performance needs.
Manufacturing Process Overview
Because oil-based paint combines pigments, drying oils (or alkyd resins), solvents and additives, making it requires controlled blending, grinding, and emulsification steps to guarantee uniform color, viscosity and film-forming properties. You’ll see manufacturers mill pigments, disperse binders, and adjust viscosity while monitoring particle size for reliable Color matching. Quality control tests film build and drying time. You can request eco friendly options with lower VOC alkyds or modified processes. Below is a quick process snapshot:
| Stage | Purpose | Outcome |
|---|---|---|
| Milling | Break pigment | Even dispersion |
| Blending | Combine raws | Consistent mix |
| Testing | QC checks | Spec compliance |
| Packaging | Fill cans | Labeled product |
Common Additives And Solvents
After blending and quality checks establish the base oil and pigment balance, manufacturers fine-tune performance by adding specific solvents and additives. You’ll see solvents like mineral spirits thin the formula for brushing or spraying, affecting Paint texture and drying time.
Additives control flow, gloss, mildew resistance, and leveling so your chosen Color palettes look consistent. Consider these common types:
- Solvents — adjust viscosity and open time for application.
- Resins and driers — build film strength, hardness, and cure rate.
- Functional additives — anti-skinning, dispersants, anti-foaming agents to stabilize storage and finish.
Finish and Appearance: Latex vs Oil-Based
Though both latex and oil-based paints can give walls a polished look, they differ noticeably in sheen, texture, and how imperfections show up. You’ll notice latex gives a flatter, more even finish that hides minor flaws and supports easier color matching.
Meanwhile, oil-based paints yield a smoother, glossier surface that accentuates brush strokes and fills imperfections. If you want a crisp, high-sheen trim or durable cabinetry, oil-based can deliver that sleek look.
For walls, ceilings, and eco-friendly options, latex is usually preferable — it balances appearance, lower VOCs, and simpler cleanup without sacrificing visual quality.
Drying, Curing, and Recoat Times
You’ll want to know the difference between drying (when paint feels dry) and curing (when it reaches full hardness) because they affect how soon you can handle or topcoat a surface.
Typical recoat windows vary—latex often allows a few hours, while oil-based paints usually need longer, sometimes a day or more.
Humidity, temperature, ventilation, and film thickness can all slow drying and extend curing times.
Drying Versus Curing
When you’re planning a paint job, know that drying and curing are different: drying is when solvents evaporate and the surface feels touch-dry, while curing is the slower chemical hardening that gives the film its full durability and resistance.
You’ll notice:
- Latex dries fast, aiding color blending and quick recoat, but cures slower for full toughness.
- Oil feels tackier longer, so texture techniques may need patience before sanding or glazing.
- Temperature and humidity affect both; lower temps and higher humidity slow drying and curing.
Respect curing times for longevity—touch-dry isn’t ready for heavy use or cleaning.
Typical Recoat Windows
Because recoat windows balance dry-to-touch times with full cure needs, you should plan recoating based on paint type, temperature, and humidity rather than only on how the surface feels.
For latex, typical recoat windows run 2–4 hours for low-VOC formulas and up to 24 hours for heavier coats. Oil-based enamels often need 24–48 hours. Follow manufacturer guidance and test a small area before committing.
Consider how your color options and sheen preferences affect visibility of imperfections and required coats—flat hides differently than semi-gloss.
Allow extra cure time before heavy use or cleaning to make certain of durability and adhesion.
Factors Slowing Drying
If humidity is high or temperatures are low, paint will take far longer to dry and cure than the label suggests. You’ll notice tacky finishes, slower recoat windows, and sometimes lingering odor when conditions aren’t right. Manage expectations by controlling environment and technique.
- Humidity: high moisture delays solvent evaporation; use dehumidifiers or wait for drier days.
- Temperature: cold slows chemical reactions; heat the space modestly to speed curing.
- Surface and product: porous substrates, heavy color palettes, or thick texture techniques increase absorption and drying time; thin coats dry faster.
Plan accordingly to avoid smudges and poor adhesion.
Durability and Wear: Where Each Holds Up Best
Although both latex and oil-based paints can look great at first glance, they wear differently under daily use and specific stresses. You’ll find latex resists fading and yellowing, so color blending stays truer over time and maintenance is easier in sunlit rooms.
It’s more flexible, tolerating slight movement without cracking. Oil-based finishes handle abrasion and scuffing better, offering a harder surface ideal for trim and high-contact areas. However, they can yellow and show wear differently.
Choose latex where color fidelity and easy touch-ups matter; pick oil-based when you need maximum surface toughness and long-lasting sheen.
Surface Compatibility and Adhesion Differences
When prepping a room, you’ll want to match paint type to the substrate: latex bonds well to most primed drywall, plaster, and previously painted surfaces, while oil-based formulas stick better to glossy trims, metal, and certain stained woods. You’ll consider adhesion factors and adjust Surface preparation and paint mixing accordingly.
Practical tips:
- Sand glossy surfaces and wipe clean to improve oil adhesion.
- Scuff or degloss before latex application; use compatible primers when switching types.
- Control viscosity during paint mixing to ensure even film build and grip.
Choose based on substrate, meant traffic, and compatibility—not habit.
Prep and Priming Rules for Each Type
Because prep and priming set the foundation for lasting results, you’ll treat latex and oil-based systems differently: clean and repair surfaces, sand gloss on trim, and choose a primer formulated for the paint type and substrate.
You’ll degrease oil-based old paint and use solvent-based primers for stubborn stains; for latex, wash with mild detergent and use high-adhesion latex or stain-blocking primers.
Feather edges, fill holes, and sand between coats for smooth adhesion. Let primers dry fully per label.
When planning color mixing, prime neutral or tinted to reduce coats. Preserve surface texture; avoid discussing roller techniques here to save application tips.
Application Tips: Brushes, Rollers, Sprayers, Thinning
If you want a professional finish, choose the right tool for the surface and paint. Match brushes to paint: synthetic for latex, natural-bristle for oil. Keep color matching samples handy and consider eco-friendly options with low-VOC formulations.
Choose the right tools and paints—synthetic brushes for latex, natural bristles for oil, and low‑VOC options.
- Brushes: angled sash for trim, wider for flat areas; clean per manufacturer.
- Rollers: nap length matches texture; use lint-free covers to avoid fibers.
- Sprayers: thin latex slightly for sprayers, follow nozzle specs; test spray first.
Don’t over-thin—thinning affects hide and drying. Work in consistent strokes and keep a wet edge for even coverage.
Cleaning, Stains, and Repainting Advice
After you finish painting, keep surfaces clean and address stains before repainting to guarantee lasting results. Wipe dust and grime with mild detergent for latex; use mineral spirits for oil-based stains, testing hidden spots first.
Treat grease, smoke, or ink with appropriate cleaners and a stain-blocking primer to prevent bleed-through. When repairing scuffs, sand lightly and match finish and texture options to blend repairs seamlessly.
Choose new color palettes thoughtfully to avoid frequent touch-ups. For repainting, clean, prime, and feather edges for smooth progressions.
Store leftover paint labeled for future spot repairs and color matching.
VOCs, Odor, and Indoor Air Quality
How will the paint you choose affect the air you breathe? You’ll notice odor differences: oil-based paints smell stronger and linger longer, while modern latex dries quicker with milder fumes.
Consider Environmental concerns and VOC reduction when picking finishes to protect vulnerable occupants.
- Choose low-VOC latex to cut indoor pollutants and minimize smell.
- Ventilate during and after painting to disperse lingering solvents.
- Use air purifiers and allow longer cure times for oil-based options.
You’ll balance durability and aesthetics with indoor air quality, making choices that reduce exposure and improve short- and long-term comfort.
Environmental Impact and Disposal Rules
Good indoor air matters, but so does what happens to leftover paint and used cans—improper disposal and high-VOC formulas can harm waterways, soil, and wildlife.
You should follow local environmental regulations when storing, transporting, or discarding paint.
Choose low-VOC or water-based latex to reduce impact, and never pour paint down drains.
For oil-based products, treat them as hazardous waste and use approved collection sites.
Label containers, seal lids, and consult municipal Disposal procedures for drop-off schedules and recycling options.
Best Uses by Room: Kitchens, Baths, Living, Bedrooms
For kitchens and dining areas you’ll want a paint that stands up to grease, scrubbing, and frequent cleaning, so you’ll often choose a durable, washable latex or a semi-gloss finish.
In baths and laundry rooms, pick a mildew-resistant, high-humidity formula—usually a semi-gloss or satin latex with added mold inhibitors.
We’ll compare how latex and oil-based options perform in these moisture- and stain-prone spaces so you can pick the best fit.
Kitchen And Dining
Even though kitchens and dining areas see heavy use and frequent cleaning, you don’t have to sacrifice appearance for durability. You’ll want paint that balances color psychology with paint durability so meals feel inviting and surfaces resist scuffs and stains.
Choose semi-gloss or satin latex for easy cleaning; oil’s durability isn’t worth the fumes and yellowing indoors.
- Pick warm hues to stimulate appetite and socializing.
- Use washable finishes where splatters and fingerprints occur.
- Test samples under your lighting to ensure true color and sheen.
This approach keeps rooms welcoming, practical, and low-maintenance.
Baths And Laundry
Need a finish that stands up to moisture and repeated scrubbing? In baths and laundry rooms you’ll want a durable, mildew-resistant latex with semi-gloss or satin sheen for easy cleaning.
Latex handles humidity better than traditional oil, dries faster, and resists yellowing. Use proper priming over damp-prone surfaces and consider oil-based when sealing stain-prone areas, but expect longer cure and stronger odor.
For cohesive results, do careful color matching to coordinate cabinets, tiles, and trim.
Texture techniques like light stippling or eggshell finish on ceilings can hide imperfections and improve wear where steam and splashes concentrate.
Trim, Doors, and Cabinetry: When Oil Still Makes Sense
Although water-based paints have come a long way, oil-based finishes still make sense on trim, doors, and cabinetry when you want the hardest, most durable surface and the smoothest leveling for fine details. You’ll favor oil when repairing antique mouldings that reflect historical preferences or when demanding ultra-smooth, brushstroke-free results.
Consider eco friendly options like low-VOC alkyds if you worry about fumes.
Think about:
- High-traffic doors needing resistance to dings and frequent cleaning.
- Cabinet faces where sheen uniformity and self-leveling matter.
- Trim with intricate profiles where brush marks must disappear.
Choose based on performance needs.
Cost: Upfront Price, Labor, and Long-Term Value
Choosing oil for durability or latex for ease will also affect what you pay now and over the life of the paint job. You’ll find latex usually costs less per gallon, dries faster, and cuts labor hours.
Oil primers and enamels raise material and labor expenses but can extend intervals between repaints. Historical trends show latex dominating residential interiors for decades, lowering long-term costs through simpler application and cleanup.
If you need exact color matching on trim or restorations, oil can be pricier to match but sometimes required for authenticity. Balance upfront price, labor time, and projected repaint frequency for best value.
Common Problems and How to Fix Them
When paint starts to peel, blister, yellow, or show lap marks, you’ll want to identify whether the issue stems from the substrate, the product, or the application so you can fix it correctly the first time. Check cause, then act:
- Surface prep: sand, clean, and prime porous or glossy surfaces; poor adhesion causes peeling.
- Product choice: mismatched coatings (oil over latex) or bad Color mixing causes streaks; use compatible primers and proper mixing ratios.
- Application and storage: apply at recommended temps and film thickness; correct Paint storage prevents contamination and spoilage.
Test a small patch before full repairs to confirm success.
How to Test If Existing Paint Is Latex or Oil-Based
Before you repair or repaint, you’ll want to know whether the existing coating is latex or oil-based so you pick compatible primers and topcoats.
Rub a cotton ball soaked in denatured alcohol or rubbing alcohol over a small, hidden area; if paint softens or comes off, it’s latex.
If alcohol does nothing, try mineral spirits—if that dissolves it, it’s oil-based.
Note glossy layers may resist tests; abrade a tiny spot with sandpaper first.
Record results and any paint brands found on labels to guide replacements.
For accurate color matching, bring a sample to the store rather than guessing.
Decision Checklist: Pick the Right Paint for Your Project
Although you’ve already tested the existing finish, you still need a clear checklist to match paint type, sheens, and primers to the surface and use—so start by listing substrate (drywall, wood, metal), room conditions (moisture, traffic), and desired durability and appearance.
Use this quick guide to decide latex vs oil, primer need, and paint sheen while considering color matching.
- Assess surface: porosity, previous finish, rust or stains; choose primer type accordingly.
- Match use: high-moisture or high-traffic needs durable latex or oil for trim; pick satin or semi-gloss for cleanability.
- Finalize color matching under actual lighting before buy.
Frequently Asked Questions
Can I Mix Latex and Oil-Based Paints Together?
No, you shouldn’t mix latex and oil-based paints together because they won’t bond properly; poor paint adhesion and conflicting drying times will cause peeling, cracking, and uneven finish. Prime and use compatible products instead.
Do Oil-Based Paints Yellow Over Time on Light Colors?
Yes — oil-based paints tend to yellow over time on light colors. You’ll notice reduced color retention as varnish-like binders oxidize; choose high-quality formulations for better paint durability and minimize noticeable yellowing.
Are There Water-Based Alternatives to Traditional Oil-Based Paints?
Think of them as kinder cousins: you’ve got eco friendly options like waterborne alkyds and high-quality acrylics that don’t sacrifice finish; you’ll compare durability comparisons showing improved wear, faster drying, and easier cleanup than traditional oils.
How Do Climate and Humidity Affect Paint Performance?
Climate impact alters drying times and expansion; humidity effects cause blistering, mildew, and adhesion loss. You’ll choose formulations and timing accordingly, and you’ll ventilate, control moisture, and use suitable primers to guarantee durable, even finishes.
Can Pets or Children Be Affected Differently by Paint Types?
Yes — you’ll notice paint toxicity and health risks differ: oil-based paints emit stronger fumes and VOCs, so they’re riskier for kids and pets; latex is milder, but you should still ventilate and avoid contact or ingestion.
Conclusion
You’ve got the info to pick wisely, so trust your gut: measure twice, cut once. If you want easy cleanup, faster drying, and less odor, go latex; if you need tougher, smoother finishes for trim or high-wear areas, choose oil-based. Test old paint before recoating, consider ventilation and curing time, and balance upfront cost versus long-term durability. With the right choice, your paint job will look great and last.