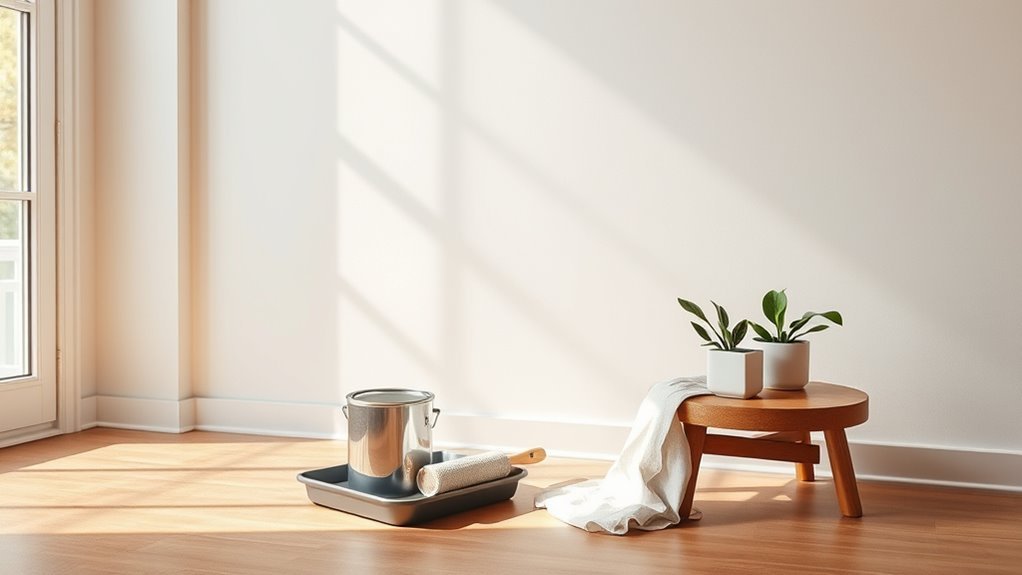
Is It Okay to Use Exterior Paint Inside?
You can use exterior paint inside in a few limited cases, but you’ll need strict ventilation, PPE, and careful prep because exterior formulas often have higher VOCs, biocides, and UV additives that can off‑gas, smell, or irritate. Use it only on trim, doors, or utility rooms where durability matters, avoid bedrooms and food areas, prime bare surfaces, and run fans for days. Keep these precautions in mind and you’ll learn when it’s appropriate and when to choose interior paint.
Quick Answer: Can You Use Exterior Paint Inside?
Yes — you can use exterior paint inside, but you shouldn’t do it routinely. If you need a quick fix, it’ll adhere and resist moisture, but fumes, stronger biocides, and different VOC profiles mean you’ll want to limit indoor use.
Yes — exterior paint works indoors for quick fixes, but fumes, stronger biocides, and VOCs mean limit use.
Consider environmental impact: exterior formulas can off-gas longer and aren’t optimized for indoor air quality, so ventilate thoroughly.
Color matching can be tricky because exterior sheens and pigments react differently under indoor light; test a small area first.
For occasional, temporary, or utility spaces it’s acceptable, but for living areas choose interior paints designed for safety and comfort.
What This Guide Covers
When you’re deciding whether to use exterior paint indoors, this guide walks you through the key differences, risks, and situations where it’s acceptable so you can make an informed choice. You’ll get clear explanations of formulation, durability, VOC concerns, and odor so you can weigh pros and cons fast.
Practical sections show when exterior paint might be fine for high-moisture rooms or trims, and when to stick with interior formulas. You’ll also find tips on matching outdoor landscape hues with interior paint color choices, surface prep, ventilation, and cleanup.
Plus, there’s a safety checklist and recommended alternatives.
Why Exterior and Interior Paints Differ
Because they’re formulated for different environments, exterior and interior paints have distinct ingredients and performance priorities that affect durability, odor, and safety.
You’ll notice exterior formulas emphasize weather resistance, flexible binders, and tougher finishes to handle moisture and UV, which helps maintain color consistency outdoors.
Interior paints focus on low odor, easier cleaning, and smoother application for living spaces.
If you’re concerned about indoor air quality, look for eco-friendly options specifically labeled for interiors rather than assuming exterior low-VOC claims suffice.
Choosing the right type preserves finish, minimizes smells, and reduces potential indoor exposure risks.
Key Exterior Paint Ingredients to Watch Indoors (Biocides, UV Stabilizers)
Although exterior paints give walls long-lasting protection outdoors, some ingredients can cause problems inside if you use them indoors. You should watch for biocides and UV stabilizers that remain active indoors, since they can off-gas or accumulate dust.
Check product labels and research components; manufacturers sometimes list fungicides or chemical UV absorbers. Consider environmental impact and seek products with transparent safety data or third-party paint certification that covers indoor use.
If unsure, contact the maker or choose an interior-rated alternative. By being selective, you protect occupants and indoor air without sacrificing durability or aesthetics.
VOCs: Exterior vs. Interior Paint
If you’re comparing exterior and interior paints, VOC levels are one of the clearest differences to check. Exterior formulas often contain higher VOCs to withstand weather, so you’ll notice stronger solvents that aren’t ideal for enclosed spaces.
For paint safety, choose low‑VOC or zero‑VOC interior alternatives when working inside; they reduce chemical exposure while still providing good coverage.
Be aware that switching from exterior to interior paint can affect color matching because sheen and binder differences alter perceived hue. If exact color is essential, test samples side‑by‑side under your indoor lighting before committing to a full coat.
Odor and Off‑Gassing Risks Indoors
When you bring exterior paint indoors, you need to watch VOC emissions because they can linger in closed spaces and affect air quality.
You’ll often notice stronger, longer-lasting odors from exterior formulations compared with interior paints.
Ask how long the smell persists and whether you can ventilate or use low‑VOC alternatives to reduce exposure.
VOC Emission Concerns
Because exterior paints are formulated for durability rather than indoor air quality, their solvents and additives can release volatile organic compounds (VOCs) that linger and produce strong odors when you bring them inside or use them in enclosed spaces.
You’ll notice that paint durability and color matching don’t offset health risks: VOCs can trigger headaches, irritation, and respiratory problems, especially in poorly ventilated rooms.
If you’re considering exterior paint indoors, check VOC ratings on labels, choose low‑ or zero‑VOC alternatives when available, and ventilate thoroughly during and after application.
Use personal protective equipment and keep sensitive occupants away until levels drop.
Prolonged Paint Odors
How long will that sharp, chemical smell from exterior paint hang around inside your home? It can linger hours to weeks depending on VOC content, ventilation, humidity, and temperature.
You’ll notice stronger off‑gassing with darker paint color and when large surfaces get coated.
Improve air exchange: open windows, run fans, and use air purifiers with activated carbon.
Heat speeds curing but raises fumes; balance warmth and ventilation.
Clean application tools promptly to avoid lingering solvent odors.
If anyone has respiratory sensitivity, consider temporary relocation until odors fade or choose low‑VOC interior alternatives for future projects.
Indoor Air Quality and Health Implications
Although exterior paint can refresh a room’s look, applying it indoors can release volatile organic compounds (VOCs) and particulates that degrade your home’s air quality and may trigger headaches, respiratory irritation, or worse for sensitive people.
You’ll want to remember exterior formulations prioritize outdoor aesthetics and weather resistance over low emissions. Those additives and biocides can linger, off-gassing for days or weeks, and aggravate asthma, allergies, or chemical sensitivities.
Improve ventilation, use a respirator while painting, and choose low-VOC or interior-grade alternatives when possible.
If symptoms persist, stop work, get fresh air, and consult a medical professional.
Adhesion on Drywall, Trim, and Wood
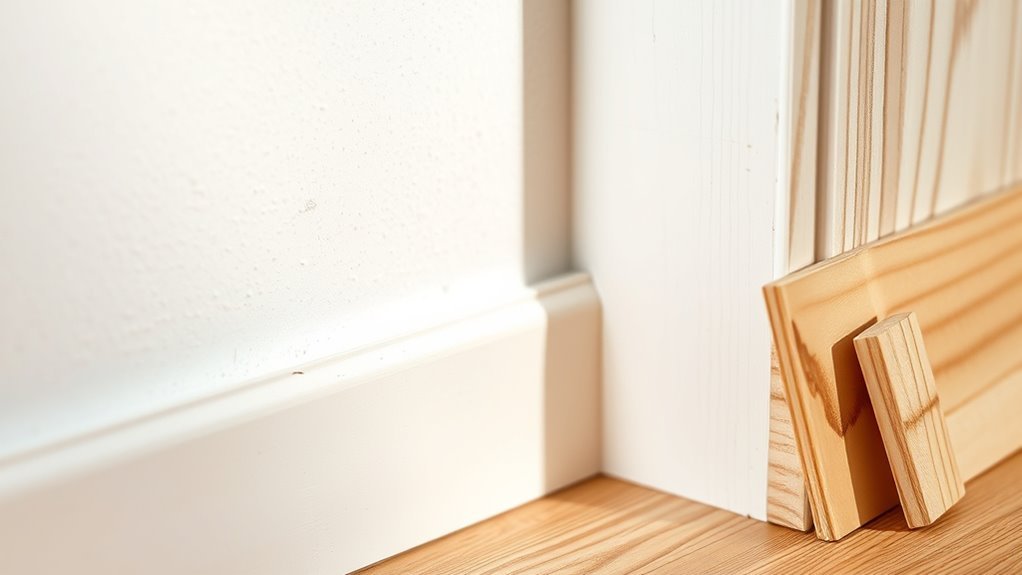
Before you use exterior paint indoors, you’ll need to get drywall prepped so the finish will stick and look smooth. Check for dust, glossy primer, or chalky surfaces and sand or prime as needed to promote adhesion.
For trim and wood, clean, sand, and use the right bonding primer so the paint won’t peel or blister.
Drywall Surface Preparation
When you’re prepping drywall, trim, and wood for exterior paint, good adhesion starts with clean, sound surfaces—remove dust, chalk, loose paint, and any mildew so primers and topcoats can bond properly.
Sand glossy spots, fill holes, and wipe with a damp cloth; let surfaces dry fully.
Prime patched areas with a compatible primer to seal porous drywall and prevent flashing.
Test a small patch to confirm adhesion before committing.
Keep your color preferences in mind but finish preparation first.
Store leftover primer and paint correctly—proper paint storage preserves performance and avoids contamination that can ruin adhesion.
Trim And Wood Bonding
If you want paint to stick and last on trim and wood, start by making sure surfaces are clean, dry, and sound—remove old loose paint, sanding gloss to dullness, and scrape out cracks or rot so filler and primers can do their job.
Match primer type to substrate—use oil-based for knotty pine, high-adhesion for sanded gloss, or shellac for stain blocking.
Sand between coats for smooth paint texture.
When choosing finish, consider color coordination with walls and hardware.
Apply thin, even coats and allow full cure before handling.
Proper prep and compatible products guarantee durable bonding and a professional look.
Drying and Curing Behavior Indoors
Because indoor conditions limit airflow and humidity can stay higher than outdoors, you’ll notice exterior paints dry on the surface faster than they fully cure. Drying removes solvents and moisture, while curing is a slower chemical process that strengthens the film.
You’ll want good ventilation and moderate temperatures so curing proceeds without trapping odors or VOCs, reducing environmental impact.
Expect tackiness, longer recoat windows, and potential blush in humid rooms.
Also, watch color matching: wet vs. cured appearance can differ, so test swatches and allow full cure before final assessment.
Patience prevents premature wear and finish issues.
When Exterior Paint’s Durability Helps Inside
You can take advantage of exterior paint’s tougher formulation indoors where wear resistance and moisture protection matter. Use it in entryways, bathrooms with good ventilation, laundry rooms, and mudrooms where scuffs and humidity challenge finishes.
Choose a paint color that complements interiors but also hides dirt; exterior lines often offer durable sheens that stand up to scrubbing.
Test adhesion on a small patch, and be mindful of stronger odors during curing.
Use proper application tools—rollers and brushes rated for enamel or exterior coatings—and ventilate well.
That way you get longevity from an exterior product without sacrificing indoor appearance.
When Never to Use Exterior Paint Indoors
Don’t use exterior paint in high-humidity rooms like bathrooms or laundry areas, because it can trap moisture and promote peeling or mildew.
Avoid it in children’s bedrooms and playrooms since some formulations may emit more VOCs than interior-rated paints.
And never apply exterior paint to food preparation surfaces where safety and cleanability matter most.
High-Humidity Areas
Ever wondered if exterior paint can survive a steamy bathroom or a soggy laundry room? You shouldn’t assume exterior durability equals indoor success. Exterior formulas prioritize weather resistance and UV protection, not constant indoor moisture control. In high-humidity areas they can trap moisture, peel, or encourage mold.
| Surface | Risk |
|---|---|
| Bathroom walls | Peeling, mildew |
| Laundry room | Trapped moisture |
| Shower surrounds | Adhesion failure |
Instead, choose paints labeled for bathrooms or high-humidity spaces with mildewcide and breathable finish. That protects surfaces and your indoor air quality.
Children’s Rooms
When should you never choose exterior paint for a child’s room? You shouldn’t if hazards outweigh outdoor durability benefits. Exterior formulas can have stronger solvents and additives that off-gas, altering the paint color and indoor air quality.
Consider these specific risks:
- Lead-containing older exterior paints present ingestion risk for toddlers.
- Strong VOCs from exterior primers or sealers can irritate lungs and eyes.
- Textured exterior finishes trap dirt, allergens, and are hard to clean.
- Exterior mildew inhibitors and anti-corrosion chemicals aren’t tested for prolonged indoor exposure.
Choose low-VOC, interior-rated options to safeguard health and preserve intended paint color.
Food Preparation Surfaces
Because food prep areas come into direct contact with meals and utensils, you shouldn’t use exterior paint on countertops, cutting boards, or inside cabinets where food is stored or prepared. Exterior formulas can contain mildewcides, UV stabilizers, and solvents that aren’t certified for food-contact surfaces.
If you want a durable finish, choose products labeled safe for countertops or apply certified topcoats over appropriate primers.
Also consider how paint color and paint sheen affect cleaning: glossy, nonporous sheens resist staining and wipe clean better than flat finishes.
Always follow manufacturer safety data sheets and local regulations to protect health and avoid contamination.
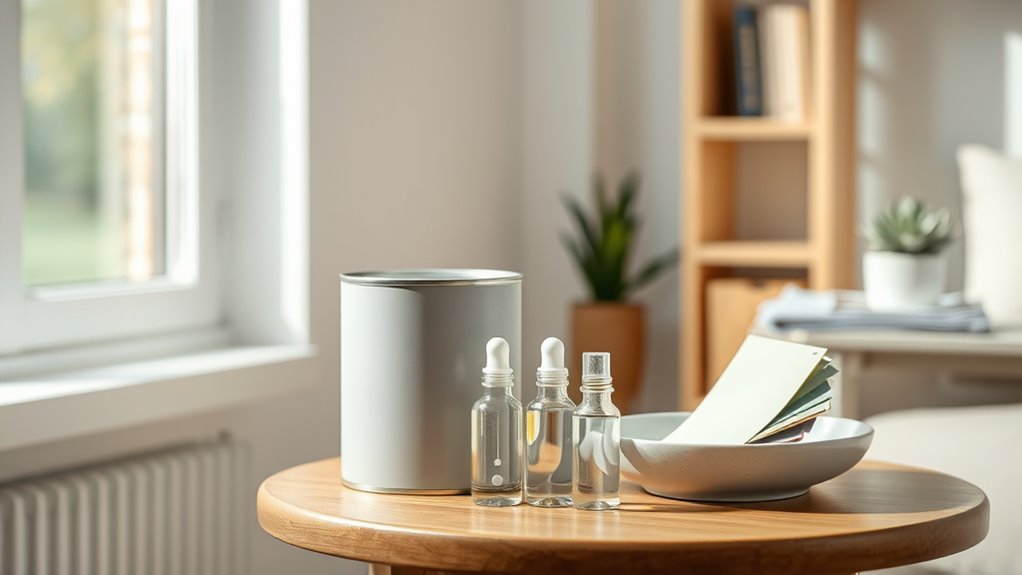
Label Checklist: What to Look for Before Using Exterior Paint
Before you open a can of exterior paint, check the label for surface compatibility, drying time, recommended number of coats, and temperature or humidity limits so you won’t be caught off-guard by poor adhesion or slow curing.
You should also note VOC levels and any warnings about indoor use, since environmental impact ties to paint manufacturing choices. Look for washability, mold resistance, and whether the formula contains biocides.
Finally, confirm cleanup requirements and recommended primers.
- VOC content and indoor-use warnings
- Surface types and primer needs
- Drying time and coat count
- Cleanup and disposal instructions
How to Test Exterior Paint on a Small Indoor Sample
Start by preparing a small, clean test surface like a piece of scrap drywall or wood so you get a realistic sample.
Apply a small paint patch and smooth it evenly to see how it covers and levels.
Let it dry fully and check for tackiness and any lingering odor before deciding to use the paint indoors.
Prepare Test Surface
Want reliable results when testing exterior paint indoors? You’ll prepare a small, controlled surface to check exterior durability and paint blending.
Clean and dry the area; remove grease, dust, and loose finish. Lightly sand glossy spots so the sample adheres.
Tape off a 3×3 inch square to contain the test and label it with date and product.
Use a hidden or low-traffic spot like inside a closet or behind furniture.
Monitor for odor, adhesion, and color shift over several days.
Record observations and photos to compare against interior-grade references before deciding.
Apply Small Paint Patch
Once you’ve prepared the test square, apply a 2–3 thin coats of the exterior paint so you can judge coverage, drying time, and finish without overwhelming the substrate. Use a small brush or mini-roller, letting each thin coat level before adding the next. Watch for color consistency between coats and against your desired indoor sample under the room’s lighting.
Check edges for adhesion and run marks; smooth any drips promptly. Note how the sheen matching compares to nearby interior surfaces—glossier exterior paints may reflect light differently. Label the patch with paint name and date so you can compare results later.
Evaluate Drying And Odor
How quickly does the exterior paint dry in your indoor conditions, and how strong is the odor while it’s curing? Test a small patch on foam board, note tack-free time, and sniff intermittently over 24–72 hours. Track these factors:
- Dry time: record minutes/hours until touch-dry and fully cured.
- Odor intensity: rate from mild to overpowering; ventilate and retest.
- Surface feel: check for tackiness or film irregularities affecting exterior durability indoors.
- Color matching: compare wet vs. dry hue under room lighting and at different angles. Use results to decide if you’ll proceed.
Preparing Interior Surfaces for Exterior Paint
Before you bring exterior paint indoors, get the surfaces clean, dry, and sound so the coating adheres and lasts. You’ll wash away dirt, sand loose flakes, and fix damaged spots so moisture won’t trap under the finish. Consider color theory for how exterior hues read inside and note paint branding for specs and VOCs. Test a small patch, sand between coats, and verify good ventilation while it dries. Use compatible caulk on gaps and wipe dust before painting so adhesion’s reliable.
| Step | Task | Why |
|---|---|---|
| 1 | Clean | Removes contaminants |
| 2 | Repair | Fixes substrate |
| 3 | Sand | Promotes adhesion |
| 4 | Test | Checks color & finish |
| 5 | Ventilate | Speeds drying |
When to Use an Interior Primer First
If you’re painting with exterior-grade paint inside, start with an interior primer on new or bare surfaces to guarantee proper adhesion.
Use a stain- and odor-blocking primer when marks, tannin bleed, or smells could come through the topcoat.
And prime when you’re making a drastic color change so the new shade covers evenly with fewer coats.
New Or Bare Surfaces
When you’re painting new or bare surfaces, start with an interior primer to guarantee proper adhesion and even coverage. You’ll seal porous drywall, block minor imperfections, and create a uniform base so topcoats perform as designed.
Before priming, do color testing on a small patch to confirm hue after drying and avoid surprises during paint mixing. Choose a primer formulated for interiors and compatible with your finish coat.
- Seal pores for consistent absorption
- Improve topcoat adhesion and durability
- Reduce number of finish coats needed
- Make certain of accurate color and sheen results
Stain Or Odor Blocking
Because stains and lingering smells can bleed through and ruin a fresh finish, you’ll want to start with a stain- and odor-blocking interior primer to lock them in. Choose a solvent- or shellac-based option for nicotine, water stains, pet odors, or tannin bleed.
Apply evenly and sand lightly for texture matching before topcoating. A good primer improves adhesion and prevents discoloration that could show through, even with light exterior formulas used inside.
For subtle shifts, use color blending techniques by tinting primer toward the topcoat to reduce the number of finish coats and produce a uniform, durable result.
Drastic Color Changes
Although a bold shift can refresh a room, you’ll usually need an interior primer first to block old color and guarantee true coverage. When you’re moving from dark to light or switching among contrasting Color palettes, primer evens tone, reduces coats, and prevents bleed-through. Exterior paint inside may hide, but it won’t replace proper priming.
Check Paint warranties—using wrong products can void them. Follow these steps:
- Clean and sand surfaces.
- Apply stain-blocking primer to intense colors.
- Let primer fully dry before topcoat.
- Use interior-rated paint for finish and warranty compliance.
Application Tips to Reduce Fumes and Odor
If you want to keep fumes and odor to a minimum while applying exterior paint indoors, focus on ventilation, low-VOC products, and application methods that limit airborne particles.
Start by choosing low- or zero-VOC exterior formulations and confirm color matching with small test patches to avoid repeats.
Opt for roller or brush application rather than aerosol sprayers to reduce mist.
Use thin, even coats to speed drying and cut odor time.
Seal containers immediately and dispose of rags properly.
Wear a fitted respirator rated for organic vapors when needed, and limit occupancy of the painted room until smells subside.
Ventilation Strategies During and After Painting
You’ll want to keep windows and doors open to guarantee steady fresh airflow while you paint.
Use fans and window exhausts to direct fumes outside and speed drying.
After painting, keep ventilation running until the smell fades and the room feels fully aired.
Ensure Fresh Airflow
How will you keep fresh air moving while painting and as the finish cures? You’ll open windows and doors to create cross-breezes, check that fans don’t blow fumes into occupied rooms, and rotate between painting areas to let air clear. Consider temporary schedules so occupants avoid freshly painted spaces until odors dissipate.
Remember that color matching and sheen options don’t change ventilation needs. Follow these steps:
- Open opposing windows for cross-ventilation.
- Use window and ceiling fans to direct air outward.
- Work in shorter sessions to allow airing periods.
- Keep HVAC dampers set to introduce fresh outdoor air.
Use Venting Equipment
Why not bring portable venting tools in to speed odor removal and keep fumes away from occupants? You should position box fans in windows to push contaminated air out while bringing fresh air in elsewhere. Use a window exhaust fan for continuous extraction and consider a HEPA air scrubber if odors persist.
Keep doors closed to limit spread and seal vents to prevent HVAC contamination. Ventilate during and for 48–72 hours after painting; longer if you used exterior paint with stronger solvents formulated for outdoor durability and weather resistance.
Always follow fan manufacturer guidance and monitor comfort and odor levels.
PPE: What to Wear When Using Exterior Paint Indoors
Because exterior paints contain stronger solvents and additives than most interior formulas, you should wear proper personal protective equipment whenever you use them indoors. You’ll protect yourself while preserving exterior aesthetics and weather resistance qualities on trim or patched areas. Follow these essentials:
Because exterior paints have stronger solvents, wear proper PPE indoors to protect yourself and preserve trim finishes.
- NIOSH‑approved respirator with organic vapor cartridges.
- Chemical-resistant gloves (nitrile or butyl) and long sleeves.
- Safety goggles or a full-face shield to guard against splashes.
- Disposable coveralls and shoe covers to avoid tracking contamination.
Fit and replace PPE per manufacturer guidelines, and handle containers carefully to minimize spills and airborne exposure.
How to Reduce VOC Exposure After Painting
After you finish painting, keep windows and doors open and run fans to boost indoor ventilation.
You can also run a HEPA air purifier to cut airborne VOCs while the paint cures.
For cleanup, use low‑VOC solvents and disposable rags to limit lingering fumes.
Improve Indoor Ventilation
When you finish painting, boost air flow right away by opening all available windows and doors and running fans to push fumes outside; this cuts VOC buildup and speeds drying. You’ll want to keep ventilation consistent for 48–72 hours, especially if exterior paint was used indoors. Keep doors open between rooms to create cross-breezes.
Pay attention to color matching and sheen selection—the more coats or darker colors you apply, the longer ventilation matters.
Practical steps:
- Run window and box fans to exhaust air outward.
- Use ceiling fans on low to circulate.
- Prop interior doors to promote flow.
- Ventilate during and after each coat.
Use Air Purifiers
How can you cut lingering VOCs faster than ventilation alone? Use an air purifier with a true HEPA filter plus activated carbon to trap particles and adsorption for gases.
Place units in the painted room and run continuously for several days, keeping doors closed to concentrate filtration.
For projects like vintage finishes or tricky color blending where you may’ve used multiple coats or products, boost purifier runtime and consider a higher-capacity unit sized for the room.
Monitor odor and consider using a VOC detector if concerned.
Maintain and replace filters per manufacturer specs to keep adsorption and particulate capture effective.
Choose Low-VOC Cleanup
Want to cut VOCs even after the brushes and rollers are put away? Choose low-VOC cleanup products and methods to limit lingering fumes while preserving color matching and finish durability. Use gentle steps:
- Rinse brushes in a sink with mild, low-VOC brush cleaner; avoid solvent bins.
- Wipe excess paint onto rags, then use biodegradable soap and warm water for latex or recommended low-VOC solvent for oil-based paints.
- Store used rags in sealed, labeled containers to prevent off-gassing; dispose per local regs.
- Ventilate while cleaning and until odors dissipate to protect indoor air quality and maintain finish durability.
Children, Pregnancy, and Pet Safety Considerations
Because young children, pregnant people, and pets are more vulnerable to paint fumes and dust, you should take extra precautions before and during any exterior painting project.
Keep kids, expectant household members, and animals out of work zones and ventilate well; use fans and open windows to disperse odors.
Choose products with clear paint branding that list low-VOC or non-toxic certifications, even if you’re focused on outdoor aesthetics.
Wear masks and gloves, clean up spills promptly, and contain sanding dust with plastic sheeting.
Postpone major jobs if someone’s pregnant or immunocompromised, and consult a pediatrician or vet when unsure.
Potential Long‑Term Indoor Problems to Watch For
While exterior painting seems harmless once the job’s done, it can create indoor issues that show up months or years later if you don’t manage materials and cleanup carefully. You’ll want to monitor odors, off‑gassing, and stray particles that settle on HVAC filters or fabrics.
Residual mildewcides can transfer from clothing used for garden maintenance or from outdoor furniture you bring inside. Watch for surface adhesion failures on trim or cabinets, and for cleaning challenges that eat at finishes.
Inspect periodically and ventilate. Consider isolating painted items until curing completes to reduce long‑term risks.
- Off‑gassing
- Contamination
- Adhesion failure
- Cleaning damage
Color, Sheen, and Finish Differences Indoors
When you bring exterior paint indoors, you’ll notice color matching can be tricky because sunlight and indoor lighting shift hues.
You’ll also see that higher-sheen exterior formulas reflect light differently than typical interior finishes, changing how colors read.
Finally, remember exterior paints are formulated for weather resistance, so their finish durability and maintenance needs can differ from standard interior paints.
Color Matching Challenges
Although matching exterior paint to indoor surfaces seems straightforward, differences in color, sheen, and finish can make the result look off once the paint’s on your walls. You’ll face challenges achieving color consistency because outdoor formulations and pigments shift under indoor lighting.
Paint branding can hide subtle tint variations between lines, so a same-named shade may not match. To minimize surprises, consider:
- Test swatches on interior walls and observe over several days.
- Request a custom tint from the manufacturer for interior use.
- Compare base formulas; exterior primers differ from indoor bases.
- Use small touch-ups before committing to full coverage.
Sheen And Light Reflection
Because indoor lighting and surface sheen work together, the same color can read completely different inside your home, so you should think about finish as much as pigment.
You’ll notice glossy exteriors reflect light and amplify imperfections, while matte indoor sheens scatter light for softer tones. For color consistency, test swatches under morning, afternoon, and artificial light to see how reflections shift hue and depth.
If you’re switching between interior and exterior formulas, prioritize sheen matching to maintain uniform appearance across connected spaces. Small sheen differences can age a room visually, so evaluate samples before committing.
Finish Durability Differences
Sheen affects more than looks—it also influences how a finish wears over time, so you should weigh durability alongside color and reflectivity. Interior traffic, cleaning, and humidity change how finishes age. Exterior formulas may have additives for UV and mildew resistance that alter color blending and cure, affecting indoor appearance and hardness.
Consider Finish sheen when choosing: higher sheens resist scuffs and clean easier; lower sheens hide imperfections.
- Evaluate wear: high-traffic needs durable sheens.
- Test Color blending: samples show undertone shifts.
- Check VOCs and indoor cure behavior.
- Prioritize cleanability over outdoor additives.
Matching Sheen and Touch‑Feel for Interior Aesthetics
When you choose interior paint, matching sheen to touch-feel matters as much as color because finish affects both how a surface looks and how it feels under your hand. You’ll notice a color mismatch if gloss levels differ between adjacent surfaces, and sheen inconsistency can make trim or doors feel out of place.
Pick sheens that match the room’s use: flatter for soft, muted walls; satin for modest durability and smoothness; semi-gloss for trim you’ll touch often. Test small swatches and run your hand over them. That tactile check guarantees the room looks cohesive and feels right to you.
Cleaning and Maintenance After Using Exterior Paint Inside
Matching finish and feel sets the stage, but caring for surfaces painted with exterior formulas requires a different approach. You’ll need gentler cleaning, test a hidden spot, and avoid harsh solvents that can strip the tougher topcoat.
Consider ventilation during cleaning to limit fumes and monitor for unexpected sheen changes.
- Use mild detergent and soft cloths; avoid abrasive pads.
- Spot-test cleaners to prevent finish damage.
- Address chips promptly to stop moisture intrusion and staining.
- Dispose of used rags and leftovers responsibly; consider paint recycling to reduce environmental impact.
Cost vs. Risk: Should You Save Paint or Buy Interior?
You might be tempted to save money by using exterior paint indoors, but weigh that against safety and indoor air quality risks.
Exterior formulas can underperform on adhesion, finish, and ease of cleaning compared with paint made for interior use.
Think about long-term maintenance costs—what looks like an upfront savings could cost more in repairs, recoats, or health-related issues down the road.
Cost Savings vs. Safety
Even though using leftover exterior paint might seem like an easy way to cut costs, it can expose you to safety risks and long-term expenses you didn’t plan for. You’ll save money up front, but you also risk higher VOC exposure, improper adhesion, and damage that requires redoing.
Think about color matching and sheen selection—exterior formulas may alter indoor appearance and finish. Balance the tradeoff: calculate replacement cost versus potential remediation, health impacts, and resale effects.
Consider these points:
- Short-term savings vs. long-term repainting
- VOCs and indoor air quality
- Health and allergy risks
- Warranty and resale implications
Performance Trade Offs
When weighing performance trade-offs, consider whether saving leftover exterior paint is worth the potential costs you’ll face down the line. You might save money now, but exterior formulas prioritize weather resistance and UV protection over indoor concerns like low odor, stain resistance to common household marks, and smoother finishes.
Using exterior paint can work for specific applications—trim, high-moisture areas, or rustic outdoor-themed rooms with outdoor decor—but you’ll trade comfort and indoor durability. Balance immediate savings against aesthetic and health trade-offs; sometimes buying proper interior paint reduces rework, complaints, and replacements, making it the smarter investment.
Long-Term Maintenance Risk
How much risk are you willing to accept to save a few dollars now? You’ll weigh exterior durability against indoor needs: that rugged formula resists weather but may not clean or breathe like interior paint. Color matching can be trickier too—sheen and fading differ.
- Higher upfront savings vs. potential repaint costs.
- Tough finish may trap moisture, causing maintenance issues.
- Mismatched color/sheens force touch-ups or full repaint.
- Long-term repair frequency raises total cost beyond initial savings.
You should consider lifecycle cost, resale impact, and whether saving now creates bigger expenses later.
Decision Checklist: Buy Interior Paint or Use Leftovers
Because leftover paint can save money but may not deliver the finish you want, you should run a quick checklist before committing to reuse it.
Check label compatibility: exterior formulas may differ in sheen and binder compared with interior paint. Confirm color match under indoor light and test adhesion on a small area.
Smell and VOCs matter; note that environmental impact and paint regulation affect allowable chemicals—older cans may exceed current indoor-safe standards.
Inspect for contamination, separation, or clumps.
If in doubt, buy interior paint for living spaces; if all checks pass, you can responsibly use leftovers.
Lower‑VOC Exterior Options and Greener Alternatives
If you’re weighing the risks of using leftover exterior paint indoors, you might also want to contemplate greener choices for outdoor projects themselves. Choosing lower‑VOC exterior formulations reduces fumes and still handles outdoor exposure and UV.
Look for water‑based acrylics designed for durability and Paint longevity without heavy solvents. Consider these options:
- Low‑VOC acrylic latex for siding and trim.
- Plant‑based solvent blends for wood and metal.
- High‑solids, low‑VOC coatings that extend Paint longevity.
- Recycled‑content or certified eco paints with transparent ingredient lists.
You’ll cut emissions, protect workers, and keep outdoor surfaces performing longer.
What to Do With Leftover Exterior Paint You Won’T Use Indoors
When you’re not going to use exterior paint indoors, don’t just toss the can—store, repurpose, or dispose of it properly to avoid hazards and wasted material. Keep cans sealed, labeled with color and date, and store them in a cool, dry place away from heat.
Repurpose small amounts for outdoor touch-ups, garden furniture, planters, or craft projects that enhance outdoor aesthetics. Offer leftover paint to neighbors, community groups, or online swap posts.
For mixing or matching, test swatches for color coordination before committing. Avoid pouring paint down drains; handle leftovers responsibly to protect people and the environment.
Disposal Rules and Local Regulations
Local disposal rules for exterior paint vary by municipality, so check your city or county guidelines before you act. You’ll need to follow disposal regulations to avoid fines and environmental harm. Consider options and required steps:
Local paint disposal rules differ by municipality—check local guidelines first to avoid fines and environmental harm.
- Locate local paint recycling events or drop-off centers and confirm accepted types.
- Solidify small leftover amounts (let them harden) if curbside rules allow before trashing.
- Label cans clearly and never pour exterior paint down drains or into soil.
- Contact hazardous waste facilities for oil-based or large-volume disposal and ask about fees.
Following paint recycling and disposal regulations keeps you compliant and protects your community.
How Pros Handle Exterior‑to‑Interior Paint Situations
Knowing how to dispose of exterior paint properly matters, but pros also plan ahead to avoid bringing exterior-specific problems inside. You’ll see they test a small patch indoors, assess odor and finish, and confirm adhesion to interior substrates.
They adjust color schemes because exterior formulations can read differently under indoor lighting; they simulate lighting effects at various times of day. Pros strip or sand tricky exterior coatings and use appropriate primers to guarantee durability.
They ventilate, use low-VOC topcoats when needed, and keep work areas isolated. You can follow these same steps to minimize surprises and ensure a lasting result.
Common Myths About Using Exterior Paint Indoors
Because exterior and interior paints serve different purposes, a bunch of myths have sprung up about using exterior paint indoors — and they can lead you to bad results. You’ll hear claims that exterior paint is tougher, odorless, cheaper, or safer.
Reality’s simpler: formulation differences affect finish, VOCs, and durability. Consider environmental impact and proper paint recycling instead of guessing.
- Tougher = always better indoors? Not necessarily.
- Exterior paint lacks odor? Often false; VOCs vary.
- Cheaper option? Hidden costs in prep and finish.
- Safer for kids? Check labels, don’t assume.
Troubleshooting: Peeling, Odor, and Adhesion Fixes
If your exterior paint is peeling, smells strong, or won’t stick, don’t panic — you can fix most issues with the right prep and products. Start by sanding and cleaning surfaces, then use a primer formulated for adhesion and odor-blocking. Improve ventilation, choose low-VOC options, and consider a thin topcoat for outdoor durability indoors only where necessary. For color matching, test swatches after priming.
| Problem | Quick Fix | Tip |
|---|---|---|
| Peeling | Sand + primer | Confirm substrate is dry |
| Odor | Ventilate + low-VOC | Use odor-blocking primer |
| Poor adhesion | Use bonding primer | Avoid glossy surfaces |
| Color mismatch | Tint samples | Test in daylight |
Real‑World Examples of Safe Interior Uses
When you need to use exterior paint indoors for touch-ups or temporary solutions, choose small, well‑ventilated spaces like a utility closet, garage entryway, or laundry room where durability matters more than perfect indoor finish.
You can apply exterior paint in specific scenarios if you control ventilation, odors, and cleanup.
Consider these examples:
- Sealing a damp basement threshold where mildew resistance helps.
- Revitalizing a garage door interior-facing edge exposed to wet shoes.
- Protecting shelving in a mudroom used for outdoor gear and outdoor plants.
- Quick patching on concrete floors before repainting, avoiding risky paint mixing indoors.
Step‑by‑Step Safety Plan If You Decide to Use Exterior Paint Indoors
Before you start, prepare a concise safety plan that covers ventilation, PPE, containment, and cleanup so you don’t create health or property risks.
Before you start, prepare a concise safety plan covering ventilation, PPE, containment, and cleanup to avoid risks.
Identify the exterior paint’s VOC level and any solvent warnings, and compare with eco-friendly pigments or historical paint types if preserving authenticity.
Choose respirator, gloves, goggles, and disposable coveralls.
Seal the room with plastic, tape vents, and lay drop cloths.
Increase airflow with open windows and box fans venting outside.
Test a small area, work in short shifts, and keep children and pets away.
Dispose of rags and containers per local hazardous‑waste rules.
Frequently Asked Questions
Will Exterior Paint Interfere With Smoke Detectors or Fire Alarms Indoors?
About 60% of paint-related sensor faults link to particulates, so you shouldn’t expect exterior paint to trip smoke detectors—its solvents might clog sensors though. You’ll preserve paint durability but should consider environmental impact and ventilation.
Can Exterior Paint Affect Indoor Humidity or Condensation Patterns?
Yes — it can. You’ll notice paint chemical composition and weather resistance properties often make exterior paint less vapor-permeable, so it can trap moisture, alter indoor humidity and raise condensation risk on cooler surfaces unless ventilation’s improved.
Are Exterior Paints Safe on Kitchen Cabinets or Food-Contact Surfaces?
No — you shouldn’t slap exterior paint on kitchen cabinets or food-contact surfaces; it’s overkill and can off-gas harshly. You’ll want paint durability and color compatibility, but choose interior or food-safe coatings instead for safety.
Will Exterior Paint Prevent Mold Growth Differently Than Interior Mold Paints?
No — exterior paint won’t prevent mold differently than interior mold paints; you’ll need proper surface preparation and good ventilation. Exterior formulas boost paint durability against weather, but mold-specific interior products target indoor moisture and antimicrobial protection.
Can Using Exterior Paint Void Home Insurance or Warranty Coverage?
Yes — using exterior paint inside can void warranty or insurance if it causes damage; you’ll risk paint durability claims and color fading issues, and insurers or manufacturers might deny coverage if improper products contributed to loss.
Conclusion
You can sometimes use exterior paint inside in a pinch, but you should weigh risks like stronger odors, higher VOCs, and added biocides that aren’t meant for indoor air. Think of it like wearing a raincoat indoors—effective but uncomfortable. If you must, ventilate well, choose low‑VOC formulas, test a small area, and consider a topcoat or sealant made for interiors. When possible, stick with paint designed for indoor use to protect health and finish.