Is Oil Based Paint Good for Exterior Use? Guide
You can confidently use oil‑based paint outdoors when you want a hard, long‑lasting, weather‑resistant finish that seals wood grain, resists scuffs, and holds up on trim, doors, and metal with proper prep and primers. It dries slower, has stronger odors and higher VOCs, and can be less flexible in freeze–thaw climates, so plan ventilation and maintenance. With correct application, cleanup, and periodic recoats it’s durable — keep going to learn practical tips, limits, and when to choose alternatives.
What This Guide Covers
If you’re weighing oil-based paint for outdoor projects, this guide tells you what to expect: we’ll compare durability, finish, drying time, surface prep, maintenance, and environmental concerns. We’ll show which surfaces and climates favor oil formulas versus alternatives. You’ll get clear comparisons so you can choose what’s best for wood, metal, and trim.
We’ll explain how oil’s historical use shaped expectations and what modern formulations change. You’ll learn practical prep steps, cleaning and recoating tips, and how environmental impact factors into product choice and disposal.
Use this to match paint type to project needs.
Quick Answer: Is Oil-Based Paint Good for Exterior Use?
Wondering whether oil-based paint is a good choice for exterior use? You can get durable, glossy finishes and long-lasting coverage, but there are trade-offs to weigh. Consider performance, maintenance, and broader consequences.
- You’ll appreciate the classic, robust look that evokes historical usage.
- You might worry about fumes and cleanup hassles.
- You’ll face environmental impact concerns from solvents and disposal.
- You may prefer alternatives that balance durability with lower toxicity.
How Oil-Based Paint Protects Exterior Surfaces
When you use oil-based paint outside, it forms a tough, weather-resistant barrier that stands up to rain, sun, and temperature swings.
It soaks into the substrate more deeply than many water-based options, improving adhesion and sealing out moisture.
That deep penetration plus a hard, long-lasting topcoat gives exterior surfaces extended protection and less frequent repainting.
Durable Weather Resistance
Because oil-based paint forms a dense, hard film as it cures, it gives exterior surfaces robust protection against rain, wind, and temperature swings. You’ll notice less blistering and fewer hairline cracks, so your siding and trim stay sealed longer. Proper brush techniques help you lay that film smoothly, reducing brush marks that trap moisture.
The pigments resist color fading, keeping finishes vibrant through seasons. You’ll appreciate the confidence of solid coverage and slower weathering.
- Pride in a finish that endures storms
- Relief from constant touch-ups
- Joy in richer, lasting color
- Confidence in long-term protection
Deep Surface Penetration
Although it looks like just a surface coat, oil-based paint actually soaks into porous materials, sealing wood grain and filling tiny voids so moisture and pests can’t get in. You’ll notice that proper surface preparation—cleaning, sanding, and priming—lets the oil penetrate evenly, creating a stable bond rather than sitting atop the substrate.
That bond reduces water ingress and limits micro-movement that can crack finishes. Because the pigment embeds within the film, oil formulas resist color fading longer than some water-based options, though UV protection still matters.
Follow prep steps and inspect periodically to maintain that deep, protective penetration.
Long-Lasting Protective Coat
If you want a durable exterior finish that stands up to weather and wear, oil-based paint gives you a long-lasting protective coat by forming a tough, flexible film that adheres deeply to the substrate. You’ll get excellent color retention and water resistance, reducing peeling and cracking.
Over time, the film shields against abrasion, mildew, and UV degradation, though consider environmental impact when choosing formulations. Proper prep and maintenance extend lifespan. Feel confident in the barrier it provides.
- Pride in a home that resists storms
- Relief from constant repainting
- Comfort knowing surfaces stay vibrant
- Assurance against moisture damage
Rain, Sun, and Freeze–Thaw: Weather Resistance
When you pick oil-based paint for exteriors, consider how it handles UV exposure and intense sunlight, since prolonged rays can break down binders and fade pigments.
Also think about freeze–thaw cycles and moisture penetration, because trapped water and repeated freezing can crack and lift the film.
Next, we’ll compare oil-based formulas and alternatives on their ability to resist sun damage and seasonal wet/dry stresses.
UV And Sunlight Durability
How will oil-based paint hold up under constant sun and UV exposure? You’ll find it resists color fading better than many water-based options and maintains surface texture longer, but prolonged UV will still break down binders over years. You should expect gradual yellowing on lighter hues and some loss of gloss.
To respond, monitor and maintain finishes, choose UV-stable pigments, and consider protective clear coats.
- You’ll feel relieved when colors stay truer longer.
- You’ll worry less about immediate peeling.
- You’ll notice subtle yellowing over time.
- You’ll appreciate tougher surface texture retention.
Freeze–Thaw And Moisture
Because exterior paint faces cycles of rain, baking sun, and freezing nights, you’ll want a finish that resists both moisture penetration and the stresses of expansion and contraction. You’ll find oil-based paints seal well but can become brittle with repeated freeze–thaw cycles; flexible, breathable formulations or modern alkyd blends perform better. Consider eco friendly options if runoff or disposal concerns matter, and reserve oil-based choices for trim rather than broad siding. For Indoor applications choose low-VOC alternatives.
| Benefit | Consideration |
|---|---|
| Moisture seal | Can trap water |
| Flexibility | Resists cracking |
Adhesion and Durability on Wood, Metal, and Masonry

Although oil-based paints often grip porous surfaces better than latex, their performance varies with substrate and prep, so you’ll want to match primer, cleaning, and curing practices to the material.
Wood accepts oil paint well when sanded and primed. Metal needs de-rusting and an appropriate metal primer to prevent peeling. Masonry requires a breathable alkyd or masonry-grade formulation plus a masonry primer to avoid trapped moisture that undermines adhesion.
You’ll also consider color mixing and paint storage to keep batches consistent. Follow these emotional cues:
- Relief: protection feels secure.
- Pride: surfaces look intentional.
- Frustration: neglect shows quickly.
- Confidence: correct prep pays off.
Will the Gloss Last on Your Siding?
You’ll want to know what affects gloss durability—UV, weather, and the paint’s formulation all play a role. Proper surface prep and priming will help the finish stick and resist dulling.
And with periodic cleaning and timely recoats you can preserve that sheen much longer.
Gloss Durability Factors
When you pick a gloss finish for your siding, expect its shine to fade over time unless the paint and conditions work in your favor. You’ll notice gloss sheen depends on binder quality, UV resistance, and how deep surface reflection is from the cured film.
Weather, pollutants, and cleaning frequency wear the topcoat; oil-based formulas resist scuffs but can yellow. Choose high-quality gloss with UV inhibitors and follow maintenance schedules to prolong lustre.
- Frustration when shine dulls too soon
- Relief from choosing durable formulas
- Pride in a reflective, cared-for exterior
- Regret if maintenance’s neglected
Surface Preparation Impact
Shine and durability depend as much on what you do before painting as on the paint itself; poor prep undermines even the best gloss. You’ll need thorough surface preparation: clean mildew, strip loose or peeling finish, sand glossy areas, and fill cracks.
That removes contaminants and creates a keyed surface so oil-based coatings can bond. Prime bare wood or metal with a compatible primer to promote paint adhesion and seal tannins.
If you skip these steps, the gloss will flake, cloud, or yellow unevenly. Invest time up front so the siding keeps a uniform, long-lasting sheen.
Maintenance And Recoating
Because exterior gloss takes a beating from sun, rain, and abrasion, maintenance determines how long that sheen will last on your siding. You’ll inspect annually, touch up worn spots, and plan full recoats every 5–10 years depending on exposure and quality.
Proper color mixing restores uniformity; correct brush techniques prevent lap marks and ensure even sheen. Clean surfaces before recoating, sand glossy failures, and use compatible primers.
Emotional reminders keep you motivated:
- Preserve pride in your home’s curb appeal
- Avoid costly repairs down the road
- Protect investment against harsh weather
- Enjoy confidence in a lasting, glossy finish
Stain-Blocking and Tannin-Bleed Control
If you’re tackling exterior wood or older painted surfaces, stain-blocking and tannin-bleed control are critical to preventing ugly brown streaks and discoloration that can show through new coats.
You should choose an oil-based primer labeled stain-blocking for tannin-rich woods like cedar or redwood. Apply primer to bare or stained areas, sealing knots and water stains before topcoating.
Mind color mixing if you tint primers—add pigments sparingly and test adhesion. Store leftover primer properly; paint storage in a cool, dry place preserves blocking properties.
Inspect primed surfaces for bleed-through and recoat with another sealing layer if needed.
Drying Time and Project Scheduling
Once the primer has sealed tannins and stopped bleed-through, plan your project around realistic drying and recoat windows—oil-based products take longer to dry than latex, so you’ll need to schedule more wait time between coats and before exposing the surface to moisture.
You’ll monitor temperature and humidity; cool or damp conditions extend tack and cure times. Allow extra time when matching colors, as color matching under different light can mislead you, so test small areas.
Consider paint sheen changes as the film cures.
Emotional checklist to keep you steady:
- Patience preserves finish
- Respect the clock
- Test before committing
- Celebrate slow, durable results
Odor, VOCs, and Health Precautions
While oil-based paints give durable, smooth finishes, they also release strong odors and higher VOCs than most latex formulations, so you’ll want to plan for ventilation and exposure control. You should work when weather allows cross-ventilation, keep doors and windows open, and run fans to push fumes away.
Wear an appropriate respirator rated for organic vapors, gloves, and eye protection. Limit time in freshly painted areas, especially for children, pregnant people, and anyone with respiratory issues.
Check product labels for VOC emissions and choose lower-VOC alkyds if available. Dispose of rags and containers following local hazardous-waste rules.
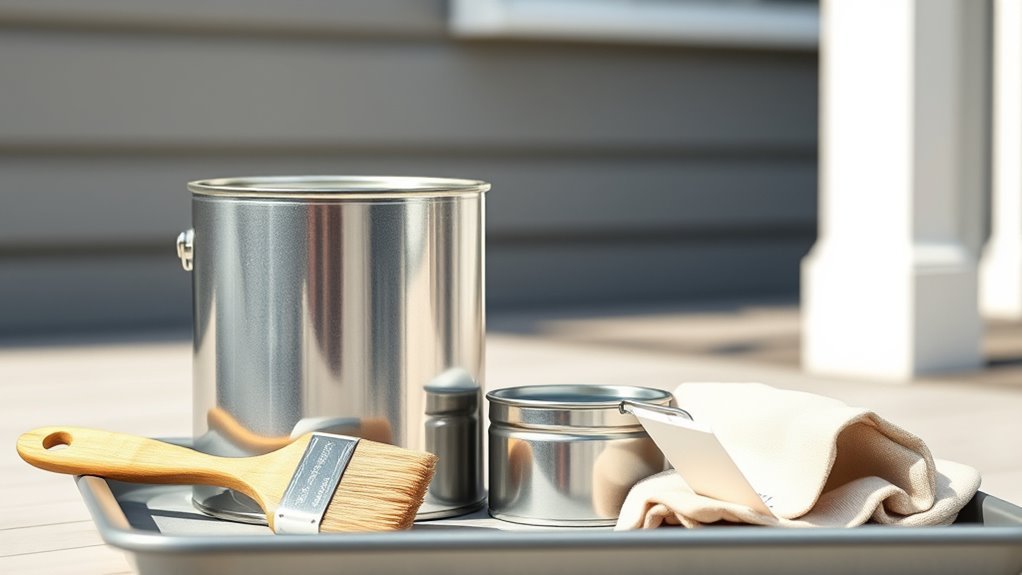
Cleanup, Tools, and Maintenance Tips
When you’re done painting, you’ll need the right solvents and methods to clean brushes and prevent clogs.
Gather essential tools—good brushes or rollers, drop cloths, and proper storage containers—to make the job easier.
For long-term results, plan routine inspections and touch-ups to protect the finish and catch problems early.
Cleanup Solvents And Methods
Need to clean up oil-based paint without making a bigger mess? You’ll choose cleaning techniques and solvent types carefully to protect surfaces and yourself. Start by blotting fresh spills, then use the gentlest solvent that works. Ventilate, wear gloves, and test a hidden spot.
- Feel relief when mineral spirits lift stains without scrubbing endlessly.
- Enjoy confidence using paint thinner for stubborn spots, sparingly.
- Breathe easier with citrus-based solvents for small touch-ups.
- Avoid panic: properly contain rags to prevent spontaneous ignition.
Wipe tools, store solvents sealed, and dispose of waste per local rules.
Essential Painting Tools
Because prep and cleanup make or break your finish, having the right tools on hand saves time and frustration. You’ll need proper brushes, rollers, scrapers, and cleaners for oil based paints. Focus on Brush selection for cut-in work and durable synthetic or natural-bristle brushes for alkyd paints. Use a tray, quality drop cloths, and respirator; practice good Color mixing with a stir stick and graduated cups. Clean solvents and rags go in sealed containers.
| Tool | Purpose |
|---|---|
| Angle brush | Cutting edges |
| Roller | Large coverage |
| Scraper | Remove loose paint |
| Stir stick | Color mixing |
| Solvent jar | Cleanup control |
Long-Term Maintenance Tips
If you want your oil-based exterior finish to last, plan regular cleanup and maintenance routines now so small issues don’t become costly repairs later. You’ll clean brushes with appropriate solvents, label cans after color mixing, and keep tools rust-free.
Check for cracking, flaking, and mildew twice yearly, touch up chips promptly, and rotate seasonal inspections.
Practice safe paint storage: seal lids, store upright in a cool dry place, and keep solvents away from heat.
Emotional reminders help you stay diligent:
- Protect your pride in the home.
- Keep memories intact.
- Avoid frustrating redo work.
- Preserve curb appeal.
When Oil-Based Paint Beats Acrylic Latex
When you need extreme durability and a hard, smooth finish for high-traffic trim, doors, or exterior metal, oil-based paint often outperforms acrylic latex. You’ll choose oil paint when substrate adhesion, abrasion resistance, and a level, brush-mark-free surface matter most.
It’s ideal for restoring architectural elements where historical finishes or traditional gloss are required. You’ll tolerate longer cure times and stronger solvents because the result resists scuffs and holds detail.
Use oil-based coatings on porch rails, metal railings, and window sashes that need a tough shell. Prepare surfaces meticulously and follow safety and disposal rules for solvents.
When Acrylic Latex or Alternatives Are Better
Although oil has its strengths, you’ll often find acrylic latex or newer waterborne alkyds are the smarter choice for most exterior jobs. You’ll prefer them when you want faster drying, easier cleanup, and flexibility that reduces cracking on siding and trim. They pair well with evolving Color trends and long-lasting finishes, and many brands offer eco friendly options that cut VOCs without sacrificing durability.
For most exteriors, choose acrylic latex or waterborne alkyds for faster drying, easier cleanup, and durable, low‑VOC finishes.
- You’ll appreciate quick recoats and less downtime.
- You’ll like lower-maintenance surfaces that resist peeling.
- You’ll feel better choosing low-VOC, eco friendly options.
- You’ll enjoy truer, longer-lasting Color trends on exterior walls.
Repainting: Working Over Oil-Based or Latex Coats
Since you’ll often be dealing with existing finishes, knowing how to repaint over oil-based or latex coats matters for a lasting result. You’ll first identify the existing type: oil feels slick, latex more flexible.
Sand and degloss oil coats to promote adhesion; use a bonding primer if you switch from oil to latex. When switching from latex to oil, guarantee full curing and clean thoroughly.
Match color carefully—old layers yellow or fade, so test samples in different light. Consider paint sheen: glossy surfaces need more sanding or primer to avoid visible imperfections.
Follow manufacturer’s cure times for best durability.
Best Exterior Uses for Oil-Based Primers and Topcoats
When you need durable protection, oil-based primers and topcoats shine on high-traffic doorways because they resist scuffs and hold up to frequent use.
They’ll also protect metal railings from rust and wear when properly primed.
Use them on trim and window sills where a hard, weather-resistant finish matters most.
High-Traffic Doorways
If your entryway sees constant foot traffic, swinging doors, and frequent knocks from bags or groceries, oil-based primers and topcoats give you the durability you need—they resist scuffs, fill minor imperfections, and bond tightly to wood and metal so finishes hold up longer than many water-based alternatives.
You’ll get a tough, smooth surface that stays attractive despite daily wear. Consider ventilation and low-VOC or eco-friendly options if sensitivity is a concern, and remember many formulations suit indoor applications too.
Emotional payoff:
- Pride in a resilient, welcoming door
- Relief from constant touch-ups
- Confidence guests notice quality
- Calm knowing it lasts
Metal Railings Protection
Although metal railings face constant exposure to rain, sun, and abrasion, oil-based primers and topcoats give you a resilient, long-lasting shield that bonds tightly to steel and wrought iron.
You’ll prep the metal railing by removing loose paint and rust, then use a compatible oil-based primer to inhibit surface corrosion.
Apply thin, even topcoats for a hard, flexible finish that resists chipping and moisture penetration.
Oil-based systems fill minor imperfections and adhere where water-based paints might fail, so maintenance intervals extend.
For best results, work in dry conditions and follow manufacturer cure times before regular use.
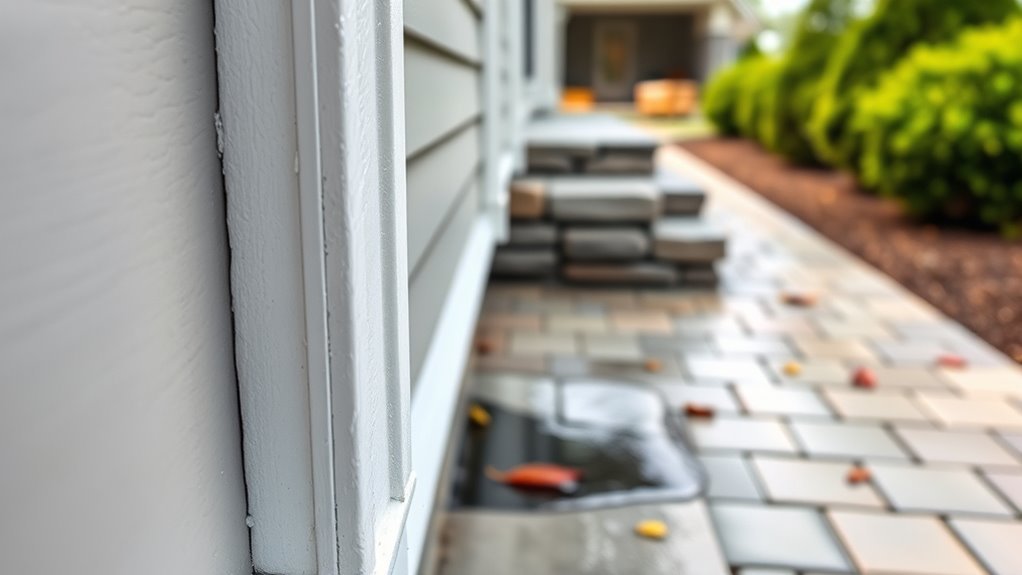
Trim And Window Sills
Moving from railings to the finer exterior details, trim and window sills benefit greatly from oil-based primers and topcoats because they face constant moisture, sun, and abrasion at joints and edges. You’ll protect vulnerable wood and minimize Color fading while sealing seams and nail holes. Oil-based finishes build a hard barrier that resists wear; use proper Brush techniques to reduce brush marks and guarantee even coverage.
Apply primer first, sand between coats, and finish with two topcoats for longevity.
- Pride in crisp edges
- Relief from frequent repairs
- Confidence during storms
- Joy in lasting curb appeal
Climate Advice: Hot, Humid, Cold, and Coastal Areas
When you choose oil-based paint for exterior surfaces, consider how temperature, humidity, and salt air affect drying, adhesion, and long-term performance. You’ll adapt like you would with interior finishes or artistic techniques: slow curing in heat can cause sagging; high humidity prolongs tackiness; cold prevents proper film formation; coastal salt accelerates corrosion. Plan timing, thin coats, and primer suited to conditions.
| Climate | Tip |
|---|---|
| Hot/Humid | Paint mornings, use fast-flash solvents |
| Cold/Coastal | Heat substrates, use corrosion-resistant primers |
Test a small area before full application.
Cost: Materials, Labor, and Long-Term Upkeep
If you’re weighing oil-based paint, factor in higher upfront material costs and specialized supplies—oil formulas, mineral spirits or fast-flash solvents, and oil-compatible primers—plus the potential need for more frequent repainting or stripping over years, which raises lifetime expenses.
You’ll pay more for labor because application and cleanup take longer, and contractors may charge a premium for proper surface prep.
Expect higher labor costs: oil paint requires longer application, extra cleanup, and premium surface prep.
Consider limited color options versus modern alternatives and whether eco-friendly options matter to you; those choices influence cost.
Emotional budget impact:
- Frustration over surprise costs
- Relief when a job lasts visually
- Anxiety about ongoing upkeep
- Pride in a finished, classic look
Regulations and Environmental Limits to Check
Because oil-based paints contain higher volatile organic compounds (VOCs) and hazardous solvents, you’ll need to check local regulations, air-quality rules, and disposal limits before you buy or apply them.
You should verify Environmental regulations that govern VOC limits for exterior coatings in your region; many areas restrict sale or use of high-VOC formulas.
Check permit requirements for spraying, work-hour emissions rules, and approved disposal methods for contaminated rags and leftover product.
Retailers or local air-quality districts can provide limits and alternatives.
Following these rules avoids fines, protects neighbors’ health, and helps you choose compliant, lower-emission options.
Application Tips for Best Exterior Results
After checking regulations and disposal rules, you’ll want to focus on proper surface preparation and weather timing to get durable, attractive results with oil-based exterior paint. Sand, clean, and prime; don’t paint in high humidity or extreme heat.
After checking regs, prepare surfaces and choose mild weather—sand, clean, prime for durable oil-based exterior results
Test Color matching in small areas and let it cure to guarantee satisfaction. Use right-quality brushes and practice brush techniques for smooth, even strokes. Seal trims and joints carefully.
- Feel proud as surfaces transform
- Enjoy calm knowing the finish lasts
- Smile when brush marks disappear
- Relax watching slow, steady drying
Follow these steps and your exterior will look great.
Decision Checklist: Choose Oil-Based or Not?
When deciding whether to use oil-based paint for an exterior project, weigh durability and adhesion against longer drying, stronger fumes, and stricter cleanup requirements so you can choose the finish best suited to the surface and your schedule. You’ll assess substrate, weather, maintenance willingness, and Color options—oil gives depth but fewer modern shades. Consider branding considerations if matching corporate palettes or signage longevity. Prioritize safety (ventilation, PPE) and cleanup (solvents). Use this quick checklist to decide.
| Factor | Quick verdict |
|---|---|
| Durability vs time | Oil: long life, slow cure |
| Aesthetics & matching | Oil: rich finish, limited shades |
Frequently Asked Questions
Can Oil-Based Paint Be Applied Over Pressure-Treated Wood Without Priming?
No, you shouldn’t; pressure-treated wood often needs primer compatibility checks because oils and preservatives hinder paint adhesion, so you’ll prime with a compatible primer first to guarantee the oil-based paint bonds and lasts.
How Long Should Surfaces Cure Before Applying Sealant or Caulk?
You should wait 24–72 hours for paint or wood to cure before sealing or caulking, depending on surface preparation and weather considerations; warmer, drier conditions speed curing, while cold or humid weather may require longer drying times.
Will Oil-Based Paint Yellow on White Trim Over Time?
Yes — oil-based paint will yellow over time, so you’ll notice a yellowing tendency on white trim. To preserve white trim preservation, choose high-quality alkyds with UV stabilizers or switch to non-yellowing waterborne alternatives.
Are There Special Disposal Rules for Leftover Oil-Based Paint?
Yes — you’ve got rules: don’t chuck it like trash, don’t pour it down drains, bring it to hazardous-waste collection. You’ll protect paint durability and limit environmental impact, so follow local disposal guidelines and recycling options.
Can Oil-Based Exterior Paint Be Tinted On-Site to Deep Colors?
Yes — you can tint oil-based exterior paint on-site to deep colors, but you’ll need professional color matching and compatible tinting options; expect stronger pigments, longer drying, and possible batch variations, so sample before committing.
Conclusion
In the end, you’ll find oil-based paint is a dependable old friend for exterior jobs: it’s tough, seals well, and forgives a few sins in preparation, though it carries a stiffer price and a less polite environmental footprint. If you crave long-lasting sheen on wood or metal and don’t mind stronger fumes and cleanup, go ahead. But if you prefer a gentler, greener companion that’s easier to live with, a modern waterborne alternative may suit you better.