Is Satin Paint Good for Exterior Walls? Full Guide
Yes—satin paint is a strong choice for exterior walls when you want durable, low-luster protection that’s easier to clean than flat finishes and hides minor flaws better than gloss. It works well on siding, trim, doors, and shutters if you prep surfaces and pick primers for wood, stucco, brick, or vinyl. Expect good weather resistance, mildew options for humid climates, and moderate upkeep. Keep going to learn practical tips, testing steps, and climate-specific advice.
Quick Answer: Is Satin Paint Right for Your Exterior?
If you want a durable, low-sheen finish that hides minor imperfections better than glossy paint, satin is a strong choice for exterior walls. You’ll get weather resistance, easy cleaning, and a subtle sheen that complements many styles.
Consider color psychology: satin’s soft reflectivity can make hues feel warmer and more inviting, improving curb appeal.
Consider how satin’s gentle sheen warms colors and creates a more inviting, appealing curbside presence.
Choose eco-friendly paints to minimize VOCs and environmental impact without sacrificing performance.
Satin works well on siding, trim, and doors, but weigh exposure and maintenance needs.
If you want longevity with moderate sheen and practical benefits, satin’s likely a good fit.
What a Satin Finish Is (Vs. Flat, Eggshell, Gloss)
While satin sits between flat and gloss on the sheen spectrum, it gives you a smooth, low-luster surface that subtly reflects light without the shine of gloss.
You’ll notice satin hides minor imperfections better than gloss while offering more durability and washability than flat.
Compared with eggshell, satin has a tad more sheen and is easier to clean, yet it’s less reflective than semi-gloss.
Choose satin if you want a balanced look that supports modern interior trends and practical exterior needs.
Its mild sheen can influence color psychology by making hues feel slightly richer and more vibrant outdoors.
Satin Vs. Flat, Eggshell, and Gloss: Quick Comparison
Now that you know where satin sits on the sheen spectrum and why people pick it for exteriors, here’s a quick, side-by-side look at how satin compares to flat, eggshell, and gloss so you can pick the right finish fast.
- Satin — Durable, slight sheen, hides minor flaws; ideal for trim and siding when you want washable surfaces without high shine; works with varied color schemes and major paint brands.
- Flat — Best at hiding imperfections; low durability; not great for high-traffic exteriors.
- Eggshell — Softer sheen than satin; moderate durability; good compromise.
- Gloss — Very durable and washable; highlights flaws and reflects light strongly.
How Climate Affects Satin Paint Performance
Because satin balances durability and low-to-moderate sheen, your local climate plays a big role in how long it looks good and how often you’ll need to repaint.
Because satin balances durability and sheen, your local climate determines how long it stays beautiful and when to repaint.
In humid areas, mildew and blistering shorten lifespan, so you’ll choose mildew-resistant satin and inspect seals often.
In sunny, hot climates, UV fades pigments faster, affecting color psychology and requiring UV-stable formulations to keep tones vivid.
Freeze-thaw cycles cause cracking; flexible satin with proper primers helps.
Coastal salt spray demands corrosion-resistant coatings.
Also consider historical authenticity in restoration—pick satin formulas that match period finishes while still handling local weather challenges.
How Wall Material (Wood, Stucco, Brick, Vinyl) Changes Your Choice
Your wall material changes what satin paint you should pick because wood’s grain and movement need flexible, breathable formulas to avoid cracking.
For stucco, you’ll want a paint that handles heavy texture and lets moisture escape.
Brick and vinyl demand attention to porosity and adhesion, so choose products and prep methods that bond well to those surfaces.
Wood: Grain And Movement
When you’re dealing with wood siding, the grain and natural movement of the boards directly affect how satin paint performs and how you should prepare the surface. You’ll want to account for wood grain direction and movement flexibility so coatings adhere and don’t fail as boards expand and contract.
Sand, fill gaps with flexible exterior caulk, and choose a satin formula with good elasticity. Follow these steps:
- Clean and dry siding, sanding along the wood grain.
- Use a quality primer designed for wood.
- Apply a flexible caulk to seams and nail holes.
- Choose a satin paint rated for exterior movement.
Stucco: Texture And Breathability
Shifting from wood’s grain and movement to stucco means adjusting for a very different surface: heavy texture and high breathability. You’ll want satin paint that can settle into crevices without highlighting imperfections.
Stucco texture varies—smooth to coarse—and you’ll need a thicker, elastomeric or masonry-acrylic satin to bridge shadows and resist cracking. Because of stucco breathability, choose a breathable formula that lets moisture escape, preventing blistering and mildew.
Prep matters: clean, repair hairline cracks, and use appropriate primer for alkaline surfaces. Apply with a roller designed for textured masonry and expect slightly lower sheen on rough stucco.
Brick/Vinyl: Porosity And Adhesion
Because brick and vinyl present opposite challenges—brick soaks and holds paint while vinyl repels it—you’ll choose satin formulations for very different reasons. You’ll factor in Brick porosity and Vinyl adhesion when selecting primers, application methods, and maintenance plans.
- For porous brick, use a penetrating primer to seal pores and improve satin topcoat uniformity.
- On vinyl, pick a paint labeled for plastics and test Vinyl adhesion with a small sample.
- Satin hides surface irregularities on brick but needs more coats for full coverage.
- Clean, dry surfaces and proper prep determine how long satin finishes last on both materials.
How Wall Condition Affects Satin Suitability
Check the surface smoothness before choosing satin, because satin highlights imperfections more than flat finishes.
If the existing paint is blistered, peeling, or chalky, you’ll need to repair or strip it to guarantee good adhesion and an even look.
Also inspect for moisture or staining issues—satin won’t hide water damage and can make stains more noticeable unless you treat them first.
Surface Smoothness Level
When your exterior walls are relatively smooth, satin paint will highlight their finish and resist dirt without calling attention to minor imperfections. However, on rough or uneven surfaces, the same sheen can emphasize bumps, patches, and texture differences.
You’ll want to assess smoothness before painting, since satin accentuates detail and affects color coordination and architectural harmony. Prep can include sanding, skim coats, or choosing a lower sheen.
- Smooth stucco: satin shows uniformity well.
- Slight texture: satin softens but reveals high spots.
- Rough masonry: satin highlights irregularities.
- Patchwork areas: sand and prime first.
Existing Paint Integrity
Smoothness gives you a lot of information about how satin will look, but you also need to inspect the existing paint layer before you commit. Check for peeling, chalking, or hairline cracks; satin highlights imperfections more than flat finishes, so you’ll need proper prep.
If the underlying coat has been heavily pigmented, color psychology plays a role: dark, saturated bases can change perceived sheen and mood through the new satin layer. Also consider how exterior light and interior lighting near entryways will interact with reflected sheen.
Repair, sand, and prime compromised areas so satin performs evenly and lasts.
Moisture And Staining
If your exterior walls hold moisture or show stains, satin finishes will call attention to those flaws rather than hide them, so you’ll need to address the causes before painting. You should diagnose leaks, efflorescence, or tannin bleed and fix them so the satin sheen sits on a sound surface.
Choose primer and paint brands that offer stain-blocking formulas; test a small area. Consider how the sheen will affect your chosen color palettes outdoors.
Follow these steps:
- Inspect for leaks and repair sources.
- Remove mold and efflorescence thoroughly.
- Use stain-blocking primer.
- Select reputable paint brands and test samples.
Moisture, Mildew, and Dirt: How Satin Paint Compares

Because satin has a slight sheen and a tighter binder than flat paints, it sheds moisture better and resists dirt buildup, making it a practical choice for exterior walls that face humidity or frequent soiling.
You’ll find mildew less likely to take hold on satin finishes, though proper surface prep and a breathable primer still matter.
Satin holds up well where rain splashes or landscaping spray reach lower walls and decorative accents, so your color selection won’t hide grime as much as resist it.
Choose mildew-resistant formulas in humid climates and prioritize good drainage and ventilation to limit growth.
Cleaning and Maintenance Expectations for Exterior Satin
When you choose exterior satin, expect easier cleaning than with flat finishes: its slight sheen lets dirt and grime rinse away with a garden hose or a mild detergent solution, so routine maintenance is straightforward. You’ll find upkeep simple, and stains usually lift without aggressive scrubbing.
Consider how your exterior ties to interior decoration and paint color choices to maintain cohesive curb appeal.
- Rinse weekly in dusty seasons.
- Spot-clean with mild soap for bird droppings.
- Avoid abrasive brushes that dull sheen.
- Recoat every 5–7 years depending on exposure and fading.
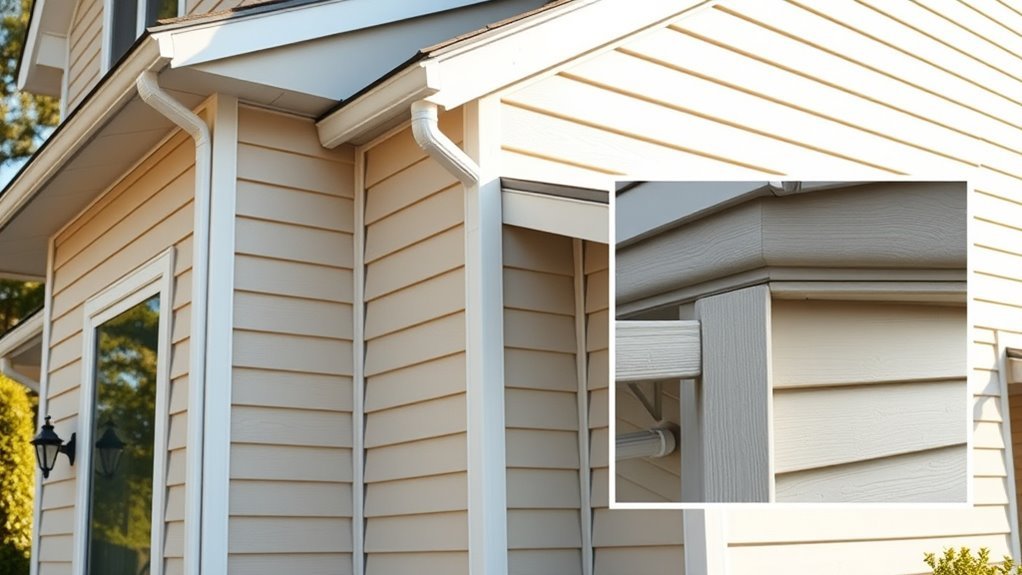
Best Uses for Satin Paint: Siding, Trim, and Accents
When you’re choosing where to use satin paint, think about siding first for its balance of weather resistance and subtle sheen.
Use it on trim where you want easy cleanability and durable edges that resist scuffs.
And pick satin for accent areas to let color pop without an overly glossy finish.
Siding Weather Resistance
If you want siding that stands up to rain, sun, and temperature swings, satin paint is a strong choice thanks to its durable finish and slight sheen that sheds moisture and hides minor surface flaws. You’ll appreciate how satin resists fading and helps prevent water intrusion on clapboard, fiber cement, or engineered wood.
Choose a color palette that balances UV resistance and curb appeal; test samples to see lighting effects at different times of day.
Consider these practical tips:
- Prime properly for adhesion and moisture barrier.
- Use high-quality exterior satin formulas.
- Apply two thin coats for uniform protection.
- Maintain gutters to reduce siding exposure.
Trim Cleanability And Durability
Because trim takes the brunt of fingerprints, scuffs, and weather, satin is a smart choice—you’ll get a finish that’s easy to wipe clean without looking shiny, and it stands up to abrasion better than flat paints.
You can scrub mold, dirt, and grime without sanding through the coat, so maintenance stays simple. Satin also holds crisp edges, so your choices in color psychology—contrast, harmony, or subtle accenting—read clearly.
Choose low-VOC satin to reduce environmental impact while keeping durability. For trim exposed to high traffic or moisture, satin balances cleanability, longevity, and mindful material selection.
Accent Color Pop
Want to make a feature pop without overpowering the whole façade? Use satin on accents to add controlled sheen and depth. Satin reflects enough light to draw the eye without screaming for attention, which suits color psychology when you want subtle emphasis. It also pairs well with historical architecture, letting decorative elements read clearly.
Consider these accent choices:
- Front door — bold hue, satin for welcoming shine.
- Window sashes — contrast trim that frames views.
- Shutters — pop color that respects period details.
- Porch posts and railings — highlight structure without extra gloss.
Satin balances durability and tasteful emphasis.
When Not to Use Satin: Choose Gloss or Flat Instead
Although satin works well on many exterior surfaces, there are clear situations where you’d be better off choosing gloss or flat instead.
If your home’s style or interior decor relies on matte finishes for a cohesive look, flat helps maintain that aesthetic.
Choose gloss when you want high shine for trim, doors, or areas that need tough, washable surfaces.
Satin can highlight imperfections, so avoid it on rough or heavily textured walls where flat masks flaws.
Also consider paint color selection: very dark or very light hues may read differently with satin’s sheen, so pick finish to match your visual goals.
Prep Surfaces Before Applying Satin
Before you roll on satin, make sure the surface is clean—remove dirt, mildew, and loose paint with a scrub and rinse.
Patch cracks, fill holes, and sand rough spots so the finish lays smoothly.
Prime any bare wood, metal, or repaired areas to guarantee adhesion and uniform sheen.
Surface Cleaning Basics
How clean is your exterior really? You’ll want a spotless surface so satin finishes adhere and show color psychology and paint color trends accurately. Start with a light rinse, then targeted cleaning where grime builds up. Wear gloves, test a small area, and avoid harsh abrasives that damage substrate.
- Pressure-wash gently, 1200–1500 psi, keeping nozzle 2–3 feet away.
- Use a mild detergent or trisodium phosphate substitute for mildew and oils.
- Scrub with a soft-bristle brush on stubborn spots.
- Rinse thoroughly and let dry 24–48 hours before proceeding.
Repairing And Priming
Once the surface is clean and dry, you’ll repair damage and apply primer so your satin finish bonds evenly and lasts. Fill cracks and holes with exterior filler, sand smooth, and remove dust.
Replace rotten trim and tighten loose siding before priming bare wood, metal, or patched areas. Choose a high-quality primer compatible with your chosen paint brands and follow the manufacturer’s flash times.
Pick primer tinting near your final hue to reduce coats and reveal accurate color options. Apply primer evenly, avoid drips, and inspect for missed spots.
Let it cure fully before rolling or brushing on satin paint.
Best Primers and Paint Types for Exterior Satin
When you want a durable, attractive satin finish on exterior walls, choosing the right primer and paint matters as much as prep work. The wrong combination can shorten the life of the finish and hide imperfections.
Consider color psychology and paint color trends when selecting sheens and pigments so your home reads right and stays current. Pick quality formulas that resist mildew, UV, and moisture.
- Acrylic latex primer — bonds well, breathable.
- Oil-based primer — for stained or chalky surfaces.
- 100% acrylic satin exterior paint — durable, flexible.
- Elastomeric coatings — for hairline-crack protection.
Tools for Applying an Even Satin Finish
Want smooth, professional-looking satin on your exterior walls? Choose quality tools: a 3/8–1/2″ nap roller for even coverage, angled sash brushes for trim, and a foam brush for touch-ups. Use an extension pole, sturdy tray, and a lint-free microfiber cloth to catch drips.
Keep a paint edger for crisp lines and a quality respirator, gloves, and drop cloths for protection. Store leftover paint properly — note paint shelf life to avoid application issues.
Remember that consistent finish affects perception; consider color psychology when picking sheen and hue to ensure the appearance matches your design goals.
Step-by-Step Application Tips for a Smooth Satin Finish
With your tools staged and safety gear on, start by prepping the surface: clean dirt and mildew, scrape loose paint, sand glossy spots, and fill cracks so the satin lays flat.
Next, plan your sequence: work top-down, section by section, keeping a wet edge.
Choose rollers and brushes suited to satin’s sheens.
- Prime stained or bare areas, let dry fully.
- Cut in edges with a high-quality angled brush.
- Roll with even pressure, overlap passes 50%.
- Inspect in varied light, wait recommended recoat time.
Consider color psychology and historical finishes when selecting tones for curb appeal.
Touch-Up and Repair: Matching Sheen and Blending Edges
When you touch up satin on exterior walls, match the sheen level to avoid obvious patches. Feather your edges and use thin, overlapping strokes so new paint blends into the old.
Prep bare areas with primer and a clean, sanded surface before you paint.
Matching Sheen Levels
Because satin’s mild gloss can make touch-ups stand out, you’ll need to match sheen carefully to blend repairs into surrounding areas. Even slight differences in gloss catch light and reveal edges. Use color matching and sheen consistency when planning repairs so the patch won’t draw attention.
Consider these steps:
- Clean the area and let it fully dry before testing sheen.
- Test small swatches of the existing paint and your touch-up mix in varied light.
- Adjust dilution or primer type to tweak gloss until it matches.
- Apply thin layers, curing between coats to confirm final sheen.
Feathering Paint Edges
Although satin shows edges easily, you can hide touch-ups by feathering the paint so it blends seamlessly into surrounding areas. Work quickly while paint’s wet; use a small brush or damp roller to soften the repair perimeter with light, outward strokes.
Match sheen and hue through careful color mixing, testing tiny amounts until the tone aligns. Keep a bit of original paint for consistency and proper paint storage to avoid curing or separation.
Feather in thin layers, building coverage slowly to prevent lap marks. Finish by stepping back often; subtle adjustments beat heavy-handed patches and preserve a uniform exterior.
Primer And Surface Prep
After feathering edges for a seamless touch-up, prep and priming become the foundation for a lasting match of sheen and color. You’ll clean, sand, and remove loose paint to prevent paint peeling and reduce color fading. Use a bonding primer on bare spots and a stain-blocking primer where tannins or repairs show. Feather primer slightly beyond the repair to blend.
- Clean surface: wash dirt, mildew, and chalk.
- Sand: smooth edges and dull gloss for adhesion.
- Prime: choose bonding or stain-blocking formulas.
- Repaint: match satin sheen and feather into surrounding finish.
Cost Comparison: Satin Paint Vs. Other Exterior Finishes
When you compare costs, satin paint often sits between flat and high-gloss finishes—offering a balance of durability and price that makes it a sensible choice for many homes.
Satin paint strikes a practical middle ground—more durable and pricier than flat, yet more affordable than high-gloss.
You’ll find satin costs more than flat due to better paint durability and easier cleaning, but less than premium elastomeric or high-gloss options.
Consider color choices too: vivid pigments or specialty shades can raise prices regardless of sheen.
Labor and prep affect totals—satin’s forgiving finish may reduce touch-ups.
If you want moderate upfront expense with good performance, satin usually gives the best compromise among appearance, maintenance, and cost.
Longevity and Warranty Expectations for Exterior Satin
Cost and performance go hand in hand, so it’s worth looking at how satin holds up over time and what warranties actually cover. You’ll see satin resist dirt and mild fading for 7–15 years depending on climate and prep. Warranties vary; read exclusions for chalking, color shift, and surface failure.
- Expect manufacturer guarantees mostly for film integrity, not color life.
- Regular maintenance extends durability and honors warranty terms.
- Choose reputable brands that link technical data to color psychology and Interior design recommendations.
- Keep records of prep, product codes, and application photos for claims.
Test Satin on Your House Before You Commit
Since lighting, texture, and surrounding colors change how satin looks, test a small, well-prepped swatch on each façade before you commit. Pick a few shades from your shortlisted color palettes and apply them where sunlight, shade, and nearby trim interact.
Use samples from different paint brands to compare sheen, coverage, and drying appearance. Observe at various times—morning, midday, and dusk—and after rain.
Inspect for lap marks, streaking, and how the finish hides or reveals texture. Record results and photos, then choose the satin tone and brand that performs best under real conditions.
Frequently Asked Questions
Can Satin Paint Hide Existing Exterior Imperfections Like Cracks or Peeling?
Not really — satin paint won’t hide major cracks or peeling; you’ll need thorough surface preparation and repair. With proper application techniques and priming, it’ll minimize minor imperfections but won’t conceal structural damage completely.
Will Satin Finish Colors Fade Faster Than Flat Over Time?
Yes — satin can show more sheen and consequently seem to fade sooner in sun-soaked areas, but its texture enhancement often beats flat; if you use UV-resistant pigments and proper prep, you’ll extend color longevity and resist washout.
Can I Use Satin Paint on Exterior Metal Surfaces?
Yes — you can use satin paint on exterior metal surfaces if you choose durable color choices and do proper surface preparation: clean, de-rust, prime with a metal primer, then apply satin topcoat for weather-resistant finish.
Does Satin Paint Affect Home Resale Appeal or Curb Value?
Yes — satin paint can boost curb appeal if you choose durable colors and guarantee strong surface adhesion; buyers notice consistent Color durability and well-adhered finishes, and you’ll preserve resale value by maintaining a clean, attractive exterior.
Are There Eco-Friendly or Low-Voc Satin Paint Options?
Green goodness grabs you: you can choose eco friendly formulations and low VOC alternatives that perform well outdoors, and you’ll enjoy healthier homes, reduced odors, and durable finishes without sacrificing sheen or weather resistance.
Conclusion
Satin paint’s a strong choice for exteriors if you want moderate sheen, easier cleaning, and decent durability — but test it first, because one size doesn’t fit all. Consider your climate and wall material, and remember that “measure twice, cut once” applies: prep and sample well to avoid mismatched sheen or premature wear. If you do the homework and follow manufacturer guidance, satin can give you a balanced, long-lasting finish you’ll be proud of.