Is There a Clear Coat for Latex Paint? Options Guide
Yes — you can clear coat latex paint to protect and finish it. Choose water-based polyurethanes for high-traffic indoor areas, acrylic sealers with UV protection for outdoor surfaces, or acrylic sealers for art and flexible substrates. Prep glossy latex by cleaning and sanding, test a small patch for adhesion and color change, and apply thin even coats. Avoid oil-based clears over latex unless you use a bonding primer. Keep going to see picks, tests, and application tips.
Who This Guide Is For and What You’ll Learn
Whether you’re restoring a painted piece, sealing a craft project, or protecting a high-traffic wall, this guide helps you choose the right clear coat for latex paint. You’ll learn what clear coats do, which finishes suit indoor or outdoor use, and how to match sheen to your project’s needs. It’s for DIYers, crafters, and pros who want durable results without guessing.
You’ll see practical tips on prepping surfaces, tools to use, and troubleshooting common issues. Expect concise comparisons of water-based and solvent options, plus quick references to Painter tools and color mixing considerations for tinted topcoats.
Quick Answer: Is There a Clear Coat for Latex Paint?
Yes — you can use clear coats over latex paint, and you’ll choose from options like water‑based polyurethanes, acrylic sealers, or varnishes.
Pay attention to application methods (spray, brush, or roll) and drying times so you get an even finish.
Also check compatibility and do a small test patch to verify adhesion and sheen match your expectations.
Clear Coat Options
Curious if you can protect latex paint with a clear coat? You can choose acrylic polyurethane for durability, water-based poly for low odor, or a clear acrylic sealer for flexibility.
Interior projects often suit water-based poly; exterior surfaces benefit from UV-resistant formulations.
Consider satin, semi-gloss, or gloss sheens to match your finish. Think about color mixing only when tinting clear coats—avoid adding pigments unless product allows.
For best results, clean and maintain brushes and rollers for tool maintenance to prevent contamination.
Each option trades hardness, yellowing risk, and breathability—pick based on exposure and desired look.
Application And Compatibility
Wondering if you can top latex paint with a clear coat? You can, but prep matters. Clean, sand glossy latex until dull, then use a compatible water-based clear to avoid color shift and poor adhesion.
Test small areas to check color mixing effects—sheer clears can subtly deepen hues. Apply thin, even coats with a synthetic brush, roller, or sprayer, letting proper dry times prevent tackiness.
For texture enhancement, choose matte, satin, or gloss clears; each changes perceived texture and light reflection. Avoid oil-based clears over latex unless a bonding primer’s used to guarantee long-term compatibility.
Decision Flowchart: Pick the Right Clear Coat
Before you pick a clear coat, map out your needs—surface type, indoor or outdoor use, desired sheen, and the level of abrasion or chemical resistance—so you can follow a simple decision path that narrows choices quickly. Use this flowchart approach to match performance to project goals: protect, preserve, or refine appearance.
Map needs first—surface, location, sheen, and durability—then choose a clear coat to protect, preserve, or refine.
Consider color blending and texture enhancement when choosing sheens and additives. Don’t forget compatibility with your latex formula.
- High abrasion: water-based polyurethane.
- Outdoor exposure: exterior acrylic sealer.
- Smooth indoor finish: satin or semi-gloss polyurethane.
- Artistic pieces: UV varnish for color stability.
When to Seal Latex Paint (Common Use Cases)
You should seal latex paint in high-traffic areas like hallways and trim to protect against scuffs and wear.
If surfaces see regular moisture—bathrooms, kitchens, or basements—a clear coat helps resist staining and mildew.
For outdoor exposure, sealing adds UV and weather resistance to extend the paint’s life.
High-Traffic Areas
When walls and trim get constant contact—hallways, stairways, kids’ rooms, and entryways—sealing latex paint becomes a practical step to protect finish and reduce cleaning needs. You’ll preserve color mixing outcomes and maintain desired paint texture while adding a durable layer.
Choose a clear coat based on sheen and traffic levels; satin or semi-gloss often works best. Prep properly: clean, sand, and test adhesion. Consider wipeability and repairability when selecting products.
- Use a durable water-based poly for easy cleanups.
- Prefer semi-gloss for trim and handrails.
- Test a small area first.
- Recoat only when fully cured.
Moisture-Prone Surfaces
High-traffic rooms taught you to pick tougher sheens; moisture-prone areas demand different protection because water and humidity attack paint films and substrates. You’ll want breathable sealers that resist mildew, prevent peeling, and keep Color mixing or Texture enhancement choices intact. Use water-based polyurethane or acrylic masonry sealer in bathrooms, kitchens, and basements. Test adhesion and vapor transmission first.
| Area | Recommended Sealer | Notes |
|---|---|---|
| Bathroom | Water-based polyurethane | Mildew-resistant, low odor |
| Kitchen | Acrylic sealer | Handles splashes, preserves color |
| Basement | Masonry/acrylic | Breathable, prevents flaking |
Seal edges and joints; recoat as humidity or wear dictate.
Outdoor Exposure
Why seal latex paint on exterior surfaces? You’ll protect color, boost solar reflectivity, and guard against UV, moisture, and abrasion. If you plan laser engraving decorative panels or hanging outdoor art, a clear coat preserves edges and detail.
- High-sun areas — seal to reduce fading and improve solar reflectivity.
- Coastal or rainy zones — seal to block moisture and salt corrosion.
- High-traffic spots — seal to resist abrasion from people or pets.
- Decorative work (including laser engraving) — seal to preserve fine detail and simplify cleaning.
Choose a UV-stable, breathable exterior sealer for best results.
How Latex Paint Reacts to Clear Coats: Adhesion, Curing, Sheen
Because latex paints form a flexible, water-based film, clear coats interact with them in ways that affect adhesion, curing, and final sheen; you’ll see differences depending on the clear coat chemistry, application method, and the paint’s age and gloss level. You should consider color mixing effects and texture enhancement when choosing a clear coat: glossier coats deepen color and smooth texture, matte coats mute sheen and emphasize texture. Surface prep and drying time influence adhesion and cure; older paint may need scuffing.
| Clear Coat | Effect on Sheen | Notes |
|---|---|---|
| Gloss | Deepens color | Smooths texture |
| Satin | Balanced | Moderate adhesion |
| Matte | Mutes color | Highlights texture |
Water-Based Polyurethane: Why It’s Usually Safe for Latex
You’ll find water-based polyurethane generally plays well with latex because both are water-compatible and form a stable bond without solvent-induced problems.
I’ll explain simple application methods—brushing, rolling, or spraying—and how to avoid common issues like bubbles or uneven sheen.
Then we’ll cover the durability and finish options so you can pick the right sheen and protection level for your project.
Compatibility With Latex
While oil-based clear coats can react poorly with latex paint, water-based polyurethane usually plays nicely with it because both are compatible at the chemistry and application level. You’ll find it won’t yellow, it dries clear, and it respects the adhesion of latex layers.
Consider these compatibility points to decide if it’s right for your project:
- Surface bonding: water-based formulas bond to cured latex without breaking film integrity.
- Flexibility: similar elasticity reduces cracking when substrates expand or contract.
- Color mixing: clear finish preserves blended hues without altering tones.
- Brush techniques: water-based poly accepts thin, even strokes for uniform coverage.
Application Methods Explained
When you apply water-based polyurethane over cured latex, the key is preparing the surface and using thin, even coats so the finish bonds without trapping solvent or causing blush.
Scuff-sand lightly, remove dust, and guarantee full cure. You’ll work with a synthetic-bristle brush, foam applicator, or short-nap roller for smooth coverage and minimal bubbles.
Thin coats dry fast, letting you inspect color mixing outcomes and maintain the intended hue. Multiple light passes control sheen and promote uniform texture enhancement without lifting the underlying paint.
Follow manufacturer flash times, avoid heavy strokes, and sand between coats if needed for the next layer.
Durability And Finish
Because water-based polyurethane has a low-solvent formula and bonds mechanically to cured latex, it’s generally safe to use over latex paint without causing lifting or discoloration. You’ll get a clear protective film that resists abrasion and reduces the chance of paint peeling while preserving color mixing effects beneath.
It dries fast, clears milky sheen quickly, and won’t yellow like oil-based coats.
- Improves scratch resistance for high-traffic areas.
- Maintains true color mixing without altering hues.
- Adds moisture protection to prevent bubbling and peeling.
- Requires proper curing time to ensure adhesion and durability.
Polycrylic : What It Is and When to Use It
Polycrylic is a water-based clear finish that’s tough, fast-drying, and designed to protect latex paint without yellowing, so you can seal painted furniture, trim, or cabinets and keep colors true.
You’ll like it for interior projects where quick recoat times matter and odor needs to stay low. It comes in satin, semi-gloss, and gloss, letting you control sheen and assist subtle color blending across pieces.
Apply thin coats with fine bristle or foam; sand lightly between coats for adhesion. Use polycrylic for painted surfaces that need scratch and moisture resistance, but stick to water-based topcoats only.
Oil-Based Polyurethane: Pros, Cons, and Compatibility Risks
You might choose oil-based polyurethane for its tough, long-lasting finish and warm amber tone that enhances latex paint on trim and floors.
Watch compatibility: it can yellow over time, may not bond well to some water-based paints without proper sanding or a primer, and has stronger fumes.
When you apply it, use thin, even coats, allow long dry times, and work in a well-ventilated area to avoid runs and adhesion problems.
Oil-Based Polyurethane Benefits
If you want a tough, long-lasting finish for latex-painted surfaces, oil-based polyurethane delivers superior abrasion and chemical resistance compared with most waterborne clear coats. You’ll appreciate its warm amber tone that enhances color mixing and depth, and its self-leveling properties that hide minor brush marks. It cures hard, resists solvents, and stands up to frequent cleaning.
- Durability: withstands wear and scuffs better than many waterborne options.
- Appearance: enriches sheen and depth without yellowing quickly.
- Application: flows smoothly, forgiving for less-experienced users.
- Maintenance: simple brush maintenance with mineral spirits keeps tools reusable.
Adhesion And Compatibility Risks
Although oil-based polyurethane bonds well to many surfaces, it can clash with some latex paints and substrates, so you should check compatibility before sealing a project. You may see wrinkling, solvent lifting, or poor adhesion when oil formulations interact with waterborne binders or delicate finishes.
Test a small area and let it cure; failure modes reveal incompatibilities faster than assumptions. Also beware that additives and pigments used for color mixing might alter film formation.
For businesses, mismatched coatings can undermine product appearance and branding strategies, so document tests and vendor recommendations to avoid costly refinishing or reputation damage.
Application Tips And Cautions
When applying oil-based polyurethane over latex paint, take deliberate steps to guarantee proper adhesion and a smooth finish. You’ll prep by sanding gloss, cleaning dust, and testing a small patch to watch for color mixing or film reactions.
Mind fumes and longer cure times; oil poly can amber, affecting light tones or faux finishing effects. Use thin coats, wait full dry times, and ventilate.
If compatibility is doubtful, try a shellac primer barrier.
- Sand and tack before coating.
- Apply thin, even strokes.
- Allow full cure between coats.
- Test for ambering on samples.
Acrylic Varnishes for Latex-Painted Surfaces
Because acrylic varnishes dry clear and remain flexible, they’re one of the easiest protective topcoats to use over latex paint. You’ll find they preserve color matching and can boost texture enhancement without yellowing.
Apply thin, even coats with a synthetic brush or foam roller, sanding lightly between coats for adhesion. Choose satin, gloss, or matte according to desired sheen; matte hides imperfections, gloss highlights texture.
Dry times are short, so you can recoat within hours. Clean up with soap and water.
Test a small area first to confirm compatibility and appearance before finishing the entire project.
Spar Urethane and Exterior Finishes for Latex Paint
If you’re protecting exterior latex paint, spar urethane is worth considering because it’s formulated to flex and resist UV and moisture.
You should test compatibility first—some oil-based spar urethanes can amber or not adhere well to water-based finishes.
For best results, choose a spar urethane labeled safe for latex or use an exterior waterbased clear designed for latex paint.
Spar Urethane Compatibility
Although spar urethane’s marine-grade formula promises UV and moisture resistance, you should know it wasn’t designed for bonding directly over latex paint without proper preparation.
You can use spar urethane if you sand glossy latex, remove contaminants, and apply a compatible primer. Test adhesion on a small area first.
Remember color mixing can affect opacity beneath clear coats, so confirm the final hue before sealing.
Use proper brush techniques—long, even strokes or a foam applicator—to avoid streaks and bubbles.
- Sand glossy latex to 120–220 grit
- Clean with mild solvent
- Prime with an adhesion primer
- Test cure and adhesion
Exterior Latex Finishes
When you need durable protection for outdoor latex-painted surfaces, choose exterior-grade finishes specifically formulated to handle UV exposure, moisture, and temperature swings. You’ll often pick spar urethane or exterior acrylic clear coats designed to flex with substrate movement and resist yellowing.
Test small areas to check chemical interactions between the latex and the clear coat; some solvent-based spar products can cause clouding. Apply thin, even coats, sanding between layers if recommended, to maintain adhesion.
These finishes offer abrasion resistance and color enhancement without sacrificing breathability. Follow manufacturer instructions for temperature and recoat windows to ensure long-lasting results.
Satin, Semi-Gloss, and Gloss: Choosing the Right Sheen
Curious which sheen will suit your project best? You’ll pick based on appearance and function: satin softens imperfections and aids color matching, semi-gloss highlights details and resists scuffs, gloss offers maximum shine and easy cleaning.
Consider room use, light levels, and desired texture enhancement when deciding.
- Satin: Subtle sheen, hides minor flaws, good for living spaces.
- Semi-gloss: Balanced reflectivity, ideal for trim and high-traffic areas.
- Gloss: High reflectivity, durable finish for accents.
- Practical tip: Test swatches under your lighting to confirm look and feel before committing.
Water-Based Poly vs. Varnish: Durability and Use Cases
You’ll find water-based polyurethane is low-odor, fast-drying, and resists yellowing, making it great for interior latex-painted surfaces.
Varnish can offer tougher abrasion and UV resistance for high-wear or exterior uses, though it may amber over time.
Compare those strengths to pick the best finish for your specific project and environment.
Water-Based Poly Advantages
Although both water-based poly and traditional varnish protect latex paint, water-based poly delivers tougher, clearer protection without the heavy odor or long cure times of oil-based varnishes. You’ll enjoy fast dry times, minimal yellowing, and easy cleanup, so your color mixing choices stay true and your finish stays crisp.
Apply with proper brush techniques for smooth, even coats and avoid lap marks.
- Dries quickly—short recoats and faster project completion.
- Low odor—safer for indoor use and occupied spaces.
- Non-yellowing—preserves original hues and vibrancy.
- Easy cleanup—soap and water, no solvents needed.
Varnish Durability Comparison
When choosing between water-based poly and traditional oil-based varnish, think about where and how the finished piece will be used: water-based poly gives tough, clear protection with fast drying and minimal yellowing—ideal for indoor furniture and painted trim—while oil-based varnish offers slightly harder, more abrasion-resistant film that can stand up better in high-traffic or outdoor applications but brings longer cure times and potential yellowing. Consider color mixing impacts and primer selection before sealing. Compare properties:
| Property | Impact |
|---|---|
| Yellowing | Water-based: low; Oil-based: higher |
| Durability | Water-based: flexible; Oil-based: harder |
Best Use Case Scenarios
How should you pick between water-based poly and oil-based varnish for a specific project? You’ll weigh durability, appearance, and maintenance.
Water-based poly dries clear, resists yellowing, and suits color blending where accurate hues matter.
Oil-based varnish adds warmth and excels at texture enhancement on wood grains or decorative finishes.
- Use water-based poly for interior trim, vivid colors, and quick recoat windows.
- Choose oil varnish for floors, antique restoration, and richer tones.
- Prefer poly for low-VOC needs and easy cleanup.
- Pick varnish when abrasion resistance and classic sheen outweigh color fidelity.
Epoxy Clear Coats for Latex-Painted Surfaces
If you want a tough, glossy finish over latex paint, epoxy clear coats are one of the strongest options available. They offer excellent abrasion and chemical resistance once fully cured.
You’ll need proper primer selection to guarantee adhesion, especially on high-gloss latex; some epoxies bond poorly without a compatible primer. Plan color matching before sealing—clear epoxy can slightly amber or deepen hues, so test on a sample.
Apply thin, even coats, following pot life and cure times, and sand between coats if necessary.
Use good ventilation and appropriate PPE; cured epoxy gives a durable, low-maintenance finish for heavy-use surfaces.
Using Lacquer Over Latex: Risks and Workarounds
Although lacquer can give a fast-drying, high-gloss finish, you should be cautious about applying it over latex paint because lacquer solvents can soften or wrinkle the underlying latex film.
You’ll test adhesion first and consider primer selection: use a solvent-resistant bonding primer if needed. Be mindful of color mixing effects under a glossy lacquer—deep or translucent tones may shift.
- Test a small area for softening and compatibility.
- Sand between coats to improve mechanical adhesion.
- Use a compatible primer selection to block solvents and stabilize the latex.
- Allow full cure of latex before attempting lacquer.
Food-Safe and Tabletop Finishes Over Latex-Painted Furniture
After checking lacquer compatibility you’ll want to take into account finishes that are safe for surfaces that contact food—especially for tabletops, cutting boards, and kids’ furniture.
You should choose FDA-compliant or explicitly labeled food-safe topcoats and follow manufacturer cure times so solvents don’t off-gas onto meals.
Polyurethane variants formulated for food contact, water-based epoxy, and certified mineral oil/food-safe wax blends work well over fully cured latex if adhesion is good.
Test adhesion and clean thoroughly during furniture repair before sealing.
Regular maintenance keeps the finish intact; recoat or sand minor damage to preserve both appearance and food safety.
Best Clear Coats for Painted Furniture
When you’re choosing a clear coat for painted furniture, pick a product that balances durability, appearance, and compatibility with your paint and use-case. You’ll want a finish that resists scuffs, doesn’t amber, and layers well over latex without altering color mixing outcomes or hiding brush techniques. Consider sheen, drying time, and maintenance needs.
- Water-based polyurethane — clear, durable, minimal yellowing.
- Acrylic varnish — flexible, good for vivid colors.
- Polycrylic — easy cleanup, low odor, fits indoor pieces.
- Oil-modified urethane — very tough, may deepen tones.
Test on scrap first to confirm compatibility.
Sealing Trim and Baseboards Painted With Latex
If you want your trim and baseboards to stay crisp and resist chips, sealing latex paint is essential. You’ll choose a clear coat that preserves color contrast between trim and walls while resisting scuffs from vacuuming and foot traffic.
For smooth, glossy trim, use a durable polyurethane or water-based varnish; it enhances paint texture and wipes clean. For textured or rubbed finishes, pick a matte or satin clear coat to avoid exaggerated sheen.
Always test on a scrap piece, apply thin even coats, and sand lightly between coats for adhesion. Let each coat cure fully before heavy use.
When to Seal Interior Walls With a Clear Coat
Although interior walls don’t always need a clear coat, you’ll want to seal them when they face high-traffic areas, frequent cleaning, or moisture exposure—places like hallways, kitchens, bathrooms, and kids’ rooms.
Seal interior walls in high-traffic, moisture-prone areas—hallways, kitchens, bathrooms, and kids’ rooms—to protect finish and ease upkeep.
You’ll protect color integrity and simplify upkeep, especially where color mixing occurred or touch-ups are likely. A clear coat resists stains and reduces repaint frequency.
Consider sheens that match the room and use products compatible with latex. Keep brush maintenance in mind to avoid streaks and contamination.
Apply when surfaces are fully cured and free of soap film.
- High-traffic corridors
- Kitchens near prep zones
- Bathrooms and laundry areas
- Children’s playrooms
Prep Checklist Before Applying Any Clear Coat to Latex
Before you roll on any clear coat, make sure the latex surface is clean, free of grease, and deglossed if it’s shiny so the finish will adhere.
Check that room temperature and humidity are within the product’s recommended range to avoid curing problems like blushing or orange peel.
Tack any dust and address imperfections before coating to get an even result.
Surface Cleaning And Deglossing
A clean, deglossed surface is the foundation for any durable clear coat over latex—so you’ll want to remove dirt, grease, and any shiny top layer before you touch a brush or sprayer. You’ll start by washing with mild detergent, rinsing, and drying.
Degloss with a liquid deglosser or fine sandpaper to scuff sheen without damaging color blending or texture enhancement. Remove sanding dust with tack cloths. Confirm solvents are compatible with your paint.
- Wash and rinse thoroughly.
- Use deglosser or 220–320 grit sanding.
- Wipe with solvent-safe tack cloth.
- Inspect for remaining gloss or contaminants.
Temperature And Humidity Control
Now that your surface is clean and deglossed, control the environment so your clear coat cures correctly: keep the workspace between about 50–85°F (10–29°C) and relative humidity under 60% when applying latex-compatible clear coats.
You should monitor temperature fluctuations during drying; avoid open windows, heaters, or A/C that cause swings. Humidity effects include extended tack times, blushing, and clouding—hold steady conditions for the recommended dry time.
Use a hygrometer and thermometer, and postpone work if conditions stray. For large projects, tenting with a dehumidifier or space heater stabilizes the environment and improves adhesion.
Cleaning Painted Surfaces Before Sealing
When you’re sealing latex paint, clean surfaces thoroughly so the clear coat sticks and looks professional. You’ll remove dust, grease, and leftover color mixing residues that can cloud finish or interfere with adhesion. Wipe with a mild detergent, rinse, and let dry fully; avoid soaking edges. Use a lint-free cloth and gentle scrubbing to preserve Brush techniques’ smooth strokes already applied. Pay attention to corners and hardware, masking where needed.
- Degrease with TSP substitute.
- Rinse with clean water.
- Dry and tack cloth.
- Remove loose particles with a soft brush.
Scuff Sanding: How Much and Where to Sand
Before you apply any clear coat, lightly scuff sand the painted surface to promote adhesion without removing the finish underneath. You’ll focus on high-touch areas and glossy spots where scuff sanding improves paint adhesion. Use 320–400 grit sandpaper, a light hand, and short passes. Test a small area to confirm you’re just dulling the sheen. Don’t over-sand flat or porous sections. After scuffing, wipe away residue before sealing. Below is a quick guide to where and how much to sand.
| Area | Recommended Grit |
|---|---|
| High gloss panels | 320 |
| Edges/corners | 400 |
| Large flat areas | 400 |
| Repairs/blemishes | 320 |
Tack Cloths and Dust Control for a Smooth Finish
Before you spray or brush on clear coat, you’ll want to wipe the surface with a proper tack cloth to pick up fine dust without leaving residue.
Control dust in the workspace by wiping down surfaces, using a tack rag just before coating, and minimizing airflow that can kick up particles.
These simple steps will help you get a smooth, blemish-free finish.
Proper Tack Cloth Use
A tack cloth is one of the simplest tools you can use to remove fine dust and hairs just before applying clear coat, and using it correctly makes the difference between a smooth finish and visible imperfections. You’ll gently wipe panels after final sanding, avoid overworking surfaces, and replace cloths when they get clogged. Keep brush maintenance separate—clean brushes before tack-wiping to prevent contaminant transfer.
Consider color coordination of prep stages so you don’t mix cloths between primer, color, and clear. Use tack cloths to finish, not to clean greasy residue; follow with a final solvent wipe if needed.
- Light, single-pass wipes
- Replace when sticky
- Avoid oil contact
- Store sealed
Dust Control Techniques
When you’re getting ready to lay down clear coat, controlling dust is as important as your sanding—tack cloths and a few simple dust-control habits will prevent tiny specks from ruining the finish.
Wipe surfaces with a fresh tack cloth just before coating, changing cloths when they load.
Work in a clean, low-traffic space; turn off fans that stir dust and run a HEPA air scrubber if you can.
Wear lint-free clothing and avoid shaking rags.
Between coats, use light sanding and tack cloths again.
Good dust control complements your color mixing accuracy and steady brush techniques for a smooth final coat.
When to Re-Prime Before Clear Coating Latex
How do you know if the surface needs another coat of primer before you apply clear coat? Check adhesion, color uniformity, and surface feel: if paint flakes, shows bleed-through, or uneven sheen, re-prime.
Color mixing issues that left ghost tones or stains warrant sealing. Texture enhancement goals—if you want a smoother or more uniform tactile finish—also justify another primer layer.
Seal any ghost tones or stains from color mixing, and prime again to achieve a smoother, more uniform texture.
- Flaking or poor adhesion after sanding.
- Visible stains, tannin bleed, or strong underlying colors.
- Uneven texture that will telegraph through the clear coat.
- Porous spots that absorb finish differently.
Re-prime selectively; don’t overdo it.
Mixing, Thinning, and Stirring Clear Coats Correctly
Before you slap on a clear coat, get the mixing ratios right and follow the manufacturer’s thinning instructions so the finish levels and cures properly.
Use the recommended thinner and measure carefully rather than guessing, and pay attention to pot life and viscosity while you work.
Stir gently but thoroughly with a clean tool for the specified time to avoid bubbles and guarantee an even coat.
Proper Mixing Ratios
If you want your clear coat to perform as promised, getting the mixing ratios right is essential. You’ll follow manufacturer instructions, measure by volume, and keep records for repeatable results. Pay attention to pot life and humidity limits. Match any additive ratios precisely and avoid guesswork; color mixing notes can matter if you’re sealing tinted latex.
Adjust technique, not ratio, when switching tools—brush techniques influence finish but shouldn’t change measured proportions.
- Use calibrated cups for resin and hardener.
- Mix in a clean container, scraping sides.
- Stir slowly to avoid bubbles for 2–3 minutes.
- Let rest before application to de-gas.
Correct Thinning Methods
Getting the ratios right set the foundation; now you’ll focus on thinning and stirring so the clear coat flows evenly and cures properly.
You’ll choose a compatible thinner—water for waterborne clears, manufacturer-recommended solvent for others—and add it incrementally, testing viscosity against the product’s flow cup or recommended brush/spray behavior.
Keep color mixing separate: don’t introduce pigments when thinning a clear.
Thin only to the level needed for your application method, accounting for temperature and humidity.
Use gentle, consistent motions to combine components without air entrapment.
Maintain clean tools, measure carefully, and label mixed batches for repeatable Texture techniques results.
Stirring Techniques And Timing
When you mix and thin clear coats, stir slowly and steadily to blend components without whipping in air; you’ll preserve gloss and avoid bubbles. Focus on stirring consistency—use a flat paddle, scrape the sides, and keep a steady rhythm.
Pay attention to timing: after thinning, wait the manufacturer’s recommended dwell before application to assure proper viscosity and timing for sealing.
Follow these concise steps:
- Measure additives precisely and pour into the container.
- Stir from bottom to top for uniform pigments and solvents.
- Check viscosity with a viscosity cup; adjust minimally.
- Allow recommended flash time before sealing or recoating.
Brush vs. Roller vs. Sprayer: Application Methods Compared
Although each tool can apply a clear coat, your choice of brush, roller, or sprayer will determine finish quality, speed, and prep needs. You’ll consider color mixing effects and texture enhancement when picking tools: brushes give control and slight texture, rollers are fast with moderate stipple, sprayers deliver smooth, even coats but need masking.
| Tool | Speed | Finish |
|---|---|---|
| Brush | Slow | Slight texture |
| Roller | Medium | Moderate stipple |
| Sprayer | Fast | Smooth, thin film |
You’ll prep differently: brush needs less masking, sprayer demands thorough protection and thinning for ideal results.
Drying Times and Recoat Windows for Water-Based Poly
Because water-based poly dries by evaporation and coalescence rather than solvent curing, you’ll see a relatively fast surface dry but should still respect the recoat window to avoid adhesion problems or lifting of the previous coat. You’ll typically wait 2–4 hours between coats at room temperature and moderate humidity; colder or humid conditions extend that.
Plan coats to preserve color mixing integrity and prevent texture enhancement loss. Follow manufacturer times and test a small area before proceeding.
- Confirm tack-free surface before recoating.
- Lightly sand between coats for bite.
- Monitor humidity and temperature.
- Allow full cure before heavy use.
Drying Times and Recoat Windows for Oil-Based Poly
Water-based polys dry fast on the surface, but oil-based poly behaves differently and calls for more patience. It dries by oxidation and solvent evaporation, so you’ll see a much longer tack-free time and extended recoat windows.
You’ll typically wait 6–8 hours before a light recoat and up to 24 hours for full recoating in normal conditions. Cooler or humid environments stretch this.
Sanding between coats is often required to ensure adhesion, especially over varied substrates after primer selection and color mixing that can affect appearance.
Plan longer cure times before heavy use—full hardness can take days to weeks.
How Many Coats Do You Need?
You’ll usually apply one to two base coats of latex paint for full coverage before thinking about a clearcoat.
Apply the clearcoat only after the base coats are fully dry and any touch-ups are done so it bonds evenly.
If you want extra durability or a smoother finish, plan on a thin second clear layer after the first has cured.
Number Of Base Coats
When deciding how many base coats to apply, consider the paint’s opacity, the surface condition, and the color change you’re making. You’ll usually need two coats for even coverage, but factors like deep color shifts or porous surfaces can raise that.
Base coats affect color blending and offer initial texture enhancement, so plan accordingly. Inspect after each dried coat and only add more if streaks, uneven sheen, or visible substrate remain. Follow manufacturer dry times between applications to avoid lifting.
- Porous surfaces: 3 coats or primer plus 2 coats
- Drastic color change: 3 coats
- High-quality paint: often 2 coats
- Spot repairs: feather additional thin coats
When To Apply Clearcoat
Wondering how many clearcoat layers you actually need? You’ll usually apply one to three coats: one for light protection, two for balanced durability and sheen, three if you want strong abrasion resistance.
Wait until latex base coats are fully dry—typically 24 hours—before sealing. Sand lightly between coats for adhesion and texture enhancement control.
If you’ve mixed pigments or experimented with color mixing, test a clearcoat on a sample to confirm final tone and gloss.
Thin coats dry faster and reduce runs. Finish with the recommended dry time before use to guarantee long-term protection and a consistent surface.
Sanding Between Coats: Grit and Technique
Because proper sanding smooths imperfections and promotes adhesion, you should sand lightly between latex clear-coat layers using the right grit and a gentle hand. You’ll preserve subtle latex texture and guarantee color blending remains seamless while removing dust nibs. Use light pressure, keep the surface clean, and test on a scrap piece.
- Start with 320–400 grit for gentle leveling.
- Move to 600 grit before final clear coats for a silky feel.
- Use a sanding block or fine foam pad to keep pressure even.
- Wipe with a tack cloth and let the surface fully dry before recoating.
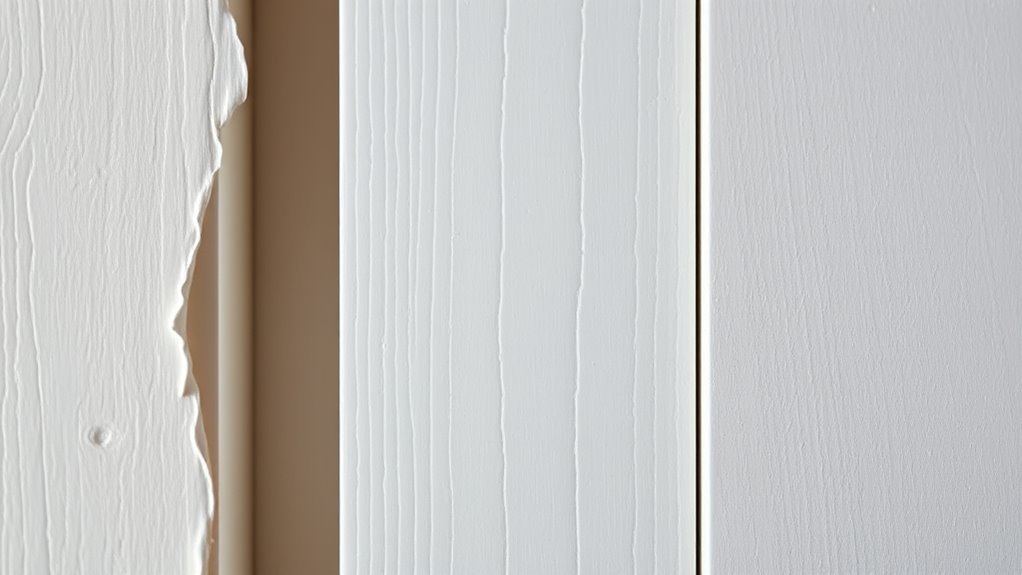
Avoiding Brush Marks, Bubbles, and Streaks
If you want a glass-smooth finish, focus on thin, even strokes and proper thinning or flow-enhancing additives so your brush won’t leave trails, bubbles don’t form, and streaks level out as the clear cures.
Work with a high-quality, flagged-bristle brush or foam applicator and maintain a wet edge to prevent overlap marks.
Roll or brush in consistent directions for subtle color blending when blending panels, and use light pressure to avoid texture enhancement from heavy passes.
De-gas thicker clear coats, avoid excessive agitation, and sand lightly between coats to remove any minor imperfections before applying the next layer.
Preventing Cloudiness (Blush) With Water-Based Finishes
To prevent cloudiness (blush) with water-based finishes, avoid painting when humidity is high and give pieces plenty of dry time.
Pick fast-drying sealers so layers set quickly and are less likely to trap moisture.
Apply thin, even coats to promote consistent drying and reduce the chance of a milky finish.
Avoid Humidity During Drying
When you apply water-based clear coats in humid conditions, tiny droplets can become trapped as the finish dries and create a milky haze called blush. You’ll prevent this by focusing on humidity control and diligent surface preparation before coating.
Work when dew point and relative humidity are low, use dehumidifiers or HVAC to stabilize the room, and avoid painting right after cleaning or wet-sanding.
- Check weather and indoor RH; postpone if above recommended levels.
- Dry the substrate thoroughly after washing or sanding.
- Keep ventilation steady but avoid direct drafts.
- Allow extra dry time between coats to reduce blush risk.
Use Fast-Drying Sealers
Keeping humidity low helps, but you can further reduce blush by sealing the surface with a fast-drying water-based sealer before topcoating. You’ll lock in moisture quickly, preventing the milky haze that forms when solvents condense.
Apply the sealer according to label directions and wait the recommended dry time—fast cure minimizes reabsorption of moisture.
Besides preventing cloudiness, a good sealer aids color matching by stabilizing the base beneath your clear coat and provides subtle texture enhancement for smoother, more consistent topcoat appearance.
Choose a sealer compatible with your latex system and test a small area first.
Apply Thin, Even Coats
Although fast-drying sealers help, you’ll still need to apply your water-based clear in thin, even coats to avoid blush. Heavy application traps moisture and slows cure, creating that milky haze. You should work quickly but steadily, keeping a light touch and building layers.
Thin coats preserve color mixing accuracy and let texture enhancement show through without clouding. Aim for uniform passes and proper flash time between coats.
- Use a high-quality synthetic brush or foam roller.
- Maintain 6–8 hours drying between coats.
- Sand lightly (220–320) for adhesion.
- Avoid humid or cold conditions during application.
Yellowing Risks: Which Clear Coats Discolor Latex
Clear coats based on oil- or alkyd-modified resins are the most likely to yellow over time, especially on light or white latex finishes, so you’ll want to avoid them if color stability matters.
Avoid oil- or alkyd-based clear coats; they tend to yellow, especially over light or white latex finishes.
You should choose waterborne polyurethane or acrylic clears to preserve true tones and protect your color matching. Test a small panel before committing: apply your chosen clear using the same brush techniques you’ll use on the job to check sheen and interaction.
Matte clears can hide slight shifts better than high gloss.
Keep records of product names and batch numbers so you can repeat successful, non-yellowing results.
Temperature, Humidity, and Environmental Effects During Application
You’ll want to check the manufacturer’s temperature range limits before you start, since too-hot or too-cold conditions can ruin adhesion and curing.
High humidity slows curing and can cause cloudiness or blushing, while very low humidity can lead to bubbling or poor film formation.
Also be aware of airborne contaminants like dust, pollen, and exhaust that settle into the wet clear coat and mar the finish.
Temperature Range Limits
When you’re planning to apply a clear coat over latex paint, pay close attention to temperature and humidity because they directly affect flow, cure time, and adhesion. You’ll want to avoid extremes: most latex-compatible clears specify optimal ranges.
Temperature fluctuations can cause blushing, cracking, or poor adhesion, so pick conditions that match the product’s limits and ensure paint compatibility. Work when temperatures are steady and within range listed by the manufacturer.
- Check product datasheet for minimum and maximum application temperatures.
- Avoid night-to-day swings that exceed recommended ranges.
- Don’t apply near freezing or excessive heat.
- Use controlled environments when possible.
Humidity Impact On Curing
If humidity’s high during application, the solvent and water in latex clear coats evaporate more slowly, so coatings take longer to set and are at greater risk of blushing, tackiness, and poor intercoat adhesion.
You should monitor relative humidity and delay spraying or brushing if levels exceed manufacturer recommendations, since prolonged cure times can compromise Latex durability and lead to splotchy sheen.
Use dehumidifiers, increase airflow, and choose fast-drying formulations when possible to improve film formation.
Allow extra flash and recoat times, and inspect adhesion before topcoating.
Proper timing preserves Clear coat aesthetics and long-term performance in humid conditions.
Airborne Contaminant Risks
Because airborne dust, pollen, and spray mist can land on uncured latex clear coats, they can mar finish appearance and compromise adhesion to underlying layers. You need to control temperature and humidity to minimize airborne particles and dust contamination during application. Follow these practices to reduce risks:
- Work when temperatures and relative humidity fall within product specs to speed curing and limit particle attraction.
- Use tack cloths and air filtration to remove airborne particles before coating.
- Avoid windy or dusty environments; set up barriers or a temporary booth if needed.
- Allow full cure time; inspect and sand out any dust contamination before recoating.
Compatibility Testing: How to Do a Reliable Patch Test
Before you commit a clear coat to the whole surface, do a small compatibility patch so you won’t risk peeling, discoloration, or poor adhesion. Choose an inconspicuous area, clean it, and note the paint’s sheen and drying time.
Test any color mixing you used originally to verify the base hasn’t altered.
Apply the clear coat with the brush techniques you’ll use on the job—light, even strokes and minimal back-brushing.
Let it cure fully, checking adhesion, gloss match, and flexibility.
Record products, ratios, and times so you can replicate successful results or avoid incompatible combinations.
Troubleshooting: Clouding, Streaking, and Tackiness
When clear coats cloud, streak, or stay tacky, you’ll want to diagnose the cause quickly so you can fix it before it ruins the finish. First, check humidity and temperature — moisture causes clouding and tackiness.
If clear coats cloud or stay tacky, diagnose humidity, temperature, and curing conditions quickly to save the finish.
Second, confirm product compatibility; improper combos can streak and interfere with color matching and texture enhancement.
Third, inspect application technique: overworking or thick coats trap solvents and stay tacky.
Fourth, evaluate drying time and ventilation; slow cure often leads to streaks or tacky feel.
Address the specific cause: thin coats, proper ambient conditions, and compatible clear coats restore a smooth, durable finish.
Repairing Scratches and Chips in a Clear-Coated Latex Finish
If you find clouding, streaking, or tackiness resolved, you’ll still sometimes face scratches and chips that need spot repairs.
Start by cleaning the area, sanding lightly, and removing loose clear coat.
Match the underlying latex with careful color matching—test swatches on scrap.
Apply primer if bare wood or metal shows, then feather paint into the damaged spot.
Use fine brush techniques for thin, controlled layers of latex; let each layer dry fully.
Once paint blends, apply a compatible clear coat in thin passes, using the same steady brush strokes to avoid brush marks.
Finish by curing per product instructions.
Removing an Old Clear Coat From Latex Paint
Although removing an old clear coat can seem intimidating, you can strip it effectively by evaluating the coating type and choosing the right method—chemical stripper, heat, or mechanical abrasion—based on the surface and surrounding paint. You’ll test a small area, protect edges, and consider how removal affects color mixing and texture enhancement of the underlying latex.
Strip old clearcoat confidently: assess its type, test methods, protect edges, and choose chemical, heat, or sanding accordingly.
Choose gentle methods for thin layers; aggressive methods for hardened or multiple coats. Plan cleanup and recoat strategy before you begin.
- Identify clear coat chemistry and adhesion.
- Try solvent or gel stripper on a patch.
- Use heat gun sparingly to lift film.
- Sand progressively, finish with fine grit.
Wax for Latex-Painted Furniture: When It’s a Good Option
Curious whether wax is the right finish for your latex-painted furniture? You’ll find wax works well for pieces that need a soft, low-sheen look and subtle protection. Use paste wax to enhance color, highlight decorative techniques, and gently age trim and Metal accents. Apply thin coats and buff for an even feel; it won’t change paint color dramatically. Ideal for bedside tables, dressers, and display pieces where tactile finish matters more than heavy-duty defense.
| Best Use | Result |
|---|---|
| Low-sheen look | Soft, tactile finish |
| Decorative techniques | Enhanced detail |
| Metal accents | Coordinated patina |
| Small furniture | Quick application |
Wax Limitations: Wear, Moisture, and Upkeep
Wax gives a lovely low-sheen finish, but it won’t stand up to heavy wear or moisture the way harder clear coats do. You should expect quicker Wax wear on high-traffic pieces and frequent reapplication to maintain protection.
Wax provides a soft, low-sheen finish but won’t endure heavy wear or moisture—expect quicker wear and frequent reapplication.
Wax resists minor scuffs but not prolonged moisture exposure, so moisture damage can lift or cloud the finish. Consider these practical limits:
- Reapply wax every few months on surfaces you use often.
- Avoid placing wet items directly on waxed paint.
- Sand and recoat if wax builds unevenly or shows wear.
- Use wax only for low-use, indoor pieces.
Exterior Durability: UV Resistance and Weatherproofing for Latex
When you put latex-painted surfaces outdoors, UV rays, temperature swings, and moisture will degrade the finish over time. So choose a clear coat that specifically boosts UV resistance and seals against water.
You’ll want a tough, flexible sealer—marine-grade polyurethane or exterior acrylic varnish—that prevents chalking and yellowing while shedding rain.
Apply thin, even coats and test adhesion over any decorative “Interior accents” that shift outdoors.
If you used delicate “Artistic techniques,” add a primer and clear adhesion promoter first.
Maintain with periodic inspections and recoat before failure to preserve color and protection.
Low-VOC and Eco-Friendly Clear Coat Choices
If you want to minimize fumes and environmental impact, choose low-VOC or water-based clear coats formulated for latex paint—these give good protection without the strong solvent smell of traditional polyurethanes. You’ll preserve color blending and subtle texture effects while keeping indoor air safer.
Pick products labeled low-VOC or waterborne acrylics, and test adhesion over your base coat. Apply thin, even layers and allow full curing to avoid tackiness.
Consider sealers with recycled content for extra eco credentials.
- Waterborne acrylic clear
- Plant-based varnishes
- Low-VOC satin polyurethane
- Non-yellowing acrylic sealer
Cost Comparison: Common Clear Coat Materials
Comparing clear coat options by price helps you match performance to budget quickly. You’ll weigh upfront cost against durability; acrylics are affordable, polyurethane costs more but resists abrasion, and varnishes vary. Consider how coatings affect color mixing and surface texture—gloss hides flaws, matte shows texture. Use the table to compare typical per-quart pricing and lifespan.
| Material | Typical Cost/Quart |
|---|---|
| Acrylic Waterborne | $15–$30 |
| Oil-Based Polyurethane | $20–$45 |
| Spar Varnish | $25–$50 |
| Waterborne Polyurethane | $25–$60 |
Choose based on budget, appearance, and expected wear.
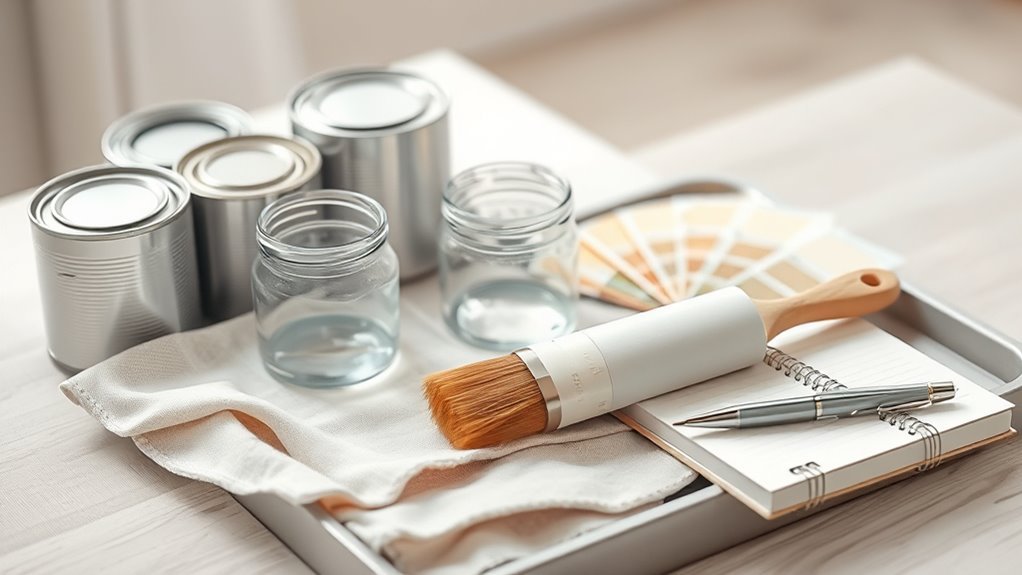
Tools and Supplies Checklist for Sealing Latex Paint
Now that you’ve weighed cost against performance, gather the right tools so your chosen clear coat applies smoothly and lasts. You’ll want items that support Color mixing accuracy and preserve Texture enhancement choices while minimizing dust and drips.
Prepare to test on a scrap to confirm sheen and compatibility.
- Quality synthetic brush or foam roller for even laydown.
- Fine-grit sandpaper (220–400) and tack cloth for adhesion.
- Mixing cup, stir sticks, and a small scale for precise Color mixing ratios.
- Protective gloves, respirator mask, and drop cloths to control cleanup and safety.
Step-by-Step Quick How-To: Sealing a Small Painted Piece
Before you seal the piece, make sure it’s completely dry, lightly sanded, and wiped with a tack cloth so the clear coat bonds and lays down smoothly. You’ll work in thin coats, sanding lightly between them. Use a satin or gloss clear that complements your finish; test for color matching and paint blending on scrap. Apply with a foam brush or spray, keeping strokes even. Cure fully before handling.
| Step | Tip |
|---|---|
| 1 | Clean surface |
| 2 | Thin coat |
| 3 | Light sand |
| 4 | Final coat and cure |
Cleaning and Maintaining Sealed Latex Surfaces
Although sealed latex surfaces resist dirt and moisture, you’ll still need regular care to keep them looking their best. Wipe spills promptly with a soft cloth and mild detergent, avoiding abrasive pads that can dull sheen or disrupt delicate faux finishes. Dust weekly to prevent grit from scratching clear coats.
Test cleaners in an inconspicuous spot when you’ve done color mixing or layered effects to verify no reaction. Follow these steps:
- Dust with microfiber, then vacuum edges.
- Clean with pH-neutral soap and water.
- Rinse and dry immediately to prevent streaks.
- Buff lightly with a soft cloth for shine.
When to Repaint Instead of Adding a Clear Coat
If the paint is peeling, chalking, markedly faded, or showing adhesion problems, you should repaint rather than just add a clear coat.
Repainting makes sense when surface damage or color drift is extensive; a clear coat can’t correct major fading or mismatched tones. You’ll repaint to achieve accurate color matching and restore uniform coverage.
Replacing the top layer also lets you correct texture issues—apply primers or adjust rollers for texture enhancement so the finish looks consistent.
Choose repainting when longevity and appearance matter more than a quick protective layer; it’s a better long-term solution for compromised latex finishes.
Common Mistakes That Cause Peeling or Adhesion Failure
When a clear coat peels or won’t stick, it’s usually because one or more surface-prep or application steps were skipped or done poorly. You’ll avoid failures by addressing common mistakes quickly and precisely.
- Skipping proper cleaning: dirt or wax prevents adhesion, so degrease and rinse thoroughly.
- Ignoring sanding: glossy latex needs scuffing for bite; poor sanding ruins bond.
- Applying over incompatible paints: don’t top fresh or uncured layers; ensure full cure.
- Wrong application: heavy coats, poor brush techniques, or bad color blending can trap solvents and cause lifting.
Follow steps carefully to prevent peeling.
How to Test Long-Term Compatibility Before Committing
How do you know a clear coat will hold up over time? Test small samples on scrap pieces of the same substrate and painted with your chosen latex and color matching method.
Test clear coats on matching scrap pieces, fully cure them, then stress-test for real-world durability.
Cure them fully, then expose samples to accelerated stress: UV from a lamp, moisture cycles, and temperature swings to evaluate weather resistance and adhesion.
Inspect for yellowing, cracking, or lifting at intervals—one week, one month, three months.
Sand and recoat a test spot to check intercoat bonding.
Document results and compare products side-by-side before committing to a full project application.
Quick References: Product Recommendations by Project Type
Because different jobs stress finishes in different ways, you’ll want a short, targeted list of clear-coat options tailored to each project type. You’ll choose by balancing latex durability with required paint flexibility and look.
- Interior walls: water-based polyurethane for easy cleaning and moderate latex durability without cracking.
- Trim and doors: acrylic enamel clear coats for a harder surface and better abrasion resistance.
- Kitchens and bathrooms: marine-grade waterborne varnish for moisture resistance while retaining paint flexibility.
- Outdoor siding: spar urethane or exterior acrylic sealer for UV protection and prolonged latex durability in harsh weather.
Frequently Asked Questions
Will Clear Coats Change the Color Saturation of Latex Paint Over Time?
Yes — clear coats can slightly alter color saturation over time; you’ll notice subtle shifts as UV exposure and yellowing affect color stability, and different products can change finish sheen, so pick UV-resistant, non-yellowing formulas.
Can Clear Coats Be Applied Over Textured or Popcorn-Painted Surfaces?
Yes — you can coat textured or popcorn-painted surfaces, but textured surface preparation matters: you’ll clean, remove loose material, and lightly sand. For clear coat adhesion tips, use a flexible, high-build sealer and multiple thin, even coats for best results.
Are There Antimicrobial or Mildew-Resistant Clear Coats for Bathrooms?
Sure thing — yes: you’ll find antimicrobial coatings and mildew resistant finishes specifically made for bathrooms, and they’ll help prevent mold growth; just follow surface prep and manufacturer cure times so they’ll perform like a charm.
How Do Clear Coats Affect VOC Levels and Indoor Air Quality Long-Term?
Clear coats can raise initial VOCs but choosing low-VOC formulas and proper curing reduces long-term offgassing; you’ll see VOC reduction and sustained air quality improvement as solvents dissipate and durable finishes limit future emissions and mold growth.
Can Clear Coats Be Used Over Latex Spray Paint on Plastics?
Sure, you can — cautiously. Carefully condition plastic, choose a compatible primer, then apply a gloss finish or a matte coating clear coat; you’ll avoid cracking, promote protection, and guarantee proper adhesion for durable, dependable results.
Conclusion
You can protect latex paint with the right clear coat, but choose carefully: water-based polyurethanes, acrylic sealers, or waterborne polyaspartics each have pros and cons depending on surface, exposure, and sheen. Test a small area, follow dry-time and recoating instructions, and sand between coats when needed—measure twice, cut once. If adhesion’s poor or paint’s old and chalky, repaint instead of sealing. With the right match, a clear finish extends life and looks.