Should I Sand Floors Before Painting Walls? Guide
You should usually sand floors before painting walls if the finish is glossy, flaking, or has paint drips, since sanding reduces dust, improves adhesion, and prevents problems later; but if your floors need no sanding (tile, laminate, or well-scuffed wood) you can paint walls first as long as you protect floors, seal vents, and control dust. Consider floor type, timeline, and dust management when deciding — keep going and you’ll get clear checklists and sequencing tips to follow.
How to Decide: Sand Floors Before Painting Walls?
If your floors are in good shape with a durable finish, you can skip sanding before painting walls; but if the finish is flaking, glossy, or stained with paint drips, you should sand to prevent dust, adhesion problems, and uneven results.
You’ll inspect finish, test adhesion with tape, and check for gloss or contaminants. Choose sanding techniques that match the damage—light scuffing for sheen, deeper sanding for flaking.
Protect floors when you paint with drop cloths and seal edges. Coordinate painting methods and floor prep so dust control, ventilation, and sequencing minimize rework and finish issues.
When Painting First Makes Sense
When your floors are already in good shape or you’ve decided the risk of dust and finish damage is low, painting the walls first can make the job faster and less fussy. You’ll save time on masking, move freely, and often finish walls before floor work begins. Use strategic planning to protect high‑traffic areas and think through project timing so drying and reentry won’t harm floors. Below is a quick comparison to help you decide.
| Benefit | Prep needed | Risk |
|---|---|---|
| Faster access | Minimal | Low |
| Easier taping | Moderate | Low |
| Scheduling ease | High | Medium |
| Cleaner edges | Moderate | Low |
| Quick touchups | Low | Medium |
When Sanding Floors First Is Better
Because sanding kicks up dust and can scuff new paint, you’ll often get better results by finishing the floors first when the project involves refinishing or replacing flooring, high‑traffic entryways, or wide open plans where dust would settle on wet walls.
You’ll focus on floor preparation and surface treatment, choose sanding techniques and finish types, and align tool selection with project planning.
Prioritize dust management, safety precautions, and cleanup strategies to protect adjacent spaces and limit environmental impact.
Sand first when heavy work, multiple coats, or refinishing makes contamination likely.
- Protect
- Plan
- Clean
Decision Checklist: Key Factors to Weigh
You’ve seen why heavy floor work usually calls for sanding first; now weigh the specifics of your project to decide what makes sense.
Check floor preparation needs: damage, finish removal, and whether sanding improves paint adhesion for trim or baseboards.
Consider dust management—can you contain and clean sanding debris without contaminating freshly painted walls?
Factor project timeline and whether simultaneous tasks harm workflow efficiency.
Plan surface protection for areas you paint first.
Review material compatibility between flooring, primers, and wall paint.
Choose a renovation strategy that balances quality, schedule, and cleanup so you avoid rework and delays.
How Floor Type Affects Sequencing
If you have solid hardwood, you’ll usually sand before painting to avoid tracking dust onto fresh walls.
With engineered wood you might wait until after painting since it tolerates less aggressive sanding and often needs lighter prep.
For tile and laminate, you can paint walls first because those floors won’t be sanded and are easier to protect.
Hardwood Versus Engineered
Floor type matters when you’re deciding whether to sand floors before painting walls: solid hardwood and engineered wood behave differently, so your sequencing should change accordingly.
You’ll weigh hardwood benefits like long-term durability factors and aesthetic appeal against engineered drawbacks such as limited refinishing.
Consider maintenance differences and installation methods when planning: sanding solid boards before painting is common, while engineered often needs protection or light touch-ups.
Factor cost comparison and environmental impact into timing—sanding can release dust and wastes.
Choose sequencing that protects finishes and matches each floor’s lifecycle, minimizing rework and preserving value.
- Sand solid hardwood first.
- Protect engineered surfaces.
- Plan dust control.
Tile And Laminate
If you’re installing afterward, paint first to simplify tile maintenance and prevent grout haze on new walls. For existing tile, skip sanding; tape and use drop cloths, and clean afterward per tile maintenance recommendations.
With laminate care, avoid abrasive prep; use felt sliders and protective sheeting during painting to prevent scratches or moisture damage.
Hardwood: Risks of Sanding Before Painting
When you sand hardwood before painting walls, you risk exposing bare wood that will absorb paint, stain, and moisture unevenly, leading to blotches and long-term damage.
Sanding hardwood before painting can expose bare wood that soaks finish unevenly, causing blotches and lasting damage.
You should weigh sanding techniques against the potential for raised grain and inconsistent finish durability. If you sand, seal promptly with a compatible primer to prevent patchy absorption.
Consider spot-sanding only where necessary and test in an inconspicuous area. Protect floors during wall work to avoid finish scuffs.
- Test sealant adhesion first.
- Use fine-grit, controlled sanding.
- Seal immediately after sanding.
Should You Sand Engineered Wood or Laminate First?
Before you grab a sander, check whether your floor is engineered or laminate since the top veneer and backing respond differently to sanding.
Sanding engineered planks can damage the thin hardwood layer, and sanding laminate is usually a bad idea because it lacks a real wood surface.
Instead, consider hand-sanding edges, light deglossing, or using cleaners and primers as gentler alternatives.
Assess Floor Material First
If your floors are engineered wood or laminate, you’ll want to identify the exact construction before you grab a sander—these materials react very differently to abrasion and finish removal.
Do a careful floor assessment: check wear-layer thickness, core type, and existing finish to gauge material compatibility and surface preparation needs.
Consider maintenance considerations and long term effects on boards and warranties. Factor in dust management, finishing options, and cost implications when project planning so you pick methods that protect the floor and match your aesthetic impact goals.
- Verify wear layer and core.
- Weigh finishing options vs. cost.
- Plan dust control.
Risks Of Sanding Engineered
Sanding engineered wood or laminate can permanently damage the floor if you don’t match the method to its construction, so you need to know what you’re dealing with before you touch a sander.
You’ll risk sanding through the thin veneer, exposing ply layers or particleboard beneath. Different sanding techniques suit solid wood, not all engineered boards; aggressive drum sanders and coarse grits can remove the wear layer fast.
Laminate usually has a decorative top that sanding won’t fix and will ruin.
Consider engineered risks: uneven sanding, loss of warranty, cupping, or irreversible depth loss if you proceed without verification.
Alternatives To Mechanical Sanding
When your engineered or laminate floors can’t take mechanical sanding, you still have practical options to prepare and protect them before painting walls. You don’t have to risk damage; choose sanding alternatives and dust-free methods to keep finishes intact and cleanup minimal.
Consider gentle surface prep, protective masking, and nonabrasive cleaners to guarantee paint work doesn’t harm floors.
- Use microfiber dustless sanding pads and hand-sanding for tiny scuffs.
- Apply clear protective films or rosin paper taped at edges to prevent drips.
- Clean with a pH-neutral, residue-free solution and tack cloth for dust-free results.
Do Tile, Vinyl, and Concrete Need Sanding?
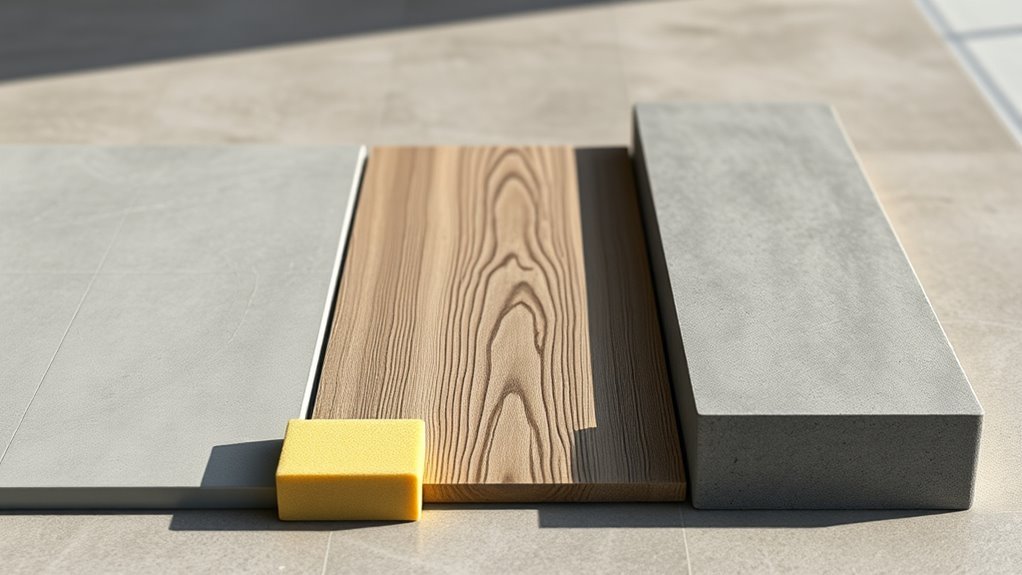
Tile, vinyl, and concrete each demand a different approach, so you’ll want to treat them differently before painting walls nearby. For tile sanding and vinyl preparation, you usually won’t sand smooth glazed tile or resilient vinyl—focus on cleaning, scuffing, and primers to guarantee surface adhesion and paint compatibility. Concrete treatment often benefits from light abrasion or etching to improve adhesion; consider flooring finishes and sealers. Plan dust management when any mechanical prep is used, and consider material properties to choose primers and coatings that bond without excessive sanding.
| Material | Recommended Prep | Notes |
|---|---|---|
| Tile | Clean/scuff | Avoid heavy sanding |
| Vinyl | Degrease/scuff | Use specialized primer |
| Concrete | Light etch/abrade | Improves adhesion |
| All | Dust control | Wet methods reduce dust |
Typical Dust Volume and Particle Size From Floor Sanding
Although floor sanding can seem quick, it generates a surprising volume of dust that ranges from coarse grit to very fine respirable particles, and you’ll want to plan for both.
You’ll see visible chips plus invisible dust; dust particle size varies from >100 microns (settling quickly) to <2.5 microns (stays airborne). Your sanding techniques affect how much and how fine the dust becomes—aggressive cuts and worn discs produce more fine particulates.
Control strategies (vacuum collection, barriers, masks) matter. Consider these typical outcomes:
- Coarse grit debris — larger, settles fast.
- Medium particles — airborne briefly.
- Fine respirable dust — lingers, health risk.
How Paint Overspray Mixes With Sanding Dust
If you spray or brush paint while floor sanding is underway—or even shortly after—the airborne fine dust and paint mist combine and create sticky particulate that clings to walls, trim, and wet paint surfaces.
You’ll notice a gritty texture in wet paint and reduced paint adhesion where dust settled, causing fisheyes or poor leveling.
To avoid ruined finishes, stop sanding before you paint whenever possible, seal off zones, run HEPA filtration, and wipe surfaces with tack cloths.
Stop sanding before painting, seal work areas, run HEPA filtration, and finish with tack cloths to protect your paint.
Effective dust prevention preserves your work and reduces sanding back and repainting.
Plan sequencing so dust and finish steps don’t overlap.
Room Use and Traffic: Timing to Minimize Rework
If the room gets heavy foot traffic, you’ll want to sand and seal before repainting to avoid tracking dust and nicked new paint.
Put room function first—kitchens and hallways need sturdier scheduling than guest bedrooms.
Plan work around your daily activities so you minimize interruptions and rework.
High-Traffic Area Priorities
Because you’ll likely be living around the work, start by scheduling sanding and painting in the least-used rooms first and save high-traffic areas for last—this reduces the chance you’ll have to redo finishes after daily wear and accidental scuffs.
Focus on durable, high traffic materials where people pass often and plan floor maintenance windows that let coatings cure fully.
Prioritize corridors, entryways, and family rooms so final touches see minimal early damage.
- Finish bedrooms and guest rooms first.
- Tackle connecting spaces next (hallways, stairs).
- Reserve entry, kitchen, and living room for last.
Room Function First
When planning sanding and painting, let each room’s purpose and foot traffic dictate the order so you won’t have to redo work later. You should tackle low-traffic, aesthetic-focused rooms first to preserve room aesthetics and finish details, then move to busy areas. Prioritize rooms where color coordination matters to avoid scuffs or overspray ruining freshly sanded floors. Use the table to quickly sort priorities by function and impact.
| Room Type | Recommended Order |
|---|---|
| Bedroom | 1 |
| Living Room | 2 |
| Kitchen | 3 |
| Hallway | 4 |
Schedule Around Activities
After you’ve prioritized rooms by function and foot traffic, plan sanding and painting around daily activities so you don’t undo your work. You’ll reduce scheduling conflicts and avoid activity interruptions by mapping use patterns, blocking off time, and setting clear start/finish windows.
Communicate closures to household members and contractors, and post signs to prevent accidental entry. Sequence tasks so high-dust sanding happens when rooms are empty, then paint once dust settles. Consider overnight drying for low-traffic rooms.
- Block peak-use hours
- Schedule sanding on off-days
- Paint during quiet evenings
Which Order Reduces Furniture Moving Labor?
If you want to minimize how much you move furniture, sand the floors before painting the walls so you can leave larger pieces covered in place and only shift lighter items as needed.
Sand floors first so larger furniture stays covered in place—only lighter items need moving for painting.
That approach lets you plan a furniture arrangement that keeps heavy items against walls, reducing trips and back-and-forth.
Sanding first creates a clean workspace; you can tarp and mask around immobile pieces, then paint without dragging furniture back and forth.
This sequence boosts labor efficiency by concentrating heavy lifting early and keeping wall prep and painting as low-movement tasks.
You’ll save time, effort, and potential floor damage.
Should You Paint or Sand Baseboards and Trim First?
Wondering whether to paint or sand baseboards and trim first? You’ll usually sand trim, sanding imperfections, fill gaps, then paint — that gives smoother baseboard painting results and cleaner edges. If walls need repainting too, mask trimmed areas to protect fresh work.
- Sand first: remove old finish, smooth flaws for better adhesion.
- Paint trim next: cut in neatly after sanding and priming.
- Timing tip: do baseboard painting after wall prep but before final floor work to avoid scuffs.
This sequence balances efficiency and finish quality, reducing touchups and protecting your freshly sanded trim.
Door Frames and Thresholds: Sequencing Tips
When you’ve finished sanding and painting baseboards and trim, focus on door frames and thresholds next so you don’t smear fresh paint or damage newly sanded surfaces.
Start door frame preparation by removing hardware, masking hinges, and lightly sanding edges to guarantee adhesion without harming trim.
Remove hardware, mask hinges, and lightly sand edges to ensure paint adhesion without damaging the trim.
Work top-down: paint frame faces before jambs to prevent drips.
For threshold treatment, clean and sand the shift area, then apply appropriate primer or sealant to protect against traffic.
Use painter’s tape to safeguard painted walls and floors.
Let everything fully cure before reinstalling hardware or moving heavy items through doorways.
If You’ll Replace Flooring, Should You Paint First?
If you’re planning to replace the flooring, it’s usually best to paint the walls and trim first so you don’t risk dinging new floors.
Just protect the new floor with drop cloths or rosin paper if painting happens after installation.
Coordinate timing with your contractor so painters and flooring installers don’t get in each other’s way.
Paint Before Flooring
Because you’re replacing the flooring, paint the walls first to save time and avoid accidental damage to new floors; it’s easier to protect old floors or the subfloor than to mask and cut in around finished flooring.
You’ll optimize paint adhesion and paint durability, simplify wall treatment, and keep renovation planning and the project timeline cleaner.
Manage dust management and sanding techniques before flooring arrives so debris won’t contaminate the floor finish. Focus on floor preparation later.
- Paint walls to preserve wall protection and speed workflow.
- Sand and remove dust for better paint adhesion.
- Sequence tasks for clear renovation planning.
Protect New Floor
A few simple precautions will keep your new floor looking pristine while you finish the walls, so cover it with breathable rosin paper or heavy-duty drop cloths and tape seams with low-tack painter’s tape.
You’ll protect surface protection and simplify floor maintenance by blocking paint splatter, foot traffic marks, and grit.
Prioritize dust prevention: seal vents, use tack cloths, and run a HEPA vacuum after sanding to avoid compromising paint adhesion on trim and baseboards.
In project planning, verify material compatibility between covers, adhesives, and new flooring to prevent stains or chemical reactions and guarantee a clean, durable finish.
Coordinate Timing And Trades
Plan the sequence of painting and flooring work to avoid redoing tasks and to save time and money.
You’ll need strong trade coordination and clear contractor communication to align project timelines, budget considerations, and task prioritization.
Consider site preparation before crews arrive and think through resource allocation and labor management to prevent scheduling conflicts.
- Confirm contractor communication and finalize project timelines.
- Sequence site preparation, then paint if floors come after, to improve workflow efficiency.
- Allocate resources, set task prioritization, and plan for labor management to control budget considerations and avoid delays.
If You Plan to Refinish Floors, Should You Paint First?
Wondering whether to paint your walls before refinishing hardwood? If you plan floor refinishing, paint first in most cases.
Painting walls before sanding and finishing floors minimizes risk of drips, scuffs, and discoloration from sanding dust or finish recoats. You’ll still need careful cleanup after sanding, but wall painting cures more easily without fresh floor fumes or tack.
Schedule wall painting after major carpentry but before floor refinishing so trim and baseboards get a clean edge. If floors require major replacement or staining that could affect wall height, coordinate timing, but generally paint first.
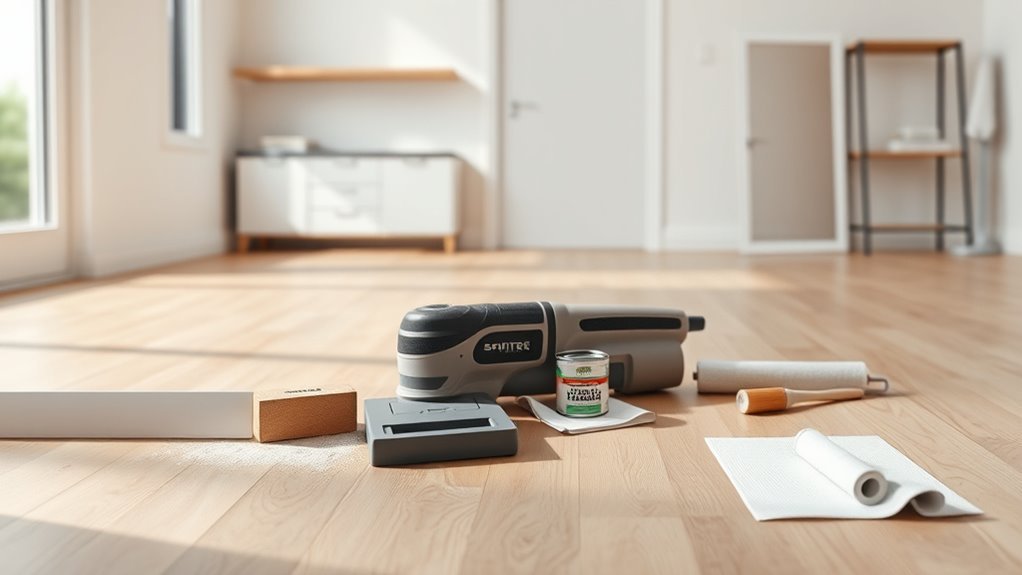
Protective Steps When Sanding Before Painting
If you’re sanding before painting, take steps to protect walls, fixtures, and air quality so dust and debris don’t ruin your finish or your health.
Plan project timelines and equipment selection: choose sanders with dust containment and HEPA-compatible connectors.
Wear protective gear and follow health precautions—respirator, goggles, and disposable coveralls.
Use floor coverings and wall protection: plastic sheeting taped at seams, drop cloths, and door seals.
Control air filtration by running HEPA air scrubbers and closing vents.
Cleanup methods matter—vacuum with HEPA, wet-wipe surfaces, and change filters promptly to prevent recontamination.
- Prepare containment
- Use proper PPE
- Follow cleanup methods
Protective Steps When Painting Before Sanding
Before you sand after painting, take steps to protect the fresh finish and keep dust from embedding in wet or tacky paint—start by blocking off the painted area with plastic sheeting and use low-tack painter’s tape to seal edges so you can sand without spreading debris.
Next, let paint cure fully per label; if you must work sooner, wear soft-soled shoes and avoid touching walls.
Create a short buffer zone by covering floors and trim, and plan sanding techniques that minimize airborne dust—hand-sanding with fine grit or using a vacuum-sanding attachment helps preserve wall protection and the painted surface.
Best Dust-Containment Methods for Sanding
When you need to sand without turning the room into a dust cloud, focus on containment: seal doors and vents with plastic sheeting and tape, set up a zippered doorway or negative-pressure box if you’ll be inside, and run a HEPA-rated vacuum or air scrubber to capture airborne particles at the source.
Create controlled work zones, keep sanding surfaces damp when appropriate, and use tools with onboard dust collection to limit spread. Follow these practical steps:
Create contained work zones, keep surfaces slightly damp, and use tools with onboard dust collection to minimize spread.
- Isolate the area with ceiling-to-floor plastic and tack down edges.
- Use a dust-sealed sander or shrouded attachment.
- Run continuous air filtration and spot-clean.
Vacuum Systems, Dust Extractors, and HEPA Filters
Dust control starts with the right vacuum and extractor: choose a HEPA-rated unit sized for the job, hook it up to your sander or use a standalone dust extractor, and run it continuously to capture particles at the source.
You’ll want vacuum system features like sealed hoses, automatic filter cleaning, variable suction, and easy-empty dust bins to reduce leakage and maintenance.
Compare dust extractor types—tool-attached units, mobile canisters, and larger jobsite vacs—so you match capacity and portability to room size.
Use genuine HEPA cartridges, inspect seals, and change filters per manufacturer guidance to keep airborne dust low while you work.
Setting Temporary Walls and Plastic Sheeting
You’ll want to decide how to divide the room—zipper doors, temporary frames, or simple taped sheets—based on traffic and work area size.
Use heavy-duty plastic sheeting and proper taping techniques to seal floors, doorways, and vents so dust doesn’t migrate.
If you need a sturdier barrier, build a quick temporary frame with 2x4s or tension poles to support the sheeting and keep it from sagging.
Room Division Options
Deciding how to divide your space before you sand or paint makes cleanup and containment much easier, so pick a method that fits the project scale and traffic patterns.
You’ll want divisions that respect room layout and design flow, maintain color coordination and wall decor plans, and protect furniture placement and lighting considerations.
Think about space utilization, aesthetic balance, and clear functional zones while minimizing disruption to traffic patterns.
- Use temporary walls to create sealed work zones and preserve adjacent wall decor.
- Hang plastic curtains to protect furniture placement and maintain lighting considerations.
- Combine screens and tape for flexible functional zones.
Protective Sheeting Techniques
1 simple barrier can save hours of cleanup: set up temporary walls or hang plastic sheeting to seal off work zones, control airborne particles, and protect floors, fixtures, and furniture from paint and sanding debris.
You’ll pick sheeting materials rated for dust barriers and tack them tightly using painter’s tape, staples, or pole systems. Wear protective gear while installing and inspect wall coverings for gaps.
Follow safety precautions for ventilation and fire hazards. Plan workspace organization to keep tools inside the zone and separate clean areas.
Use cleanup strategies like vacuuming HEPA filters and maintenance tips to extend protection between coats.
Temporary Frame Construction
Now that you’ve sealed off the work zone with dust-rated sheeting, build a temporary frame to hold it taut and secure so airborne particles and paint won’t escape.
You’ll weigh material selection, design considerations, and construction techniques to match site preparation and project timeline constraints.
Consider environmental impact and cost analysis when choosing reusable versus disposable components.
Follow safety measures and check tool requirements before you start.
Use sturdy studs or adjustable poles, clamps, and seals to prevent gaps.
- Plan: layout, timeline, and permits.
- Build: poles, clamps, and tensioning.
- Finish: seal, inspect, and remove safely.
Masking Techniques for Protecting Fresh Paint
Where should you start when protecting freshly painted walls from dust, drips, and scuffs?
Begin by planning masking methods: outline edges, vents, baseboards, and fixtures. Use low-tack painter’s tape for clean lines and delicate surfaces, and high-adhesion tape where needed.
Plan masking first: outline edges, vents, baseboards, and fixtures, using low‑tack tape for delicate areas and stronger tape where needed
Apply plastic sheeting or kraft paper over floors and furniture, securing edges with tape so it won’t shift. For trim and hardware, wrap with tape and removable film. Protect outlets with foam plugs or tape.
Check seams and corners, smoothing tape to prevent seepage. Remove tape while paint’s tacky for crisp edges. Inspect for missed spots and touch up immediately.
How Long to Wait After Sanding Before Painting
Although sanding speeds prep, you shouldn’t rush straight to painting—wait until the surface is clean, dry, and free of dust so the new coat will adhere properly and look smooth.
You’ll typically wait 30–60 minutes for moisture to evaporate after a light sanding, longer for wet sanding or high humidity.
Choose sanding techniques that minimize dust and check paint compatibility—oil over latex needs different handling.
Follow manufacturer times for primers. If in doubt, run a quick adhesion test.
- Light sanding: wait 30–60 minutes
- Wet sanding: wait until fully dry (several hours)
- High humidity: add extra drying time
How Long to Wait After Painting Before Sanding
After painting, you’ll need to wait until the surface is fully dry before sanding—drying times vary by temperature, humidity, and paint thickness.
Know your paint type (latex, oil, or quick-dry primer) because each requires different cure times before you can sand without gumming or tearing the finish.
Use the touch test—lightly press an inconspicuous spot; if it’s firm and doesn’t feel tacky, it’s usually safe to sand.
Drying Time Before Sanding
Because freshly applied paint needs time to cure, you shouldn’t rush into sanding right away — waiting the proper amount prevents gouging, peeling, or gummy dust.
You’ll judge drying duration by touch and firmness; don’t assume dry-to-touch means ready. Prioritize preparation importance: protect floors, ventilate, and test a small area first.
Follow these simple checks:
- Light touch test: no tackiness after your recommended wait.
- Visual inspection: even sheen and no soft spots.
- Firm scrape test: tooth develops without paint shaving off.
If any test fails, wait longer—patience saves rework.
Paint Type Matters
If you’re sanding, remember that paint formulation dictates how long you should wait—latex (water-based) dries to touch faster but often needs 7–30 days to fully cure, while oil-based and alkyd paints can take several days to weeks to harden enough for safe sanding.
You’ll adjust wait times based on paint finish; glossy surfaces feel harder sooner but still need proper cure to avoid clogging sandpaper or gumming up tools.
Also consider wall texture — flatter, porous textures may accept sanding earlier than high-build textures that remain soft longer.
When in doubt, follow manufacturer cure recommendations for best results.
Touch Test Technique
Wondering when it’s safe to sand? You’ll use the touch test as part of surface preparation and moisture assessment to judge paint adhesion before sanding. Don’t rush—consider finish compatibility and timing strategy to avoid lifting paint.
- Light press: if tacky, wait; repeat touch test hourly for solvent and water-based paints.
- Edge check: test a hidden spot to confirm cure and try gentle sanding techniques with fine grit.
- Prep plan: choose equipment choice for dust management, wear protective measures, and confirm adequate cure time for ideal paint adhesion and clean sanding results.
Which Paints Resist Sanding-Dust Adhesion?
When you pick paint that’s formulated to repel dust, you’ll cut down on sanding-dust adhesion and make cleanup far easier. Choose paints labeled low-tack or dust-resistant; many modern acrylic-latex and alkyd blends reduce particle cling.
Higher-gloss sheens shed dust better than flat finishes, though sheen choice affects appearance and maintenance. Apply proper sanding techniques beforehand to remove loose particles and guarantee adhesion; primer with stain-blocking properties also helps.
Look for products citing paint durability and easy-clean formulas. Test a small area after dry time to confirm resistance before proceeding with full wall work near freshly sanded floors.
Common Floor Finishes and Their Cure Times
Although different floor finishes look similar at a glance, they cure at very different rates and demand distinct wait times before you paint nearby walls or move furniture.
You should consider floor types, finish durability, and moisture effects when planning. Curing affects preparation methods and which sanding techniques you’ll use; some oils need days, water-based poly dries fast, and two-component epoxies cure longest.
Follow product recommendations for tack-free and full-cure times, and adjust painting tips accordingly to avoid contamination. Regular finish maintenance influences long-term results.
- Oil-based: long cure, careful sanding techniques.
- Water-based: quicker, lighter prep.
- Epoxy/polyurethane: high durability, extended cure.
Wall Touch-Up Strategies After Floor Work
After sanding or refinishing floors, you’ll want to protect adjacent walls from dust and accidental knocks by taping edges and laying down drop cloths.
If you find paint scuffs or chips, lightly sand the affected spots, clean the dust, and apply touch-up paint with a small brush or roller.
Finish by feathering the edges so the repair blends smoothly with the surrounding wall.
Protecting Adjacent Walls
If you’re doing floor work, protect the walls before you start and plan for quick touch-ups afterward so dust, splatter, and scuffs don’t leave lasting marks; a few simple steps up front save time and keep your paint job looking fresh.
You’ll want reliable wall protection along adjacent surfaces to prevent airborne grit and tool knocks. Use low-tack painter’s tape and thin plastic sheeting, and keep a small kit for spot cleaning and blending.
- Tape and plastic: cover baseboards and adjacent surfaces.
- Drop cloths: catch dust and debris.
- Touch-up kit: small brush, matching paint, cleaner.
Repairing Paint Scuffs
Even with good protection and a quick touch-up kit on hand, walls often pick up scuffs and nicks during floor work, and you’ll want a fast, reliable approach to fix them so your paint looks uniform.
First, assess damage: light scuffs respond to gentle scuff removal with a magic eraser or degreasing cleaner.
For deeper gouges, sand lightly, fill with spackle, sand smooth, and prime exposed areas.
Match sheen and color for seamless paint touch ups, using a small brush or mini-roller.
Work wet edges into surrounding paint, feather strokes outward, and let layers dry fully before evaluating.
Top Mistakes That Cause Rework and Damage
When you skip proper masking and floor protection, paint splatters and drips quickly turn a quick job into costly rework and damaged finishes.
You’ll also hurt paint adhesion by skipping floor preparation or ignoring material compatibility. Poor dust management, wrong equipment selection, and weak surface protection reduce finish durability and force fixes.
Scheduling conflicts that rush steps cut project efficiency and invite errors.
- Rushing prep — neglects dust management and material compatibility.
- Wrong tools — compromises paint adhesion and finish durability.
- Skipping protection — increases rework, damages floors, wastes time.
Repainting vs. Extra Protection: Cost Tradeoffs
You’ll want to compare the immediate cost of repainting scuffed floors with the upfront price of added protective steps like sanding, priming, or using drop cloths.
Repainting may seem cheaper now but can add up if you’ll need touch-ups every few years, while extra protection often pays off over the long term.
Think about how long you plan to keep the finish and budget accordingly.
Repainting Cost Comparison
Deciding whether to sand floors before painting comes down to balancing upfront labor and materials against future repainting costs. You should weigh how long you want that paint job to last.
You’ll create a realistic repainting budget by doing a simple cost estimation: compare immediate sanding expenses to projected touch-ups and full repaints over several years.
Consider traffic, finish durability, and how often you’ll repaint. Quick math can reveal whether protection pays.
- Calculate upfront sanding and sealer cost.
- Estimate annual repainting frequency and expense.
- Compare total 3–5 year costs to decide.
Long-Term Protection Value
A worn doorknob or scuffed baseboard can tell you whether extra floor protection pays off: investing in sanding and a durable sealer now cuts down on frequent touch-ups and full repaints later, so you should weigh that upfront cost against projected maintenance over several years.
Calculate long term value by comparing sanding plus high-quality finish versus repeated wall and trim spot repairs. If traffic’s heavy, the investment protection of a tough sealer typically wins—less downtime, fewer materials, and higher resale appeal.
If usage is light, skip the extra step and schedule occasional touch-ups instead.
Time Tradeoffs and Sample Project Schedules
Because sanding adds prep time but can cut down on rework, weigh where you want to spend labor versus finish quality: if you need a quick refresh and the floors are in decent shape, skip full sanding and plan touch-up painting windowsill-to-baseboard the same day; if you want a durable, showroom result, block at least a weekend for sanding, dust cleanup, and a day between coats of paint.
Sanding saves rework but adds time—choose quick touch-ups for speed or a weekend sand-and-paint for lasting quality.
Balance project flexibility with scheduling priorities: pick a fast schedule for cosmetic updates or a slower one for longevity.
Example sample schedules to guide decisions:
- One-day touch-up plan.
- Weekend sand-and-paint.
- Multi-week phased rooms.
DIY vs. Hiring Pros: Sequencing Considerations
Decide your sequence based on the skills you have, the time you can commit, and the budget you’re working with.
If you’re confident and have time, doing floors before walls can save mess and rework; if not, pros can fast-track the right order.
Weigh labor costs against risk of mistakes to pick the most efficient plan.
Sequence Based On Skill
If you’re doing the work yourself, plan the sequence around your skill level and available time: tackle dust-making jobs like sanding and drywall repair before painting and cover or remove flooring to prevent grit embedding in fresh paint.
But if you’re hiring pros, coordinate roles so specialists handle the messier prep while painters focus on walls once floors are protected or finished.
Assess your comfort with sanding techniques and protective gear, match wall preparation to chosen paint types, and pick flooring options that tolerate work traffic.
Prioritize dust management, surface cleaning, project planning, finishing touches, and paint durability.
- Evaluate skills
- Assign tasks
- Schedule steps
Time And Cost Tradeoffs
Now that you’ve matched tasks to your skill level and planned dust-heavy work first, weigh the time-and-cost tradeoffs between doing it yourself and hiring pros when sequencing floor sanding and wall painting.
You’ll compare time efficiency against cost: DIY saves money but demands more hours and learning, while pros improve efficiency metrics at a premium.
Use cost analysis and expense tracking to log tool rental, materials, and labor considerations.
Project budgeting and resource allocation should reflect hidden costs like repairs and downtime.
Good timeline management avoids overlap that doubles effort—choose the sequence that optimizes budget, quality, and schedule.
What to Ask Contractors About Order and Cleanup
Who should do what and when? You’ll want clear contractor communication up front: ask who handles floor sanding versus wall painting, the sequence they recommend, and timing to avoid rework.
Confirm cleanup expectations—daily debris removal, final vacuuming, and disposal of dust. Also ask about protecting fixtures and HVAC to limit dust migration.
- Who does sanding/painting and the ideal order.
- Daily and final cleanup scope plus dust control methods.
- Liability for damage and proof of insurance.
Get written answers and a timeline. That prevents surprises and keeps the job efficient.
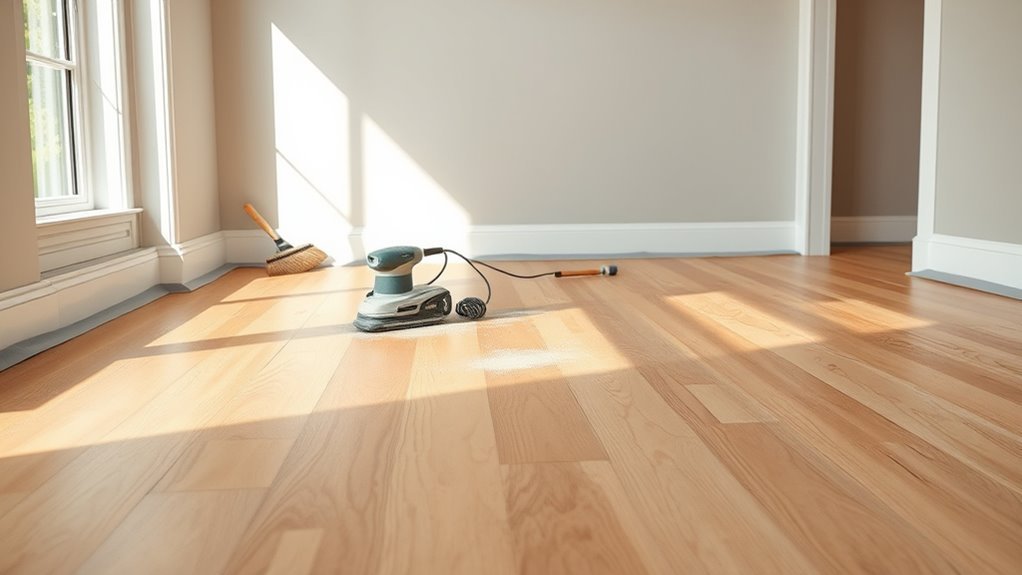
Low-Dust Sanding Tools You’ll Need
1 essential piece of low-dust sanding gear is a vacuum-equipped floor sander, which captures most dust at the source and keeps the work area far cleaner than open sanding.
You’ll also want a handheld orbital sander with dust porting for edges and tight spots, plus a shop vacuum with HEPA filtration to collect residual particles.
Use abrasive pads designed for minimal clogging and an attachment kit to link tools to your vacuum.
Adopt low dust techniques by sanding slowly, keeping vacuums running, and changing filters regularly.
Choosing the right sanding equipment reduces cleanup and protects freshly painted walls.
Supplies to Protect Painted Walls and Trim
Before you sand, gather drop cloths and old sheets to catch dust and debris so your painted walls stay clean.
Use painter’s tape carefully—press edges down for crisp lines and remove it at the right time to avoid peeling.
Add protective corner guards where needed to shield trim from bumps and scuffs while you work.
Drop Cloths And Sheets
When you’re ready to paint, drop cloths and sheets are your first line of defense for walls, trim, and floors—choose heavy-duty canvas or tightly woven cotton for durability and plastic or painter’s paper for quick, affordable coverage.
You’ll pick drop cloths types based on reusability and traction; canvas grips floors, plastic resists spills, and paper conforms to edges.
Use old bedsheets for lightweight sheet protection over furniture, securing edges so they don’t shift. Keep pathways clear and overlap seams to prevent drips reaching the floor.
Remove dust from covers before folding and store clean cloths for future projects.
- Canvas: reusable, non-slip
- Plastic: cheap, waterproof
- Sheets: breathable, versatile
Painter’s Tape Techniques
Once your drop cloths are laid and furniture is covered, painter’s tape becomes the tool that gives you sharp lines and protects trim, baseboards, and windows from stray brush strokes.
You’ll choose tape width to match edges, press firmly along seams to prevent bleed, and remove tape while paint is tacky for clean edges.
Use low-tack tape on fresh drywall and higher-adhesion tape on glossy trim.
For long runs, overlap ends slightly and smooth with a plastic card.
These painter’s tape techniques, paired with deliberate masking strategies, save time and preserve crisp boundaries between wall and trim.
Protective Corner Guards
- Choose material and impact rating
- Follow installation steps
- Match color and style
Cleaning Routines Between Sanding and Painting Steps
Because sanding kicks up fine dust that’ll ruin paint adhesion and finish, you need a focused cleaning routine before you start priming or painting. Gather cleaning supplies—vacuum with HEPA, tack cloths, microfiber mops, and buckets—then follow proven cleaning techniques.
Start with post sanding cleanup using a vacuum, move to damp-wiping for surface preparation, then finish with tack cloths to remove stubborn particles.
Emphasize dust prevention by sealing vents and covering furniture, and consider environmental considerations like proper dust disposal and low-VOC cleaners.
For efficiency tips, work methodically from high to low areas and keep supplies organized so you don’t recontaminate surfaces.
Air Quality Concerns and Health Precautions
After you’ve removed sanding dust from surfaces, don’t forget the air itself—fine particulates and VOCs can linger and affect health while you prime and paint.
You should control airborne particles and protect respiratory health by ventilating, timing work, and using low-VOC products. Open windows, run fans to exhaust toward outside, and avoid painting on still, stagnant days.
Limit time in the work area and let coatings cure before occupying. Choose water-based primers and paints labeled low-VOC to reduce fumes.
Monitor symptoms like throat irritation or headaches and stop work if you notice them; seek fresh air and medical advice if needed.
- Ventilate well
- Use low-VOC products
- Limit exposure time
Respirators, Masks, and PPE for Floor Work
Which respirator or mask you choose can make a big difference to your safety when sanding or working on floors. You should pick respirator types rated for fine dust and particles, check mask fittings for a tight seal, and swap filters as manufacturer recommends.
Combine PPE essentials—eye protection, hearing protection, and disposable coveralls—with good dust management like vacuuming and containment. Follow established safety protocols to monitor air quality and limit exposure time.
Protective gear reduces health risks such as respiratory irritation and long-term lung damage. Inspect equipment before each job and replace worn items promptly to maintain protection.
Handling Lead Paint or Old Finishes Safely
Protective gear and dust control you used for sanding also matter most when you’re dealing with lead paint or old finishes, but you’ll need stricter procedures and testing before you start.
Protective gear and dust control are crucial for sanding—test first and use stricter lead-safe procedures if hazards are present.
Get a certified lead test kit or hire a pro to confirm hazards. If lead’s present, follow local regulations for lead paint precautions and arrange containment, HEPA filtration, and wet methods to minimize dust.
- Test: confirm lead or hazardous finish before work.
- Contain: seal room, use negative air and HEPA vacuums.
- Remove: use wet scraping or licensed abatement for safe removal and disposal.
Small-Room Strategies vs. Whole-House Sequencing
If you’re working room by room, sanding and painting small spaces lets you contain dust and finish one area before moving on.
Tackling the whole house at once can be faster overall but needs a clear sequence to keep dust from contaminating finished rooms.
Plan dust-control steps—like containment, negative air, and cleanup—into whichever approach you choose.
Small-Room First Approach
When you’re tackling painting in a home-by-room rhythm, the small-room first approach prioritizes finishing one compact space completely before moving on. This lets you test colors, techniques, and timing on a manageable scale.
You’ll refine small room techniques, confirm sanding needs, and develop efficient workflows without disrupting the whole house. Start with a clear plan, protect floors, and note time per task so estimates improve.
Use this focused trial to decide whether to sand floors before painting walls in larger areas.
- Test paint and sanding sequence
- Time each task for planning
- Record lessons for repeatability
Whole-House Workflow
Having refined your approach in a single room, scale up to a whole-house workflow by mapping tasks to minimize overlap and rework—you’ll decide where sanding fits best across multiple rooms and trades.
You’ll use project planning to set room prioritization, timing strategies, and trade coordination so floor preparation happens when dust and traffic impact is lowest.
Consider material compatibility and protective measures for finished areas, and weigh cost implications of staged versus continuous work.
Clear schedules improve workflow efficiency and reduce repeat mobilization.
Balance dust management needs with painting timelines so each phase flows into the next without surprises.
Dust Control Strategies
Because dust behaves differently in a single room than across an entire house, you’ll need distinct approaches: seal and isolate small rooms with plastic and negative-pressure fans to keep sanding debris contained, while whole-house sequencing relies on staged sanding, air filtration, and clear traffic routing to prevent cross-contamination between finished and work areas.
You’ll pick equipment selection for dust containment, use HEPA air filtration, and follow cleaning techniques after each pass. Good project planning ties surface preparation to workspace organization and safety measures so you work efficiently and protect painted areas.
- Isolate: plastic, tape, negative pressure
- Filter: HEPA units, change schedules
- Clean: wipe, vacuum, final inspection
Staging Rooms to Minimize Disruption and Dust Spread
Before you sand, set up each room to keep dust contained and daily life functional: move furniture to the center and cover it with drop cloths or plastic, seal doorways and vents with painter’s tape and plastic sheeting, and create a dedicated entry path so you don’t track grit through the house.
Use staging techniques that prioritize dust management and surface protection: designate a sanding zone, arrange tools and HEPA vacuum nearby, and mark off living areas.
For furniture protection and room preparation, label covered pieces and keep essentials in sealed bins.
Maintain workspace organization to simplify cleanup strategies and preserve air quality.
Checklist: Sequence When Painting Then Sanding
If you plan to paint first and sand afterward, follow a clear step-by-step checklist so you don’t trap dust in fresh paint or damage finishes: outline tasks by room, schedule drying and cure times, protect newly painted surfaces, and prepare sanding tools and filtration before you start.
You’ll want a room-by-room plan that coordinates floor preparation with painting techniques, ventilation, and cure windows. Seal vents, tape trim, and use drop cloths that won’t shed.
Ready HEPA filtration and vacs, pick sandpaper grits, and wait recommended paint cure times.
- Sequence rooms and cure times
- Protect and mask surfaces
- Prep sanding/filtration tools
Checklist: Sequence When Sanding Then Painting
Start by organizing tasks so you sand floors in a controlled sequence that prevents dust from contaminating fresh paint: clear the room, remove furniture, and seal vents and doorways.
Contain dust with plastic and drop cloths, then sand from the farthest corner toward the exit so you can vacuum as you go.
After sanding, thoroughly vacuum, tack-rag, and wipe surfaces to complete floor preparation.
Allow proper cure time for any sealers before starting paint application on walls.
Work top-to-bottom when painting, keep windows closed to limit dust, and inspect for residual dust before final coats.
Final Decision Flowchart: Pick the Right Order
Wondering which task comes first? You’ll follow a simple flow: assess dust risk, check wall condition, then pick sanding techniques that limit mess.
If floors need heavy sanding, protect newly painted walls; if walls need patching and priming, paint first and then sand floors lightly. Use this checklist to decide quickly.
- Consider dust: choose low-dust sanding techniques or finish floors after walls if dust control is poor.
- Evaluate wall preparation: if extensive patching or primer’s required, paint before final floor sanding.
- Final step: seal floors last to avoid contaminating fresh paint.
Frequently Asked Questions
Will Humidity or Weather Affect Whether to Sand or Paint First?
Yes — humidity effects and weather conditions matter, so you’ll schedule sanding and painting when humidity’s low and weather’s stable; high moisture can cause poor adhesion, longer drying, and dust sticking, so avoid rainy or humid days.
How Does Ceiling Height Influence Sanding/Painting Order?
Higher ceilings mean you’ll tackle sanding techniques and wall preparation first to avoid rework; you’ll use scaffolds or poles, control dust, and paint top-down so airborne particles from sanding don’t ruin freshly finished upper walls.
Should Closet Interiors Be Sanded or Painted First?
Paint closet interiors first; you’ll treat them like a blank book ready for new words. You’ll use sanding techniques to prep surfaces, then apply painting finishes, avoiding drips onto freshly prepped floors or trim.
Does Planned Wallpapering Change the Sanding/Painting Sequence?
Yes — if you’re wallpapering afterward, you’ll prep walls first: do wall preparation, patch and sand lightly for surface adhesion, clean dust, then hang wallpaper; avoid heavy floor sanding that stirs debris onto fresh prep.
How Does Presence of Built-In Cabinetry Affect Order Decisions?
If built-in cabinetry’s color and space layout are fixed, you’ll paint walls first to avoid cabinet overspray; if you’ll change cabinet color or reconfigure layout, sand/paint floors first so finishes won’t damage new cabinets or disrupt installation.
Conclusion
You’ll usually pick the order that saves work and limits dust—paint first if you can protect floors, sand first when you need bare wood or finishes will hold up paint. Consider floor type, dust control, timing, and who’s living there; weigh disruption, smell, and cure times. Plan protection and clean-up so you’re not wrestling with problems later. In short, match the sequence to the job and you’ll hit the nail on the head.