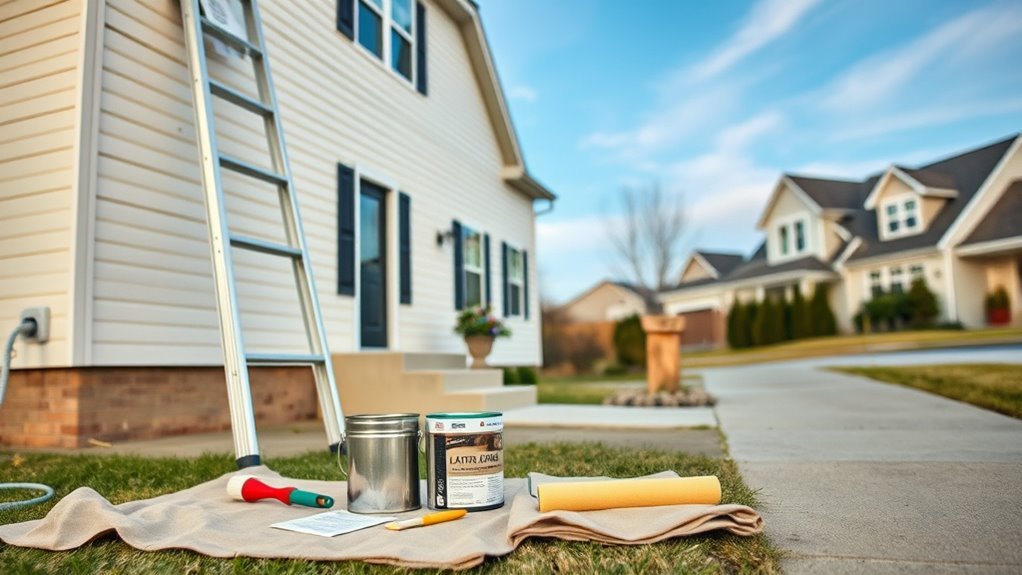
What Is the Cost of Painting a House Exterior?
You’ll typically pay between $1,500 and $15,000+ to paint a house exterior, depending on size, height, siding type, paint quality, and whether you hire pros or do it yourself. Expect labor to be 60–75% of the bill and prep to add 20–40%, with small homes done in a few days and large or high-access jobs taking weeks. Seasonal timing and regional rates matter, and if you keep going you’ll get detailed cost breakdowns and tips.
How Much Does Exterior House Painting Cost?
How much you’ll pay to paint your home’s exterior depends on several clear factors: the size and height of your house, the type and condition of the siding, paint quality, and whether you hire professionals or do it yourself.
You’ll estimate costs by considering material types, surface preparation, and painting techniques that affect time and labor. Use budgeting strategies and DIY tips to save, but weigh contractor selection for complex jobs.
Factor seasonal factors for pricing and color trends for resale value. Include maintenance tips and eco-friendly options to reduce long-term cost and environmental impact.
Plan precisely and get multiple quotes.
Typical Cost Ranges by House Size
For most homeowners, exterior painting costs scale predictably with house size: a small one-story will run far less than a large two-story or a multi-level home.
You’ll typically see ranges:
- small one-story (1,000–1,500 sq ft) $1,500–$3,500;
- medium two-story (1,500–2,500 sq ft) $3,500–$7,500;
- large two-story or multi-level (2,500+ sq ft) $7,500–$15,000+.
Factors shifting costs include trim complexity, number of doors and windows, accessibility and required prep.
Your chosen painting styles—smooth, textured, or accent color work—also affect labor and materials.
Get multiple quotes and itemized estimates tied to house size and selected painting styles.
Cost Differences by Siding Material
Because siding type changes prep, materials, and labor, the paint job cost can vary widely from one home to the next.
You’ll find each siding material brings distinct cost factors: wood needs stripping and primer, vinyl requires specialized cleaners, and stucco demands textured coatings.
Consider maintenance considerations and longevity impacts—wood may need frequent touch-ups while fiber cement lasts longer but costs more upfront.
Regional pricing and color choices affect paint availability and labor rates.
Think about environmental effects of low-VOC vs standard paints.
Your contractor selection matters for accurate estimates and proper prep, so get multiple bids and check references.
Pricing for Single-Story vs Two-Story Homes
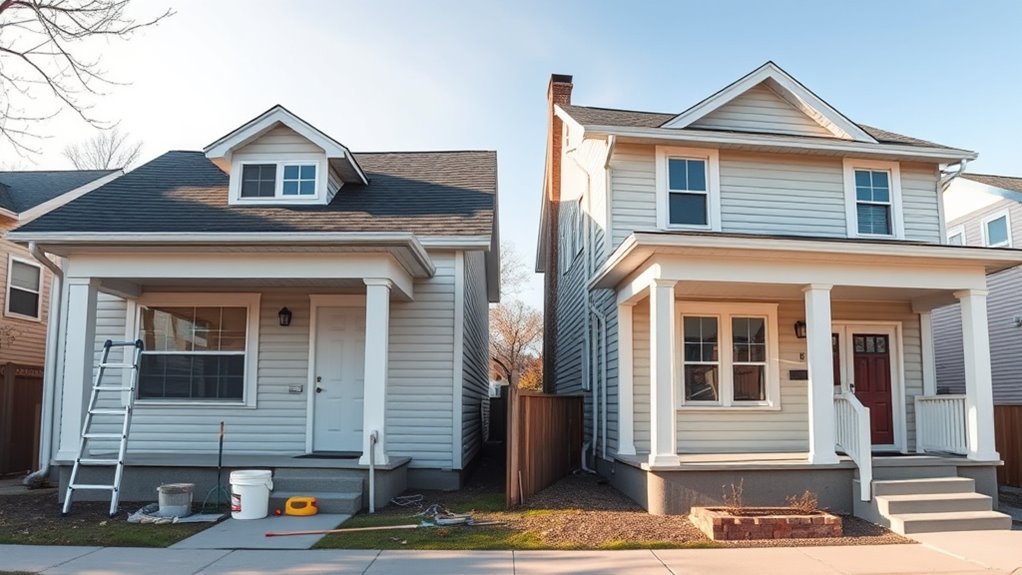
When you compare single-story and two-story homes, you’ll find the price difference comes down to access, safety, and time: two-story jobs usually cost more because they need taller ladders or scaffolding, extra safety measures, and longer labor hours, while single-story projects are quicker and require less equipment.
Two-story jobs cost more—taller ladders or scaffolding, added safety, and longer labor make single-story faster and cheaper.
You’ll notice single story benefits like faster completion and lower setup costs, while two story challenges raise labor and insurance expenses.
Consider these quick points when estimating:
- Equipment: scaffolding vs basic ladders affects rental and setup fees.
- Labor: more time and crew for upper levels increases hourly costs.
- Safety: added precautions mean higher insurance and oversight.
How Paint Quality Affects Total Cost
If you choose higher-quality paint, you’ll pay more up front but cut long-term costs by needing fewer recoats and less frequent repainting. Cheaper paints lower your initial bill but often demand extra coats, touch-ups, or earlier full repaints, which raises lifetime expense.
You should weigh paint durability and color longevity against your budget: premium formulas resist fading, chalking, and mildew, so you repaint less often. Midrange options can be a smart compromise if surfaces are in excellent condition and exposure is low.
Also consider warranties and pigment concentration—they affect how often you’ll need maintenance and the total cost over years.
Labor vs. Materials: Typical Split
On most exterior painting jobs, labor makes up roughly 60–75% of the total cost, while materials account for the rest; you’ll pay for skilled prep, repairs, and application more than for the paint itself.
You should expect labor costs to vary with crew size, timeline, and regional rates, while material expenses hinge on paint type, primer, and extras like caulk or tape.
Balancing them helps you get value without overspending.
- Ask for a detailed bid separating labor costs and material expenses
- Compare warranties tied to workmanship vs. product
- Consider mid-range paint plus skilled labor for longevity
How Much Prep Work Adds to the Bill

Because thorough prep determines how long your paint job lasts, it can add a significant portion to the overall bill—you’ll often see prep equal to 20–40% of the total cost on older or damaged exteriors.
You’ll pay for prep work essentials like scraping, sanding, caulking, and priming to guarantee adhesion and a smooth finish.
Surface cleaning—pressure washing, mildew removal, and degreasing—prevents peeling and stains.
Accessibility, height, and intricate trim raise labor time. If you cut corners here, you’ll face earlier touch-ups and higher lifetime costs.
Budget appropriately so the finished job performs as promised.
Cost to Repair and Replace Siding Before Painting
When you’re planning to paint, factoring in siding repairs or replacement is essential since damaged boards, rot, or warped panels can double back into paint failures and wasted labor.
You’ll start with a siding condition assessment to spot loose trim, gaps, or failing seams. Costs vary by scope and siding material options: vinyl repairs are cheaper, fiber cement or composite replacements cost more.
Budget for labor, disposal, and matching finishes. Consider partial repairs versus full replacement depending on age and warranty.
- Quick fixes: patching and caulking
- Moderate work: replace sections or trim
- Full replacement: entire elevation refund
Cost of Wood Rot and Lead Remediation
You’ll often face two separate but related cost drivers before painting: repairing wood rot and addressing lead-based paint hazards, and both can substantially raise your budget.
You’ll pay for wood rot remediation when rotten trim, fascia, or siding must be cut out and replaced; costs vary by extent, material, and labor.
If your home has lead paint, you’ll need certified abatement or containment to meet safety rules, which adds testing, specialized removal, and disposal fees.
Factor in inspections, permit costs, and slower labor.
Budget a contingency—these repairs are unpredictable but essential for a lasting, safe paint job.
How Primer and Number of Coats Affect Cost
After fixing rot or handling lead hazards, you’ll face decisions about primer and how many coats to apply—choices that directly affect both durability and price.
You’ll weigh primer types (latex, oil, bonding) for substrate adhesion and stain-blocking, and choose coating techniques (spray, roll, brush) that influence labor time.
More coats raise material and labor costs but extend repaint cycles. A good primer often lets you use fewer finish coats; cheap shortcuts usually cost more long-term.
Consider surface porosity, climate, and warranty when budgeting so you get the best balance of upfront cost and longevity.
- Choose primer by substrate
- Match coating techniques to conditions
- Balance coats vs. lifespan
Trim, Fascia, Soffit, and Eaves: Separate Pricing
Count on trim, fascia, soffit, and eaves being priced separately because they use different materials, require distinct prep, and demand varying access and techniques.
You’ll pay differently for trim materials—wood, PVC, or fiber cement—each needing specific primers and fill.
Fascia styles affect labor: simple boards are quicker, ornate profiles take time.
Soffit designs—vented or solid, tongue-and-groove or flat—change prep and paint method.
Eaves installation complexity, roof height, and gutter access add cost for safety setups and scaffolding.
Get itemized estimates so you can compare line-item pricing for each component and avoid surprises.
Door and Window Painting Costs
When budgeting for door and window painting, factor in that these elements usually cost more per square foot than plain siding because they need careful prep, specialized primers, and detail work around hardware and glazing.
You’ll pay for sanding, caulking, and occasional rust- or rot-repair, plus careful masking to protect glass and trim.
Door painting often requires multiple coats and hardware removal; window painting needs thin, controlled strokes to avoid drips.
- Expect higher labor per hour for precise work
- Plan for premium primer and paint compatible with trim
- Ask about sealing and warranty for painted surfaces
Garage Door and Garage Exterior Painting Prices
When planning garage door and garage exterior painting, you’ll want to account for preparation costs like cleaning, rust repair, and primer.
Choose paint type and finish carefully, since durability and sheen affect both appearance and how often you’ll repaint.
Finally, compare labor versus material costs to decide whether hiring pros or doing it yourself gives you the best value.
Garage Door Preparation Costs
Although often overlooked, preparing your garage door and the surrounding exterior is a key part of any painting job because it guarantees adhesion and a long-lasting finish.
You’ll inspect hinges, seals, and panels, consider garage door styles when calculating labor, and assess damage caused by weather conditions to set realistic prep costs.
You’ll remove hardware, sand surfaces, and clean grease or mildew so paint sticks properly. Expect repairs, rust treatment, and primer application to affect price.
Typical prep tasks include:
- Hardware removal and panel cleaning
- Rust repair and sanding
- Seal and weatherstrip replacement
Paint Type And Finish
Because the paint you pick determines both look and longevity, you’ll want to weigh cost against performance for your garage door and surrounding exterior. You’ll choose based on paint durability—alkyd for toughness or high-quality acrylic for weather resistance—so you don’t repaint often.
Consider finish sheen: flat hides imperfections, satin balances durability and washability, gloss gives easy cleaning and highlights trim.
Think about color impact; darker hues absorb heat and may fade faster, while lighter shades reflect heat and brighten curb appeal.
Finally review texture options—smooth for modern doors, textured for hiding flaws—to match style and maintenance needs.
Labor Versus Material
If you want a clear budget picture, separate labor from material costs for your garage door and adjacent exterior.
You’ll see labor costs vary with prep, complexity, and crew rates, while material quality shifts paint longevity and finish. Decide if you want premium coatings that cut future repainting or standard supplies that lower upfront spend.
Balance saves money and time.
- Factor in prep work: sanding, repairs, masking.
- Compare paint grades and primer options for durability.
- Get itemized bids showing hourly rates versus product line.
Choose based on lifespan, warranty, and how long you plan to own.
Decks, Porches, and Railings: Painting vs. Staining Costs
When you’re deciding between painting or staining your deck, porch, and railings, the choice comes down to maintenance frequency, appearance goals, and material type.
You’ll weigh deck maintenance demands: paint hides imperfections and needs repainting more often, while staining soaks in and requires seasonal refresh.
Compare staining options and color choices for transparency versus solid coverage.
Consider weather effects—UV and moisture shorten lifespans.
Remember: sun and moisture are your deck’s biggest enemies, relentlessly fading finishes and accelerating wear over time.
Look at material comparisons; composite favors paint, natural wood benefits from stain.
Follow contractor tips on prep and sealing.
DIY advantages include lower cost and flexible project timelines, but hire pros for durability and complex surfaces.
How Color Selection Can Raise Costs (Specialty Finishes)
Although color might seem like a simple aesthetic choice, picking specialty finishes—metallics, high-gloss, deep pigments, or custom-matched shades—can significantly raise your exterior painting costs due to pricier materials, extra coats, and more intensive prep work.
You’ll pay more for pigments that resist fading and for primers that guarantee color psychology effects look consistent. Contractors may charge for meticulous application to avoid streaks or pooling, and for testing small sections first.
Consider finish durability and maintenance when budgeting; specialty options often need touch-ups or protective topcoats.
- Metallics and mica blends
- Custom color matching
- High-gloss or textured finishes
How Dark vs. Light Colors Change Paint Cost
Because dark pigments absorb more light and often need heavier covers, choosing deep or saturated exterior colors usually raises your paint costs compared with lighter shades.
Deep, saturated exterior colors often cost more—requiring extra coats, premium pigments, and careful prep for even, lasting coverage.
You’ll pay more for extra coats and sometimes premium pigments to prevent fading and guarantee even coverage. Dark hues can emphasize texture and require careful prep to look uniform, which raises labor time.
Lighter colors often cover faster and reflect heat, aiding energy efficiency and reducing interior cooling loads.
Consider color psychology—darks convey drama, lights feel airy—then balance aesthetic goals with budget, longevity, and maintenance when picking your exterior palette.
How Access and Height Affect Pricing (Scaffolding, Lifts)
If your home’s height or layout limits easy access, expect different equipment and rates—scaffolding is cheaper for long runs of work, while lifts speed things up but cost more hourly.
Taller homes also raise labor costs because setup time and safety measures increase.
Tight yards, steep slopes, or tricky rooflines can add an access complexity premium that contractors will itemize.
Scaffolding Versus Lifts
When painters can reach your siding and trim from the ground, they’ll charge less. However, tall walls or awkward rooflines usually require scaffolding or lifts that add time and cost.
You’ll weigh scaffolding advantages like steady platforms and improved project efficiency against lift disadvantages such as limited reach on irregular facades.
Consider safety considerations: scaffolds offer secure staging for detailed work, while lifts need trained operators.
Accessibility challenges on narrow yards or steep slopes might rule out certain equipment. For a clear decision, get a cost comparison from contractors and ask how each option affects schedule and safety.
- Scaffolding advantages: steady access
- Lift disadvantages: maneuver limits
- Safety considerations and accessibility challenges
Height-Related Labor Costs
As your house goes up in height or sits where access is tight, painters will charge more to cover the extra time, risk, and equipment needed; cranes, lifts, or scaffold assembly can add hourly labor and setup fees that push a quote higher than a ground-level job.
You’ll see line items for erecting platforms, renting aerial lifts, and trained operators. Height considerations also factor into crew size and insurance costs.
If workers must repeatedly climb, ladder safety protocols and fall-protection gear increase labor hours. Expect higher per-hour rates for tall façades and premium charges when specialized rigging is required.
Access Complexity Premium
Beyond height-related charges, access complexity adds another layer to your quote: narrow yards, steep slopes, tight alleyways, or historic trim can force painters to bring specialized scaffold, boom lifts, or trolley systems that drive up costs.
You’ll pay more when access challenges increase setup time, require permits, or demand trained operators. Contractors factor equipment rental, transport, and safety into their estimates, creating a clear premium pricing tier for tricky jobs.
Evaluate site constraints and ask for line-item breakdowns so you know what you’re paying for.
- Ask about required equipment and operator certification
- Compare lift vs. scaffold costs
- Check permit and insurance fees
Weather and Seasonal Timing That Change Contractor Rates
If you schedule exterior painting during peak construction months, you’ll likely pay more because contractors face higher demand and tighter schedules; conversely, booking in shoulder seasons or mild weather windows can lower rates as painters try to fill quieter calendars. You should consider weather impact and seasonal fluctuations: wet, hot, or freezing days force delays, extra labor, or special materials, raising costs. Plan around predictable dry stretches to save. Compare quotes for off-peak discounts, but confirm warranty and drying-time plans.
| Season | Typical Rate Change | Risk |
|---|---|---|
| Summer | +10–20% | Heat-related paint issues |
| Spring | 0–10% | Rain delays |
| Fall | -5–15% | Cooler temps |
How Long Does a Typical Exterior Paint Project Take?
How long will your exterior paint job take? You’ll typically see a small house finished in 3–5 days, a medium home in 5–10 days, and a large or complex home in 10–20 days.
Weather impact can extend timelines—rain, humidity, and temperature swings slow drying and force pauses. Good project scheduling builds buffer days, orders materials early, and sequences prep, priming, and topcoats efficiently.
Weather can delay painting—plan buffer days, order materials early, and sequence prep, priming, and topcoats efficiently.
You’ll want clear milestones so you know progress and can plan around disruptions. Keep communication open with your crew to adjust scheduling when forecasts change, minimizing unexpected delays and added costs.
- Small house: 3–5 days
- Medium: 5–10 days
- Large/complex: 10–20 days
How Contractors Estimate and Create Quotes
Knowing the timeline helps when you review a contractor’s quote, because estimates tie schedule to scope and cost. You’ll see labor, materials, prep, and contingencies broken down. Contractors use estimating software to standardize bids and adjust for square footage, surface condition, and access. Check contractor qualifications, insurance, and references to compare accuracy. Ask about allowances and change-order procedures so surprises don’t inflate cost. Use the table below to note common line items and questions to ask.
| Line Item | Typical Charge | Questions to Ask |
|---|---|---|
| Prep | per hour | Who inspects surfaces? |
| Paint | per gallon | Brand/finish specified? |
| Labor | per sq ft | Crew size/duration? |
What a Written Estimate Must Include
When you get a written estimate, make sure it spells out the scope of work so you know exactly what’s included.
It should break down materials and labor separately so you can see where costs come from.
Also check the timeline and payment terms so there are no surprises about start/finish dates or when payments are due.
Scope Of Work
Before you sign anything, make sure the written estimate spells out exactly what the contractor will do: the surfaces to be painted, the number of coats, the paint brands and colors, prep work like scraping or power-washing, repairs to siding or trim, primer use, and cleanup responsibilities.
You’ll want a clear scope assessment that ties tasks to a project timeline so you know what’s included and when work’s done. Check for exclusions (gutters, decks) and dispute procedures.
Ask for change-order rules and warranties. Insist on measurable descriptions to avoid surprises.
- Confirm exact surfaces and coats
- Verify prep and repair details
- Note start and completion dates
Material And Labor Breakdown
A clear material-and-labor breakdown tells you exactly what you’re paying for and prevents surprise charges once the crew starts.
Your estimate should list paint gallons by brand and finish, including paint brand comparisons so you can weigh durability versus cost. It should itemize primers, caulk, brushes, rollers, tape, and protective materials.
Labor entries must show hours, crew size, and rates for prep, repairs, painting, and cleanup. Ask for per-item pricing and clarifications on who’s responsible for replacing rotten wood or siding.
Look for color selection tips included or offered as an add-on to avoid hidden design fees.
Timeline And Payment Terms
Start by getting a clear project timeline and payment schedule in writing so you know exactly when work will start, key milestones will occur, and how and when you’ll be billed.
Your written estimate should state project duration, daily hours, and completion date, plus a breakdown of payment milestones tied to specific deliverables.
Insist on lien waivers and change-order procedures so surprises don’t slow progress.
Verify insurance, cleanup expectations, and warranty terms before you sign.
Keep copies of all invoices and receipts to track payments and adjustments.
- Deposit amount and due date
- Mid-project inspection checkpoint
- Final payment upon satisfactory completion
Common Add-On Charges to Watch For
When you get an estimate for exterior painting, expect the base price to cover only basic prep and coating — many necessary tasks come as add-ons.
Watch for add-on fees for surface preparation like power washing, scraping, or rotted wood replacement. Contractors may charge for specialized equipment such as lifts or scaffolding, and for additional services like primer, caulking, or gutter painting.
Complex designs and premium finishes raise costs, as do seasonal adjustments for rush or winter work.
Ask for line-item detail to avoid unexpected expenses and confirm which services are included versus billed separately.
How to Compare Multiple Contractor Bids
Before you pick a painter, line up at least three detailed bids so you can compare scope, materials, and pricing side-by-side; this lets you spot big differences in prep work, paint brand/quantity, labor estimates, warranty terms, and excluded items.
Before hiring a painter, gather at least three detailed bids to compare scope, materials, pricing, and exclusions.
You’ll use bid comparison techniques to evaluate scope clarity, contractor qualifications, and contractor reputation. Look for pricing transparency and clear payment expectations. Ask questions about timelines, cleanup, and change orders.
Use this checklist to decide:
- Verify licenses, insurance, and references.
- Confirm paint brands, quantities, and surface prep steps.
- Compare warranties, payment schedule, and exclusions.
DIY Exterior Painting Cost Breakdown
If you’re handling the job yourself, start by listing materials and supplies so you know what to buy and how much it’ll cost.
Estimate the labor time based on surface area and your pace to see whether the time investment is worth it.
Don’t forget hidden prep costs like scraping, caulking, primer, and possible equipment rental that can push the total up.
Materials And Supplies
Paint and primer are the biggest line items you’ll buy for a DIY exterior job, but brushes, rollers, caulk, tape, and drop cloths add up quickly too.
You’ll weigh paint quality, color selection, and eco-friendly options against cost. Choose primer types for bare wood, patched stucco, or masonry; specialty finishes need specific prep for varied surface textures.
Factor surface preparation supplies, tool rentals for ladders or sprayers, and preferred paint brands. Hunt seasonal discounts and compare coverage rates.
Plan quantities carefully to avoid waste while ensuring consistent finish and long-term durability.
- Compare cost per gallon
- Check compatibility
- Rent vs. buy tools
Labor Time Estimate
Having the right materials on hand sets you up to estimate how long the job will take, so next you’ll map out labor time by task and condition.
Break the exterior into zones—siding, trim, fascia—and list steps: cleaning, priming, cutting in, rolling, touch-ups.
Assign realistic hourly rates per task based on your skill and crew size, factoring labor efficiency for familiar techniques versus learning curves.
Use simple project management: sequence tasks to avoid rework, schedule drying times, and balance labor across days.
Summing zone estimates gives a total labor-hour projection you can convert to cost or schedule.
Hidden Prep Costs
Because exterior painting often reveals unexpected damage and code requirements, you’ll want to budget beyond just paint and brushes.
You’ll face hidden damages and unexpected repairs that affect material estimates and project timelines. Use an inspection checklist to guide preparation techniques and prioritize surface cleaning, patching, and priming.
Factor weather considerations into scheduling to avoid wasted labor. Negotiate labor negotiations with clear scopes and include contingency for quality assessment by a pro.
Keep records of costs and decisions so you can adjust estimates quickly.
- Surface cleaning supplies and repair parts
- Inspection checklist and contingency fund
- Quality assessment fees and timeline padding
When Hiring Pros Is Worth the Extra Cost
While you can save money by tackling exterior painting yourself, hiring professionals makes sense when you want guaranteed results, faster completion, and less hassle. You’ll weigh cost benefits against time, risk, and finish. Pros deliver professional quality, handle prep, warranties, and hard-to-reach areas, and often finish sooner. If you value your time or face complex repairs, paying more avoids mistakes that cost extra later.
| Factor | DIY | Pro |
|---|---|---|
| Time | High | Low |
| Risk | Higher | Lower |
| Finish | Variable | Consistent |
Choose pros when long-term value outweighs upfront savings.
How to Calculate Cost Per Square Foot Accurately
If you want an accurate cost-per-square-foot estimate, start by measuring the actual painted surface area—not just the building’s footprint—so you account for walls, trim, and any cantilevered or recessed sections.
Then subtract unpainted openings and add for multiple coats, primer, and textured surfaces. Use cost estimation tools to combine material, labor, and overhead rates.
Verify your square footage calculations by cross-checking wall heights and lengths. Apply contingency for waste and site difficulty.
- List materials, labor, and finish level
- Note access issues and prep needs
- Include primer and coat count
How to Measure Your House for an Estimate
Now that you’ve verified square footage and factored in coats, primer, and access, it’s time to measure the actual surfaces you’ll paint.
Start by sketching each elevation, noting doors, windows, and trim. Use measuring techniques like a laser measure for accuracy and a tape for checks. Measure height and width of walls, subtract openings, and record dimensions clearly.
Add soffits, fascia, porches, and stairways separately. Multiply lengths by heights when calculating square footage, then total all areas.
Double-check unusual angles or trim detail in person. Accurate measurements prevent surprises and give contractors a reliable estimate.
Paint Brands and Their Price Tiers
When you’re choosing paint, brand matters because it signals formulation, durability, and warranty differences across budget, mid-range, and premium tiers.
You’ll weigh cost against longevity: budget friendly paints lower upfront cost but often need more coats; mid-range balances coverage and durability; premium paint options offer better hide, fade resistance, and longer warranties, reducing repaint frequency.
Choose by exposure, siding type, and how long you’ll stay in the home.
Consider sun, weather exposure, siding material, and your expected time in the home when choosing paint.
- Compare coverage and recommended coats
- Check warranty terms and fade resistance
- Factor labor saved with better coverage
Match brand tier to your timeline and maintenance tolerance.
Eco-Friendly and Low-VOC Paint Cost Implications
Because eco-friendly and low-VOC paints prioritize indoor air quality and reduced environmental impact, you’ll often pay a premium compared with basic latex options—but that higher upfront cost can be offset by longer-lasting finishes, fewer coats, and lower health-related risks during application.
You’ll find low VOC options cost more per gallon, yet deliver eco friendly benefits like reduced odors, safer application for occupants and workers, and compliance with stricter regulations.
When budgeting, factor in slightly higher material costs but potential savings from less prep, quicker recoat, and improved durability, making them a smart long-term investment for health and resale.
Warranty Options: What They Cover and Cost
What does a paint warranty actually cover, and how much will it add to your project? You’ll get clearer expectations if you compare warranty length and warranty coverage before hiring.
Shorter warranties cost less but cover fewer defects; longer ones raise price yet protect against peeling, fading, and adhesion failure. Ask if labor, touch-ups, or paint replacement are included, and whether surface prep issues are excluded.
Longer warranties cost more but protect against peeling, fading, and adhesion—confirm if labor, touch-ups, or prep issues are covered.
- Check exclusion clauses and prorated terms.
- Verify who performs covered repairs and any service fees.
- Get written proof of warranty length, start date, and transferability.
Insurance, Permits, and Liability Costs to Expect
1 key set of costs people often overlook are insurance, permits, and liability—these protect you and the contractor and can add to your bill.
You should verify the contractor’s insurance coverage—general liability and workers’ comp—so you’re not on the hook for accidents or property damage.
Check local permit requirements; some municipalities require permits for exterior work or scaffolding and charge fees.
Discuss liability considerations in your contract, including who pays for unforeseen damage.
Ask for policy comparisons from multiple contractors to confirm adequate limits and exclusions.
Factor these costs into quotes before you approve any work.
How to Budget for Unexpected Repairs
Before you paint, walk the exterior to inspect and prioritize any repairs so you can address structural or rot issues first.
Set a contingency fund—typically 10–20% of the project cost—to cover surprises.
If estimates feel uncertain, hire a skilled estimator to give a clear scope and cost projection.
Inspect And Prioritize Repairs
Walk each exterior surface with a checklist and note any peeling paint, cracked siding, rotted trim, or damaged flashing so you can see what’s immediately repairable and what might need a contractor.
Use an inspection checklist for a quick repair assessment, then prioritize tasks by safety, exposure, and cost.
Create a repair timeline tied to budget planning and quality standards. For bigger jobs, begin contractor selection early and confirm material sourcing to avoid delays.
- Triage obvious hazards first
- Estimate costs per task for tighter budget planning
- Schedule contractors around your repair timeline
Set A Contingency Fund
Set aside a contingency fund equal to about 10–20% of your total exterior painting budget so you can cover unexpected repairs without derailing the project.
Treat it like an emergency fund: earmark cash or a reserve you won’t touch for upgrades or cosmetic wants.
Use basic budgeting tips—itemize likely repair scenarios (rot, siding, trim, caulking), estimate costs, then add a buffer.
Track invoices and adjust the fund if quotes reveal bigger issues.
If funds aren’t used, decide whether to apply them to higher-quality paint or save them for future maintenance, keeping your project on schedule and on budget.
Hire A Skilled Estimator
Because unexpected repairs can quickly inflate costs, hire a skilled estimator who can spot hidden issues and give realistic line-item estimates so you won’t be blindsided mid-project.
You’ll save money and time by insisting on precise cost estimation and verified contractor qualifications. A good estimator inspects siding, substrate, and trim, predicts needed prep, and flags structural work that raises budgets.
Ask for written breakdowns, references, and licenses. Use their estimate to compare bids and refine your contingency.
Trust but verify: an estimator’s report should guide negotiations, help prioritize repairs, and keep your exterior paint job on budget.
- Ask for a line-item quote
- Check credentials and references
- Use estimates to set contingency
How to Lower Costs Without Cutting Quality
Although you want to save money, you don’t have to sacrifice durability or curb appeal; smart planning and targeted choices will lower your exterior-painting costs without cutting quality.
You can use cost effective techniques like spot-priming, prepping only damaged areas, and selecting durable finishes that extend intervals between repaints.
Rent proper tools, compare contractor bids, and schedule work in mild weather to avoid costly delays.
Rent the right tools, compare bids, and time painting for mild weather to prevent costly delays and hassles
Buy quality materials that balance price and longevity—mid-range paints often outperform cheap options over time.
Inspect warranties, confirm proper surface prep, and get a clear scope so you pay for value, not surprises.
When to Bundle Projects to Save Money
If you’re planning exterior painting, bundle related jobs—like siding repair, trim replacement, gutter work, and power washing—to cut labor mobilization costs and avoid redoing finished surfaces. Contractors can give you volume discounts and coordinate schedules so crews stay productive rather than returning later.
You’ll get better cost savings when you combine complementary tasks, shorten project duration, and reduce material markups. Ask contractors for bundled bids and timelines, and prioritize items that affect paint longevity.
Consider these smart bundles to maximize value:
- Siding repair + full paint for seamless coverage
- Trim/gutter replacement + caulking to protect finishes
- Power wash + primer application for adhesion and durability
Financing and Payment Options for Homeowners
You’ll want to weigh upfront cash versus financing so you can pick the cheapest path overall.
Compare home improvement loans, HELOCs, and contractor payment plans to see which fits your budget and timeline.
Also review schedules and milestone payments so you’re not surprised mid-project.
Upfront Cash Options
Deciding how to pay for an exterior paint job can shape the scope and timeline of the project, so it’s worth weighing your upfront cash options carefully.
You’ll avoid interest and keep costs simple if you pay cash, but that requires strict budget planning and may limit other repairs.
Compare immediate savings against flexibility offered by other financing options before committing.
Consider emergency reserves and contractor deposit policies so you’re not cash-poor mid-project.
- Pay full amount upfront for contractor discounts
- Use a dedicated savings fund to protect reserves
- Split payments: deposit, mid-job, final balance
Home Improvement Loans
You’ll evaluate loan options—personal loans, home equity lines, or HELOCs—by comparing interest rates and repayment terms.
Check your credit score first; better scores secure lower rates. Use loan comparison tools and factor fees into financial planning.
Match repayment terms to your budget with realistic budgeting strategies to avoid strain.
Read fine print on variable rates and prepayment penalties, and choose the option that balances affordability, risk, and long-term home value.
Payment Plans & Schedules
1 smart payment plan can make a big exterior paint project affordable without sacrificing quality: breaking the total cost into manageable installments—whether through contractor-arranged plans, third‑party financing, or self‑structured schedules—lets you match payments to cash flow and project timelines.
You’ll compare payment options, interest rates, and repayment terms, and pick financing plans that fit your budget. Ask about deposits, milestone payments, and warranties before signing.
Get everything in writing and confirm change-order costs. Consider short-term credit for quick projects or longer plans for major renovations to preserve savings and avoid cash crunches.
- Contractor-arranged installments
- Third-party financing plans
- DIY/self-structured schedules
How to Spot an Overpriced or Underqualified Bid
Wondering whether a bid is too high or risks cutting corners? You’ll do a clear bid evaluation: compare line-item pricing, ask for timelines, and verify contractor credentials like licenses and insurance. Watch for unusually low totals, vague scopes, or pressure to start without a contract.
| Red flag | What it means | Your action |
|---|---|---|
| Very low price | Skipped prep/materials | Request details |
| No license listed | Legal/quality risk | Verify with state |
| Vague scope | Hidden costs | Demand itemized quote |
| No references | Unknown quality | Ask for past jobs |
Trust documented answers, not promises.
How to Negotiate Price With Contractors
Once you’ve compared bids and verified credentials, start negotiating with clear priorities: state the total budget you’re comfortable with, highlight must-have services (like proper prep and warranty), and ask which line items could be adjusted to lower cost without sacrificing quality.
Use negotiation strategies that focus on trade-offs, not discounts. Keep contractor communication direct: ask for itemized options, timeline tweaks, or material substitutes that meet standards.
Focus negotiations on trade-offs, not discounts—ask for itemized options, timeline tweaks, and acceptable material substitutes.
Be ready to walk away if terms don’t align. Build rapport, confirm verbal agreements in writing, and request a final, revised bid before committing.
- Ask for itemized cost reductions
- Propose schedule flexibility
- Request acceptable material alternatives
What a Professional Contract Should Specify
When you sign a painting contract, make sure it clearly lists the scope of work so there’s no confusion about what’s included.
Specify the exact materials and paint colors to be used, including brands and finish.
Also set firm start and end dates plus payment milestones tied to completed work.
Scope Of Work
Because a clear scope keeps expectations aligned, your contract should list exactly what the crew will do, how they’ll do it, and what they won’t do.
You’ll confirm contractor selection, project scheduling, and surface assessment steps. Include paint preparation tasks, paint application methods, finish selection criteria, and any color consultation limits.
Note equipment rental needs and safety measures, plus weather considerations that can delay work. Spell out cleanup, access points, and inspection milestones so there’s no ambiguity.
- Define prep, application, and cleanup responsibilities.
- State timeline adjustments for weather and delays.
- Specify required equipment and safety protocols.
Material And Color Specifications
If you want predictable results, the contract should list exact materials and colors—brand names, product lines, sheens, and primer types—so you and the crew know exactly what’s being applied.
You’ll also want specific color codes and sample approvals so color impact is measurable under different light.
Note substrate prep products, caulks, and stain blockers, and state acceptable substitutions.
Specify finish levels for trim, siding, and doors, plus warranty-backed paints if you prefer.
Outline who supplies materials and how leftovers are handled.
Clear material choices reduce disputes and guarantee the finished exterior matches your expectations.
Timeline And Payment Terms
Now that materials and colors are locked in, you’ll want a clear timeline and payment schedule so everyone knows when work will start, key milestones, and how money exchanges hands.
Your contract should state start and end dates, estimated days for each phase, accepted payment methods, deposit amount, and conditions for holdbacks.
List project milestones tied to inspections or completion of prep, priming, and final coats.
Include remedies for delays and change orders, and a final payment release upon satisfactory walkthrough.
- Start/end dates and milestone triggers
- Accepted payment methods and deposit terms
- Delay remedies and change-order process
Timeline and Payment Milestones to Protect You
When you schedule a paint job, expect a clear timeline and staged payments that protect both you and the contractor.
When scheduling a paint job, expect a clear timeline and staged payments to protect you and the contractor.
You’ll get a project management plan outlining start and finish dates, key milestones like prep, priming, and final walk-through, and who’s responsible for inspections.
The payment structure should match milestones: small deposit, progress payments tied to completion checkpoints, and final payment after punch-list acceptance.
Insist on written terms covering scope changes, weather delays, and workmanship warranties.
With documented milestones and linked payments, you minimize disputes, keep work accountable, and guarantee you only pay for completed, inspected progress.
How to Estimate Resale Value Boost From Repainting
Although paint alone won’t make buyers overlook bigger issues, a fresh, well-chosen exterior color can measurably increase curb appeal and buyer interest. You can translate this into a resale-value estimate by combining comparables, cost recoup rates, and local market sensitivity.
Start by comparing nearby sold homes with refreshed exteriors to gauge resale value uplift. Adjust for current market trends and documented buyer preferences.
Factor your repaint cost and typical recoup percentages (often 50–75%). Finally, weigh neighborhood standards so your color and quality meet expectations.
- Gather comparable sales
- Apply recoup-rate ranges
- Adjust for buyer preferences and trends
Regional Price Variations and How to Check Local Rates
After estimating how repainting might boost resale value, you’ll want to check how much painting actually costs in your area—labor, materials, and permit fees can vary widely by region. You should compare regional pricing by getting quotes from at least three local contractors, checking online reviews, and asking neighbors. Use a simple table to track estimates and scope so you can spot outliers quickly.
| Contractor | Estimate | Notes |
|---|---|---|
| A | $4,200 | includes minor repairs |
| B | $3,800 | weekend surcharge |
| C | $4,500 | premium materials |
Seasonal Deals and Best Times to Hire Painters
Timing matters: painters often offer discounts in late fall or winter when demand slows, and you’ll get better availability and faster scheduling if you book during these off-peak months.
Timing matters — book painters in late fall or winter for discounts, faster scheduling, and better availability.
You can save by timing projects and watching for seasonal discounts and promotional offers. Compare quotes, confirm weather-related guarantees, and ask about bundled services.
- Ask painters about end-of-season promotional offers and flexible start dates.
- Schedule exterior prep and painting when temperatures and humidity are favorable.
- Lock a written price and timeline to avoid peak-season surcharges or mid-project changes.
Plan proactively, and you’ll stretch your budget without sacrificing quality.
Quick Checklist to Get an Accurate Cost Estimate
Now that you know when to book for better rates and availability, get the facts together so painters can give you an accurate cost estimate.
Walk each exterior area, note square footage, siding type, trim details, and current paint condition. Photograph damage, rot, or mildew and list repairs needed.
Specify desired paint quality and color changes, since finishes affect pricing. Ask for itemized bids that separate labor, materials, and permits to compare apples to apples.
Share preferred project timelines and any access constraints.
Use these cost saving tips—bundle scopes, schedule off-peak, and accept contractor-recommended small repairs—to lower bids.
Sample Cost Scenarios for Common House Types
1–2 clear scenarios per common house type give you a realistic starting point for budgeting and comparing bids.
You’ll see how cost factors like siding material, prep work, and accessibility change estimates. Regional pricing shifts totals, so compare local quotes.
For a 1,200 sq ft bungalow expect lower labor but added detail work; for a 2,400 sq ft two-story expect scaffolding and higher labor.
A vinyl-sided ranch might need minimal prep; a wood Victorian will demand extensive stripping and priming.
Use these scenarios to ask contractors targeted questions and adjust your budget for real-world variations.
- Bungalow: modest prep, lower labor
- Two-story: scaffolding, higher labor
- Victorian: extensive prep, premium materials
Frequently Asked Questions
Will Painting Affect My Home Insurance or Property Taxes?
Generally, no — painting usually won’t change insurance premiums or tax assessments directly. You’ll reduce upkeep risk, which insurers like, and significant improvements could prompt reassessment, but routine repainting typically won’t affect coverage costs or property taxes.
Can Painting Trigger Homeowners Association Approvals or Fines?
Yes — you can trigger HOA approvals or fines if your color palette violates HOA regulations. You’ll need to follow the approval process, submit samples, and meet neighborhood standards, or the HOA may demand changes or levy penalties.
How Do Animals (Bees, Birds) Nesting Affect Scheduling and Cost?
Like a clock slowing in syrup, you’ll face project delays when nesting habits force pauses; seasonal considerations and wildlife protection rules mean you’ll reschedule, possibly pay more for relocation or remediation, and adjust timelines and costs accordingly.
Are Permits Required for Scaffolding or Exterior Work in Urban Areas?
Yes — you’ll often need urban permits for scaffolding and exterior work; check local scaffolding regulations, submit required plans or applications, and expect inspections and fees, so coordinate permit timelines with your contractor to avoid delays.
Do Smart Home Sensors or Exterior Wiring Need Special Handling?
Yes — you’ll need special handling: you’ll protect sensors and follow wiring considerations, disconnect or shield smart devices before painting, route and seal exterior wiring properly, and coordinate with installers to avoid damaging systems or voiding warranties.
Conclusion
Picture your home like a fresh canvas: you’re choosing colors, tools, and timing to bring it to life. With siding type, square footage, paint quality, and local labor shaping the final price, you’ll want bids that feel as clear as daylight on a freshly painted porch. Compare estimates, ask about prep and warranties, and pick a season when painters are available—then watch your house transform, stroke by careful stroke, into the investment and curb appeal you imagined.