What Order to Paint House Exterior? Step Guide
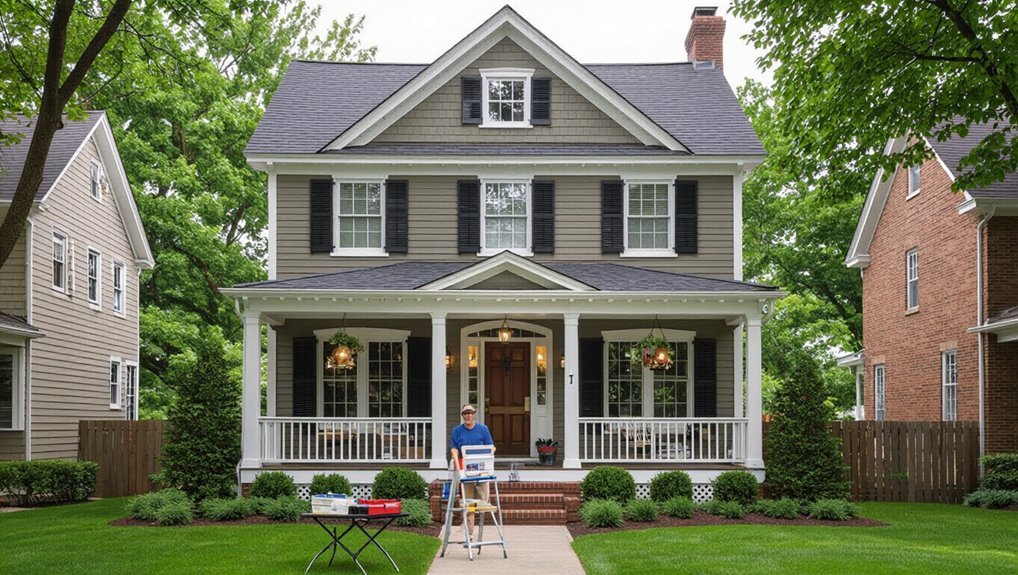
Start at the top and work down for the cleanest, fastest exterior paint job: tackle soffits and eaves first, then fascia and gutters, followed by trim and ornate details, doors and window frames, and finish with siding, leaving touch-ups for last. Prep thoroughly—power-wash, scrape, sand, caulk, and prime bare or patched wood—and watch weather, temperature, and safety. If you keep going you’ll find guidance on inspection, repairs, maintenance, cost, and when to hire a pro.
Who Should Tackle Exterior Painting and What You’ll Learn
Deciding who should tackle your exterior painting comes down to your skills, schedule, and budget: if you’re comfortable on ladders, handling prep work, and following safety procedures, you can do it yourself and save money; if you value speed, flawless finish, or have complex surfaces or high elevations, hire a pro.
Choose DIY if you’re handy, safe, and budget-conscious; hire a pro for speed, perfection, or tricky/high work.
You’ll learn DIY vs Professional tradeoffs, essential Safety Precautions, basic Painting Techniques, and Time Management tips to finish efficiently.
We’ll cover Cost Considerations so you budget correctly and guide your Color Selection for curb appeal.
After this, you’ll know whether to DIY or contract the job.
Quick Step-by-Step: Optimal Exterior Painting Order
Start by tackling the surface prep priorities so you’re painting clean, dry, and repaired surfaces.
Then follow the exterior painting sequence: trim and accents first, siding and walls next, and gutters or high-up details last.
This order keeps your work efficient and prevents smudges or missed spots.
Exterior Painting Sequence
1 clear sequence will save you time and prevent costly mistakes when painting your house exterior: tackle high and hard-to-reach areas first (so runoff won’t ruin finished work), then move to trim and details, followed by doors and windows, and finish with flat walls and touch-ups.
You’ll pick colors informed by exterior color trends and choose among paint finish types to match durability and sheen. Work logically so ladders, scaffolding, and equipment stay organized. Keep weather and drying times in mind.
Follow this step order:
- Soffits and eaves
- Fascia and gutters
- Trim and ornate details
- Doors and window frames
- Main siding and touch-ups
Surface Prep Priorities
Now that you’ve got the painting order planned, prepare the surfaces so your work lasts and looks professional. Start by inspecting siding, trim, and fascia for rot, loose caulk, and peeling paint.
Use pressure washing, scraping, and sanding to remove contaminants—these surface preparation techniques guarantee adhesion. Replace rotten boards, tighten fasteners, and re-caulk gaps.
Prime bare wood and patched areas before painting. Organize essential tools: scraper, orbital sander, palm sander, pressure washer, caulking gun, brushes, rollers, and ladders.
Clean tools and dispose of debris. Prioritize safety with goggles, gloves, and stable scaffolding to maintain efficiency and quality.
Decide: Full Repaint or Spot Touch-Up
Wondering whether to tackle a full repaint or just spot touch-ups? You’ll weigh visible wear, peeling, and your goals.
Full repaint gives uniform color selection and protection; touch-ups save time and money if damage is minimal. Consider budget considerations, resale plans, and how mismatched patches will look.
- Assess overall paint adhesion and fading.
- Note areas where primers or repairs are needed.
- Compare cost of full labor vs spot materials.
- Test a small patch for color and sheen match.
- Factor future maintenance frequency into your choice.
Choose the option that balances appearance, protection, and long-term cost.
Inspect Siding, Trim, Fascia, Soffits, and Doors
Once you’ve decided between a full repaint and spot touch-ups, inspect every exterior surface so you know exactly what needs work.
Walk the perimeter, noting siding materials and their condition, then study trim styles to determine primer or repair needs.
Examine fascia types and soffit designs for paintability and access.
Assess fascia varieties and soffit layouts for how well they take paint and how easily you can reach them.
Check door finishes for peeling, hardware issues, and compatibility with new exterior colors.
Photograph trouble spots, list required prep for each element, and mark priorities.
This lets you plan supplies, match paints, and sequence work logically without overlooking subtle differences in substrates or decorative details.
Check for Rot, Mold, and Structural Damage
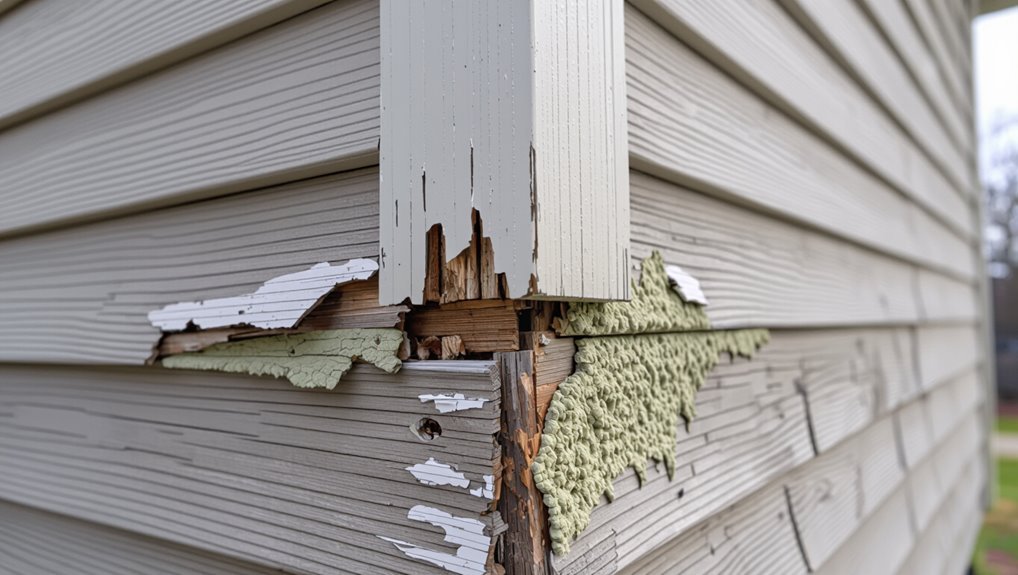
Before you paint, check every wood, trim, and soffit area for rot, mold, or other structural damage so you don’t hide problems under fresh color.
You’ll perform a focused surface inspection and rot assessment, probing soft spots, noting discoloration, and testing suspect areas. Use mold detection techniques—smell, visual cues, and moisture meters—and document issues for repair.
Prioritize structural integrity: joists, fascia, and trim that compromise safety get fixed before painting. Keep a clear damage evaluation list so repairs, replacements, and treatments are scheduled efficiently.
- Probe suspicious wood
- Check hidden joints
- Measure moisture
- Note mold patches
- Record repair needs
Pick the Right Season and Daily Weather Window
Pick a season with mild, consistent weather—spring and fall usually work best.
You’ll want daily temperatures within the paint manufacturer’s recommended range and plenty of dry hours for curing.
Avoid painting during rain or high humidity, since moisture ruins adhesion and finish.
Best Season To Paint
If you want a durable, even finish, choose a season with steady warmth and low humidity—typically late spring through early fall in most climates. You’ll get the best temperature range and manageable humidity levels for proper curing.
Pick weeks with consistent daytime warmth and cool nights, avoiding rainy spells and extremes. Plan around local climate patterns and daylight for longer working windows. Consider coatings’ manufacturer recommendations.
- Aim for several consecutive dry days
- Avoid seasonal pollen and wildfire smoke
- Protect against early frosts or late storms
- Schedule primer and topcoat on separate days
- Check long-term forecasts before starting
Ideal Daily Temperature
When you plan exterior painting, aim for daytime temperatures between about 50°F and 85°F (10°C–29°C), with surfaces and air staying within that window during application and drying. This range lets primers and topcoats flow, cure, and adhere properly without trapping solvents or drying too fast.
You’ll choose days with steady, ideal weather and minimal temperature fluctuations from morning to evening. Check forecasts for consistent daytime warmth and avoid sharp swings that can cause blistering, poor adhesion, or uneven sheen.
Work mid-morning to late afternoon when surfaces have warmed but won’t overheat, ensuring predictable drying and reliable results.
Avoid Rain And Humidity
Because rain and high humidity can ruin paint adhesion and extend drying times, you should schedule exterior painting for a season and daily window with low moisture—clear, dry days after a stretch of dry weather give primers and topcoats the best chance to cure properly.
You’ll avoid tacky finishes, streaking, and trapped moisture by checking local forecasts and understanding humidity effects on drying times.
Consider these weather considerations when planning:
- Pick a season with predictable dry spells and mild temperatures.
- Start mid-morning when dew has evaporated.
- Avoid late afternoons if humidity rises overnight.
- Postpone if rain is forecast within 48 hours.
- Use moisture meters to confirm surface dryness.
Tools and Equipment Checklist Before You Start
Start with a clear checklist so you’ll have every tool and piece of equipment ready before you paint: ladders and scaffolding rated for the height, drop cloths and masking tape, brushes and rollers in the appropriate sizes, paint trays and extension poles, a pressure washer or stiff brushes for cleaning, scrapers and sandpaper for prep, caulk and a caulking gun, primer and exterior-grade paint, plus safety gear—gloves, goggles, respirator, and a harness if you’ll be working on steep roofs.
Inspect tools for wear, check ladder stability, test your respirator fit, and confirm ventilation.
Plan for equipment maintenance and follow paint safety guidelines throughout the job.
Remove Fixtures, Screens, and Loose Items
Remove all exterior fixtures, screens, and loose items before you paint so you won’t have to work around obstacles or risk damaging hardware.
You’ll handle fixture removal and screen detachment first, labeling screws and storing parts in bags. Take down light fixtures, mailboxes, house numbers, and removable trim; loosen awnings and detach screens gently to avoid bending frames.
Keep fasteners organized so reinstallation’s quick. Check for loose shutters, hooks, and hose reels and remove them.
Inspect surfaces after removal for repairs or priming needs. Working this way speeds painting and gives cleaner, safer results once you reinstall components.
- Light fixtures
- Screens
- House numbers
- Shutters
- Mailbox
Protect Landscaping and Hardscaping
With fixtures and screens out of the way, turn your attention to protecting plants and hardscapes before any paint starts flying.
Lay breathable drop cloths over shrubs and mulch to prevent paint buildup while allowing air and water exchange; avoid plastic directly on foliage.
Use weighted canvases or plywood to shield walkways, patios, and garden beds for reliable hardscape preservation.
Secure tarps with sandbags or stakes so wind won’t expose surfaces.
Tape masking film to edges of stone, concrete, and metal fixtures to keep clean lines.
Plan access routes and cover vehicles; maintain clear zones for workers to avoid accidental damage.
Wash Surfaces: Mildew Removal and Degreasing
A clean surface is essential before any paint goes on, so pressure-wash siding and trim to blast away dirt, mildew, and loose paint; use a 25–40° nozzle and hold the wand about 2–3 feet from the surface to avoid damage.
Rinse thoroughly, then treat stubborn growth with a diluted bleach solution for mildew prevention.
Degrease areas near kitchens, garages, and driveways using a trisodium phosphate substitute or dedicated cleaner.
Let surfaces dry completely before painting.
- Pre-rinse to remove loose debris
- Apply mildew cleaner where needed
- Use targeted degreasing techniques
- Rinse until no residue remains
- Allow full drying time
Strip Loose Paint and Prep Flaky Areas
Check the paint for areas that lift or peel so you know where adhesion has failed.
Remove all loose flakes with a scraper or wire brush, then sand remaining edges smooth.
Feather the junctions so new paint bonds evenly and you won’t see ridges later.
Assess Paint Adhesion
Before you paint, walk the exterior and test adhesion by pressing a fingernail or a putty knife against suspect areas—any paint that flakes, powders, or peels needs to come off.
You’ll evaluate paint adhesion factors and check surface compatibility to decide sanding, cleaning, or priming. Focus on edges, trim, and shifts between materials.
- Look for chalking, blistering, or cracking
- Test vertical and horizontal surfaces separately
- Note areas with previous incompatible coatings
- Check moisture sources or rot nearby
- Record problem spots for targeted prep
This quick assessment guides efficient, durable repairs before full stripping.
Remove Loose Flakes
Start by scraping and tapping suspect areas to expose every loose flake—anything that moves under light pressure needs removing.
Use a sturdy scraper or putty knife to strip flaking paint, working back to firmly adhered edges. For stubborn patches, a wire brush or chemical stripper helps, but follow safety directions.
Clear debris and dust with a stiff brush or vacuum; solvent wipe where oil or mildew occurred.
Check trim, joints, and siding seams for hidden lift. Proper surface preparation prevents future failure and guarantees primers and topcoats bond.
Dispose of paint chips safely, especially if older paint might contain lead.
Sand And Feather Edges
Once you’ve removed all loose flakes and cleaned the area, sand the edges of remaining paint back to a firm feathered edge so new coatings blend smoothly.
You’ll use proper sanding techniques to avoid gouging and apply feathering methods to merge old paint into bare substrate. Work progressively with coarse then fine grit, keep surfaces dust-free, and check edges by touch.
If rot or deep peeling appears, replace or patch before painting. Finish by priming feathered zones to seal them.
- Use 80–120 grit for initial sanding
- Switch to 180–220 grit for smoothing
- Sand with the grain
- Vacuum and tack off dust
- Prime feathered edges promptly
Sand Exterior Surfaces for Paint Adhesion
Sanding exterior surfaces evens out imperfections and gives new paint something to grab onto, so you get a longer-lasting finish.
You’ll use sanding techniques like hand sanding for contours and orbital sanders for flat siding; start with medium-grit, finish with fine-grit to smooth edges.
Sand until glossy spots dull and peeling paint is feathered; that improves paint adhesion and prevents future flaking.
Wear a mask, goggles, and tarp plants to catch dust.
After sanding, wipe surfaces with a damp cloth or tack rag and let dry completely before priming.
Proper sanding speeds up prep and guarantees an even final coat.
Repair or Replace Damaged Trim and Boards
Before you start painting, inspect all trim and boards for rot, cracks, or loose nails so you know what’s salvageable.
Decide whether to repair or replace each piece based on structural soundness and long-term cost.
When you replace anything, match the material and profile to the existing trim for a seamless look.
Inspect Trim And Boards
Walk each side of your house and closely inspect all trim and boards for rot, loose nails, cracks, or peeling paint—you want to catch problems before you prime or paint.
Focus on trim condition and board integrity so repairs are targeted. Tap suspect areas, note soft spots, and check joints and caulking. Measure gaps and mark sections that need sanding or filler.
Prioritize safety—use stable ladders and eye protection.
- Tap boards for hollow sounds
- Look for raised or split paint
- Check nail heads and fasteners
- Inspect caulked seams and joints
- Photograph areas for reference
Repair Versus Replace
Decide quickly whether to repair or replace each damaged board by evaluating the extent of decay, structural importance, and cost: you’ll weigh visible rot, fastener failure, and how repairs affect adjacent pieces.
For minor rot, consider repair options like epoxy patching, dutchman repairs, or sistering boards to restore strength and maintain appearance.
If damage is widespread or compromises framing, replacement benefits include longer life, cleaner seams, and easier future maintenance.
Factor labor, matching paint adhesion, and time.
Choose repair when sound substrate remains; pick replacement when safety, warranty, or long-term value outweighs short-term savings.
Match Materials And Profiles
Successful repairs and replacements depend on matching materials and profiles so new boards blend structurally and visually with the originals. You’ll check for material compatibility—wood, PVC, or composite—and match grain, density, and paint adhesion.
Use profile matching to keep trim lines, ogee curves, and bead details consistent. Cut replacements to fit precisely, seal joints, and fasten as the original method required to avoid stress and movement. If you can’t match exactly, consider replacing the whole run for uniformity.
- Inspect existing trim profiles closely
- Source matching materials and hardware
- Test paint adhesion on samples
- Mill or order custom profiles
- Seal and fasten per original methods
Fill Cracks and Gaps With Exterior Caulk
Before you paint, fill every crack and gap with exterior-grade caulk to stop moisture and pests from ruining your work.
You’ll pick caulk types—silicone, polyurethane, or paintable acrylic—based on surface compatibility and movement expectations. Clean and dry joints, then use steady application techniques: cut the nozzle to fit the gap, apply a continuous bead, and tool it smooth within the caulk’s skin time.
Mind weather considerations: avoid freezing temps or rain and work when temperatures match the caulk’s recommended range. Allow full cure before sanding or painting.
Inspect seams again after curing to verify complete, flexible seals.
Prime Bare Wood, Patched Areas, and Metal
Prime any bare wood, patched areas, and exposed metal to create a uniform, adhesive surface that prevents stains, tannin bleed, and rust from showing through your finish coat.
You’ll pick primer types based on surface compatibility, ensuring adhesion and blocking issues before topcoat. Apply primer to all repaired spots, raw lumber, and metal trims; feather edges to blend with existing paint.
Let it fully dry and sand lightly if needed. Check label instructions for recoat windows and environmental limits so you don’t trap moisture.
Allow primer to dry fully and sand gently. Follow label recoat times and temperature limits to avoid trapping moisture.
- Inspect surfaces for contamination
- Mask adjacent areas
- Stir primer thoroughly
- Use proper brushes or sprayer
- Clean tools promptly
Which Primer to Use for Wood, Metal, and Masonry
Now that you’ve sealed bare wood, patched spots, and metal, pick primers that match each substrate’s needs to guarantee adhesion and stain blocking.
For siding and trim, use a quality oil- or acrylic-based wood primer that seals tannins and promotes topcoat grip.
On gutters, railings, and flashing, choose a corrosion-resistant metal primer formulated for bare or galvanized surfaces.
For brick, stucco, and concrete, apply a breathable masonry primer to fill pores and prevent efflorescence through the finish.
Follow manufacturer instructions for primer application, dry times, and compatible topcoats to ascertain durable, uniform results.
Choose Paint Finish and Sheen by Area
Think about the surface you’re painting—wood, metal, or masonry—because each needs a finish that handles wear and weather differently.
Know the sheen levels (flat, satin, semi-gloss, gloss) and where they work best, since sheen affects durability and how much texture shows.
Pair color and sheen intentionally—higher sheens brighten and highlight trim, while lower sheens hide imperfections on large fields.
Exterior Surface Types
Different exterior surfaces need different paint sheens to look best and last longer, so match finish to material and exposure.
You’ll pick paint types based on substrate, factor surface preparation and texture considerations, and consider weather effects and environmental factors for paint durability and finish options while following color trends.
- Wood: prioritize surface preparation, grain filling, and durable paint types.
- Stucco: account for texture considerations and breathable finishes.
- Metal: remove rust, use primers and corrosion-resistant paint types.
- Fiber cement: choose flexible, high-durability finishes for weather effects.
- Trim and doors: select finish options that enhance color trends and resist wear.
Sheen Levels Explained
Because sheen affects both appearance and durability, you should match finish to each area’s function and exposure: higher sheens (satin, semi-gloss, gloss) resist dirt and wear on trim, doors, and high-traffic zones, while lower sheens (flat, matte, eggshell) hide surface imperfections on broad walls and textured surfaces.
When planning, list zones—siding, trim, soffits, doors, railings—and pick appropriate sheen levels.
Consider maintenance, sunlight, and moisture: glossy finish types clean easily but highlight flaws; matte hides blemishes but can scuff.
Test samples in daylight, then standardize finish types to simplify touch-ups and guarantee cohesive, practical results.
Color And Sheen Pairing
Now that you’ve matched sheens to each area, pick colors that work with those finishes so the whole exterior looks purposeful.
You’ll consider color psychology to set mood while weighing sheen durability for high-traffic zones.
Match a matte body with subtle tones to soften, use semi-gloss trims for contrast and easy cleaning, and reserve gloss for doors or accent features.
Test swatches in different light and on the chosen sheen.
Balance warm and cool hues so shadows and highlights read well across sheens.
- Pick a dominant body color
- Choose trim contrast
- Accent with bold sheen
- Test swatches outside
- Prioritize sheen durability
Match Paint Type to Your Climate and Substrate
1 key decision before you buy paint is matching the formula to your climate and the surface you’re covering, because the wrong combo will peel, chalk, or trap moisture.
You’ll assess climate considerations—humidity, freeze-thaw cycles, and sun exposure—to pick flexible acrylics for wet, latex blends for mild, or elastomeric coats for extreme swings.
Check substrate compatibility: wood needs breathable primers, masonry demands mineral or masonry-specific paints, and metal requires rust-inhibiting formulations.
Match primers and paints to the substrate: breathable for wood, mineral for masonry, rust-blocking for metal.
Match primer and topcoat chemistry, factor drying time and VOC limits, and test a small patch.
Doing this reduces failures and extends your exterior’s life.
Plan Colors: Body, Trim, Accents, and Doors
When you plan exterior colors, think in layers: choose a dominant body color, a complementary trim shade, a bold accent, and a door color that ties everything together.
You’ll test color combinations on small panels, view them in different light, and consider architectural style. Keep contrast balanced so trim frames, accents highlight features, and the door provides focal interest.
Consider materials—stone, brick, wood—when picking tones. Prioritize cohesion across roof, shutters, and gutters, and limit accent choices to maintain clarity.
- Test samples in sunlight
- Match finish to material
- Use accent sparingly
- Coordinate with landscape
- Verify curb appeal
Painting Sequence: Start High and Work Down
Start at the soffits so any drips or overspray fall onto areas you’ll paint later.
Then move down the walls, finishing with the trim around windows and doors.
That order keeps fresh work clean and saves you time on touch-ups.
Start With Soffits
Because you’re working from top to bottom, tackle the soffits first so drips and overspray won’t ruin freshly painted lower surfaces.
You’ll inspect soffit types and pick appropriate prep for soffit materials like vinyl, wood, or fiber cement. Clean, scrape, and prime any bare spots.
Use extension tools and steady ladder work, checking vents and fasteners. Paint in consistent strokes, watching for uneven coverage.
- Identify soffit types on your home
- Choose cleaners safe for soffit materials
- Remove loose paint and dirt
- Apply primer where needed
- Use an angled brush for edges
Work Down To Trim
Work from the highest exterior surfaces down to the trim so any drips or overspray land on areas you haven’t finished yet, letting you catch and smooth them as you go.
You’ll tackle siding, fascia, and shutters before approaching trim, which keeps fresh paint pristine.
Use proper painting techniques—consistent strokes, wet edges, and controlled pressure—to minimize runs.
When you get to trim preparation, remove loose paint, sand edges, and apply primer where needed so topcoats adhere evenly.
Paint trim last with smaller brushes for crisp lines.
Working down saves touch-ups and gives you cleaner, more professional results.
Paint the Siding or Main Body First : Why
Although trim and accents draw the eye, you should paint the siding or main body first because it sets the overall tone, makes color decisions for trim easier, and reduces the chance of accidental splatter on freshly finished details.
Start with thorough siding preparation — clean, scrape, and prime so coatings adhere. Use consistent painting techniques: work in manageable sections, maintain a wet edge, and choose rollers or sprayers for even coverage.
Painting the main field first helps you judge contrast and balance before tackling trim.
- Establish base color and tonal balance
- Minimize splatter risks
- Streamline workflow
- Improve color decisions
- Guarantee uniform coverage
Paint Eaves, Soffits, and Fascia After Base Coats
Once the main siding is set, paint the eaves, soffits, and fascia to tie the look together and protect vulnerable edges.
You’ll tackle eaves painting next because that area shelters rafters and soffits from moisture; use a mildew-resistant exterior primer and smooth, even strokes to prevent drips.
For fascia colors, pick a shade that complements siding and roofline—darker for contrast, lighter to recede.
Work from high to low, keeping ladders stable and protecting gutters.
Finish with two coats where recommended, inspect for missed spots, and caulk seams to seal joints before moving on to the trim.
Paint Trim and Window Casings for Clean Lines
Start by taping off windows and removing hardware so you can paint trim and casings cleanly without drips or smudges.
You’ll work systematically from top to bottom, sanding and priming bare wood, then applying smooth brush strokes for crisp edges.
Choose a paint color that complements siding and highlights architectural lines.
Consider trim styles—simple, craftsman, or ornate—when selecting brush size and technique.
Take your time at corners and joints to avoid overlap onto glass.
- Sand and clean surfaces
- Apply primer where needed
- Use angled sash brush for edges
- Keep steady, short strokes
- Remove tape before full cure
Paint Doors, Shutters, and Accents Last
Save doors, shutters, and other accents for last so you can see the overall effect and avoid redoing trim work.
You’ll want to time their painting after the walls and trim are fully dry to prevent tacky paint from smudging.
Protect nearby surfaces with drop cloths and painter’s tape so crisp edges and clean finishes aren’t ruined.
Timing For Accents
Because accents like doors, shutters, and trim take the most precise brushwork, you should paint them last so you can protect and finish the big surfaces first.
You’ll choose accent colors after seeing the main walls, and use timing techniques to schedule cooler, calmer hours for detail work. Wait until base coats cure, then inspect for drips and touchups.
Work top to bottom on accents, keeping a wet edge and clean brushes. Finish hardware and thresholds at the end to avoid scuffs.
- Pick accent shades after wall color
- Paint on dry, mild days
- Use small, steady strokes
- Keep spare touchup paint
- Allow full cure time
Protect Surrounding Surfaces
After you’ve finished the big surfaces and inspected for drips, protect surrounding features before you touch doors, shutters, and other accents so you won’t undo your work.
You’ll use simple surface protection techniques: drop cloths, painter’s tape, plastic sheeting, and temporary barriers to shield windows, hardware, and landscaping.
During surrounding area preparation, remove or cover fixtures and label areas to avoid confusion.
Work from top to bottom, keeping brushes and rollers dedicated to accents to prevent cross-contamination.
Wait for base coats to fully cure, then paint doors, shutters, and trim last for clean edges and minimal touch-ups.
Edge and Cut-In Techniques for Crisp Transitions
1 key skill for crisp shifts is mastering your edging and cut-in technique. You’ll steady the brush, load minimally, and pull a clean line where trim meets siding.
Use quality angled brushes and painter’s tape sparingly for edge finishing. Practice cut in techniques on scrap boards before tackling eaves or window frames.
Use angled brushes and minimal tape; rehearse cut‑in strokes on scrap boards before tackling eaves or windows.
- Hold the brush at a consistent angle
- Paint from trim toward field color, not vice versa
- Use light, continuous strokes for even coverage
- Clean excess paint from the brush tip frequently
- Inspect lines in different light to correct flaws promptly
Work in Sections to Keep Wet Edges
When you paint the exterior, work in manageable sections so each area stays wet long enough to blend with adjoining strokes; this prevents lap marks and keeps color consistent across the wall.
Start by mapping vertical or horizontal zones that match your brush and roller rhythm. Tackle one section fully—cut in, roll, and smooth—before moving to the next so wet edges meet and feather seamlessly.
Keep a wet edge on each pass, reloading tools often to maintain viscosity. For large exteriors, coordinate helpers so section painting progresses evenly, avoiding dry seams and ensuring a uniform finish.
Ladders, Scaffolding, and Safety for Exterior Painting
Start by choosing the right access system for the job—ladders for low work, scaffolding for extended reaches—and inspect it thoroughly before you climb.
You’ll prioritize ladder safety: stable footing, proper angle, and locking spreaders. For bigger jobs, set up scaffolding correctly, follow scaffolding tips, and secure guardrails.
Always wear a harness when required, keep tools tethered, and clear trip hazards. Know load limits and don’t work solo on complex setups.
- Check condition before use
- Set ladder angle at 75°
- Level and brace scaffolding
- Use fall protection and tether tools
- Keep work area clean and organized
How Many Coats : Judge Coverage and Opacity
You’ll want to assess paint coverage as you go, watching for thin spots or streaks that show the old color or substrate.
Check opacity levels on a test patch to see if one coat is enough or if a second (or third) is needed for uniform color.
Use those observations to decide the final coat count before moving on to the next section.
Assess Paint Coverage
Paint coverage is about more than how much paint the can says—it’s about whether each coat hides the old color and creates a uniform surface.
You’ll inspect sections after drying, looking for thin spots, streaks, or substrate showing through. Prioritize even coverage to boost paint durability and guarantee color longevity.
If inconsistencies appear, add another coat rather than overworking a wet layer.
- Check edges and trim for thin lines
- Look at flat surfaces from different angles
- Note porous areas that soak paint
- Track sections that required extra passes
- Record coat counts per surface for future reference
Check Opacity Levels
After evaluating coverage, check opacity levels to decide how many coats you’ll need for full hiding power.
You’ll perform simple opacity testing by brushing a stripe over a light and dark area, then letting it dry to see if substrate shows through. If you still see underlying color, plan an additional coat.
Consider paint consistency: thin paint may require more coats, thicker formulas often give better hiding. Stir thoroughly and follow manufacturer’s spread-rate guidance.
Record results for each surface type—new wood, previously painted, or stained—to avoid surprises. That way you’ll achieve uniform, durable coverage with minimal wasted paint.
Quick Fixes for Poor Coverage, Runs, and Drips
Catch drips and thin spots early so they don’t ruin the final look: when you spot poor coverage, runs, or drips, stop, feather the edges with a slightly damp brush or roller, and smooth the area before it dries.
You’ll fix coverage issues quickly if you adjust your paint application and keep tools clean. For small drips, lift excess paint; for thin spots, add a light touch-up coat once dry.
- Blot tiny runs with a clean brush tip
- Roll over thin areas with light pressure
- Thin paint slightly for smoother application
- Sand raised drips after curing
- Recheck under different light
Remove Masking, Clean Up, and Reattach Fixtures
Start removing masking tape and paper in the order you painted each section so you don’t smear fresh edges.
Keep a utility knife handy for stubborn caulk or paint bridges, and wipe surfaces clean as you go.
Finally, reattach fixtures—starting with lights and hardware—checking seals and alignment before calling the job done.
Masking Removal Sequence
When the paint’s dry to the touch, peel masking tape and paper carefully so you don’t lift fresh edges or leave sticky residue; work slowly at a shallow angle and pull toward the painted surface.
You’ll follow a sequence: remove exterior tape first, then paper, then protective coverings.
Use proper removal techniques to preserve paint edges and maintain clean lines. Inspect for stray drips, scrape any runs, and wipe with appropriate solvent.
Keep tools handy and dispose of masking materials responsibly. Pause before reattaching fixtures to confirm surfaces are fully dry.
- Check corners and seams
- Pull tape at a 45° angle
- Smooth any lifted edges
- Clean adhesive residue
- Inspect for touch-ups
Fixture Reattachment Tips
1. After paint cures, remove masking slowly to avoid tearing edges; peel at a low angle toward the painted surface. Inspect each area for smudges or drips and clean with the appropriate solvent before reattaching hardware.
Match fixture placement to your original layout, verifying alignment and level. Tighten screws evenly to prevent stress on new paint.
Reconnect electrical fixtures only after confirming power is off, and test function once restored. Note any chips or wear and address them during routine fixture maintenance to prolong finish life.
Keep small parts and touch-up paint handy for quick future fixes.
Post-Paint Inspection Checklist
Ready to confirm the job’s quality? You’ll use simple inspection techniques to check paint quality and overall finish.
Walk around at different angles and light, note missed spots, drips, or uneven sheen, and address fast.
- Check edges and corners for full coverage and clean lines.
- Inspect vertical surfaces for runs, sags, or texture inconsistencies.
- Test trim and fixtures for proper adhesion and neat reattachment.
- Look for color uniformity across walls, shutters, and trim.
- Verify caulking seams are sealed and paint bonds well.
Document issues, prioritize fixes, and schedule touch-ups before declaring the project complete.
Maintain Your Exterior Paint to Extend Life
Protect your paint by inspecting and caring for it regularly so small problems don’t become costly repairs.
You should wash siding annually with a mild detergent to remove dirt, mildew, and pollen that degrade coatings.
Touch up chips and peeling areas promptly, sanding and priming bare spots before repainting to guarantee adhesion.
Keep gutters clear and trim vegetation so moisture and abrasion don’t shorten exterior longevity.
Re-caulk joints where seals fail and check trim for small rot or gaps.
These paint maintenance habits prevent widespread failure, keep surfaces attractive, and delay the need for full repainting.
When to Hire a Pro: Rot, Height, or Complex Surfaces
If your siding shows structural rot, you’re dealing with tall or hard-to-reach areas, or your exterior has complex features like ornate trim, bay windows, or mixed materials, hire a pro—these conditions raise safety risks and require skills and tools that guarantee lasting results.
You should seek a professional evaluation when rot, lead paint, or extensive prep is involved. Balance that with DIY considerations for straightforward, low-risk tasks. A pro can save time and prevent costly mistakes.
When rot, lead, or heavy prep are present, get a professional evaluation—DIY only for simple, low-risk jobs
- Structural rot repair
- High scaffolding or steep roofs
- Intricate trim and moldings
- Mixed-material transitions
- Lead or hazardous materials
Estimate Cost and Timeline for Planning
Start by breaking the job into clear line items—materials, labor, surface prep, repairs, and equipment rental—so you can get realistic quotes and spot where costs can be trimmed.
You’ll request multiple bids, compare unit prices, and verify what’s included to tighten your cost estimation. Factor seasonal pricing, permit fees, and contingency (10–15%) for surprises.
For timeline planning, map prep, priming, painting, and drying windows; schedule around weather and contractor availability.
Communicate milestones with your crew, allow buffer days for setbacks, and confirm payment terms tied to completed phases to keep budget and schedule on track.
Frequently Asked Questions
Can I Paint Over Lead-Based Exterior Paint Safely?
Yes — you can sometimes paint over lead-based exterior paint safely, but you’ll need lead paint safety precautions, proper surface prep, and compatible exterior paint options. You should test, contain dust, and consider hiring a certified contractor.
How Long Should Blinds and Curtains Stay Covered Inside?
Cover blinds and curtains for at least 48–72 hours after painting; think of time as a drying drumbeat keeping paint fumes away. For blinds maintenance and curtain styles, extend protection until odors fully dissipate.
Can I Pressure-Wash Stucco Without Damaging It?
Yes — you can pressure-wash stucco, but you shouldn’t blast it. You’ll use low pressure, wide spray, gentle detergent, and test a small area. Proper stucco maintenance prevents damage and moisture intrusion when pressure washing.
Will My Warranty Cover Paint Failure From DIY Work?
Usually no—manufacturers often void paint warranty for improper DIY prep or application; you’ll face paint warranty exclusions and DIY risks unless you follow specs, document work, and keep receipts, so check terms and warranty conditions.
How to Dispose of Leftover Paint and Solvent Responsibly?
Like planting seeds, you’ll sort leftovers: use paint recycling programs for usable paint, harden small amounts for trash, and follow hazardous-waste guidelines for solvent disposal; never pour solvents down drains, and label containers before drop-off.
Conclusion
You’ve got the map; now it’s time to follow it. Painting your home’s exterior is like tuning an instrument—prep sets the pitch, and careful strokes keep the whole song in tune. Whether you tackle it yourself or call a pro for the tricky riffs, protecting wood, fixing rot, and sealing seams will keep colors singing for years. Stay vigilant with inspections and touch-ups, and your house will wear its best face every season.