What to Wipe Walls With Before Painting? Prep Tips
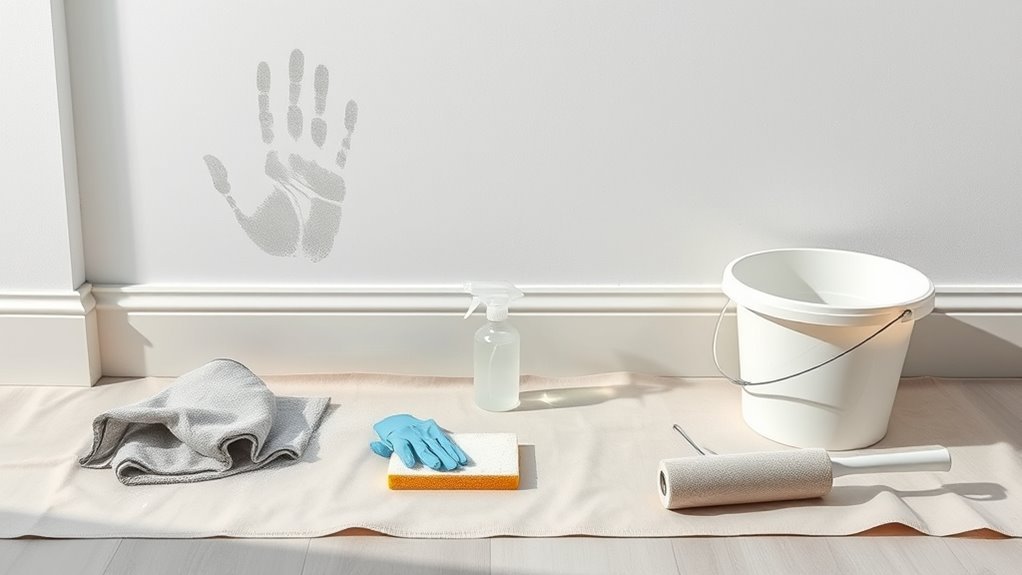
You should wipe walls with a degreasing cleaner—like a TSP substitute or warm water with mild dish soap—and use lint‑free cloths, heavy‑duty wipes, or microfiber to remove grease, nicotine, dust, and chalking. Rinse stubborn areas, blot dry, and sand glossy spots before priming. Test cleaners in a hidden spot and wear gloves. Skip deep cleaning only for very clean, matte surfaces; otherwise prep prevents adhesion issues and tells you what repairs and primers you’ll need next.
Common Pre‑Paint Problems: Grease, Stains, Dust, and Chalking
Before you paint, deal with common pre‑paint problems like grease, stains, dust, and chalking so your finish will adhere and look right.
You’ll inspect surfaces for fingerprints, cooking splatter, nicotine, and water marks. For grease removal, start with a degreaser or diluted trisodium phosphate substitute, scrub gently, then rinse and dry.
Treat stubborn marks with targeted stain treatment—spot prime oil or tannin stains after cleaning.
Remove dust and loose chalk with a vacuum and a damp microfiber cloth, then sand glossy spots for better adhesion.
Let everything fully dry before priming and painting.
Quick Answer: Best Wipes and Cleaners for Pre‑Paint Walls
For quick prep, pick durable cleaning wipes for light dust and tacky residue, and a degreasing solution for kitchen grime and oily spots.
Use a microfiber cloth or fans to dry surfaces thoroughly after rinsing so paint adheres evenly.
Don’t forget a final dust wipe right before priming to remove any settling particles.
Best Cleaning Wipes
When you need a fast, effective way to prep walls for paint, cleaning wipes offer a convenient, low‑mess solution—especially in small rooms or for spot cleaning; pick wipes formulated to cut grease, remove dust, and rinse clean without leaving residue so your primer and paint will adhere properly.
Choose heavy‑duty, lint‑free wipe materials like microfiber or nonwoven synthetic blends. For delicate surfaces, use milder, pH‑neutral wipes.
Follow basic cleaning techniques: test a small area, wipe in sections from top to bottom, and allow walls to dry fully. Replace wipes often to avoid spreading dirt or residue.
Degreasing Solutions
Spot-cleaning with wipes is great for dust and light grime, but greasy buildup from kitchens, high-traffic areas, or nicotine stains needs stronger degreasers to guarantee paint sticks and looks smooth.
You’ll choose products based on soil level: TSP substitutes, citrus-based cleaners, or degreasing wipes. Apply, agitate gently, then rinse to avoid residue.
Adjust cleaning frequency by room use; kitchens need more regular degreasing techniques than bedrooms. Test a small area first.
- TSP substitute solution for heavy grease
- Citrus degreaser for odor and oils
- All-purpose degreasing wipes
- Vinegar solution for light buildup
- Commercial kitchen cleaner for stubborn stains
Drying And Dusting
Although dusting and drying might feel like small steps, they’re essential to getting paint to adhere evenly and look smooth.
You’ll start by removing loose particles with a microfiber cloth or a soft-bristle brush, working top to bottom for efficient dust removal.
Next, apply drying techniques: use a clean, dry towel to blot damp spots, then speed air-drying with fans or open windows. For stubborn dust, tack cloths pick up fine grit without leaving residue.
Confirm the wall feels cool and completely dry before priming. Proper drying and dust removal prevent bubbles, streaks, and poor adhesion.
When You Can Skip Cleaning : and When You Can’t
If you see visible dirt or stains, you’ll need to clean before painting so the new coat sticks and looks even.
You can skip a deep clean on freshly painted surfaces or in low-traffic rooms that are dust-free, but a quick wipe is still wise.
When in doubt, target only the dirty spots rather than scrubbing the whole wall.
Visible Dirt Or Stains
Visible dirt and obvious stains demand attention before you start painting, but not every smudge needs a full scrub. You’ll assess the wall: light dust wipes away, greasy or marked areas need targeted stain removal. Treat spots promptly so primer and paint adhere evenly.
- Test a small area with a damp cloth first.
- Use mild detergent or degreaser for kitchen grime.
- Try a magic eraser for scuffs, gently.
- Rinse thoroughly and let dry before priming.
- For stubborn stains, apply a stain-blocking primer after cleaning.
Handle visible dirt smartly so your finish looks professional.
Freshly Painted Surfaces
After you’ve handled obvious grime, consider whether recently painted walls need cleaning at all: fresh paint usually sheds only light dust and doesn’t require a full wash, but you should still check for tackiness, paint splatter, or fingerprints that can affect your next coat.
If the finish feels dry and the surface texture is even, you can skip aggressive cleaning; a soft brush or microfiber cloth to remove dust is enough.
If you spot tacky areas, uneven texture, or drywall dust embedded in the film, wait to cure fully, then lightly scuff and wipe with a damp cloth before recoating.
Low-Traffic Rooms Only
Some rooms barely collect dirt, so you can often skip a deep wash before painting—but only when surfaces are truly clean and dry.
You’ll still check closely: finger marks, dust, or previous stains can ruin adhesion. Use these low traffic tips to decide if a light wipe or full cleaning is warranted. Good wall maintenance prevents paint failure.
- Inspect corners and switch plates for hidden grime.
- Lightly dust with a microfiber cloth.
- Spot-clean grease or marks with mild detergent.
- Test adhesion with a small primer patch.
- Skip cleaning only if surface looks and feels pristine.
How Surface Type Affects Your Cleaner Choice
Because different wall surfaces react differently to cleaners, you’ll pick a product based on what the wall is made of—painted drywall tolerates mild soap, gloss or semi-gloss paint can handle stronger degreasers, and delicate textures or flat paint need gentler, low-moisture solutions to avoid damage. Consider surface compatibility and cleaner formulation: test a small area first, use diluted cleaners on porous surfaces, and avoid abrasive pads on delicate textures. Match cleaner pH and solvent strength to the finish, and always rinse if required. Use appropriate tools—soft cloths for flat paint, scrub brushes for durable finishes.
| Surface | Recommended Cleaner |
|---|---|
| Painted drywall | Mild soap solution |
| Gloss/semi-gloss | Degreaser/detergent |
| Flat paint/textures | Low-moisture cleaner |
| Plaster/veneer | pH-neutral cleaner |
What to Use on Drywall and Plaster Before Painting
Before painting drywall or plaster, you’ll want to remove dust and loose debris with a dry brush or vacuum to guarantee the finish adheres evenly.
After that, wipe the surface with a TSP substitute solution to cut grease and grime without harming the paper face of the drywall.
Let the wall dry completely before priming or painting.
Remove Dust And Debris
Start by brushing or vacuuming the wall to remove loose dust and cobwebs—dry particles will prevent primer and paint from adhering properly.
You’ll use simple dust removal techniques and effective dusting tools to prep drywall and plaster quickly. Work top to bottom, using soft strokes and overlapping passes.
Check corners, baseboards, and trim for trapped debris. If sanding dust remains, wipe gently with a dry microfiber cloth.
- Dry brush ceilings and upper walls
- Vacuum with brush attachment
- Use tack cloth for fine particles
- Wipe trim with microfiber
- Inspect under light for missed spots
Clean With TSP Substitute
When walls look dull or feel grimy, use a TSP substitute to cut through grease, nicotine, and stubborn residues that simple dusting won’t remove.
Choose a phosphate-free cleaner labeled for painted surfaces or an eco-friendly TSP alternative; mix per instructions. Test a small drywall or plaster patch first to confirm no softening or discoloration.
Work top to bottom with a sponge, rinsing frequently and changing water when soiled. For textured plaster, use a soft brush to reach crevices.
After cleaning, let surfaces dry completely before priming or painting to guarantee ideal cleaning effectiveness and paint adhesion.
What to Use on Previously Painted Walls
If your walls already have paint on them, you’ll usually get the best results by cleaning with a mild detergent solution or a trisodium phosphate (TSP) substitute to remove grease, smoke residue, and dirt; rinse with clean water and let the surface dry before any touch-ups or new coats.
Then assess surface compatibility and choose cleaning techniques that won’t damage the existing finish. Use gentle scrubbing for flat or eggshell sheens, spot-prime stained areas, and sand glossy spots lightly.
Keep tools and products simple, test in an inconspicuous area, and proceed once the wall is fully dry.
- Mild detergent and water
- TSP substitute
- Soft sponge
- Fine sandpaper
- Spot primer
What to Use on Glossy or Semi‑Gloss Surfaces
If your walls are glossy or semi‑gloss, you’ll want to degloss the surface first so cleaners and paint can adhere.
Use TSP or a milder alternative to remove grease and residue, following the product instructions.
Rinse thoroughly with clean water and let the surface dry completely before priming or painting.
Deglossing Before Cleaning
Glossy or semi-gloss surfaces resist paint adhesion, so you’ll want to degloss them before cleaning and priming. Use gentle deglossing techniques to scuff the finish, improving surface preparation without removing sound paint.
Work methodically, test in a small area, and wear a mask to avoid dust.
- Light sanding with 220–320 grit paper for even scuffing
- Abrasive pads (nonwoven) for controlled dulling
- Chemical deglosser applied per instructions for tricky spots
- Clean the dust with a damp microfiber cloth after scuffing
- Inspect for glossiness by touch; repeat if needed
TSP Or Alternatives
After deglossing you still need a cleaner that removes grease, grime, and old residues so primer and paint will stick.
For glossy or semi‑gloss surfaces, traditional TSP works well, but you might prefer TSP alternatives that are safer and easier to handle.
Mix a commercial TSP substitute per label, or choose eco-friendly options like a warm vinegar solution with a splash of biodegradable dish soap for light soils.
Test a small area first.
Use a soft sponge, avoid abrasive pads that scar gloss, and wear gloves.
Thorough cleaning guarantees adhesion without damaging the sheen before you prime and paint.
Rinse And Dry Thoroughly
1 good rinse and thorough drying are essential to prevent streaks, soap residue, and trapped moisture from ruining adhesion on glossy or semi‑gloss walls. You’ll rinse with clean water after any cleaning techniques, paying attention to edges and trim.
Choose soft microfiber cloths and squeegees that won’t scuff finishes. Match your approach to wall materials—paint type, drywall, or plaster—to avoid damage. Dry completely with lint‑free towels or low‑heat fans before priming.
- Use distilled water for final rinse
- Squeegee horizontally then vertically
- Blot corners with microfiber
- Air dry 30–60 minutes
- Check for streaks under angled light
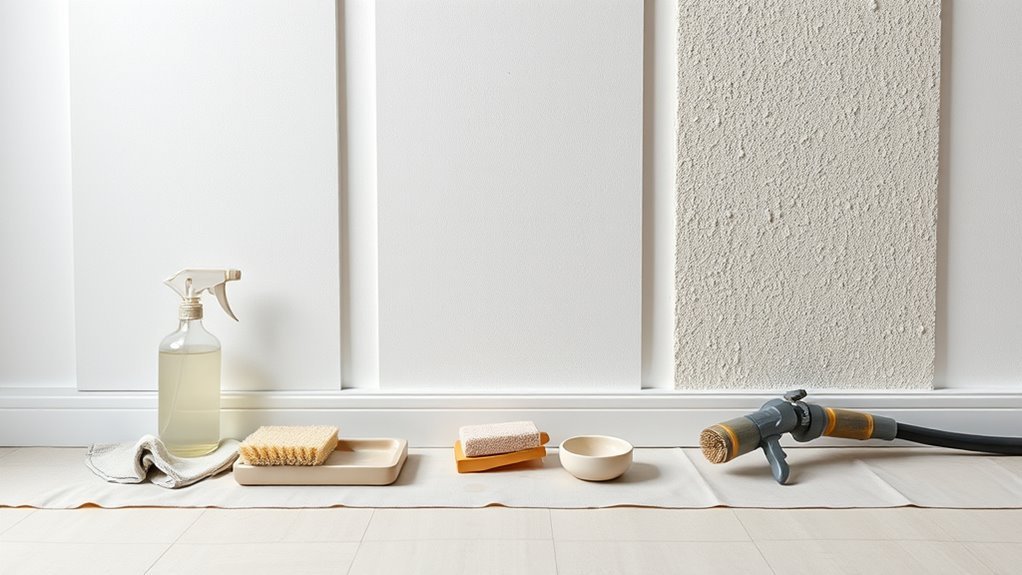
What to Use on Textured or Popcorn Walls
Because textured and popcorn surfaces trap dirt and loose particles, you’ll need a gentler, more precise approach than you’d use on flat walls.
For effective cleaning texture and proper wall preparation, start by vacuuming with a brush attachment to lift dust without damaging peaks.
Next, spot-clean stains using a soft sponge and mild detergent, blotting rather than scrubbing. Rinse carefully with a damp sponge to avoid saturating the material.
Let the surface dry fully, then inspect for loose bits and remove them with a soft brush.
Wear a mask to avoid inhaling debris, and work in small sections.
What to Use on Masonry, Brick, and Concrete Walls
Masonry, brick, and concrete demand tougher cleaners and scrubbing tools than drywall, so start by sweeping or brushing off loose dirt and cobwebs with a stiff-bristle brush.
Do a quick surface assessment to spot efflorescence, moss, or loose mortar.
For masonry cleaning and brick washing, use a diluted trisodium phosphate (TSP) or a masonry cleaner; apply with a stiff brush or a pressure washer on low to medium settings for concrete preparation.
Rinse thoroughly and let dry. Repair cracks and worn mortar before painting.
Protect nearby plants and test cleaners on a small area first.
- Sweep and brush
- TSP solution
- Low-pressure rinse
- Mortar repairs
- Dry and inspect
How to Remove Grease From Kitchen Walls
Grease on kitchen walls attracts grime and can prevent paint from sticking, so start by testing a small hidden area.
Then degrease with a solution of warm water and a few drops of dish soap or a commercial kitchen cleaner; scrub with a non-scratch sponge or soft brush, rinse with clean water, and let the surface dry before priming or painting.
For tougher buildup, mix a paste of baking soda and water or use a diluted trisodium phosphate substitute, applying gently and rinsing thoroughly.
Work in sections, ventilate the room, and repeat grease removal on stubborn spots until kitchen surfaces feel clean and residue-free.
How to Remove Nicotine and Heavy Smoke Stains
Start by testing a small, out-of-the-way spot to see how the wall and existing paint react. Then tackle nicotine and heavy smoke stains with a cleaner that breaks down tar and nicotine rather than just masking discoloration. You’ll remove surface grime, reduce smoke odor, and prep for primer.
Use gloves, ventilate, and work top to bottom. Try stronger solutions only if milder cleaning methods fail.
- Mix trisodium phosphate or a heavy-duty cleaner per directions
- Apply cleaner with a sponge, rinse frequently
- Repeat stubborn areas gently
- Neutralize residue with clean water
- Let walls dry fully before priming
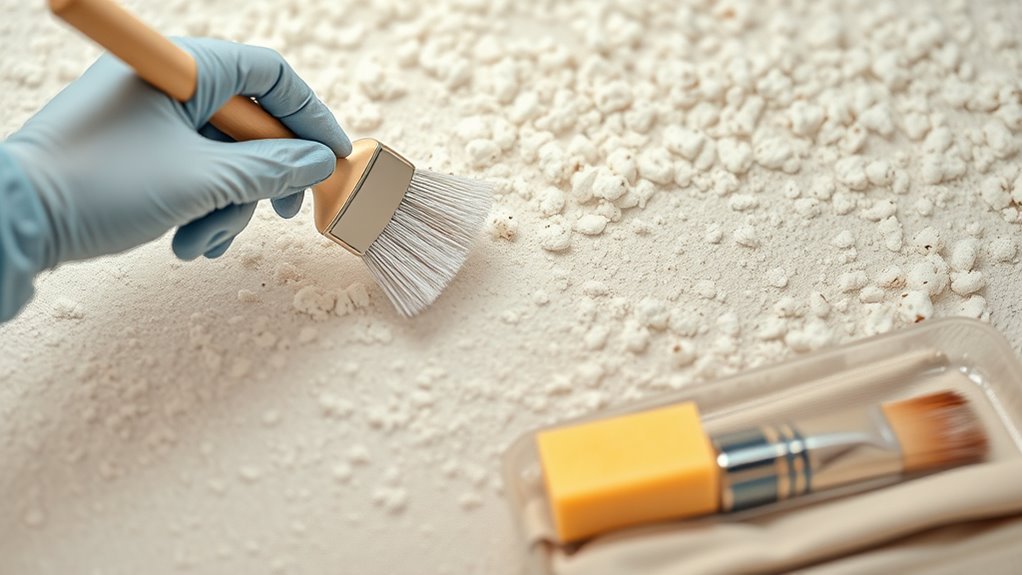
Handling Dusty or Chalky Walls Before Painting
If your walls feel powdery to the touch or leave a dust residue, you’ll need to remove that chalky film before painting so the new coat will adhere properly; start by dry-brushing with a soft-bristle brush or vacuuming with a brush attachment to lift loose particles.
Next, wash walls with a mild detergent solution and a sponge, rinsing thoroughly to eliminate chalky residue. For stubborn areas, use a TSP substitute following label directions.
Let surfaces dry completely, then test adhesion with a small primer patch. These dust removal techniques guarantee paint bonds evenly and prevents peeling or uneven finish.
How to Remove Mold and Mildew Safely
When you spot mold or mildew on walls, treat it promptly and safely to prevent spread and protect your health; wear gloves, eye protection, and a mask, ventilate the room, and isolate the area by covering nearby surfaces.
Start with a bleach solution (1 cup bleach to 1 gallon water) or a commercial remover, test a hidden spot, scrub gently with a nonmetal brush, rinse, and dry thoroughly. For porous materials, consider replacement.
Start with a bleach solution or commercial remover; test first, scrub gently, rinse, dry, and replace porous materials.
After cleaning, focus on mold prevention and mildew treatment by controlling humidity and fixing leaks. Monitor the area for recurrence and repaint with mold-resistant primer if needed.
- Ventilate and seal off area
- Use PPE and test cleaner
- Scrub, rinse, dry completely
- Replace heavily affected material
- Control humidity and leaks
Best Mild Cleaners for Delicate or Washable Wallpaper
Because delicate and washable wallpapers can tear, stain, or lose adhesion with harsh chemicals, you’ll want cleaners that lift dirt gently without damaging patterns or seams.
Use mild detergent options—a few drops in warm water—applied with a soft sponge or microfiber cloth, wrung nearly dry. Test a hidden scrap or inconspicuous corner first, blotting rather than scrubbing to preserve finish and seams.
For grease, a gentle degreasing wipe designed for wallpaper works, but always re-test. Rinse with plain water to remove residue and pat dry.
Regular, careful wallpaper care prevents staining and reduces the need for heavy cleaning.
Safe Household Cleaners: Product List and Recipes
You’ll want a few gentle, effective options on hand before you start painting: a 1:1 vinegar-and-water solution for general cleaning, a baking soda paste for stubborn spots, and a mild dish soap mix for greasy areas.
Test each on an inconspicuous patch first to make sure the finish holds up. Follow simple ratios and rinse with clean water so the surface is ready for primer or paint.
Vinegar And Water Solution
If you want an inexpensive, non-toxic cleaner that tackles grease and grime before painting, mix white vinegar and water for a simple solution.
You’ll appreciate vinegar benefits: it deodorizes, cuts grease, and dissolves light grime without harsh fumes. Use proper cleaning ratios to protect finishes—start with 1:1 for kitchens, 1:4 for general walls. Test an inconspicuous spot first.
- Use warm water to boost effectiveness.
- Wring the cloth so surfaces stay damp, not soaked.
- Rinse glossy or delicate paint with plain water afterward.
- Wear gloves if you have sensitive skin.
- Store mix in a labeled spray bottle.
Baking Soda Spot Cleaner
Scrub stubborn spots with a paste of baking soda and water for a quick, gentle cleaner that’s safe on most painted surfaces.
Mix into a spreadable paste, apply to stains, let sit a minute, then gently rub with a soft cloth or sponge.
Rinse residue with a damp cloth and dry the area before priming or painting.
Test a hidden spot first to verify paint finish isn’t dulled.
For greasy marks, add a few drops of warm water when making the paste rather than stronger solvents.
Store leftover dry baking soda in a sealed container for future use as a versatile wall cleaner.
Mild Dish Soap Mix
For larger areas or general cleaning before painting, switch from spot treatments like baking soda to a gentle mild dish soap mix that cuts grease without harming finish.
You’ll mix a few drops of mild dish soap in a bucket of warm water, test a hidden spot, then wipe walls top to bottom with a soft cloth or sponge. This shows dish soap benefits: grease removal, easy rinsing, and paint-safe cleaning.
Adjust cleaning frequency based on surface grime and paint age. Rinse with clean water and let dry fully before painting.
- Mix ratio: 1 tsp soap per quart
- Use soft sponge
- Test hidden spot
- Rinse thoroughly
- Dry completely
Make and Use a Safe TSP Substitute
Tackle the grime by mixing a safe TSP substitute you can make at home: combine one tablespoon of powdered trisodium phosphate substitute (or washing soda), one tablespoon of household bleach-free degreaser, and a gallon of warm water to strip grease and chalk without harsh fumes.
Use safe ingredients and a homemade cleaner to protect surfaces and indoor air. Wear gloves, test a small patch, then work from bottom to top with a sponge to avoid drips.
Rinse with clean water, allow walls to dry fully, and repeat only on stubborn spots. Store leftover solution securely and discard after 24 hours.
When to Use Trisodium Phosphate (TSP) Versus Gentler Options
You’ll reach for TSP when walls are stained with grease, smoke residue, or heavy grime that milder cleaners won’t lift.
For routine cleaning or sensitive surfaces, use gentler options like dish soap, vinegar, or a commercial pH-neutral cleaner to avoid damage.
Pick the method based on soil level and the paint type so you get a clean surface without harming drywall or trims.
When To Use TSP
While gentler cleaners handle most light dirt and grease, reach for trisodium phosphate (TSP) when walls are heavily soiled, stained with nicotine or smoke, covered in waxy residue, or prepped after sanding glossy finishes.
You’ll want TSP for tough jobs where paint adhesion matters; it strips contaminants more thoroughly than many TSP alternatives, so use it sparingly and follow safety cleaning tips like ventilation and gloves.
After scrubbing, rinse well and let walls dry before priming. Consider a spot test first to avoid damage on delicate surfaces.
- Heavy nicotine or smoke stains
- Waxy kitchen buildup
- Glossy paint sanding residue
- Mildew-marked areas (after treatment)
- Prep before repainting high-traffic rooms
Gentler Alternatives And Use
If your walls just have light dust, fingerprints, or mild cooking grease, reach for gentler cleaners instead of TSP—things like diluted dish soap, white vinegar solutions, or commercial non-toxic wall cleaners will remove most everyday grime without the risks that come with stronger chemicals.
You should pick gentle solutions for painted drywall, wallpapered rooms, or lightly soiled surfaces to avoid stripping finish or irritating occupants. Reserve TSP for stubborn stains, heavy grease, smoke damage, or prep before high-adhesion coatings.
Always test a small area, follow product directions, wear gloves, ventilate, and rinse thoroughly—these safe alternatives protect surfaces and your health.
Choosing the Right Degreaser for Tough Kitchen Grime
Looking for a degreaser that actually cuts through baked-on kitchen grime? You’ll pick degreaser types based on strength, surface safety, and ventilation.
Match cleaner chemistry to kitchen surfaces—alkaline for grease, enzymatic for organic residue, and solvent-based for stubborn buildup. Test compatibility, follow label directions, and rinse well before painting.
- Use mild alkaline for painted drywall and laminate
- Choose solvent sparingly on metal or tile
- Try enzymatic for food-stained areas
- Prefer citrus or biodegradable options for low-odor needs
- Wear gloves and ventilate tightly sealed rooms
Choose wisely to protect the wall and prep for paint.
How to Test a Cleaner on an Inconspicuous Spot
Pick a hidden area like inside a closet or behind a trim so any damage won’t show.
Apply a small patch of the cleaner with a cloth or sponge and let it sit briefly.
Inspect the spot after it’s fully dry for discoloration, peeling, or residue before treating visible walls.
Choose Hidden Area
Before you scrub the whole wall, test your cleaner on an inconspicuous spot like behind a light switch plate or inside a closet corner.
Choose a hidden area that’s representative of the paint finish and wait for any reaction. Use gentle cleaning techniques first, then step up if needed, noting results.
If the spot discolors, softens, or peels, stop and pick a milder solution.
- Pick behind trim or outlet covers
- Try inside a closet or cabinet corner
- Check near baseboards out of sight
- Use a small, well-lit test area
- Photograph the spot for comparison
Apply Small Patch
Start by wiping a tiny area—about 2×2 inches—behind a switch plate or inside a closet with the cleaner you plan to use.
You’ll apply a small patch using the same patch materials and patch techniques you’ll use on visible walls so the test reflects real conditions.
Dab gently with a microfiber cloth or sponge, avoid oversaturation, and follow product instructions.
Label the spot discreetly so you can find it later.
Testing verifies the cleaner won’t strip finish, alter color, or raise texture.
If it looks unchanged after proper handling, the cleaner’s safe to use across the room.
Inspect After Drying
Once the test patch has fully dried, closely inspect the area for changes in color, sheen, or texture, using natural light and a hand-held flashlight to reveal subtle differences.
If you notice any softening, fuzziness, or discoloration, the cleaner isn’t safe to use on visible walls. You’ll use simple drying techniques and inspection methods to evaluate safely.
Check edges and compare to surrounding paint, feel for tackiness, and note odor changes. If it passes, proceed cautiously. If not, try a milder solution.
- View under natural light
- Use a flashlight for contrast
- Gently touch for tackiness
- Smell for chemical residue
- Compare edge color
Rags, Sponges, and Brushes: Which to Pick for the Job
When you’re prepping walls, choosing between rags, sponges, and brushes comes down to the surface texture, the type of dirt, and how much control you need—rags are great for wiping down flat walls.
Sponges handle grooves and trim, and brushes reach stubborn grime and crevices. You’ll assess sponge selection by pore size and absorbency for textured areas, while rag effectiveness depends on fiber and cleanliness.
Sponges tackle grooves and trim; brushes reach stubborn grime and crevices—choose sponges by pore size, rags by clean, suitable fibers.
Use soft rags for dust and light stains, denser sponges for scuffed surfaces, and stiff-bristle brushes for caked-on residue.
Match tool to task, rinse or replace often, and work top to bottom.
Microfiber Towels vs. Cotton Rags for Streak‑Free Wiping
After you pick the right tool for the surface, you’ll want to choose the cloth that gives a streak-free finish: microfiber towels or cotton rags.
You’ll prefer microfiber for delicate, lint-free wiping; its microfiber benefits include superior pickup and less water streaking. Cotton rags offer cotton durability and absorbency for heavy grime and rough spots.
Pick microfiber for final dusting and cotton for initial scrub. Clean both regularly to avoid transfer.
- Microfiber: traps dust, low lint
- Cotton: tough, highly absorbent
- Dry vs damp: microfiber excels damp
- Reuse: both washable
- Cost: cotton cheaper upfront
How to Use Magic Erasers Without Damaging Paint
One simple trick can keep Magic Erasers from sanding away your paint: test first and scrub gently.
You’ll dampen the eraser, squeeze excess water, and try it on an inconspicuous spot to check finish reaction. Use light pressure and short strokes; the magic eraser technique is about control, not force.
Stop if sheen dulls or color lifts. Rinse the area and blot dry to inspect results.
For stubborn marks, repeat the gentle process rather than increasing abrasiveness. These steps prioritize paint damage prevention while letting you remove smudges and scuffs without over-scrubbing or guessing.
Choosing Scrub Pads and Scouring Tools Safely
Because different pads and scouring tools vary in abrasiveness, pick products that match your wall finish and test them first on an inconspicuous spot.
Different pads vary in abrasiveness—choose ones suited to your wall finish and test in an inconspicuous spot first.
You’ll want to balance cleaning power with paint protection, so know scrub pad types and practice safe scouring to avoid scratches or dulling. Use gentle motions, minimal pressure, and appropriate cleaners. Replace worn pads that may embed grit.
- Soft cellulose sponge for light dust and grime
- Nonwoven abrasive pads for painted walls
- Microfiber for delicate surfaces
- Nylon brush for textured areas
- Scotch-Brite pad (fine grade) for stubborn marks
Best Protective Gear: Gloves, Goggles, and Ventilation
Before you start wiping, pick chemical-resistant gloves that fit well and won’t tear while you scrub.
Put on snug goggles or a face shield to keep splashes and dust out of your eyes.
Open windows, use fans, or run an exhaust to keep fumes and moisture from building up in the room.
Protective Gloves Choice
When you’re prepping walls, choosing the right gloves protects your skin from cleaners, solvents, and rough surfaces while keeping dexterity for scrubbing and detail work.
Pick nitrile gloves for chemical resistance and latex gloves if you need elasticity and lower cost; consider disposable options for messy jobs or eco friendly gloves if you prefer biodegradables.
Focus on glove fit and glove sizing so you maintain feel and avoid slippage.
Look for textured grip on palms and fingers for wet surfaces.
Replace damaged gloves promptly and match glove type to cleaner labels and task duration to stay safe and efficient.
- Nitrile gloves
- Latex gloves
- Disposable options
- Glove fit and glove sizing
- Textured grip and chemical resistance
Eye Protection Options
1 essential piece of protective gear you shouldn’t skip is eye protection—goggles shield your eyes from splashes, dust, and flying debris while you wipe and sand walls.
Choose snug safety goggles that seal around your eyes to keep out fine particles and chemical mist. If you wear glasses, get over-the-glasses goggles or prescription inserts.
Combine goggles with appropriate face masks to protect your respiratory system from dust and fumes; a fitted N95 or respirator is often best.
Keep both tools clean, store them where they won’t scratch, and inspect straps and seals before each use to guarantee reliable protection.
Room Ventilation Methods
How will you keep fresh air moving while you wipe and sand walls? You’ll use simple airflow techniques and humidity control to stay safe and comfortable.
Open windows opposite each other, run a fan toward the outside, and use a box fan with a filter to pull dust out. Keep humidity moderate so dust settles less and surfaces dry faster.
- Open opposing windows for cross-ventilation
- Exhaust fan directing air outside
- Box fan with a furnace-grade filter
- Portable HEPA air purifier running continuously
- Dehumidifier to maintain ideal humidity control
Wear gloves and goggles while you ventilate.
How to Prepare the Room Before You Start Wiping
Before you start wiping, clear the room of furniture, wall hangings, and any floor coverings that could get in the way or trap dust. Check your room layout and furniture arrangement so you know where to place protected items. Seal vents, cover floors with drop cloths, and tape edges around trim and outlets. Gather supplies in a central tray and wear gloves and a mask. Keep windows closed until you’ve finished dusting if outdoor pollen is high.
| Task | Tool | Tip |
|---|---|---|
| Remove art | Ladder | Label hooks |
| Move furniture | Sliders | Group centrally |
| Cover floors | Cloths | Overlap seams |
| Seal vents | Tape | Mark locations |
Step‑By‑Step Pre‑Paint Wiping Routine
Start by evaluating how much dirt, grease, or stains are on the walls so you know whether you need a mild soap, a degreaser, or a TSP substitute.
Pick the right cleaning solution for your surface and the level of soil to avoid damage and extra work.
With your cleaner ready, you’ll be set to follow a simple wiping sequence that gets the wall ready for primer and paint.
Assess Surface Dirt
Begin by visually scanning each wall and running your hand over the surface to feel for dust, grease, cobwebs, or peeling paint—this quick check tells you which areas need light dusting, degreasing, or scraping before you wipe.
Use a simple surface assessment to note problem spots and categorize dirt types so you can prioritize cleaning. Check corners, trim, around switches, and behind furniture.
Record what each area needs and work top to bottom to avoid recontamination.
- Light dust and cobwebs
- Cooking grease and fingerprints
- Sticky residue or stains
- Flaking or peeling paint
- Mold spots or mildew
Choose Cleaning Solution
Now that you’ve mapped out dirt types and trouble spots, pick a cleaner that matches the soil: mild soap and water for dust and light grime, a degreaser for kitchen grease, a trisodium phosphate (TSP) substitute for stubborn stains, and a diluted bleach solution for mold or mildew.
Choose water temperature and dilution per label, test a hidden area, and use microfiber cloths or sponges that won’t damage finishes.
Follow safety guidance—gloves, ventilation, rinsing—and avoid mixing chemicals.
These cleaning techniques speed prep and reduce repainting risk. Proper solution choice is a key step in effective surface preparation.
How Long to Let Cleaned Walls Dry Before Painting
Because moisture affects adhesion, you should let cleaned walls dry fully before painting; in most indoor conditions that means waiting 24 hours, but high humidity or thick cleaning solutions can stretch that to 48 hours or more.
You’ll monitor drying time and surface temperature to guarantee proper paint bond. Use ventilation, fans, and mild heat to accelerate drying without overheating.
Check by touch and a moisture meter if available. Don’t rush — painting damp walls causes bubbling and peeling.
- Open windows to lower humidity
- Run fans for several hours
- Use a dehumidifier if needed
- Warm the room slightly
- Verify with a moisture meter
Spotting and Prepping Repairs After Cleaning
After the walls are fully dry, walk the surface to spot damage the cleaning may have revealed—faded paint, hairline cracks, nail pops, gouges, and peeling edges are common.
You’ll be evaluating damage methodically: mark trouble spots with a pencil, note depth and width, and prioritize repairs that affect adhesion or appearance.
For small holes and shallow gouges, apply spackle, press firmly, and wipe away excess. For larger gaps use a patching compound.
Let repairs cure fully, then test smoothness. Use a short scraper or flexible card to help with smoothing imperfections before priming and painting.
When to Sand After Wiping and When to Skip Sanding
If your cleaned walls feel smooth and show no loose paint, you can often skip sanding; otherwise, sand where repairs, glossy finishes, or stubborn stains remain so paint will adhere evenly.
You’ll decide based on surface texture, patch edges, and sheen. Use light sanding to dull gloss, feather repair edges, or remove loose bits.
Try gentle sanding techniques first; if sanding isn’t practical, consider sanding alternatives like deglossers or bonding primers. Follow with a clean wipe.
- Light 120–220 grit sanding for feathering
- Orbital sander for large glossy areas
- Hand block for patches
- Liquid deglosser option
- Bonding primer alternative
How to Remove Stubborn Stains Like Crayon and Ink
Stubborn stains like crayon and ink won’t come off with a simple wipe, so you’ll need targeted methods that loosen the mark without damaging the wall finish.
For crayon removal, gently scrape excess with a plastic scraper, then apply a dab of baking soda paste or a melamine sponge; test in an inconspicuous spot first.
Gently scrape crayon, then lift marks with baking soda paste or a melamine sponge—test first.
For ink solutions, try isopropyl alcohol on a cloth, blotting toward the stain’s edge, or use a commercial ink remover following label directions.
Rinse treated areas with water, pat dry, and let fully dry before priming or painting to guarantee adhesion and even coverage.
How to Deal With Oily Fingerprints and Handprints
Once you’ve lifted crayon and ink, you’ll often still find greasy fingerprints that won’t take paint well; oily residues attract dirt and prevent primer from sticking.
Tackle oily fingerprints with targeted oily residue removal and simple cleaning techniques so paint adheres evenly. Work small, test cleaners on an inconspicuous spot, then wipe gently.
- Mix dish soap and warm water for light grease
- Use trisodium phosphate (TSP) solution for heavy buildup
- Apply isopropyl alcohol on stubborn spots, then rinse
- Rinse with clean water and dry thoroughly
- Prime treated areas to seal any remaining residue
How to Clean High Walls and Ceilings Safely
Cleaning high walls and ceilings safely starts with the right setup: use a sturdy ladder or extension pole, wear eye protection and a dust mask, and clear the area below before you climb. Use microfiber dusters, a pole-mounted mop, and a mild detergent mix. Test a small area, work top-down, and rinse with clean water. Keep one hand on the ladder and avoid overreaching; enlist a helper when possible. Prioritize wall safety by inspecting for loose plaster or paint before cleaning.
| Task | Tool | Tip |
|---|---|---|
| Dusting | Extension pole | Top-down |
| Washing | Microfiber mop | Mild detergent |
| Rinsing | Clean water | Gentle pressure |
| Inspecting | Flashlight | Check stability |
Tips for Cleaning Around Trim, Outlets, and Fixtures
Start by removing or covering anything that could get wet or dirty: take off outlet and switch plates, wrap light fixtures with plastic, and mask trim edges with painter’s tape.
You’ll do trim cleaning and outlet care first, then fixture protection. Perform a quick surface inspection to spot grease or damage. Use a gentle wipe technique matched to wall types and work in a logical cleaning order from top to bottom.
- Use a soft brush for dust in crevices.
- Wipe trim with a damp microfiber cloth.
- Clean around outlets carefully; keep power off.
- Protect fixtures with plastic and tape.
- Check edges for paint adhesion before painting.
How to Prevent Streaks and Residue From Cleaners
When you want a smooth, paint-ready surface, pick cleaners that rinse clear and work in small sections so you can wipe and dry before residue settles; use a soft, lint-free cloth or microfiber and finish with a dry pass to remove any streaks.
Test cleaners on an inconspicuous area so you won’t damage finish. Wring cloths well to avoid dripping and change water frequently.
Wipe in consistent overlapping strokes, then dry with a separate clean cloth to prevent streaking. For stubborn spots, spot-clean and rinse thoroughly.
These cleaning techniques improve adhesion and overall surface preparation for a flawless paint job.
Eco‑Friendly Cleaning Options for Pre‑Paint Prep
Before painting, you can use simple eco-friendly options like a vinegar-and-water solution for grease, a baking soda scouring paste for scuffs, or certified green commercial cleaners for tougher grime.
Mix vinegar and water in a spray bottle and wipe with a microfiber cloth, and make a paste with baking soda and water to gently scrub spots.
Choose commercial cleaners labeled biodegradable and low-VOC to protect indoor air and the environment.
Vinegar And Water Solution
A simple 1:1 mix of white vinegar and water gives you an effective, eco-friendly cleaner for walls that cuts grease, removes light stains, and won’t leave harmful residues that can interfere with paint adhesion.
You’ll appreciate vinegar benefits: it deodorizes, disinfects mildly, and’s safe compared with harsh chemicals. Use recommended cleaning ratios—1:1 for general cleaning, dilute more for delicate surfaces.
Test a hidden spot first. Wipe with a soft cloth, rinse if paint is older, and let dry fully before priming or painting.
- Mix in a spray bottle
- Test an inconspicuous area
- Use a microfiber cloth
- Rinse if needed
- Allow full drying
Baking Soda Scouring Paste
Mix equal parts baking soda and water into a spreadable paste and you’ve got a gentle, eco‑friendly scouring agent that tackles grease, grime, and scuff marks without harsh chemicals.
You’ll apply it with a damp cloth or soft sponge, rub gently, then rinse thoroughly so paint adheres.
Beyond cleaning, note baking soda benefits: it deodorizes, mildly abrades, and’s safe for most painted surfaces when used carefully.
Try small scouring paste recipes variations—add a few drops of liquid soap for stubborn spots or a splash of vinegar for fizzing power—testing first in an inconspicuous area to avoid damage.
Eco-Friendly Commercial Cleaners
If you’d prefer ready-made solutions over homemade pastes, eco-friendly commercial cleaners give you plant-based, biodegradable formulas that cut grease and grime with less fuss.
You’ll find eco-friendly options labeled for walls, gentle on paintable surfaces yet tough on oils and fingerprints. Use a soft cloth or sponge, rinse with clean water, and let surfaces dry before priming.
Green cleaning products often reduce odors and toxic residues, improving indoor air during prep. Look for third-party certifications and follow dilution instructions to avoid streaks or residue.
- plant-based all-purpose
- biodegradable degreaser
- low-VOC wall cleaner
- fragrance-free option
- certified green formula
Disposing of Used Cleaners and Rags Safely
Because oily rags and chemical-soaked wipes can unexpectedly combust or contaminate soil and waterways, you should handle disposal with care: bag used rags separately, air-dry them flat outdoors away from sparks, then seal in metal containers or approved disposal bags.
Check local regulations for hazardous waste drop-off; many communities accept paint-related materials and solvents.
Don’t toss chemical wipes or solvent-soaked cloths in regular trash or drains. For small amounts, follow product labels for eco-friendly disposal options like absorption in cat litter before sealing.
Label containers and transport according to local guidelines to protect people and the environment.
Common Mistakes That Ruin Paint Adhesion
When you skip proper cleaning or sand improperly, paint won’t stick and flaws like peeling or bubbling appear quickly. You must control adhesion factors by cleaning, deglossing, and choosing compatible primers.
Poor surface preparation, oily residues, or damp walls undermine bonding. Don’t rush; fix these mistakes:
- Painting over dust or grease without degreaser.
- Using wrong primer for glossy or previously painted surfaces.
- Skipping sanding or over-sanding and leaving loose particles.
- Applying paint on damp walls or without proper dry time.
- Ignoring hairline cracks, failing to fill and smooth for even adhesion.
Follow steps deliberately to guarantee lasting results.
Cost & Time to Prep Walls Before Painting
Now that you know how poor prep ruins adhesion, plan for both time and money to do the job right: prepping a typical room usually takes 2–6 hours for cleaning, minor repairs, sanding, and priming, and costs range from $20–$150 in materials if you DIY (cleaner, degreaser, spackling, sandpaper, primer), or $150–$600+ per room for professional prep depending on labor and extent of repairs.
Do a cost analysis before you start: factor materials, tools, and possible contractor fees.
Prioritize time efficiency by grouping tasks—clean, repair, sand, then prime—and budget extra for unexpected fixes.
Quick Checklist: Cleaning Supplies to Buy Before Painting
1 simple shopping trip can get you most of what you need to clean walls for painting: pick up a mild all-purpose cleaner or TSP substitute, a degreaser for kitchen surfaces, spackling compound, sandpaper (120–220 grit), a scrub pad or microfiber cloths, a stiff-bristled brush for textured areas, a bucket, disposable gloves, and a few rags.
You’ll use these essential tools for basic cleaning techniques and minor repairs before priming. Keep the list compact so you don’t overbuy. Pack items that match your wall type and mess level.
- All-purpose cleaner or TSP substitute
- Degreaser
- Sandpaper
- Spackle
- Microfiber cloths
Troubleshooting: What to Do If Paint Still Flakes After Cleaning
If flaking paint persists after cleaning, don’t assume the surface is ready—poor adhesion often has underlying causes like moisture, incompatible paint layers, or inadequate sanding.
First perform a surface inspection: press, scrape, and tap to find loose areas. Remove all loose paint down to sound substrate, then sand feathered edges to promote adhesion.
Check for moisture—fix leaks, dry the wall, and test with a moisture meter if needed.
If old paint is oil-based and you plan latex over it, use a proper primer or strip the coating.
Re-clean dust after repairs before repainting.
Final Prepping Steps Right Before You Roll or Brush
Once you’ve removed dust, repaired loose paint, and let the surface dry, take a few focused final steps before you roll or brush so your finish goes on smoothly. You’ll confirm that your wall cleaning did its job and that paint adhesion will be strong.
Walk the room, feel for imperfections, and address them quickly. Tape edges, stir paint, and set up drop cloths. Keep tools organized so you don’t introduce debris.
Walk the room, smooth flaws, tape edges, stir paint, set drop cloths, and keep tools tidy to avoid debris.
- Wipe tack cloths over trim and corners
- Lightly sand glossy spots
- Vacuum and wipe floors to avoid tracking dust
- Apply primer where needed
- Check humidity and temperature
Frequently Asked Questions
Can I Paint Over Wallpaper Without Removing It if It’s Firmly Attached?
Yes — you can often paint over firmly attached wallpaper, but you’ll assess wallpaper types and guarantee proper paint adhesion; you’ll clean, repair seams, prime with a bonding primer, and test a small area before fully painting.
Will Primer Hide Residual Odors After Cleaning Walls?
Yes — but only partially. I once neutralized paint-smell with coffee grounds; primer helps cover mild odors after wall cleaning, but for strong smells you’ll need odor neutralizers, deep cleaning, or sealing primers to fully lock scents.
How Do Humidity and Temperature Affect Paint Adhesion After Cleaning?
Humidity and temperature directly affect adhesion factors: if it’s too humid or cold, paint won’t bond well; if it’s hot or dry, it can dry too fast. You’ll control environmental conditions for proper curing and adhesion.
Can I Use Bleach Solutions on Colored or Painted Walls Safely?
Brightly beware: you can cautiously clean colored or painted walls with diluted bleach, but keep bleach concentration low, test a hidden spot first, rinse thoroughly, and protect trim—otherwise wall color may fade or finish get damaged.
Should I Caulk Gaps and Seams Before or After Wiping Walls?
You should caulk gaps after wiping walls so caulking techniques bond to clean, dry surfaces; during wall preparation you’ll remove dust and grease first, then apply caulk, smooth seams, let cure, and repaint for best results.
Conclusion
Before you roll, remember that the prep you skip shows up in the finish. I once wiped a kitchen wall with plain water and later watched grease bleed through: a 30% recoat tripled my time. Treat walls like a canvas—clean, degloss, and sand where needed—so your paint will behave. Spend the extra 10–20 minutes per room on proper cleaners and wipes; you’ll save hours and avoid that maddening touch‑up loop.