When to Pull Tape Off Painted Wall?
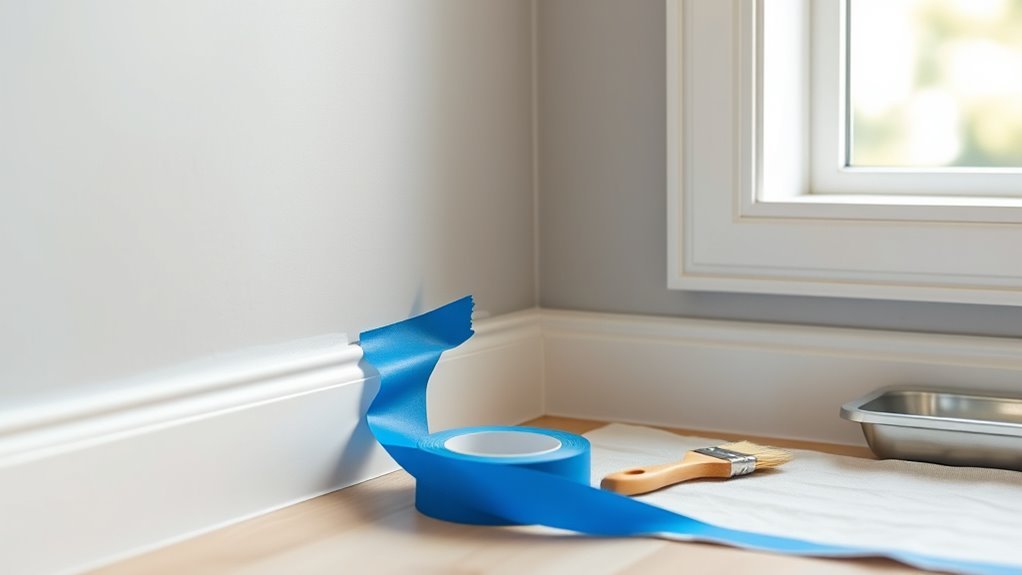
Pull the tape while the paint is still slightly tacky so you get a crisp edge without lifting or tearing. For latex, pull 30–60 minutes after the final coat; for oil-based or enamel, you can wait up to 24 hours. Sheen and conditions matter: matte and high humidity need longer, gloss and warm, dry rooms allow quicker pulls. Score stubborn edges with a blade and peel at a low angle; keep going for tips on finishes, timing, and fixes.
Quick Answer: When to Remove Painter’s Tape?
If you want crisp lines and minimal touch-ups, remove painter’s tape before the paint fully hardens — usually while it’s still tacky to the touch, about 30–60 minutes after the final coat for latex and up to 24 hours for slower-drying enamels.
You’ll judge timing by paint consistency: it should resist smudging but still be pliable.
Pull tape back on itself at a 45-degree angle, slowly and steadily, to reduce tearing and prevent paint pull. If tape adhesion seems weak or paint’s gummy, score the edge with a blade first.
Pull tape back slowly at a 45° angle to avoid tearing; score gummy edges first to prevent paint lift.
Quick removal keeps edges sharp and cuts rework time.
Why Timing Matters for Crisp Paint Lines
You’ve learned when to pull tape; now let’s look at why that timing makes the difference.
You control the edge quality by balancing paint set and tape adhesion. If you wait too long, paint cures and lifts with the tape, ruining crisp lines. Pulling while paint is tacky prevents tearing and reduces feathering.
Proper cleaning techniques before you tape—removing dust, grease, and loose flakes—helps tape stick uniformly so paint won’t bleed underneath.
Clean edges and correct removal timing work together: prep guarantees adhesion, and timely pulling preserves the crisp separation between colors for a professional finish.
Painter’s-Tape Timing: Latex vs. Oil-Based Paints
Latex and oil-based paints dry and cure at very different rates, so you’ll need to time tape removal accordingly.
Pulling tape at a 45-degree angle usually works best, but oil-based films are less flexible so you may need to adjust your angle and timing.
Watch for paint film flexibility — if the paint still stretches, wait a bit longer to avoid lifting.
Dry Time Differences
Because different paint chemistries cure at different rates, you’ll need to time tape removal based on whether you used water-based (latex) or oil-based paint.
Consider how dry time varies with paint types and how tape quality interacts with surface texture. Environmental factors like humidity and temperature, plus paint thickness and application methods, change how long edges need protection.
Match tape choice and removal timing to those variables to avoid lifting or bleeding.
- Check recommended dry time for your paint types
- Test tape quality on the actual surface texture
- Factor environmental factors (temp, humidity)
- Adjust for paint thickness and application methods
Tape Removal Angle
When removing painter’s tape, angle matters as much as timing: pull slowly at a low, consistent angle (about 45 degrees) to reduce the chance of lifting fresh latex paint, while for oil-based paints you can usually pull a bit steeper once the film’s fully cured. You’ll use tape removal techniques that favor smooth, steady motion. Test a corner to find ideal angles for your paint type. Keep tension in the tape, not the paint. If you see lifting, stop and score the edge. Practice on scrap surfaces to build confidence before tackling visible walls.
| Situation | Tip |
|---|---|
| Latex, fresh | 45° slow pull |
| Latex, cured | 60° steady pull |
| Oil, cured | 75° firmer pull |
| Lifting occurs | Score edge, reattempt |
Paint Film Flexibility
If you want clean edges, pay attention to how flexible the paint film is before removing tape: latex paints stay softer and more flexible for hours to days, so you should pull tape sooner and more gently to avoid stretching the film, while oil-based paints harden and become brittle as they cure, letting you wait longer and use a steeper pull without risking as much distortion.
You’ll judge timing by feel and finish: softer paint film needs a low-angle, slow peel; brittle film tolerates a faster, higher-angle pull. Consider environmental factors that affect tape adhesion and curing.
- Test a small corner first
- Peel slowly on latex
- Use sharper angle for oil
- Monitor room temperature
Wait Times by Finish: Matte, Eggshell, Satin, Gloss
Different sheens dry at different rates, so you’ll want to time tape removal based on finish: matte and eggshell often need a bit longer to cure than satin or gloss.
Aim to remove tape during the best window—usually when the paint is dry to the touch but not fully cured—to protect clean edges.
To keep lines sharp, score the tape with a utility knife and pull back slowly at a 45° angle while the paint is still slightly tacky.
Drying Time By Finish
Because paint finishes cure at different rates, you’ll want to adjust your tape removal timing based on the finish you used.
You should understand drying stages and finish types so you know when paint’s surface is set versus fully cured. Generally, matte feels dry fastest but can dent; eggshell and satin need a bit longer for resilience; gloss sets firmest and may tolerate later removal.
- Matte: surface dry quickly, handle gently
- Eggshell: moderate dry time, better durability
- Satin: longer drying, tougher finish
- Gloss: slowest cure, most forgiving of tape edges
Best Removal Window
When you remove painter’s tape at the right moment, you’ll get clean lines without peeling or tearing the paint; below are practical wait times by finish so you can plan removal with confidence.
For matte, wait 24 hours—its low sheen needs longer cure time, and lighter tape types reduce adhesion.
Eggshell often releases cleanly after 12–24 hours if you’ve done proper surface preparation and used medium-adhesion tape.
Satin usually allows removal at 8–12 hours; faster curing balances with moderate tape grab.
Gloss cures quickest; you can remove tape after 1–6 hours, especially with low-tack tape types, but avoid forcing it.
Edge Cleanliness Tips
If you want razor-sharp paint lines, timing removal to each finish’s cure rate is key: matte needs the longest wait (about 24 hours) because its low sheen and softer surface let tape pull at the film.
Eggshell typically releases cleanly after 12–24 hours with proper prep and medium-adhesion tape.
Satin is usually safe at 8–12 hours as it firms up faster, and gloss can often be pulled after 1–6 hours—just use low-tack tape and avoid yanking.
Follow these concise edge cleanliness tips to protect lines and paint:
- Choose tape types suited to finish and drying time.
- Test a small strip after recommended wait.
- Confirm thorough wall preparation first.
- Pull tape slowly at a 45° angle.
How Humidity and Temperature Affect Tape Removal
Although you mightn’t notice it, humidity and temperature strongly change how tape sticks and peels, so pay attention to the conditions before you pull it off.
You’ll see humidity effects when moisture levels slow paint curing and weaken tape adhesion, causing edges to lift or leave residue.
Temperature impact matters too: heat can soften adhesive, making it smear; cold firms it, raising tear risk.
Consider environmental conditions when planning removal—wait for stable, moderate temps and low humidity.
Proper surface preparation and knowing paint types help you choose timing and technique so tape comes off cleanly without damage.
Tape Removal for Wood Trim Versus Drywall
You’ll want to pull tape off wood trim and drywall at different times because the surfaces, paint types, and adhesive bonds behave differently.
Consider how glossy or porous paint affects adhesion, then choose a removal angle and technique—slow and low for trim, straighter and steady for drywall.
Adjust your timing and peel speed to avoid lifting paint or tearing drywall paper.
Timing Differences By Surface
Wondering whether to pull tape off trim or drywall first? You’ll base timing on surface types and paint firmness.
Wood trim often cures faster and tolerates earlier removal without nicking edges; drywall paper can lift if tape’s peeled too soon.
Consider tape brands and their adhesive strength—low-tack for drywall, stronger for trim.
Follow these quick guidelines:
- Remove tape from trim after paint feels dry to the touch.
- Wait longer on drywall until paint’s set but not fully cured.
- Cut sealed edges with a blade on delicate drywall.
- Peel slowly at a 45° angle to protect both surfaces.
Adhesion And Paint Type
Because paint chemistry and tape tack both determine how tightly film bonds to wood trim versus drywall, you’ll want to match tape choice and removal timing to the surface and paint type.
You’ll notice wood trim, especially stained or varnished, often has stronger paint adhesion and different adhesion properties than drywall primer or flat latex.
Use low-tack tape on sensitive finishes and wait longer for solvent-based paints to cure on trim.
On drywall, quicker removal is usually safe once paint skins over.
Always test a small corner to confirm the tape won’t lift finish or leave residue before proceeding.
Removal Technique And Angle
When removing tape from wood trim versus drywall, pull slowly and at a low angle to the painted surface to minimize lifting—about 30 to 45 degrees for trim and closer to 90 degrees for drywall.
You’ll assess tape adhesion and tape durability: flexible, low-tack tape favors low angles on trim; stronger adhesive on drywall can be peeled straighter.
Pulling too fast or wrong angle lifts paint. If paint’s fresh, score the edge and wait recommended curing time.
Use steady pressure and backhand motion to keep a clean line. Adjust technique if tape shows residue or resistance.
- Use 30–45° for wood trim
- Use ~90° for drywall
- Score fresh paint edges
- Watch tape durability
Wait Time Per Coat: Full Jobs vs. Touch-Ups
If you’re tackling a full-room paint job, plan on longer cure times between coats than you’d for a quick touch-up: full jobs often need 2–4 hours or more depending on paint type and humidity before you can safely remove tape without lifting film.
For touch-ups, you’ll usually wait less—often 30 minutes to an hour—using specific touch up techniques to blend and avoid re-taping.
Always check manufacturer recommendations and test a small section. Aim to time removals near job completion so edges are set but not fully cured; that balance prevents peeling while preserving a crisp line.
Best Technique to Remove Painter’s Tape
Timing matters: you’ll usually want to pull tape while the paint’s tacky, typically around 90 minutes after application for most latex paints.
When you remove it, pull slowly and back on itself at a low angle to avoid lifting fresh edges.
If the tape’s stuck, score the paint film with a sharp utility knife first, then finish the peel.
Timing For Removal
To get the cleanest edge, remove painter’s tape while the paint is still slightly tacky rather than after it’s fully cured.
You’ll rely on tape durability and proper surface preparation to decide timing; stronger tape or rougher surfaces need quicker removal to avoid peeling.
Work slowly, pull back at a 45-degree angle, and warm old tape with your hand or a hair dryer if needed.
Check one corner before committing to a long strip.
- Remove when paint is tacky but set
- Test a small section first
- Pull at a low angle slowly
- Warm stubborn tape slightly
Remove At 90 Minutes
Wait 90 minutes after painting, then peel the tape while the paint’s still slightly tacky so you get a razor-sharp edge without lifting fresh paint.
You’ll grip the tape at a low angle and pull back slowly, keeping tension steady to overcome tape adhesion without tearing the film.
Good wall preparation—clean, dry surfaces and proper primer—helps tape stick evenly and peel predictably.
If paint drags, pause and score tiny sections where needed, but mostly keep a smooth, continuous motion.
This timing balances cure and flexibility, letting you reveal crisp lines while minimizing touch-ups and preserving the finish you worked for.
Use Sharp Utility Knife
If paint still clings when you start peeling, pull out a sharp utility knife and score along the tape edge before continuing—that little cut separates the film from the paint film so you won’t rip fresh edges.
You’ll protect crisp lines by using proper knife techniques and selecting tape types suited to drying time. Hold the blade shallow, angle toward the tape, and cut slowly. Work in short sections, re-scoring if paint drags. Clean or replace dull blades to avoid tearing.
Practice on scrap surfaces to match pressure and tape adhesion, and always pull tape back at a low, steady angle for best results.
- Hold blade shallow and steady
- Angle toward tape edge
- Use new blades for clean cuts
- Score short sections before peeling
Correct Angle and Speed for Clean Edges
When you pull the tape back at a low, consistent angle—about 45 degrees or less—you’ll get the cleanest edge because the adhesive separates from the paint rather than tearing it.
Pull slowly and steadily, keeping the tape taut, and don’t jerk or rip it off. Use proven tape removal techniques: slow, steady motion with the tape folded back on itself helps prevent paint lift.
Keep the angle consistent along the strip and pause if paint seems to lift, pressing the tape down then resuming. This controlled pace improves edge preservation and reduces touch-up time, giving crisp lines without stressing fresh paint.
Removing Tape From Fresh Caulk and Taped Seams
When removing tape from fresh caulk and taped seams, wait until the caulk has formed a skin but isn’t fully cured so it doesn’t pull away.
Peel the tape back at a low angle, steady and slow, to keep the bead intact.
If the tape starts to tear or stick, use a razor or sharp-edged tool to cut along the seam and prevent pulling.
Timing For Caulk Skin
Although caulk needs time to form a proper skin, you don’t have to guess—check the manufacturer’s cure times and perform a simple touch test before removing tape. You’ll monitor caulk curing and tape adhesion so seams stay neat.
Lightly press the center; if it’s tacky, wait. If it holds shape, remove tape carefully. Consider temperature and humidity—both change cure speed.
- Verify manufacturer’s recommended skin time
- Use a fingertip touch test for tackiness
- Keep room temperature and humidity stable
- Remove tape when caulk resists indentation and pulls cleanly
Tape Removal Angle
If you pull the tape at the right angle, you’ll get a crisp edge and avoid dragging cured caulk or paint with it.
When removing tape from fresh caulk and taped seams, use steady motion and consider tape removal techniques that minimize stress on the new bead. Start pulling slowly, keeping the tape close to the surface, and move back over itself at a low, consistent angle.
Ideal tape angles are usually between 30° and 60° from the wall; adjust for tape type and caulk firmness. Pulling too steeply lifts material; too shallow can stretch and tear the tape.
Tools To Prevent Tearing
One or two simple tools can save you from torn tape and ruined caulk—think a sharp utility knife or a plastic putty knife to score and lift the tape edge before you pull.
You’ll choose tools based on tape types, tape brands, adhesive strength, tape widths, and surface compatibility. Follow painter tips and application techniques: score stubborn edges, lift slowly at a low angle, and use a wipe to keep clean edges.
Match tape removal tools to paint types and fresh caulk. Practice on scraps to learn feel and avoid gouging. Small investments prevent rework and preserve crisp lines.
- Sharp utility knife
- Plastic putty knife
- Micro-scraper or razor
- Soft cloth and solvent
When to Score the Tape Edge and How to Do It
When the paint has begun to skin over but isn’t fully cured, score the tape edge to prevent tears and lifted paint; you’ll cut through the dried film and let the remaining paint peel away cleanly.
Use a precise scoring technique: hold a fresh utility blade at a low angle and run it lightly along the tape edge. Test on a scrap of each surface if you’re unsure which tape types you used—painter’s tape, masking tape, or delicate-surface varieties behave differently.
Don’t press hard; you only break the skin. After scoring, pull the tape back on itself slowly for a crisp line.
Using Heat or a Hairdryer: Help or Harm?
Although heat can soften paint and loosen adhesive, it’s a tool you should use carefully. A hairdryer on low can help lift tape cleanly on stubborn edges, but excessive heat will blister paint or damage drywall.
Although heat can help lift tape, use a hairdryer on low—too much heat risks blistering paint or harming drywall.
You’ll use heat application sparingly to tweak tape adhesion after proper surface preparation and painter’s tape placement. Monitor temperature effects and humidity influence, since both alter paint cure and paint texture.
Use drying techniques only to finish edges, combining gentle warmth with removal tools like a putty knife. Test a small area first to avoid ruining finish or speeding cure unevenly.
- Start low and move constantly
- Test a hidden spot
- Combine with scoring when needed
- Avoid prolonged exposure
How Tape Quality Changes Removal Timing and Results
Because tape quality directly affects both how long you should wait and how clean the edge will be, pick tape that matches your paint type and surface prep.
You’ll find low-tack painter’s tape peels sooner with minimal tearing, while high-adhesion varieties cling longer and resist lifting on rougher surfaces.
Consider tape adhesion and paint compatibility: delicate eggshells need gentler adhesive; semi-gloss tolerates stronger bonds.
Test a small strip to confirm removal timing and edge crispness.
Store tape properly to preserve its tack.
Choosing the right tape reduces rework, saves time, and improves final results when you remove it.
Signs You Waited Too Long and How to Fix Torn Paint
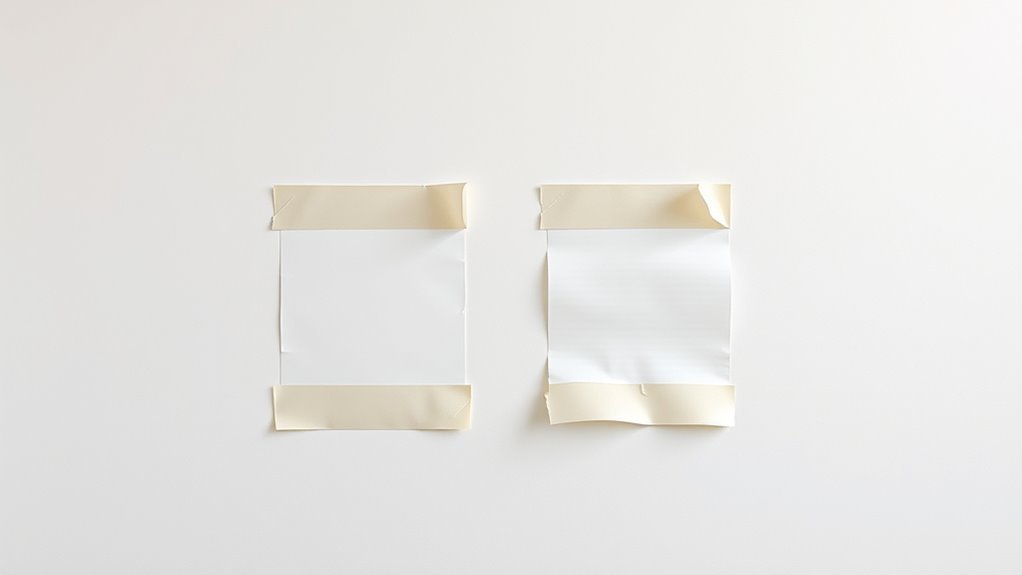
If you pull tape after the paint fully bonds, you’ll often lift flakes or strips of paint off the wall—look for ragged edges, exposed drywall, or long strings of paint stuck to the tape as clear signs you waited too long.
You can spot tape mistakes and poor paint adhesion by checking seams and corners.
To fix torn paint, remove loose flakes, sand feathered edges, apply primer to bare spots, and repaint with light coats.
- Remove all loose paint gently
- Sand edges smooth before priming
- Use bonding primer on exposed areas
- Repaint with thin, even coats
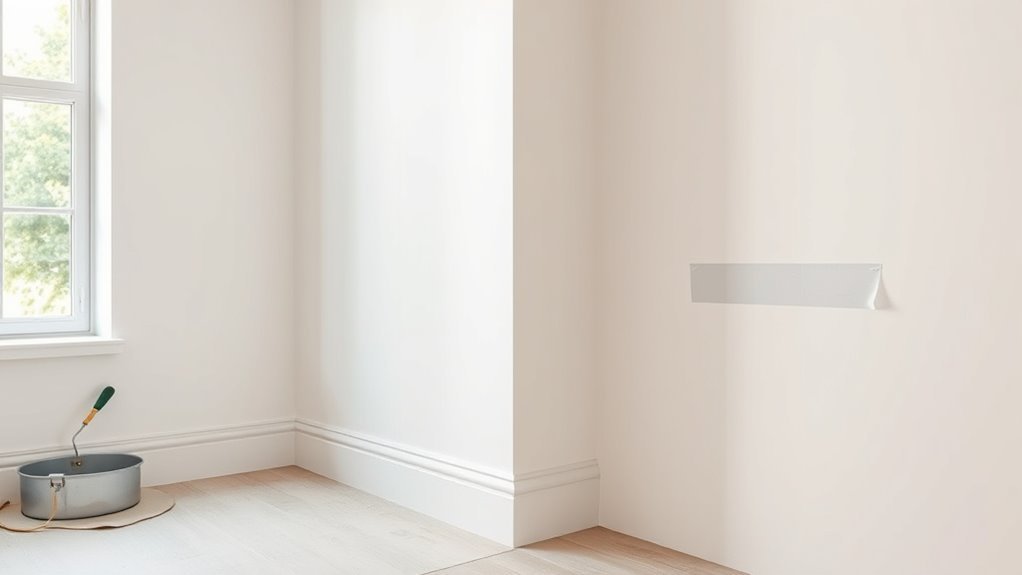
Quick Fixes for Bleed-Through and Jagged Edges
When you spot paint bleed-through or jagged edges after removing tape, act quickly to minimize sanding and repainting.
First, gently scrape raised ridges with a putty knife, then sand feathered spots smooth.
Gently scrape raised paint ridges with a putty knife, then sand feathered areas smooth for a seamless finish.
For small bleed-through areas, blot with a damp cloth to remove loose pigment, let dry, and apply a stain-blocking primer or thin coat of matching paint.
Use a fine brush for crisp touch-ups along jagged edges, dragging the bristles away from the line.
As a last resort, re-tape correctly, seal the edge with caulk or clear acrylic, then repaint for clean results.
Timing Rules for Primers, Enamels, and Low‑VOC Paints
Although timing varies by product and conditions, you should let primers dry fully before applying tape or topcoats. Wait for enamels to cure longer than latex before handling or masking, and follow low‑VOC paint manufacturers’ specific recoat windows to avoid lifting or poor adhesion.
You’ll monitor drying conditions, temperature effects, and humidity levels; guarantee surface preparation for primer adhesion; and consider paint compatibility with tape types. Longer enamel paint curing improves edge sealing and reduces gouging when removing tape.
Choose tapes for tape longevity and targeted dwell time to match paint curing.
- Check primer adhesion before masking
- Match tape types to paint compatibility
- Monitor temperature effects and humidity levels
- Time removals for peak edge sealing
Common Mistakes That Ruin Edges and How to Avoid Them
1 common mistake that ruins paint edges is rushing—peeling tape too soon or too late lets paint lift or tear. You should focus on tape application, press edges firmly, and wait for the paint to skin but not fully harden. Don’t pull at a steep angle; pull back slowly at 45 degrees for best edge protection. Avoid reusing old tape or stretching it while applying. Check for bleeding and touch up with a fine brush instead of re-taping repeatedly. Practice on scrap surfaces to refine timing and technique for crisp lines every time.
| Mistake | Cause | Fix |
|---|---|---|
| Rushing | Poor timing | Wait for skin |
| Bad press | Gaps | Firm roll |
| Old tape | Weak adhesive | Use fresh |
| Steep pull | Lifted paint | 45° pull |
| Bleeding | Improper seal | Seal edge |
Quick Reference Cheat Sheet: Timing by Paint, Temp, and Surface
Start by matching tape removal timing to three factors you control: the type of paint, the ambient temperature and humidity, and the surface material—each affects how the paint skins and bonds.
Match your tape removal to paint type, temperature, humidity, and surface—these control how paint skins and bonds.
You’ll use this cheat sheet to choose timing based on paint sheen and conditions. Consider tape types and proper surface preparation before you apply tape. Remove at an angle for best edges.
- Water-based matte: remove after 30–60 minutes in warm, dry rooms
- Latex or eggshell: 1–2 hours; longer if humid
- Oil-based or gloss: wait 8–24 hours
- Delicate surfaces: test small area first
Frequently Asked Questions
Can I Remove Tape From Freshly Painted Textured Walls?
Yes — you can remove tape from freshly painted textured walls, but wait until paint is dry to touch; peel slowly at a 45° angle to protect textured surfaces and preserve paint adhesion, avoiding jagged edges or lifting.
Does Tape Removal Timing Differ for Exterior Paint Jobs?
Yes — you’ll remove tape sooner outside if sun and heat accelerate drying, but wait longer if cold or humidity slows it; exterior paint and tape adhesion interact, so test edges and peel when paint’s firm but not brittle.
Will Tape Stick to Wet Paint if I Press It Down Later?
Yes—you’ll risk wet paint adhesion problems if you press tape onto still-wet paint; it’ll lift or smear. Use proper tape application techniques: wait until paint’s tack-free, press gently, and remove carefully to avoid damage.
Can I Reuse Painter’s Tape After Peeling It off Once?
Yes—you can sometimes reuse painter’s tape: like stretched rubber, like faded ribbon, you’ll lose grip. Check tape quality, assess adhesion factors like residue, edge integrity, and stickiness; if compromised, don’t reuse or expect clean lines.
Should I Remove Tape Differently Around Painted Metal Fixtures?
Yes — you should remove tape differently around painted metal fixtures: you’ll peel slowly, pull at a 45° angle, guarantee edge sealing to prevent paint bleeding, and use low-tack tape or score edges for crisp lines on metal.
Conclusion
You’ll get the sharpest lines when you peel tape at the right moment: not too soon to lift wet paint, not too late to tear cured edges. Match your timing to paint type, finish, and climate; check edges, score if needed, and pull slowly at a 45° angle. Learn from mistakes, adjust for humidity, and fix small flaws promptly. Plan ahead, act carefully, and finish confidently for professional-looking results.