Where to Hang a Painting on the Wall? Guide
Hang your painting so its center sits about 57–60 inches from the floor to match average eye level, and place it where it anchors the room’s focal point—doorways, seating, or a fireplace. Center artwork above furniture, leaving 6–12 inches above sofas or consoles, and scale the piece to wall size so it doesn’t feel lost or overpowering. Use appropriate anchors for drywall, plaster, or brick, keep groupings aligned, and keep going to learn practical mounting and spacing tips.
Hang Art at Eye Level: Use the 57–60 In Rule
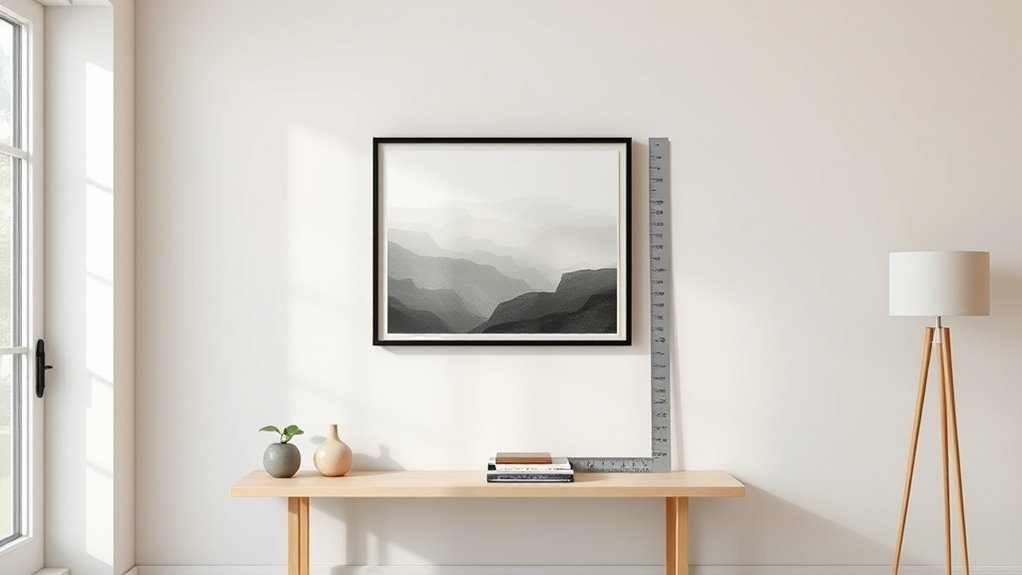
Start by placing the center of the artwork about 57–60 inches from the floor; that range matches the average eye level and keeps pieces feeling natural in most rooms. You’ll measure from the floor to the artwork’s center, adjust for frame depth, then mark the wall.
Consider seating and standing zones—lower in dining areas, slightly higher in entryways—while keeping consistent art height across groupings. Align centers when hanging multiple pieces to maintain visual balance.
If furniture sits beneath the piece, leave 6–12 inches above it. Trust the rule as a starting point, then tweak for sightlines and room scale.
Pick the Focal Point First: Where the Painting Should Lead the Eye
Start by choosing the painting’s focal point so it anchors at eye level and feels intentional.
Let natural sight lines—doorways, furniture, and where people stand—guide placement.
Balance the piece’s visual weight with surrounding elements so the eye lands where you want it to.
Eye-Level Anchor
Where should the eye land first when you enter a room? You want an eye-level anchor that guides attention and creates visual harmony.
Choose a focal point—often centered at about 57–60 inches from floor to artwork center—so art placement feels natural. Stand where people usually enter and adjust height until the piece commands view without shouting.
For groups, align the collective center at eye level. Consider scale, nearby furniture, and sightlines to keep the anchor steady.
When the painting leads the eye calmly, the room feels intentional; you’ll notice balance immediately and visitors will too.
Natural Sight Lines
How do you want a room to guide your eye when you walk in? Choose a focal point that draws attention naturally, using natural light to highlight the painting.
Position the artwork so sight lines from the doorway, seating, and main circulation lead to it, creating visual balance without forcing attention.
Consider scale and distance: too high or small breaks the flow. Use reflections, windows, or architectural lines to reinforce direction.
Trust your instincts—move the piece until it feels inevitable.
- Map entry-to-seating sight lines.
- Test under natural light at different times.
- Adjust height for comfortable viewing distances.
Complementary Visual Weight
Think of visual weight as the way objects pull your eye: you want your painting to anchor the room without overpowering it.
Choose a focal point first—then position the artwork so it reinforces that focus. Consider nearby furniture, lighting, and color contrasts to achieve visual balance; a heavy sofa needs a stronger, lower piece, while a light console pairs with smaller, airy work.
Use the painting to lead sight lines toward architectural features or seating. In art placement, keep scale proportional and leave breathing room; subtle asymmetry can feel intentional, guiding the eye while keeping the room cohesive.
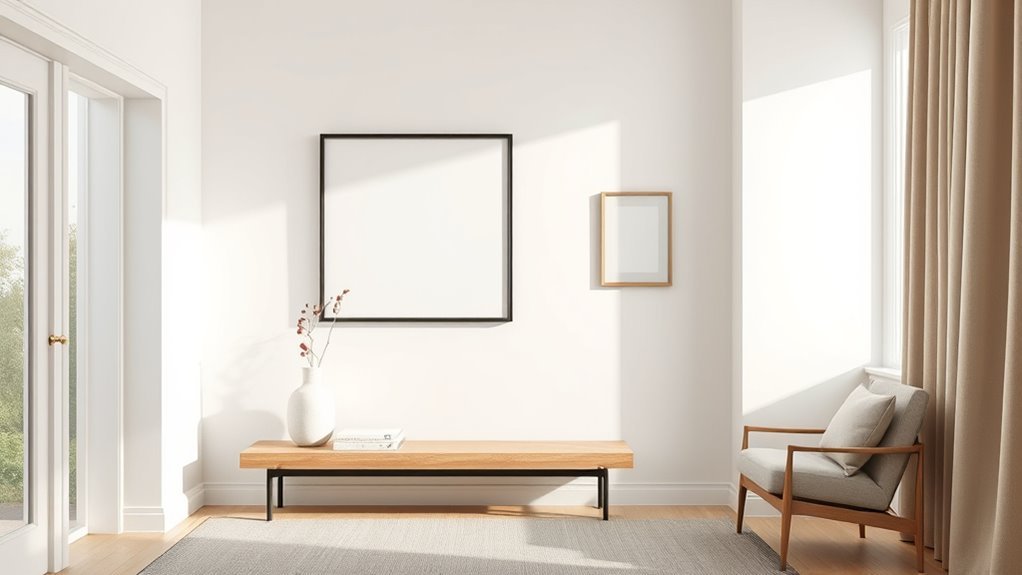
Center Art Above Furniture: Sofas, Consoles, and Beds
Centering art above furniture creates a cohesive focal point that ties a room together. You’ll want to contemplate scale, proportion, and eye level to get it right.
Centering art above furniture unifies a room—consider scale, proportion, and eye level for a balanced focal point
When you choose a piece, consider art style and furniture harmony so the work complements textures, colors, and the room’s mood. Hang at about 6–12 inches above the furniture top for visual connection, adjusting for ceiling height and seating depth.
Maintain symmetry with sofas and beds; for consoles, a single centered piece or balanced pair works best.
- Align center with furniture midpoint.
- Keep consistent margins.
- Adjust for architectural features.
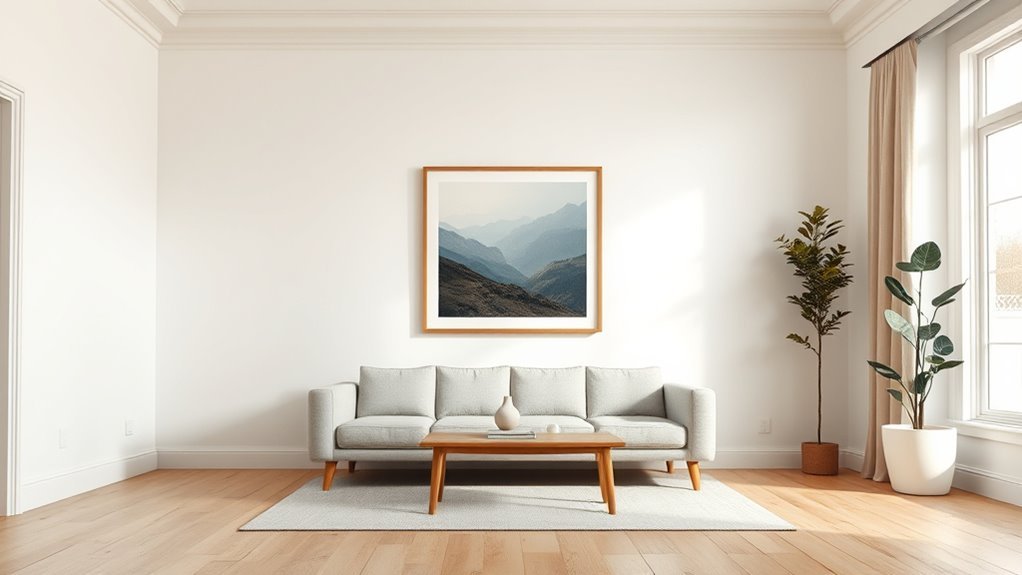
Choose Painting Size for Wall and Room
Where should your eye land when someone walks into the room? Pick a painting size that creates that focal point: large, bold pieces dominate open walls; medium works over sofas or consoles; small suits niches.
Consider room scale, ceiling height, and furniture proportions so the artwork feels intentional. Match painting styles to the room’s mood—minimalist pieces in calm spaces, dramatic works in lively rooms.
Factor in wall colors: contrast brighter walls with darker, bolder art, or unify neutrals with subtle palettes. Measure twice, visualize with paper templates, and choose a size that balances presence with harmony.
Space Multiple Pieces: Gaps for Gallery Walls and Groups
Once you’ve settled on sizes, plan the negative space between pieces so the group reads as a unified composition.
You’ll use consistent gallery spacing to achieve visual harmony without overcrowding. Aim for even gaps for formal grids, slightly varied gaps for casual clusters, and room-specific spacing that respects furniture and sightlines.
- For tight gallery walls, pick 2–3 inches to keep rhythm steady.
- For mixed groups of similar sizes, use 3–5 inches to let each piece breathe.
- For large arrangements over furniture, increase to 4–8 inches so the grouping feels anchored and balanced.
Arrange Mixed-Size Frames: Anchor, Balance, and Flow
Harmony in a mixed-size arrangement comes from choosing a strong anchor piece, then balancing and linking other works so your eye moves naturally across the wall.
Start by placing the anchor at eye level or slightly above, then arrange medium and small frames around it to create movement. Use consistent frame styles or repeat a color to unify disparate shapes, achieving visual harmony without uniformity.
Vary spacing modestly to avoid rigidity, and align edges or centers to form invisible pathways.
Step back often, adjust for scale and weight, and trust your instincts to refine flow and balance.
Adjust for High Ceilings and Low Furniture
If your room has high ceilings or the furniture sits low, lower the visual center of your artwork so it reads with the furniture rather than above it. You’ll make intentional height adjustments so the piece connects to the seating line and complements furniture placement.
Aim for artwork center about 6–12 inches above low-back sofas or consoles, or align bottom edges with table tops for cohesion. Consider scale so the painting doesn’t float in empty vertical space.
Use these quick tips:
- Hang center 6–12″ above low furniture for a grounded look.
- Group lower to mirror sofa lines and maintain balance.
- Measure consistently for precise height adjustments.
Hang Over Stairs & Narrow Walls: Tilt and Placement Tips
When you’re hanging art over stairs, tilt the painting slightly downward so viewers walking below get the desired perspective.
On narrow walls, center the artwork vertically and leave equal margins on top and bottom to keep it from feeling cramped.
These small angle and placement tweaks make the piece read clearly from moving viewpoints.
Angle For Staircases
Because you’re often viewing artwork from different heights and angles on a staircase, tilt the piece slightly downward toward the primary sightline so it reads naturally as you move; aim for small staircase angles (5–15°) to maintain consistent visual flow without glare.
Position the centerline slightly higher than typical eye level to compensate for elevation changes. Use secure hardware rated for angled loads.
- Mount top-weighted brackets to prevent shifting and preserve the desired tilt.
- Align frames with the stair’s rise to reinforce movement and rhythm.
- Check sightlines from multiple steps before final tightening.
Slim Wall Centering
On narrow walls or over stairs, choose vertically oriented or slim-frame works to match the wall’s proportions. Tilt slightly toward the usual vantage point on stair landings to improve legibility.
Measure from adjacent architectural lines and center relative to those, not the wall edges. Prioritize proportional art placement over exact middle placement to achieve visual balance and avoid awkward, cramped compositions.
Mounting Options: Hooks, Picture Rails, French Cleats
Choosing the right mounting method affects how secure, level, and removable your artwork will be, so consider hooks, picture rails, and French cleats based on the painting’s weight, wall type, and how permanent you want the installation to be.
Choosing the right mounting—hooks, rails, or French cleats—ensures secure, level, and appropriately permanent artwork display
You’ll match hooks vs. nails to lightweight frames and varied frame styles; picture rails suit gallery layouts and flexible mounting heights; French cleats excel with heavy pieces for even weight distribution.
Use appropriate installation tools and account for wall textures and art types when planning.
Pick the system that matches your needs for safety, adjustability, and aesthetic.
- Hooks
- Picture rails
- French cleats
Match Mounting to Wall Type: Drywall, Plaster, Brick, Studs
Now that you’ve picked a mounting system, match it to the wall you’ll hang on—drywall, plaster, brick, or studs each demand different anchors, tools, and techniques.
For drywall, use toggle or molly anchors for heavier pieces; light frames work with plastic anchors or picture hooks.
With plaster, pre-drill and use hollow-wall anchors or screw into lathe where possible.
For brick or masonry, use masonry anchors or sleeve anchors with a hammer drill.
Whenever you can, fasten into studs for maximum security using wood screws or lag bolts.
Consider mounting techniques and wall compatibility to guarantee safe, lasting placement.
Common Mistakes to Avoid When Hanging Paintings
Don’t hang your painting too high where viewers have to tip their heads to see it.
Pay attention to the wall’s proportions so a small piece doesn’t look lost on a large expanse or a large work overwhelms a narrow wall.
Fixing height and scale early will make the rest of the placement decisions easier.
Hanging Too High
One common mistake is hanging a painting too high, which makes it feel disconnected from the room and strains viewers’ necks. You want art height that invites interaction and enhances the visual impact, not isolation.
Place artwork so its center sits near eye level for most occupants, and consider seating sightlines. Avoid ceilings-only placement that shrinks the piece.
- Measure: position the center about 57–60 inches from the floor for general rooms.
- Grouping: align group centers, not tops, to preserve cohesion.
- Adjust: lower slightly in seating areas so the work connects with people, not the ceiling.
Ignoring Wall Proportions
If you hang a small painting on a vast, bare wall (or cram a large piece into a narrow alcove), the artwork will lose its presence and the room will feel off-balance.
You should consider wall height and surrounding space before choosing size. Measure vertical and horizontal proportions, then pick art that occupies a sensible fraction—typically 60–75% above furniture or within eye-level groupings.
Don’t ignore scale when arranging multiples; staggered sizes can restore visual balance if planned.
If uncertain, mock up with paper templates on the wall to test scale and placement so your piece complements the room instead of fighting it.
Quick Fixes: Easy Tweaks When Art Looks Off
Noticing a painting looks off? You can fix it fast. Small adjustments to art placement restore visual balance and make the piece feel intentional.
Noticing a painting feels off? Small placement tweaks restore balance and make it look intentionally styled.
Try these tweaks:
- Move it 2–3 inches left or right to center on focal furniture or sightlines.
- Lower or raise it 2–4 inches so the center sits at eye level—about 57–60 inches from the floor—or aligns with nearby elements.
- Add a small companion piece or slim shelf to anchor the work and improve overall visual balance without overcrowding.
Test each change, step back, and trust your eyes; minor shifts often solve the problem.
Frequently Asked Questions
How High Should Paintings Be Hung in a Child’s Room?
Hang paintings at a height matching your child’s eye level, typically 36–48 inches from the floor, so they can engage. You’ll consider child’s height, activity zones, and art placement flexibility as they grow and play.
Can Lighting Damage Framed Artwork Over Time?
Yes — but don’t panic yet: lighting can gradually harm framed artwork. You’ll want to limit UV exposure, control humidity levels, use filters or LEDs, and rotate displays so colors and materials don’t fade or warp.
How Do I Hang Art on Rental Walls Without Nails?
Use adhesive hooks or wall safe tape to hang frames without nails; choose weight-rated options, clean the wall first, press firmly, follow removal instructions, and stagger larger pieces across studs-free areas to avoid slippage and damage.
What Insurance Covers Damage to Hung Paintings?
You’ll usually get art insurance or a rider on homeowner’s or renter’s insurance to provide damage coverage for hung paintings; check for agreed value, transit and accidental damage clauses, and keep receipts and photos for claims.
Can I Hang Paintings Outdoors or on a Covered Porch?
You can hang paintings outdoors or on a covered porch, but you’ll need artwork with outdoor durability and proper weather protection; choose sealed, UV‑resistant pieces, use corrosion‑proof hardware, and monitor exposure to moisture and sun.
Conclusion
You’ve got the rules, the tools, and the eye—now trust them. Step back, breathe, and hang that piece where it draws you in; if it feels wrong, don’t panic. Tiny tweaks—an inch here, a different hook there—can change everything. Keep measuring, keep adjusting, and watch the room come alive. One small shift might reveal the perfect sightline you didn’t expect—so pause, pull the string, and see what’s waiting.