Which Paint Is Best for Walls? Expert Guide
For most interior walls you’ll want a high-quality latex (water-based) paint in an eggshell or satin sheen because it cleans easily, dries fast, and balances durability with a low-reflective finish that hides minor flaws. Pick satin for bathrooms or kitchens where moisture and scrubbability matter; choose eggshell for living rooms and bedrooms for a softer look. Prep with primer and test samples under room lighting, and keep going to see detailed tips on finishes, VOCs, and maintenance.
Quick Answer: Best Paint for Most Interior Walls
If you want a reliable all-purpose option, go with a high-quality latex (water-based) paint in eggshell or satin sheen—it balances durability, ease of cleaning, low odor, and good coverage, making it ideal for most interior walls.
You’ll pick latex for bedrooms, living rooms, and hallways; it suits varied paint types and adapts to common wall textures. Use satin where moisture or scuffs are likely, eggshell for a softer look.
Test samples on your actual wall textures to confirm finish and color under room light. Apply with proper primers on patched or high-porosity surfaces for best results.
How to Choose Paint: A Simple Decision Framework
When you’re picking paint, focus on three quick questions: what’s the room’s use and traffic level, what surface and prep does it need, and which finish and formula will balance look, durability, and cleanup.
First, match paint types to function: high-traffic rooms need scrubbable, durable finishes; low-traffic spaces can favor softer sheens.
Second, inspect surfaces—repair, prime, and consider stain-blocking if needed.
Third, use color psychology to set mood: calming hues for bedrooms, energizing tones for kitchens.
Finally, test samples on your wall, observe them in different light, and choose the combination that meets performance and aesthetic needs.
Latex vs. Oil: Which Base Should You Choose?
Curious which base will serve your walls best? You’ll weigh latex benefits like easy cleanup, faster drying times, low odor levels, and kinder environmental impact against oil advantages such as durability, smoother application techniques, and richer color choices.
Pick latex for quick projects, frequent repainting, and healthier indoor air. Choose oil for high-traffic trim or surfaces needing a hard finish.
Consider finish options and whether you’ll tolerate longer drying times and stronger smells during application. Test samples in your room, note coverage and sheen, then decide based on maintenance, room use, and how each handles wear.
Paint Finishes Explained: Flat, Eggshell, Satin, Semi‑Gloss, Gloss
There are five common wall finishes you’ll encounter—flat, eggshell, satin, semi‑gloss, and gloss—each balancing sheen, durability, and ease of cleaning. You’ll pick based on room use: flat hides imperfections, eggshell feels soft, satin resists stains, semi‑gloss brightens trim, gloss pops accents. Consider paint sheen alongside finish durability to match lifestyle and mood.
| Finish | Feeling |
|---|---|
| Flat | Calm, forgiving |
| Eggshell | Cozy, subtle |
| Satin | Practical, warm |
| Semi‑gloss/Gloss | Energetic, confident |
Choose where you want softness or resilience; your finish sets tone and function.
How Sheen Affects Color and Hides Flaws
Pay attention to sheen because it can make colors look lighter or richer depending on how it reflects light.
Higher sheens highlight surface flaws, while flatter finishes help hide bumps and brush marks.
Pick a sheen that balances the room’s lighting and traffic—use higher sheens in trim and high-use areas and flatter sheens on imperfect walls.
How Sheen Changes Color
When you pick a paint sheen, you’re not just choosing finish and durability—you’re changing how the color reads and how imperfections show.
You’ll notice sheen impact immediately: glossier sheens reflect more light, making colors appear brighter and cooler, while flatter sheens absorb light, deepening tones. That color perception shift alters mood and contrast in a room.
- Glossy: boosts saturation and highlights trim, but can emphasize texture.
- Eggshell/satin: balances warmth and reflectivity for lived-in rooms.
- Matte: mutes hues, hides minor flaws, and offers subtle, even color.
Sheen And Surface Imperfections
Sheen doesn’t just change color perception—it also determines how much of the wall’s texture and blemishes everyone notices.
You’ll learn that flatter sheen types absorb light reflection, masking minor surface textures and reducing imperfection visibility. Semi-gloss and satin throw more light, highlighting bumps, repairs, and uneven drywall.
Good wall preparation minimizes flaws before you pick a finish, but consider sheen durability too: higher sheen resists scuffs and cleans easier, so some tradeoffs matter.
Match your cleanup needs and tolerance for visible texture when choosing finish. Test samples under your room’s lighting to judge how sheen reveals or conceals imperfections.
Choosing Sheen For Rooms
Although finish level changes how you perceive color and texture, you can use that to your advantage when picking paint for each room.
Sheen selection influences perceived brightness and how well walls hide imperfections, so match finishes to room functions and traffic. Use flatter sheens to minimize bumps in low-traffic spaces, and choose satin or eggshell where you need wipeability without glaring shine.
For wet or high-touch rooms, go semi-gloss for durability and easier cleaning, accepting slightly more reflectivity.
Consider lighting and color depth—higher sheen boosts saturation and highlights flaws, so balance function with appearance.
- Flatter: hides flaws
- Satin: balanced
- Semi-gloss: durable
Coverage and Hide: What to Expect From Different Paints
A few coats of paint won’t always cover dark or uneven surfaces, so you’ll want to know a product’s coverage and hide before you buy.
You’ll assess coverage expectations by checking listed spread rate (sq ft per gallon) and real-world opacity notes from manufacturers and reviews.
Higher-quality paints often deliver better hide, reducing coats and saving time.
Pigment concentration, binder quality and sheen affect paint opacity; matte hides flaws better but may need more touch-ups, while eggshell and satin balance durability with decent coverage.
Match your expectations to the surface and plan for one or two extra cans for problem areas.
Primer: When to Use It and Which Type to Pick
If coverage or surface issues mean you’ll need extra coats, you’ll likely want to prime first to save time and improve the topcoat’s performance.
You’ll pick a primer based on substrate and goals: stain-blocking for marks, bonding for slick surfaces, or high-build for repairs.
Choose primers by surface and purpose—stain-blockers for marks, bonding for slicks, high-build for repairs.
Match primer types to the wall: drywall, plaster, previously painted, or glossy finishes.
Use proper application techniques—brush for edges, roller for fields, and thin coats to avoid drips.
Let the primer dry fully and sand lightly if needed before painting.
A right primer makes your topcoat truer, faster, and more durable.
Durability and Washability: Finish + Formulation Tradeoffs
When you pick a paint, think beyond color—finish and formulation determine how well walls resist scuffs, stains, and repeated cleaning.
You’ll weigh durability factors like abrasion resistance and film thickness against aesthetic goals. Glossier finishes boost washability ratings and tolerate frequent scrubbing, while eggshell or matte hides imperfections but needs gentler cleaning.
Consider formulation options—acrylic blends resist yellowing and stains better than cheaper vinyls; stain-blocking or mildew-resistant formulas suit kitchens and bathrooms.
Use finish comparisons and product specs to match room use: pick tougher, higher-ratings where traffic and mess are frequent, softer options where appearance matters more.
How Many Coats Will You Really Need?
How many coats you’ll need depends a lot on the surface type—raw drywall, patched walls, and glossy surfaces all absorb and show paint differently.
Quality paint often covers better, so a premium formula can cut you down to one or two coats.
And don’t forget color and coverage: dramatic color changes or thin, light-hiding tones usually require an extra coat.
Surface Type Matters
Because different surfaces absorb and reflect paint differently, the number of coats you’ll need can vary a lot—smooth, primed drywall usually takes one to two coats, while porous plaster, raw wood, or dark colors may demand three or more.
Consider how surface texture and wall material affect coverage so you can plan time and budget.
- Porous surfaces (plaster, raw wood): expect 2–4 coats; use primer first to seal.
- Smooth, sealed drywall: 1–2 coats for solid colors; lighter shades may need less.
- Textured walls: often need extra paint to fill recesses; test a small area first.
Paint Quality Counts
Surface type affects coverage, but paint quality often has an even bigger impact on how many coats you’ll need.
If you choose a higher-quality acrylic or latex, you’ll often get full coverage in fewer passes, saving time and reducing waste. Better formulas improve paint longevity and resist fading, so you won’t have to repaint as often.
They also boost color retention, keeping hues truer over years. Don’t skimp on primer when needed; pairing it with quality paint multiplies effectiveness.
Assess sheen and purpose—high-traffic areas benefit from durable finishes—and follow manufacturer spread-rate recommendations for best results.
Color And Coverage
Color choice and coverage go hand in hand when you’re deciding how many coats a wall will need, since darker or more saturated hues and drastic color changes usually require extra layers to achieve full, even opacity.
You’ll weigh color psychology and color trends against practicality: neutrals often need fewer coats, while bold shades and deep pigments hide unevenness less effectively.
Primer reduces coats when switching from dark to light. Quality paint with higher pigment load covers better, saving time.
- Light to light: usually 1–2 coats with good paint.
- Light to dark: 2–3 coats plus primer.
- Dark to light: primer then 2 coats.
Best Paint for High‑Traffic Living Rooms and Hallways
When you pick paint for high-traffic living rooms and hallways, prioritize durable finishes and easy-clean formulations that stand up to fingerprints, scuffs, and frequent washing.
Choose satin or eggshell sheens for a balance of durability and subtle reflection; flat hides imperfections but won’t clean well. Look for paints labeled scrubbable or high-durability, often acrylic or latex blends, so you can wipe marks without removing pigment.
Choose satin or eggshell for durability and subtle sheen; pick scrubbable, high-durability acrylic or latex paints for easy cleaning.
For color selection, pick mid-tones and warmer neutrals that hide wear and coordinate with trim and flooring.
Test samples on walls and clean them after curing to guarantee long-term resilience and appearance.
Best Paint for Kitchens and Moisture‑Prone Walls
Kitchens and other moisture-prone walls demand paint that resists humidity, stains, and frequent scrubbing without peeling or molding.
You’ll want paints formulated for kitchen humidity and strong moisture resistance so surfaces stay clean and durable. Choose finishes and formulations that balance washability with low sheen to hide imperfections.
- High-quality acrylic latex: offers excellent moisture resistance and easy cleaning for splatters.
- Satin or semi-gloss finish: withstands scrubbing, resists staining, and reflects less wear.
- Mildew-resistant additives: protect against mold in corners and behind appliances.
Select paints labeled for kitchens and follow proper surface prep.
Best Paint for Bathrooms and Laundry Rooms
Bathrooms and laundry rooms need paint that stands up to high humidity, frequent temperature swings, and scrubbing, so pick a durable, moisture-resistant formula that won’t peel or harbor mildew.
You should choose a semi-gloss or satin finish for easy cleaning and resistance to moisture, addressing bathroom humidity directly.
Look for paints labeled mold- and mildew-resistant and with low VOCs to keep air quality safe in confined spaces.
Choose mold- and mildew-resistant, low-VOC paint to protect air quality in tight, humid spaces.
For laundry room durability, prioritize formulations with stain resistance and washable surfaces that tolerate repeated wiping.
Proper surface prep and ventilation are essential to maximize lifespan and maintain a fresh, clean look.
Best Paint for Bedrooms and Low‑Traffic Spaces
Bedrooms and other low-traffic rooms let you prioritize comfort and appearance over extreme durability, so pick paints that enhance color depth and hide imperfections while still being easy to maintain.
You’ll focus on finish and hue to shape bedroom ambiance and use color psychology to set mood. Consider these choices:
- Matte or eggshell: soft look, hides flaws, cozy feel for restful spaces.
- Low-VOC premium latex: good coverage, easy cleanup, better indoor air.
- Accent wall with satin: subtle sheen for contrast and depth without high gloss.
Test samples on your wall before committing.
Choosing Paint for Kids’ Rooms and Play Areas
For kids’ rooms and play areas, you’ll want low‑VOC paints to keep indoor air safer for little ones.
Pick washable, durable finishes so you can scrub crayon marks and spills without stripping the color.
Balancing low emissions with a tough, easy‑clean surface gives you the best of both safety and practicality.
Low-VOC Options
Because young children are more sensitive to fumes, choosing low-VOC or zero-VOC paints for playrooms and kids’ bedrooms helps keep indoor air safer while still giving you durable, easy-to-clean walls.
Look for eco friendly alternatives labeled zero-VOC or very low-VOC to protect indoor air quality without sacrificing finish. You’ll still want to ventilate during application and cure time.
- Check certifications: Green Seal, Greenguard, or similar.
- Test small areas: confirm odor, coverage, and color before committing.
- Read ingredient lists: avoid added antimicrobials or strong solvents that can emit gases.
Washable Durable Finishes
When you’re picking paint for kids’ rooms and play areas, prioritize washable, durable finishes that stand up to fingerprints, crayon marks, and frequent cleaning.
Choose paints formulated with washable technologies so spills and doodles wipe away without fading or ghosting. Opt for satin or semi-gloss sheens—those durable materials resist abrasion and tolerate regular scrubbing better than flat finishes.
Test a small area with common cleaners to confirm color retention. Look for stain-blocking primers and paints labeled for high-traffic areas.
You’ll get a room that stays bright and clean longer while minimizing touch-ups and repainting.
Stain‑Blocking and Mold‑Resistant Paints: When They Matter
If your walls show water stains, nicotine discoloration, or frequent mildew, stain‑blocking and mold‑resistant paints can save you time and rework. You’ll choose these when staining or moisture recurs despite cleaning.
Prioritize mildew prevention and proper surface preparation: remove growth, dry thoroughly, and prime stained areas before painting. These coatings seal tannins and resist fungal growth, cutting repaint frequency.
- Kitchens/bathrooms: extra protection where humidity spikes.
- Basements: blocks soil gases and water‑related stains.
- Renovations: hides old smoke or water damage without repeated coats.
Apply per label and inspect for ongoing moisture issues.
VOCs, Odors, and Healthier Low‑VOC/Zero‑VOC Options
VOCs in many paints can trigger headaches, dizziness, respiratory irritation, and long‑term risks for sensitive people.
You’ll reduce those hazards by choosing low‑VOC or zero‑VOC formulas and airing the room well while painting.
Look for certified labels and check solvent lists so you’re actually getting a healthier option.
Health Risks From VOCs
Although paint can make a room look fresh and clean, the chemicals that give many paints their quick-drying and easy-cleanup properties can also release volatile organic compounds (VOCs) that may cause odors and health issues.
You should know VOCs exposure can worsen asthma, trigger headaches, and affect indoor air quality immediately; there are also documented long term risks like respiratory and neurological effects.
Consider these points to protect your household and consider safe alternatives that meet paint regulations and minimize environmental impact, especially for children’s safety.
- Reduce exposure with ventilation and time.
- Monitor symptoms, seek medical advice.
- Dispose paints per local rules.
Choosing Low‑VOC/Zero‑VOC
Wondering how to cut paint-related odors and health risks? You can choose low‑VOC or zero‑VOC paints to reduce indoor air pollution and lingering smells.
Look for third‑party certifications and read labels; “low” isn’t standardized, so verify actual VOC grams per liter. Test small cans first and ventilate during and after application.
Eco friendly options often use water‑based formulas with minimal solvents, making cleanup easier. Expect comparable durability and color choices now; premium low‑VOC products match conventional paints.
The main payoff is improved indoor air quality and clear health benefits for sensitive occupants, children, and pets.
Eco‑Friendly Interior Paints: Clay, Lime, and Antimicrobial Options
If you want a healthier, more natural finish for your walls, clay and lime paints plus antimicrobial formulations give you low-impact alternatives to conventional acrylics.
You’ll appreciate clay benefits like breathability, gentle odor control, and subtle matte texture. Lime properties include natural alkalinity, mold resistance, and a durable mineral finish.
Antimicrobial effectiveness in some paints adds surface protection without heavy biocides. For eco friendly comparisons, consider lifecycle impacts, ingredient transparency, and indoor air quality.
Antimicrobial paints can protect surfaces with fewer harsh biocides—compare lifecycles, ingredient transparency, and indoor air quality.
- Clay: soft finish, easy touch-ups, low VOCs.
- Lime: long-lasting, mineral aesthetic, moisture-tolerant.
- Antimicrobial: targeted protection, check approvals.
Budget Paints That Still Perform: What to Expect
Those natural options are great when you can splurge on specialty finishes, but you can still get reliable results on a tighter budget.
When you choose budget options, expect decent coverage and color range but plan for more coats than premium paints. Look for durable latex blends and mid‑grade acrylics labeled for washability to match your performance expectations.
Prepare surfaces thoroughly to compensate for lower hide and sand between coats for smoothness. Save by buying larger cans, matching sheens across rooms, and testing samples.
You’ll accept minor tradeoffs in longevity and touch‑up ease while keeping costs under control.
When to Splurge: Premium and Professional‑Grade Paints
Spend on premium or professional‑grade paint when you want fewer coats, superior durability, and a finish that stays truer to color over time.
You’ll notice premium paint benefits in coverage, touch-up ease, and stain resistance, so high-traffic rooms hold up longer. Consider professional grade options if you need uniform sheen, faster project completion, or contractor-level warranties.
- Save time: better coverage means fewer coats and quicker results.
- Long-term value: improved durability reduces repaint frequency and maintenance.
- Performance: superior pigment load and binders deliver more even, lasting color.
Choose based on room use and budget trade-offs.
How to Read Paint Labels and Tech Specs
When you’re choosing paint, read the label to understand sheen options, VOC levels for safety, and stated coverage per gallon.
Sheen affects durability and how much surface imperfections show, while VOCs tell you about fumes and required ventilation.
Coverage and yield help you estimate how many cans you need so you don’t run out mid‑project.
Paint Sheen Explained
Because sheen affects both appearance and durability, you should learn how to read paint labels and tech specs before you pick a finish.
You’ll spot gloss levels, light reflectance, and recommended surfaces; that’s how you judge sheen impact and match sheen preferences to rooms.
Read technical data for scrub rating and hiding power so the finish fits traffic and maintenance.
- Flat/matte: hides flaws, low reflectance, good for ceilings.
- Eggshell/satin: subtle sheen, easier to clean, versatile for living areas.
- Semi-gloss/gloss: high durability, highlights imperfections, best for trim and kitchens.
VOCs And Safety
Safety matters: knowing how to read paint labels helps you limit VOC exposure and protect indoor air quality. You’ll check VOC regulations, safety standards, and listed VOC grams per liter. Look for certifications and third‑party testing to gauge health impact and environmental considerations. Prioritize low‑VOC or zero‑VOC options during paint selection, and note application and cure times that affect indoor air quality. Compare hazard symbols, recommended PPE, and disposal instructions. Use the quick reference below to compare common label entries.
| Label item | What it tells you |
|---|---|
| VOC level | Air emission potential |
| Certification | Compliance with regulations |
| Hazard symbols | Health impact warnings |
| Disposal | Environmental considerations |
| PPE | Safety standards |
Coverage And Yield
Coverage tells you how much area a can of paint will actually cover, while yield lets you compare brands and formulas so you can buy the right amount.
Read the label for coverage estimates (sq ft per gallon) and note whether that assumes one coat, ideal surface, or specific paint application. Factor in porosity, texture, and color change; rough or dark-to-light projects need more.
- Prep: sealed, smooth walls boost actual yield.
- Swatch: test a small area to confirm coverage estimates.
- Calculator: multiply surface area by coats, then divide by labeled yield to buy cans.
Color Matching and Sample Testing Strategies
When you’re matching paint, start by comparing swatches under the same light that the room gets, since color shifts between natural, incandescent, and LED can be dramatic.
You should test multiple tones, include neutrals and accents, and use color palette strategies to guarantee cohesion with furnishings and fixtures.
Apply swatches to a sample board techniques setup so you can move them around walls and view them together. Label each sample with brand, finish, and room orientation.
Let samples dry fully before judging, observe at different times of day, and narrow choices to two before committing to a full purchase.
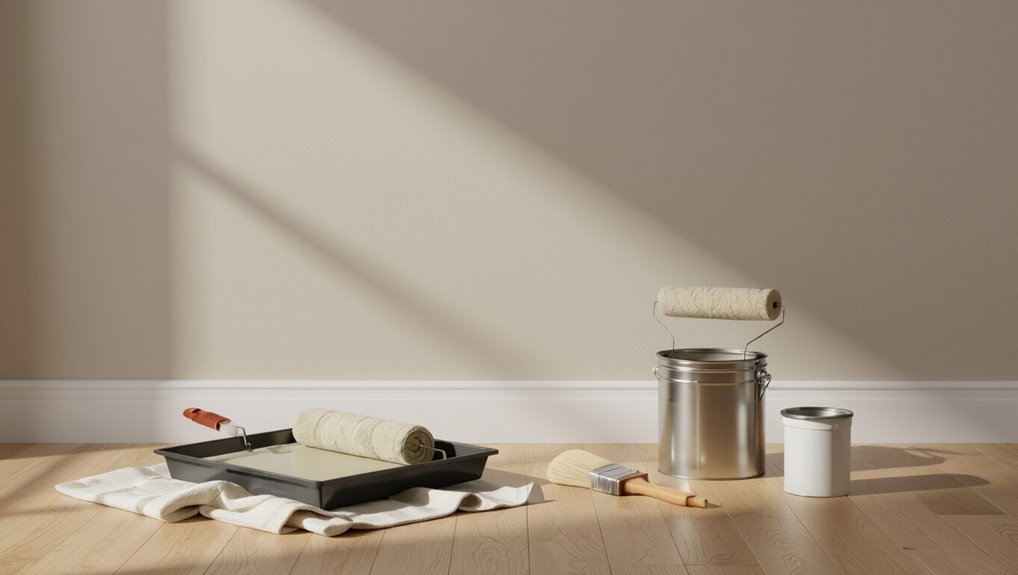
Tools and Application Tips for Best Results
Gather the right tools before you open a can: quality brushes, a roller with the appropriate nap for your wall texture, a sturdy tray, painter’s tape, a good extension pole, and a reliable drop cloth.
You’ll focus on tool selection, surface preparation, and safe, efficient application techniques. Wear gloves, goggles, and mask as safety precautions.
Clean, sand, and prime patches so paint adheres. Practice cutting in with a brush, then roll with steady, overlapping strokes. Keep a wet edge and don’t overload your roller.
Clean tools promptly to prolong life and avoid contaminating future finishes.
- Prep surfaces
- Use proper tools
- Follow safety precautions
Coverage, Hide, and Real‑World Testing (Short Checklist)
Because paint specs don’t tell the whole story, you should test how much a product really covers and hides before committing to a whole room.
Because specs lie, test a 1×1-foot patch to see real coverage before painting the whole room.
Pick a 1×1-foot patch on a wall with common flaws. Apply one coat in the morning, inspect opacity after drying, then add a second coat to gauge true coverage.
Note drying color shift and texture differences. Try different tools—roller, brush, mini-roller—to compare coverage strategies and speed.
For hide techniques, test tinting or primer-first vs direct-to-surface. Record coats needed, time, and appearance; use that brief checklist to choose the right paint.
Maintenance: Cleaning and Touch‑Up Tips by Finish
For each finish, you’ll learn the best spot-cleaning techniques to remove dirt without harming the paint.
I’ll show how to repair scuff marks quickly and when you should sand or just touch up.
You’ll also get preventive maintenance tips to keep walls looking fresh longer.
Spot Cleaning Techniques
One simple rule will save you time and paint: tackle spots as soon as they appear, since fresh stains lift far easier than set-in ones.
You’ll choose spot cleaning methods based on finish — flat needs gentler care; satin and semi-gloss tolerate mild detergent. Test a hidden area first.
- Blot with a damp microfiber, then mild soap for water-based stains.
- Use a magic eraser lightly for stubborn marks, rinse and dry promptly.
- For grease, apply a degreasing dish soap, rinse, and consider effective touch ups if sheen differs.
Repairing Scuff Marks
After spot-cleaning, you’ll often find scuff marks that need a different approach—these are usually surface abrasions from shoes, furniture, or everyday wear.
Start with gentle scuff removal techniques: a melamine sponge, baking soda paste, or a soft cloth with mild detergent. Test a hidden spot first.
If marks penetrate finish, lightly sand, wipe, and apply matching touch-up paint using a small brush or roller for even texture. For textured walls use stippling.
Consider wall repair options like spackling tiny gouges before painting. Finish with the correct sheen to blend repairs; let layers dry fully between coats.
Preventive Maintenance Tips
While regular cleaning keeps walls looking fresh, tailoring your routine and touch-ups to the paint finish prevents damage and extends its life.
You should schedule preventive maintenance and use appropriate cleaners: flat needs gentle dusting, eggshell and satin tolerate mild soap, semi-gloss and gloss handle scrubbers.
Keep a small touch-up kit with original paint, a brush, and labeled swatches.
- Inspect quarterly for chips, stains, or mold; address issues immediately to protect paint longevity.
- Use color-matched spot repairs and feather edges to blend.
- Avoid abrasive tools; test cleaners in an inconspicuous spot first.
Common Mistakes That Ruin a Paint Job (And How to Avoid Them)
Though a fresh coat of paint can transform a room, simple mistakes like skipping prep, using the wrong tools, or rushing between coats will turn a great-looking job into a costly redo; here’s what to watch for and how to avoid those pitfalls.
You must prioritize paint preparation: do wall cleaning, repair imperfections, and apply surface priming where needed.
Choose the right paint supplies and test color selection under real lighting considerations.
During paint application, use consistent technique and respect drying times between coats.
Don’t cut corners—proper prep, tools, and patience prevent streaks, bubbles, and premature wear.
Cost Comparison: Materials and Labor Per Room
When planning a paint project, you’ll save time and money by comparing material and labor costs per room up front.
Do a simple cost analysis: estimate paint quantity, primer, tape, and drop cloths. Get quotes for labor expenses and note whether prep, repairs, and cleanup are included. Factor room size and ceiling height.
- Small room: lower paint volume, modest labor time.
- Large room: higher paint cost, more labor hours.
- Complex surfaces: extra primer, tooling, and skilled labor increase total.
Use these figures to prioritize rooms and avoid surprise charges.
Decision Checklist: Pick the Right Paint for Your Walls
Now that you’ve compared materials and labor costs per room, you can focus on choosing the right paint without blowing your budget. Use this checklist: prioritize finish for durability, test paint color trends in small patches, consider VOC levels and eco friendly choices, and factor room use and lighting. Pick primer and tools, then plan timing for drying and touch-ups. Trust samples over photos. Use the quick emotional guide below to match mood and function:
| Feeling | Finish | Action |
|---|---|---|
| Calm | Matte | Sample |
| Energized | Satin | Accent |
| Clean | Semi-gloss | Wipeable |
Frequently Asked Questions
How Long Before I Can Hang Heavy Artwork on Freshly Painted Walls?
You can hang heavy artwork after full curing, usually 2–4 weeks, depending on paint and drying time; guarantee proper wall preparation, use anchors or studs, and avoid stressing fresh paint until it’s fully hardened to prevent damage.
Can I Paint Over Wallpaper Without Removing It Entirely?
Yes — about 60% of pros avoid it, but you can paint over wallpaper if you prime and sand seams. Use wall preparation tips, address wallpaper adhesion concerns, and pick a high‑adhesion primer before painting.
Will Paint Color Change Under Different Artificial Lighting Types?
Yes — you’ll see color appearance shift under various bulbs; lighting effects from warm, cool, or LED sources alter hue, saturation, and contrast. Test paint samples in each artificial light before committing to a final wall color.
How Do I Dispose of Leftover Paint and Empty Cans Responsibly?
About 2 million gallons of household paint get wasted yearly — you should take leftovers to paint recycling centers or hazardous waste events; empty cans go for eco friendly disposal or curbside recycling if fully dry and labels removed.
Can I Mix Leftover Paints From Different Brands or Batches Safely?
You can, but you shouldn’t assume paint compatibility; test small mixes first. Brand or batch differences affect finish, drying and adhesion, so you’ll get unpredictable color blending and performance unless you stick to same type and manufacturer.
Conclusion
You’ve got the tools to pick paint like a pro — from base and finish to upkeep and costs — so what’ll you choose for your walls? Aim for latex for most rooms, match sheen to traffic and imperfections, and favor eggshell or satin for balance. Clean and touch up appropriately, avoid common prep mistakes, and use the checklist to confirm your choice. With this guide, you’ll get durable, attractive results you’ll enjoy daily.