How to Remove Dried Paint From Canvas Without Damage
You can remove dried paint from canvas safely by first identifying the paint type—acrylic, oil, or other—and testing solvents and mechanical methods on an inconspicuous corner. Work gently with soft brushes, cotton swabs, distilled water or mild detergent for acrylics, and mineral spirits or eco solvents for oils, stopping if the ground moves or paint softens too much. Use poultices, controlled heat, and plastic scrapers sparingly, and consult a conservator for fragile or valuable pieces; more practical steps follow.
Quick Answer: Can You Remove Dried Paint From Canvas?
Yes—you can remove dried paint from canvas, but the success depends on the paint type, how long it’s been dry, and the canvas finish.
You’ll use gentle paint removal techniques, test solvents on hidden areas, and work gradually to avoid damage.
Follow canvas preservation tips like supporting the weave, avoiding excessive abrasion, and drying flat to maintain texture and longevity.
Identify the Paint: Acrylic vs Oil vs Other
Wondering which type of paint you’re dealing with? Check paint characteristics: acrylics dry quickly, feel flexible, and often have a plastic-like film; oils dry slowly, remain tacky longer, and smell of solvents.
Consider paint composition—water-based versus oil-based—by testing a tiny corner with water or solvent.
Other media (gouache, tempera) behave differently; identifying type guides safe removal methods.
When to Stop and Consult a Conservator
If the paint removal risks tearing, flaking, or other structural damage to the canvas, stop and get a professional opinion.
You should also consult a conservator if the work is high‑value, historic, or has significant provenance.
Conservators have the tools and training to assess and treat these sensitive cases safely.
Severe Structural Damage
When dried paint has caused tears, severe buckling, loss of ground, or starts separating whole areas of the canvas, stop work and consult a trained conservator—these are structural problems that DIY fixes can make worse and may require specialized consolidation, re-lining, or stretcher/frame intervention.
You shouldn’t continue; a conservator will perform a structural integrity assessment and apply professional canvas preservation techniques to stabilize and repair.
High-Value Or Historic Works
Because high-value or historic paintings carry cultural and monetary significance, you should stop DIY treatments and consult a trained conservator as soon as you suspect original materials, provenance, or maker importance—or if the work shows aging patterns you don’t recognize.
A conservator will assess risks, document condition, and apply appropriate restoration techniques and preservation methods you shouldn’t attempt, protecting value and authenticity.
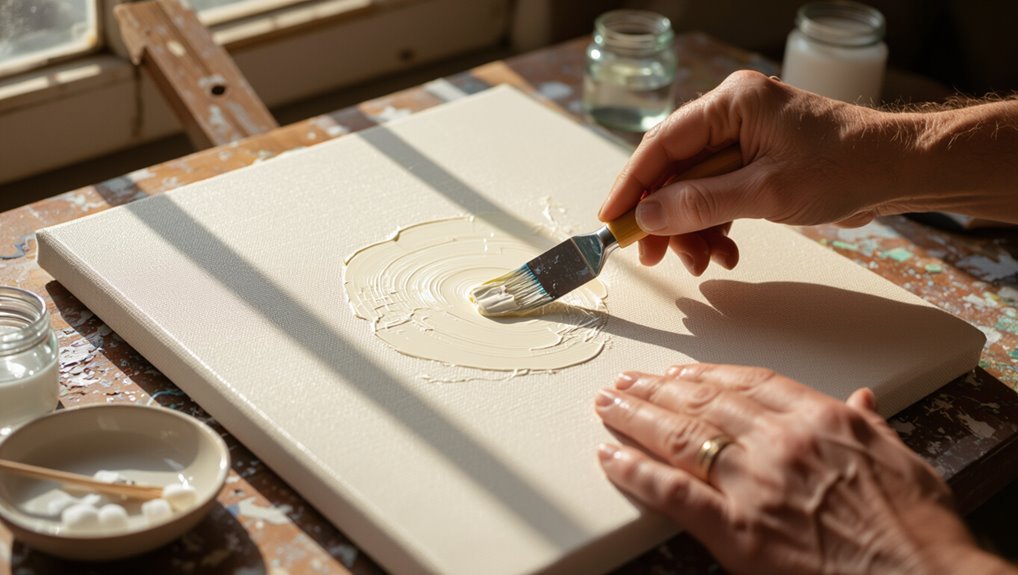
Essential Tools and Safe Materials for Canvas
Although dried paint can look permanent, you’ve got options and the right kit makes the job far easier and safer.
For canvas care and paint preservation, gather soft brushes, cotton swabs, pH-neutral soap, distilled water, methyl cellulose poultice, and archival gloves.
Use gentle solvents sparingly, a magnifier, and blotting paper.
Keep ventilation and proper lighting; avoid abrasives and household cleaners.
How to Spot-Test Without Harming the Artwork
Now that you’ve assembled your tools and set up a safe workspace, always spot-test before applying anything to the whole painting.
You’ll protect artwork safety by checking inconspicuous areas and documenting results.
Try these spot test methods:
Try these spot-test methods: small hidden area, minimal solvent, good light, photograph, and proceed only if safe
- Test a hidden corner
- Use minimal solvent on a swab
- Wait and inspect under good light
- Photograph changes
- Proceed only if no damage shows
Remove Dried Acrylic Paint: Safe Solvents and Methods
1 smart approach is to start with the gentlest means: remove dried acrylic paint using water, mild detergent, or a cotton swab dampened with isopropyl alcohol (70%) before trying stronger solvents.
Work small areas, blot don’t rub, and rinse frequently.
If needed, use commercially formulated acrylic removers sparingly.
Always spot-test and follow safe techniques to protect canvas texture and original pigments.
Remove Dried Oil Paint: Solvent and Solvent‑Free Options
If you successfully softened dried acrylic with water or alcohol, know that oil paint needs a different approach because it resists water and responds to solvents and careful mechanical removal.
You can choose solvent types or solvent‑free methods; pick safe, tested techniques. Consider:
- mineral spirits for small areas
- turpentine cautiously
- poultices for lifting
- mechanical scraping gently
- eco friendly options like citrus solvent
Remove Dried Paint: Small Splatter Step‑by‑Step
First check what kind of paint you’re dealing with—acrylic, oil, or latex—so you can choose the right approach.
For tiny splatters, gently lift dried bits with a soft brush, tweezers, or a rubber eraser before trying any wet treatment.
If residue remains, spot-clean with a suitable mild solvent or cleaning solution tested on an inconspicuous area first.
Assess Paint Type
Wondering whether that tiny dried splatter is acrylic, oil, or house paint will change how you remove it—so start by identifying the type before you touch the canvas.
Use paint composition analysis and canvas texture evaluation to guide choices.
Check:
- sheen and hardness
- smell when scraped
- solubility test on edge
- color penetration
- age of the stain
Gentle Mechanical Removal
1. You’ll begin with gentle scraping using a plastic palette knife at a low angle to lift flakes without tearing fibers. Work outward from the splatter’s edge, not the center.
Follow with soft brushes to remove loosened particles, brushing toward the lifted paint. Take frequent pauses to inspect progress and avoid overworking the canvas; stop if you see any fiber distortion.
Spot Cleaning Solutions
Choose a targeted solvent based on the paint type and fabric strength, then test it on an inconspicuous spot before applying to the splatter.
You’ll do spot cleaning gently, work outward, and blot rather than rub to avoid damage.
- Identify paint type
- Start with mild solvent
- Blot with clean cloth
- Rinse solvent residue
- Repeat cautiously for paint removal
Remove Dried Paint: Lifting Larger Patches and Drips
Tackle larger patches and drips carefully, because they need a different approach than small specks—years-old blobs can be fragile or deeply bonded to the canvas.
Use gentle lifting techniques and tested patch methods: soften edges with appropriate solvent, blot with cotton swabs, apply a dampened poultice to loosen paint, and work from perimeter inward.
Always test a hidden area first.
Mechanical Removal: Safe Scraping and Scuffing Techniques
When you tackle dried paint mechanically, pick gentle tools like plastic scrapers, rubber erasers, or fine-grit pads to avoid damaging the canvas.
Use controlled, light scuffing motions—short, consistent strokes at a shallow angle—so you remove paint without cutting fibers.
If you meet resistance, stop and reassess rather than forcing the tool.
Gentle Tool Selection
Before you start scraping, pick tools that give you control and won’t crush the canvas: a soft plastic razor blade, a rubber-tipped clay knife, and a fine-grade artist’s eraser are good choices.
Use gentle scrapers, soft brushes, and test on a corner. Keep pressure light and angle shallow.
- soft plastic razor blade
- rubber-tipped clay knife
- artist’s eraser
- lint-free cloth
- magnifying lamp
Controlled Scuffing Methods
Now that you’ve chosen gentle tools and checked a corner, it’s time to remove the dried paint with controlled scuffing.
Use a soft rubber eraser or micro spatula, hold tool at a low angle, and apply controlled pressure. Work outward from the paint edge with short, deliberate strokes.
Stop if the canvas texture changes, then reassess solvent options or consult a conservator.
Use Heat and Moisture Safely to Soften Paint
Soften dried paint gently with controlled heat and moisture to make removal easier without damaging the canvas.
Use careful heat application and moisture control to avoid warping.
Use gentle, controlled heat and limited moisture to soften paint without warping the canvas.
- Test a small area first.
- Use low heat (hair dryer) briefly.
- Apply damp cloth, not soaking.
- Work gradually, re-testing often.
- Stop if canvas tightens or paint browns.
Protect Original Paint and Ground During Removal
Before you remove dried paint, assess the existing paint layer and ground to determine their condition and sensitivity.
Test any solvent in an inconspicuous spot to confirm compatibility and minimal impact.
When you work, favor gentle mechanical methods—soft swabs, scalpel under magnification, or micro-abrasion—rather than aggressive scraping.
Assess Paint And Ground
When you’re getting ready to remove dried paint, take time to assess both the paint layer and the ground beneath it so you don’t damage the original surfaces.
You’ll check adhesion, layer fragility, ground stability, and history to plan safe cleaning. Consider canvas preparation and paint compatibility.
- Inspect surface texture
- Look for flaking
- Test firmness visually
- Note ground color
- Record previous restorations
Test Solvent Compatibility
How will you know which solvent won’t harm the original paint or ground? You’ll perform small compatibility tests using different solvent types, noting softening, lifting, or color change. Start at an inconspicuous corner, document results, and proceed only with safe options.
| Solvent | Test Area | Result |
|---|---|---|
| Water | Corner | OK |
| Alcohol | Edge | Discolors |
| Mineral spirits | Back | Safe |
| Acetone | Hidden spot | Removes varnish |
Use Gentle Mechanical Methods
Start with the softest tools and work outward, so you can lift dried paint without disturbing the original paint or ground.
You’ll rely on gentle scraping and controlled pressure, testing areas first and pausing if the ground moves.
- soft brush
- microspatula
- rubber eraser
- dental pick (careful)
- magnification and steady hand
Fix Common Problems: Smearing, Ghosting, Abrasion
If dried paint smears, leaves ghost marks, or has caused abrasion to your canvas, you can usually reduce the damage with careful, targeted techniques that avoid further harm.
Use smearing techniques like gentle blotting and low-tack adhesive lifts; apply ghosting solutions such as solvent-swab testing on hidden areas.
For abrasions, lightly retexturize with fine brushes and minimal fill to blend without overworking.
Clean, Prime, and Finish After Paint Removal
Once you’ve removed unwanted paint, clean the surface gently to remove residue, prime to stabilize the ground, and finish with a protective coating that suits the medium and display conditions.
You should do careful canvas preparation to guarantee proper paint adhesion and longevity. Follow these steps:
- Vacuum/light brush to remove dust
- Use pH-neutral cleaner sparingly
- Apply a suitable primer thinly
- Test adhesion with a sample patch
- Seal with varnish appropriate to medium
Prevent Future Accidents and Prepare Canvas for Alterations
After cleaning, priming, and sealing, take steps to prevent repeat mishaps and ready the canvas for future changes.
You’ll practice canvas care by storing pieces upright, covered, and away from direct light.
Use drop cloths, capped tubes, and organized brushes for paint prevention.
Label wet areas, test solvents on scraps, and keep a simple repair kit handy so alterations stay controlled and reversible.
Cost, Time, and Risk Checklist: DIY or Hire a Pro
When weighing whether to tackle dried-paint removal yourself or hire a pro, consider three practical factors: how much you’ll spend, how long it will take, and what risks you’re willing to accept.
Do a clear cost comparison and risk assessment, then decide.
Weigh costs and risks carefully before deciding whether to DIY or hire a professional.
- Budget limits
- Time availability
- Skill level
- Artwork value
- Potential damage and liability
Frequently Asked Questions
Can Dried Paint Removal Affect the Canvas’ Archival Lifespan?
Yes — if you use harsh solvents or abrasive methods, you’ll shorten the canvas’ archival lifespan. You’ll need gentle techniques that prioritize paint preservation and canvas integrity, or consult a conservator to avoid long-term damage.
Can Removal Change the Artwork’s Texture or Brushwork Appearance?
Like a gentle tide reshaping sand, yes — aggressive removal can alter texture preservation and erode brushwork integrity. You’ll need delicate tools and tested solvents so you don’t flatten impasto or blur the artist’s original strokes.
Are Any Household Products Absolutely Forbidden on Canvases?
Yes — you shouldn’t use harsh paint solvents like acetone or methylated spirits; they’ll damage canvas and layers. Instead, try gentle cleaning techniques, testing solvents minimally and avoiding bleach, ammonia, or abrasive cleaners.
Can Framed Canvases Be Treated Without Unframing Them?
Yes—you can, but gently. Once I tried scraping gum off a framed mirror like rescuing a fresco; using framed canvas techniques and delicate paint removal tools, you’ll cautiously lift spots without stressing the frame or stretching the canvas.
Is It Safe to Remove Paint From Painted Stretcher Bars or Edges?
Yes — you can safely remove paint from painted stretcher bars or edges if you match removal methods to paint types and respect canvas materials; use gentle solvents, test small areas, avoid saturation, and work slowly to prevent damage.
Conclusion
Think of your canvas as a garden: gentle hands pull weeds (careful solvents, soft tools), and stubborn roots need a gardener’s training (conservator’s skills). You’ll know when to tend and when to call help—test a corner first, act slowly, and stop if the soil (paint, fabric, ground) resists. With patience, proper tools, and respect for the original work, you’ll restore growth rather than tear up the bed; sometimes hiring a pro saves the harvest.