When to Use Paint Primer: Complete Guide for Best Results
You should prime whenever a surface is bare, patched, stained, porous, glossy, or when you’re changing to a much lighter or darker color because primer improves adhesion, seals porous materials, and blocks stains for an even topcoat. Use oil-based primers for tough stains and durability, and latex primers for faster drying and easier cleanup. Spot-prime small repairs and full-prime panels for uniformity. Follow prep, sanding, and recoat windows for best results, and keep going to learn specific tips.
Quick Checklist: Do You Need Primer?
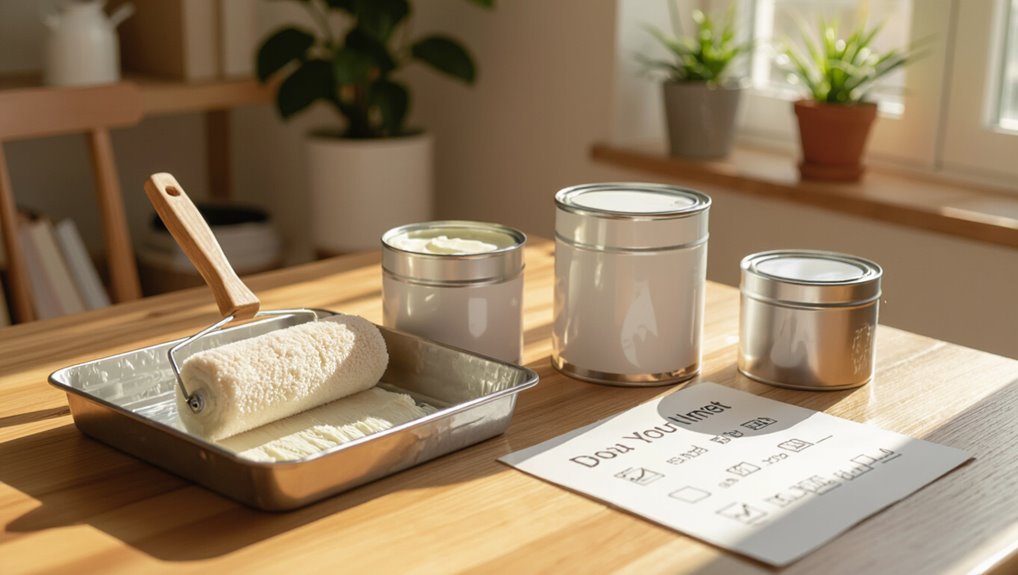
Wondering whether you need primer? You’ll assess surfaces, stains, and color changes quickly.
Note primer benefits: improved adhesion, sealed porous surfaces, and stain blocking.
Check substrate type, previous finish, and damage. If unsure, test a small area.
Prepare surfaces by cleaning and sanding, then pick proper application techniques—brush, roller, or sprayer—to guarantee even coverage and strong paint performance.
When to Always Prime: Simple Rules
1 clear rule: always prime bare or repaired surfaces before painting. You should also prime stained, porous, or drastic color-change areas. Choose primer types suited to material and finish, and match application methods to conditions.
| Surface | Primer |
|---|---|
| Bare wood | Oil or latex |
| Repaired drywall | PVA |
| Stained spots | Stain-blocking |
| Exterior metal | Rust-inhibitor |
How Primer Improves Adhesion and Prevents Peeling
Because primer creates a stable, compatible layer between the surface and your topcoat, your paint has something to grip onto instead of sliding off or soaking in unevenly.
You get clear adhesion benefits: primers bond to substrates and present a uniform surface for paint, reducing stress from expansion, moisture, and wear.
That controlled bonding is essential for peeling prevention and long-lasting finishes.
Priming New Drywall and Joint Compound
If you’ve just installed drywall or finished taping and mudding, prime those surfaces before painting so the joint compound and paper absorb evenly and the topcoat goes on smoothly.
After drywall preparation, let mud fully dry and sand lightly.
Use a high-quality drywall primer designed for joint compound application to seal porous areas, prevent flashing, and guarantee consistent finish and adhesion for your paint.
Priming Bare Wood and Millwork
Once your drywall is sealed, turn attention to bare wood and millwork before painting; they’ll soak up finish unevenly without a proper primer.
You should do thorough bare wood preparation, sanding along the wood grain, cleaning dust, and choosing primer types suited to tannin-rich species.
Millwork sealing prevents bleed-through and evens surface finish, so apply a compatible primer and let it cure before topcoat.
Priming Over Existing Paint: When to Prime vs. Recoat
When you’re working over existing paint, deciding whether to prime or simply recoat comes down to surface condition, paint type, and the change in color or sheen you’re after; prime when the old finish is chalky, peeling, stained, or a much darker color.
But you can often recoat if the surface is sound, clean, and the new topcoat is similar in color and sheen.
Use priming techniques that address stains and adhesion, and check paint compatibility—latex over oil may need bonding primer, while similar systems can be recoated after proper cleaning and scuffing.
Priming Glossy and Hard‑To‑Bond Surfaces
When you’re working with glossy or hard-to-bond surfaces, proper surface preparation is essential—clean, sand or scuff, and remove contaminants before you touch primer.
Choose a bonding primer formulated for slick substrates, and check compatibility with your topcoat.
Apply thin, even coats using the recommended tools and dry times to guarantee a lasting bond.
Surface Preparation Steps
Because glossy or hard-to-bond surfaces repel paint, you’ll need to prepare them differently than porous ones. Identify surface types, clean, scuff, degrease, and dry. Use proper preparation tools: sandpaper, abrasive pads, cleaners, and tack cloths. Follow this quick checklist:
| Step | Action | Tool |
|---|---|---|
| 1 | Clean | Degreaser |
| 2 | Scuff | Sandpaper |
| 3 | Dust | Tack cloth |
| 4 | Inspect | Light |
| 5 | Dry | Cloth |
Best Bonding Primers
After you’ve cleaned, scuffed, and dried glossy or hard-to-bond surfaces, pick a bonding primer that’s formulated to grip slick materials like laminate, glazed tile, glass, and certain plastics.
Choose from best bonding options—shellac-based for quick adhesion, solvent-based for durability, or specialty acrylic adhesion primers.
Match primer types to the substrate and topcoat to guarantee lasting adhesion and finish.
Application Tips And Techniques
Start by preparing a clean, dry workspace and gather the right tools—acid-etch or scuff pad, tack cloths, appropriate bonding primer, brushes or a high-density foam roller, and respirator if using solvent or shellac-based products.
For glossy, use proper primer selection, scuff, control application speed, employ spray application plus roller techniques and precise brush methods.
Focus on edge handling, texture matching, multi coat strategies, and drying considerations while monitoring environmental factors.
Stain‑Blocking Primer: When to Use It
If you’re dealing with tannin stains, water marks, smoke damage, or ink, a stain‑blocking primer can stop bleed‑through before you paint.
Check the surface for contamination, repair any damage, and sand or clean as needed so the primer adheres properly.
Apply primer after stains are dry and cleaned, and before your finish coats for best results.
Identify Stain Types
When you’re deciding whether to reach for a stain‑blocking primer, the first step is identifying what’s causing the discoloration—different stains need different primers and techniques.
You’ll classify stains (water, smoke, grease, tannin, ink) for accurate stain identification, then choose a primer rated for that type.
Proper stain removal methods and stain‑blocking primers prevent bleed‑through and guarantee even topcoat coverage.
Surface Preparation Needs
After you’ve identified the stain type, assess the surface condition to determine how much prep is required before applying a stain‑blocking primer.
You’ll clean, sand, and degrease based on surface types—wood, drywall, masonry, or previously painted surfaces.
Note texture considerations: heavy texture may trap stains and need spot sanding or a thicker primer.
Repair cracks and remove loose material first.
Application Timing Tips
Because stains can reappear through topcoats, plan to apply a stain‑blocking primer as soon as you’ve cleaned and repaired the surface and before you lay down any finish paint; doing so locks in tannins, smoke, grease, or water marks and prevents costly rework.
Time your work with application temperature tips in mind, and monitor drying humidity factors so primer cures fully before topcoat application.
Tackling Water, Smoke, and Nicotine Stains With Primer
If stains from water, smoke, or nicotine are discoloring walls or ceilings, a stain-blocking primer is usually your best first step; it seals contaminants, prevents bleed-through, and creates a stable base for paint.
You’ll assess stain removal techniques and primer selection criteria, then:
- Clean surface thoroughly
- Apply stain-blocking primer
- Reinspect for bleed-through
- Topcoat with quality paint
Priming Tannin‑Rich and Knotty Wood
When you’re working with tannin-rich or knotty wood, you need a primer that stops natural oils and dark stains from bleeding through your finish; otherwise your topcoat won’t look even or last.
For proper wood preparation, choose product selection focused on tannin bleed control and knot sealing, guarantee finish compatibility, create a moisture barrier, address grain raising and surface texture, and follow recommended application techniques to boost paint adhesion.
Metal and Rust: Metal‑Specific Primers Explained
After sealing knotty wood and blocking tannin bleed, you’ll face a different challenge with metal surfaces: rust and poor adhesion.
You must perform metal preparation to remove surface rust, choose primer types that promote metal adhesion, and plan primer application for rust prevention.
Protective coatings increase weather resistance and stop metal corrosion.
Protective coatings boost weather resistance and halt corrosion, keeping metal surfaces durable and maintenance-free.
- Frustration
- Relief
- Confidence
- Pride
Oil vs. Latex Primer: Which to Choose?
Wondering whether oil or latex primer will work best for your project?
You’ll pick oil when durability and stain-blocking matter — oil based benefits include sealing knots and resisting tannin bleed.
Choose latex for faster drying, easier cleanup, and flexible adhesion; its latex versatility suits walls, drywall, and mild exterior jobs.
Match primer to surface and finish for best results.
Specialty Primers: When Shellac or Other Types Help
If you’re dealing with tough stains, strong odors, or surfaces that won’t take standard primers, reach for specialty primers like shellac, shellac-based blends, or high-solvent formulas; they bond where others fail, block tannin and water stains, and dry fast for quick recoats.
You’ll appreciate shellac benefits and specialty applications that rescue problem areas.
- Relief
- Confidence
- Speed
- Durability
Spot Priming vs. Full‑Panel Priming: How to Decide
How do you know when to touch up primer only where flaws show versus priming the entire panel?
You’ll favor spot priming benefits for small repairs, knots, or isolated stains—it’s faster and uses less product.
Choose full panel considerations when color uniformity, sheen match, or widespread surface issues exist; priming the whole panel prevents flashiness and guarantees an even topcoat.
When You Can Safely Skip Primer
When the surface is already clean, uniform, and previously painted with a compatible topcoat, you can usually skip primer and go straight to paint. Doing so saves time and materials without compromising the finish as long as the substrate isn’t porous, stained, or damaged.
You’ll still weigh primer myths and primer alternatives, and consider:
- Surface condition
- Color change
- Paint quality
- Expected wear
Matching Primer to Bold Color Changes
If you’re moving from a dark color to a light one, you’ll want a primer that blocks the old pigment so you don’t need endless coats.
Choose a tinted or high-hide primer to neutralize bold reds, blues, or oranges before topcoating.
That way you’ll get true color with fewer coats and less effort.
Covering Dark To Light
Because drastic color shifts demand more than a single coat, you’ll want to choose a primer that specifically blocks the old hue and boosts coverage for the new one.
You’ll use color change techniques and shade matching strategies to plan. Follow these emotional, practical steps:
- Visualize the result.
- Test with swatches.
- Apply tinted primer.
- Finish with thin topcoats.
Neutralizing Bold Pigments
Though bold pigments can feel permanent, you can neutralize them with the right primer so your new color lays true.
Choose a high-hide, tintable primer that counters undertones using color theory—warm primers for cool pigments, cool primers for warm ones.
Consider primer opacity and pigment absorption; thicker, stain-blocking formulas prevent bleed-through.
Test a small area before full application to guarantee accurate coverage.
How Primer Reduces Your Topcoat Needs
When you apply a quality primer, it evens out porous or patchy surfaces so your topcoat covers better and you need fewer full coats.
A good primer evens porous, patchy surfaces so your topcoat covers better—fewer coats, truer color, less work.
You’ll boost paint adhesion and enjoy topcoat reduction, saving time and money while getting truer color.
Feel confident, relieved, efficient, and proud.
- Relief
- Confidence
- Efficiency
- Pride
Application Timing: Drying Times and Recoat Windows
Check the primer can surface-dry in the time recommended on the label before you move on, since different substrates and products set at different rates.
Follow the recoat window guidelines to avoid poor adhesion or trapped solvents—too soon or too late can cause problems.
Also remember temperature and humidity affect cure times, so adjust your schedule when conditions aren’t ideal.
Surface Drying Times
Paint dries in stages, and knowing those stages helps you schedule recoat windows to avoid tacky, uneven, or peeling finishes.
You’ll monitor surface conditions and drying factors like humidity, temperature, and ventilation. Check tack-free time before recoating.
Follow these emotional reminders:
- Relief: patience pays.
- Frustration: don’t rush.
- Confidence: proper cure.
- Pride: smooth finish.
Recoat Window Guidelines
Now that you know how drying stages and tack-free times work, plan your recoat window around those cues rather than a fixed clock.
Check tack, sheen uniformity, and manufacturer recoat timing to avoid solvent entrapment or poor adhesion.
For recoat considerations, wait until the primer supports light sanding without gumminess.
If unsure, test a small area before full recoating.
Environmental Impact On Cure
Because temperature, humidity, and airflow directly affect how a primer dries and when you can safely recoat, you should factor local conditions into every timing decision.
You’ll monitor environmental conditions to predict curing times and adjust schedule.
Consider:
- Temperature effects — slow in cold, fast in heat.
- Humidity levels — high humidity delays cure.
- Airflow — boosts drying.
- Weather forecasts.
Common Priming Mistakes and How to Avoid Them
Although priming seems straightforward, it’s easy to make mistakes that undermine your paint job — from skipping surface prep to using the wrong primer for the material.
You’ll encounter common errors like applying over dust, not sanding glossy surfaces, or ignoring dry times.
Avoiding pitfalls means choosing the right primer, prepping properly, following label instructions, and testing a small area first.
Primer Cost vs. Performance: When It’s Worth It
Mistakes can cost you more than a poor finish—they can make you question whether splurging on premium primer is worth it.
You’ll weigh primer types, cost analysis, performance metrics, budget considerations, and application costs to judge investment value and long term benefits.
Consider this emotional checklist:
- Regret
- Relief
- Confidence
- Pride
Make a clear quality comparison before buying.
Frequently Asked Questions
Can I Tint Primer to Better Match My Final Paint Color?
Yes — you can tint primer to better match your final color; use tinting techniques for improved color matching, but you’ll want to test small areas first, keep primer opacity, and follow manufacturer limits to avoid coverage loss.
Will Primer Prevent Mold and Mildew in High‑Humidity Areas?
Yes — using a mold-resistant primer can help; studies show mold affects about 10% of homes. You’ll get mold resistant properties beneficial in high humidity applications, though proper ventilation and cleaners remain essential.
Can I Use Spray Primer for Large Furniture Pieces?
Yes — you can use spray primer for large furniture pieces; you’ll speed coverage with proper spray technique, but you’ll need to adjust for furniture materials, thin coats, good ventilation, and masking to avoid runs, drips, and overspray.
How Long Does Unopened Primer Last in Storage?
Ironically, unopened primer can seem immortal, but you’ll typically get 2–5 years of shelf life if you keep it sealed and dry; ideal storage conditions are cool, stable temperature and away from direct sunlight or freezing.
Can I Mix Different Brands of Primer Together?
You can, but you shouldn’t mix different brands because primer types and formulations vary; you’ll risk uneven primer application, adhesion problems, or curing issues. Test small batches and stick to one manufacturer when possible for reliable results.
Conclusion
You’ve got the essentials to know when primer matters, so don’t skip it—especially on new drywall, bare wood, or stained surfaces. If you’re worried primer adds time or cost, remember it often cuts overall work by improving adhesion, reducing topcoat coats, and preventing costly repainting. Follow the simple rules here and you’ll save effort and money long-term. Trust the process: a little primer now means better, longer-lasting results later.