How to Cover Chipped Paint on Wall for a Smooth Look
You can get a smooth wall by removing loose paint, sanding the chip edges until they’re feathered, filling with spackle or joint compound, and letting it dry fully. Sand the patch flat, wipe with a tack cloth, prime the repaired spot, then apply matching paint with a small brush or roller for a seamless blend. Protect nearby surfaces and check for moisture or larger damage first; keep going to learn tips on color matching, batching repairs, and preventing future chips.
Quick Step-by-Step Fix for Chipped Paint
Start by gathering your tools: sandpaper, a putty knife, spackling compound, primer, matching paint, and a small brush or roller.
You’ll remove loose chipped paint, sand edges smooth, fill gaps with spackle, sand again, wipe clean, apply primer, then paint in thin coats.
These repair techniques restore surface continuity and blend repairs so the patch matches surrounding wall texture.
Inspect Chipped Paint and Spot Hidden Damage
Before you start patching, take a close look for surface cracks and hairline splits around the chipped area.
Check for moisture stains or soft spots that could mean a leak or high humidity.
Gently probe the surrounding plaster—if it’s loose or crumbling, you’ll need to repair that before repainting.
Check For Surface Cracks
Although chipped paint is obvious, you should take a close look for hairline cracks and soft spots that signal deeper damage.
Use a flashlight and touch-test to perform crack detection and surface evaluation. Mark areas that flex, crumble, or reveal gaps.
Note whether cracks follow seams or joints, as those need reinforcement before filling. Record locations for repair prep.
Look For Moisture Signs
If water’s gotten behind the paint, you’ll often see stains, bubbling, or a soft, spongy feel when you press the area—signs that moisture has compromised the substrate and could hide mold or rot.
During moisture detection and wall inspection, note these indicators:
- Discolored streaks or haloed stains
- Paint blistering or bubbling
- Damp odor or mildew spots
Probe For Loose Plaster
Press gently around the chipped area and listen for hollow sounds or crumbling—those telltale cues mean the plaster’s lost its bond and may need patching.
If you detect loose plaster, widen the probe slightly with a putty knife to map damage.
Mark the compromised zone, assess wall integrity, and decide whether to reattach, patch, or remove degraded material before repainting for a durable, smooth finish.
When to Patch vs. Repaint the Whole Wall
Decide based on the size, frequency, and visibility of chips: patch small, isolated flaws, but repaint when chips cover large areas, cluster in high-visibility spots, or the existing finish is faded or mismatched.
You’ll choose patching techniques for quick fixes; use repainting strategies for uniform finish and color match.
- Small chips: spot patching
- Local clusters: partial repaint
- Widespread damage: full repaint
Tools and Materials You’ll Need
Before you start, gather the essential painting tools like brushes, rollers, and a putty knife so you won’t stop mid-job.
You’ll also need surface prep materials—sandpaper, filler, primer, and tack cloth—to guarantee a smooth patch.
Finally, pick matching paints and the appropriate finish (matte, eggshell, or semi-gloss) for a seamless repair.
Essential Painting Tools
You’ll only need a handful of tools and materials to fix chipped paint effectively: a putty knife and patching compound for filling chips, sandpaper or a sanding sponge to smooth the repair, a primer and matching paint, small brushes or a mini roller for touch-ups, painter’s tape and drop cloths to protect surrounding surfaces, and a damp cloth for cleaning—keep these on hand before you start so the job goes quickly and cleanly.
- Choose paint finishes for durability.
- Pick brush types for texture match.
- Use a mini roller for smooth coverage.
Surface Prep Materials
Now that you’ve got your painting tools lined up, prep materials will make the repair stick and look seamless.
Gather sandpaper (various grits), putty knife, spackling compound, patching mesh, tack cloth, primer, and a small bucket for mixing.
Use surface preparation techniques like sanding, cleaning, and filling.
Choose effective repair materials rated for wall surfaces to guarantee durability and smoothness.
Paints And Finishes
Paint selection and finish choice make a big difference in how well your repair blends and how durable it is, so pick a paint that matches the existing color and sheen.
Use eco friendly paints when possible, and match paint finishes (matte, eggshell, satin) to avoid noticeable patches.
- Sample small area
- Use same sheen
- Feather edges for blend
Protect Surroundings and Prepare the Area
Before you start scraping or filling, clear the area and protect everything that could get splattered—furniture, floors, trim, and outlets—so dust and paint don’t create extra work later. Use drop cloths, tape, and plastic sheeting for surface protection during area preparation. Cover vents and switch plates; move small items.
| Item | Purpose | Tip |
|---|---|---|
| Drop cloth | Catch debris | Secure edges |
| Painter’s tape | Clean lines | Press firmly |
| Plastic sheeting | Dust barrier | Overlap seams |
| Mask | Safety | Replace if damp |
Remove Loose Paint Without Damaging the Wall
Start by gently scraping away any flaking or peeling paint with a putty knife or scraper held at a low angle so you lift loose bits without gouging the drywall or plaster.
Work carefully to preserve wall integrity and improve paint adhesion.
- Remove all loose fragments.
- Vacuum debris and wipe with a damp cloth.
- Inspect for soft spots before priming.
Sand Chip Edges for a Feathered Repair
Start by feathering the chip edges so the patch will blend with the surrounding wall.
Use fine-grit sandpaper and sand lightly until the edges are smooth.
Aim for a seamless shift so new paint lays down evenly.
Feather The Chip Edges
Once the loose paint’s off and the area’s clean, sand the chip edges to create a gentle slope from the surrounding paint into the bare spot.
You’ll use careful feathering techniques and subtle blending methods so the patch blends seamlessly. Focus on smooth shifts and minimal edge ridges.
- Light sanding strokes
- Check for smooth contour
- Remove dust before fill
Use Fine-Grit Sandpaper
1. You’ll use fine-grit sandpaper to feather chip edges smoothly. Work gently with controlled sanding techniques, following the chip’s perimeter until shifts blend.
Avoid aggressive pressure to prevent gouges. Check paint compatibility before sanding glossy surfaces—some finishes need scuffing, others require priming first.
Clean dust with a damp cloth, then inspect the blend before moving to touch-up.
Smooth Transition To Paint
Before you paint, lightly sand the chip edges so the old and new coatings blend seamlessly; feathering creates a gradual slope from intact paint into bare substrate that hides the repair.
You’ll guarantee color blending and texture matching for an invisible finish.
Follow these steps:
- Sand outward with fine-grit for a smooth shift.
- Clean dust before priming.
- Apply thin coats, feathering each layer.
Choose the Right Filler for Small Flakes or Deep Gouges
When you’re fixing chipped paint, picking the right filler makes the difference between a quick touch-up and repeated repairs.
Assess damage: small flakes need lightweight spackle while deep gouges demand patching compound or epoxy.
Assess damage: use lightweight spackle for small flakes, patching compound or epoxy for deep gouges.
Choose filler types based on depth and substrate. Match drying time and sandability to your repair techniques.
Test a small area to verify adhesion and smooth sanding before priming.
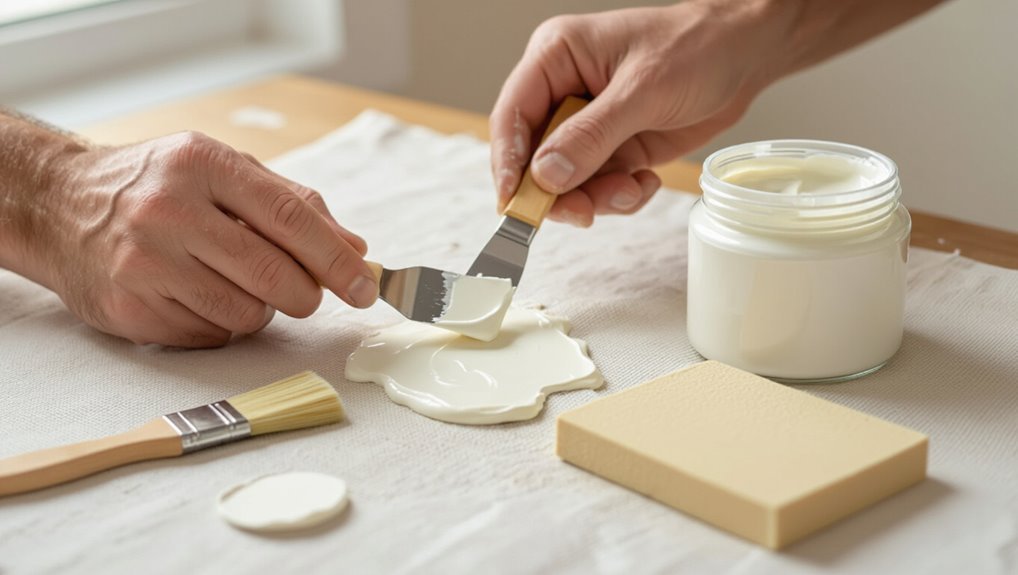
Apply Spackle or Putty for Small Chips
Grab a putty knife and a small tub of spackle, and press a thin bead of compound into each chip so it fills the void without overbuilding.
You’ll check putty consistency, smooth edges, and let it cure before sanding. Proper spackle application avoids lumps and sinking.
- Feather edges
- Match putty consistency
- Sand flush and dust off
Use Joint Compound for Larger or Textured Repairs
If the chip is larger or the wall has texture, you’ll want to assess the damage size before you start.
Apply joint compound evenly with a putty knife, building thin layers until the surface is flush.
Once it’s dry, sand and feather the edges so the repair blends smoothly with the surrounding wall.
Assess Damage Size
Start by measuring the chipped area so you can decide whether simple spackling will do or if you need joint compound for a larger or textured repair.
You’ll perform a quick damage assessment to judge chip size, depth, and surrounding texture so you pick the right approach.
- Measure diameter and depth
- Check surrounding texture
- Note underlying material
Apply Compound Evenly
Spread joint compound smoothly across the chip, working from the edges toward the center so you create an even, feathered surface that blends with the surrounding wall.
Use proper compound application techniques: load your knife thinly, press gently, and push excess away.
For textured repairs, match the texture while keeping layers thin, letting each set before adding more to aid achieving smooth finishes.
Sand And Feather Edges
Smooth the repair by sanding and feathering the edges so the patched area blends seamlessly with the surrounding wall.
You’ll use joint compound for larger or textured repairs, employ feathering techniques to taper edges, and follow sanding tips to avoid gouges.
Sand progressively finer grit, wipe dust, and inspect before priming.
- Start coarse to blend
- Refine with fine grit
- Clean and prime
Feather and Smooth Filler for Seamless Blending
Feather the filler into the surrounding paint so the repair tapers imperceptibly into the wall; you’ll want thin, even layers that you scrape at a low angle to erase ridges and build-up.
Use feather application and precise blending techniques, smoothing each layer with a flexible putty knife.
Let thin coats dry fully, sand lightly between passes, and finish with a final skim for an invisible changeover.
Prime Repaired Spots for Adhesion and Color Match
Once your filler is feathered and sanded flush, prime the repaired spots to promote adhesion and lock in a uniform base for color matching.
After feathering and sanding, prime repaired areas to ensure adhesion and a uniform base for accurate color matching.
Use a stain-blocking, high-adhesion primer and let it cure.
Then:
- Apply thin coats for even coverage.
- Sand lightly between coats to refine texture.
- Test small swatch to verify color matching and adhesion techniques.
Blend Touch-Up Paint With Brush and Roller
Start by loading a small, angled brush with touch-up paint and carefully cut a thin outline around the repaired area.
Then immediately follow with a mini-roller to roll the paint inward and blend the texture with the surrounding wall.
Use appropriate brush types and light pressure, alternate short roller passes, and employ proven blending techniques so the repaired spot dissolves into the existing finish.
Match Sheen and Texture So Repairs Disappear
After you blend the paint and texture with a brush and mini-roller, make sure the repaired spot has the same sheen and surface texture as the rest of the wall so it disappears.
You’ll check sheen matching and use texture blending to mimic surrounding finish.
Tips:
- Compare gloss with a flashlight.
- Feather edges lightly.
- Match stipple or roller pattern.
Paint Trim and Corners Near Chipped Areas
Carefully paint trim and corners near a repaired spot to keep the fix from standing out; you’ll want crisp lines and consistent finish where wall meets trim.
Use fine brushes and painter’s tape for precise trim techniques, feathering edges to blend colors.
For corner care, paint from the trim outward, steady your hand, and remove tape before paint fully dries for clean edges.
Repair Chipped Paint on Textured Walls
Textured walls need a slightly different approach than flat surfaces, so you’ll want to match both the paint color and the texture before filling chips.
Use textured wall techniques and precise paint chip solutions to blend repairs so they disappear.
- Clean and prime
- Match texture with compound or spray
- Feather paint into surrounding area
Fix Chipped Paint in High-Traffic Areas and Doorways
In high-traffic areas and doorways you’ll need to prep surfaces thoroughly by cleaning, sanding, and priming any exposed patches so the repair bonds well.
Use a durable, washable touch-up paint or a higher-sheen finish to resist scuffs and make future cleaning easier.
Apply thin, even coats and feather the edges so the repair blends with the surrounding wall.
Prep High-Traffic Surfaces
Start by clearing the area and removing any loose paint, dirt, or grease from the high-traffic surface and doorway trim so new paint will adhere properly.
Then sand, clean, and prime to improve surface durability and prevent future chips.
You’ll want to:
- Sand edges smooth.
- Clean with degreaser.
- Apply a bonding primer for high traffic areas.
Use Durable Touch-Up Paint
After you’ve sanded, cleaned, and primed those high-traffic spots and door trim, pick a durable touch-up paint that matches both color and finish so repairs blend and hold up under frequent contact.
Apply thin coats, feathering edges to guarantee color consistency and avoid overlap. Let each coat dry fully, then assess for texture or sheen differences.
Use a clear durable finish if extra protection’s needed.
Handle Lead Paint Concerns Safely in Older Homes
Because homes built before 1978 often used lead-based paint, you should assume older chipped paint could be hazardous until testing proves otherwise.
You should follow safety precautions, use proper testing methods, follow renovation guidelines, and seek professional help when needed.
- Test with certified kits or pros.
- Contain dust and wear PPE.
- Hire certified contractors for removal.
Speed-Dry Chipped Paint Repairs for Faster Reuse
When you need a room back in use quickly, speed-dry techniques let you repair chipped paint without long wait times by using fast-curing primers, quick-dry topcoats, and heat- or fan-assisted drying.
You’ll sand, clean, prime, and apply quick dry products, working in thin coats for even coverage. Use a fan or low-heat source to shorten cure time safely and monitor tackiness.
Check Repair Quality and Fix Flaws
1. Inspect the patched area under good light, evaluating smoothness and paint match. Use a fingernail to check edges; you’ll spot flaws quick.
Perform a quality evaluation, noting texture, adhesion, and color.
- Sand high spots
- Reapply thin filler
- Feather paint edges
Use proven repair techniques, retouch, then reevaluate until seamless.
Prevent Future Chipping: Humidity, Impact, and Prep Tips
To keep paint from chipping again, you’ll want to control indoor humidity, protect high-impact areas, and improve surface preparation before you paint.
Use a dehumidifier or proper ventilation to prevent moisture-related failure, add corner guards or durable trim where bumps happen, and always clean, sand, and prime for better adhesion.
If you do these three things, your repairs will last much longer.
Control Indoor Humidity
If you want chipped paint to stay gone, you’ll need to control indoor humidity because moisture is a prime culprit in paint failure.
You should monitor humidity, use dehumidifiers, and improve ventilation to protect repairs and improve indoor air quality.
Try these humidity control methods to prevent re-peeling:
- Run exhaust fans in wet rooms.
- Use a dehumidifier.
- Seal leaks and insulate walls.
Protect High-Impact Areas
Because high-traffic spots take the most abuse, you should reinforce them before repainting to keep chips from coming back.
Identify high impact areas like corners, doorways, and stairwells.
Apply protective measures: corner guards, chair rails, and durable trim paint.
Use washable, impact-resistant finishes and pads behind furniture.
Regularly inspect and touch up nip-and-tuck spots to prevent larger repairs.
Improve Surface Preparation
Start by getting the surface right: remove loose paint, sand glossy spots, and clean away dust and grease so new paint can bond properly.
You’ll reduce future chipping by controlling humidity, limiting impact, and using proper prep.
Apply surface cleaning techniques, patch and sand, then use quality primer applications before painting.
- Control humidity
- Patch and sand
- Use primer
Tackle Multiple Chips Efficiently Across a Room
When you’ve got chips scattered across a room, group them by size and proximity so you can work systematically without wasting time or materials.
Next, set up stations with needed supplies for chip repair techniques: filler, sandpaper, primer, and matching paint.
Work from largest to smallest, batching efficient touch ups to minimize drying cycles, tool changes, and cleanups for faster, uniform results.
Use Color-Correcting Tricks for Slight Mismatches
Start by evaluating the undertone and hue of the surrounding paint so you know whether the chip reads warmer, cooler, or more muted than the wall.
Use color-correcting glazes—thin translucent mixes—to nudge the patched area toward the correct tone without repainting the whole wall.
Blend the edges with a tiny tint on your brush or sponge so the repair fades seamlessly into the existing finish.
Assess Undertone And Hue
Color matters more than you might think: before matching paint, identify both the wall’s undertone (cool, warm, or neutral) and its surface hue.
A close brightness match can still look off if the undertone clashes. Use color theory and undertone matching to guide decisions so repairs disappear.
- Observe in natural light.
- Compare small swatches.
- Adjust tint subtly.
Use Color-Correcting Glazes
If your swatches and undertone checks still leave a faint mismatch, glazing offers a subtle fix that won’t require repainting the whole wall.
You can mix a translucent glaze with a tiny amount of tint to neutralize cool or warm casts. Use basic color theory to choose complementary modifiers, apply thin layers with glazing techniques, and stop when the patch visually disappears.
Blend Edges With Tint
When a repaired patch still reads slightly off, blend the edges with a tiny tint to help it vanish into the surrounding wall.
You’ll use subtle color matching and careful blending techniques to feather tone and reduce haloing.
Try these tweaks:
- Mix a drop of paint with glaze for gradual shift.
- Use a soft brush to feather outward.
- Compare in different light.
When Chipped Paint Needs a Pro (Cost, Size, Lead Risks)
Because damaged paint can signal deeper problems, you’ll want to call a pro for larger areas, uncertain causes, or any risk of lead — and knowing typical costs and safe limits helps you decide.
You should request a cost analysis and prioritize lead testing if your home predates 1978.
Pros handle structural rot, extensive flaking, or hidden moisture; they’ll advise remediation, permits, and safe disposal.
Estimate Time and Cost for a Typical Chip Repair
A small paint chip repair — about the size of a quarter or a single 2–3 inch scrape — typically takes you or a pro 30–90 minutes from prep to touch-up, while larger clusters or textured surfaces can take 2–4 hours to sand, prime, and blend.
Expect labor for a pro to run $50–$150 per hour, with most single-chip jobs costing $30–$150 total depending on travel, materials, and minimum service fees.
- Quick time estimate: plan 30–90 minutes.
- Basic cost breakdown: $30–$150 for single chips.
- Complex fixes: 2–4 hours, higher labor and materials.
Maintain Painted Walls to Keep Them Looking Fresh
After you finish repairing chips, keep the rest of your walls in good shape with simple, regular care that prevents new damage and makes touch-ups easier.
Wipe surfaces monthly using gentle wall cleaning techniques to remove dust, grease, and stains. Use soft cloths, mild cleaner, and spot-test first.
Follow paint maintenance tips like avoiding harsh scrubbing, controlling humidity, and addressing scuffs quickly to preserve finish.
Quick Troubleshooting: Common Touch-Up Issues and Fixes
You’ll run into a few predictable problems when touching up chipped paint, but most have simple fixes you can do with basic tools and a little patience.
Use proper touch up techniques and match paint selection to finish. Troubleshoot quickly:
- Visible patch — feather edges, thin layers.
- Color mismatch — check batch code, blend with glazing.
- Brush marks — use light cross-strokes, sand between coats.
Frequently Asked Questions
Can Chipped Paint Hide Mold or Mildew Growth Behind the Surface?
No, chipped paint can’t reliably hide mold or mildew; you’ll risk masking growth. For mold prevention, inspect, clean, and treat affected areas before repainting, and use proper paint sealing to block moisture and spores.
How Can I Repair Chips on Plaster Vs Drywall Differently?
Imagine running your hand over a wall; for plaster repair you’ll chip away loose bits, apply bonding compound and plaster, then sand smooth. For drywall repair you’ll use joint compound, tape seams, feather edges, and sand until seamless.
Will Heat Guns Help Remove Paint Chips Without Damaging Plaster?
Yes — heat guns can be effective, but you’ll need low heat and steady motion to avoid blistering or loosening plaster. Prioritize heat gun effectiveness and gentle plaster care, test a small area, and wear safety gear.
Can Wallpaper Be Patched Instead of Repainting After Chips?
About 60% of DIYers prefer patching over full redecorations; yes, you can patch wallpaper instead of repainting. You’ll use wallpaper maintenance tips and patching techniques, matching pattern, adhesive, smoothing seams, and sealing edges.
How Long Should New Paint Cure Before Hanging Pictures?
You should wait at least 2 weeks for paint curing before picture hanging; lacquer or oil-based paints need longer, up to 30 days. Lightly test adhesion, and use proper anchors so hanging won’t damage the fresh finish.
Conclusion
You’ve fixed the chip, but don’t stop now — the wall’s story keeps unfolding. Stay watchful: tiny cracks today can become ugly repairs tomorrow. Keep cleaning, touch up, and seal vulnerable spots so the room keeps its calm look. If a stubborn patch reappears, don’t shrug it off — there might be hidden moisture or old lead paint waiting to surprise you. Keep tools ready; the next flaw will reveal what you really need to do.