Does Primer Actually Stop Paint From Peeling? the Truth Explained
Yes — primer can largely stop paint from peeling when you use the right type and prepare the surface properly. It improves adhesion, seals porous areas, and blocks stains that would otherwise push paint loose, but it won’t fix moisture, structural decay, or brittle old coatings underneath. Pick a primer matched to your substrate, apply thin even coats, and follow dry times; skip prep and it won’t help. Keep going to see step‑by‑step fixes and common pitfalls.
Quick Answer Does Primer Stop Paint from Peeling?
Yes — primer can stop paint from peeling when you use the right type and apply it to clean, sound surfaces.
It won’t fix peeling caused by moisture, severe surface damage, or incompatible old finishes without proper repair.
Keep that in mind as you choose primer and prep the surface.
One-sentence conclusion
While primer won’t guarantee paint never peels, it dramatically reduces peeling risk by improving adhesion, sealing surfaces, and blocking stains so your paint lasts longer.
You should use primer because it addresses the main causes of failure, so when asking “does primer stop paint peeling” you’ll find it doesn’t promise perfection but gives a reliable, cost-effective way to minimize peeling.
When primer is effective vs when it isn’t
If you prep the surface properly and pick the right primer for the job, primer will greatly lower the chance of paint peeling; however, it won’t help when underlying problems like moisture, structural movement, or old flaking paint aren’t fixed first.
You’ll see success when you:
- seal bare substrate and stains
- improve adhesion on glossy surfaces
- block tannins and rust
Avoid relying on primer alone.
How Paint Peeling Happens Basic Understanding
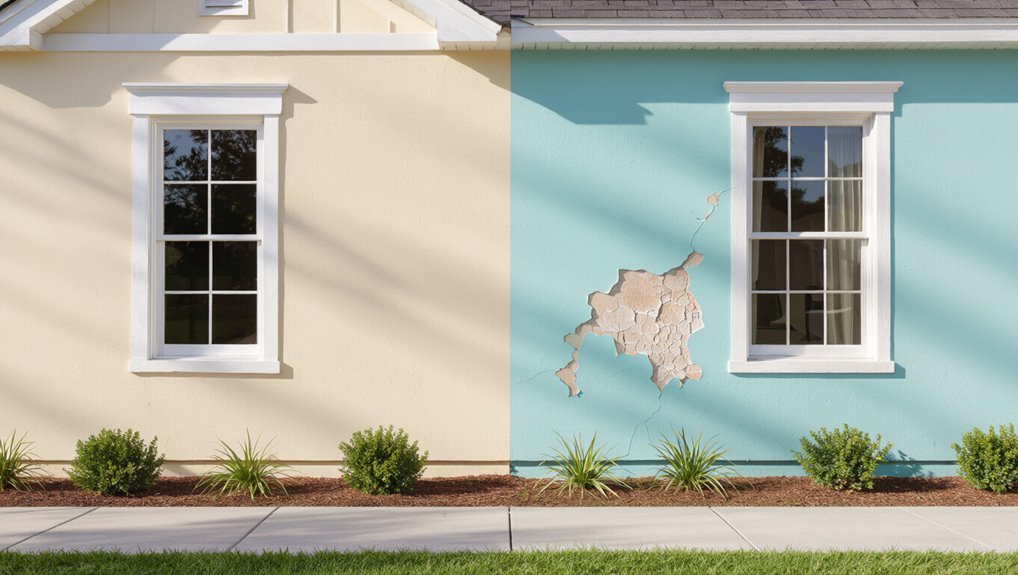
Paint peeling happens when the paint film separates from the surface, showing flaking, blistering, or curling that you can see or scrape off.
It’s usually caused by adhesion failure, trapped moisture, problems with the substrate, or simply old, brittle paint.
Proper surface preparation — cleaning, sanding, and priming — is what prevents many of these issues.
What is paint peeling? (mechanics and visible signs)
Peeling is the visible failure of a paint film when it separates from the surface beneath, usually showing as flakes, curls, or large sheets lifting away; you’ll often see edges cracking, blistering, or gaps where the substrate becomes exposed.
You can spot varied textures, loose fragments, and spreading margins; touch reveals brittle or gummy layers, and peeled areas contrast sharply in color and sheen with intact paint.
Common causes of peeling: adhesion failure, moisture, substrate issues, old paint
You’ve already seen what peeling looks like; now look at what causes it.
You’ll notice peeling usually stems from poor adhesion, trapped moisture, or bad substrate and aged coatings.
Check these common culprits:
- Adhesion failure: incompatible coatings or slick surfaces.
- Moisture: leaks, humidity, or condensation under paint.
- Substrate/old paint: crumbling, chalking, or incompatible layers.
Role of surface preparation in peeling
One key step you can’t skip is proper surface preparation, because how the substrate looks and feels determines whether new coatings will stick.
You should clean, sand, and remove loose paint, grease, and contaminants. Fill cracks, address moisture, and verify the surface is dry and keyed for primer.
Skipping prep guarantees poor adhesion and increases the chance paint will peel prematurely.
What Primer Does Science and Function
You’ll first want to match the primer type—acrylic, oil-based, bonding, shellac, or stain-blocking—to the surface and problem you’re fixing.
Primers improve adhesion and seal porous substrates, while also controlling moisture, blocking stains, and inhibiting corrosion to keep paint from failing.
Understanding each formulation’s strengths helps you pick the right primer for long-lasting results.
Primer types and their formulations (acrylic, oil-based, bonding, shellac, stain-blocking)
Primer choice matters because different formulations bond, block, or seal in distinct ways. You’ll pick acrylic for flexibility, oil-based for durability, bonding for slick surfaces, shellac for alcohol stains, and stain-blocking for tannins. Compare quickly:
| Type | Strength | Best use |
|---|---|---|
| Acrylic | Flexible | Interiors |
| Oil | Durable | Trim |
| Bonding | Adhesion | Plastics |
How primers improve adhesion and seal substrates
After choosing the right formulation, you’ll want to understand how primers actually make paint stick and keep surfaces sealed.
Primers create a uniform, slightly rough film that mechanical-bonds to porous or slick substrates and provides chemical compatibility between surface and topcoat.
They fill tiny imperfections, block surface contaminants, and form a stable interface so paint adheres evenly and resists early lifting or delamination.
Primer’s role in moisture control, stain blocking, and corrosion inhibition
While primers primarily improve adhesion, they also act as active barriers against moisture, stains, and rust—so they keep your finish looking sound and lasting longer.
You’ll pick primers with moisture-resistant binders, stain-blocking pigments, or corrosion inhibitors depending on substrate and exposure.
Applied correctly, they reduce water ingress, prevent tannin and smoke bleed, and slow metal oxidation, extending paint life and lowering maintenance.
Evidence Does Primer Prevent Peeling? (Explanation + Case Examples)
You’ll see strong evidence that primer prevents peeling when you apply it to new drywall, bare wood, or clean metal—these surfaces bond well and give paint a stable base.
But primer alone can’t fix peeling caused by old failing paint, ongoing moisture, or shoddy preparation, and trying to shortcut those problems usually fails.
Below are brief case examples showing both a successful primer job and situations where primer couldn’t save the finish.
Scenarios where primer reliably prevents peeling (new drywall, bare wood, metal)
When you start with clean, sound surfaces, primer will reliably stop paint from peeling on common substrates like new drywall, bare wood, and metal.
You’ll get long-lasting adhesion and uniform finish if you choose the right primer and follow surface prep:
- New drywall: drywall primer-sealer for even porosity
- Bare wood: oil- or shellac-based primer to block tannins
- Metal: rust-inhibiting primer for adhesion and corrosion resistance
Scenarios where primer alone won’t stop peeling (existing failing paint, structural moisture, poor preparation)
If paint’s already delaminating, primer alone won’t fix the underlying failure and you’ll still see peeling soon after repainting.
You need to remove loose coating, address structural moisture (roof leaks, rising damp), and repair blisters or rot.
Poor surface prep—dirty, chalky, or glossy substrates—prevents adhesion.
Primer helps, but only after proper remediation and substrate stabilization; otherwise peeling returns.
Short case studies / real-world examples of success and failure
Understanding why primer alone can fail makes it easier to judge real-world outcomes, so let’s look at short case studies that show what works and what doesn’t.
You’ll see a garage door prepped, primed, and lasting five years; a damp basement primed without fixing moisture that peeled in months; and a sunburned siding primed but not sanded that flaked quickly—prep and moisture control decide success.
Step-by-Step Guide Using Primer to Prevent Paint Peeling
Before you prime, you’ll want to inspect the surface, remove any loose paint, and fix underlying problems like moisture or damaged substrate.
Then pick a primer that’s compatible with your surface and finish, and follow proper application steps—right drying times, number of coats, and method.
I’ll walk you through quick tests, removal options, repair tips, a compatibility chart, and correct priming technique.
Step 1 Inspect and diagnose the surface (tests to perform)
Since peeling can come from several different causes, start by closely inspecting the surface to identify what’s wrong and which tests you’ll need to run.
Check for moisture (use a moisture meter), press for adhesion (perform a tape test), look for blistering, mold, or rust, and note substrate type.
Record findings and photos so you can choose proper remediation and primer.
Step 2 Remove loose/peeling paint (methods: scraping, sanding, chemical strippers)
With your inspection complete and problem areas documented, it’s time to remove all loose and peeling paint so the primer can bond to a stable surface.
You’ll choose a method, work safely, and clean thoroughly before priming.
- Scrape stubborn flakes with a firm putty knife or multi-tool.
- Sand feathered edges smooth, using appropriate grit.
- Use chemical stripper for multiple layers, following safety directions.
Step 3 Repair substrate and fix moisture sources (patching, sealing, flashing)
After removing loose paint, repair the underlying substrate and stop any moisture that caused the failure so your primer can bond and last.
Patch rot or cracks with appropriate fillers, replace badly damaged boards, seal gaps with exterior-grade caulk, and add or repair flashing to divert water.
Fix leaks and improve ventilation so surfaces stay dry before priming and repainting.
Step 4 Choose the right primer for the job (compatibility chart)
You’ve repaired the substrate and stopped the moisture, so the next decision is picking a primer that’ll bond to your surface and work with your topcoat. Choose based on substrate and paint type to prevent peeling. Refer to this quick compatibility guide:
| Surface | Primer Type |
|---|---|
| Bare wood | Oil or acrylic |
| Metal | Rust-inhibiting epoxy |
| Drywall | High-adhesion latex |
| Old gloss paint | Bonding primer |
Step 5 Correct priming technique (drying times, coats, application methods)
Once you’ve chosen the right primer, apply it correctly to lock in adhesion and prevent future peeling:
Work in thin, even coats, brushing or rolling along grain where applicable.
Respect manufacturer drying times between coats—usually 1–4 hours for water‑based, longer for oil.
Two coats often suffice; sand lightly between coats for smoothness.
Maintain proper temperature and humidity for curing.
Step 6 Topcoat selection and painting best practices
Having properly primed the surface, pick a topcoat that matches the primer type and the conditions the surface will face—use a water‑based paint over water‑based primer and an oil‑based paint over oil primer unless the primer label says otherwise.
Choose quality finish, follow manufacturer recoat times, apply thin even coats, sand lightly between coats if recommended, and verify temperature and humidity are within specified ranges for durable adhesion and reduced peeling.
Comparison Primer Types and Their Anti-Peeling Performance
When you choose a primer, you’ll want to compare bonding primers with conventional ones to see which grips smooth or chalky surfaces best.
Consider oil-based versus latex primers for tricky substrates like bare wood, metal, or glossy surfaces, since each handles adhesion and moisture differently.
Also weigh specialty primers—shellac for tough stains, stain-blocking for tannins, and rust-inhibiting for metal—so you use the right product for the problem.
Bonding primers vs conventional primers
Although both types aim to keep paint stuck to your surface, bonding primers and conventional primers work differently and suit different problems. You’d pick bonding primers for slick or glossy substrates; conventional primers suit sound, porous surfaces. Choose based on adhesion needs, substrate condition, and topcoat compatibility.
| Feature | When to use |
|---|---|
| Adhesion strength | Bonding |
| Surface type | Slick vs porous |
| Prep needed | Less vs more |
| Topcoat fit | Check compatibility |
Oil-based vs latex primers for problematic substrates
Since problematic substrates—like chalky, stained, or water‑damaged surfaces—demand better adhesion and sealing, you’ll want to weigh oil‑based and latex primers by how they handle those specific issues.
Oil primers penetrate, block stains, and bond to slick surfaces, reducing peel risk on tough substrates.
Latex dries faster, resists yellowing, and flexes with temperature changes but may need extra coats for severe staining.
Specialty primers (shellac, stain-blocking, rust-inhibiting) and recommended uses
If you’re tackling stains, rust, or persistent odors, specialty primers give targeted protection that stops peeling before it starts.
Use shellac-based primers for severe water stains and smoke—fast adhesion and stain sealing.
Choose stain-blocking latex for tannin bleed and mild discoloration.
Apply rust-inhibiting primers on bare metal to prevent corrosion and primer failure.
Follow surface prep and manufacturer cure times.
Common Mistakes That Make Primer Ineffective
Don’t assume primer will fix everything if you skip proper surface prep or don’t remove loose paint and underlying causes like moisture or movement.
You’ll also weaken adhesion by using the wrong primer for the substrate or applying primer over damp surfaces or before it’s fully cured.
Addressing these mistakes first is key to preventing peeling.
Skipping surface preparation
When you skip surface preparation, primer can’t bond properly and the paint will peel sooner rather than later.
You’ll trap dirt, oils, and loose particles under primer, creating weak spots that fail under moisture or movement.
Sand, clean, and remove old loose paint before priming.
Proper prep guarantees the primer adheres, forms a stable base, and actually helps prevent peeling over time.
Using the wrong primer for the substrate
Even with proper prep, choosing the wrong primer can undo all that work.
If you pick a latex primer for glossy metal, or an oil-based primer for masonry, adhesion and compatibility suffer. You’ll get poor bonding, visible bleed-through, or finish failure.
Match primer type to substrate and paint—metal, wood, drywall, masonry—so coatings adhere and peeling risk drops drastically.
Applying primer over damp surfaces or without proper curing
If you coat a damp surface or paint over primer that hasn’t fully cured, the primer can trap moisture and fail to form a stable bond, leading to bubbling, blistering, or peeling once the paint dries.
You should always confirm dryness and cure time, use moisture meters if needed, and wait recommended intervals; rushing or ignoring instructions guarantees adhesion problems and wasted effort.
Insufficient paint removal or ignoring underlying causes (moisture, movement)
Because primer only bonds to a clean, stable surface, failing to remove loose paint or address underlying issues like moisture and structural movement will let new coatings peel right off.
You need to strip or sand loose layers, fix leaks, improve ventilation, and stabilize shifting substrates before priming.
Otherwise adhesion fails and you’ll repeat the cycle—wasting time, materials, and money on repairs that won’t hold.
Prevention, Maintenance and Best Practices
You should inspect painted surfaces regularly and act at the first signs of bubbling, cracking, or adhesion loss.
Control moisture and ventilation, pick the right primer and paint for the substrate, and follow a simple product checklist before you start.
With routine maintenance—cleaning, touch-ups, and addressing sources of damp—you’ll greatly reduce the chance of peeling.
Regular inspection and early intervention
When you make regular inspections part of your routine, you catch loose edges, blistering, and early signs of adhesion failure long before they become full‑scale peeling problems.
You’ll act fast to repair or recoat small areas, preserving finishes and avoiding costly jobs later.
- Check seams, trim, and corners monthly
- Address hairline lifts immediately
- Document spots and track progress
Environmental and substrate control (humidity, ventilation)
If humidity and ventilation aren’t controlled, even the best primer won’t stop paint from peeling; you need to manage moisture and airflow to protect adhesion.
You should monitor RH, avoid painting in damp conditions, and use dehumidifiers or fans to dry substrates.
Guarantee fresh-air exchange to prevent condensation.
Stabilize substrate moisture content before priming, and ventilate during curing to reduce blistering and failure.
Product selection checklist before priming and painting
1 clear checklist keeps paint failures from the start: pick a primer compatible with your topcoat and substrate, confirm VOC and cure times fit your schedule, check recommended surface prep (etching, sanding, or cleaning), choose the right sheen and opacity for coverage, and verify temperature and humidity application ranges so the film can form and adhere properly.
Then match primer type to substrate, buy quality brushes/rollers, and test a small patch.
Long-term maintenance tips to prevent peeling
Now that you’ve picked the right primer and prepared the surface, keep the finish intact with practical maintenance routines and preventative checks.
Inspect annually for cracks, moisture, or blistering. Clean gently with mild detergent and soft brush to remove dirt and mildew.
Touch up chips promptly, control humidity, and fix leaks quickly.
Repaint high-wear areas every 5–7 years to maintain adhesion and appearance.
Quick Decision Flowchart When to Prime, When to Strip, When to Repair
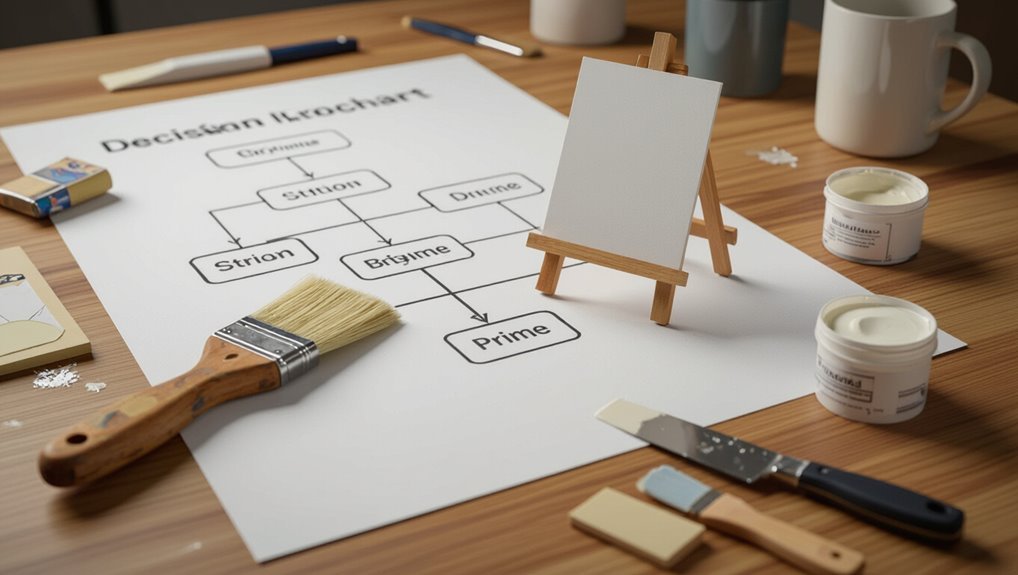
When you’re facing flaking, multiple paint layers, or patchy adhesion, a simple decision flowchart helps you choose whether to prime, strip, or repair.
Inspect adhesion: if paint lifts easily, strip to bare substrate. If surface is sound but porous or stained, clean and prime.
For localized damage, repair and feather, then prime. Finish with appropriate topcoat.
FAQ
You’ll want clear answers to practical questions like whether you can prime over peeling paint or must remove it first and how long to wait before topcoating.
You’ll also want to know if primer stops peeling from moisture, whether a multi-purpose primer will work on every surface, and how to check that the primer actually bonded to the substrate.
Keep these FAQs in mind as you decide the right prep and product for your job.
Can I prime over peeling paint, or must I remove it first?
Can you prime over peeling paint? No — you should remove loose, flaking paint first.
Scrape, sand, and clean the surface until edges are solid and smooth. Spot-prime bare areas with a suitable adhesion primer, then prime entire surface for uniformity.
Skipping removal lets peeling continue beneath new coatings, defeating the primer’s purpose and shortening topcoat life.
How long should I wait after priming before topcoating?
After you’ve removed loose paint and spot-primed bare areas, give the primer time to cure before applying the topcoat.
Generally wait the manufacturer’s recommended dry time—often 1–24 hours for latex primers and longer for oil-based types.
Touch test for tackiness, guarantee full adhesion, and avoid heavy humidity or cold.
If unsure, wait an extra few hours for reliable bonding.
Will primer stop peeling caused by moisture behind the wall?
Although primer helps seal and improve paint adhesion, it won’t stop peeling caused by active moisture behind the wall; you need to find and fix the water source first.
You should dry the area, repair leaks, and address vapor or drainage issues before priming.
Once the wall is dry and moisture-free, use a moisture-tolerant primer and proper topcoat to prevent future failure.
Is it OK to use a multi-purpose primer for all surfaces?
Wondering if one multi-purpose primer will do the job for every surface? You can use multi-purpose primers for many situations—drywall, wood, and some metals—but they aren’t ideal everywhere.
For stubborn stains, raw wood, bare metal, or high-moisture areas, choose specialty primers. Match primer chemistry to the substrate and finish paint for best adhesion and long-term peeling prevention.
How do I tell if the primer bonded properly to the substrate?
How can you tell if the primer really bonded to the surface?
Check adhesion by gently scoring a small cross-hatch, applying tape, then pulling—no primer should lift.
Look for uniform coverage, no beading or chalky powder, and consistent drying without tackiness.
After topcoat, monitor for early peeling or blistering; good bonding prevents those issues.