Can I Use Exterior Paint on Furniture
You can use exterior paint on furniture when you need strong UV, moisture, and rust protection for porch benches, metal sets, or weathered plastic, but it’s overkill for indoor pieces and can off-gas more VOCs. Prep thoroughly, match the formula to the material, and expect a rigid film that may crack on flexible or glossy surfaces without proper sanding or primers. Keep in mind removal is harder; continue and you’ll find tips, cautions, and step-by-step guidance.
Should You Use Exterior Paint on Furniture?

If you’re wondering whether you can use exterior paint on furniture, the short answer is: sometimes — but choose carefully.
You’ll pick exterior paint when durability against moisture and UV matters, especially for outdoor pieces. Consider adhesion to wood or metal, and test a small area first.
Choose exterior paint when moisture and UV protection matter—ideal for outdoor furniture; test adhesion on wood or metal first.
Remember that color mixing can be trickier with exterior formulations; pigments and sheen differ from interior paints, so match samples.
Also plan for future paint removal—exterior coats can be tougher to strip and may need stronger solvents or sanding.
Weigh longevity versus finish needs before committing to exterior paint on furniture.
Quick Decision Guide: Use Exterior Paint or Not?
While exterior paint can protect outdoor furniture, you should only choose it after weighing a few quick factors: location (indoor vs. exposed outdoor), material (wood, metal, plastic), desired finish (smooth vs. textured), and how often you’ll refinish.
Decide fast by imagining use and upkeep, whether you keep indoor plants nearby, or plan furniture restoration later.
Consider these visual cues:
- Sun-faded bench on a sunny porch
- Rain-speckled metal bistro set
- Weathered wooden planter with indoor plants moved outside
- Faux-rattan chair with peeling finish
- Plastic Adirondack chair cracked by UV
If exposure or durability demands it, exterior paint may fit.
When Exterior Paint Is a Smart Choice for Furniture
Now that you’ve run through the quick factors, it’s easier to spot when exterior paint is the right call: choose it for pieces that sit in full sun, face frequent wetting, or get rough handling—like porch benches, metal café sets, and plastic Adirondacks with UV breakdown. You’ll pick exterior paint when outdoor decor needs longer life and improved paint durability. It resists fading, mildew, and moisture better than interior formulas. Match formulation to substrate, prep thoroughly, and seal if needed. Use the table to compare common scenarios and benefits.
| Situation | Benefit |
|---|---|
| Sun-exposed wood | UV resistance |
| Wet-prone pieces | Moisture protection |
| Metal seating | Rust inhibition |
| Plastic chairs | Fade control |
When Exterior Paint Is a Poor Choice for Furniture
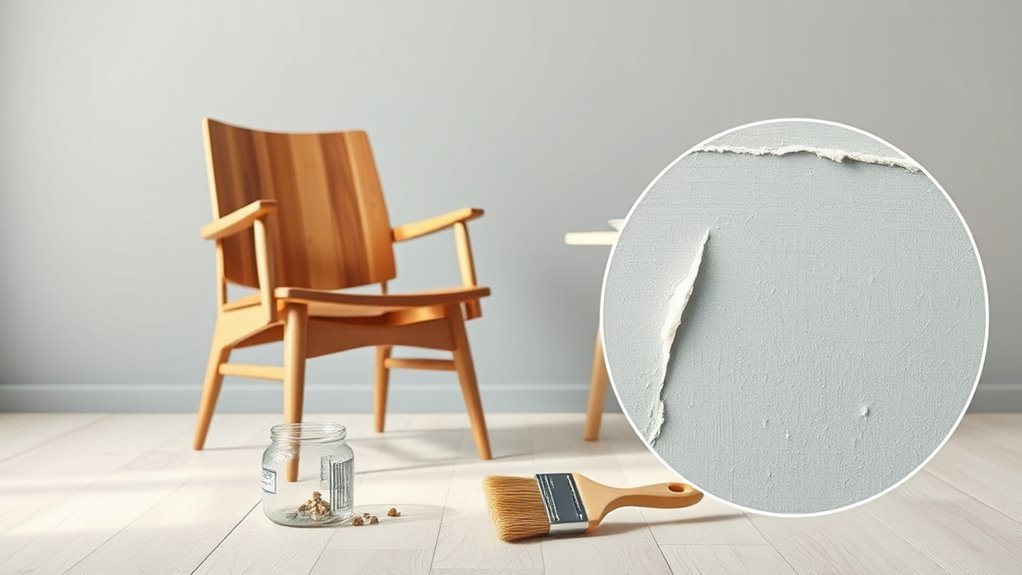
If your furniture has very smooth or slick surfaces, exterior paint may not stick well without roughing or priming first.
It also dries into a relatively rigid film that can crack or flake on pieces that flex or get bumped.
Finally, many exterior formulations emit higher VOCs, so they’re not the best choice for indoor spaces where air quality matters.
Poor Adhesion On Smooth Surfaces
Because exterior paints are formulated to bead and resist moisture, they often struggle to grip very smooth furniture surfaces like lacquered tabletops or glossy veneers. You’ll notice poor adhesion even if the color matching looks fine and the paint durability promises seem strong.
To avoid peeling and flaking, prepare the surface correctly or choose a product designed for slick finishes.
Visualize the problem:
- paint sliding off a glossy dining table
- small bubbles along a varnished shelf edge
- chips forming on a lacquered dresser drawer
- peel lines where heat met the finish
- uneven sheen where paint didn’t bite
Surface sanding and a proper primer help.
Inflexible Finish Causes Cracks
When exterior paint stays rigid as wood expands and contracts, hairline cracks and flaking quickly appear on furniture surfaces. You’ll notice them under interior lighting, where small fractures catch the eye and finish fragments collect in joints after temperature shifts.
Rigid coatings don’t flex with seasonal humidity, so tabletops and chair backs split along grain lines. During furniture assembly or after you glue and clamp pieces, stress points show damage first.
If you want durable indoor pieces, choose flexible formulas or add a clear topcoat that moves with the substrate. Otherwise, you’ll repair peeling, brittle paint repeatedly.
Unsuitable For Indoor VOCs
Although exterior paints shield against weather, they often release higher levels of volatile organic compounds (VOCs) that linger indoors and can harm your health. You’ll want low-VOC or water-based options for furniture, especially where indoor humidity concentrates fumes.
Exterior formulas can off-gas longer, aggravating allergies and affecting air quality. Besides health, think aesthetic considerations: rougher textures, glossy blisters, or color shifts may clash with indoor decor. Choose purpose-made interior paints to avoid problems.
- a sealed porch chair that smells stale
- a glossy finish yellowing near a heater
- paint film cracking in damp basements
- lingering chemical odor in a nursery
- mismatched sheen under warm lighting
How Exterior and Interior Paint Formulas Differ
When you compare exterior and interior paints, you’ll notice they use different binders and pigments meant for UV and moisture resistance versus indoor wear and color fidelity.
Exterior formulas also include additives for flexibility and mildew resistance that interior paints usually don’t need.
And because VOC levels and long-term durability are treated differently, your choice affects both indoor air quality and how well the finish holds up.
Binder And Pigment Differences
Because exterior paint has to stand up to sun, rain, and temperature swings, its binders and pigments differ from what you’ll find inside your home. You’ll notice binder differences: exterior binders are tougher, more UV-resistant, and less prone to chalking, while interior binders favor finish and scrub resistance.
Pigment characteristics change too: exterior pigments resist fading and block moisture, interior pigments prioritize color purity and low VOCs.
Picture the contrast:
- Weather-beaten porch wood with deep, durable film
- Glossy indoor chair with smooth touch
- Faded fence vs. bright patio table
- Rain beading on a coated bench
- Sun-bleached vs. colorfast finish
Additives And Flexibility
If you want exterior paint to survive sun, wind, and moisture, it gets extra additives and a flexible binder package that interior formulations usually don’t need. You’ll notice exterior additives like UV stabilizers, mildewcides, and coalescing agents help films resist cracking and chalking outdoors.
Using that on furniture can help with durability, but you’ll face flexibility issues: outdoor binders stretch differently and can remain softer or more brittle depending on temperature. You should test adhesion, sanding, and finish feel first.
For movable joints or delicate veneers, consider primers or topcoats designed for interior use to avoid unpredictable behavior.
VOCs And Durability
Additives and binder flexibility affect how paint performs outdoors, but you also need to take into account volatile organic compounds (VOCs) because they shape both durability and safety.
You’ll notice exterior formulas use tougher resins and higher VOCs to resist weathering, while interior paints prioritize low VOCs for healthier indoor air under interior lighting.
That tradeoff affects adhesion, flexibility, and long-term color retention.
Consider these images when choosing:
- A rain-beaten bench with cracked finish
- A sun-faded tabletop losing paint color
- A low-VOC room smelling fresh under warm bulbs
- A glossy outdoor chair shedding flakes
- A sealed piece enduring seasons without peeling
Which Binders and Resins Add Outdoor Durability
When you’re choosing exterior paint for furniture, the binder or resin in the formula determines how well the finish resists moisture, UV, and temperature swings.
You’ll favor acrylic resins for flexibility and water resistance; 100% acrylic holds color trends well and won’t become brittle in cold.
Alkyds offer toughness and adhesion on metal or trim but yellow slightly over time.
Polyurethane and epoxy resins add abrasion and chemical resistance for high-use pieces, though they can be less breathable.
For eco-friendly options, look for waterborne acrylics and low-VOC formulations that balance outdoor durability with reduced environmental impact.
How UV Blockers and Additives Affect Performance
Having chosen a resin that balances flexibility and toughness, you’ll next want to take into account UV blockers and other additives that determine how long the finish will hold color and integrity outdoors. You’ll pick formulations where UV blockers absorb or reflect harmful rays, slowing fading and polymer breakdown.
Additive effects include improved adhesion, mildew resistance, and pigment stability, but overloading can impair curing. Picture outcomes:
- sun-bleached slats resisting color loss
- satin sheen fighting chalking
- tighter grain repelling moisture
- mildew-free joints after rainy seasons
- chips that stay localized
Choose balanced packages for durable, long-lasting exterior furniture finishes.
Sheen and Texture Differences: Exterior vs. Interior
Because exterior pieces face sun, rain, and abrasion, their sheens and textures are formulated differently than interior finishes to prioritize durability over pure appearance. You’ll notice exterior paints often have a flatter sheen to hide surface imperfections and resist color fading.
While interior paints offer glossier sheens for easy cleaning and a richer look. Exterior formulations can be thicker, hiding minor defects but emphasizing brush strokes unless you thin and sand between coats.
If you use exterior paint on furniture indoors, test a small area: sanding, proper primers, and careful brushing help control texture and appearance without sacrificing weather resistance.
Indoor Toxicity and VOCs of Exterior Paint
When you use exterior paint on indoor furniture, check the VOC content levels because many exterior formulas emit more fumes than interior paints. Those higher VOCs can raise indoor air risks, causing headaches, irritation, or longer-term health concerns in poorly ventilated spaces.
Let the piece dry and off-gas in a well-ventilated area for the manufacturer’s recommended safe drying times before bringing it into regular use.
VOC Content Levels
How much VOCs are in exterior paint matters more than you might think, because those compounds can off-gas during application and linger in nearby indoor spaces. You should check labels for low-VOC or zero-VOC formulations; vegetable based and solvent free options cut emissions.
Compare grams per liter (g/L) figures — lower is better — and prefer certified products. Consider ventilation and curing time when using higher-VOC paints outdoors on furniture stored indoors.
- a brush spreading glossy blue
- a can labeled “low-VOC”
- a cloth wiping fumes away
- a plant-based icon on a tin
- cured furniture in sunlight
Indoor Air Risks
Want to keep your indoor air healthy after painting outdoor furniture? You should know exterior paints can emit VOCs that irritate eyes, nose, and lungs. Open windows, use fans, and limit exposure where you place freshly painted pieces. Consider moving indoor plants away until fumes dissipate and rethink furniture arrangement to keep seating and sleep areas distant from drying items.
| Risk | Symptom | Action |
|---|---|---|
| High VOCs | Headache | Ventilate |
| Solvents | Dizziness | Respirator |
| Odor | Nausea | Remove occupants |
| Residue | Long-term | Choose low-VOC |
Select low-VOC products to reduce indoor toxicity.
Safe Drying Times
Although drying times vary by formulation and conditions, you should plan for exterior paint to off-gas indoors for at least 24–72 hours. You’ll want ventilation and time before bringing painted furniture into living spaces with indoor plants or near delicate paint color schemes.
Keep doors and windows open, run fans, and isolate pieces where possible. Picture a staged airing:
- A sunlit garage with a fan on low
- A balcony draped with a lightweight sheet
- A table turned upright on cardboard
- A chair kept away from curtains and plants
- A small box fan pointing toward an open window
Wait longer for strong odors or high-VOC paints.
Furniture Types That Tolerate Exterior Paint
When you’re choosing pieces to refinish with exterior paint, pick furniture that already handles moisture, temperature swings, or rough use—think metal patio sets, pressure-treated or teak outdoor wood, and plastic resin pieces.
You’ll want items where outdoor lighting won’t hide flaws, so choose sturdy surfaces and simple furniture design that take primer and topcoat evenly.
Metal resists warping, hardwoods like teak repel rot, and resin tolerates UV when prepped.
You should sand, clean, and use suitable primers. For mixed materials, target the dominant substrate.
These choices cut maintenance and make exterior paint a practical option.
Furniture Types to Avoid With Exterior Paint
If you picked outdoor-ready pieces earlier, good—now turn away from items that won’t hold up to exterior paint. You’ll want to avoid surfaces that trap moisture, release sap, or have delicate finishes. Also consider how indoor plants and regular temperature shifts affect painted indoor pieces moved outside.
Avoid pieces that trap moisture, release sap, or have delicate finishes—think durability before painting for outdoor use.
Don’t forget furniture hardware that corrodes or detaches under heavy coatings.
- Delicate antique veneers with thin glue
- Soft woods that swell when wet
- Wicker or cane that cracks and flakes
- Metal with rust-prone fasteners and fragile furniture hardware
- Upholstered pieces with padding that molds
How Wood Species Affect Paint Adhesion
Because different species vary in grain, oil content, and hardness, the wood you choose directly shapes how well paint will stick and how long the finish lasts.
You’ll find open-grain woods like oak and ash hold primer differently than tight-grain maple or birch; open grain may need filling for a smooth look.
Oil-rich woods such as teak or cedar can resist adhesion unless de-greased and primed with a stain-blocking product.
Hardwoods can require more sanding for mechanical tooth.
Consider wood grain and paint compatibility when selecting materials and prep: match primer type to species for durable exterior-painted furniture.
Moisture, Temperature and Exterior Paint Curing
You’ll want to control humidity when painting outdoors—too much moisture can slow drying and invite adhesion problems, while too little can cause blistering.
Aim for moderate humidity (typically 40–70%) and check the paint manufacturer’s recommendations.
Also remember that cooler temperatures lengthen cure time and warmer temperatures speed it up, so plan your work for stable, moderate conditions.
Optimal Humidity Levels
When painting outdoor furniture, aim for moderate humidity—generally between 40% and 60%—so paint can dry and cure evenly without trapping moisture or drying too fast. You’ll monitor humidity levels to protect finish and maintain paint consistency; too high causes tacky surfaces, too low leads to poor flow.
Work in calm, sheltered conditions and check a hygrometer.
Visualize outcomes:
- Dew on slats after a damp night
- Crisp brushstrokes on a day with steady air
- Tiny blisters from trapped moisture
- Smooth, level coats when conditions are right
- Even sheen on cured pieces
Adjust timing and storage to match readings.
Temperature’s Effect On Curing
Though moisture and temperature work together to shape a paint’s cure, temperature often sets the pace. You’ll notice warm, stable days speed solvent evaporation and film formation, while cold nights slow chemical reactions and prolong tackiness.
Rapid temperature swings from local weather patterns can cause blush, poor adhesion, or cracking as the film expands and contracts before full cure. Dark paint color absorbs more heat, altering surface cure versus air temperature.
Paint according to the manufacturer’s recommended range, avoid extremes, and allow extra drying time when forecasts predict cooler or variable conditions to guarantee a durable finish.
Tools and Supplies for Exterior-Painted Furniture
Before you start painting exterior furniture, gather a few essential tools and quality supplies so the job goes faster and lasts longer. You’ll want items that help with prep, application, and finish — and consider color matching and paint blending if you’re touching up or mixing shades.
Before painting exterior furniture, gather essential tools and quality supplies to speed the job and ensure lasting results
Pack:
- Sandpaper (various grits) and a sanding block
- Good-quality exterior primer and paint
- Brushes (angled sash, synthetic) and a small foam roller
- Rust-inhibiting spray for metal parts and painter’s tape
- Clean rags, tack cloth, and a well-ventilated drop cloth
These keep the work tidy and durable.
How to Test Compatibility on a Scrap or Hidden Surface
Once you’ve gathered your tools and supplies, test the paint on a scrap piece or a hidden area to make sure it bonds, looks right, and holds up. Pick a scrap from the same material or an inconspicuous spot.
Apply primer if you plan to use it, then paint a small patch. Check adhesion after drying and after a light scuff test.
Observe color after full cure—outdoors light can change tones, and color mixing may alter the shade more than you expect.
Note odor levels and ventilate; paint fumes can be stronger outdoors or in enclosed spaces.
Record results before proceeding.
Cleaning and Degreasing Before Painting
Because paint won’t stick to grease, you need to remove dirt, oils, and old wax thoroughly before priming. You’ll wipe down with a mild degreaser, rinse, and dry; this step improves adhesion and helps your paint color selection look even.
Focus on joints and hardware crevices so weatherproofing tips you follow later work well. Visualize the surface as you clean:
- A streak-free tabletop after degreasing
- Sanding dust removed from ornate legs
- Clean screw holes ready for primer
- Even, matte wood ready to accept color
- Smooth edges that seal against moisture
Finish with a tack cloth before priming.
Removing Old Finishes Safely
How do you strip old paint or varnish without damaging the wood beneath? Use chemical strippers suited to the finish type, follow label safety, and work in a ventilated area.
Test a small hidden area first to check how the wood reacts and whether the remaining grain will affect later color matching.
Scrape gently with a plastic or wooden tool, avoid gouging, and neutralize residues per product instructions.
For delicate details, use a soft-bristle brush.
Dispose of waste properly.
After stripping, inspect for stains or finish remnants that could compromise surface durability before proceeding with cleaning or refinishing.
When and How to Sand for Adhesion (What Grits)
After you’ve removed old finishes and checked for residues, sanding prepares the surface so new paint will stick and look smooth. You’ll sand to level rough patches, feather edges for color blending, and create tooth for adhesive exterior paint.
Start with 80–120 grit to remove defects, then 150–180 grit to smooth, finishing with 220 grit for delicate decorative accents. Use a sanding block or orbital sander for flats, hand-sand curves.
Clean dust with a tack cloth before painting. Inspect for remaining gloss; dull, even surface means you’re ready. Don’t over-sand veneer or thin areas—stop when smooth.
Primers: When to Use Them and Which Type
When you’re painting outdoor furniture, primer isn’t optional—it’s a foundation that improves adhesion, blocks stains, and evens out surface porosity so topcoat color and durability perform as expected.
You should prime bare wood, tannin-rich species, repaired areas, and glossy finishes you’ve scuffed. Use an exterior acrylic bonding primer for most surfaces; oil-based or shellac primers handle severe stains or bleed-through.
For metal, choose a rust-inhibiting primer. Pick a primer close to your topcoat for easier color matching and to reduce the number of coats.
A high-hide primer boosts paint opacity, saving time and improving final coverage and longevity.
Choosing the Right Exterior Paint Sheen
You’ll want to weigh sheen durability, since higher glosses resist wear and clean better than flats.
Remember gloss level affects how visible surface flaws will be and how much prep you’ll need.
Pick a sheen that balances longevity, appearance, and the amount of sanding or priming you’re willing to do.
Sheen Durability Comparison
Why does sheen matter for outdoor furniture durability? You’ll pick a sheen based on wear, maintenance, and appearance; it changes how surfaces shed moisture and resist abrasion. Consider these visual and functional cues as you paint, using color blending and brush techniques to control texture and coverage:
- Smooth semi-gloss that beads rain and wipes clean
- Satin with soft glow, hiding minor scratches
- Eggshell offering subtle depth but less abrasion resistance
- Matte that masks flaws but holds dirt more
- High-gloss that’s tough but shows imperfections
Match expected use and upkeep to sheen for lasting protection and easier care.
Gloss Level Effects
Picking the right gloss level ties directly to the durability cues you just reviewed, because sheen governs how paint handles moisture, abrasion, and visibility of flaws.
You’ll favor higher gloss for easy cleaning and scuff resistance on seating and tabletops, while satin or eggshell hides imperfections and offers moderate durability for decorative pieces.
Consider outdoor light and color matching—gloss can intensify hues and reveal differences between batches or paint branding.
Test swatches in the actual spot, note how wear shows over time, and choose a sheen that balances maintenance, aesthetic, and the furniture’s expected use.
Surface Preparation Needs
Because the sheen you pick changes how flaws, adhesion, and moisture show up, surface prep becomes the deciding factor for a durable finish. You’ll sand, clean, and prime more carefully for higher sheens since they reveal imperfections and resist moisture differently.
Consider previous Color mixing stains or coatings; strip or seal them to guarantee adhesion. Check paint storage for viscosity changes before applying.
Visualize tasks:
- Sanded edges smooth to touch
- Dust-free surfaces under bright light
- Primer sealed joints, no bleed-through
- Taped crisp lines at corners
- Test patch showing final sheen
Prep right and your exterior paint will perform on furniture.
Brush, Roller, or Spray: Application Methods
When you choose how to apply exterior paint—by brush, roller, or spray—you’re deciding the finish, speed, and level of control you’ll have over the job. You’ll pick a brush for detail and edges, a roller for flat panels and speed, or a sprayer for the smoothest, fastest coverage.
Test samples to confirm color mixing matches expectations before committing. Consider ventilation, masking, and cleanup needs: brushes need thorough cleaning; rollers require proper nap for texture; sprayers demand thinning and technique.
Store leftovers properly—seal cans, label mixes, and follow paint storage guidelines so you can touch up later.
Avoiding Brush Marks and Orange Peel
Before you paint, make sure the surface is clean, smooth, and sanded so imperfections won’t telegraph through the finish.
Pick a fine-nap roller suited to the paint type and work in even, overlapping passes to minimize texture.
Keep the paint at the manufacturer’s recommended viscosity—thin it only if instructed—so it levels out without sagging or leaving brush marks.
Proper Surface Preparation
Though a smooth finish starts with the right paint, you’ll only avoid brush marks and orange peel by preparing the surface correctly: clean, sand, and prime so the paint can level and adhere evenly.
You inspect for old flaking, grease, or pits; you wipe with degreaser, sand progressively, and remove dust. Match primer to your topcoat—color matching matters—even when checking leftover paint containers for tint notes.
Lightly scuff glossy surfaces and fill gaps with fine putty. Use tack cloths before priming.
Visualize the result:
- A satin face catching light
- Seamless edges
- Even pores
- No brush trails
- Smooth, durable skin
Choosing The Right Roller
If you want a finish free of brush marks and orange peel, pick a roller that matches the paint’s sheen and the furniture’s texture—short nap for smooth, long nap for porous—and use fine synthetic fibers for water-based paints and natural-synthetic blends for solvent-based coats. You’ll pair roller choice with brush selection for edges and tight spots, and keep color matching consistent by rolling in the light direction. Test on a scrap, note lay-in and pile pick-up, and work wet edges.
| Surface | Nap | Recommended Use |
|---|---|---|
| Smooth | 1/8″ | Doors, tabletops |
| Semi-rough | 1/4″ | Chairs, slats |
| Rough | 3/8″+ | Weathered wood |
Correct Paint Consistency
Once you’ve matched rollers and brushes to the surface, get the paint’s viscosity right so it lays smooth without brush marks or orange peel. You’ll thin acrylic or latex subtly—follow manufacturer guidelines—and stir thoroughly during color mixing to keep pigments uniform.
Test on scrap wood, adjust with a little water or recommended reducer, and note drying behavior. Avoid overworking the wet edge.
Keep unused paint sealed and stored upright; proper paint storage preserves consistency.
Visualize finish goals:
- Silk sheen flowing like satin
- Tiny peaks melting under a gliding brush
- No dimples or pocked skin
- Even coverage without streaks
- Crisp edges, soft reflection
How Many Coats Do You Need?
Because exterior paint has to stand up to weather and wear, you’ll usually need more than one coat to get durable, even coverage on furniture. Start with a thin priming coat suited to the material; this improves adhesion and helps with color matching if you’re covering a darker finish.
Apply two standard topcoats, brushing or spraying smoothly to avoid drips. Inspect between coats for runs or missed spots; do any paint removal or sanding before the next layer.
For high-traffic pieces, consider a third coat or a clear protective topcoat. Lightly scuff between coats for best intercoat adhesion.
Drying and Curing Times for Exterior Paint
When you’re painting outdoor furniture, drying times depend on temperature, humidity, airflow, and the type of paint you use.
You’ll usually be able to recoat within a few hours to a day, but full curing can take anywhere from several days to a few weeks.
I’ll explain how those factors change both the initial dry time and the longer full cure timeline so you can plan use and protection accordingly.
Drying Time Factors
Although the paint may feel dry to the touch within hours, the real drying and curing times for exterior paint depend on several key factors you’ll want to understand. Temperature and humidity control affect solvent evaporation; good color blending and proper brush techniques influence film thickness and drying consistency.
You’ll also need to watch:
- Cool, damp nights slowing drying
- Thick coats from hurried application
- Poor ventilation trapping moisture
- Direct sun causing uneven skin formation
- Paint formulation (latex vs. oil) setting pace
Manage these variables: thin coats, ventilate, and avoid extreme conditions so your furniture dries evenly and bonds well.
Full Cure Timeline
Curious how long your exterior-painted furniture will actually take to fully cure? You’ll see surface dry in hours, but full cure takes weeks. Temperature, humidity, and coat thickness affect timelines. Expect 7–30 days for hardness; oils and enamels can need longer. Test joints and finish before heavy use, and wait to do final color matching until cured to ensure true tones. Different furniture styles can influence sanding and topcoat choices, so plan accordingly.
| Stage | Typical Time | Notes |
|---|---|---|
| Surface dry | Hours | Ready for light touch |
| Handle safe | 24–48 hrs | Avoid heavy use |
| Light use | 7 days | Mostly cured |
| Full cure | 14–30+ days | Maximum hardness |
| Refinish safe | 30+ days | Best color match |
Sealing Exterior-Painted Furniture for Extra Protection
Because outdoor conditions are unpredictable, you’ll want to seal exterior-painted furniture to lock in color and guard against moisture, UV, and wear. You’ll choose a suitable topcoat—waterbased polyurethane, spar urethane, or marine varnish—matching your finish and interior decor if pieces move indoors.
Sealing also preserves paint color trends you love, prevents chalking, and eases cleaning. Apply thin, even coats and follow product dry times; avoid overworking the finish.
Visualize protection:
- a glossy sheen repelling raindrops
- a matte coat hiding scuffs
- sunproof film glowing faintly
- smooth fingers gliding over panels
- clear barrier against stains
Sanding Between Coats: When and How
You’ll want to sand between coats once the paint’s dry to the touch but not fully cured, which helps adhesion and smooths any imperfections.
Use fine-grit sandpaper (220–320) or a sanding sponge and keep pressure light to avoid cutting through the finish.
Always remove dust with a tack cloth or vacuum and a damp microfiber before the next coat.
When To Sand
When your finish feels slightly rough, has small imperfections, or shows brush marks, it’s time to sand between coats to guarantee smooth adhesion and a flawless final look.
Wait until the coat is dry to the touch — follow manufacturer dry times, consider humidity, and avoid disturbing color mixing or paint storage layers.
Light sanding removes nibs and promotes bonding without stripping coverage. Sand gently, wipe with a tack cloth, then apply the next coat.
Visualize the change:
- a glassy tabletop under light
- seamless chair curves
- even painted slats
- crisp edges on trim
- a satin sheen revealed
Grit And Tools
If your goal is a glass-smooth finish, pick the right grit and the right tool for the job: use a fine 220–320 grit sandpaper by hand or a soft sanding block to gently scuff cured paint between coats.
Reserve 400–600 grit for very smooth finishes or topcoats like lacquer, and reach tight corners or ornate details with folded sandpaper, sanding sponges, or fine abrasive pads.
Sand lightly—pressure ruins edges—and always sand after the paint fully cures per label instructions.
Keep grit progression consistent, store spare sheets flat in paint storage to avoid curling, and remember color mixing won’t hide poor surface prep.
Dust Removal Techniques
Because tiny particles will show up under a clear or glossy topcoat, you should remove dust between coats with care. You’ll sand lightly with fine grit, wipe with a tack cloth, then inspect in good light.
Sand only after the paint feels dry to the touch; wait longer for humid days. Use gentle pressure to avoid cutting through the finish.
- a soft-bristled brush like for garden tools
- a clean tack cloth absorbing fine grit
- folded microfiber for edges
- compressed air for crevices
- a sanding block to keep surfaces flat
Think like landscape design: plan each pass for even results.
Fixing Runs, Drips, and Other Application Problems
Although you took care to apply paint evenly, runs and drips can still happen; don’t panic — they’re fixable with a few simple steps. Let the area dry slightly until tacky, then gently drag a sharp single-edge razor or fine sanding block along the run to level it.
Sand feathered edges smooth, wipe with a tack cloth, and recoat lightly using thin, even layers. For color mixing consistency, stir thoroughly before retouching and avoid overworking the spot.
Store leftover paint properly—seal cans tightly and label for paint storage—so touch-ups match and remain ready for future fixes.
Preventing Cracking and Peeling
When you want a durable finish, start with proper surface prep and the right products so paint can flex with the furniture instead of breaking away. Sand smooth, remove dust, and choose an exterior acrylic with some elasticity to resist cracking and prevent color fading or texture change over time.
Prime porous wood and let each coat cure fully. Avoid thick coats and rapid temperature swings during application.
Visualize results:
- Tight grain accepting primer
- Thin, even brushstrokes
- Slight give in the dried film
- Stable indoor temperature while curing
- Long-lasting color without flaking
Routine inspection prevents small issues becoming big ones.
Repairing and Refinishing Later
When it’s time to repair and refinish, you’ll first assess the surface for cracks, rot, or peeling to determine how much work is needed.
Pick a stripper or sanding method that’s appropriate for the paint type and the furniture’s material so you don’t damage the substrate.
Once the surface is sound, refinish with compatible paint or stain and seal it to protect against weather and wear.
Assess Surface Damage
How badly is the finish damaged, and what’ll it take to get it back to good condition? You’ll inspect cracks, flaking, and gouges, note old color mixing issues and poor paint storage that caused separation, and decide if sanding, filling, or replacing veneer is needed.
Imagine the repair steps:
- Sanded edges revealing raw wood
- Bubbling paint where moisture sat
- Deep gouges needing wood filler
- Patches of mismatched hues from prior touch-ups
- Loose veneer lifting at joints
Count materials, time, and skill; prioritize structural fixes before repainting so exterior paint bonds and lasts.
Choose Appropriate Stripper
Once you’ve assessed the damage, pick a stripper that matches the old finish, substrate, and your workspace constraints so you remove coatings efficiently without harming the wood or veneers.
Choose a gel for verticals and delicate veneers, a liquid for thick enamel, or a citrus-based mild option for indoor projects where interior decor odors matter.
Test in an inconspicuous spot, follow dwell times, and use scrapers and nylon pads with the grain.
Wear gloves, ventilate, and dispose of residue per local rules.
Matching stripper choice preserves substrate for later painting techniques and helps you avoid sanding through thin veneers.
Refinish And Seal
After stripping and repairs, you’ll prep the surface by sanding to a smooth, uniform profile, cleaning all dust, and addressing any remaining dents or gaps with appropriate filler so finishes adhere evenly.
You’ll test color mixing on a scrap piece, noting how exterior pigments and paint branding affect opacity.
Apply a bonding primer, sand lightly between coats, then choose a sealer suited to the paint type.
When repairing later, strip glossy spots and feather edges before refinishing.
Visualize the result:
- A matte, even tabletop
- Crisp edges without bleed
- Seamless repaired corner
- Uniform sheen across slats
- Durable outdoor-ready finish
Painting Metal and Wrought Iron With Exterior Paint
When you’re painting metal or wrought iron with exterior paint, prepare to remove rust, roughen glossy surfaces, and choose coatings that flex with temperature changes. You’ll strip loose corrosion with a wire brush or rust converter, clean thoroughly, and sand to give primer bite.
Apply a metal-specific primer, then exterior enamel or acrylic formulated for metal. Mind proper adhesion and drying times; thin coats prevent drips.
Consider color mixing for custom hues, but respect paint branding recommendations for compatibility. Finish with a clear protective topcoat for extra durability.
Regular inspection and touch-ups will keep the piece rust-free and looking sharp.
Painting Wicker, Rattan, and Plastic
Although these materials may seem fragile, you can get durable, attractive results by prepping and painting wicker, rattan, and plastic correctly. You’ll clean, sand lightly, and use a primer made for plastic or porous fibers so paint adheres and paint durability improves.
Consider Color mixing to match trims or go bold. Spray paints often give even coverage on woven surfaces; brushes work for tight spots. Seal with a clear exterior topcoat for UV and moisture resistance.
- sun-bleached wicker getting fresh white
- glossy rattan in deep teal
- woven chair with speckled finish
- molded plastic side table in matte black
- repaired armrest with blended tones
Painting Outdoor Cushions and Fabrics: What Works
When you’re painting outdoor cushions and fabrics, you need to check whether the material is compatible with paint — some synthetic performance fabrics resist coating while others accept it.
Use paints formulated for textiles or outdoor use, like acrylic fabric paints or flexible outdoor latexs, to avoid cracking and loss of breathability.
Always test a small hidden area and follow the manufacturer’s curing instructions for best results.
Outdoor Fabric Compatibility
Curious whether you can paint your outdoor cushions without ruining their weatherproofing? You can, but you’ll need to assess fabric compatibility first. Check labels and test a small hidden area; coatings can change breathability and repel water differently.
Consider how painted cushions pair with indoor plants near patios and exposed furniture hardware. Visualize outcomes:
- A sun-faded stripe restored with subtle color
- A spill-resistant patch holding up after rain
- A painted zipper peeking under a cushion edge
- Color matching with rattan and metal frames
- A treated surface shrugging off mildew
Test, choose breathable products, and preserve original treatments when possible.
Paint Types For Cushions
Now that you know how to check fabric compatibility and preserve treatments, you’ll want to pick paints that won’t crack, block breathability, or wash away.
For cushion fabric, choose flexible textile or fabric paints formulated for outdoor use; they bond without stiffening fibers. Acrylic fabric medium mixed with exterior acrylic paint improves adhesion and paint durability while maintaining softness. Spray fabric paints penetrate better for seams and piping.
Always test a hidden patch, cure per instructions, and topcoat with a UV-protective, flexible sealer if recommended. Avoid rigid enamel or house paints that can crack, flake, and reduce breathability.
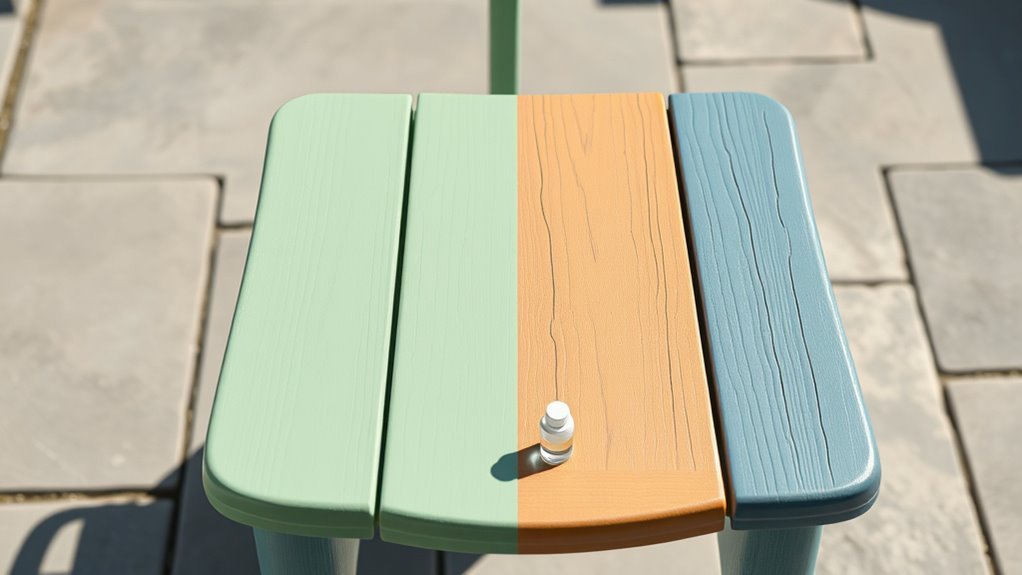
Color Tips for Outdoor Furniture
If you want your outdoor furniture to pop and last, choose colors that balance style with practicality. You’ll pick hues that hide dirt, resist fading, and complement surroundings while nodding to vintage restoration or mirroring indoor ambiance. Think contrast, cohesion, and mood.
- Sun-washed navy against pale decking
- Weathered sage for a cottage vibe
- Bright coral as an energetic focal point
- Matte charcoal to ground mixed materials
- Soft cream to reflect light and unify seating
Test swatches in daylight, consider plantings and cushions, and pick palettes that age gracefully without demanding constant upkeep.
Matching Sheen to Style and Maintenance
Think about how you’ll use the piece and pick a sheen that matches that function.
High-gloss or semi-gloss hides wear and wipes clean easily for high-traffic items.
While satin or matte suits relaxed seating and hides imperfections.
We’ll weigh cleaning needs against the look you want so the finish works long-term.
Match Sheen To Use
Because the finish you choose affects both look and upkeep, match the paint sheen to how the piece will be used and the style you want. You’ll balance color coordination with paint durability: choose matte for rustic charm, satin for moderate traffic, semi-gloss for trim-like resilience, and high-gloss for hard-wearing accents.
Picture use and room vibe before you paint.
- A farmhouse table with matte warmth
- A hallway bench in durable satin
- A kitchen stool with semi-gloss practicality
- Cabinet doors flashing high-gloss shine
- A porch rocker blending finish and function
Pick sheen to suit wear and style.
Cleaning And Upkeep
Now that you’ve matched sheen to use and style, you’ll want a straightforward care plan so the finish keeps looking right over time.
Wipe dust with a soft, dry cloth; dampen slightly for grime, then dry immediately to prevent water spots.
Use mild soap—no harsh solvents—to protect topcoat and any layers that reflect historical significance or modern flair.
Repair chips promptly with touch-up paint and light sanding, then seal if needed.
Avoid abrasive pads and direct sunlight when possible.
Your upkeep preserves durability and lets the piece’s artistic expression remain vivid while extending its usable life.
Cost Comparison: Exterior Paint vs. Furniture Paints
When you’re deciding between exterior paint and furniture-specific formulas, cost matters beyond the price per can — you should weigh coverage, durability, and prep work too.
Exterior paints are often cheaper per ounce and resist weathering, while furniture paints target smoother finish and low-odor formulas for indoor use.
Consider these practical trade-offs and how gardening tips or interior lighting influence where the piece will live.
- a sun-faded porch bench with peeling paint
- a kitchen chair under warm bulbs
- a painted bedside table near a lamp
- a patio table after rain
- a refinished dresser in soft light
Choose based on lifespan and finish needs.
How Long Exterior Paint Lasts on Wood, Metal, Plastic
You weighed cost and finish — now look at lifespan: exterior paint performs very differently depending on substrate.
On wood, properly prepped and sealed, durability’s strong — expect 5–10 years outdoors, less in harsh sun or moisture.
Metal lasts well if you remove rust and use primer; expect 7–15 years before touch-ups.
Plastic’s the trickiest: adhesion depends on surface chemistry and primers, so longevity ranges widely, often 2–7 years.
For any material, finish, UV resistance, and maintenance matter.
Choose products with compatible texture options for adhesion, and plan color matching and periodic maintenance to extend life.
Indoor Application Safety When Using Exterior Paint
When you use exterior paint indoors, keep fresh air moving to cut fumes and exposure.
Check VOC levels and wear a respirator if the label warns of health risks.
Prep the surface and contain cleanup to prevent dust and solvent residue from spreading.
Ventilation And Fumes
Worried about fumes when using exterior paint indoors? You need good indoor ventilation to limit fumes exposure and keep breathing safe. Open windows, run fans, and create air flow so vapors don’t linger while you paint and dry. Wear a respirator if air moves slowly.
- A cross-breeze through two opposite windows
- A box fan blowing out the door
- An exhaust fan near the work area
- A door propped open to a ventilated room
- Damp cloths to catch drips and reduce lingering odor
Check airflow frequently and pause if you smell strong, persistent fumes.
VOCs And Health Risks
Although exterior paints are formulated for outdoors, many still release volatile organic compounds (VOCs) that can build up indoors and cause headaches, dizziness, or respiratory irritation.
So you should minimize exposure by choosing low-VOC products, improving ventilation, and using personal protection like a respirator.
You’ll also want to limit time spent near fresh paint; set up fans, open windows, and keep children and pets away.
Consider drying pieces outdoors if weather allows.
Indoor plants won’t neutralize VOCs reliably, though they can make a room feel fresher.
Be mindful that darker paint color may emit stronger odor during curing.
Surface Preparation And Cleanup
If you’re using exterior paint indoors, prepare the surface and cleanup plan before you open the can. You’ll ventilate the room, protect floors, and prep the piece for adhesion. Sand, clean, and degloss to guarantee texture contrast where you want it; prime porous spots. Think color coordination early so drips don’t force last-minute changes. Keep cleanup supplies handy and contain dust and fumes.
- Drop cloths taped down
- Masking to protect trims
- Sanding block and tack cloth
- Nitrile gloves and respirator
- Paint thinner, rags, sealed waste can
Work methodically and dispose of solvents properly.
Disposing Leftover Exterior Paint Responsibly
When you finish a project, don’t just toss leftover exterior paint in the trash or pour it down the drain; hazardous chemicals can harm the environment and clog waste systems. You should check local hazardous-waste drop-offs, share usable cans with neighbors for color customization, or donate to community groups. Consider solidifying small amounts with kitty litter before disposal if allowed. Track disposal rules to reduce environmental impact and avoid fines.
| Action | Benefit |
|---|---|
| Hazardous-waste drop-off | Proper disposal |
| Donate/share | Saves resources |
| Solidify small cans | Safer landfill |
| Recycle cans | Metal recovery |
Alternatives to Exterior Paint for Outdoor Furniture
After you’ve handled leftover paint responsibly, you might prefer options that avoid paint altogether for your outdoor furniture. You can choose durable materials and treatments that resist paint weathering and blend with surroundings. Think about maintenance, style, and how pieces interact with indoor plants if you move them inside seasonally.
Consider these alternatives to paint:
- Natural teak oil enriching wood grain and repelling moisture
- Powder-coated metal frames that resist chipping and rust
- Weatherproof cushions and slipcovers adding color without coating
- Reclaimed wood with sealant highlighting texture
- Composite decking boards for long-lasting, low-maintenance surfaces
Each option cuts repainting and upkeep.
When to Use Exterior-Grade Wood Stain Instead
Because exterior-grade wood stain soaks into fibers instead of sitting on top, you should choose it for raw or stripped wood that needs UV and moisture protection without hiding grain.
Use stain when you want visible texture, simpler maintenance, and faster drying than many paints.
Match opacity to exposure: transparent for mild weather, semi-transparent for moderate protection, solid for maximum coverage.
Consider color mixing only to adjust tone before application, not after.
Keep leftover stain sealed and store upright in a cool, dry place; good paint storage practices apply to stains too to prevent spoilage and contamination.
When Lacquer, Chalk Paint, or Enamel Are Better
If you’re weighing stain against other finishes, lacquer, chalk paint, or enamel can be better when you need faster build, harder surfaces, or specific looks that stain can’t provide. You’ll choose based on durability, sheen, and style: lacquer for smooth rapid layering, chalk paint for matte texture and distressing, enamel for toughness.
Practice color mixing to match decor and learn brush techniques for even coats or faux effects. Imagine finishes:
- A glossy lacquered tabletop reflecting light
- Chalk-painted drawers with soft patina
- Enamel on outdoor benches resisting scuffs
- Layered tones from careful color mixing
- Smooth edges from deliberate brush techniques
Combining Exterior Paint With Epoxy or Polyurethane
When you combine exterior paint with a clear epoxy or polyurethane topcoat, you get both color and long-lasting protection—paint supplies the hue and coverage while the clear coat seals out moisture, UV, and abrasion.
Combine exterior paint with a clear epoxy or polyurethane topcoat for color plus durable protection against moisture, UV, and abrasion
You’ll prep surfaces, sand lightly between coats, and choose a compatible clear coat for adhesion.
Epoxy gives a hard, chemical-resistant finish; polyurethane adds flexible, scratch-resistant resilience.
Mind that color blending can shift slightly under glossy clears, so test samples first.
This pairing enhances paint durability for outdoor or high-use furniture, letting you retain vibrant color while resisting weathering and wear.
Maintenance Routine for Exterior-Painted Furniture
Combining exterior paint with a clear epoxy or polyurethane gives your furniture robust protection, but you’ll still need a regular maintenance routine to keep that finish looking and performing its best. Check monthly for chips, dirt, and water pooling. Wipe with a mild soap solution, rinse, and dry. Touch up chips promptly with matching paint color to prevent moisture intrusion. Tighten hardware and sand tiny rough spots before recoating.
- Sweep debris off surfaces
- Blot spills immediately
- Inspect seams and joints
- Lightly sand glossy wear areas
- Reapply clear coat as needed
This keeps outdoor furniture durable and attractive.
Seasonal Care and Winter Prep
As temperatures drop and storms pick up, you’ll want to prepare exterior-painted furniture so it stays protected through winter. Move smaller pieces indoors as Indoor accents or into a shed; cover larger items with breathable, waterproof covers and elevate legs off cold, wet ground.
Clean and touch up chips with matching exterior paint and re-seal joints to block moisture. For Holiday decorating, avoid adhesive hooks that strip finishes; use ribbon or clamps that won’t trap water.
Check covers after heavy weather and air out stored pieces on mild days to prevent mildew. Plan spring inspections for trapped moisture damage.
Real Examples: When Exterior Paint Worked-And When It Failed
You’ve prepped and stored your pieces for winter, but real-world outcomes show how those steps pay off—or don’t. You’ll see success when exterior paint resists rain and salt near marine environments, or when good priming prevents peeling.
Failures often trace to poor prep or using outdoor gloss indoors, which can harm indoor air quality.
Failures usually come from bad prep or using outdoor gloss inside — an easy way to wreck finishes and indoor air.
- Sun-bleached Adirondack chair that held color for five summers
- Rusty hardware lifting paint on a porch bench
- Crisp finish on a painted teak table near the sea
- Chalky flake after skipping primer
- Fumes lingering in a small room
Step-by-Step Painting Checklist
Before you pick up a brush, gather your tools and set a clear sequence: clean, sand, prime, paint, and seal.
Start by removing hardware and wiping surfaces with a degreaser so dirt won’t interfere. Sand to dull gloss and smooth imperfections, then vacuum and tack-cloth dust.
Apply a suitable primer for adhesion, especially on slick outdoor-grade surfaces. Use thin, even coats of exterior paint, letting each dry fully before the next.
Lightly sand between coats if needed. Finish with a compatible sealer for durability.
This checklist helps integrate exterior paint into interior decor and successful furniture restoration.
Troubleshooting Quick Fixes After Painting
If a drip, sticky spot, or uneven patch shows up after the paint’s dry, act quickly to minimize damage and save time later. You can correct most flaws without stripping layers: sand lightly, clean, and feather in touch-ups.
For sticky areas, wait longer or apply a thin coat of compatible sealer. Keep weather resistance and color retention in mind when choosing fixes so outdoor pieces stay durable.
- Sand the blob until smooth
- Wipe dust with a tack cloth
- Reapply thin, even coats
- Match sheen and pigment precisely
- Seal with a weather-resistant topcoat
Check results in good light.
Frequently Asked Questions
Can Exterior Paint Be Used on Indoor Heirloom or Antique Furniture Safely?
Yes — you can, but you shouldn’t assume it’s ideal for heirloom or antique furniture. You’ll need proper surface preparation, and exterior paint gives excellent paint durability; still, test compatibility and consider preservation before proceeding.
Will Exterior Paint Affect Mattress, Bedding, or Indoor Air Quality Long-Term?
If you paint near your mattress, bedding, or indoors, you’ll likely notice stronger odors initially and possible VOCs; over time paint durability and color fading matter less than ventilation and low‑VOC choices, so you should ventilate consistently.
Can Pets or Children Safely Use Furniture Painted With Exterior Paint Indoors?
Yes — but only after proper curing and sealing: you’ll reduce chemical toxicity and maintain paint durability by ventilating, using low-VOC options, letting full cure time pass, and applying a tested non-toxic clear topcoat before indoor use.
How Does Exterior Paint Smell Evolution Compare to Indoor Paints Over Months?
Exterior paints usually emit stronger solvents initially but their odor longevity’s similar or slightly longer than indoor paints; you’ll notice paint durability benefits, yet you’ll still want ventilation and time for off-gassing to minimize lingering smells.
Are There Warranty or Insurance Implications for Using Exterior Paint on Furniture?
Like a contract’s fine print, you’ll find warranties may exclude furniture treated with non-specified coatings. You’ll want to check policies; Paint durability and Color options can affect claims, so document choices and get insurer approval beforehand.
Conclusion
Yes — you can use exterior paint on furniture, but don’t treat it like a magic wand. If you want ultimate weatherproof armor for your porch bench, exterior paint’s your superhero cape; for delicate indoor pieces, it can feel like wrapping a soufflé in burlap. Know the surface, prime properly, and seal if needed. Done right, it fights sun, rain, and toddler attacks; done wrong, it peels, smells, and ruins the vibe. Choose wisely.