Can I Use Latex Paint on Wood
Yes — you can use latex paint on most interior and many exterior wood surfaces if you prep properly. Sand, clean, and prime bare or tannin-rich wood, seal end grain, and choose a quality acrylic latex for durability. Use oil or shellac primer for heavy stains or knotty pine, and sand between coats for a smooth finish. Work in moderate temperatures and let coats fully cure, and keep going to learn the detailed steps and tips.
Short Answer: When Latex Paint Works on Wood
When you’re painting interior trim, furniture, or smooth, well-prepared exterior wood, latex paint usually works great because it’s flexible, quick-drying, and easy to clean. You’ll choose latex when surfaces are stable and you want low-odor, durable coverage.
Prep matters: sand, clean, and prime porous or tannin-rich woods so adhesion won’t fail. Use proper brushes or rollers and apply thin, even coats for best leveling.
For tricky shades, rely on color matching at the store and precise paint mixing to achieve consistency between batches. You’ll avoid latex where heavy moisture, severe movement, or high-heat exposure occur.
When to Use: and Avoid: Latex on Wood
If your project involves stable, interior wood or well-sealed exterior trim, go ahead and choose latex paint for its flexibility, quick drying, and easy cleanup. Use it on doors, baseboards, cabinets, and window casings where surfaces are sound and joints are caulked.
Avoid latex on raw exterior siding prone to moisture, on surfaces with peeling finish, or where high-heat exposure occurs. Don’t paint over rusted metal hardware without proper priming, and avoid latex for outdoor furniture that flexes.
In interior design, lean on latex for color-rich walls and trim, but prep thoroughly for lasting adhesion and durability.
How Wood Species Affects Latex Paint Adhesion
Whether your project uses softwood like pine or hardwood like oak matters because they accept latex differently.
You’ll notice softwoods are more porous and soak up primer and paint.
While dense hardwoods may need sanding and a bonding primer to stick.
Pay attention to grain direction too, since it influences how smoothly the paint applies and how long the finish lasts.
Softwood Vs. Hardwood
Because softwoods and hardwoods differ in density, grain, and sap content, they take latex paint differently — and that affects how you should prepare and finish them.
You’ll find softwoods like pine absorb primer unevenly and may need de-greasing to avoid sap bleed-through.
Hardwoods like oak resist penetration and benefit from light sanding for adhesion.
For both, choose primers suited to the species, then use quality latex for uniform color mixing and coverage.
If you want low-VOC, eco-friendly options, pick water-based primers and paints designed for exterior or interior wood, and follow manufacturer cure times.
Porosity And Grain
Moving from species differences to surface characteristics, porosity and grain determine how well latex paint sticks and how many coats you’ll need. You’ll notice open-grained woods like oak soak more paint, so prime and expect extra coats. Tight-grained woods like maple need sanding for tooth.
Porosity affects absorption rate, which changes drying time and final sheen. Therefore, test a small area before committing.
When mixing colors, account for base absorption to avoid surprises in color mixing results.
Store leftover latex properly—seal cans, avoid freeze/thaw in paint storage—to keep primers and paints reliable for touch-ups.
Latex on Softwoods vs. Hardwoods
When you paint wood, the species matters: softwoods like pine absorb more and may need sealing, while hardwoods like oak take paint more evenly but can show grain through thinner coats.
You’ll prep softwoods by sanding, filling knots, and using a primer or sealer to prevent blotchy absorption and reduce the need for repeated coats.
Hardwoods often need less sealing but benefit from light scuff-sanding to help adhesion.
If you plan wood staining beforehand or later, test a scrap.
And if old finishes remain, consider paint stripping first to guarantee uniform coverage and proper adhesion.
Can You Use Latex on Plywood and MDF?
If you’re working with plywood or MDF, you can generally use latex paint, but you’ll need to prepare the surface first to get a smooth, durable finish. Sand, fill seams, and apply a quality primer to seal porous edges; MDF especially soaks up moisture. Choose paint texture based on wear—satin for cabinets, eggshell for walls. For Color matching, test swatches over primer and view in different light. Expect to sand between coats for ultra-smooth results.
| Material | Prep Tip |
|---|---|
| Plywood | Seal edges, prime |
| MDF | Sand, use oil-based primer |
Is Latex Paint Suitable for Exterior Wood?
You can use latex on exterior wood, but it only performs well if you choose the right product and prep the surface properly.
Pay attention to weather durability—pick a high-quality exterior latex with UV and moisture resistance and the right finish for your exposure.
Clean, sand, prime, and seal any bare or damaged areas before painting to guarantee a long-lasting coating.
Durability In Weather
Although latex paint handles moisture and sun exposure better than many alternatives, its suitability for exterior wood depends on formulation and prep. You’ll want exterior-grade latex, UV-resistant varnishes, and flexible blends that resist cracking. Use proper painting techniques to guarantee even coverage and think about color matching for heat absorption—darker tones can heat and stress finishes. Expect good performance on siding, trim, and furniture if you maintain seals and recoat as recommended.
| Property | Benefit | Limit |
|---|---|---|
| Flexibility | Resists cracking | Eventually degrades |
| UV resistance | Slows fading | Not permanent |
| Moisture resistance | Prevents swelling | Needs recoating |
Proper Surface Preparation
Because proper prep lets latex bond and flex with exterior wood, don’t skip cleaning, sanding, and priming before you paint. You should remove dirt, mildew, and loose fibers with a stiff brush and mild detergent, then rinse and let the wood dry fully.
Sand glossy or rough areas for adhesion and feather edges of old coatings.
Use an exterior-grade primer tailored to wood; it seals tannins and improves flexibility.
Stir thoroughly when doing color mixing to maintain uniform pigment, and label cans before storage.
For paint storage, keep lids sealed, store upright in a cool, dry place, and use within manufacturer timelines.
Paint Type And Finish
How well will latex paint hold up on exterior wood? You’ll find it resists moisture and UV better than oil, but choose 100% acrylic latex for flexibility and adhesion.
Pick a satin or semi-gloss finish for trim and high-traffic areas; flatter sheens hide imperfections but shed water less.
Remember proper color mixing for consistent coverage when matching touch-ups, and rotate cans to avoid settling.
For durability, combine suitable primer, topcoat, and maintenance.
Store leftover paint correctly—seal lids, label cans, and follow paint storage guidelines to preserve performance for future repairs.
- Choose 100% acrylic latex
- Use satin/semi-gloss for trim
- Mind color mixing
- Practice proper paint storage
Using Latex in High-Moisture Areas
Wondering whether latex paint can handle damp rooms? You can use latex in bathrooms and basements if you pick a moisture-resistant formula and guarantee good ventilation.
Choose semi-gloss or satin for easier cleaning and mildew resistance.
Watch exposed wood edges and joints—seal them with a compatible caulk or waterproofing product first.
For repairs or touch-ups, pay attention to color matching when you replace boards; proper paint mixing and tinting help maintain a uniform look.
Maintain humidity control and wipe wet surfaces promptly to prevent peeling.
Regular inspection and spot maintenance will extend the finish’s lifespan in moist environments.
Do You Need Primer Before Painting Wood With Latex?
If you’ve prepped damp-area wood properly—sealing edges and keeping moisture down—the next step is deciding whether to prime before applying latex. You’ll usually need primer on bare or stained wood to seal tannins, even out porosity, and control wood grain telegraphing under thin latex.
Primer also helps paint sheen look uniform and improves adhesion.
Primer evens out paint sheen and boosts adhesion for a smoother, longer-lasting finish
- Bare wood benefits from primer to block stains.
- Previously painted, well-adhered surfaces may skip primer.
- High-porosity grain often needs sealing for even finish.
- Use primer when switching from oil to latex to prevent adhesion issues.
Decide based on substrate and desired durability.
Best Primers for Latex on Bare Wood
When you’re prepping bare wood for latex paint, picking the right primer makes a big difference.
You can choose an oil-based bonding primer for tough adhesion, a shellac-based sealer to block knots and tannins, or an acrylic latex primer for easy cleanup and flexibility.
Each option works best for specific problems, so match the primer to the wood’s condition.
Oil-Based Bonding Primer
Because oil-based bonding primers create a tough, adhesive layer, they’re one of the best choices for sealing bare wood before you apply latex paint. You’ll get superior adhesion, reduced tannin bleed, and a stable base that helps hide minor wood grain inconsistencies.
Apply with a brush or roller, sand lightly between coats, and allow full cure before topcoating.
- Bonds well to raw wood
- Resists tannin and sap bleed
- Provides a uniform base for latex paint
- Improves topcoat durability
Use ventilation and follow manufacturer instructions; oil-based primers take longer to dry than waterborne products.
Shellac-Based Sealer
Alongside oil-based primers, shellac-based sealers offer a powerful option for prepping bare wood before you apply latex paint. You’ll get excellent stain blocking, rapid drying, and strong adhesion that prevents tannin bleed-through and knots from ruining your finish.
Apply thin, even coats and sand lightly between layers for a smooth base. Shellac isn’t water-resistant when uncured, so seal it properly before exterior exposure.
If you’re concerned about Latex paint myths, note shellac’s reliable performance under latex topcoats. Though not the most Eco friendly options, modern formulas reduce VOCs while keeping shellac’s longtime benefits.
Acrylic Latex Primer
Looking for a reliable, user-friendly primer for bare wood? You’ll like acrylic latex primer: it seals grain, sands smoothly, and accepts latex paint easily. It tolerates moisture better than oil primers, so you can finish faster and worry less about lumber pricing forcing shortcuts.
Use it to stabilize knots and provide a uniform base that preserves your paint color options. Apply with brush, roller, or sprayer; one coat usually works on prepared wood.
- Dries quickly for fast recoats
- Low odor and easy cleanup
- Good adhesion to most woods
- Flexible with temperature swings
When to Choose Oil-Based Primer Instead
If your wood has heavy stains, tannin bleed, water damage, or previously-used oil finishes, pick an oil-based primer — it blocks stains and bonds better to oil residues than latex primers do. You’ll choose oil when you need Oil based primer advantages: superior stain blocking, better adhesion to contaminated surfaces, and a more reliable base for long-term Latex paint durability in challenging situations. Use oil primer on trim, old varnish, or pitchy knots.
| Situation | Why oil primer helps |
|---|---|
| Stained wood | Blocks tannins |
| Water damage | Seals fibers |
| Old oil finish | Bonds well |
| Knotty pine | Stops sap bleed |
| High-traffic trim | Durable base |
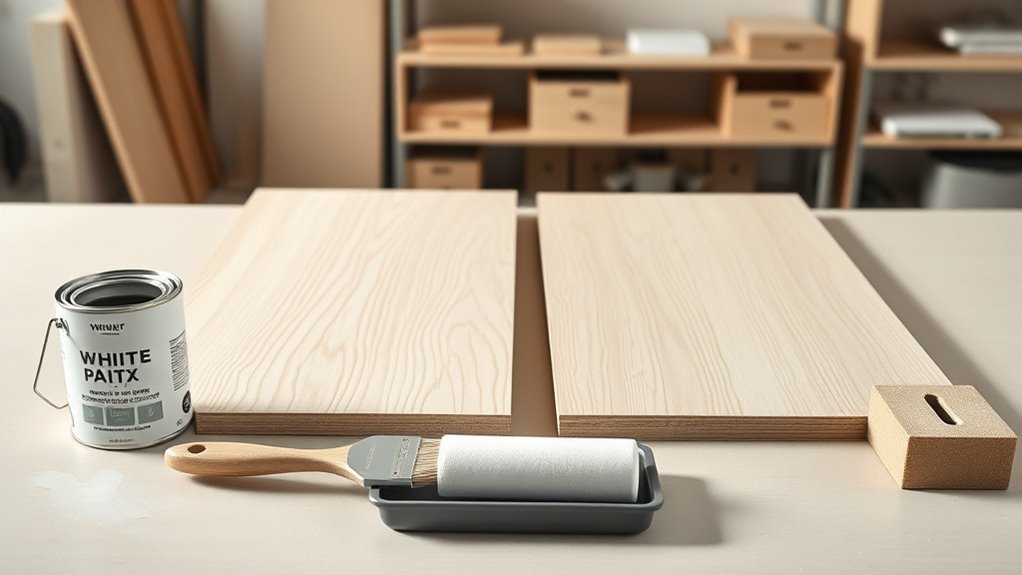
How to Prep New, Bare Wood for Latex Paint
Once you’ve decided oil primer is unnecessary, prep new, bare wood so latex paint will adhere and look smooth. You’ll sand to remove mill glaze, clean dust, and seal pores with a water‑based primer.
Choose primer tinting for Color matching to reduce topcoat coats. Consider grain and desired finish when selecting Texture options—smooth, satin, or semi‑gloss.
- Sand with 120–150 grit, finish with 220 for smooth surfaces
- Wipe with tack cloth, then clean with mild detergent
- Apply a thin, even coat of water‑based primer
- Lightly sand primer (220) before applying latex topcoat
This guarantees even coverage and durable adhesion.
Prepping Previously Painted Wood for Latex
Start by checking the existing paint for peeling, cracking, or chalking so you know whether to strip or just spot-repair.
Clean and degrease the surface thoroughly to remove dirt, oils, and residues that will prevent adhesion.
Finish by sanding or scuffing glossy areas to create enough tooth for the latex to stick.
Assess Existing Paint Condition
Before you repaint, inspect the existing finish to determine adhesion, film condition, and compatibility with latex—look for peeling, cracking, chalking, blistering, or glossy oil-based layers that may prevent proper bonding. You’ll test adhesion with a scrape or tape pull.
Note chalking by rubbing a cloth, and identify oil-based gloss with a solvent or smudge test. Record color mixing concerns if previous coats will affect final tint.
Confirm paint ventilation while working to avoid fumes. Decide whether sanding, deglossing, or a bonding primer is needed before applying latex to achieve a durable finish.
- Check adhesion first
- Look for chalking
- Test for oil-based gloss
- Note color mixing impact
Clean And Degrease Surface
After you’ve confirmed the old finish will accept latex, clean and degrease the surface thoroughly so the new paint can bond properly. Use a mild degreaser or TSP substitute, work in small sections, and rinse with clean water. Remove grease, wax, and contaminants; let dry fully. If you’ll be doing color matching or paint mixing, clean samples ensure accuracy. Test-clean an inconspicuous area before full cleaning.
| Task | Product |
|---|---|
| Grease removal | TSP substitute |
| Final wipe | Clean water |
Keep wipes and brushes dedicated to avoid cross-contamination during cleanup.
Sand And Scuff For Adhesion
With the surface clean and dry, scuffing or sanding the old paint creates the tooth latex needs to bond properly. You’ll sand lightly with fine-grit paper or use a scuff pad to remove gloss and rough up the surface without stripping all paint.
That prepares wood for primer, aids color blending between old and new layers, and supports texture enhancement where needed. Clean dust thoroughly before priming.
Focus on even abrasion; avoid deep gouges. Consider spot-sanding repairs and feathering edges for smooth progressions.
- Use 220–320 grit for light scuffing
- Sand along grain only
- Remove dust with tack cloth
- Prime scuffed areas promptly
How to Identify and Remove Old Oil-Based Paint
How can you tell if the paint on your wood is oil-based? Look for a hard, glossy paint sheen and obscured wood grain; oil finishes often feel slick. Test with denatured alcohol on a hidden spot — if it softens, it’s likely latex; if not, it’s oil.
| Step | Indicator | Action |
|---|---|---|
| 1 | Glossy sheen | Try solvent test |
| 2 | Hidden wood grain | Assess adhesion |
| 3 | Brittle layers | Score and peel |
| 4 | No solvent reaction | Use chemical stripper |
Use a compliant stripper, follow directions, scrape gently, then neutralize and clean before priming for latex.
Sanding Tips for a Smooth Latex Finish
Before you prime or topcoat, sand the wood to create an even, slightly roughed surface that helps latex adhere—use 120–150 grit for bare wood and 180–220 grit between coats. You’ll sand with the grain, keep even pressure, and check for smooth progressions at edges.
Sand with the grain using 120–150 grit for bare wood, 180–220 between coats; keep even pressure and dust-free.
Choose sandpaper and dust masks that align with eco friendly options if that matters. Light tack-cloth wiping removes dust before painting.
Consider color matching by testing small areas after sanding to guarantee primer and topcoat yield the desired hue.
- Sand with the grain
- Use progressive grits
- Remove dust thoroughly
- Test for color matching
Cleaning Wood Before Painting
Although sanding preps the surface, cleaning wood before painting removes the fine dust, oils, and contaminants that still prevent latex from bonding properly. You’ll vacuum or brush away sanding dust, then wipe with a tack cloth or damp microfiber.
For oily or grimy spots, use a diluted trisodium phosphate substitute or mild detergent, rinse, and let dry thoroughly.
If previous coatings require paint removal, strip or chemically treat per product instructions, then neutralize residue before cleaning.
For wood staining projects, guarantee stain is fully dry and wiped clean so the latex adheres evenly.
Always work in ventilated conditions.
Filling Holes and Sealing Open Grain
If you want a smooth, professional finish, fill nail holes and gouges and seal open-grain woods before you paint; doing so prevents paint from sinking into pores and highlights.
You should use a wood filler for dents, sand flush, then apply a grain sealer or thin layer of primer to close pores.
Test color matching on scraps after paint mixing; fillers can affect sheen and tint.
Seal edges and end grain to avoid blotching.
Follow with light sanding and dust removal.
Use compatible products (water-based for latex) and verify adhesion before final coats.
- Fill deep holes first
- Sand smooth
- Seal open grain
- Test color matching and paint mixing
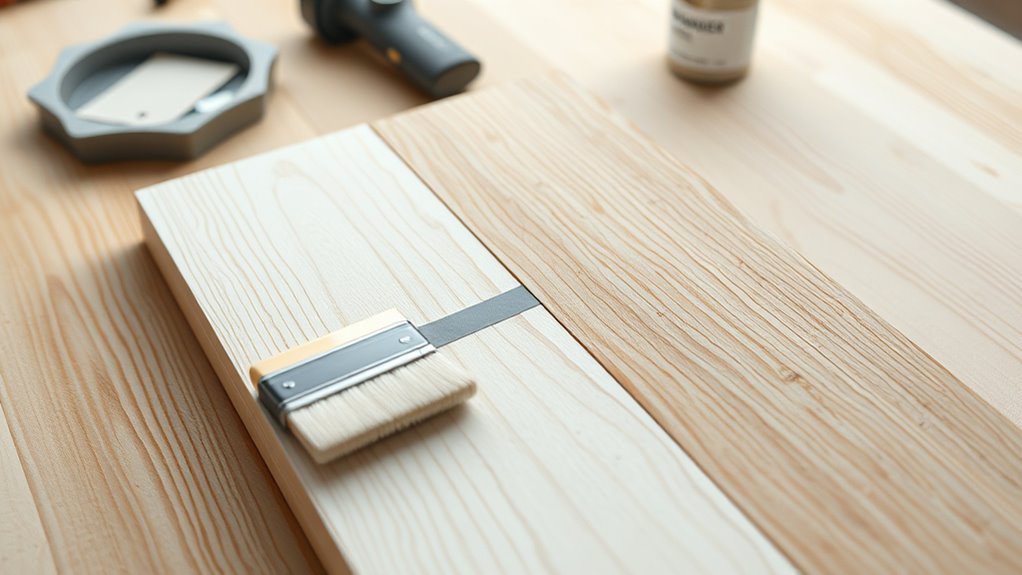
Best Brushes and Rollers for Latex on Wood
When you’re painting wood with latex, choosing the right tools makes a big difference. Natural-bristle brushes hold paint well for oil but are less ideal for latex.
Synthetic brushes are designed to shed less and give a cleaner cut on edges. For large flat areas, foam rollers deliver an extra-smooth finish without brush marks.
Natural-Bristle Brush Benefits
Because natural-bristle brushes hold paint differently than synthetics, they give you a smoother finish on wood with oil-based or oil-modified latex, letting you work with fewer brush marks and better edge control.
You’ll find them ideal for fine-grain tasks like garden furniture and trim where a soft laydown matters, and for interior walls trim that needs crisp edges. They pick up and release paint evenly, helping you reduce strokes and touch-ups.
Use them on primed or oil-tolerant surfaces; avoid pure water-based latex on bare wood.
- Smooth laydown
- Superior edge control
- Excellent paint pickup
- Reduced brush marks
Synthetic Brush Advantages
Although natural bristles shine with oil-based paints, synthetic brushes and rollers give you the control and durability you need for latex on wood.
You’ll find nylon, polyester, or blended filaments resist swelling with water-based formulas, maintain shape, and release paint evenly so brushstrokes are minimal.
Choose a synthetic sash brush for trim and a short-nap roller for flat panels; both help you achieve consistent coverage and accurate color matching.
Clean-up is simple with soap and water, letting you reuse brushes without damage.
Invest in quality synthetics to save time and get a professional-looking finish on wood.
Foam Rollers For Smoothness
If you want an ultra-smooth, brush-free finish on flat wood surfaces, foam rollers are your go-to tool. You’ll get minimal texture and even coverage with latex when you roll in thin, overlapping passes.
Choose a high-density foam for self-primed wood and a low-nap roller for sealed or glossy pieces.
Keep rollers clean between coats and follow paint storage guidelines to avoid skinning.
Foam works well after any Color mixing so hues stay consistent across panels.
Use light pressure to prevent bubbles and replace the roller if it deforms.
- High-density for primer
- Low-nap for gloss
- Clean between coats
- Replace when worn
Spraying Latex Paint on Wood
When you spray latex paint on wood, you’ll get a smooth, even finish faster than brushing or rolling, but success depends on preparation, equipment, and technique.
You’ll sand, clean, and prime to guarantee adhesion and prevent blotches. Thin paint per sprayer instructions to avoid clogging, and test spray on scrap wood for proper atomization and color mixing.
Maintain your sprayer: flush after use, replace worn tips, and check seals—tool maintenance prevents drips and streaks.
Spray in thin, overlapping passes, keep consistent distance and motion, and work in controlled conditions to avoid runs and orange peel.
How Many Coats of Latex Paint on Wood
After spraying a first coat and letting it dry, you’ll usually need one or two additional coats of latex on wood to build color depth and durability. Most projects are satisfied with two coats total, while high-traffic surfaces or drastic color changes often benefit from three.
After the first coat dries, plan one or two more latex coats—two usually, three for heavy wear or big color changes
You should assess wood grain, primer coverage, and desired finish. Use Color matching to guarantee consistency between coats, and consider Eco friendly options if indoor air quality matters.
Light sanding between coats improves adhesion and smoothness. Aim for even application rather than extra thickness.
- Inspect for full coverage
- Sand lightly between coats
- Match color across test panels
- Choose low-VOC paints
Drying and Recoat Times for Latex Paint
Although latex paint feels dry to the touch within 30–60 minutes under ideal conditions, you’ll usually need to wait 2–4 hours before recoating and up to 30 days for full cure. You should plan projects around those windows so you don’t mar the finish while handling wood.
Thin, even coats dry faster; avoid heavy application. If you mix colors, allow extra drying time between coats to prevent lifting or tint contamination during color mixing.
Store leftover paint properly—tight lid, cool place—to preserve recoat performance and color accuracy. Proper timing and paint storage help achieve a smooth, durable wood finish.
How Temperature and Humidity Affect Latex Paint
Curious how weather plays into your paint job? You’ll want to control temperature and humidity because they change drying speed, adhesion, and finish.
Too-cold conditions slow curing and can cause poor film formation. Too-hot, especially with low humidity, dries the surface before the paint levels. High humidity extends drying and risks a milky finish or trapping moisture.
- Ideal painting temperature: typically 50–85°F (10–29°C)
- Avoid painting in direct sun or when rain’s forecast
- Store mixed cans properly to prevent contamination during paint storage
- Stir thoroughly to ensure consistent color mixing before application
Getting Even Color on Knotty or Resinous Wood
Knotty or resinous wood can bleed tannins and sap through paint, so you should seal knots first with a shellac-based or specialty knot blocker to stop stains.
After sealing, use a tinted primer slightly darker than your topcoat to even out absorption and reduce the number of finish coats.
These two steps give you a much more consistent, stain-free color on tricky wood.
Seal Knots First
If your wood has visible knots or resin pockets, seal them before you paint so they don’t bleed through and discolor the latex finish. You’ll clean the area, sand lightly, and apply a shellac- or knot-sealing primer that blocks tannins and sap. This prevents streaks on smooth surfaces and patterned pieces like lattice patterns or thin wood veneer panels.
After sealing, sand smooth and spot-prime any missed spots. For best results, follow manufacturer cure times and test a small area.
- Use a shellac-based sealer for heavy resin.
- Sand between coats for adhesion.
- Keep a lint-free cloth for wiping.
- Test on scrap wood first.
Use Tinted Primer
When you’re working with knotty or resinous wood, tinting the primer toward your topcoat color evens out absorption and hides variations so you’ll need fewer finish coats.
You’ll pick a primer tint that approximates the final paint color to mask resin bleed and dark knots. Apply a thin, even coat and let it cure fully; resin can be unpredictable, influenced by weather patterns and humidity.
If resin still shows, spot-apply a second tinted layer before sanding lightly.
Matching primer to paint color reduces labor, improves coverage, and helps you achieve consistent, professional-looking results on challenging wood.
Preventing Tannin and Resin Bleeding
Because some woods—like cedar, redwood, and certain tropical species—bleed tannins and resins that stain and lift paint, you’ll want to seal them before applying latex. Choose a quality stain-blocking primer or an oil-based sealer; you’ll protect the wood and simplify color matching while reducing bleed-through. Test a small area first.
Consider eco-friendly options like low-VOC sealers if indoor air quality matters. After sealing, sand lightly and wipe dust before painting. Maintain the finish by checking joints and end-grain.
- Always test primer compatibility
- Use multiple thin coats
- Seal end-grain thoroughly
- Allow full cure before topcoat
Choosing Sheen: Flat, Satin, Semi-Gloss
After sealing tannin-prone or resinous wood and sanding smooth, pick the paint sheen that matches the room’s needs and wear level. Flat hides imperfections and suits low-traffic areas.
Satin offers mild sheen and easier cleaning for trim or doors. Semi-gloss resists scuffs and is ideal where you need durability and shine.
Choose based on light reflection, cleaning frequency, and aesthetic. Test small patches to confirm appearance under your lighting.
When color mixing, note sheen affects perceived hue.
Store leftover latex properly—seal cans, label sheen and color, and follow paint storage guidelines to keep consistency for future touch-ups.
Making High-Traffic Wood Surfaces More Durable
To keep high-traffic wood looking good, you’ll start with proper surface preparation—clean, sand, and prime so the finish sticks.
Pick a durable coating like a satin or semi-gloss latex formulated for floors or trim, or add a clear polyurethane topcoat for extra protection.
Finally, plan routine maintenance and quick touch-ups to stop small dings from becoming bigger problems.
Proper Surface Preparation
Want your painted wood floors or stair treads to stand up to daily wear? You’ll prep carefully: clean, repair, sand, and prime so latex bonds and finishes last despite traffic and changing weather patterns. Consider moisture levels before painting and avoid painting in extreme humidity; proper paint mixing and pot life matter for uniform coverage.
Seal gaps and loose boards, remove contaminants, and sand to dull glossy surfaces. Then apply a quality primer suited to wood.
- Clean thoroughly (degreasers if needed)
- Repair cracks and loose nails
- Sand to a consistent profile
- Use the right primer and dry conditions
Choosing Durable Coatings
How can you make painted wood floors and stair treads stand up to heavy use? Choose a high-quality latex or alkyd floor enamel with abrasion resistance and quick curing. Apply a durable primer compatible with wood and follow manufacturer recoat times.
For extra protection, add two-part polyurethane or waterbased polycrylic topcoats rated for floors; test adhesion on scrap first. Maintain proper paint ventilation while curing to avoid trapped solvents and guarantee full hardness.
Consider darker stains or tinted topcoats and thoughtful color mixing to hide wear. Use recommended rollers or pads and allow full cure before heavy traffic to maximize longevity.
Maintenance And Touch-Ups
While durable finishes are your first line of defense, regular maintenance and quick touch-ups will keep high-traffic wood floors and stair treads looking good and extend their life. You’ll inspect daily wear, clean gently, and sand tiny scuffs before they worsen.
Match touch-up paint by testing color mixing on scrap wood and note sheen differences. Work with proper paint ventilation when you apply repairs. Use compatible primer and finish for adhesion, and avoid heavy traffic for 24–48 hours after recoating.
- Clean area before repair
- Feather edges with fine sandpaper
- Match sheen and color
- Ventilate and cure fully
Finishing Trim and Molding With Latex Paint
Before you start, make sure the trim is clean, sanded smooth, and primed—latex paint sticks best to a well-prepared surface. You’ll seal gaps with caulk, sand between coats, and choose a semi-gloss or satin for durability and easy cleaning.
Use a high-quality angled brush for crisp edges and work in long, smooth strokes to avoid brush marks. Consider color mixing tests on scrap trim to confirm hue under room lighting.
Store leftover paint properly—tight lids, cool dry place—for future touch-ups. Drying times vary; wait between coats for a hard, even finish that resists scuffs.
Painting Furniture With Latex: Pros and Cons
Trim and molding prep practices carry over to furniture, but painting furniture with latex has its own rewards and limits. You’ll like latex color options and easy cleanup; its paint drying speed helps you finish projects faster.
However, latex can chip on high-use pieces and may need sanding for adhesion on glossy surfaces.
- Choose durable latex for frequent-use items
- Sand and prime glossy or oily woods first
- Test color on a small area before committing
- Expect quicker recoats but protect during cure
Weigh convenience and appearance against durability for the piece’s meant use.
When to Add a Clear Topcoat or Sealer
You’ll want to seal painted wood when the surface will get wear, moisture, or frequent cleaning to protect the finish and extend its life.
Choose a clear coat based on durability and sheen—water-based poly for easy cleanup and low odor, oil-based for tougher protection, or a wax for a softer, furniture-friendly feel.
Apply the sealer after the latex paint has fully cured and follow manufacturer drying times for best results.
When To Seal Painted Wood
Wondering whether to add a clear topcoat? You should protect painted wood when it faces wear, moisture, or frequent cleaning.
Outdoors—like garden furniture—needs protection from sun and rain. Indoors, seal high-touch pieces and any painted trim that meets metal surfaces or hardware to prevent corrosion and chipping.
Seal right after paint cures per manufacturer instructions; don’t wait until damage appears.
- High-traffic surfaces
- Outdoor exposure and UV
- Moisture-prone areas (bath, kitchen)
- Contact with metal or hardware
Choose a compatible sealer and test a small area first to ensure adhesion and finish.
Clear Coat Types Explained
When should you add a clear topcoat? You’ll add one when you need extra durability, UV protection, or to lock in color matching after latex paint. Choose water-based poly for low environmental impact and quick drying; use oil-based for tougher surfaces but expect stronger fumes. Spar urethane for floors, and lacquer for smooth furniture finishes. Test first.
| Type | Best for | Notes |
|---|---|---|
| Water-based poly | Indoor trim | Low VOC, clear |
| Oil-based poly | High-traffic floors | Durable, yellowing |
| Spar urethane | Exterior wood | UV resistance |
| Lacquer | Furniture | Fast dry, glossy |
Repairing Chips and Scratches in Latex Paint
If a chip or scratch mars your latex-painted wood, you can usually fix it yourself with a few simple steps and common tools. Clean the area, sand lightly, apply a primer if bare wood shows, then feather on matching latex paint.
For best results, test color mixing on scrap to match sheen and tone. Keep small amounts of matched paint labeled for future touch-ups; proper paint storage prevents drying and color shift.
- Tidy edges before painting
- Use thin layers to avoid drips
- Match sheen as well as color
- Store touch-up jars sealed and cool
Removing Latex Paint From Wood Without Damage
Before you start stripping, test your chosen removal method on an unseen spot to make sure it won’t harm the wood.
Try gentle chemical strippers or heat and a putty knife for flaky latex.
Only sand as a last resort to avoid gouging the grain.
After removal, smooth the surface with fine sanding and refinish or seal to restore the wood’s appearance.
Test Paint Removal First
Since paint removers and sanding methods can react differently with various wood types and finishes, test removal in an inconspicuous spot first. You’ll confirm how the wood handles abrasion, solvents, and whether underlying stains or varnishes appear. Note previous color mixing issues or lingering hues from poor paint storage that could affect results. Record what you try, duration, and outcome so you can repeat successful steps.
- Start with a small area no larger than a coin.
- Try gentle sanding before stronger methods.
- Wipe residues and let dry to check true color.
- Compare results to adjacent finished surfaces.
Gentle Chemical Options
When mechanical methods risk scratching or raising the grain, you can try gentle, wood-safe chemical options that soften latex paint for easy removal without damaging the substrate. You’ll want products labeled for wood and latex paint; apply a thin layer, wait per instructions, then lift softened paint with a plastic scraper or cloth. Test a small area first.
Rinse residue with a damp cloth and mild detergent to finish chemical cleaning. For sensitive projects, look for eco-friendly options like citrus-based removers or biodegradable gels that reduce fumes and cleanup hazards while still protecting the wood’s surface.
Sanding And Finishing
If chemical softeners didn’t fully remove the latex or you prefer a more controlled finish, sanding and careful refinishing will get the job done while protecting the wood.
Start with coarse, then medium, then fine grit; sand with the grain and inspect for remaining paint. Use a tack cloth, then test-stain a hidden spot before refinishing.
Remember to note any color mixing you plan for touch-ups and keep leftover varnish sealed—proper paint storage prevents contamination.
- Sand progressively: 80→120→220 grit
- Always sand with the grain
- Wipe dust thoroughly
- Test finish on scrap or hidden area
Common Mistakes Using Latex on Wood: And Fixes
Although latex paint is forgiving, you can still make a few predictable mistakes that ruin the finish or shorten its lifespan. You might skip proper prep—clean, sand, and prime—causing peeling.
Overthinning or improper color mixing yields weak coverage and blotchy tones; follow manufacturer ratios.
Poor paint storage lets cans skin over or freeze; keep them sealed, upright, and at stable temperatures.
Applying thick coats creates drips and long cure times; use thin, even layers.
Painting in extreme humidity traps moisture and prevents adhesion; wait for recommended conditions.
Fixes: sand failures, spot prime, recoat correctly, and store materials properly.
Health, VOCs, and Safety When Painting Wood
Because paint vapors can build up quickly in enclosed spaces, you should control exposure to VOCs and dust before you start sanding or brushing wood. Open windows, run fans, and schedule work when fewer people and indoor plants are present to reduce contamination.
Before sanding or painting, ventilate well, run fans, and schedule work away from people and plants.
Wear an N95 or respirator rated for organic vapors, goggles, and gloves.
Use low-VOC or zero-VOC latex for furniture restoration to lower risks.
Clean spills promptly and store cans sealed.
- Ventilate continuously during painting
- Use appropriate respirators for sanding
- Keep indoor plants away from fumes
- Dispose of rags and dust safely
Cost: Latex vs. Oil-Based Paint for Wood
Good ventilation and careful handling reduce health risks, but you’ll also want to weigh the upfront and long-term costs when choosing between latex and oil-based paint for wood.
Latex usually costs less per gallon and dries faster, so you save on labor and can recoat sooner.
Oil-based paint can be pricier and requires solvents for cleanup, raising disposal and paint storage considerations.
You might spend more mixing custom hues with oil because color mixing often demands more pigment and time.
For small projects, latex is economical; for high-wear surfaces, factor in maintenance and potential refinishing costs over time.
How Long Latex Paint Lasts on Properly Prepped Wood
If you prep wood correctly, latex paint can last many years, but how long depends on where the piece lives.
Outdoors, expect 5–10 years on siding or trim with good priming and regular maintenance; harsh sun or moisture will shorten that.
Indoors, you’ll often get 10–15 years or more before wear and yellowing become noticeable.
Expected Lifespan Outdoors
How long will latex paint last on properly prepped exterior wood? Expect 5–10 years on siding and trim if you prep, prime, and choose quality paint. Sun, moisture, and temperature swings shorten life; dense grain and raised wood grain need more care.
Paint sheen affects durability—gloss hides dirt and resists wear better than flat finishes.
- Use high-quality primer and topcoat for best adhesion.
- Seal end grains and joints to prevent moisture intrusion.
- Repaint sooner on horizontal surfaces exposed to sun and rain.
- Inspect yearly and touch up cracks to extend service life.
Lifespan Indoors
Wondering how long latex paint will hold up on indoor wood? You can expect 7–15 years on properly prepped surfaces. With stable humidity, gentle wear, and good primers you’ll see long-lasting color; indoor lighting may reveal minor fading sooner. Preserve finish by cleaning gently, avoiding harsh scrubs, and protecting high-traffic areas. Keep an eye on joints and trim where wear starts and on areas where wood grain shows through thinner coats.
| Location | Typical Lifespan |
|---|---|
| Trim | 7–12 years |
| Furniture | 8–15 years |
| Doors | 6–10 years |
Signs Latex Paint Is Failing: And How to Fix It
When latex paint starts to fail, you’ll notice clear visual and tactile cues that tell you it’s time to act. You may see peeling, cracking, chalking, or discoloration; touch reveals tackiness or powdery residue. Check areas near trim and high-traffic spots, and reassess paint color if fading affects aesthetics. Remember ladder safety when inspecting high spots.
When latex paint fails, look for peeling, cracking, chalking, or tacky spots—inspect trims and high-traffic areas safely.
- Peeling edges that lift from wood
- Fine cracks or alligatoring across surfaces
- Chalky residue when you rub painted areas
- Sticky or soft spots after drying
Fix by scraping, sanding, priming, and recoating with compatible latex paint.
Painting Reclaimed and Exotic Woods With Latex
If you’ve repaired peeling or sanding down failing latex paint, you’ll want to approach reclaimed and exotic woods a bit differently because their history and natural oils affect adhesion.
You should clean thoroughly, de-grease with a solvent, and sand to open the grain.
Use a high-quality primer formulated for oily or dense woods; test adhesion with a small patch.
When choosing color mixing or tinting, pick pigments compatible with your primer to avoid bleeding.
Apply thin coats, allow full curing between layers, and select a finish sheen that hides minor imperfections on reclaimed surfaces.
Monitor adhesion before final use.
Best Season and Timing to Paint Wood With Latex
Because latex paint needs moderate temperatures and humidity to cure properly, plan your project for spring or fall when days stay between about 50°F and 85°F (10°C–29°C) and humidity runs below 70%. You’ll avoid blistering, slow drying, and poor adhesion.
Morning and late afternoon offer stable temps; don’t paint in direct midday sun or just before rain. For outdoor items like garden furniture, pick a dry stretch of several days.
For indoor murals, maintain a consistent indoor climate and good ventilation.
- Check forecast for consecutive dry days
- Paint during stable temperature windows
- Avoid high humidity periods
- Allow full cure before exposure
How to Identify Paint Type on Old Wood Surfaces
How can you tell what kind of paint’s on old wood? Begin by inspecting sheen and brush marks: oil paints often show smooth, glossy finishes and hard edges. Latex usually feels softer and may show more visible brushstrokes.
Use the smell test — solvents indicate oil, water-based smells indicate latex. Perform a small solvent test in an inconspicuous spot: rubbing alcohol removes latex; mineral spirits affect oil.
Note layering and color shifts—apply basic color theory to understand undertones and aging that affect identification. Document your findings before any paint application so you choose compatible primers and topcoats and avoid adhesion problems.
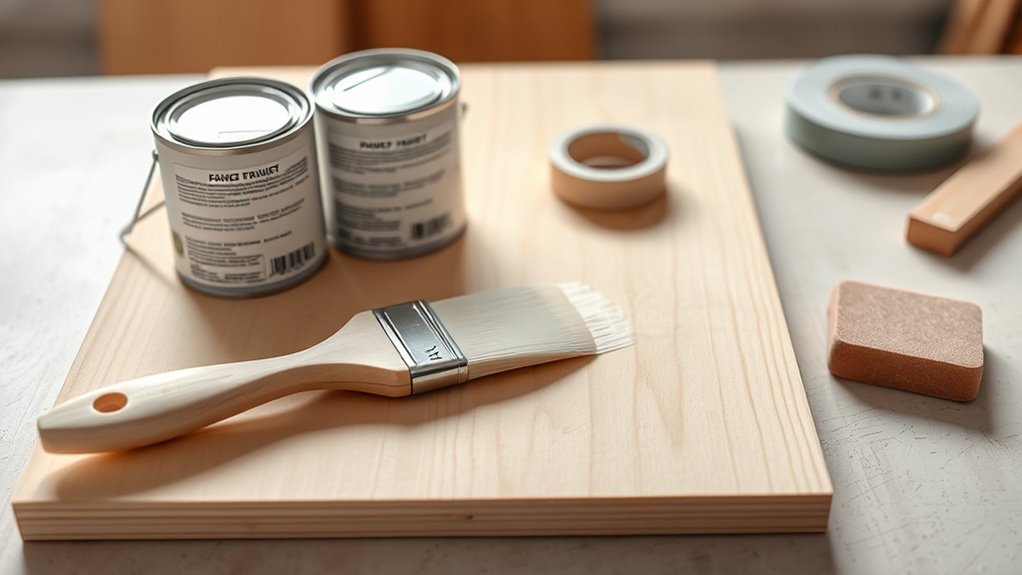
Quick Prep-and-Paint Checklist for Latex on Wood
Ready to paint? You’ll prep smart: clean, sand, and fix any damage so latex bonds well to wood. Prime bare or stained areas, and pick the right sheen for use. Mind ventilation and temperature for curing.
Ready to paint—clean, sand, repair, prime where needed, and choose the right sheen; ensure proper ventilation and curing.
- Wipe, degrease, and sand smooth; remove dust before priming.
- Use a compatible primer; let it dry fully for best adhesion.
- Stir thoroughly for consistent color mixing, avoiding streaks.
- Label cans with date; follow recommended paint storage to keep leftovers usable.
Follow this checklist, and you’ll get an even, durable finish without rework.
Choosing a Latex Paint Brand for Wood Projects
When picking a latex paint brand for wood projects, focus on durability, adhesion, and finish compatibility with your substrate and primer. You’ll want a brand rated for exterior or interior use depending on exposure; check resin type and solids for wear resistance.
Consider local weather patterns—humidity and temperature swings demand flexible, mildew-resistant formulas. Read user reviews for real-world adhesion on oak, pine, or composite.
Verify tinting limits and follow manufacturer instructions for paint mixing to maintain warranty and color consistency. Buy samples and test on scrap wood, sanding between coats, before committing to large quantities.
Frequently Asked Questions
Can Latex Paint Be Used on Wood With Existing Wax Finishes?
Yes — you can, but you’ll need wax removal first. You’ll strip or thoroughly clean the surface, sand lightly, and perform proper surface preparation so the latex paint will adhere and finish evenly without peeling.
How Do I Paint Wood With Lead-Based Primer Safely?
You can paint safely: imagine sunlight on dust-free boards — wet-sand, HEPA-vacuum, and use certified lead-safe paint removal or encapsulation, wear respirator, disposable coveralls, and gloves, then prime and topcoat; follow Lead safety regulations.
Will Latex Paint Adhere to Pressure-Treated Decking Without Primer?
Yes — but you shouldn’t assume it’ll last. You’ll need thorough surface preparation on pressure-treated decking; removing mill glaze, cleaning, and drying improves adhesion and paint durability, otherwise peeling and premature failure are likely.
Can I Thin Latex Paint for Brush Application on Tight Wood Details?
Yes — you can thin latex paint slightly for tight wood details; you’ll preserve paint durability by not over-thinning. You’ll improve color matching and flow, but test first and use a compatible thinner or water sparingly.
How Soon After Staining Can I Apply Latex Paint to Wood?
Immediately after staining dries to the touch—usually 24 hours—but wait 48–72 hours for full cure. You’ll guarantee better color matching and paint durability, and you’ll avoid tackiness, like a bard strumming lute.
Conclusion
So yes — you can use latex on wood, but only when you’re ready to do the prep work your wood secretly wishes for. You’ll cheerfully sand, prime, and pick the right season, then watch latex behave beautifully on hardwoods, plywood, or MDF — and stubbornly on oily or weathered softwoods. It’s like hiring a cooperative roommate: useful, economical, and perfectly pleasant, as long as you do all the chores first.