Can Interior Paint Be Used Exterior
You can use interior paint outside for short-term, sheltered jobs like covered porches or decorative accents, but it won’t last like exterior-grade coatings. Interior formulas lack UV stabilizers, mildewcides, and flexible binders, so they’ll fade, chalk, peel, or grow mildew faster unless you clean, prime, and seal thoroughly. Avoid high-moisture or direct-sun areas, test a small patch, and plan for earlier repainting — keep going to learn the right prep, primers, and when to choose exterior paint.
Who This Guide Is For And What It Answers
If you’re weighing whether it’s okay to use interior paint outdoors, this guide is for you: it answers when you can get away with it, what risks you’ll face, and how to prepare surfaces and finish coats to improve durability.
You’re likely a DIYer, renter, or designer curious about costs, aesthetics, and longevity. You’ll learn practical prep steps, when temporary use is acceptable, and how color psychology influences outdoor choices.
Expect clear advice on adhesion, moisture resistance, and protective topcoats. You’ll also get tips on paint brushing technique for clean edges and avoiding common mistakes that shorten exterior life.
Quick Answer: Can You Use Interior Paint Outside?
Although you can sometimes use interior paint outdoors for short-term or sheltered projects, it’s not a good long-term solution because interior formulas lack the binders, UV stabilizers, and moisture resistance needed for exterior exposure. You can get away with it on covered porches or temporary décor, but expect faster fading, chalking, peeling, and possible mildew.
Choose colors mindful of color psychology—lighter hues reflect heat, darker ones absorb it—and pick durable paint finishes suited to traffic and weather.
If you must use interior paint, prep thoroughly, seal with a compatible clearcoat, and plan to repaint sooner than you’d with exterior products.
High-Level Difference: Interior Vs. Exterior Paint
You’ve seen why interior paint can work short-term outdoors, but understanding why it underperforms comes down to fundamental formulation differences. You’ll notice interior and exterior coatings differ in binders, additives, and finish choices, affecting durability, adhesion, and how color shows.
Color psychology guides interior choices for mood; exterior palettes favor visibility and curb appeal. Paint textures vary too — smooth interiors versus textured exteriors for concealment and weathering. Consider these distinctions:
- Binder composition: flexibility and UV resistance
- Additives: mildewcides and surfactants
- Sheen options: flat to gloss implications
- Application environments: controlled vs. exposed
Why Exterior Paint Needs To Protect : The Risks
Because exterior surfaces face constant assault from sun, rain, wind, pests, and temperature swings, the paint has to do more than look good — it has to act as a protective barrier. You’ll risk peeling, fading, mildew, and structural damage if the coating can’t repel moisture or resist UV.
Choosing a color involves color psychology, but don’t let aesthetics override performance; pale tones reflect heat, dark ones absorb it. Surface finish and paint texture affect how water beads and how dirt settles, influencing longevity.
If you use the wrong product, maintenance costs rise and repairs accelerate.
How Binders Determine Durability
The protection paint provides comes largely from what’s binding the pigments and additives together. You should focus on binder chemistry because it controls adhesion, flexibility, and resistance to moisture and abrasion.
Choose binders engineered for exterior cycles; they’ll slow color fading and maintain film integrity under heat and rain.
Choose exterior-grade binders to preserve color and film integrity through heat, rain, and UV exposure.
- Polymer type dictates toughness and elasticity.
- Crosslinking levels affect chemical and water resistance.
- Hydrophobic binders shed moisture better than interior formulas.
- UV-stable formulations reduce binder breakdown and color fading.
Inspect technical data sheets to match binder performance with your climate and substrate needs.
Pigments, Fading, And UV Resistance
When sunlight hits paint, pigments determine both the color you see and how quickly it breaks down. So choose pigments with proven UV stability for exterior use.
You’ll want pigments formulated for pigment stability so hues don’t shift or chalk under prolonged sun. Look for labels noting UV protection or exterior-grade pigments; they absorb or reflect damaging rays and slow chemical breakdown.
Even with stable pigments, lighter shades resist heat-related fading better than deep, high-chroma colors.
Test small areas, monitor for fading over months, and combine pigment choices with proper exterior binders to maximize long-term color retention.
Solvents, VOCs, And Outdoor Performance
When you use interior paint outside, the solvent evaporation rate changes because wind, temperature, and humidity speed drying and can affect film formation.
You’ll also notice that VOC emissions may differ outdoors—some solvents off-gas faster in open air, while others dissipate more slowly in cool, still conditions.
Understanding these differences helps you pick a product that cures properly and meets local VOC regulations.
Solvent Evaporation Rates
Curious how solvent evaporation shapes outdoor performance? You’ll notice interior formulas dry faster indoors; outside, heat, wind, and humidity change evaporation, affecting film formation and durability. Color matching can shift as solvents flash off unevenly, and paint branding won’t prevent weather-driven variation.
Consider these practical effects:
- Faster evaporation can cause poor leveling and visible seams.
- Slow evaporation risks sagging or longer tack times in cool, humid conditions.
- Variable rates alter pigment dispersion, affecting final hue and gloss.
- Additives help control evaporation but may not compensate for outdoor stresses.
You’ll need exterior-specific formulations for consistent, long-lasting results.
VOC Emission Differences
Although interior paints often rely on faster‑evaporating solvents to speed drying, outdoor use exposes those VOCs to sunlight, heat, and air currents in ways that change both emission rates and environmental impact. You’ll notice altered off‑gassing profiles that can accelerate degradation and affect color matching as UV breaks down pigments. Paint texture can also shift when solvents evaporate differently outdoors, causing film irregularities. Consider VOC limits and outdoor-rated formulations to avoid issues.
| Factor | Outdoor Effect | Mitigation |
|---|---|---|
| Solvent VOCs | Faster photochemical reactions | Use exterior low‑VOC |
| Texture | Cracking, orange peel | Test sample outdoors |
Mildew Inhibitors: Why They Matter Outside
You’ll want mildew inhibitors on any paint that’s facing the elements because they stop mold growth before it starts. That protection helps the finish last longer by preventing breakdown from fungal attacks.
It’s especially important on moisture-prone surfaces where trapped dampness would otherwise ruin the coating.
Prevents Mold Growth
When moisture, shade, or poor ventilation let mildew take hold on siding or trim, paints with mildew inhibitors stop spores from colonizing and spreading, keeping surfaces cleaner and reducing the frequency of costly cleaning or repainting.
You’ll notice fewer dark streaks and less odor when surfaces resist mold, so exterior living spaces stay usable and attractive. That matters when you plan color coordination between indoors and out or arrange furniture placement on porches without worrying about damp stains.
Benefits include:
- Reduced mold staining on siding and trim
- Lower cleaning frequency and expense
- Healthier exterior air near entries
- Easier long-term maintenance
Extends Paint Durability
Keeping mildew at bay does more than keep surfaces looking fresh—it helps paint last longer. When you choose exterior-grade mildewcide additives or paints with built-in inhibitors, you reduce fungal breakdown that dulls pigments and weakens binders. That preserves color psychology choices you made—vibrant hues stay true longer, neutrals resist spotting—so your desired mood endures.
Inhibitors also protect varied paint texture from pitting and blotching, keeping finishes uniform and easier to clean. Use products formulated for outdoor exposure and follow label guidance; doing so extends service life, lowers maintenance frequency, and keeps façades performing as you aimed.
Protects Moisture-Prone Surfaces
Because damp areas invite mildew fast, choosing paints with mildewcide matters for moisture-prone surfaces like shaded siding, bathroom exteriors, and porch ceilings. You’ll want formulations labeled for exterior use because they resist fungal growth, tolerate wet cycles, and keep finishes stable.
Check product data for mildew resistance, compare paint branding reputations, and verify color matching if you’re touching up. Apply proper primer and guarantee surfaces dry between coats.
Consider these practical points:
- Confirm exterior-rated mildewcide in the formula
- Test small patch for color matching outdoors
- Follow manufacturer surface prep instructions
- Choose trusted paint branding for warranties
Flexibility And Temperature Cycling Explained
If temperatures swing between blazing sun and freezing nights, exterior paint has to flex without cracking or peeling. You’ll notice interior formulas often lack the elasticity needed for repeated temperature fluctuations, so paint compatibility matters when choosing coatings for outdoor exposure.
Flexible exterior paints expand and contract with wood, vinyl, or metal while resisting stress that causes microcracks. You should check technical data for elongation and movement ratings rather than assuming indoor products will perform.
If you need durable results, pick a product designed for exterior thermal cycling; otherwise expect faster deterioration and more frequent repainting.
Adhesion Differences For Siding, Brick, And Trim
When you pick paint for different exterior surfaces, remember that adhesion varies widely between siding, brick, and trim—each substrate has unique porosity, texture, and surface energy that affect how coatings bond. You’ll notice siding’s smooth panels need different formulations than rough brick, and thin trim reacts to flex and edge wear.
Consider color psychology when choosing shades, since finish and paint texture influence perceived depth and maintenance needs. Match sheen and formulation to each substrate to reduce peeling.
- Siding: low porosity, often needs good film-forming properties
- Brick: high porosity, grips matte textures
- Trim: thin edges, needs flexible coating
Surface prep: essential for consistent adhesion
Why Exterior Primers Improve Longevity
Although primers often go unseen, they form the essential bond between surfaces and topcoats that keeps paint from peeling, chalking, or soaking in unevenly. You’ll extend exterior finishes by sealing porous surfaces, blocking stains, and creating a uniform base so your topcoat adheres consistently.
Proper primer reduces moisture intrusion and UV-driven breakdown, so you won’t chase premature failures. Think of color coordination and paint layering: primers can neutralize substrate tones and let fewer topcoat coats achieve true color and coverage.
Using the right primer before exterior painting saves time, money, and maintenance while preserving appearance and structural protection.
Best Primer Types For Exterior Surfaces
When prepping exterior surfaces you’ll want to pick a primer that matches the job: oil-based primers block stains and adhere well to bare wood and metal.
Acrylic latex primers offer flexibility and mildew resistance on siding and previously painted areas.
You can use oil-based primers where sealing and rust prevention matter most.
For general exterior work and easier cleanup, acrylic latex primers are usually the practical choice.
Oil-Based Primers
If you’ve got tough exterior surfaces—bare wood, metal, or chalky old paint—oil-based primers are the workhorse that’ll block stains, seal porous substrates, and promote strong adhesion for topcoats, especially under harsh weather conditions.
You’ll find they tolerate tannin bleed and rust, and help control moisture migration so your finish lasts. Keep in mind how color psychology influences topcoat choice since primer tint affects perceived hue, and assess paint texture compatibility to avoid adhesion problems.
- Excellent stain blocking
- Superior metal adhesion
- Smoothes rough texture
- Longer open time for adjustments
Acrylic Latex Primers
Switching from oil-based primers’ stain-blocking strength, you’ll find acrylic latex primers offer faster drying and easier cleanup without sacrificing durable adhesion on many exterior materials.
You’ll like their flexibility—resisting cracking as surfaces expand and contract—and mildew resistance helps maintain finish.
Apply them to wood, stucco, fiber cement, and previously painted surfaces; they bond well and accept topcoats evenly, improving paint texture and reducing roller marks.
Consider color psychology when choosing primer tint: a warm-tinted primer can enrich a light topcoat, while a gray base boosts depth for deeper colors.
Use a quality brush or sprayer for consistent coverage and longevity.
When Interior Paint Might Survive Outdoors
Although interior paint isn’t made for constant exposure, it can sometimes hold up outdoors for a short time if conditions are favorable and you take basic precautions.
You’ll want to pick sheltered spots like covered porches, use light colors for UV resilience, and consider color psychology when choosing hues to influence mood. Check paint texture for smoothness—less porous finishes shed moisture better.
Prep surfaces well and avoid high-traffic areas.
- Apply only to clean, dry, sealed surfaces
- Use quick topcoat protection if possible
- Monitor for peeling or discoloration weekly
- Remove and repaint at first sign of failure
Surfaces That Never Accept Interior Paint
Don’t try interior paint on bare metal surfaces—you’ll get poor adhesion and fast corrosion.
You shouldn’t use it in high-moisture areas like bathrooms or around foundations because it won’t resist mold or water damage.
And glossy exterior trim needs a tough exterior-grade coating, so interior formulas will likely peel and fail.
Bare Metal Surfaces
Why would you try interior paint on bare metal? You shouldn’t. Bare metal demands primers and coatings made for metal to prevent metal corrosion and to control paint toxicity exposure.
Interior formulas won’t bond or flex with temperature swings, so flaking and rust follow. Treat bare metal this way:
- Clean and degrease; remove rust to bare substrate.
- Use a metal-specific primer to promote adhesion and block corrosion.
- Apply exterior-grade topcoat formulated for metal and outdoor UV exposure.
- Dispose of contaminated rags and waste per paint toxicity guidelines.
Skipping proper metal prep or products risks rapid failure and environmental or health hazards.
High-Moisture Areas
After handling bare metal properly, you still can’t use standard interior paint in places that stay wet or steam-soaked—bathrooms, shower surrounds, laundry rooms, and outdoor-facing eaves will reject it. You need coatings formulated for constant moisture and mildew resistance.
Prioritize surface preparation: remove mold, repair grout and seals, and choose a primer rated for damp environments. Maintain humidity control with ventilation or dehumidifiers before and after application so paint adheres and cures.
Use exterior-grade or specialized waterproof paints and elastomeric coatings where exposure is persistent. Skipping these steps leads to peeling, staining, and premature coating failure.
Glossy Exterior Trim
When you’re tackling glossy exterior trim—window casings, door frames, fascia, and decorative millwork—interior paints won’t bond properly and will fail quickly, so always select exterior-grade enamels or spar varnishes made for slick, weather-exposed surfaces.
You’ll prep by deglossing, cleaning, and using a bonding primer formulated for exterior slick substrates. Choose products rated for UV, moisture, and temperature swings; consider color matching to existing siding or historic profiles.
Pick finish options that shed water and resist abrasion. Follow manufacturer cure times and maintenance schedules so your trim stays intact and looks consistent.
- Degloss and clean thoroughly
- Use exterior bonding primer
- Choose color matching carefully
- Select durable finish options
Seasonal Timing: Best Windows For Outdoor Painting
If you want a durable, even finish on exterior surfaces, pick painting windows when temperatures are steady and humidity is low. You’ll aim for daytime highs between 50–85°F and nights above freezing so paint cures evenly and adhesion holds.
Morning dew and sudden storms ruin fresh coats, so check forecasts for several dry days. Early fall or late spring usually offer the best balance of warmth and low humidity.
Consider how color psychology shifts in different light—darker hues absorb heat more—and test your chosen paint sheen outdoors. Plan timing, and you’ll avoid rework and uneven aging.
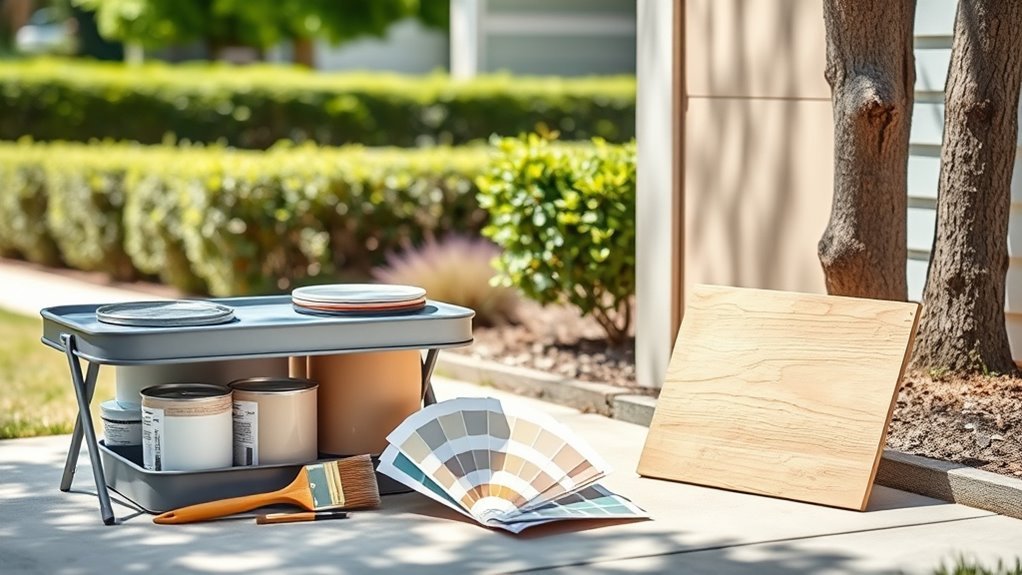
Prepping Exterior Surfaces For Any Paint
Before you paint, clean the surface thoroughly with a pressure washer or stiff brush to remove dirt, mildew, and loose paint.
Patch cracks and holes with appropriate fillers and sand smooth so repairs sit flush with the surrounding area.
Finish by applying a suitable primer to guarantee proper adhesion and a uniform topcoat.
Surface Cleaning Techniques
Although prepping might seem tedious, cleaning exterior surfaces is the single step that determines how long your paint will last. You’ll remove dirt, mildew, and loose material so paint adheres. Consider how grime affects color mixing and paint thickness decisions later. Use appropriate cleaners, rinse thoroughly, and let surfaces dry fully before painting. Focus on methodical, even cleaning rather than brute force.
- Soft wash for siding and delicate areas
- Pressure wash for brick or concrete (low setting first)
- Mildew treatments where staining appears
- Degreaser on metal or near grills and driveways
Keep safety gear on and protect plants.
Repairing Cracks And Holes
Why fix cracks and holes now? You’ll prevent water intrusion, peeling, and stains that ruin finishes and clash with your chosen color theory or furniture styles.
Scrape loose material, widen tiny hairline cracks so filler bonds, and clean dust before patching.
Use exterior-grade filler for larger gaps; apply in layers, let each cure, then sand smooth to match adjacent texture.
For masonry, use appropriate mortar or patching compound.
Seal gaps around trim with paintable exterior caulk.
Repairing thoroughly guarantees paint adheres and your exterior color and style choices last—avoiding callbacks and costly surface failures.
Priming For Proper Adhesion
Curious how a single coat can make or break your exterior paint job? You’ll prime to guarantee adhesion, seal porous surfaces, and align paint texture with existing finishes. Choose a primer suited for substrate and climate; it helps with color matching when hiding old hues or stains.
Apply evenly, sanding between coats for a smooth base. Don’t skip flash-off times.
- Clean and degrease before priming
- Use stain-blocking primer where needed
- Sand lightly to match texture
- Spot-prime repairs and raw wood
Proper priming saves failures and extends topcoat durability, especially if you’re using interior paint outdoors.
How To Test Interior Paint On An Exterior Patch
Before you roll the interior paint onto a visible area, try it on a small, inconspicuous exterior patch to see how it holds up and looks in real conditions. Choose a sheltered spot, clean and dry, and apply primer if you plan to elsewhere.
Note color theory: sunlight shifts hues, so observe at morning, midday, and dusk.
Test paint texture by brushing and rolling as you’ll on the final surface; watch for runoff, sagging, or dulling.
Let the patch cure fully—at least a week through weather changes—then inspect adhesion, sheen retention, and how the color reads before committing.
Common Failure Modes To Expect
When you use interior paint outside, expect two main failure modes: peeling and flaking where adhesion fails, and mildew or staining where moisture and biology take hold.
You’ll see peeling in sun-exposed or poorly prepped areas, and mildew in damp, shaded spots.
Knowing these outcomes helps you judge whether a temporary fix is acceptable or if proper exterior paint is needed.
Peeling And Flaking
Why does paint that looked solid yesterday start lifting in sheets today? You’ll see peeling issues when interior paint can’t flex with temperature swings, bond to dirty or damp surfaces, or was applied over incompatible coatings.
Flaking prevention starts with proper surface prep, choosing exterior-formulated binders, and allowing adequate cure time before exposure. If you ignore adhesion and moisture barriers, expect rapid failure.
- Clean and dry surfaces before painting
- Use primers compatible with topcoats and substrates
- Avoid painting in extreme temperatures or high humidity
- Inspect and remove loose material before recoating
Address these to reduce peeling and flaking.
Mildew And Staining
How do those dark, fuzzy spots appear overnight on a wall that looked fine the day before? You’ll notice mildew and staining on exterior surfaces when interior paint lacks mold inhibitors and breathability.
Moisture gets trapped, spores settle, and discoloration spreads despite your best color matching or careful paint mixing. You can’t rely on interior formulations outdoors; they’re prone to staining, chalking, and biological growth.
Treat stains promptly, use a mildew-killing wash, and switch to exterior-grade paint with fungicides and proper permeability. For repairs, clean thoroughly before repainting and avoid blending old interior shades that hide underlying damage.
How Weather Accelerates Paint Failure
Although you mightn’t notice it day to day, weather mercilessly speeds up paint breakdown by forcing repeated stress cycles on the coating. You’ll see expansion and contraction from temperature fluctuations that crack or delaminate paint, while UV radiation weakens binders and fades pigments. Moisture gets under edges, lifting layers and promoting rot. Wind erosion strips surface additives and carries abrasive particles that dull and thin the film.
- Thermal cycling causes microcracks.
- UV degrades polymer chains.
- Rain and humidity penetrate seams.
- Wind erosion abrades protective layers.
Preventive maintenance and proper exterior formulations extend service life.
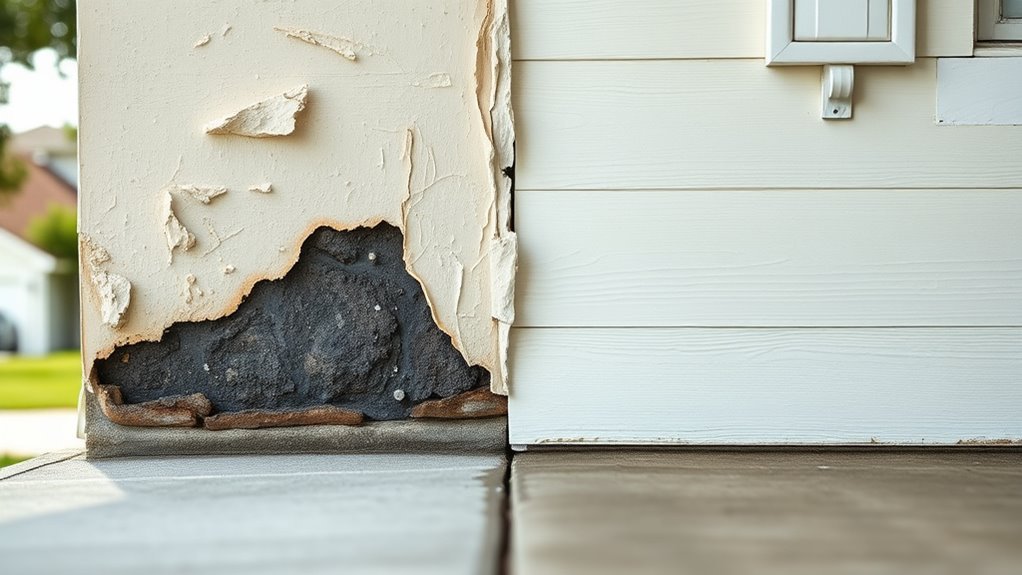
Signs Your Exterior Paint Job Is Failing
If you’re seeing paint peeling or flaking, that’s a clear sign the finish isn’t adhering and water’s likely getting underneath.
You’ll also spot mold or mildew as dark patches or fuzzy growth in damp, shaded areas.
Catching these issues early lets you fix the problem before rot or structural damage sets in.
Peeling Or Flaking
When paint starts to peel or flake off your siding, it’s a clear sign the coating’s adhesion has failed and moisture or sun damage is getting in. You’ll notice paint peeling in patches or large sheets, exposing bare material that invites further deterioration.
Poor surface preparation, incompatible primers, or using interior paint outdoors often causes early failure. Act quickly to assess and repair affected areas so damage doesn’t spread.
- Scrape loose paint to sound substrate
- Sand and clean for proper adhesion
- Prime with exterior-grade primer
- Repaint using exterior-formulated coating
Mold And Mildew
Notice black, green, or gray streaks and fuzzy patches on your siding? You’re likely seeing mold and mildew creeping in where paint failed to protect.
If you used interior paint outdoors, it often lacks mold prevention additives and breathable formulation, so moisture gets trapped and organisms flourish.
Clean affected areas with a fungicidal wash, dry thoroughly, then repaint with exterior-grade, mildew resistant paint designed for damp conditions.
Address underlying moisture sources—poor drainage, clogged gutters, shaded spots—so treatment lasts.
Regular inspections and prompt action will keep mold from spreading and preserve your home’s exterior finish and health.
Steps To Remove Flaking Interior Paint Outdoors
Before you start scraping, protect the area and yourself: lay down drop cloths, tape off trim and fixtures, and put on safety glasses, a dust mask, and gloves.
Start by testing paint adhesion with a putty knife, then soften stubborn flakes with a heat gun or chemical stripper designed for outdoor use.
Sand smooth gradations to blend paint texture, then clean surfaces with a stiff brush and mild detergent to remove dust and mildew.
Consider color psychology when planning touchups so repaired areas don’t draw attention.
- scrape loose paint
- soften with heat or solvent
- sand feathered edges
- wash and rinse thoroughly
Primers And Sealers To Convert Interior Paints
If you plan to use interior paint outdoors, you’ll need a primer or sealer that bonds to the old finish and blocks moisture and stains. You’ll choose one formulated for exterior substrates—stain-blocking, mildew-resistant primers or clear sealers that enhance adhesion.
If using interior paint outside, first apply an exterior-grade primer or sealer to bond, block moisture, and resist stains.
Apply according to surface: porous wood needs penetrating primer; glossy surfaces need deglossing primer. Match primer sheen and base to your desired color schemes so topcoat tinting behaves predictably.
Test a small area and inspect after curing. Consider how treated surfaces will interact with outdoor furniture arrangements to avoid scuffs.
Follow manufacturer dry times and recoat windows for lasting protection.
Choosing Latex Vs. Acrylic For Exteriors
Once you’ve sealed and primed the surface for outdoor exposure, you’ll pick a topcoat that stands up to weather and wear—usually a latex or an acrylic exterior paint.
You’ll weigh flexibility, adhesion, and durability: acrylic resists fading and chalking; latex cleans up easily and stretches with temperature swings. Consider your substrate, local climate, and desired finish.
Match paint branding to warranties and UV resistance claims, and test samples under your meant Color schemes.
- Acrylic: superior UV and color retention
- Latex: economical, flexible choice
Check brand specs and warranties.
Test samples for true outdoor appearance.
Low‑VOC Exterior Paint Options
Wondering how to balance durability with indoor-air quality for outdoor projects? You can choose low‑VOC exterior formulas that still resist moisture, UV, and mildew. Look for certified labels and check the technical data for outdoor durability.
Consider color psychology when picking hues—lighter tones reflect heat, darker ones absorb it, and neutrals suit traditional facades.
Pay attention to paint texture: smoother finishes shed dirt but show imperfections, while textured coatings hide flaws and add grip on vertical surfaces.
Apply proper primers and follow manufacturer directions; that way you’ll get safer air quality without sacrificing long‑term protection.
Cost Comparison: Interior Vs. Exterior Paint
Because exterior formulas have to stand up to weather, you’ll usually pay more per gallon for exterior paint than for interior—though the gap varies by brand, finish, and special additives like mildewcides or UV blockers.
You should weigh upfront cost against longevity: exterior paints resist fading, chalking, and mildew, so you replace them less often.
Consider these factors when comparing prices and specs:
- Base cost differences and availability of color matching for exact hues.
- Impact of paint gloss on durability and cleaning.
- Additives (UV blockers, mildew inhibitors) that raise price but extend life.
- Coverage rates and recommended coats.
Time And Labor Trade‑Offs To Consider
You’ll need to weigh the extra prep time required to make interior paint hold up outdoors against the risk of premature failure.
Think about how much you’ll spend on labor for sanding, priming, and sealing versus just using an exterior-grade product. That choice affects both upfront cost and long-term maintenance.
Prep Time Vs. Risk
While using interior paint outdoors might save time up front, skipping proper prep increases the chances you’ll face peeling, fading, and costly touch-ups sooner than you’d expect. You’ll weigh faster jobs against higher failure risk: correct surface cleaning, priming, and sealing matter because interior Paint formulations and Application techniques aren’t tuned for weather. If you rush, moisture and UV exploit weaknesses.
- Clean surfaces thoroughly to remove dirt and chalk.
- Use an exterior-grade primer to improve adhesion.
- Check for loose caulk and repair gaps before painting.
- Allow full cure times; don’t shortcut drying between coats.
Labor Cost Considerations
When you weigh time against out‑of‑pocket labor costs, remember that cutting prep or using interior paint outside often shifts work from expensive professional hours to frequent, smaller repairs later.
You’ll want to factor in recurring touchups, weather‑driven peeling, and the time you’ll spend sanding and repainting.
Hiring pros up front costs more, but they’ll handle sealing, priming, and proper application, reducing long‑term labor.
If you try DIY fixes, consider how color matching and paint branding affect repeat buys and matching fades.
Tally projected hours over years, not just the immediate project, before deciding.
DIY Checklist: Use Interior Paint Or Buy Exterior?
If you’re weighing whether to use interior paint outdoors or buy exterior-grade, start by matching the paint’s properties to the job. Check exposure: sun, moisture, and temperature swings demand exterior formulations.
If you’re debating interior vs. exterior paint, match paint properties to exposure—sun, moisture, and temperature matter.
Consider substrate prep, adhesion, and longevity before you decide.
- Inspect surface porosity and choose appropriate primer.
- Evaluate color mixing limits; interior tints may fade faster outdoors.
- Test paint texture compatibility with exterior tools and finishes.
- Estimate coverage and maintenance frequency for the location.
You’ll save time and money by choosing paint suited to conditions rather than forcing interior products into exterior roles.
Quick Fixes Vs Long‑Term Solutions
Because you want a fast, low-cost fix or a durable solution, decide on trade-offs up front: quick fixes like brushing on interior paint can mask problems temporarily but won’t resist UV, moisture, or extreme temperatures.
Whereas investing in proper exterior-grade products, primers, and prep buys you longevity and less maintenance. You’ll choose quick fixes for short timelines or small touch-ups, accepting faster fading and potential peeling.
For lasting results, pick exterior-specific formulations, match color matching carefully to avoid obvious patches, and select an appropriate paint sheen for weather resistance and desired appearance.
Plan based on exposure and lifespan goals.
Maintenance Tips To Extend Exterior Life
You should inspect exterior surfaces regularly to catch peeling, cracking, or mildew before problems grow.
When you spot wear, make timely touchups with compatible paint to seal and protect exposed areas.
Consistent checks and prompt repairs will stretch the life of your exterior finish.
Regular Surface Inspections
When did you last walk your home’s perimeter with a critical eye? You should inspect siding, trim, and joints monthly to catch problems early. Look for cracking, peeling, and moisture stains; note areas where color matching will matter for future touchups and where different brush techniques were used originally.
- Check caulking and seals around windows and doors.
- Examine fascia, eaves, and trim for rot or blistering.
- Scan for mildew, dirt buildup, or insect damage.
Record locations and severity; photograph for comparison.
Consistent inspections save time and prevent small issues from becoming costly repairs.
Timely Repaint Touchups
How soon should you touch up small paint failures before they spread? You shouldn’t wait—address chips and cracks within days to prevent moisture and UV damage.
Clean the area, sand lightly, and prime exposed substrate.
For best results, do careful color matching: compare swatches in sunlight and on the wall. If you must blend interior paint outdoors, use proper paint mixing to adjust tint and sheen so repaired spots don’t stand out.
Apply thin coats, allow full drying between layers, and feather edges to hide gradations.
Regular, prompt touchups extend exterior life and avoid larger, costlier repaint jobs.
Warranties: How Misuse Affects Coverage
Although warranties promise protection, they usually hinge on proper use and application, and misusing interior paint outdoors can void that coverage. You’ll want to read labels carefully: surface gloss and paint branding determine meant use, and deviating risks denial of claims. If you apply interior paint outside, manufacturers can refuse repair or replacement when failure’s linked to misuse.
- Keep receipts and product data sheets for any claim.
- Document the exact product name and batch from the label.
- Note where and how you applied the paint in case of inspection.
- Follow prep, climate, and substrate guidelines to maintain coverage.
Environmental And Health Considerations For VOCs
Beyond warranty concerns, you should also consider how volatile organic compounds (VOCs) in paint affect your health and the environment. You’ll want to limit indoor pollution by choosing paints that meet local VOC standards and by ensuring good ventilation during application and drying. Be aware that exterior use of interior paint can still release VOCs outdoors and nearby, impacting air quality. Monitor occupants for headaches or irritation after painting and follow disposal rules to avoid soil or water contamination.
| Concern | Action |
|---|---|
| Indoor pollution | Ventilate, use low-VOC |
| Regulations | Check VOC standards |
Eco‑Friendly Exterior Paint Choices
When you’re choosing exterior paint with the environment and health in mind, prioritize low-VOC or zero-VOC formulas, recycled-content options, and coatings certified by reputable eco-labels. These choices cut air pollution, reduce toxic exposure, and often perform as well as conventional paints.
You’ll want durable, breathable finishes that resist UV and moisture while staying eco friendly and, where possible, biodegradable in packaging or additives. Consider these options and traits:
- Acrylic latex with low-VOC certification
- Natural oil-based blends with sustainable sourcing
- Recycled-pigment or recycled-resin formulations
- Third-party eco-labels (Green Seal, EcoLogo)
Choose products with clear specs and warranties.
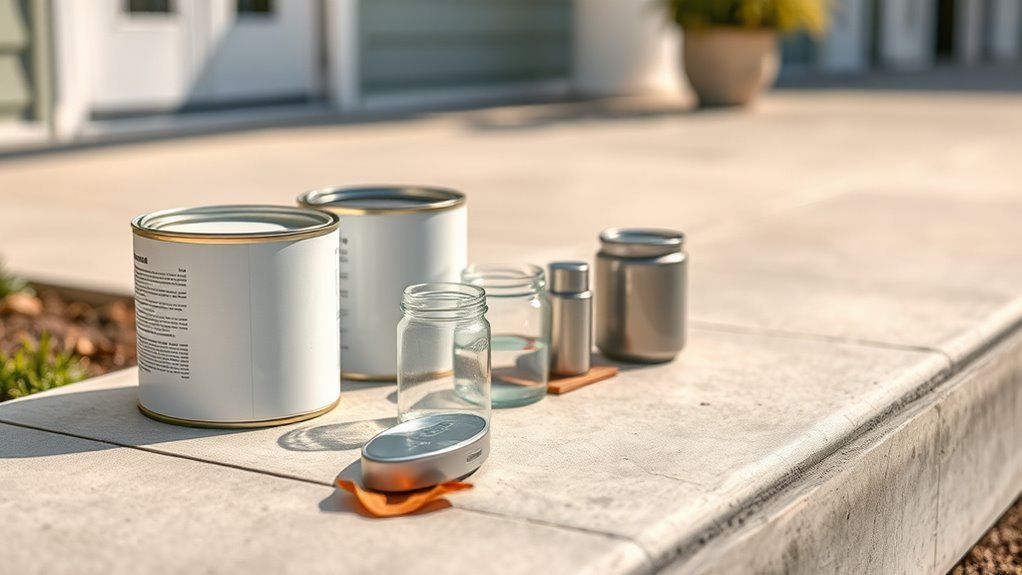
Tools And Materials Checklist For Exterior Projects
Picking eco-friendly coatings matters, but you also need the right tools and materials to get a durable, professional exterior finish. You’ll want quality exterior-grade paint, primers formulated for weather resistance, and sealants for gaps.
Gather brushes, rollers, extension poles, a pressure washer or hose, scrapers, sandpaper, caulk guns, drop cloths, ladders, and safety gear.
Bring a color matching card or spectrophotometer to ensure consistent hue, and test small areas for paint sheen and adhesion.
Include rusty-metal primer or wood preservative where needed.
Plan supplies by surface area and drying times so you don’t run short mid-project.
How Contractors Decide When Interior Paint Is Acceptable
When you’re weighing whether interior paint will work outside, contractors first look at the surface type—trim or sheltered soffits might tolerate it, while siding exposed to wear won’t.
They’ll also consider local weather and exposure, avoiding interior formulas in areas with heavy sun, rain, or temperature swings.
If conditions are mild and the substrate is low‑traffic, pros may make a calculated exception.
Surface Type Matters
Although it looks tempting to use leftover interior paint, surface type dictates whether it’ll hold up outdoors. Contractors assess substrate porosity, texture, and existing coatings to decide if an interior formulation can perform.
You’ll need to evaluate how the surface soaks up or repels paint, and whether color matching and paint sheen will change once exposed. Inspect for adhesion issues and previous finishes before committing.
Consider these factors:
- Porous masonry vs. smooth siding affects penetration and durability
- Rough textures need higher-build coatings for coverage
- Previously glossy surfaces may require sanding or primer
- Metal needs corrosion-resistant prep and primers
Weather And Exposure
Surface conditions and long-term exposure determine whether that interior paint can survive outside, so after you’ve checked substrate and finish, look at the climate it’ll face. You’ll assess UV, moisture, temperature swings, and wind-driven debris; contractors weigh those against the paint’s formulation and expected lifespan.
For brief, sheltered applications they might accept interior paint if you’re willing to risk more frequent touch-ups. They’ll also consider color matching and paint mixing—adjusting pigments or adding mildewcide to improve durability.
Ultimately you’ll opt for exterior-grade coatings when exposure is high, or when maintenance access and aesthetic consistency matter long-term.
When To Call A Pro For Repainting
If you’re unsure whether a repaint is beyond DIY, watch for signs like widespread peeling, rotted trim, extensive mildew, or underlying structural damage—these issues usually mean you should call a pro.
You’ll also want expert help when color psychology matters—for resale or curb appeal—or when matching complex paint texture and finishes. A pro assesses substrate, recommends appropriate exterior-grade products, and guarantees proper prep and ventilation.
- Structural or moisture-related damage
- Large surface area or multi-story work
- Historic or color-matched restorations
- Safety concerns (lead, height, scaffolding)
Hire a pro to save time and avoid costly mistakes.
Case Studies: Success And Failure Examples
You’ll see clear contrasts in these case studies: some interior paints actually achieved strong adhesion on exterior trim when prep and sealers were right.
Other examples show weather-related failures where sun, rain, and freeze-thaw cycles caused peeling and blistering.
Finally, long-term durability tests reveal which formulations held up over years and which failed after seasonal stress.
Successful Adhesion Examples
Ever wondered why some interior paints hold up surprisingly well outdoors while others peel within months? You’ll see cases where careful prep, favorable substrate, and thoughtful product choice made interior paints succeed on sheltered exterior trim. Color psychology influenced choices—lighter tones reduced heat absorption on small surfaces. Eco friendly formulations with improved binders and UV stabilizers also surprised inspectors.
You can learn from these concise wins:
- Proper cleaning and scuff-sanding before application
- Using a compatible primer rated for exterior exposure
- Choosing interior paint with documented UV/additive performance
- Applying thin, even coats with adequate cure time
Replicate these steps for predictable adhesion.
Weather-Related Failures
Those successful sheltered-trim examples show what good prep and product choice can do, but weather often upends even careful work. You’ll see projects where interior paint held briefly on covered eaves, yet exposed siding suffered color fading within a season.
In another case, improper primer and trapped moisture led to surface cracking across a porch beam. You’ll learn that wind-driven rain, UV, and freeze-thaw cycles expose interior formulations’ limits.
When you consider using interior paint outside, compare case studies: note where shelter, correct primer, and timely maintenance prevented failure versus where exposure quickly revealed the paint’s vulnerabilities.
Long-Term Durability Tests
How long will interior paint really last when it’s put to the test outside? You run long-term durability tests to compare real-world outcomes: peeling, UV fade, mildew, and adhesion on varied substrates. You note how color psychology shifts as sunlight alters tones, and how interior lighting informs your expectations before exterior exposure.
Case studies show some enamel-based interiors survive years on sheltered trim, while flat finishes fail quickly on siding. You’ll learn patterns and limits.
- Enamel interior on protected trim: success
- Flat latex on siding: failure
- Semi-gloss on porches: mixed
Impact of UV and moisture cycles: critical
Common Myths About Interior Paint Outdoors
Think you can just slap interior paint on siding and call it done? You’ll hear myths: indoor décor paints behave the same outside, color matching guarantees weather resistance, or cheaper interior options save money long-term.
Don’t assume indoor décor formulas withstand moisture, UV, or temperature swings. Color matching addresses appearance but not adhesion or mildew resistance. You’ll also be told sheen alone fixes durability — it doesn’t.
Indoor paints aren’t built for moisture, UV, or temperature swings—color or sheen won’t ensure adhesion or mildew resistance.
Another myth: primers aren’t necessary outdoors; they often are. Question claims that touch-ups will hide failures; peeling and fading tell a different story.
Test assumptions before committing to an exterior application.
How To Test Durability Over Months
Before you commit to painting an exterior surface with interior paint, set up a small, controlled test area and monitor it over several months so you can judge real-world durability. You’ll observe fading, chalking, adhesion, and moisture response while considering how color psychology and interior design choices translate outdoors.
Record conditions, take photos, and note timing of changes.
- Check adhesion monthly after rainfall
- Photograph in consistent light for color shifts
- Measure gloss and surface texture changes
- Log temperature and humidity during tests
Use results to decide if the interior paint meets exterior needs or if exterior-grade options are required.
Cost‑Saving Strategies Without Sacrificing Durability
After you’ve run a multi-month durability test and logged performance, you can use that data to cut costs without sacrificing longevity. Use test results to pick fewer, high-performing formulas rather than many specialty cans.
Buy larger quantities of the proven blend to lower unit price, and negotiate with suppliers using documented field data.
Consider color psychology when choosing palette limits—select hues that hide dirt and weathering to reduce repaint frequency.
Stick with trusted paint branding for warranty support, but opt for contractor-grade rather than premium retail if tests show parity.
Track lifecycle costs to justify each savings choice.
Fast Repairs: What You Can Do Today
When a quick touch-up can stop damage from spreading, prioritize fixes you can complete today. You’ll want to clean the area, sand loose flakes, and use a suitable primer before applying paint. Check color mixing for small batches to match faded hues, and note paint branding so future touch-ups align. Use quick-dry formulas designed for outdoor exposure when possible.
When a quick touch-up can stop spread, clean, sand, prime, and test small paint batches for an outdoor match.
- Clean and dry surface thoroughly.
- Sand and remove flaking paint.
- Apply compatible primer to bare spots.
- Mix small paint batches, test match.
These steps limit further deterioration and buy time until a full exterior repaint.
Quick Reference: Do This, Avoid That
Those quick repairs buy you time, but you’ll want a simple checklist to guide what to do and what to avoid next. Do clean and dry surfaces thoroughly, use primer compatible with your substrate, and pick exterior-grade topcoat when permanence matters. Do test a small area for adhesion and note paint texture differences that affect coverage.
Do consider color psychology for curb appeal and heat absorption on sunny walls. Avoid using interior-only paints on trim exposed to weather, avoid skipping sealers on porous masonry, and avoid assuming sheen equals durability—check labels and manufacturer’s recommendations first.
Decision Checklist: Use Interior Paint Or Buy Exterior?
If you’re weighing whether to use leftover interior paint or buy exterior-grade, focus on three practical factors: exposure level (direct weather, UV, moisture), substrate type (wood, metal, masonry, previously painted surface), and desired longevity versus budget.
You’ll assess adhesion, flexibility, and resistance to mildew; interior formulas usually lack UV stabilizers and water resistance. Consider your color schemes and paint textures—flat interior sheens hide imperfections but trap moisture outdoors.
- High exposure: buy exterior-grade
- Protected areas (porches, under eaves): interior may suffice with primer
- Metal or masonry: choose exterior for corrosion and breathability
- Tight budget: prioritize critical surfaces
Frequently Asked Questions
Can Interior Paint Harm Nearby Plants or Soil When Used Outside?
Yes — interior paint can harm nearby plants and soil. You’ll risk plant safety and negative soil impact from solvents, heavy metals, or flaking paint. You should avoid spills, rinse tools away from garden, and choose safer coatings.
Will Interior Paint Off-Gas Differently When Applied Outdoors?
Yes — you’ll notice different off-gassing outdoors because indoor paint durability and exterior weather resistance affect VOC release; you’ll get faster dispersion in open air, but sunlight, temperature, and moisture still change emission rates and longevity.
Can Interior Paint Be Used on Outdoor Furniture That Sits Uncovered?
Yes — but it’s risky: if you prioritize color matching and finish durability, you’ll likely choose exterior-grade coatings instead, since interior paint won’t withstand weather, UV, or moisture long-term on uncovered outdoor furniture.
How Does Interior Paint Perform on Metal Railings and Hardware?
Interior paint generally performs poorly on metal railings and hardware; you’ll risk metal rust and poor paint adhesion unless you thoroughly sand, prime with a rust-inhibiting metal primer, and choose a durable topcoat designed for metal.
Are Touch-Up Kits for Interiors Safe for Temporary Outdoor Repairs?
Briefly: you can, but cautiously. Carefully consider Indoor paint compatibility; Touch up kit safety varies—they’ll temporarily shelter metal, but won’t withstand severe storms. You’ll need primer, sealant, and speedy, seasonal reapplication.
Conclusion
You can, sometimes—but don’t expect miracles. Using interior paint outside is like sending a raincoat to fight a hurricane: it might hold up for a little while, but sun, moisture, and temperature swings will beat it down fast. If you’re patching fast or painting a short-term surface, go ahead; for anything permanent, get exterior paint. Spend smart where it counts, or you’ll be repainting sooner than you ever wanted.