Can You Paint Chalk Paint Over Latex Paint
Yes—you can paint chalk paint over latex if the surface is clean, dry, and properly prepped. Start by testing adhesion with tape, clean away grease, and scuff or sand glossy spots. Use a bonding primer on slick, stained, or repaired areas and plan for two thin coats with light sanding between. Seal with wax or polyurethane for durability. Keep following for practical tips on prepping, coverage, and sealing to get reliable results.
Quick Answer: Can You Paint Chalk Paint Over Latex?
Yes—you can paint chalk paint over latex paint in most cases. You’ll usually skip heavy sanding or priming, though you should clean the surface and check for peeling.
Chalk paint adheres well, letting you alter color contrast and layer paint textures for matte or distressed looks. If the latex is glossy, scuff it lightly to improve grip.
Test a small area to confirm adhesion and desired effect. For durable surfaces or heavy-use furniture, consider a bonding primer or light sanding first.
When Chalk Paint Over Latex Is a Good Idea
You can get great results when the surface is prepped properly—cleaned, sanded or scuffed, and free of grease or loose paint.
Chalk paint sticks best in mild, dry conditions and over latex that’s fully cured and not glossy.
However, you should use a bonding primer if the old finish is slick or stained.
Knowing these prep steps and when to prime will help you decide if chalk paint is the right choice.
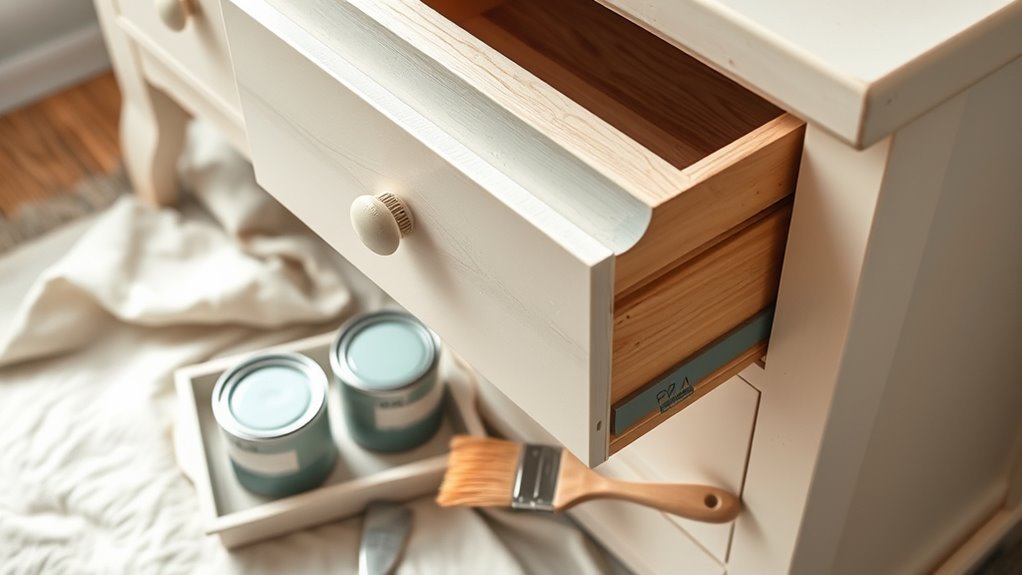
Surface Preparation Steps
Before you brush on chalk paint over latex, make sure the surface is clean, dry, and free of loose finish so the new paint can adhere properly. Start by wiping with mild detergent, rinse, and let dry completely.
Lightly sand glossy spots to dull sheen, then remove dust with a tack cloth. Fill dents, sand smooth, and clean again.
If you plan color mixing or want layered effects, test swatches to see how pigments interact.
Prime repairs with an appropriate primer. These prep steps give you a stable base for applying chalk paint and experimenting with artistic techniques confidently.
Adhesion-Friendly Conditions
When the existing latex finish is clean, lightly sanded, and free of peeling or heavy gloss, chalk paint will stick well and give you a smooth, durable result. You’ll know it’s a good idea when the surface is stable and stains or oils aren’t present. Consider these practical checks:
- Even sheen across the piece ensures adhesion and predictable color mixing.
- No loose paint or bubbling—if present, address it first.
- Clean, degreased surfaces prevent lifting and uneven coverage.
- Proper brush care—use quality brushes, clean between coats—to maintain finish consistency and avoid streaks.
These conditions let you skip heavy primers confidently.
When To Use Primer
If the latex surface shows any gloss, stains, or previous repairs, use a primer to make sure chalk paint bonds evenly and hides imperfections. You’ll also prime glossy latex to prevent peeling and seal tannin-rich woods or water stains.
Prime when switching dramatically between light and dark tones to avoid extra coats and unpredictable color mixing. Choose a stain-blocking, adhesion-focused primer for best results.
Let primer dry fully and follow manufacturer guidelines on sanding. Proper paint storage keeps leftover primer and chalk paint usable for touch-ups.
Primer saves time, reduces coats, and delivers a uniform, long-lasting finish.
When You Should Avoid Chalk Paint Over Latex
Although chalk paint often sticks to latex, you should avoid using it over certain latex finishes—like high-gloss or oil-modified latex, heavily contaminated surfaces, or poorly adhered existing paint—because adhesion problems, visible imperfections, or ongoing peeling can ruin your new finish.
Although chalk paint often bonds to latex, avoid it over high-gloss, oil-modified, contaminated, or poorly adhered finishes—prep first.
You’ll also want to skip chalk paint when:
- The surface has waxy residues or grease that resist bonding.
- Existing paint flakes or bubbles, signaling poor adhesion.
- You need perfect color mixing for matching trim or detailed furniture styles.
- Surfaces are exposed to heavy wear or moisture without proper sealing.
In these cases, prep or primer is wiser than a quick coat.
Start Here: Tape Test for Adhesion
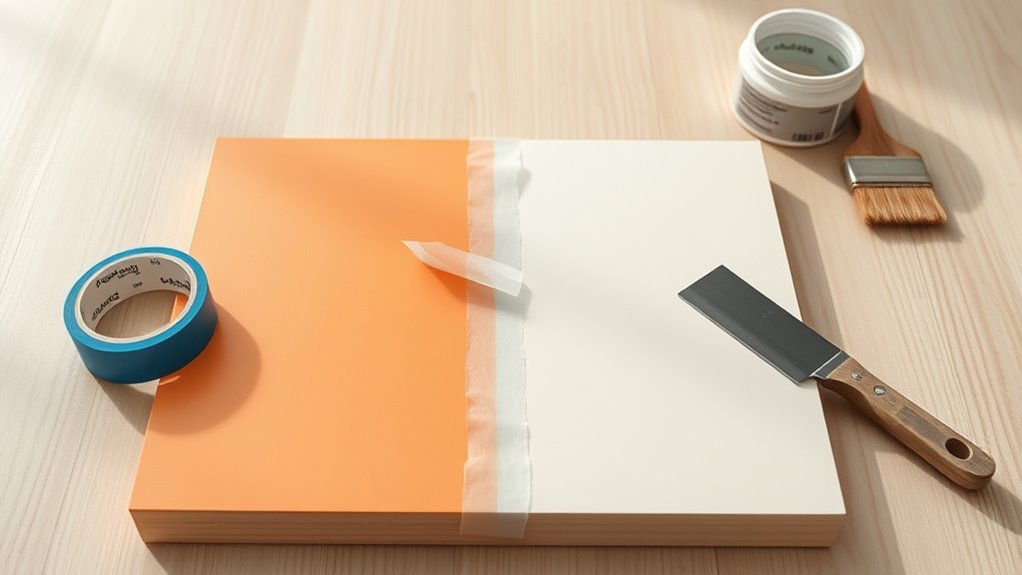
Before you grab a brush, do a simple tape test to check whether the latex surface will hold chalk paint—this quick check often saves a ruined finish on surfaces that looked fine but won’t bond.
Pick an inconspicuous area, clean it, apply a strip of high-quality painter’s tape, press firmly, then peel sharply. If paint lifts, you’ll need sanding or a primer. Repeat in several spots and note results.
This also helps you consider color theory when planning layers and distressing.
Record outcomes and label paint cans; include storage tips for leftover chalk paint and taped samples for future reference.
Does the Latex Sheen Matter for Chalk Paint?
Because sheen affects surface smoothness and adhesion, you’ll want to note the latex finish before you paint. The latex sheen matters because high-gloss surfaces resist Chalk sheen bonding more than flat ones, affecting Latex compatibility. Consider these quick points:
- Flat or matte: accepts chalk paint easily and improves Chalk sheen appearance.
- Eggshell/satin: moderate adhesion; you may scuff lightly for better grip.
- Semi-gloss/gloss: slick; sanding or deglossing boosts compatibility.
- Trim/metallic finishes: assess adhesion with a tape test and spot-prime if needed.
Knowing the sheen guides your prep choices without overcomplicating the job.
How Surface Condition Guides Prep Steps
Now that you know how sheen affects adhesion, look at the actual surface condition to decide your prep steps. Inspect for flaking, gloss, stains, or previous wax; these dictate sanding, deglossing, or spot-priming.
If the latex is smooth but clean, deglossing pads or mild scuff-sanding usually suffice.
For chalk paint that needs even coverage and accurate color mixing, remove contaminants to prevent tint shifts.
When repairing gouges or heavy wear, fill and sand to a uniform plane before priming.
Consider your furniture styling goals—distressed, modern, or layered—and match prep intensity to the final look.
When It’s Safe to Skip Sanding Before Painting
If the latex surface is clean, lightly glossy, and free of flaking or heavy wear, you can often skip aggressive sanding and rely on deglossing or a quick scuff with a nylon pad instead. You’ll save time when conditions are right.
Consider these simple checks:
- Surface is well-adhered and shows no peeling.
- Gloss level is low to medium — rinse and scuff if needed.
- Existing color matching is acceptable for your project’s look.
- Piece fits the furniture styles you want; delicate profiles benefit from minimal prep.
When those apply, a light degloss keeps adhesion without heavy sanding.
When You Must Sand Latex Before Chalk Paint
When the existing latex paint is peeling, chalky, or glossy enough that a deglosser won’t bite, you must sand before applying chalk paint to guarantee proper adhesion and a smooth finish. You’ll sand when surface texture, loose edges, or strong color contrast could show through or reduce paint durability. Sanding evens gloss, removes compromised film, and prevents future flaking. Use 120–220 grit, clean dust, and spot-prime bare areas. Light sanding also helps distressing techniques. If you’re unsure, test a small area. Proper prep saves time and ensures the chalk paint bonds and lasts.
| Issue | Action |
|---|---|
| Peeling | Sand and prime |
| Glossy | Scuff sand |
| Chalky | Remove, sand |
| Strong contrast | Sand, prime |
| Bare wood | Sand, prime |
How to Test for Loose or Flaking Paint
Before you start painting, check for loose or flaking paint so you don’t trap unstable layers under your new finish. You’ll want to assess adhesion before chalk paint or color mixing experiments change the look during furniture restoration.
Before painting, test for loose or flaking paint—remove any unstable layers to ensure a lasting finish.
Try these quick tests:
- Press fingernail into edges to see if paint chips.
- Use a putty knife to gently lift suspicious areas.
- Tap the surface—hollow sounds can mean delamination.
- Wipe with a damp cloth; stubborn powder or flakes indicate poor bond.
If any test shows failure, remove loose paint, sand smooth, and prime before applying chalk paint.
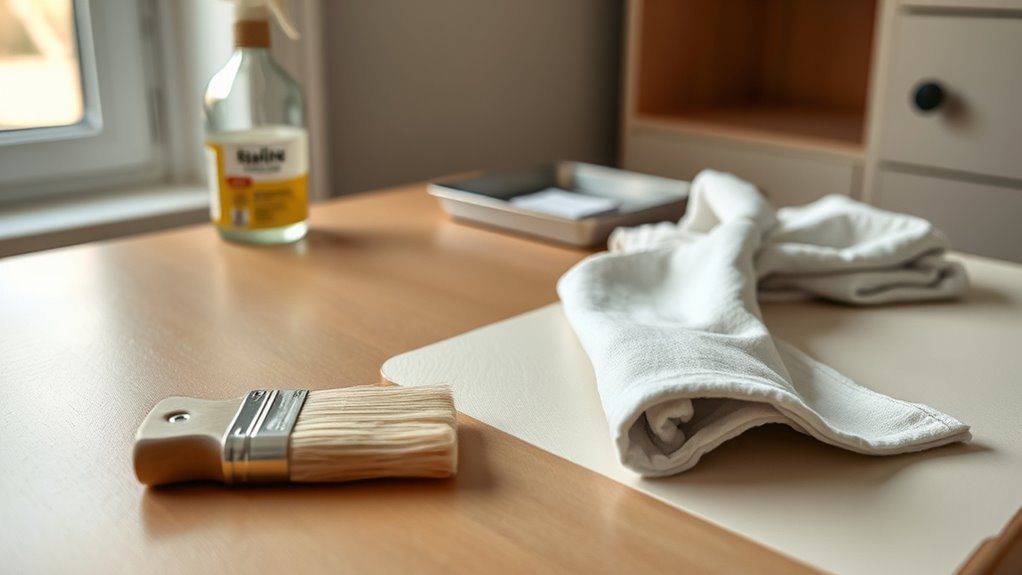
How to Clean Latex: Remove Grime and Oils
Before you paint, you’ll need to degrease the latex surface with a trisodium phosphate (TSP) solution or a dedicated kitchen degreaser to cut through oils and fingerprints.
For stubborn grime, scrub gently with a non-scratch pad or soft brush, rinsing thoroughly and letting the surface dry completely.
If greasy residue remains, repeat the cleaning or use a stronger commercial degreaser following the product instructions.
Degreasing The Surface
If your latex surface has any grease, oil, or heavy grime, you’ll need to degrease it thoroughly so chalk paint will adhere properly; otherwise, the paint can peel or show uneven texture. Start by testing small areas for color contrast and color matching after cleaning.
Follow these steps:
- Wipe surface with warm, soapy water to remove light dirt.
- Use a commercial degreaser or trisodium phosphate (TSP) solution for oily residue.
- Rinse thoroughly with clean water to remove cleaners.
- Dry completely and sand lightly where gloss remains.
These steps guarantee a clean base so chalk paint bonds and looks even.
Removing Stubborn Grime
Once you’ve rinsed and dried the surface, tackle any remaining stubborn grime or oil spots with a stronger approach so your chalk paint won’t lift later.
Mix a solution of trisodium phosphate (TSP) or a commercial degreaser per label instructions, wearing gloves and ventilating the area. Scrub gently with a non-abrasive pad, rinse thoroughly, and dry.
For persistent oil, use isopropyl alcohol or white vinegar on a cloth, testing a hidden spot first to guarantee latex compatibility.
Allow full drying before priming.
Proper cleaning boosts chalk durability and adhesion, reducing peeling and securing a long-lasting finish.
Best Degreasers and Cleaners for Latex Prep
Because latex surfaces often hold grease, grime, and waxy residues that repel new coatings, you’ll want to choose a cleaner that strips contaminants without damaging the existing paint. You’ll prep like a pro, balancing color mixing decisions and furniture shaping touches after a proper clean.
Consider these dependable options:
- TSP substitute — heavy-duty grease removal, rinse well.
- Citrus-based degreaser — gentle on finish, lifts wax.
- Simple green or all-purpose cleaner — great for light grime.
- Isopropyl alcohol (70%) — removes oily deposits and silicone, spot-test first.
Wear gloves, ventilate, and let surfaces dry fully before painting.
Liquid Deglosser vs. Sanding: Pros and Cons
When prepping latex for chalk paint, you’ll weigh liquid deglossers against sanding on ease of use, surface bonding strength, and the time-versus-dust tradeoff.
Liquid deglossers are quick and low-mess but may not roughen the surface as effectively as sanding for long-term adhesion.
Sanding gives stronger mechanical bite but takes more time and creates dust you’ll have to manage.
Ease Of Use
Although both liquid deglossers and sanding get the job done, you’ll find their ease of use is very different: a deglosser wipes on quickly with minimal effort and cleanup, while sanding takes more time, elbow grease, and dust control. You’ll choose based on tools, patience, and finish goals.
- Speed: deglossers save time; sanding’s slower.
- Mess: deglossers reduce dust; sanding needs containment.
- Skill: deglossers are forgiving; sanding risks uneven spots.
- Cost: consider budget considerations—deglossers save on tools, sanding may fit DIY supplies.
Also factor Color mixing if you’ll tint or glaze afterward.
Surface Bonding Strength
If you want the most reliable adhesion over latex paint, sanding creates a mechanically keyed surface that paint and primers can grab onto. A liquid deglosser chemically etches the sheen without altering texture.
You’ll choose sanding when you need strong bite for chalk paint, especially if previous layers are glossy or uneven. A deglosser’s convenience preserves delicate texture application and avoids sanding marks, but it may not bond as durably on all surfaces.
Consider how your color mixing will interact with primer and topcoat—sanded surfaces often yield truer layers, while deglossed ones can shift tones slightly.
Time And Dust Tradeoff
Choosing between sanding and a liquid deglosser comes down to how much time and mess you’ll tolerate. You’ll weigh speed, clean-up, and surface readiness when painting chalk paint over latex.
- Sanding: creates dust, gives strong mechanical bite, avoids color mixing surprises.
- Liquid deglosser: fast, low dust, but relies on chemical etch; watch for chalk paint fumes.
- Time: deglosser saves hours; sanding costs time but can be quicker for small flaws.
- Finish control: sanding offers smoother results; deglosser works well if latex is glossy and intact.
Pick based on workspace and tolerance for mess.
How to Repair Chips and Flaking Latex
When you find chips or flaking in latex paint, you’ll want to remove loose material, feather the edges, and create a clean, stable surface before applying chalk paint. Scrape and sand back to sound paint, then wipe away dust with a damp cloth.
Fill gouges with a lightweight spackle, sand smooth, and clean again. If you’re concerned about visible repairs, use color matching or subtle paint mixing to blend patched areas with the surrounding finish before topcoating.
Let repairs fully cure. Lightly scuff the entire area so chalk paint adheres evenly, then proceed with your chosen chalk paint application.
Primer or Direct Chalk Paint: When to Prime
After repairing and sanding the surface, decide whether you need a primer or can apply chalk paint directly. The choice hinges on the existing finish, stains, and how much adhesion and coverage you want. You’ll usually skip primer when the latex is matte, uniform, and not stained, especially if color matching or a distressed look suits your furniture styles.
Prime when colors bleed, surfaces are glossy, or you need maximum adhesion and durability. Consider these quick triggers:
- Matte, stable finish — paint directly.
- Bold color change — prime first.
- Stains or tannins — always prime.
- High-traffic piece — prime for longevity.
Which Primers Bond to Glossy Latex
Because glossy latex repels many coatings, you’ll want a primer formulated for slick surfaces to guarantee chalk paint sticks and lasts. Choose bonding primers labeled for glossy or slick substrates—acrylic-epoxy, shellac-based, or high-adhesion latex primers work well.
Scuffing first improves mechanical bite, but these primers chemically adhere where sanded paint won’t.
You’ll also want stain-blocking options if tannins bleed through. Think of primer choice like color theory in painting: the underlayer affects final hue and saturation, much as ground layers shaped art history techniques.
Test a small area to confirm adhesion and color shift before committing.
Pick a Chalk Paint: Adhesion, Sheen, Durability
Now that you’ve chosen a primer to bond to glossy latex, pick a chalk paint that matches your needs for adhesion, sheen, and durability. Consider these points to guide choices for furniture restoration and color matching:
Now that your primer is set, choose a chalk paint for adhesion, sheen, durability, and perfect color matching.
- Adhesion: choose formulas labeled high-adhesion or chalk-mineral blends for better grip.
- Sheen: matte chalk gives antique looks; satin or waxed finishes add subtle sheen and wipeability.
- Durability: look for built-in sealers or returns well to sanding without flaking.
- Color matching: test small swatches and layer primers or glazes to achieve exact tones.
Test before committing to guarantee satisfaction and longevity.
DIY Chalk Paint Recipes vs. Store-Bought
When you’re choosing between DIY chalk paint recipes and store-bought options, weigh cost and control against consistency and convenience.
If you like experimenting, DIY gives low cost and total control over color options and texture enhancement—you can tweak pigment and additive ratios to suit projects.
Store-bought formulas save time, deliver predictable coverage, and include tested binders for better durability and uniform finish. You’ll pay more, but you’ll avoid mixing mistakes and batch variability.
For small jobs or signature mixes, DIY works well; for larger or client work where reliability matters, buy premixed chalk paint.
How to Apply Chalk Paint Over Latex for Smooth Coverage
If your latex-painted surface is clean and sound, you can get a smooth, durable finish by prepping properly and applying chalk paint with the right tools and technique. You’ll want to address adhesion and surface uniformity before painting.
If your latex paint is sound, prep, sand, clean, prime spots, then apply thin chalk paint coats and seal.
- Sand lightly to remove gloss and reduce texture contrast.
- Clean thoroughly; remove dust, grease, and debris.
- Prime any bare spots or high-sheen areas to aid color matching and adhesion.
- Apply thin, even coats of chalk paint, allowing proper dry time between layers.
Finish with a clear wax or sealer for durability and to harmonize sheen and color matching.
Which Brushes, Rollers, or Sprayers Work Best?
You’ll get the best results with a high-quality synthetic brush for detail work and a dense foam or short-nap roller for flat surfaces.
If you’re covering large pieces or want an ultra-smooth finish, a HVLP sprayer or airless sprayer will save time and reduce brush marks.
Match tool choice to the piece—brush for trim and crevices, roller for tabletops and panels, sprayer for full cabinets or multiple pieces.
Best Brush Types
Curious which applicator will give you the smoothest, most durable finish when brushing chalk paint over latex? Pick brushes that match the piece and your technique.
Natural-bristle brushes handle chalk’s thicker body well on wood; they aid subtle color mixing for layered looks.
Synthetic brushes resist water and clean easily for frequent use.
Angled sash brushes help you cut in around trim and moldings, ideal for varied furniture styles.
Use a small round brush for details and a wide flat for panels; avoid cheap shed-prone brushes that leave hairs.
Clean brushes promptly to maintain shape and performance.
Roller And Sprayer Choices
When tackling chalk paint over latex, choosing the right roller or sprayer speeds the job and affects the finish. You’ll want a dense microfiber or short-nap roller for smooth, even coverage without lint. Use a ¼”–3/8″ nap for furniture, ½” for lightly textured walls.
Airless sprayers deliver fast, uniform coats and excellent color blending, but require thinning and masking. HVLP gives control for detailed work and subtle texture effects. Practice on scrap to adjust pressure and tip size.
Clean equipment thoroughly; clogged tips ruin finish. Match tool to project size and desired surface feel.
Layering and Drying Times for Chalk Over Latex
Although chalk paint adheres well to latex, you’ll still want to plan your layers and drying schedule carefully to avoid tacky finishes or uneven texture. You’ll control appearance and durability by sequencing coats, allowing drying between sanding, and considering color mixing for subtle shifts and texture enhancement techniques.
Plan coats and drying times carefully—sand only when dry, test a corner, and extend drying in humid conditions.
- Wait 1–2 hours between thin chalk coats in warm, dry conditions.
- Lightly sand only after paint feels dry to the touch, about 2–4 hours.
- Extend drying to 24 hours before waxing or sealing in humid weather.
- Test a corner to confirm cure and desired finish before proceeding.
How Many Coats of Chalk Paint You’ll Need
Before you start, make sure you clean and scuff the latex surface so the chalk paint will bond properly.
Thin, even coats usually cover better than one thick one, so plan on applying multiple light layers rather than a single heavy coat.
Expect two to three coats for full coverage, adjusting based on how porous or glossy your surface is.
Surface Preparation Needed
If your latex paint is in good shape—clean, smooth, and well-adhered, you’ll usually need only one to two coats of chalk paint. Before you start, prep matters: you’ll remove grease, sand glossy spots, and ensure a dry, dust-free surface so color mixing and decorative techniques behave predictably.
- Clean surface with mild detergent, rinse, dry.
- Lightly sand glossy areas; wipe off dust.
- Fill holes, prime bare spots or repaired areas.
- Test a small patch to check adhesion and desired coverage.
Do these steps and you’ll get consistent finish, fewer coats, and longer-lasting results.
Coat Thickness Guidance
When you’re covering latex paint with chalk paint, plan on two thin coats as the typical starting point. Apply the first coat thinly to avoid drips and to see how the existing color influences coverage. Let it dry fully, then assess: if the latex shows through or you want richer saturation, add a second thin coat.
For dramatic color mixing or layered effects in furniture design, you might add a third coat selectively, sanding lightly between layers for adhesion and texture control. Seal with wax or poly as needed.
Keep coats thin for even drying, minimal brush marks, and predictable results.
Sanding Between Coats: When It Helps
Sanding between coats can smooth brush strokes, remove dust nibs, and help the next layer adhere better, especially on glossy latex or older finishes. You’ll want light sanding with fine grit to avoid removing paint. Think of it like color mixing prep: smooth layers let pigments sit evenly, and it supports artistic techniques that rely on consistent texture.
Sanding between coats smooths brush strokes and dust nibs, helping layers adhere and pigments sit evenly.
- Lightly sand with 220–320 grit after drying.
- Wipe residue with a tack cloth before recoating.
- Sand only where texture or adhesion issues appear.
- Avoid heavy sanding that exposes substrate or removes detail.
This keeps finishes uniform and predictable.
How to Distress Chalk Paint on Painted Latex
Before you start distressing chalk paint over latex, make sure you prep the surface by cleaning, deglossing, and applying a compatible base or primer where needed.
Use controlled distress techniques—light sanding on edges, gentle scraping with a putty knife, or selective rubbing with steel wool—to reveal the underlying latex in a natural-looking way.
Work in layers and test your method on a hidden spot so you can adjust pressure and tools for the effect you want.
Prep The Surface
Although latex is generally slick, you can get chalk paint to adhere and distress well by prepping the surface properly. Start by cleaning grime and wax with degreaser; rinse and dry thoroughly.
Lightly sand glossy areas to give tooth, then wipe dust away. Use a bonding primer if the latex is particularly slick or dark.
- Clean surface completely.
- Sand glossy spots for adhesion.
- Apply bonding primer where needed.
- Plan color mixing and consider original furniture styles to guide your palette.
These steps guarantee even coverage and predictable distressing without diving into distress techniques yet.
Distress Techniques Explained
When you want a naturally worn look on chalk-painted latex, work from least to most aggressive: start with light scraping or rubbing to expose edges, move to targeted sanding for subtle reveal, and finish with heavier abrasion or wet distressing where deeper wear would occur (corners, drawer fronts, and handles). You’ll test techniques on a scrap piece, balance color mixing and texture application, and protect areas that shouldn’t age. Vary grit, sponge, and steel wool to control reveal. Finish with wax or sealer.
| Tool | Area | Effect |
|---|---|---|
| Sandpaper | Edge | Subtle |
| Steel wool | Panel | Soft |
| Wet rag | Corner | Deep |
| Sponge | Surface | Mottled |
Sealing Chalk Paint Over Latex: Wax vs. Polyurethane
If you’ve applied chalk paint over latex, the next big decision is how to seal it—wax or polyurethane—and each finish gives different protection, sheen, and maintenance needs. You’ll weigh Chalk preservation against Latex durability, surface use, and desired sheen.
Consider:
- Wax: easy to apply, soft patina, good for low-traffic pieces.
- Polyurethane: tougher, water-resistant, better for high-use surfaces.
- Compatibility: test a small area to ensure adhesion and finish look.
- Maintenance: wax needs periodic reapplication; polyurethane cleans with soap and water.
Choose based on use and look, and always test before finishing the whole piece.
Polyurethane or Wax: Which to Use?
You’ll choose wax or polyurethane based on how tough you need the surface to be and the look you want.
Wax gives a softer, low-sheen finish but needs more upkeep.
Polyurethane offers harder protection and a range of sheens from satin to glossy.
Consider traffic and desired appearance to pick the best sealant.
Durability And Protection
Although chalk paint gives furniture a lovely matte finish, you’ll still need a protective topcoat to keep surfaces durable. Deciding between polyurethane and wax comes down to how much wear the piece will see and the look you want. You’ll choose based on traffic, exposure, and whether you enjoy re-waxing.
Consider:
- Polyurethane: hard, long-lasting for tabletops and high-use pieces.
- Wax: softer, easier spot-repair, good for gentle-use items.
- Maintenance: wax needs periodic reapplication; polyurethane is low-care.
- Compatibility: test first—color mixing and different furniture styles can affect adhesion and final protection.
Finish Appearance Differences
When choosing between polyurethane and wax, think about the exact look you want and how the piece will be used.
You’ll pick polyurethane for a durable, clear finish that holds up to frequent handling and resists stains, preserving color contrast and a consistent sheen.
Choose wax if you want a softer, hand-rubbed appearance that emphasizes texture variation and lets subtle brushstrokes or distressing show through.
Wax requires reapplication and offers less protection, so it’s best on low-traffic pieces.
Polyurethane works for tabletops and high-use items; wax suits decorative pieces where warmth and tactile depth matter more than toughness.
Protecting High-Use Surfaces: Tabletops and Cabinets
Because tabletops and cabinets get the most daily wear, you’ll want a clear, durable finish over chalk paint to prevent scratches, stains, and constant touch-ups. You’ll also consider color matching during furniture restoration so repairs blend seamlessly. Follow practical steps:
Protect tabletops and cabinets with a clear, durable water-based finish—match colors, sand lightly, and apply thin coats.
- Sand lightly, wipe clean, and guarantee adhesion.
- Apply two thin coats of water-based polyurethane for clarity and flexibility.
- Use a foam brush for smooth coverage; sand between coats with fine grit.
- Let cure fully before heavy use and test a small hidden area first.
These steps keep surfaces attractive and resilient without sacrificing chalk paint’s matte charm.
Fixing Peeling, Bubbling, or Chalky Finishes
If your chalk paint is peeling, bubbling, or feels powdery, don’t panic—these issues usually come from poor adhesion, trapped moisture, or incompatible underlying finishes. You can fix them with a few targeted steps.
First, strip loose paint and sand to sound substrate; remove dust. Test for moisture and address leaks before repainting.
Prime with a bonding primer suited to latex beneath chalk paint. Reapply thin, even chalk paint coats, allowing full cure between layers.
Seal with appropriate wax or poly for protection. Use color mixing sparingly and artistic techniques for touch-ups to blend repaired areas seamlessly.
Avoiding Visible Brush Strokes on Latex Surfaces
To keep your latex-painted surface smooth and professional-looking, focus on proper thinning, the right brush or roller, and consistent stroke technique. You’ll avoid lap marks and visible brush strokes by prepping, controlling paint consistency, and working with the light.
- Thin paint slightly per label to improve leveling and avoid thick ridges.
- Use a high-quality nylon/poly brush for trim, low-nap roller for flats to limit texture.
- Maintain wet edges and work with lighting effects so flaws show and get fixed immediately.
- Sand lightly between coats with fine grit, clean dust, then apply final thin coat for even color palettes.
Painting Latex Walls With Chalk Paint: Pros and Cons
If you’re thinking of using chalk paint on latex walls, remember that proper surface preparation—cleaning, sanding, and priming—makes the biggest difference in how well it sticks.
Chalk paint can give a matte, vintage finish you’ll love, but it’s generally less durable than latex and often needs a protective topcoat in high-traffic areas.
We’ll weigh those trade-offs so you can decide if the look is worth the extra prep and maintenance.
Surface Preparation Needs
Because chalk paint adheres differently than latex, proper surface preparation matters more than you might expect. You’ll need to clean, scuff, and sometimes prime latex walls before applying chalk paint to guarantee adhesion and an even finish.
You’ll also consider how preparation affects color mixing and texture enhancement so the final look matches your intent.
- Clean: remove grease, dust, and mildew with a mild detergent.
- Scuff: lightly sand glossy latex to promote bonding.
- Repair: fill cracks and smooth imperfections before painting.
- Prime: use a bonding primer on difficult or patched areas for consistent coverage.
Durability And Finish
When you apply chalk paint over latex, expect a softer, more matte finish that looks charming but wears differently than traditional latex—chalk paint’s porous, velvety surface resists sheen but can scuff, chip, or show stains more easily, so you’ll need to seal high-traffic areas to preserve durability.
You’ll appreciate its antique look and how color mixing lets you create subtle patinas, borrowing historical techniques for layered depth. Still, durability depends on proper sealing: use wax or clear topcoat, recoat vulnerable zones, and clean gently.
If you want hard-wearing walls, test and plan maintenance before committing.
Kitchens and Bathrooms: Humid-Area Considerations
Although kitchens and bathrooms see constant moisture and temperature swings, you can still use chalk paint over latex if you take steps to prevent peeling and mildew. You’ll protect surfaces and keep Color psychology in mind when choosing hues for cabinets or vanities, and you can apply furniture restoration techniques to salvage worn pieces. Follow these practical steps:
- Thoroughly clean and degrease surfaces.
- Sand lightly and use a bonding primer rated for humid areas.
- Apply chalk paint in thin coats, allowing full cure between layers.
- Finish with a water-resistant topcoat or wax designed for wet rooms.
Coverage Tips When Painting Over Dark Latex
When you’re covering dark latex, start by priming the surface to block stains and even out color.
You’ll usually need multiple thin coats of chalk paint for full coverage rather than one thick layer.
Allow proper drying time between coats to avoid streaks and guarantee an even finish.
Prime Dark Surfaces
Want good coverage over a dark latex base? Prime Dark Surfaces lets you block show-through and reset the tone so your chalk paint pops—think color psychology and historical context when choosing primer hues.
Follow these steps:
- Clean and sand the surface to promote adhesion.
- Choose a high-hide, tinted primer (neutral or near your topcoat).
- Apply with a brush for edges, roller for flats; maintain even film.
- Allow full cure before light sanding and chalk paint application.
Priming saves time and coats later, and it helps achieve consistent color and finish on previously dark latex.
Use Multiple Coats
If you’re covering dark latex, expect to apply multiple thin coats rather than a single heavy one—each layer builds opacity and avoids drips or uneven texture.
Start with a light, even first coat to create a base; sand lightly between coats for adhesion and smoothness.
Use thin, consistent strokes and allow full drying time so color mixing from wet layers won’t muddy tones.
Count on three or more coats for deep colors.
Finish with a clear wax or sealer suited to historical styles if you want an aged look.
Patience here guarantees patchiness and ensures durable, even coverage.
Costs and Time: Plan Your Chalk-Over-Latex Project
Although chalk paint can simplify refinishing, you still need to budget time and money for prep, materials, and sealing. You’ll factor in color matching and budget planning early so surprises don’t stall the job.
Estimate sanding, priming (if needed), coats, and curing time for each piece.
Expect to pay for brushes, chalk paint, primer, wax or topcoat, and touch-up supplies.
- Calculate paint quantity and cost.
- Schedule prep, drying, and recoat windows.
- Add contingency for mismatched color or extra coats.
- Account for tools, sealers, and cleanup time.
Eco-Friendly and Low-VOC Chalk and Primers
Because you’ll likely be working indoors and around family, choosing low‑VOC chalk paints and primers matters for both health and the planet. You’ll reduce fumes and still get a durable finish when you pick certified low‑VOC products.
Test small areas to confirm adhesion over latex and use a low‑VOC bonding primer if needed.
For color matching, sample swatches in different light and layer thin coats to achieve hue depth without waste.
Low‑VOC formulas respond well to typical artistic techniques like dry brushing and distressing, letting you create curated looks while keeping indoor air safer for everyone.
When to Call a Pro Instead of DIY
When a project involves extensive surface damage, complex finishes, or structural concerns, call a pro instead of tackling it yourself. You’ll save time and avoid costly mistakes when paint adhesion, underlying rot, or hidden repairs are involved.
Consider hiring help if precision color theory application or custom glazing is required, or when furniture selection and structural modification overlap.
When precise color theory, custom glazing, or overlapping furniture and structural changes are involved, call a professional.
- Severe surface damage or rot
- Multi-layered or hazardous coatings
- Complex color theory or custom finishes
- Large or valuable furniture selection needing restoration
A pro protects value, guarantees durability, and delivers a predictable, high-quality result.
Frequently Asked Questions
Can Chalk Paint Be Used on Latex-Painted Outdoor Furniture?
Yes — you can use chalk paint on latex-painted outdoor furniture, but you’ll prep thoroughly. You’ll sand, clean, and prime to boost chalk paint durability and guarantee latex paint compatibility, then seal with outdoor topcoat for protection.
Will Chalk Paint Yellow Over Time on Latex Surfaces?
About 20% of painted finishes yellow within years; you won’t always see chalk paint yellowing on latex if you prime and seal properly. Chalk paint durability depends on primer and latex paint compatibility to prevent yellowing over time.
Can I Mix Latex and Chalk Paint to Create a Hybrid Formula?
You can, but don’t expect perfect results: mixing latex and chalk paint for hybrid formulas can alter adhesion, finish, and drying. Test small batches, adjust ratios, and use a bonding primer to improve paint mixing performance and durability.
How Does Temperature Affect Chalk Paint Adhesion Over Latex?
Temperature affects chalk paint adhesion over latex: you’ll get best results with moderate temperatures and good surface preparation; extreme heat, cold, or humidity can weaken bonding, so sand, clean, and prime when conditions are steady and dry.
Are There Special Safety Precautions for Lead-Painted Latex Before Chalk Painting?
Yes — you’ll treat it like handling a dragon: respect, prep, and caution. You’ll follow lead safety protocols, test for lead, avoid sanding, seal or encapsulate the surface, and use proper PPE during surface preparation.
Conclusion
You can usually paint chalk paint over latex—let’s test that theory. Try a quick tape test: press tape to a hidden spot, pull—if paint peels, sand or prime. Chalk paint sticks best to satin or flatter latex and to clean, scuffed surfaces; glossy finishes need sanding or bonding primer. If the color underneath is dark, expect extra coats or a primer. When in doubt or for expensive pieces, call a pro to avoid costly mistakes.