Can You Paint Exterior of House in Winter
Yes—you can paint your house exterior in winter if you follow strict prep and product rules. You’ll need surfaces totally dry, paints and primers rated for low temps, and work scheduled during warmer, low‑humidity daylight hours. Use heaters, tents, and slow‑dry techniques, avoid painting frost or damp siding, and expect longer cure times. Skip tasks when conditions drop below the paint’s minimums. Keep going for a practical checklist and tips to get it right.
Can You Paint Your House Exterior in Winter? Quick Yes/No + Checklist
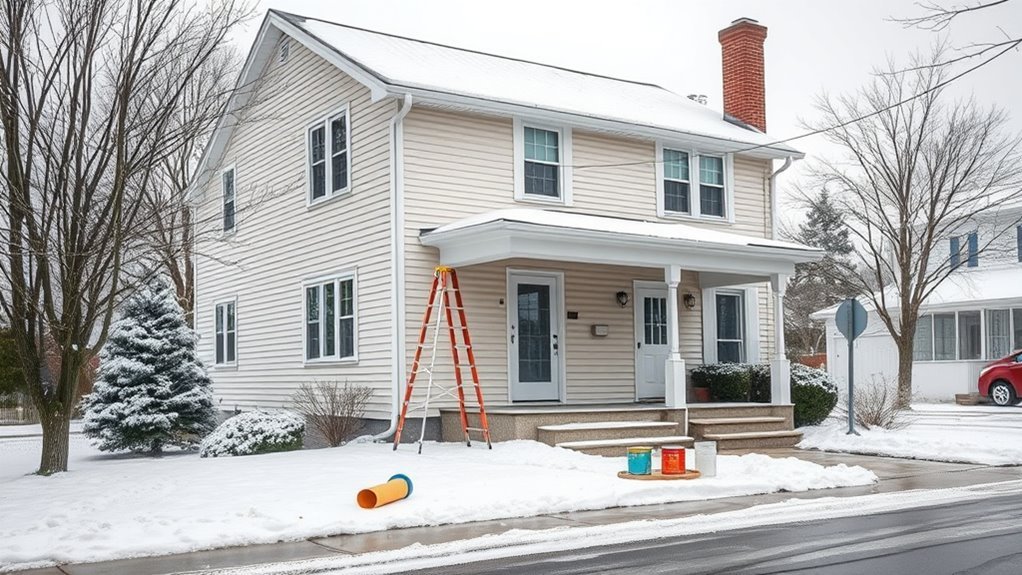
Yes — you can paint your house exterior in winter, but only if you follow a strict checklist to avoid adhesion and curing problems. You’ll inspect surfaces, remove loose paint, and guarantee siding is dry and frost-free. Check product labels for low-temperature formulas and plan shorter sections so paint skins properly.
Use primers rated for cold, keep tools warm, and allow extended cure time. Monitor forecasts to avoid precipitation and rapid temperature drops. Consider color coordination with lighter shades that reflect weak winter sun and select high-quality coatings to maximize paint durability when conditions stress film formation.
When Winter Painting Makes Sense: Temps, Humidity, and Daylight Limits
You can paint in winter, but only if the temperature, humidity, and available daylight align with the paint’s specs. Check the minimum and maximum temperature thresholds on the can.
Monitor relative humidity so film formation isn’t compromised, and plan work hours around the sun to allow proper drying.
If any of those factors don’t cooperate, postpone or limit the job to small, sheltered areas.
Temperature Thresholds
Although cold weather can be challenging, you can still get good results if you respect specific temperature, humidity, and daylight limits.
Focus on temperature thresholds: most exterior latex paints have a minimum application temperature around 35–50°F (check labels). Oil-based products often tolerate slightly lower temps. Don’t paint if overnight temperatures will drop below the paint’s cure range.
Work midday when surfaces warm, and test small areas before committing. Use warm, properly mixed paint, and keep paint brushes and tools from freezing.
Adjust color palettes toward lighter shades that absorb less heat loss, improving drying consistency.
Humidity Considerations
Temperature matters, but humidity can make or break a winter paint job just as much—high moisture slows drying and can cause milky haze or adhesion problems.
Overly dry, windy days can skin the surface before solvents escape. You’ll check relative humidity alongside temperature: ideal exterior curing often sits between 40–70% RH.
If humidity’s high, delay painting until conditions improve or choose fast-curing formulations designed for damp climates.
For short delays, keep cans in controlled paint storage to prevent freezing; for longer gaps, consider bringing materials indoors for indoor painting prep.
Monitor forecasts and use moisture meters on substrates before you start.
Daylight And Scheduling
When daylight shrinks in winter, plan your painting around the hours of usable light so you can finish each coat before dusk and avoid cold, slow curing overnight. Work starts, breaks, and clean-up should all fit within that window.
You’ll map tasks to daylight: prep and primer first, topcoats when temperatures peak. Check forecasts for consecutive clear days to allow proper drying.
Adjust crew size or stagger sections if light is limited. Pick color selection and paint texture wisely—flat sheens hide imperfections but slow drying, satin cleans easier; thicker texture may need longer cure time, so schedule accordingly.
Best Paints and Formulations for Winter Exterior Painting
If you’re painting outside in winter, pick products formulated to cure and stick at low temperatures so your finish dries properly and lasts. Choose acrylic-latex blends labeled for cold-weather application; they balance flexibility and adhesion.
For wood, use low-temp oil-modified formulations or specialty exterior primers plus compatible topcoats. Check manufacturer minimum application temps and pot life.
Consider color options carefully: darker shades may absorb heat and cure faster, while light hues reflect cold.
Prioritize paint durability ratings—UV, freeze-thaw, and mildew resistance—to reduce maintenance.
Buy from reputable brands and follow their product pairings to guarantee warranty and maximum performance.
Prep Steps to Ensure Adhesion and Proper Curing in Cold Weather
Before you paint, scrape, sand, and clean surfaces thoroughly so the new coating can bond to solid, dry material.
Check the forecast and plan work for the warmest part of the day, because paint needs minimum temperatures and time above them to cure properly.
If temperatures might drop too low, use heaters, slow-setting additives, or wait for a warmer window to guarantee adhesion and full cure.
Surface Preparation Steps
How do you get paint to stick and cure properly when temperatures are low? Start by cleaning surfaces thoroughly: remove dirt, mildew, and loose paint with a pressure washer or stiff brush, then let surfaces dry as long as weather permits.
Scrape and sand to feather edges, degloss shiny areas, and repair cracks or rot with appropriate fillers.
Mask trim and protect nearby plants.
For best results, do color matching indoors to avoid surprises under winter light, and choose tools carefully — brush selection matters for cold-weather paints; synthetic bristles often perform better than natural ones in low temps.
Temperature And Cure
Wondering how cold will affect paint adhesion and drying? You’ll need to manage temperature and cure to guarantee the job holds. Choose a paint brand rated for low temps and consider color choices—darker hues absorb heat, aiding cure.
Prep steps include warming surfaces and storing materials indoors.
- Imagine a sun-warmed dark siding speeding cure.
- Picture a pale wall reflecting cold, slowing set.
- Visualize a heater blowing across a primed trim.
- See cans warmed to room temp before rolling.
You’ll follow manufacturer minimums, allow extra cure time, and avoid freezes.
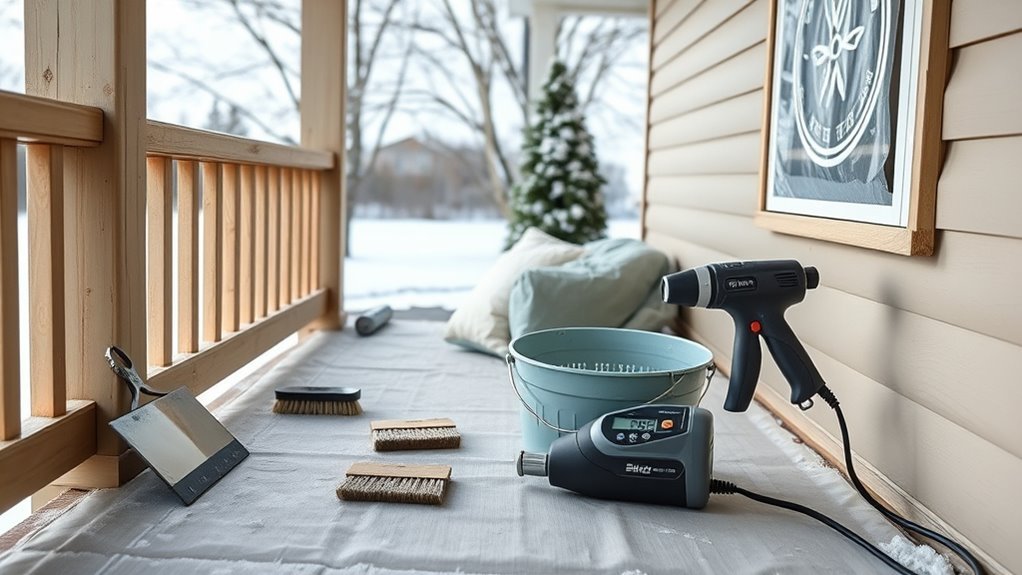
Tools and Techniques for Safe Winter Exterior Painting
When temperatures drop and daylight shortens, you’ll need the right tools and techniques to keep exterior painting safe and effective. You’ll choose brushes, rollers, and paints rated for low temperatures, consider primer types, and recall color psychology to predict how hues read in gray light. Borrow from historical techniques like layering for durability, and use slip-resistant ladders and weatherproof tarps. Stay organized, keep materials warm, and work when surfaces are dry.
| Tool | Purpose | Tip |
|---|---|---|
| Low-temp paint | Bonds in cold | Store warm |
| Synthetic brushes | Flexible in chill | Clean promptly |
| Weatherproof tape | Seal edges | Replace often |
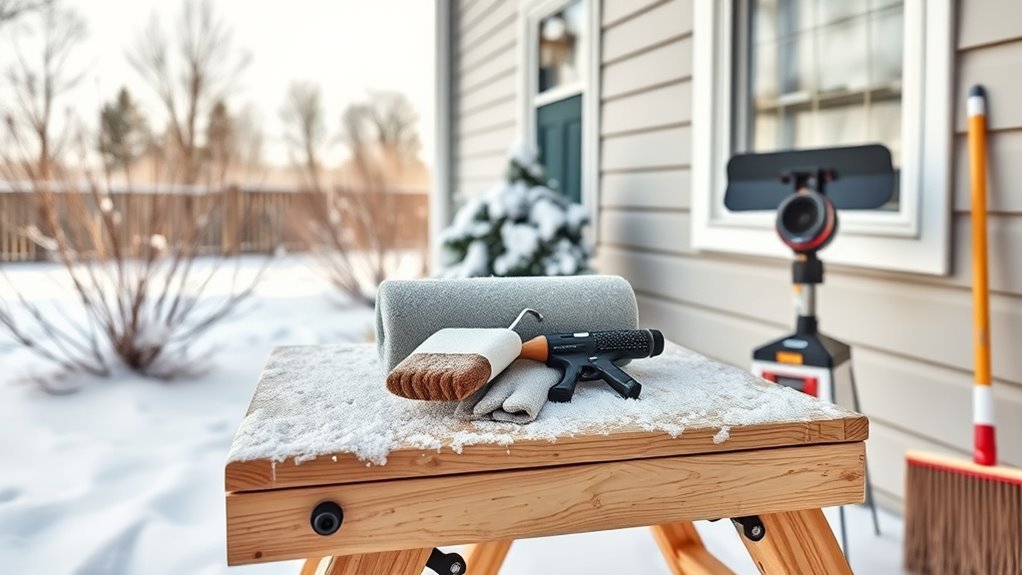
Managing Drying and Curing: Heaters, Tents, and Realistic Timing
You’ve picked the right tools and work windows, but controlling drying and curing is the next challenge in cold-weather exterior painting. You’ll use heaters and tents to raise surface temperature, but monitor humidity and ventilation so solvents escape and film forms properly.
Choose slower-curing formulas when nights are cold, and remember paint sheen affects drying—gloss dries differently than flat. Visualize the process:
- Warm tented area to target temp.
- Dehumidify and ventilate for solvent release.
- Allow extended tack-free intervals overnight.
- Inspect cure before recoating or exposure.
Apply color theory to anticipate final appearance after full cure.
Common Winter Painting Mistakes and How to Avoid Them
Because cold-weather painting brings unique constraints, it’s easy to make mistakes that compromise adhesion, finish, or longevity—so you should focus on prevention from the start. Don’t paint damp surfaces, skip proper prep, or use products rated for warmer temps. Choose eco friendly paints with low-VOC formulas and check cold-weather specs. Mind color trends—darker shades absorb more heat but can hide flaws. Protect fresh work from frost and condensation, and follow manufacturer curing times.
| Mistake | Fix |
|---|---|
| Painting wet surfaces | Fully dry and heat if needed |
| Using wrong paint | Use low-temp, eco friendly paints |
| Rushing cure | Allow extended dry time |
When to Wait for Warmer Weather Instead: Decision Checklist
If temperatures stay below a paint’s rated minimum or humidity stays high, pause the job and wait for warmer, drier conditions—painting in marginal weather risks poor adhesion, extended cure times, and visible defects that are costly to fix.
Use this checklist to decide:
- Surface dry to touch and no frost in morning.
- Forecast shows several consecutive days above minimum temp.
- You’ve completed exterior cleaning methods and repairs; no trapped moisture.
- Seasonal color trends won’t be outdated by delay (samples stay viable).
If any item fails, reschedule. Waiting protects finish, saves touch-ups, and keeps color choices accurate.
Frequently Asked Questions
Can Painting Brick or Masonry Exteriors in Winter Damage the Material?
Yes—you can, but freezing temperatures and moisture can damage brick or masonry if paint or mortar freezes during curing. You’ll avoid issues by postponing work, using proper primers, or opting for exterior staining or indoor painting alternatives when conditions suit.
Will Warranties Cover Winter Exterior Paint Jobs?
Warranties often won’t cover winter exterior paint jobs unless the contractor documents proper prep and uses seasonal paint options rated for cold; you’ll need written confirmation, proof of interior painting compatibility, and specific temperature-based warranty clauses.
Can I Paint Metal Siding in Freezing Temperatures?
Imagine paint shivering on metal siding like tiny penguins; you shouldn’t paint in freezing temperatures because Paint drying stalls and Temperature effects cause adhesion failures, so you’ll wait for warmer, stable temps or use cold-formulated coatings instead.
How Does Salt From Roads Affect Winter-Painted Surfaces?
Salt from roads accelerates salt corrosion, so you’ll see faster surface deterioration on winter-painted surfaces; salt draws moisture, breaks paint bonds, and promotes rust on metal, so you’ll need frequent cleaning and protective coatings.
Is It Safe to Paint Near Holiday Lights or Decorations?
Yes — you can paint near holiday lights and decorative displays, but you should unplug them and protect fixtures; you’ll avoid electrical hazards and paint damage, and you’ll keep both decorations and fresh paint looking their best.
Conclusion
Yes—you can paint your house exterior in winter if temperatures, humidity, and daylight align. Prep thoroughly, pick cold-weather formulations, and plan for extended drying times using heaters or tents. If temperatures stay too low or surfaces are wet, wait for warmer days. For example, a homeowner in Denver used high-quality acrylic latex, temporarily heated and tented a porch, and achieved durable results despite nights below freezing—showing careful planning beats blanket avoidance of winter painting.