Can You Paint Oil Based Enamel Over Latex
Yes — you can paint oil-based enamel over latex, but only if you prep properly. Clean and degrease the surface, sand glossy latex to create tooth, remove dust, and repair imperfections. Always apply a bonding or stain-blocking primer first, sanding between thin coats, then use natural-bristle brushes and maintain a wet edge for smooth enamel coverage. Expect better durability but more fumes and longer dry times, and keep going to learn troubleshooting, timing, and when to avoid switching.
What User Intent Does This Guide Serve?
When you’re reading this guide, you want practical answers and clear steps for painting oil-based enamel over latex—what works, what doesn’t, and how to avoid common problems. You’re looking to assess risks, prep needs, and expected finishes so you can decide whether to proceed or hire a pro.
This guide serves homeowners, DIYers, and pros needing quick decisions supported by historic practice and modern coatings science. It briefly notes historical context for why standards changed and touches on color psychology to help you anticipate how gloss and hue shift with enamel.
You’ll get concise, actionable guidance and troubleshooting.
Quick Answer: Can You Paint Oil Over Latex?
Yes — but you’ll need to prep the surface properly first by cleaning, sanding, and removing any loose paint.
You should use a quality bonding primer to guarantee the oil-based enamel adheres and won’t peel.
Skip those steps and you’ll risk uneven finish and poor durability.
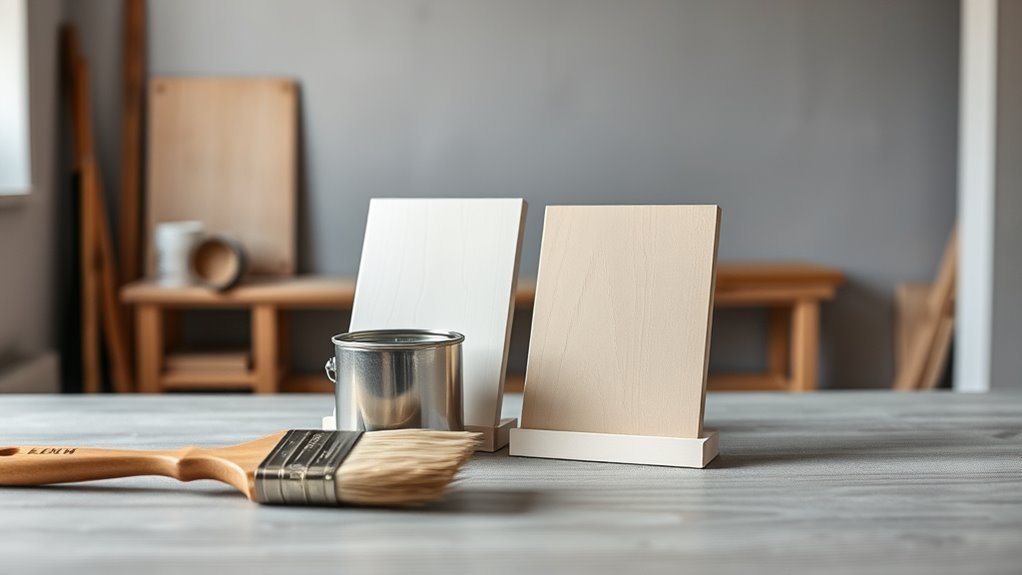
Surface Preparation Needed
Before you apply oil-based enamel over latex, you’ll need to properly clean, sand, and prime the surface so the new paint will adhere and resist peeling. Start by wiping away grease, dust, and mildew with a degreaser or TSP substitute, then rinse and let dry completely.
Lightly scuff glossy latex with fine-grit sandpaper to create tooth; remove sanding dust with a tack cloth. Repair holes and smooth with putty where needed.
Consider color mixing effects if switching tones—test a small area. Choose the right brush selection for oil: natural-bristle brushes for smooth, even coverage and fewer brush marks.
Primer Importance
Although oil-based enamel can physically go over latex, you should always prime first to guarantee adhesion and prevent peeling or yellowing. You’ll choose a bonding or stain-blocking primer to create a stable interface, stop tannins, and resist alkyd yellowing.
Apply thin, even coats and sand lightly between layers for grip. Primer evens absorption so topcoat color mixing stays true and predictable.
Use proper brush techniques: short, controlled strokes with a quality natural-bristle brush for oil-based primer, maintaining a wet edge to avoid lap marks.
Skipping primer risks poor adhesion, uneven sheen, and premature failure of the oil finish.
Who Should Consider Switching to Oil Enamel?
If you need a finish that stands up to heavy wear, oil-based enamel is worth considering—especially for high-traffic surfaces like trim, doors, cabinets, and furniture that get bumped, wiped, or exposed to moisture.
You should consider switching if you want superior durability, smoother leveling, and a hard, washable surface.
Pros include longer-lasting results and fewer touch-ups.
Weigh those benefits against health hazards and environmental impact: you’ll need proper ventilation, respirators, and safe disposal.
Choose oil enamel when longevity outweighs those concerns, or when a professional finish is required for commercial or frequently used residential spaces.
When to Avoid Switching to Oil Enamel?
Switching to oil-based enamel makes sense for heavy-use items, but you should avoid it in situations where its drawbacks outweigh durability. If you care about quick recoat, low odor, or matching a delicate paint color under varied interior lighting, stick with latex. Don’t use oil enamel on flexible surfaces, poorly prepped finishes, or where ventilation’s limited.
| Situation | Concern | Recommendation |
|---|---|---|
| Poor ventilation | Strong fumes | Avoid oil enamel |
| Flexible trim | Cracking risk | Use latex |
| Color matching | Interior lighting shifts | Test samples |
| Quick turnaround | Slow cure | Choose latex |
Oil vs. Latex: Key Differences
Oil and latex paints differ in chemistry, performance, and handling, so you’ll want to pick the type that matches the job rather than assuming one is always better. You’ll notice oil offers longer open time, smoother leveling, and durable finish. Latex dries faster, resists yellowing, and cleans with water. Consider surfaces, odor tolerance, and cure time before switching. Know that color mixing behaves differently and that brush types matter for finish quality.
- Oil gives self-leveling, glossy results
- Latex provides flexibility and faster recoat
- Mixing pigments differs between bases
- Natural vs synthetic brushes affect laydown
How Adhesion Works and Common Bonding Failures
When you paint, adhesion depends on how well the new coat wets, bonds to, and mechanically keys into the existing surface; poor bonding happens when one of those steps fails. You’ll check surface profile, primer compatibility, and drying times so oil enamel can grip latex. Understand that mechanical tooth and chemical affinity matter more than color blending or fancy texture techniques. Common failures include delamination, crawling, and pinholing — each linked to improper prep, incompatible binders, or surface tension issues.
| Failure Mode | Likely Cause |
|---|---|
| Delamination | Poor primer or no mechanical key |
| Crawling | High surface tension |
How Surface Contaminants Stop Enamel From Sticking
You’ve covered how mechanical tooth and chemical affinity affect bonding; now look at what sits on top of the surface. Dirt, oil, wax, and old waxy polish create a barrier that prevents enamel from wetting and anchoring. You’ll notice poor color blending, streaks, and lift even with perfect brush techniques if contaminants remain. Remove residues before painting so solvents and primers can work.
- Dust and grime block micro‑contact.
- Skin oils repel oil‑based enamel.
- Silicone and wax leave invisible repellents.
- Environmental residues (grease, smoke) alter drying.
Clean thoroughly; contamination ruins adhesion.
Step 1: Test Whether Existing Paint Is Latex or Oil

Wondering which paint type you’re dealing with? You can test paint type quickly: rub a small hidden area with a cotton ball soaked in rubbing alcohol. If paint softens or comes off, it’s latex; if it stays, it’s oil-based.
Use a utility knife to score a tiny patch and scrape loose flakes to examine layer color mixing—oil tends to sit as distinct layers, latex blends more.
Try sanding a discreet spot: latex sands to a powdery dust, oil gums.
Note how the surface accepts different brush techniques during a sample stroke to confirm feel.
Record results before proceeding.
Step 2: Check Sheen and Condition of the Current Finish
Now check the surface sheen so you know how glossy the current finish is and whether it’ll show brush marks.
Inspect the area for chips, cracks, or peeling that need repair before painting.
Finally, test adhesion in a small spot to confirm the new enamel will bond properly.
Assess Surface Sheen
Before you coat latex with oil-based enamel, check the existing sheen and condition so you know how much prep you’ll need. Glossy or semi-gloss finishes resist adhesion more than satin or flat ones. Run your hand and a fingernail over the surface to gauge slickness.
High gloss needs more sanding or a bonding primer; lower sheen often accepts enamel with light scuffing. Also consider how color mixing or different brush techniques will reveal surface flaws.
- Glossy: heavy sanding or deglosser, primer likely
- Semi-gloss: medium prep, primer recommended
- Satin: light scuffing usually enough
- Flat: minimal prep, test first
Inspect For Damage
Once you’ve gauged the sheen, take a close look for physical damage that could spoil a new enamel coat. Walk the surface, feeling for chips, cracks, blistering, or raised seams. Note gouges that need filler and flaking areas that must be removed; don’t assume sanding will fix deep damage.
Document spots and decide if spot-priming is needed. While inspecting, consider how prior color mixing might hide defects and mark undertones that could show through thin enamel.
Check your tools too—proper tool maintenance guarantees effective repair work and prevents contaminating new paint with debris or rust.
Determine Paint Adhesion
How well will the old paint hold the new enamel? You’ll test adhesion by checking gloss and surface condition: glossy latex can repel oil enamel unless scuffed. Use a fingernail or tape test to gauge bonding.
Consider color theory when evaluating whether undertones or contrast will need extra coats. Evaluate whether existing brush techniques left raised edges that trap enamel.
- Do a tape pull to see if film lifts
- Sand glossy areas to dull the sheen
- Spot-prime bare or tacky spots with bonding primer
- Note undertones that affect final appearance
These steps tell you if enamel will stick and look right.
Step 3: Clean Surfaces Before Repainting
Because dirt, grease, and chalky residue stop primers and enamels from bonding, you’ll need to clean the surface thoroughly before you paint. Remove surface contamination with degreaser, rinse, and dry; failing to do so invites paint peeling. Focus on crevices, edges, and hardware. Use a sponge, nylon brush, or pressure washer for large areas. Allow full drying time before priming.
| Tool | Cleaner | Target |
|---|---|---|
| Sponge | Mild detergent | Flat walls |
| Brush | TSP substitute | Trim/crevices |
| Pressure washer | Water only | Exterior siding |
Step 4: Sand Latex for Oil-Enamel Adhesion
Now that the surface is clean, you’ll sand the latex to give the oil-based enamel something to bite into.
Use medium-grit sandpaper and work evenly until the sheen is dulled.
Finish by removing all dust with a tack cloth or vacuum so the primer and enamel bond properly.
Clean Surface Thoroughly
Before you sand, make sure the surface is completely clean so the sanded profile will bond to the oil-based enamel. You’ll remove grease, dust, and loose paint so sanding creates a true tooth for adhesion. Use mild detergent, rinse, and dry; for stubborn grime use a TSP substitute. Test a small area to confirm previous color blending or brush techniques residues won’t interfere.
- Wipe with a lint-free cloth after washing
- Scrape flaking paint and vacuum debris
- Degrease glossy spots before sanding
- Allow full drying time to avoid trapping moisture
Cleanliness prevents adhesion failures and uneven finish.
Use Medium-Grit Paper
When you’re ready to sand, choose medium-grit paper (around 120–150 grit) to scuff the latex surface without cutting through it. This grit creates enough tooth for oil-based enamel to grip while keeping sanding time reasonable.
Work with light, even pressure and follow the grain or existing brush marks to avoid visible scratches. Use a sanding block for flat areas and hand-sand corners. Avoid over-sanding edges.
As you prep, think ahead to color mixing and brush selection—smoother, uniformly abraded surfaces help thin glazes and precise brushes lay down enamel evenly, reducing the need for heavy touch-ups.
Remove Dust Completely
After sanding, wipe the surface thoroughly to remove every bit of dust so the oil-based enamel can bond evenly. Leftover particles will cause poor adhesion, visible bumps, and an uneven finish.
You’ll use a tack cloth or damp microfiber, moving across the panel in one direction and replacing cloths as they fill. Check crevices with a soft brush. Finish only when the surface looks and feels clean.
- Use tack cloth after a final dry sweep.
- Vacuum corners to capture fine particles.
- Let surfaces dry fully before priming.
- Store tools and leftover paint properly for color mixing and paint storage.
Step 5: When and How to Use Chemical Deglossers?
If your latex surface has a glossy finish that sanding can’t reach or you’d rather skip abrasive prep, a chemical deglosser will dull the sheen and promote adhesion for oil-based enamel. You’ll wear gloves, ventilate, and follow product instructions; think of chemical stripping as a controlled etch that boosts paint adhesion without removing the entire coating. Apply with a rag, work small areas, rinse or wipe as directed, and let fully dry before painting. Avoid using near delicate finishes or sensitive materials. Monitor for uneven dulling and repeat only if necessary.
| Step | Action |
|---|---|
| 1 | Test area |
| 2 | Apply |
| 3 | Wipe |
| 4 | Dry |
Step 6: When to Use a Bonding Primer?
You’ve removed the shine or sanded the surface, and now you need to decide whether a bonding primer will give oil-based enamel the grip it needs. You should use a bonding primer when adhesion is doubtful—especially on slick latex, previously glossy trim, or surfaces with old finishes.
Consider substrate, porosity, and whether you’re changing sheens or undertones that affect color mixing. Also weigh manufacturer recommendations and compatible paint brands to avoid failures.
- Slick or glossy latex
- Stains, tannins, or metal substrates
- High-traffic or moisture-prone areas
- When switching to oil-based enamel
Choosing the Right Primer for Latex→Oil Conversion
Before you switch from latex to oil-based enamel, you’ll want to properly clean, sand, and repair the surface so the primer can bond well.
Choose a high-quality bonding primer formulated for latex-to-oil conversion—these products grip slick or previously painted surfaces and prevent peeling.
I’ll cover specific surface prep steps and recommend a few trusted bonding primers next.
Surface Preparation Steps
When switching from latex to oil-based enamel, pick a primer that’s formulated for adhesion to latex and compatibility with oil paints so your topcoat will bond and cure properly.
You’ll prep surfaces methodically: clean, sand, degrease, and seal. Remove loose paint, wash with TSP or mild detergent, and rinse thoroughly. Sand glossy areas to dull the surface. Wipe with a solvent or tack cloth, then allow full drying.
Keep your workspace ventilated and follow product dry times. Remember color mixing effects on primer tinting and proper brush cleaning after oil work to maintain tools and finish quality.
- Clean thoroughly
- Sand to key
- Degrease and dry
- Wipe before priming
Recommended Bonding Primers
Which primer will actually make oil-based enamel stick to your latex surface? You’ll want a high-adhesion bonding primer designed for latex-to-oil conversions; they key to success are proper color matching and consistent brush techniques to avoid lap marks.
| Primer Type | Best For | Dry Time |
|---|---|---|
| Shellac-based | Stains/odors | 30–60 min |
| Oil-based | Smooth metal/wood | 6–8 hrs |
| Latex-bonding | General drywall | 1–2 hrs |
| Adhesion promoter | Glossy surfaces | 1–3 hrs |
Test a small area, follow label sanding suggestions, and apply thin, even coats for durable enamel adhesion.
Best High-Adhesion, Oil-Compatible Primers
If you’re planning to top latex with oil-based enamel, choose a primer that bonds to both water- and solvent-based surfaces and resists peeling. High-adhesion, oil-compatible primers contain specialty resins or adhesion promoters that create a durable bridge between the old latex and the new enamel, ensuring even coverage and minimizing lifting or blistering.
Look for products labeled “bonding,” “universal,” or “oil-etch” for tricky surfaces. Consider your color mixing needs and proper paint storage to keep primers effective.
Seek primers labeled bonding, universal, or oil-etch — and mind color mixing plus proper storage to preserve performance.
Examples to evaluate:
- Shellac-based primers for stain blocking and adhesion
- Alkyd primers for durable enamel bonding
- Epoxy primers for extreme adhesion
- Acrylic-urethane hybrids for flexibility
How to Apply Primer for Best Adhesion and Coverage
Although proper surface prep makes the biggest difference, applying primer correctly is what guarantees adhesion and even coverage when you top latex with oil-based enamel.
You’ll work in thin, even coats—brush into edges, roll in a “W” pattern, and avoid overworking. Sand lightly between coats for tooth, clean dust, and remove contaminants with a tack cloth.
Match primer sheen to your topcoat needs and consider color matching primer to reduce required topcoat layers. Stir thoroughly, follow label instructions, and keep unused primer sealed—proper paint storage preserves performance.
Inspect for drips and correct flaws before coating with enamel.
How Long to Wait Between Primer and Oil-Enamel Coats?
Because oil-based enamels need a proper foundation, you should let primer dry fully and then key it lightly before topcoating.
Wait time depends on primer type, temperature, and humidity; typically 24 hours ensures solvent cure and adhesion.
If humidity is high or temperatures are low, extend drying to 48 hours.
Light sanding removes dust nibs and promotes mechanical bond.
Keep primer and enamel covered—proper paint storage avoids contamination and altered color mixing in leftover tins.
Follow manufacturer’s recoat window to prevent lifting.
- Typical dry: 24 hours
- Cold/wet: 48 hours
- Light sanding: 220–320 grit
- Check label before topcoat
Thinning Oil Enamel for Brushing or Spraying
Once your primer’s dry and lightly sanded, you’ll need to adjust oil-based enamel for the application method you choose.
After primer is dry and sanded, thin oil-based enamel appropriately for your chosen application method.
For brushing, thin sparingly—add 5–10% mineral spirits to improve flow without losing body; test on scrap and watch leveling.
For spraying, increase to 10–20% depending on gun specs and nozzle size; strain the mixed paint to remove skin and debris.
Keep notes for color mixing ratios when you blend batches to match sheen and tone later.
Clean tools promptly with appropriate solvent and follow tool maintenance routines to prevent clogs and prolong brush or gun life.
Best Tools for Applying Oil Enamel Over Primed Latex
When you’re ready to apply oil-based enamel over a primed latex surface, choosing the right tools makes the difference between a smooth, durable finish and visible brush marks or orange peel. You’ll pick tools that suit scale, sheen and any color mixing you’ve done. Use quality supplies and keep them clean.
- Natural-bristle angled sash brush for edges and fine work (brush types impact stroke)
- High-density foam roller for smooth large areas
- HVLP or airless sprayer for ultra-smooth, uniform coatings
- Stainless steel mixing paddle and container for consistent color mixing and thinning
Use light, even strokes and maintain wet edges.
Oil-Enamel Drying and Curing: What to Expect
Though oil-enamel often feels dry to the touch within a day or two, you should expect actual curing to take much longer — typically several days to weeks for light handling and up to 30 days (or more for thicker coats) to reach full hardness and chemical resistance.
You’ll notice surface tack fading as solvents evaporate and oils oxidize. Avoid heavy use until curing advances.
If you mix colors, do so sparingly to prevent extending dry time with extra solvents or additives.
Clean brushes immediately after use; proper brush maintenance preserves bristles and prevents hardened enamel buildup that ruins application.
How Humidity and Temperature Affect Oil Enamel
You’ll want to keep oil-based enamel within its recommended temperature range (usually 40–90°F) because extremes slow drying or cause poor film formation.
High humidity slows solvent evaporation and can tack up the surface, while very low humidity can make the finish dry too quickly and crack.
Both factors change curing time, so plan longer cure periods in cool or humid conditions to avoid issues.
Temperature Range Effects
If your workshop’s climate swings, expect it to change how oil-based enamel behaves: temperature and humidity directly influence drying time, flow, and adhesion. You’ll notice cooler temps thicken enamel, slowing flow and hampering smooth color mixing. Warmer temps thin it, altering how brush techniques lay paint. Work within recommended ranges (usually 50–85°F) to keep consistency predictable.
- Low temps: sluggish flow, brush marks
- High temps: faster skinning, longer leveling issues
Narrow range: best for consistent gloss and cure. Controlled heating: helps application but avoid overheating surfaces.
Adjust solvent and thinning sparingly to compensate.
Humidity And Drying
When humidity rises, oil-based enamel takes longer to dry because moisture slows solvent evaporation and delays the chemical curing that hardens the film. You’ll notice tacky surfaces, longer recoat windows, and greater risk of runs or dust adhesion.
Work in well-ventilated, controlled humidity whenever possible; a dehumidifier or heat can help without overheating. Keep solvent-sensitive tasks in stable conditions to preserve finish consistency and avoid odd results from rapid color mixing under fluctuating moisture.
Store cans upright with lids sealed; proper paint storage prevents moisture contamination that would worsen drying issues and compromise final hardness.
Curing Time Variations
Humidity and temperature together determine how fast oil-based enamel cures, so after managing high humidity you should also control heat for predictable results. You’ll notice cooler, damper conditions slow polymerization, raising tack time and dust pickup, while heat speeds solvent release and risks orange peel. Adjust schedules accordingly, and factor in substrate temperature after latex undercoating.
- Monitor relative humidity and surface temp before starting.
- Allow longer flash time between coats in cool, humid rooms.
- Keep consistent climate during curing to preserve color mixing integrity.
- Store cans upright; proper paint storage prevents viscosity shifts that affect cure.
How Many Coats Will You Need?
Deciding how many coats you’ll need depends on the color change, the condition of the latex beneath, and the sheen you want.
If you’re switching from dark to light, expect at least two coats of oil-based enamel over a primed latex surface; deep color mixing issues may force a third.
For similar hues or well-prepped, high-quality latex, two coats usually suffice.
Smooth, glossy finishes sometimes need an extra coat for uniformity.
Let each coat dry fully and inspect under good light.
Keep leftover enamel sealed properly—paint storage matters if you plan touch-ups or an added coat later.
Avoiding Brush Marks and Lap Lines
Before you start painting, make sure you sand and clean the surface well so the enamel bonds evenly and won’t show flaws.
Use the right brush or foam applicator, keep a wet edge, and work in consistent, overlapping strokes to prevent lap lines.
Take your time and thin the paint slightly if needed so it levels out without visible brush marks.
Proper Surface Preparation
If you want smooth results and to avoid obvious brush marks or lap lines, prep the surface thoroughly: clean off dirt and grease, sand glossy areas to dull the sheen, and fill any dents or seams so paint lays down evenly. You’ll want consistent primer and attention to edges so oil-based enamel bonds well over latex.
Consider color matching for fewer coats and plan responsible paint disposal for leftovers. Before painting, follow these steps:
- Degrease and wash surfaces; rinse and let dry completely.
- Sand with fine grit; remove dust.
- Spot-prime repaired areas.
- Tape edges carefully and remove residue.
Application Technique Tips
When you’re ready to apply oil-based enamel over latex, work in long, even strokes and keep a wet edge so each pass blends into the last; this prevents obvious brush marks and lap lines.
Use a high-quality natural-bristle brush or a foam roller suited to enamel, and maintain consistent pressure to avoid ridges.
Feather each stroke into the previous one and avoid overworking.
If you mix tint for color mixing, stir thoroughly and strain to remove clumps.
Keep leftover enamel sealed and upright for proper paint storage, label cans with date and mix, and clean tools immediately to preserve finish.
Preventing Fish-Eyes and Gloss Problems
Although oil-based enamel can give a durable, glossy finish over latex, you’ll need to eliminate contamination and control surface tension to prevent fish-eyes and uneven gloss.
Clean thoroughly, degrease, and sand to promote adhesion. Avoid silicone, wax, or oily residues—these cause fish-eyes.
Pay attention to color mixing and tool maintenance: mix pigments fully and clean rollers/brushes immediately. Use compatible additives sparingly.
- Clean and solvent-wipe before priming
- Strain paint after color mixing to remove particles
- Replace contaminated brushes or thoroughly clean them
- Test a small area to confirm uniform sheen before full application
Managing Yellowing and Color Shift Over Time
Why does oil-based enamel sometimes yellow over time, and what can you do about it? You’ll notice yellowing from oxidation of oil binders and amine blushes; lighter pigments show color fading faster. To limit change, use high-purity pigments with good pigment stability, apply thin, even coats, and guarantee full cure before topcoating. Consider a clear non-yellowing sealer or UV-resistant topcoat to protect color. Monitor tones over months and test small areas first.
| Cause | Prevention | Result |
|---|---|---|
| Oxidation | Thin coats | Less yellowing |
| UV | UV topcoat | Reduced fading |
| Impurities | Pure pigment | Better stability |
Oil Enamel, Flexibility, and Cracking on Latex Bases
Because oil-based enamels cure into a harder, less flexible film than most latex paints, you’ll often see cracking or delamination when enamel is applied directly over a flexible latex base that expands and contracts with temperature and humidity. You should assess substrate movement before coating; small hairline cracks often widen under enamel.
Pay attention to color mixing impacts and test samples, since primer and topcoat tints can hide flaws. Refine application with proper brush techniques to minimize stress points.
Consider these actions:
- Sand and scuff to improve adhesion
- Use a compatible bonding primer
- Spot-fill flexible seams
- Test seasonal movement before full application
Durability: Oil-Over-Latex vs. Same-Base Repaint
When you paint oil-based enamel over existing latex, adhesion can be unpredictable unless you prep and prime the surface properly.
Over time, an oil-over-latex system may show different wear patterns—yellowing, crazing, or edge lift—compared with repainting with the same base.
Also consider that repairs and touch-ups are easier when you stick with the same base, while patching oil over latex can require more sanding and spot-priming to blend.
Adhesion Over Existing Latex
If you brush oil-based enamel directly over existing latex without proper prep, you’ll often get poor adhesion and a finish that can peel or crack sooner than a like-for-like repaint. You should sand, degloss, and prime to bond properly.
You’ll also weigh trade-offs like color matching and eco-friendliness when deciding.
- Sanding creates tooth for the oil to grip.
- High-adhesion primer isolates latex and supports enamel.
- Test a small patch to check bond and color shift.
- Clean and dry surfaces prevent adhesion failure.
Follow these steps and you’ll avoid premature peeling and uneven appearance.
Long-Term Wear Comparison
Although oil-based enamel can give a hard, glossy finish that resists scuffs at first, it won’t necessarily outlast a like-for-like repaint over the long term unless you’ve prepped and primed correctly; incompatibility with the underlying latex can lead to cracking, peeling, and edge lift as substrates expand and contract. You’ll find durability depends on adhesion, film flexibility, and application technique—Color mixing consistency and Brush selection affect film integrity. Compare typical outcomes:
| Scenario | Expected Wear | Risk |
|---|---|---|
| Oil over latex | Moderate | Moderate cracking |
| Oil over primed latex | Good | Low |
| New oil over oil | Best | Low |
Maintenance And Repairability
Because repair frequency and ease hinge mostly on adhesion and film compatibility, you’ll find oil-over-latex systems often demand more prep and touch-up care than same-base repaints. You’ll need to sand, degloss, and prime problem areas so new enamel sticks without lifting.
Expect more careful color matching when you patch—color mixing across bases can shift sheen and tint—so test samples first. Check paint branding for recommendations; some manufacturers forbid cross-priming.
- Sand and scuff to improve mechanical bond.
- Use a bonding primer specified by the brand.
- Feather edges to hide gradations.
- Recoat same-base for easiest future repairs.
How to Test a Small Area Before Committing
Before you commit to painting the whole surface, test a small, inconspicuous area to see how the oil-based enamel adheres, dries, and looks over the latex. Clean the spot, sand lightly, and apply primer if you plan to use one.
Paint a sample patch with the same tools and technique you’ll use overall. Observe drying time, gloss, and paint texture; note any color mixing effects between underlying latex and topcoat.
Check adhesion after 24–72 hours by pressing and gently scoring. If it holds, proceed; if you see lifting, bubbling, or unacceptable finish, reassess your prep or product choice.
Repairing Flaking or Peeling After Oil Enamel
When oil-based enamel starts to flake or peel, you’ll need to remove loose paint, assess the underlying cause, and prepare the surface so new coatings will bond properly. Scrape and chip away to solid edges, then clean with a degreaser.
Identify moisture, adhesion failure, or poor color mixing that may have stressed the film. Prime bare spots with a bonding primer. Confirm paint ventilation while drying and curing to avoid future failures.
Repair steps:
- Scrape to sound substrate and vacuum dust
- Feather edges with a scraper
- Apply primer to exposed areas
- Recoat only when fully cured and ventilated
Sanding Between Coats for a Glass-Smooth Finish
Before you sand between coats, let each layer fully dry—oil enamel over latex can take longer than you expect, so check the manufacturer’s times.
Use finer grits (220–320) for smoothing without cutting through the film, and coarser grits only for leveling flaws.
Sand in a clean, dust-free area and wipe with a tack cloth or use a vacuum sander to prevent particles from marring the finish.
Drying Time Considerations
Although oil-based enamel can feel dry to the touch relatively quickly, you’ll need to respect longer drying times before sanding between coats to avoid clogging abrasives or leaving scratches in soft film. You should wait the manufacturer’s recommended recoat window; temperature and humidity slow cure.
Also consider prior steps like color mixing and thoughtful brush selection since they affect film build and drying uniformity. Monitor tack with light touch and use thin coats.
- Allow full cure for overnight tack-free sanding
- Warm, dry conditions speed safe sanding
- Avoid heavy sanding on partially cured film
- Test a hidden area before full sanding
Grit Selection Guide
If you want a glass-smooth finish, choosing the right grit for sanding between oil-based enamel coats matters more than you might think — it controls how well the next coat bonds and how many passes you’ll need.
Start with 320–400 grit after the first coat to remove imperfections without cutting through the film.
Move to 600–800 grit for final leveling before the last coat to reduce visible scratches.
Use a light touch and clean the surface between grits to avoid contamination.
Keep your brush cleaning routine separate; stray debris or old bristles can ruin a satin, jewel-like finish.
Dust-Free Sanding Techniques
When you sand between oil-based enamel coats for a glass-smooth finish, keep dust out of the equation by working slowly, using tack cloths and vacuum-equipped sanders, and wiping the surface after each pass so the next coat bonds perfectly.
You’ll control particles, preserve Color blending, and maintain Texture matching by following disciplined, dust-free steps. Focus on light pressure and short passes. Use a respirator and clean workspace. Finish by wiping with a lint-free cloth dampened with mineral spirits.
- Vacuum sander on low
- Microfiber tack cloths
- Soft bristle brush for edges
- Clean-room mindset
Cleaning Brushes and Equipment After Oil Enamel
Because oil-based enamel dries hard and sticky, you’ll need to act promptly to keep brushes and tools usable. After finishing, remove excess paint by wiping on rags, then work a suitable solvent through bristles until paint thins. Rinse in a clean solvent cup, reshape bristles, and hang brushes to dry.
For rollers and trays, scrape excess, then flush with solvent and follow with warm, soapy water to remove residue. Keep a small jar for color mixing remnants and label it.
Regular brush maintenance extends life: comb bristles, store flat or hanging, and never let tools sit in solvent overnight.
Safety Checklist: Ventilation, Solvents, Disposal
A quick safety checklist will keep you healthy and your workspace compliant: guarantee steady fresh-air flow, use only appropriate solvents, and dispose of waste correctly. You’ll check ventilation before starting, separate rags and containers, and choose solvents recommended for oil enamel. Mind how color mixing cans and extra thinners interact.
Clean Brush types by solvent baths in labeled containers away from children and pets. Follow local disposal rules for contaminated rags and solvent. Don’t pour leftovers down drains. Keep a fire extinguisher nearby. Maintain clear labels and wear gloves and a respirator when ventilation can’t fully eliminate fumes.
- Verify airflow and source control
- Use only approved solvents
- Segregate contaminated rags
- Follow local disposal rules
Environmental and VOC Concerns When Using Oil Enamel
If you’re using oil-based enamel, know that its high VOC content can substantially impact indoor air quality and contribute to smog and health risks. So plan to minimize emissions by choosing low-VOC formulations, using proper ventilation, and limiting application amounts.
You should also consider the broader environmental impact: solvent runoff, disposal of contaminated rags, and long curing emissions. Use water-based alternatives when possible, store containers tightly, and follow local hazardous-waste rules.
Personal protective equipment and air purifiers cut exposure. Track VOC emissions during and after work, and opt for certified low-VOC products to reduce risk and environmental harm.
Cost Comparison: Oil Enamel vs. Latex Repainting
When you’re weighing repainting options, compare upfront material costs, labor time, and long-term maintenance to see which finish is truly cheaper.
You’ll find oil enamel often costs more per can and may need specialized primers, while latex is cheaper and more forgiving.
Factor in color matching difficulty and paint branding price premiums.
Consider resale and durability to judge lifecycle cost.
- Oil enamel: higher material cost, durable finish
- Latex: lower cost, easier recoat
- Color matching: may raise expense for both
- Branding: premium brands inflate upfront budget
Time Investment: Prep and Curing Differences
You’ll spend more time prepping a latex surface before applying oil-based enamel, since it needs thorough cleaning, sanding, and sometimes a deglosser or primer for proper adhesion.
Oil-based paints also take longer to dry to the touch and require extended curing times between coats and before full use.
Plan your project timeline around those prep and curing differences to avoid missed steps or premature handling.
Prep Time Differences
Because oil-based enamels bond differently than latex, your prep and curing times will change noticeably. Oil requires more thorough surface sanding, deglossing, and longer dry and cure periods, while latex often lets you skip aggressive sanding and returns to service faster.
You’ll spend extra minutes on surface cleaning, tack-cloth passes, and testing adhesion before topping latex with oil. Plan for additional masking and ventilation. Consider how color mixing affects opacity and how brush selection changes finish and work speed.
- Scuff sanding to remove gloss and promote adhesion
- Degrease and clean joints and hardware
- Prime with compatible adhesion primer
- Allow extended tack-free wait before handling
Curing And Drying
After prepping and priming, drying and curing times become the real time sink: oil-based enamels take far longer to set and fully harden than latex, so you’ll need to plan for extended tack-free periods, longer recoat windows, and days—or even weeks—before heavy use. You’ll notice thinner feel while still soft; humidity and temperature slow curing. Adjust brush techniques for visible lay-in and avoid overworking. Color mixing can affect dry time slightly. Picture stages:
| Stage | Feel |
|---|---|
| Fresh | Wet |
| Tack-free | Slightly sticky |
| Recoat-safe | Firm |
| Handle | Dry to touch |
| Full cure | Hard as glass |
How Substrate Changes Your Approach (Wood, Metal, Drywall)
When switching to oil-based enamel, the material you’re painting matters—wood, metal, and drywall each demand different prep and primer choices to guarantee adhesion and a durable finish.
You’ll adjust color blending and brush techniques per substrate: wood needs sanding and stain-blocking primer; metal requires rust treatment and etch primer; drywall calls for patching and a high-adhesion latex or oil primer.
Match primer type to substrate, then apply enamel.
- Wood: sand, clean, use stain-blocking primer
- Metal: remove rust, use etching primer, consider oil-based primer
- Drywall: fill seams, prime with high-adhesion primer
- Finish: use proper brush techniques
Handling Tannin-Rich or Previously Stained Wood Under Latex
Struggling with tannin bleed or old stain showing through latex? You’ll need to block those stains before topcoating. Sand lightly to remove gloss and loose stain, clean dust, then apply a high-quality stain‑blocking primer formulated for tannin bleed.
For severe wood staining, use shellac-based primers—they seal tannins better than standard latex primers. Test a small area, let the primer cure, and recheck for bleed-through. If bleed recurs, reapply blocking primer.
Once sealed, you can topcoat with latex or oil-based enamel. Maintain even application and adequate drying between coats to prevent adhesion or stain resurgence.
Painting Trim and Doors vs. Walls
When you switch from walls to trim and doors, your prep needs to be more meticulous — sanding, deglossing, and masking take extra care.
Trim and doors face more wear, so you’ll want a tougher enamel and pay attention to adhesion.
Also consider higher-sheen finishes on trim for durability and lower-sheen options on walls for hiding imperfections.
Prep Differences For Trim
Because trim and doors take more wear and show brush marks differently than walls, you’ll need a distinct prep approach before painting. You’ll sand to dull gloss, clean grime, and repair dents so oil-based enamel adheres cleanly over latex.
Consider primer compatibility and test small areas, especially with color mixing from leftover cans and different paint branding. Tape carefully and remove hardware to avoid uneven edges. Follow this checklist:
- Sand edges between coats for smooth lines
- Clean with TSP or degreaser, then rinse
- Use a bonding primer suited to both formulas
- Label cans for future touch-ups and color matching
Durability And Wear
Although trim and doors face more scuffs and frequent contact than walls, you can extend their finish life by choosing the right enamel and prep work. You’ll get tougher surfaces on trim and doors because enamel cures harder; walls tolerate softer latex.
For high-traffic areas, sand, clean, and prime meticulously so enamel bonds and resists abrasion. Use proper brush techniques for smooth edges and reduced brush marks on trim; roll walls for consistent coverage.
Consider color blending when matching repaired sections to avoid visible patches. Regular cleaning and touch-ups keep enamel looking fresh longer, minimizing full repaint cycles.
Finish And Sheen Choices
If you want trim and doors to stand out and resist wear, choose a higher-sheen enamel for those surfaces and a lower-sheen latex for walls. You’ll balance durability and appearance: sheen affects cleanability and highlights imperfections. Consider how color mixing impacts the final tone when switching sheens. Match brush types to finish—angled sash brushes for trim, rollers for walls—to get crisp lines and smooth walls.
- Use satin or semi-gloss on trim for durability and subtle shine.
- Reserve eggshell or matte for walls to hide texture.
- Test samples under room light before committing.
- Prep and prime surfaces for adhesion.
Using Oil Enamel in High-Wear Areas for Durability
When you need a finish that stands up to constant contact, oil-based enamel is a smart choice for high-wear areas like door frames, trim, stair treads, and kitchen cabinets. You’ll prep thoroughly, sand glossy latex, and clean residues. Use proper color mixing for consistent touch-ups and pick brush techniques that minimize brush marks and build durable films. Work in thin, even coats, allow full cure between layers, and sand lightly for adhesion. Below is a quick reference:
| Area | Recommendation |
|---|---|
| Door frames | Semi-gloss, thin coats |
| Trim | High-build brushes |
| Stairs | Extra sanding |
| Cabinets | Full cure time |
Avoiding Compatibility Issues With Specialty Latex Finishes
You should first identify specialty latex types like low-VOC, waterborne alkyd, and faux-finish or textured formulations because they can react differently with oil enamel.
Check surface compatibility by testing a small area for adhesion and flex before committing to a full coat.
If adhesion’s poor, sand and use a high-quality bonding primer formulated for latex-to-oil changes to guarantee a reliable finish.
Identify Specialty Latex Types
Because some latex paints are formulated for specific tasks, you’ll want to identify specialty types before planning to topcoat with oil-based enamel. You’ll check labels and consider color mixing history and historical trends that might indicate additives or binders affecting adhesion.
Know these common specialty latex categories so you can decide on testing or priming first:
- Latex with high-sheen acrylic additives (durability focus)
- Mold- and mildew-resistant latex (biocides present)
- Low-VOC or waterborne alkyd blends (modified binders)
- Paints labeled for exterior or masonry use (extreme adhesion formulas)
Identify the type, then pick compatible primers or test patches.
Assess Surface Compatibility
After identifying specialty latex types, check how their surface properties will interact with oil-based enamel before you paint. You’ll inspect sheen, flexibility, and any additives like stain blockers or mold inhibitors that can repel oil.
Test a small area to watch adhesion and color shift—color mixing issues can occur when underlying pigments alter the enamel’s hue. Note porosity: slick or highly flexible latex may cause cracking or peeling under rigid enamel.
Also consider surface hardness for brush selection; firmer bristles help with heavier enamel, while softer brushes trap solvents. Use tests to confirm compatibility before committing to a full coat.
Proper Prep And Priming
When prepping specialty latex for oil-based enamel, clean and scuff the surface thoroughly so the primer can bond. Don’t skip removing chalky residue, grease, or loose paint.
You’ll choose a high-adhesion oil-based or bonding primer and feather any edges. Test a small area to confirm adhesion before full application.
Remember that prior treatments, tinting, or color mixing can affect compatibility, so note product histories.
- Sand glossy latex to dull the sheen.
- Degrease and rinse; let fully dry.
- Apply thin, even primer coats per instructions.
- Store leftover primer properly for future touch-ups; follow paint storage guidelines.
How to Switch Back to Latex in Future Repaints
If you’ve used oil-based enamel and plan to switch back to latex later, you’ll need to remove or seal the enamel first so the latex can adhere properly and flex with the substrate.
Strip glossy enamel with chemical remover or sand to dull the surface, then clean thoroughly.
Strip glossy enamel—use a chemical remover or sand to dull it, then clean thoroughly before repainting.
If you opt to seal, use a high-quality bonding primer labeled for oil-to-latex conversion.
Match tinting for color blending before topcoats to avoid visible seams.
Use proper brush techniques—soft bristles, light pressure, and consistent strokes—to minimize lap marks.
Test a small area, allow full cure, then proceed with your latex repaint.
When Hybrid Alkyds or Waterborne Enamels Are Better
When you’re weighing options, pick hybrid alkyds if you need oil-like durability with faster drying and easier cleanup than traditional oils.
Choose waterborne enamels when low odor, quicker recoat times, and better color retention matter, especially indoors.
Both give you a smooth, hard finish, so match the product to your project’s drying time and ventilation constraints.
When To Choose Hybrid Alkyds
Although waterborne enamels have improved, you’ll pick a hybrid alkyd when you need the toughness and self-leveling finish of traditional oil with easier cleanup and faster drying than full-solvent enamels.
Choose hybrids if you want durable cabinetry, trim, or furniture that resists wear and sands smoothly. Pay attention to color mixing to guarantee consistent batches and match.
Your brush selection matters: a high-quality synthetic or china bristle gives the best laydown.
Consider these scenarios:
- High-traffic surfaces needing hard, glossy protection
- Projects requiring fast recoat times
- Surfaces that benefit from oil-like leveling
- Situations where solvent cleanup is acceptable
Advantages Of Waterborne Enamels
You’ll still choose waterborne enamels for many jobs because they dry faster, clean up with soap and water, and give low-VOC performance that’s better for indoor air quality.
You’ll appreciate modern waterborne formulas when working on trim, cabinetry, or furniture where quick recoat times matter. They mimic the smooth finish of traditional oil enamels without solvents, and their historical uses have expanded as technology improved.
You’ll also reduce environmental impact compared with solvent-heavy paints, cutting odors and hazardous waste. Use waterborne enamels when you need fast turnaround, safer indoor application, and reliable adhesion over existing latex with minimal fuss.
How Professionals Approach Oil-Over-Latex Projects
If you’re tackling an oil-over-latex project like a pro, you’ll start by evaluating the existing finish and planning surface prep before opening any cans. You inspect adhesion, degloss, and clean thoroughly, then choose primers and enamel based on substrate. You consider color mixing to match hues and minimize coats. You plan brush techniques for smooth lay-in and edge control, practicing on scrap.
Pros sequence work for curing and ventilation, avoiding rushed recoats.
- Strip or scuff to promote adhesion
- Use appropriate bonding primer
- Thin first coats for flow
- Allow full cure between layers
DIY Tools and Materials Checklist for Oil-Over-Latex Jobs
Now that you’ve evaluated the finish and planned your approach, gather the right tools and materials before you start—doing so saves time and prevents costly mistakes.
Before you begin, collect the proper tools and materials—preparation saves time and prevents costly mistakes.
You’ll need oil-based enamel, a bonding primer, high-grit sandpaper (220–400), tack cloths, solvent for cleaning, quality bristle brushes and a roller designed for enamels, plus painter’s tape and drop cloths.
Include a small mixing stick and cup for color mixing and testing.
Carry gloves, respirator, and rags for spills.
Keep an eye on tool maintenance: clean brushes with solvent, store rollers upright, and replace worn pads to ensure a smooth, durable finish.
Common Myths About Oil Over Latex
Although switching from latex to oil-based enamel is possible, several persistent myths can scare you off or lead to mistakes; separating fact from fiction helps you plan correctly. You shouldn’t assume adhesion will always fail, nor that oil will always yellow dramatically. Understand surface prep, primer choice, and drying differences.
Don’t let rumors about toxic fumes or ruined brushes stop you — use proper ventilation and solvent care. Consider how artistic techniques and color mixing behave differently with oil.
Common myths include:
- Oil will never stick to latex
- You can’t sand between coats
- Color mixing rules stay identical
- All primers are interchangeable
Quick Troubleshooting: Problems and Fixes After Painting
When you spot issues like bubbling, tackiness, or poor adhesion after painting oil over latex, act quickly to diagnose the cause and choose the right fix. Common culprits include inadequate deglossing or primer, insufficient drying time, and contamination from oils or cleaners.
Inspect texture and smell: tacky film means solvent trapped — remove loose paint, sand lightly, allow full cure, then recoat with proper enamel primer.
For bubbles, strip to sound substrate, sand, and verify surface is dry and clean.
Avoid cross-contamination by checking color mixing records and proper paint storage to maintain consistency and performance.
Sample Timeline for a Room Repaint
If you plan the job and follow a steady sequence, you can repaint a typical room in two to four days without cutting corners on prep or drying times.
Day 1: clear, clean, sand, and mask; prime if needed.
Day 2: apply first coat; allow full cure.
Day 3: inspect, spot-prime, then second coat.
Day 4: final touch-ups and reinstall trim.
Keep a concise checklist:
- Mix paint carefully; Color mixing affects final hue.
- Clean rollers and brushes promptly.
- Label leftovers and store properly.
- Tool maintenance prevents defects and saves time.
Adjust timing for humidity and product specs.
Decide: Oil Enamel or Stick With Latex?
Once your room’s prepped and you’ve scheduled coats, decide whether to switch to oil-based enamel or stick with latex for the finish. Consider durability needs, drying time, and ventilation: oil enamel gives a hard, glossy surface but takes longer and smells stronger; latex dries fast and cleans easily.
Think about Color mixing — oil and latex tints behave differently, so matching existing shades may be trickier if you switch types.
Also evaluate Brush selection: natural-bristle brushes suit oil; synthetic bristles work best with latex. Pick the system that fits performance, maintenance, and your tolerance for cleanup and odor.
Manufacturer Compatibility Charts and Further Resources
Because formulations vary widely, check manufacturer compatibility charts to confirm whether you can topcoat latex with an oil-based enamel (or vice versa) on a specific product. Manufacturers list tested pairings, recommended primers, drying times, and cleanup methods. Use their tech sheets for Color mixing guidance and for solvent notes that affect brush maintenance.
If in doubt, call technical support.
- Verify tested topcoat/undercoat combos
- Note required primers and adhesion steps
- Check recommended thinning solvents and VOCs
- Save product codes and batch info
Also consult independent forums, paint stores, and PDF datasheets before you start.
Frequently Asked Questions
Can Oil Enamel Be Applied Over Oil-Based Faux Finishes or Glazes?
Yes — you can apply oil based gloss over oil-based faux finishes or glazes, but you’ll need to guarantee proper adhesion by scuff-sanding and cleaning; latex compatibility isn’t an issue when both underlying and topcoat are oil-based.
Will Oil Enamel Adhere to Previously Wallpapered and Stripped Walls?
Yes — oil enamel can adhere if you thoroughly remove paste and smooth the surface first. After wallpaper removal, clean, sand, prime; check lead paint considerations and use appropriate primer, containment, and PPE before applying your enamel.
How Do Antiques or Lead-Based Paints Affect Oil-Over-Latex Decisions?
You should avoid oil over latex on antiques or lead-painted surfaces; you’ll risk sealing Lead paint hazards and harming Antique paint preservation. Test for lead, stabilize and encapsulate properly, or consult a conservator before painting.
Can I Use Oil Enamel Over Latex-Painted Cabinetry Hardware Without Removal?
Like threading a needle, you can—but prep matters. You’ll sand, clean, prime for adhesion, and you’ll use Color matching and careful Brush techniques to avoid drips; you don’t need to remove hardware unless damaged.
Does Adding Pigment or Tint to Oil Enamel Alter Adhesion or Curing?
Yes — adding pigment can affect pigment compatibility and the curing process, so you should test mixes first. You’ll avoid slow or inhibited curing by using compatible pigments and following manufacturer-recommended tinting limits and procedures.
Conclusion
You can, but prep matters. If you’re repainting a kitchen cabinet previously coated in latex, sand it smooth, clean thoroughly, and use a bonding primer before brushing on oil-based enamel to avoid peeling. You’d choose oil for durability and glossy finishes; avoid it over fresh latex (less than 2 weeks) or on flexible surfaces. For most walls, stick with latex unless you need high-wear resistance—then follow prep steps and test a small patch first.