Can You Paint the Exterior of Vinyl Windows
Yes, you can paint the exterior of vinyl windows, but you’ll need proper prep, the right primer, and a flexible, UV-resistant acrylic latex paint to avoid peeling or warping. Light colors reduce heat buildup; dark shades risk expansion and seal failure. Check your window warranty and manufacturer recommendations first, and test a small area for adhesion and heat effects. If you want step-by-step prep, paint choices, risks, and alternatives, keep going for more details.
Quick Answer: Can You Paint Vinyl Window Exteriors?
While you can paint vinyl window exteriors, you’ll need to prepare the surface correctly and use the right products to guarantee the paint sticks and lasts. You’ll clean, degloss, and sand lightly, then apply a vinyl-safe primer before a high-quality acrylic exterior paint designed for flexibility and UV resistance.
Test adhesion first on a hidden spot. Choose colors with color coordination in mind so frames complement siding and trim without overheating the vinyl.
Proper prep and product choice maximize paint durability and reduce peeling, cracking, or warping. If you follow these steps, painted vinyl can look good for years.
Why Homeowners Paint Vinyl Windows
Because vinyl windows can show age or clash with updated exterior colors, many homeowners choose to paint them to refresh curb appeal and unify their home’s look.
You want consistent color coordination across siding, trim, and windows so the facade reads as intentional rather than piecemeal. Painting also lets you modernize hardware and accent details without full replacement.
You may aim to match new shutters or a front door, creating a cohesive aesthetic that boosts resale appeal.
Before you act, consider how climate impact affects paint choice and longevity so your update performs well in sun, humidity, or cold.
Risks of Painting Vinyl Windows
If you paint vinyl windows, you can run into adhesion problems where the paint won’t stick or peels quickly.
The darker paint can also increase heat absorption and cause expansion or warping in hot weather.
That work may void manufacturer warranties and shorten the windows’ useful life.
Paint Adhesion Problems
When you paint vinyl windows, poor adhesion is the most common risk. You’ll notice paint peeling if the surface wasn’t cleaned, scuffed, or primed correctly.
Vinyl’s smooth texture and low surface energy resist bonding, so coatings can lift, flake, or chip over time. Sunlight and weather accelerate color fading, making your work look uneven and aged.
To reduce problems, clean thoroughly, use a compatible primer and paint formulated for vinyl, and follow manufacturer directions for drying and recoating.
Even then, monitor edges and corners for early failure so you can touch up before damage spreads.
Heat Expansion Damage
Although vinyl handles temperature changes by expanding and contracting, painting it can trap heat and interfere with that movement, so you risk warping, buckling, or cracked paint when the window heats up.
You’ll face heat damage and expansion stress because paint limits the profile’s natural flex. That increases pressure along seams and corners, causing visible distortion and paint failure.
Consider these practical risks:
- Increased expansion stress at joints leading to gaps or buckles.
- Surface blistering or cracking from trapped heat.
- Distorted frames that affect operation and seals.
You’ll want to weigh these hazards before painting exterior vinyl.
Warranty And Longevity
Heat-related distortion and paint failure can also affect your window’s warranty and long-term performance. If you paint vinyl, manufacturers may void warranties because altered surfaces trap heat or hide defects. You’ll want to check warranty terms before changing color coordination or finish.
Even with careful prep, paint durability varies; peeling or blistering can lead to mold, seal failure, or warped frames that insurers or makers won’t cover. Choose paints rated for vinyl and follow manufacturer guidance to reduce risk.
If warranty protection matters, consider alternative updates like new cladding or removable trim that preserve original factory guarantees.
Will Painting Void Your Window Warranty?
Check your warranty before you pick up a paintbrush, because terms vary and some explicitly forbid alterations.
If the manufacturer hasn’t given written permission, painting could void coverage for frame damage or finish issues.
Always contact the maker or your installer to get clear, documented guidance.
Warranty Terms Matter
Before you grab a paintbrush, read your window warranty closely—many manufacturers explicitly exclude surface alterations like painting and can void coverage if you change the finish. You’ll want to check clauses about finishes, adhesives, and any mentions of color coordination or window accessories that might affect seals or coatings.
Consider:
- Coverage limits: what problems are excluded after alteration.
- Maintenance requirements: documented care you must follow.
- Transferability: whether warranty survives owner changes post-modification.
If terms forbid painting, you risk paying for failures later. Keep records of your warranty and any approved maintenance to protect coverage.
Manufacturer Permission Required
Because manufacturers set the conditions of their warranties, you should get explicit permission before painting vinyl windows—doing otherwise can void coverage for warped frames, seal failures, or finish issues. Ask for written approval, specify paint type, and confirm any required prep so your color coordination and paint durability goals don’t clash with warranty terms. If denied, don’t paint; if allowed, follow their specs to the letter and keep records.
| Item | Action |
|---|---|
| Request | Get written permission |
| Paint | Use approved product |
| Prep | Follow manufacturer steps |
| Records | Save approvals and receipts |
| Risk | Note warranty limits |
Which Vinyl Windows Can You Paint?
Although many vinyl windows look similar, not all of them take paint the same way, so you’ll need to identify the type before you start. You’ll check for manufacturer labels, textured finishes, and whether the vinyl is factory-coated.
Choose paints and primers focused on color matching and weather resistance to avoid peeling.
- Smooth, uncoated vinyl – usually paintable with proper primer.
- Factory-coated vinyl – often rejects paint; get manufacturer approval.
- Textured or low-E finishes – risky; test a hidden spot first.
Follow prep steps closely and avoid painting if the maker advises against it.
How Paint Changes Heat Absorption and Warping
When you paint vinyl windows a darker color, they’ll absorb and hold more heat than their original finish. That increased heat retention can raise the frame temperature and boost thermal expansion.
If the paint or color choice isn’t compatible, that extra movement can increase the risk of warping or seal failure.
Increased Heat Retention
If you paint vinyl windows, you’ll change how much heat the frames absorb and hold, which can raise surface temperatures and increase the risk of warping or distortion. You should weigh color psychology because darker hues absorb more solar energy, while lighter shades reflect it.
Consider paint durability too—peeling or blistering reduces protection and can expose vinyl to prolonged heating.
- Dark colors = higher surface temps.
- Durable coatings slow degradation under heat.
- Regular inspections catch early deformation.
Choose reflective, UV-resistant paints and test a small area so you can monitor heat retention and physical changes before committing.
Thermal Expansion Risk
Because paint changes how much solar energy a vinyl frame absorbs, it also alters how much the material expands and contracts, and that shift can lead to warping, seal failure, or sticking sashes. You should consider color contrast and paint durability before coating vinyl: darker hues raise absorption, increasing thermal cycling and stress on joints. Lighter tones reduce risk but may not match aesthetics. Choose high-quality, flexible coatings formulated for vinyl and allow for manufacturer-recommended clearances. Monitor seals after painting and be ready to refinish if you see movement or seal deterioration.
| Risk factor | Mitigation |
|---|---|
| Dark color | Use lighter or reflective finish |
| Poor durability | Select flexible, durable paint |
Why Low-Heat, Light-Reflective Paints Matter
Though vinyl resists heat, your paint choice still affects window performance. You’ll want low-heat, light-reflective paints to reduce thermal stress and fading while maintaining color matching and paint durability.
They help prevent warping and prolong seals without altering expansion rates drastically.
- Reflective pigments lower surface temperature.
- Durable formulas resist chalking and UV breakdown.
- Thoughtful color matching avoids excessive heat absorption.
Choose coatings that reflect sunlight and resist UV degradation so your windows stay stable and attractive. You’ll protect frames and prolong service life without compromising function or warranty considerations.
Best Paints for Vinyl Window Exteriors (Acrylic-Latex vs. Others)
When you pick paint for vinyl window exteriors, acrylic-latex formulations usually give the best balance of adhesion, flexibility, and UV resistance compared with oil-based or specialty coatings. You’ll find acrylic-latex resists yellowing, tolerates temperature swings, and accepts primers and topcoats well during paint application.
Oil-based options can bond strongly but risk cracking and heat retention. Specialty coatings may offer unique looks but raise compatibility concerns.
Consider color psychology—lighter, cooler hues reduce heat absorption and suit curb appeal, while darker tones add contrast but increase thermal stress.
Test small areas and follow manufacturer prep steps for reliable results.
Which Paint Sheens to Use : and Avoid
You’ll want a satin or semi-gloss sheen for the best balance of durability and easy cleaning on vinyl windows.
Avoid high-gloss, which highlights surface flaws, and flat finishes, which offer poor washability and longevity.
Remember that sheen can make colors look lighter or darker, so test small samples before committing.
Best Sheen For Durability
Because the right sheen affects both appearance and how well paint stands up to weather and cleaning, choosing one that balances durability with look is key. You’ll want a finish that resists dirt, hides minor flaws, and complements color psychology and paint texture choices. Consider:
- Satin — durable, forgiving of texture, subtle sheen for trim.
- Semi-gloss — more scrubbable, highlights details, ideal for frequent cleaning.
- Low-luster enamel — combines toughness with restrained shine for modern aesthetics.
Test a small area first; adhesion and thermal cycling affect longevity on vinyl, so proper prep remains essential.
Sheens To Avoid
Having picked a sheen that balances durability and appearance, you should also know which finishes to avoid on vinyl. Avoid high-gloss — it highlights imperfections and can reduce paint adhesion, harming paint durability. Steer clear of flat eggshells that trap dirt and resist cleaning; they compromise long-term upkeep and color consistency. Semi-gloss is usually safer, but avoid specialty metallic or chalky finishes that won’t flex with thermal movement.
| Sheen to Avoid | Why |
|---|---|
| High-gloss | Shows flaws, reduces adhesion |
| Chalky/metallic | Poor flexibility, fades unevenly |
Pick flexible, outdoor-rated formulations.
Sheen And Color Impact
When choosing a sheen and color for painted vinyl windows, think about how finish and hue affect durability, maintenance, and how heat and light play across the surface. You’ll want a balanced sheen that resists dirt and shows minimal crazing; sheen durability matters for longevity.
Color psychology influences curb appeal and perceived temperature — lighter tones reflect heat, darker tones absorb it.
- Satin or low-luster: easy to clean, good sheen durability.
- Avoid high-gloss: highlights imperfections, raises maintenance.
- Choose mid-tones for balance between aesthetics and thermal performance.
Test samples in sunlight before committing.
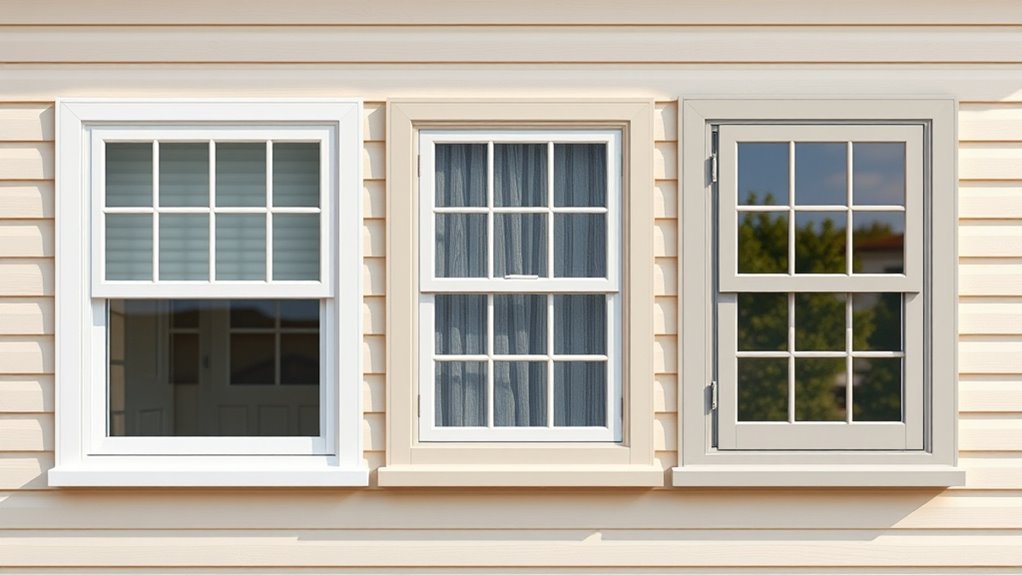
Choosing Colors That Won’t Overheat Vinyl
If you pick a dark paint for vinyl windows, know it’ll absorb more heat and can warp or weaken the frames over time; choose lighter hues to reduce thermal gain.
Use basic color theory: cool, reflective tones like pale blues, grays, and off-whites deflect sunlight better than deep reds or blacks.
Match choices to your home’s style while prioritizing function—contrast trim subtly but avoid high-absorption shades on broad surfaces.
Consider matte or satin finishes specified for vinyl to limit heat buildup.
Test a small area first in direct sun for several days to confirm performance before painting all window framing.
Inspecting Frames and Trim Before Painting
Before you break out the paint, give the vinyl frames and trim a close, systematic inspection to spot cracks, loose joints, peeling coatings, or warped sections that could compromise adhesion or finish. Check for structural issues first; small gaps need caulk, larger warps may need replacement.
Before painting, inspect vinyl trim for cracks, loose joints, peeling, or warps—fix structural issues before coating.
Consider how color psychology affects curb appeal and how darker choices can absorb heat, interacting with vinyl flexibility. Also factor in paint thickness—too heavy a coat hides detail and can sag.
Follow a quick checklist:
- Assess cracks, joints, and warping.
- Test adhesion on an inconspicuous spot.
- Note previous coatings and surface uniformity.
Cleaning Vinyl Surfaces Properly
Before you paint, remove loose dust and cobwebs with a soft brush or vacuum to guarantee the paint will stick.
Wash the vinyl using a mild detergent mixed with warm water, scrubbing gently with a soft cloth or sponge.
Rinse thoroughly with clean water and dry with a lint-free towel to prevent water spots and ensure a clean surface for painting.
Surface Dust Removal
When you’re preparing vinyl windows for painting, start by removing surface dust with a soft brush or microfiber cloth so paint will adhere evenly. Good surface preparation prevents uneven finish and helps primer stick. Focus on frames, sills, and recessed grooves; work methodically.
- Brush loose dust away, then wipe with a microfiber cloth.
- Use a soft-bristled toothbrush for grooves and weatherstripping gaps.
- Inspect under bright light; repeat dust removal where needed.
Don’t use abrasive tools that scratch vinyl. Once dust removal is complete and surfaces look clean, you’ll be ready to move to the next cleaning step.
Mild Detergent Wash
A mild detergent wash removes remaining grime and residues so primer and paint will bond properly; mix a few drops of dish soap with warm water, dip a soft cloth or sponge, and gently scrub frames, sills, and groove areas.
You’ll focus on coming at corners and hardware lines without saturating seals. Use circular motions and moderate pressure to lift oils and buildup that could interfere with adhesion.
Don’t forget to test a small patch for finish reaction. Once clean, you can assess surface color and sheen for color matching and calculate paint mixing ratios if tinting primer or picking a topcoat.
Rinse And Dry
Now that you’ve loosened and lifted grime with a mild detergent, rinse the vinyl thoroughly to remove soap residue and loosened dirt—leftover suds can prevent primer and paint from bonding. Use clean water and a soft brush, then blot dry with lint-free towels.
Time drying to suit weather conditions; avoid humid or rainy days. Guarantee surfaces are totally dry before priming.
- Rinse with fresh water until clear.
- Pat dry, then air-dry 30–60 minutes.
- Inspect for streaks or residue; repeat if needed.
Your Color choices won’t stick to damp vinyl, so confirm dryness before painting.
Sanding and Scuffing: When and How Much
If your vinyl frames are glossy or feel smooth, you’ll need to scuff them lightly before painting so the new finish will adhere. For proper surface preparation, use fine-grit sandpaper (220–320) or a scuff pad and sand just enough to dull the sheen—you’re not reshaping profiles.
Wipe away dust with a tack cloth. Test a small area to confirm paint compatibility; some coatings bond without aggressive abrasion. Don’t over-sand: deep scratches will show through and weaken the substrate.
Focus on uniform dulling, especially along edges and joints, so the topcoat lays down evenly and lasts.
Priming Vinyl Windows: Best Primers to Use
Because vinyl resists paint, you should always prime with a product formulated for non-porous plastics or vinyl specifically. These primers promote adhesion and block plasticizers that can blister topcoats.
You’ll pick primers that improve paint durability and manage color contrast when switching dark to light shades. Choose a primer labeled for vinyl or adhesion-promoting plastic primer.
Apply thin, even coats per instructions and let full cure before topcoating.
- Zinsser Bulls Eye 1-2-3 (adhesion, water-based)
- Rust-Oleum Specialty Plastic Primer (spray, quick)
- Krylon Fusion for Plastic (bonding, good for trim)
Test first on an inconspicuous spot.
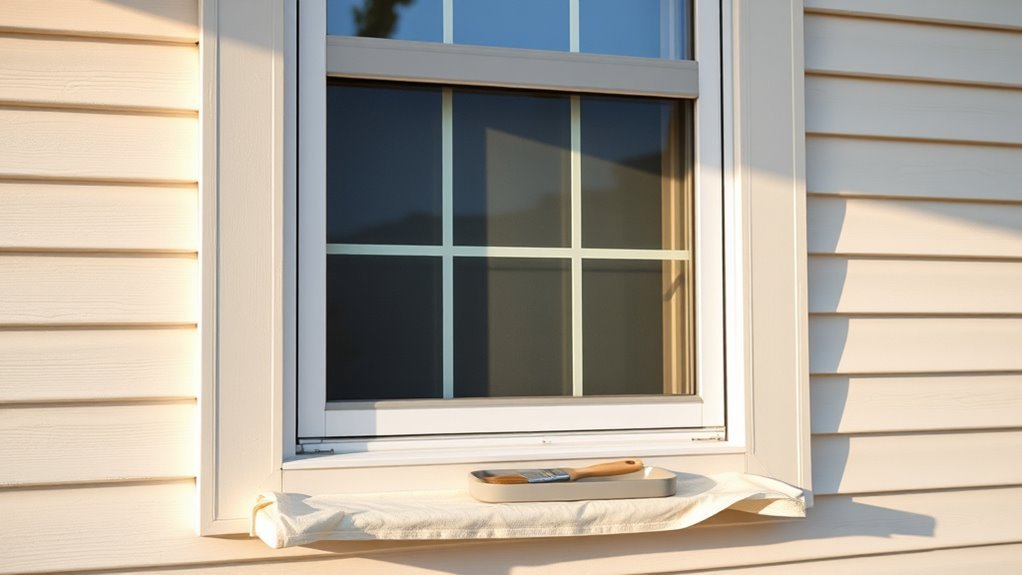
Masking Glass, Hardware, and Siding
Before you start painting, cover glass, hardware, and nearby siding with proper masking so paint stays only where you want it. Use painter’s tape plus plastic sheeting or paper, pressing edges firmly to prevent bleed.
Mask glass, hardware, and siding with tape and sheeting—press edges firmly to prevent bleed and keep paint neat.
Mask movable hardware so you can operate windows without smudges. Protect siding joints and trim to preserve original color and enable neat color coordination with frames.
Overlap sheets and secure with low-tack tape to avoid residue. Check edges periodically while painting.
Good masking minimizes cleanup and guarantees even film thickness, which contributes directly to paint durability and a professional-looking finish you’ll be proud to keep.
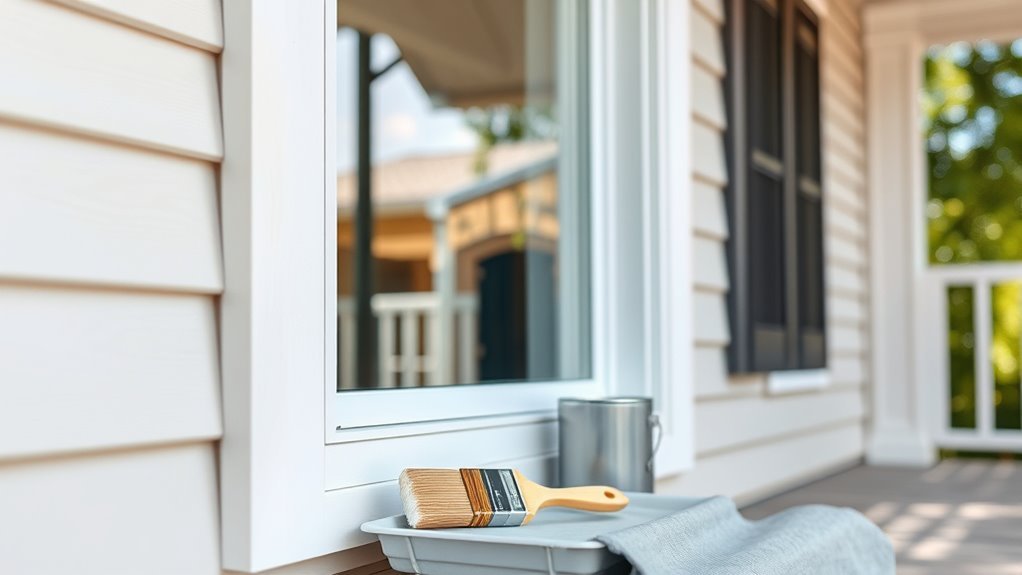
Brushes, Rollers, or Spray: Pros and Cons
When choosing between brushes, rollers, or a sprayer, think about control, finish, and cleanup so you pick the method that fits your skill level and project scope. You’ll weigh speed, edge control, and how paint texture shows on vinyl. Consider color psychology too—glossy sprays feel modern; brushed finishes read traditional.
- Brush: best for trim and tight spots; more control, slower.
- Roller: good for flat sections; smoother than brushing, moderate speed.
- Sprayer: fastest and most uniform but needs masking and practice to avoid overspray.
Pick based on surface complexity, time, and desired look.
Apply Thin, Even Coats to Avoid Drips
If you want a smooth, professional-looking finish on vinyl windows, apply several thin coats instead of one heavy one—thin layers dry faster, level better, and cut down on drips.
Work methodically: load a small amount of paint, keep your brush or roller moving, and smooth each pass to prevent ridges. Allow recommended flash time between coats so solvents evaporate and adhesion improves; skipping this risks paint peeling later.
Thin coats also resist sagging and reduce trapped moisture that accelerates color fading.
Finish with a light inspection and touch-ups where thin spots or runs appear to guarantee an even, durable result.
Optimal Temperature and Humidity for Painting
You should paint vinyl windows when temperatures are in the ideal range—usually between 50°F and 85°F—to guarantee proper adhesion.
Keep relative humidity between about 40% and 70% to help the paint dry evenly without trapping moisture.
Expect longer drying and full curing times in cooler or more humid conditions, so plan for extra wait time before putting the windows back into service.
Ideal Temperature Range
Although vinyl can look fine in a wide range of conditions, painters get the best adhesion and curing when ambient temperatures sit between about 50°F and 85°F (10°C–29°C) with relative humidity between 40% and 70%. You should choose timing and materials based on that window.
Consider:
- Morning or late afternoon application to avoid temperature extremes.
- Selecting paints with flexible binders for color selection and better thermal movement resistance.
- Scheduling work when dew and rapid cooling aren’t expected, and follow ventilation tips to disperse fumes.
If it’s colder or hotter, drying slows or finishes soften—wait for stable conditions.
Recommended Relative Humidity
Why does relative humidity matter so much when you’re painting vinyl windows? You want paint to adhere and dry predictably, especially when coordinating interior accents and exterior paint color schemes. Aim for 40–60% humidity for best results; higher moisture weakens adhesion, lower dries too fast and causes film problems.
| Humidity (%) | Effect |
|---|---|
| 30% | Too dry — tacky finish |
| 40% | Ideal — controlled cure |
| 50% | Safe — good adhesion |
| 60% | Upper limit — watch conditions |
| 70%+ | Risk — blushing, failure |
Check forecasts, avoid painting after rain, and choose products rated for your conditions.
Drying And Curing Time
When temperatures stay between 50–85°F (10–29°C) and humidity sits in the recommended 40–60% range, paint will dry and cure predictably on vinyl windows. You’ll get best paint durability and consistent color contrast when you avoid extremes.
Plan projects for stable days and use a moisture meter or phone app to check conditions. Follow these steps:
- Prime and paint when forecasted nights stay within range for 48–72 hours.
- Allow touch-dry times per label, then wait full cure before handling (often 7–30 days).
- Store painted windows indoors away from humidity spikes to finish curing.
Drying and Curing Times to Expect
If you paint vinyl windows, expect two separate wait times: drying is when the paint’s solvent evaporates and the surface feels dry to the touch, while curing is the chemical process that gives the paint its full hardness and durability.
Dry times vary by product and color selection; lighter tones often dry faster because they absorb less heat.
Weather impact matters: warm, low-humidity days speed evaporation, while cold or humid conditions lengthen both drying and curing.
Plan for tack-free times of a few hours but allow several days to a week for handled use and up to 30 days for full cure in adverse conditions.
How Many Coats for Durability and Coverage
Because vinyl’s smooth surface can show streaks and thin spots, you’ll usually need two light coats of paint for even coverage and durability, with a possible third coat in high-wear areas or when switching to a darker color.
Vinyl often needs two light coats for even coverage—add a third in high-wear spots or when darkening colors.
You should choose paints formulated for vinyl to maximize paint durability and avoid frequent recoats. Consider color psychology when picking shades—darker hues hide imperfections but may need extra coats.
Apply thin, even layers, sanding lightly between coats if needed. Prioritize adhesion and drying times.
- First coat: thin, bonding-focused.
- Second coat: builds color and protection.
- Optional third: high-wear or color shift.
Fixing Peeling, Cracking, and Orange Peel
If you spot peeling, cracking, or an orange peel texture on your vinyl windows, you’ll need to prep the surface before repainting.
Sand loose or bubbled areas, clean thoroughly, and use a vinyl-compatible primer to guarantee adhesion.
Then pick a paint formulated for vinyl that flexes with temperature changes to prevent recurrence.
Preparing The Surface
When you’re tackling peeling, cracking, or an orange-peel texture on vinyl windows, start by removing loose paint and degraded material so the surface is stable and clean. You’ll sand glossy spots, feather edges, and clean residues with a solvent recommended for vinyl.
Consider color psychology and historical preservation when deciding how smooth or textured you leave finishes near trim. Follow these steps:
- Scrape and sand to remove flakes and soften gradual change.
- Clean with a mild solvent, rinse, and dry thoroughly.
- Fill deep gouges with a vinyl-safe filler, sand smooth, then tack-cloth before priming.
Choosing Proper Paint
How should you pick paint that will adhere to vinyl and hide imperfections like peeling, cracking, or orange-peel texture? Choose a high-quality acrylic latex formulated for vinyl; it flexes with thermal movement and resists peeling.
Match paint finish to the surface—eggshell hides orange-peel better than gloss—and use binder-rich primers to smooth cracked areas.
Test small sections for adhesion and color schemes in different light before committing.
Prioritize paint durability: UV resistance, mildew inhibitors, and weatherproofing extend life.
Prep, prime, and apply thin, even coats; sanding between coats reduces texture and guarantees a uniform, long-lasting result.
When Paint Causes Thermal Expansion Problems
Because paint changes a vinyl window’s surface properties, it can alter how the frame absorbs heat and expands. That shift can create warping, seal failure, or binding during temperature swings.
You should consider color selection and paint durability because darker, less flexible coatings boost heat uptake and stress.
Watch for visible signs and act quickly:
- Frame bowing or gaps at corners.
- Difficulty opening or closing sashes.
- Fogging between panes from seal breach.
If you notice any, suspect thermal mismatch from the coating. Repainting with lighter, flexible formulations or consulting a pro reduces risk and protects function.
Maintaining Painted Vinyl: Cleaning and Touch-Ups
Once your vinyl windows are painted, you’ll want to keep them looking good with regular gentle cleaning using mild soap and a soft cloth.
For small chips or scratches, learn simple spot touch-up techniques—clean the area, feather the paint, and seal it once dry.
Consider a light protective maintenance coating to extend durability and reduce how often you need to repaint.
Regular Gentle Cleaning
When you want your painted vinyl windows to keep looking fresh, regular gentle cleaning is the simplest and most effective step you can take. You’ll prevent color fade and extend paint durability by using mild soap, lukewarm water, and a soft cloth.
Clean weekly or after storms, rinsing thoroughly and drying to avoid streaks. Avoid abrasive pads, harsh solvents, or pressure washers that strip finish.
- Remove dust with a soft brush.
- Wash with diluted dish soap, rinse well.
- Dry with a microfiber towel to prevent water spots.
Stay consistent; small efforts protect finish and appearance.
Spot Touch-Up Techniques
If small chips or scuffs appear on your painted vinyl, you can quickly blend them in with a targeted touch-up rather than repainting the whole frame.
First, clean the area and let it dry so moisture barriers like sealant or caulk aren’t compromised. Lightly sand edges for adhesion, then wipe away dust.
Use a small artist brush or touch-up pen and apply paint matched precisely—color matching matters to avoid visible patches. Build thin layers, letting each dry fully.
Finish by feathering edges for a seamless blend. Inspect after 24 hours and reapply sparingly if needed.
Protective Maintenance Coatings
Small, targeted touch-ups will keep painted vinyl looking good, but protective maintenance coatings will extend that finish and reduce how often you need to rework chips. You should clean surfaces gently with mild detergent, rinse, and let dry before recoating. Choose a UV-resistant clear coat that complements your color selection and improves paint durability.
- Prep: remove loose flakes, sand lightly.
- Clean: wash, rinse, and dry thoroughly.
- Coat: apply thin, even layers per manufacturer instructions.
Check annually for wear, reapply thin coats as needed, and store leftover product for exact-matching future touch-ups.
DIY Cost Estimate for Painting Vinyl Windows
Start by tallying the materials and time you’ll need so you can build a realistic DIY budget for painting vinyl windows. Estimate primer, acrylic paint, brushes, tape, drop cloths, sanding pads, and paint storage costs. Factor hours: prep, sanding, priming, painting, and drying. Don’t forget color matching or small touch-up supplies.
| Item | Qty | Est. Cost |
|---|---|---|
| Primer | 1-2 cans | $15–$30 |
| Paint | 1 qt | $20–$40 |
| Tools | Brushes/tape | $10–$25 |
| Misc | Sandpaper/cloths | $5–$15 |
| Time | 4–8 hrs | Value varies |
Use this to total materials plus your labor.
Professional Service Cost Breakdown
Getting a professional to paint your vinyl windows typically runs higher than DIY but saves time and guarantees a durable finish—you’ll usually pay for labor, materials, and any prep work like stripping or repairs.
You’ll get a clear cost breakdown so you know what you’re paying for.
- Labor: hourly or per-window rates covering masking, sanding, and application.
- Materials: quality exterior primer, paint, sealants, plus color matching and custom paint mixing fees.
- Prep/repairs: caulking, hinge removal, minor vinyl repairs, and cleanup.
Ask for itemized estimates and warranties to compare bids accurately.
Should You Hire a Pro or DIY?
Whether you’re weighing cost, time, or the quality of the finish, deciding between hiring a pro or doing your vinyl window painting yourself comes down to your skill level and priorities. If you’re confident, DIY saves money and gives full control over color selection and schedule, but mistakes can be costly. Hiring a pro buys expertise, consistent finish, and often lower environmental impact through proper product choice and disposal. Consider your patience, tools, and warranty needs. Use the table to weigh feelings:
| Pros | Cons |
|---|---|
| Pride | Risk |
| Savings | Time |
| Control | Mistakes |
| Learning | Stress |
| Satisfaction | Cost |
What to Ask a Pro About Vinyl Window Painting
Before you hire someone, ask specific questions so you know exactly what you’ll get. You’ll want clear answers on process, durability, and appearance. Ask about:
- Prep and primer: how will they clean, sand, and prime for adhesion and weather resistance?
- Paint type and warranty: what coatings do they use, how long will the finish last, and is there a warranty?
- Color selection and maintenance: can they advise on color psychology for curb appeal and fading, and what care is required?
Confirm licensing, references, and a written estimate that lists materials, timeline, and guarantees before you sign.
Alternatives to Painting: Trim, Cladding, Films
If painting doesn’t fit your budget, timeline, or maintenance preferences, you’ve got practical alternatives that change the look and durability of vinyl windows without repainting them.
If repainting isn’t practical, consider trim, cladding, or adhesive wraps to refresh vinyl windows affordably and with less upkeep
You can add trim—wood, PVC, or composite—to redefine proportions and conceal old frames; choose profiles that simplify color matching with siding or accents.
Aluminum cladding snaps over existing sashes to boost weather resistance and reduce maintenance, offering factory finishes with better paint durability than DIY coatings.
Adhesive films and wraps provide low-cost, reversible color changes and UV resistance, though they vary in longevity.
Combine solutions to balance aesthetics, upkeep, and budget.
How Painted Vinyl Holds Up Over 5–10 Years
Though painted vinyl can look great at first, over a 5–10 year span you’ll see several predictable changes: fading from UV exposure, chalking and surface degradation, possible peeling or flaking where adhesion was weak, and more noticeable scratches or scuffs from normal use.
You’ll notice:
- Faster color fading on south/west exposures, requiring touch-ups sooner.
- Increased chalking and microcracks where paint loses flexibility, risking adhesion.
- Wear at edges, seams, and high-contact areas that accelerates maintenance needs.
Expect maintenance, occasional repainting, and consideration of Environmental impact when choosing coatings and disposal methods.
Environmental and Safety Considerations (VOCs, Ladders)
After considering how painted vinyl weathers over 5–10 years, you’ll also want to weigh environmental and safety impacts when planning the job.
Choose low-VOC paints and primers to minimize environmental impact and protect your household air.
Dispose of leftover solvents and rags per local hazardous-waste rules, and avoid washing brushes into storm drains.
For ladder work, inspect equipment, set it on firm ground, and maintain three points of contact.
Wear gloves, eye protection, and a respirator rated for organic vapors if ventilation’s poor.
Plan breaks, hydrate, and never paint alone when working at height—safety precautions matter.
Real Homeowner Success and Failure Stories
When homeowners take time to prep properly and pick the right products, they often get durable, attractive results—one neighbor I know primed and used a paint specifically formulated for vinyl and his windows still look great five years later. You’ll learn from real attempts: some succeed with careful Color coordination and Weather resistance choices; others rush and face peeling.
Common takeaways you can use:
- Prep thoroughly: clean, sand, and prime.
- Choose vinyl-compatible, weather-resistant paint and a matching trim color.
- Test a small section to confirm adhesion and final hue.
Apply lessons, not shortcuts, for lasting results.
Final Checklist Before You Start Painting
You’ve seen what works and what doesn’t, so now make a final checklist to guarantee your prep and materials are truly ready before you paint.
Confirm surface is clean, chalk-free, and sanded lightly. Remove hardware and mask glass.
Test your primer and paint on a small hidden area to check adhesion and paint texture under sunlight.
Verify temperature and humidity are within product specs.
Choose a color mindful of color psychology—consider contrast, neighborhood harmony, and resale impact.
Stock extra primer, topcoat, brushes, rollers, and cleanup supplies.
Review safety gear, ladder stability, and disposal plan before you begin.
Decision Guide: Paint, Replace, or Leave As-Is
If your vinyl windows show only cosmetic wear and you want a fresh look without breaking the bank, painting can be a smart short-term fix—provided the frames are structurally sound and you follow proper prep and product choices. Decide based on budget, condition, and goals. Consider color matching and paint durability when choosing coatings.
If frames are structurally sound, painting vinyl offers an affordable, short-term refresh—choose proper prep and vinyl-rated coatings.
Quick guide:
- Paint: choose primer/paint rated for vinyl; best for cosmetic updates and tight budgets.
- Replace: opt for new units if seals fail, draft issues, or long-term value matters.
- Leave as-is: acceptable if frames are sound and you prioritize original warranty or minimal maintenance.
Frequently Asked Questions
Can Painting Vinyl Window Interiors Affect Indoor Air Quality Long-Term?
Yes — you can, but it can impact indoor air quality over time. You’ll release VOCs and particulates during painting and curing; long term effects depend on paint type, ventilation, and exposure, so choose low‑VOC and ventilate.
Can Painted Vinyl Windows Be Safely Pressure Washed Later?
Yes — you can safely pressure wash painted vinyl windows if you use low pressure and gentle spray angles; you’ll protect the vinyl surface and maintain paint durability, avoiding high-pressure blasting that could lift or chip the coating.
Do Painted Vinyl Windows Change UV Protection for Glass Coatings?
Yes — you might slightly alter glare control, but painting vinyl usually won’t wreck UV protection or glass coatings; you’ll just be adding a cosmetic layer, so pick compatible paints and avoid coating overlap that could interfere with sealants.
How Does Paint Adhesion Differ on Welded vs. Mechanically Joined Frames?
Welded joints usually give you smoother, continuous surfaces so paint adheres more uniformly, while mechanically fasteners create seams and gaps where paint can thin or lift, so you’ll need extra prep and flexible coatings.
Can Window Sensors or Alarm Components Be Painted Over?
No — you shouldn’t paint window sensor or alarm components because you’ll impair their function, block contacts, or void warranties; instead, you’ll mask wires and tamper switches, so leave sensors exposed and paint around them carefully.
Conclusion
You can paint vinyl window exteriors, but should you? Weigh the benefits—updated look, cost savings—against risks like peeling, heat damage, and possible warranty loss. If the vinyl’s paintable, choose compatible coatings, prep carefully, and mind VOCs and ladder safety. Or opt to replace or wrap the frames if longevity matters. Ready to take the next step knowing the trade-offs and a final checklist in hand?