Can You Seal Exterior Paint
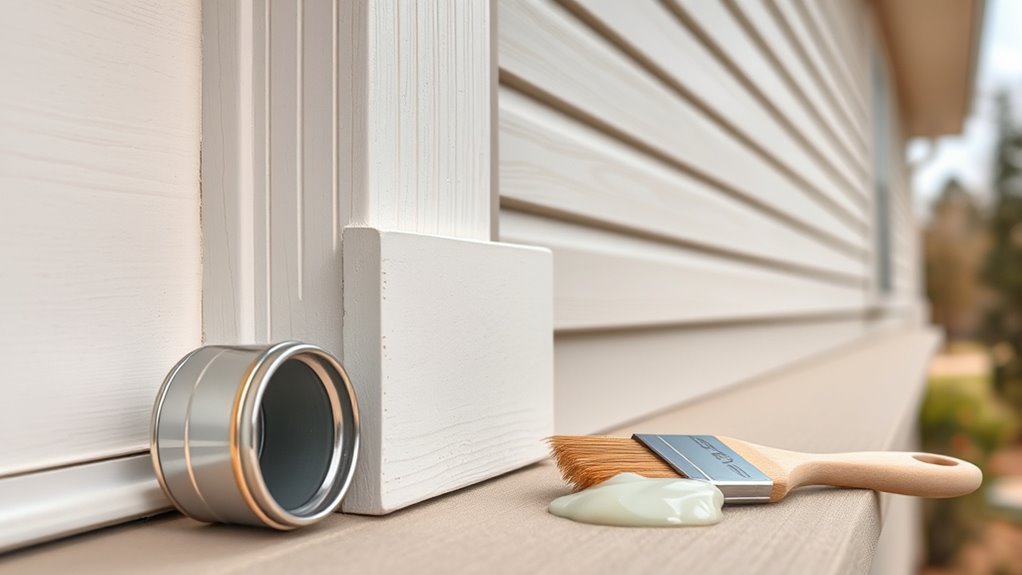
Yes — you can seal exterior paint to extend color life, add UV and water resistance, and improve scuff and dirt protection once the paint is fully cured and the surface is clean. Pick a compatible clear (water-based, acrylic, or penetrating sealer) for your substrate, test a small area, and apply thin even coats in good weather. Follow manufacturer cure times and maintenance schedules, and keep going to learn specific product choices and prep steps.
What This Guide Covers
When you’re sealing exterior paint, this guide walks you through why sealing matters, which sealers and finishes work best for different surfaces, and how to prep, apply, and maintain the finish to protect your paint and extend its life.
You’ll learn how proper prep preserves color matching and enhances paint durability, plus which products suit wood, metal, masonry, and previously coated areas.
You’ll get step-by-step prep tips, application techniques for brushes, rollers, and sprayers, and maintenance schedules to spot failures early.
Quick Decision Checklist: Should You Seal Exterior Paint?
Now that you know what sealing covers and why prep matters, decide quickly whether your project needs a sealer. Ask: is the finish weathered or showing color fading? Is the surface prone to moisture, mildew, or frequent sun exposure?
Check for early paint cracking or loose edges—those signal adhesion problems needing repair before sealing. Consider substrate type (wood, stucco, metal) and traffic or impact risk.
If you want extra UV resistance or easier cleaning, a clear sealer can help; if coating is brand-new, fully cured, and in good condition, you can likely skip it.
When Sealing Exterior Paint Makes Sense
If your paint shows fading, chalking, or a rough surface that grabs dirt, sealing makes sense because it restores protection and eases maintenance; you’ll get extra UV resistance, water beading, and a cleaner-looking finish without changing color.
You should seal when the finish is intact but weathered, not when paint is peeling or delaminating. Pick a sealer that supports color matching to avoid sheen shifts and test a small area.
Sealing preserves Texture preservation by locking surface granularity and reducing dirt adhesion. Ultimately, seal when you want extended life, easier cleaning, and minimal visual change.
How Exterior Paint Already Protects Siding
Because it forms the first line of defense, exterior paint does more than just look good: it seals porous siding, blocks UV rays that break down binders, and sheds water that would otherwise penetrate joints and grain.
As the first line of defense, exterior paint seals porous siding, blocks UV damage, and sheds moisture.
You’ll notice that a proper coating evens out surface absorption, helps prevent staining, and reduces the need for frequent repairs.
Choosing the right paint color ties into interior design continuity and curb appeal, so you’re protecting the structure while coordinating aesthetics.
Regular maintenance—cleaning, touch-ups, and timely repainting—keeps that protective layer effective, extending siding life without extra sealers in many cases.
What a Sealer Adds: UV, Moisture, and Abrasion Benefits
You’ve seen how paint itself seals pores and sheds water, but a dedicated sealer adds targeted defenses that paint alone can’t always provide. You’ll protect color fading, stabilize surface texture, and add abrasion resistance so finishes last longer.
- UV blockers reduce pigment breakdown and slow color fading.
- Water repellents prevent moisture intrusion that can lift paint and warp siding.
- Tough topcoats resist scuffs, dirt abrasion, and minor impacts to preserve finish.
Apply sealers to clean, cured paint so they bond properly. You’ll extend maintenance intervals and keep exteriors looking fresher with minimal effort.
Which Types of Sealers Work Over Exterior Paint?
You’ll find three common sealer families that work well over exterior paint: water-based clears, oil-based topcoats, and specialty acrylic or polyurethane finishes.
Each has trade-offs in durability, yellowing, and breathability, so you’ll want to match the sealer to your paint type and exposure.
Next, we’ll compare when to pick water-based versus oil-based and how acrylic and polyurethane differ.
Water-Based Clear Sealers
Want a clear, protective finish that won’t yellow or cloud your exterior paint? Water-based clear sealers are your safest bet. They dry fast, resist UV yellowing, and preserve color enhancement without significant texture alteration. You’ll find them easy to clean up and low-odor, ideal for decks, trim, and siding.
Consider these options:
- Acrylic waterborne sealers: durable, breathable, good for painted surfaces.
- Polyurethane water-based: tougher finish, non-yellowing, minimal gloss shift.
- Hybrid waterborne coats: balance of flexibility and abrasion resistance.
Always test a small area, follow manufacturer directions, and recoat only after proper curing.
Oil-Based Topcoats
If you prefer a harder, more abrasion-resistant finish than water-based sealers provide, oil-based topcoats offer that extra toughness and depth. You’ll get strong adhesion to many exterior paints, improved resistance to scuffs, and better protection against moisture.
Apply thin coats, allow proper curing, and sand between layers for best results. Be aware oil formulas can yellow slightly over time and may alter sheen, so test for color fidelity first to limit color fading.
They also lock in surface feel, aiding texture preservation on wood or masonry. Use them where durability outweighs faster drying needs.
Acrylic And Polyurethane
- Acrylic: UV resistant, flexible
- Polyurethane: durable, chemical resistant
- Tip: patch-test for color and texture changes
Clear Acrylic Topcoats vs. Penetrating Sealers
When you’re choosing between clear acrylic topcoats and penetrating sealers, think about how each protects and finishes the surface. You’ll pick acrylic topcoats for a visible, durable film that repels water, resists UV fading, and cleans easily—good if your exterior ties into interior decor progressions or porch accents.
Penetrating sealers soak in, preserving texture and breathability without changing look; they suit masonry, rough wood, and landscaped features where gardening tips warn against trapping moisture. You’ll avoid film-related peeling with sealers but accept less surface abrasion resistance.
Choose based on appearance, maintenance, and substrate porosity.
Oil-Based Sealers and Compatibility Concerns
Shifting from clear topcoats and penetrating sealers, you should know oil-based sealers behave differently and can create compatibility problems with other finishes. You’ll need to test adhesion, wait for full cure, and avoid applying over water-based paints without proper priming.
Pay attention to color matching since oil can amber and deepen tones; test small areas. Use appropriate brush techniques to minimize lap marks and guarantee even film thickness.
- Test adhesion with a cross-hatch and peel.
- Evaluate cured color before full application.
- Use long, smooth strokes and maintain a wet edge.
Follow manufacturer instructions closely.
Water-Repellent Finishes: Silane and Siloxane Products
Because silane and siloxane water-repellent finishes penetrate and chemically bond to masonry, you’ll get durable water beading without changing the surface texture or color substantially.
Silane and siloxane sealers penetrate and bond to masonry, providing long-lasting water beading without altering texture or color
You apply them to brick, stone, or porous painted surfaces to reduce moisture intrusion while allowing vapor transmission, so trapped moisture won’t blister paint.
Choose formulations labeled eco friendly options if environmental impact matters; low-VOC silanes exist.
For historical preservation projects, these finishes protect substrates without obscuring masonry details or altering appearance.
Test a small area first, follow manufacturer dwell times, and reapply as directed to maintain repellency over several years.
Varnishes, Spar Urethanes, and Marine Coatings Explained
You’ll want to know how varnishes, spar urethanes, and marine coatings differ so you can pick the right protection for your exterior paint.
Varnishes are thinner and clearer for milder exposures.
Spar urethanes offer flexible UV-resistant protection for wood that expands and contracts.
Marine coatings are the toughest choice for constant moisture and salt.
Consider the substrate, weather exposure, and desired finish when choosing between them.
Differences Between Coatings
When you’re choosing a finish for exterior wood, it helps to know how varnishes, spar urethanes, and marine coatings differ in formulation and performance. You’ll pick based on flexibility, UV resistance, and exposure.
Varnish hardens to a clear film; spar urethane stays flexible for movement; marine coatings add heavy-duty abrasion and salt resistance.
Consider color matching and texture enhancement needs, then weigh longevity versus maintenance.
- Varnish: good clarity, moderate UV protection.
- Spar urethane: flexible, resists cracking on shifting wood.
- Marine coatings: toughest for constant water and salt exposure.
Match coating properties to conditions.
When To Use Which
Now that you know how varnishes, spar urethanes, and marine coatings differ, you can match their strengths to specific jobs around your house or on a boat.
For porch rails and exterior trim, pick spar urethane for flexibility and UV resistance.
Use varnish on decorative wood where color matching matters and you want a warm glow.
Choose marine coatings for hulls, decks, and areas with constant water exposure.
If repainting, consider paint removal before sealing to confirm adhesion.
Always test compatibility with your existing finish, follow recoat windows, and prioritize the product designed for the environment it’ll face.
How to Check Paint Compatibility Before Sealing
Curious whether your paint layers will play nice under a sealer? You’ll want to inspect finish, age, and condition first to avoid color fading or texture change after sealing. Check small, hidden areas and note gloss differences.
- Test compatibility on a discreet patch: apply sealer, let cure, observe for adhesion and appearance.
- Compare dried samples: monitor for color fading over several days and any unexpected texture change.
- Confirm paint type from can labels or manufacturer guidance to match sealer chemistry.
If tests show issues, strip or recoat before sealing to guarantee a durable, uniform result.
Performing Adhesion and Solvent Tests on Painted Surfaces
Before you seal, run a quick adhesion tape test to see if the topcoat is firmly bonded or if flakes lift when you pull the tape.
Follow that with a solvent swab check—rub a small, hidden spot with a solvent-soaked cloth to confirm the paint won’t soften or smear.
These simple checks let you know whether the surface is ready for sealer or needs repair first.
Adhesion Tape Test
When you’re prepping a painted surface for sealing, the adhesion tape test quickly tells you whether the coating will hold up or need repair first; it’s a simple pull-test using a specific tape and a crosshatch cut to reveal how well the paint bonds to the substrate.
You’ll cut a grid, press quality acrylic tape, then pull sharply. Check for loose flakes, color fading, or paint cracking near edges. If paint stays, you can proceed to seal; if not, strip or repair affected areas.
- Use a sharp blade and steady hand
- Test multiple spots
- Photograph results for records
Solvent Swab Check
Wondering if the paint is fully cured or has contaminant residues that will stop sealers from bonding? Perform a solvent swab check: dampen a white cloth with mineral spirits or denatured alcohol and rub a small, inconspicuous area. If paint softens, smears, or transfers, wait longer before sealing or remove and recoat.
Test several spots—edges, high-touch areas like garden furniture, and interior walls if sealing thresholds differ. Repeat with an adhesive tape test for adhesion confirmation.
Document results and act accordingly: clean, cure, or strip. This quick check prevents adhesion failure and saves time and materials.
When Not to Seal: Paints and Conditions to Avoid
If your paint is still curing, don’t seal it—doing so can trap solvents and cause adhesion or finish problems. You should avoid sealing in several situations to prevent peeling, clouding, or trapping moisture.
Think about where the paint is used: garden furniture exposed to weather or delicate interior decor pieces with specialty finishes need different care.
- High-moisture surfaces like damp siding or porch railings
- Freshly applied or tacky finishes, including lacquer or alkyd types
- Surfaces with chalking, flaking, or contamination (oil, mildew)
If unsure, test a small area first and wait until the surface is fully stable.
How Long to Wait After Painting Before Sealing Exterior Paint?
You shouldn’t rush into sealing right after painting—especially after the situations just mentioned—because sealing too soon can trap solvents or moisture.
Wait until the paint’s dry-to-touch time passes and ideally until it’s fully cured: typically 24–48 hours for latex in good weather impact conditions, and up to 7–30 days for oil-based or cool, humid climates. Check manufacturer’s cure guidance and test a small area.
Also consider color contrast: dramatic contrasts may show sealant sheen differences, so allow extra curing to stabilize pigments.
When in doubt, err on longer wait times to protect finish and adhesion.
Surface Prep Checklist Before Applying a Sealer
Before you apply a sealer, get the surface spotless and stable: remove dirt, mildew, chalking, loose paint, and any glossy topcoat that could prevent adhesion. You’ll inspect for peeling, uneven texture, or contaminants that cause color fading or weak adhesion.
Make certain the substrate is fully dry and sound so the sealer boosts weather resistance. Check trim, joints, and fasteners for movement or gaps before sealing.
- Verify adhesion with a tape test.
- Confirm moisture content is within manufacturer limits.
- Replace or tighten damaged fasteners and fill gaps.
Follow these checks to ensure a durable, protective finish.
Cleaning, Sanding, and Repairing Painted Exteriors
When prepping painted exteriors, start by cleaning thoroughly, then sand and make targeted repairs so the sealer bonds evenly and lasts longer. Remove dirt, mildew, and chalk with a mild detergent or TSP substitute, rinsing well.
When prepping painted exteriors, clean thoroughly, sand glossy spots, and make repairs so sealers bond evenly and last.
Inspect for color fading and areas where paint cracking or peeling exposes substrate. Sand glossy spots and feather edges of flaking paint to create a uniform surface.
Fill gaps, nail holes, and deeper cracks with exterior-grade filler; allow full cure. Spot-prime repaired areas to match porosity.
Finally, wipe surfaces with a tack cloth to guarantee dust-free adhesion before sealing.
Best Tools and Application Methods for Sealers
Although choosing the right tools might seem simple, getting your sealer to perform and look its best depends on matching applicator type to the product and surface. You’ll want tools that spread evenly, avoid streaks, and respect existing Color matching where needed.
For Interior sealing projects that *shift to* exteriors, pick low-odor, compatible applicators. Keep equipment clean and follow pot-life guidelines. Consider surface texture, sealer viscosity, and drying time when prepping.
- High-quality synthetic pads for smooth surfaces
- Microfiber rollers for light textures
- Tapered brushes for trim and edges
Test a small area before full application.
Spray, Roller, or Brush: Choosing the Right Method
Because the right application method affects coverage, finish, and durability, you’ll want to pick spray, roller, or brush based on surface, sealer type, and project scale.
Picking spray, roller, or brush wisely ensures proper coverage, finish, and durability for each surface and sealer
You’ll choose spray for large, detailed areas and when maintaining uniform color matching and smooth paint texture; it’s fast but needs masking.
Use rollers on flat walls and siding to balance speed and control; nap size affects texture replication.
Reserve brushes for edges, trim, and uneven surfaces where precision matters.
Match method to substrate and sealer viscosity, plan overlaps, and test a small area to guarantee the finish meets your expectations.
How to Apply a Clear Sealer Step-by-Step
Start by prepping the surface: clean off dirt, mildew, and loose paint. Then sand glossy spots and patch any cracks so the sealer can bond.
Choose the right clear sealer and apply it evenly with your chosen method—sprayer, roller, or brush. Work in manageable sections and follow the manufacturer’s wet-film thickness.
Let each coat dry fully and inspect for missed areas before applying additional coats.
Surface Preparation
Before you mix the sealer, make sure the surface is clean, dry, and free of loose paint or contaminants so the coating will bond properly. Inspect for peeling, chalking, mildew, and failed edges; remove loose paint and sand glossy spots. Test a small area for color matching if you’ll topcoat later. Repair cracks and prime bare wood or metal. Use weatherproofing techniques like sealing gaps and ensuring proper drainage before sealing.
- Clean with mild detergent and rinse thoroughly.
- Sand rough areas and vacuum dust.
- Mask trim and adjacent surfaces to protect them.
Sealer Application
Once you’ve prepared and masked the area, apply the clear sealer with steady, even strokes so it lays down uniformly and avoids drips or puddles. Work in manageable sections, brushing or rolling along the grain and keeping a wet edge to prevent lap marks.
Use thin coats; thicker layers can trap solvent and cause clouding. Allow the recommended drying time between coats, sanding lightly if needed for texture smoothing. Check for missed spots under varied light.
Multiple thin coats offer better protection against color fading and weathering than one heavy coat. Clean tools promptly and dispose of waste per local rules.
Coverage, Coats, and Dry Times to Plan For
When you’re planning an exterior paint job, figure out coverage per gallon, how many coats you’ll need, and realistic dry times so you can schedule work and avoid rework. You’ll estimate surface area, factor in porosity, and consider color matching to reduce coats.
Choose quality formulations for paint durability; they often cover better and resist weathering.
- One primer coat for adhesion on bare or repaired areas.
- Two finish coats for uniform color and maximum protection.
Allow tack-free time, full cure times, and recoat windows per product labels.
Track temps and humidity during drying, and plan buffer days.
Weather and Seasonal Considerations for Exterior Sealing
If you’re sealing exterior paint, factor in temperature, humidity, wind, and sun exposure because they directly affect adhesion, drying, and long-term performance.
Choose a day with mild temperatures and low wind to prevent dust and debris from sticking to the sealer.
Pick a mild, low-wind day so dust and debris don’t settle into the sealer.
Avoid high humidity or imminent rain; even though indoor humidity advice helps for interior jobs, exterior humidity matters just as much for curing and paint durability.
Morning with moderate sun reduces blistering and uneven drying.
In cold weather, many sealers won’t cure properly; in extreme heat they can flash-dry, trapping solvents.
Plan seasonal timing for best results.
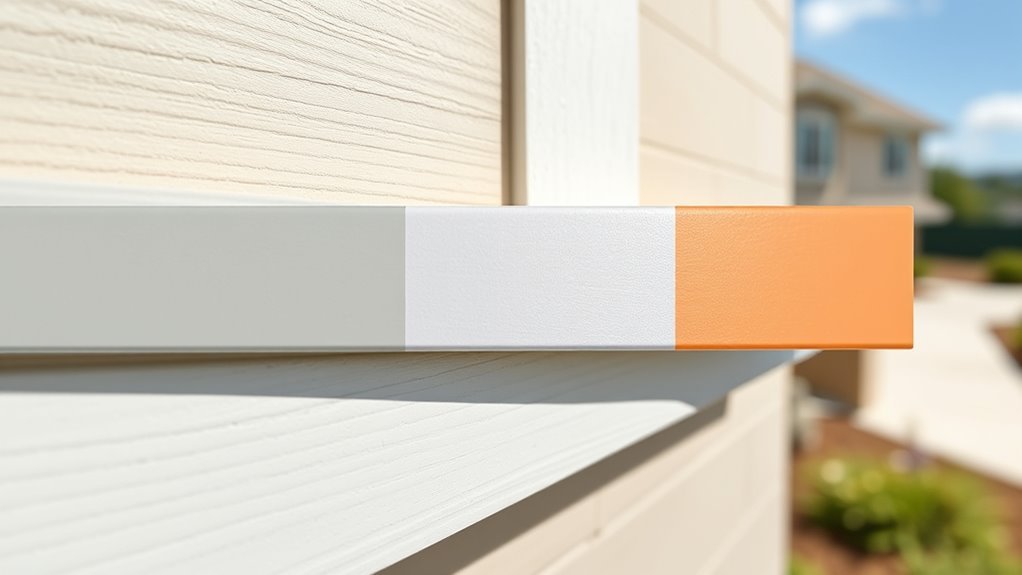
Will Sealing Change Paint Color or Sheen?
When you seal exterior paint, expect the sheen to shift slightly—some sealers raise gloss while others keep a matte look.
You may also notice colors deepen or become richer as the sealer fills and smooths the surface.
Finally, sealing can improve overall finish uniformity, evening out patchy areas and blending repaired spots with the rest of the wall.
Sheen Level Changes
Wondering whether a sealer will alter your paint’s color or sheen? You’ll usually see slight sheen shifts, not dramatic color matching issues, while paint durability often improves. Choose sealer type to control gloss and protection.
- Matte or satin sealers tend to mute sheen slightly.
- Semi-gloss and gloss sealers raise reflectivity and highlight surface texture.
- Water-based sealers keep color closer; solvent-based may deepen sheen more.
Test a small area to confirm the look before full application. If you care about exact sheen levels, pick a sealer formulated for exterior paint and follow manufacturer recommendations.
Color Depth Shift
Curious about whether sealing will deepen or shift your paint’s color and sheen? You’ll usually see subtle changes: a clear sealer can enrich pigments slightly, making colors appear deeper without altering hue.
Sealing slows color fading by protecting against UV and moisture, so tones stay truer longer. Sheen can look more pronounced because sealers improve gloss retention, but that’s about surface reflection, not pigment change.
Test a small area to confirm the effect on your specific paint and lighting. If you need no visible deepening, choose a matte-compatible sealer or apply a thin, even coat for minimal impact.
Finish Uniformity Effects
If you want a consistent look across your exterior surfaces, sealing can help but may also reveal or exaggerate differences in sheen and texture. You’ll see subtle color shifts as sealers deepen tones, so Color matching matters if panels were painted at different times.
Sealing highlights existing surface variations and supports Texture enhancement, making rough areas look more pronounced.
- Test a small area to judge how sheen and hue change.
- Pick a sealer with the finish you want (matte, satin, gloss).
- Repaint touch-ups before sealing to improve uniformity.
Plan tests and corrections to avoid uneven final results.
Do Sealers Affect Paint Breathability?
How much a sealer changes paint breathability depends on the sealer’s composition and how it’s applied. You should know breathable primers and sealers let moisture vapor pass, preventing trapped dampness that can peel paint.
Solvent-based or thick film coatings can reduce breathability, increasing risk of hidden moisture, color fading, or blistering over time. Apply thin, even coats and follow manufacturer’s permeability ratings to maintain vapor exchange.
Test a small area to check for texture alteration and adhesion before doing the whole surface.
If you’re sealing historic or porous substrates, choose products rated for vapor permeability to avoid long-term damage.
Troubleshooting Common Problems After Sealing
If you notice paint film peeling after sealing, don’t ignore it—you’ll need to check adhesion and surface contamination.
Visible brush marks usually mean the sealer was applied unevenly or over-tacked paint, so you’ll want to assess application technique and drying conditions.
In the following section, we’ll cover quick checks and fixes to get your finish back to smooth and secure.
Paint Film Peeling
Why is your exterior paint lifting or curling after sealing? You probably trapped moisture, applied sealer over poorly adhered coats, or used incompatible products. Peeling often appears where color contrast and texture enhancement reveal weak bonds.
Inspect, remove loose film, and correct the root cause.
- Remove peeling areas to sound substrate before resealing.
- Match sealer type to paint (acrylic over acrylic) and allow full cure.
- Address moisture sources: leaks, poor ventilation, or damp substrate.
Act quickly: small spots can escalate. Proper prep, compatibility checks, and drying time prevent repeat peeling and protect your exterior finish.
Visible Brush Marks
When you spot visible brush marks after sealing, they usually mean the topcoat wasn’t applied evenly or the sealer started to skin before you could level it out.
You can usually fix this by lightly sanding the affected area with fine-grit paper, removing dust, and applying a thin, even follow-up coat with a high-quality brush or a foam applicator.
Work wet edges and maintain a consistent stroke to avoid a texture change.
Check for underlying issues like color fading or contamination before recoating.
If marks persist across large areas, strip and recoat to restore uniform appearance and proper protection.
How to Remove or Fix a Sealer That Failed
Because sealers can fail from improper application, weathering, or incompatible products, you’ll first need to assess whether the coating can be repaired or must be removed completely. Check adhesion, bubbling, or peeling; test a small patched area to evaluate color matching and texture enhancement options.
Because sealers can fail, inspect for adhesion issues and test a small patch to decide repair or removal.
If repairable, scuff sand and spot-prime; if not, strip to bare substrate.
- Use chemical stripper or pressure wash for full removal.
- Sand and feather edges for partial repairs.
- Reapply compatible sealer following manufacturer’s cure times.
Always dry thoroughly, match paint and sealer chemistry, and test before full application.
Maintenance Schedule for Sealed Exterior Paint
You should perform a seasonal inspection checklist to catch cracks, peeling, or UV damage early.
Follow recoat timing guidelines based on sealer type and exposure so you’re not repainting too soon or waiting until failure.
Clean sealed surfaces on a regular schedule—typically annually or after severe weather—to maintain protective performance.
Seasonal Inspection Checklist
Although the weather shifts, a simple seasonal inspection checklist will keep your sealed exterior paint performing and looking its best year-round. You’ll walk the perimeter each season, noting chips, mildew, and seal failures. Think how exterior color and finish tie into interior design and how paint texture shows wear.
Use this quick checklist to catch issues early:
- Inspect seals and caulk at joints, trim, and windows for cracks or gaps.
- Check for discoloration, chalking, or blistering on siding and trim.
- Look for moisture entry, peeling, and mold near eaves, gutters, and foundation.
Address findings promptly to extend protection.
Recoat Timing Guidelines
When seasonal inspections show wear or every 5–10 years for most climates, plan recoats to maintain both protection and appearance.
You should monitor high-exposure areas yearly and schedule full-recoat cycles based on gloss loss, chalking, or cracking rather than calendar age alone.
Blend maintenance with other updates so exterior refreshes complement interior décor and evolving paint color schemes.
Spot-prime and recoat faded sections to extend life when damage is localized.
Keep records of products, sheen, and dates so you can match finishes later.
Proper timing prevents costly repairs and keeps sealed paint performing as designed.
Surface Cleaning Frequency
Maintaining a regular cleaning schedule keeps sealed exterior paint looking fresh and performing over time, so after planning recoats you should set a surface-cleaning routine. You’ll inspect seasonally, remove dirt and biological growth, and address stains quickly to reduce color fading and protect texture preservation.
Aim for light cleanings twice yearly, with targeted spot-cleaning after storms or pollen-heavy seasons. Use mild detergent, soft brushes, and low-pressure rinsing to avoid damaging the sealant.
- Spring: remove pollen, inspect for streaks.
- Fall: clear debris, check for mold.
- As-needed: spot-treat stains promptly to prevent long-term deterioration.
Cost Tradeoffs: Sealing Now vs. Repainting Sooner
If you seal your exterior paint now, you’ll extend its life and delay the cost of a full repaint; but that upfront saving can mean paying sooner for touch-ups or partial repairs when sealant wears unevenly. You’ll weigh cheaper sealant application against eventual patching costs, especially where weather causes inconsistent fading.
Color matching becomes harder as surrounding paint ages, and differences in paint texture show after spot repairs. If you choose sealing, budget for periodic touch-ups and occasional resealing to avoid visible patches.
Repainting sooner gives uniform protection and can be more cost-effective long term despite higher immediate expense.
Product Recommendations by Surface Type (Wood, Masonry, Metal)
Because different materials age and absorb coatings in distinct ways, you’ll want product recommendations tailored to wood, masonry, and metal to get durable, compatible protection.
For wood, pick a breathable, water-repellent sealer or semi-transparent stain that respects grain and supports historical preservation. Consider eco-friendly alternatives like plant-based oils for older structures.
For masonry, choose silane/siloxane or vapor-permeable masonry sealers that prevent moisture while letting walls breathe.
For metal, use rust-inhibiting primers and clear coats formulated for exterior metal to prevent corrosion.
- Wood: breathable sealers, plant-based oils
- Masonry: silane/siloxane, breathable barriers
- Metal: rust primer, clear protective coats
Safety, VOCs, and Environmental Considerations
How will your choice of sealer affect health, odors, and the planet? You should pick low-VOC or water-based sealers to reduce VOC emissions and indoor/outdoor odors.
Choose low‑VOC or water‑based sealers to cut odors and emissions—protect health and the planet.
Wear gloves, a respirator, and eye protection when applying any product, and work in breezy conditions to limit exposure.
Dispose of rags and leftover product per local hazardous-waste rules to minimize environmental impact.
Consider breathable sealers for masonry and wood to prevent trapped moisture and premature failure.
Read labels for certified eco-friendly options, follow manufacturer instructions, and prioritize products with third-party verification to balance durability with safety and sustainability.
Frequently Asked Questions
Can I Seal Exterior Paint Over Lead-Based Surfaces?
You can’t safely just seal lead paint; you should encapsulate with approved products or hire abatement. You’ll extend sealer longevity using proper primers, stable substrate, and regular inspections, but follow regulations and safety protocols strictly.
Will Sealing Exterior Paint Affect Warranty From the Paint Manufacturer?
Yes — sealing can void your paint warranty if the manufacturer requires specific coatings or surface preparation you didn’t follow. You should check warranty terms, confirm recommended sealers, and guarantee proper surface preparation to protect paint durability.
Can I Seal Painted Surfaces That Get Regular Pressure Washing?
Yes — you can seal painted surfaces that get regular pressure washing; think of it as armor beating back rain. You’ll need thorough surface preparation, pick compatible sealer types, and apply properly to avoid peeling and damage.
Do Sealers Impact Insect or Mold Treatments Beneath Paint?
Yes — you’ll usually preserve insect prevention and mold resistance beneath paint, since sealers lock treatments in; just guarantee compatible products and allow proper cure time so sealers won’t block effectiveness or trap moisture that could undermine protection.
Can I Apply a Sealer to Painted Surfaces With Decorative Finishes (Glazes)?
Yes — you can, but treat it like dressing a painted sculpture: test first. If decorative finishes react, choose compatible sealer; verify sealer compatibility with glaze, test adhesion and appearance, and proceed once results satisfy you.
Conclusion
Sealing exterior paint isn’t just a nicety—it’s like wrapping your house in an invisible superhero cape. Do it when paint’s sound but exposed to sun, rain, or high traffic; skip it if you plan to repaint soon. A good sealer boosts UV, moisture, and abrasion resistance, stretching time between repaints and saving headaches. Pick the right product for your surface, mind VOCs, and you’ll feel smugly invincible—until the next storm tests you.