Can You Use Latex Paint on Concrete
Yes — you can use latex paint on many concrete surfaces, but you’ll need proper prep, the right primer, and a concrete-rated latex formula for lasting results. Clean, degrease, repair cracks, and etch or prime smooth concrete so the paint bonds. Use floor- or masonry-grade acrylic latex for exterior or high-traffic areas, and add a sealer for extra protection. Follow manufacturer cure times, and keep going to learn tips for testing, tools, and maintenance.
Can You Use Latex Paint on Concrete?

Yes—you can use latex paint on concrete, and it’s a common, cost-effective choice for many interior and exterior projects. You’ll enjoy flexible adhesion, easy cleanup, and faster drying than oil-based options.
Prep matters: clean, etch, and prime porous surfaces so paint bonds and resists peeling. Consider traffic and moisture when choosing finish and primer.
For Color selection, pick light tones for heat reflection or darker hues for hiding stains; test swatches in different lighting.
Also weigh environmental impact: low-VOC formulations reduce indoor emissions and runoff risks, so opt for eco-friendly products when possible.
Quick Answer: Latex Paint for Concrete, in One Line
Yes—you can use latex paint on concrete if you properly prep and clean the surface first.
Pick a latex formula designed for masonry or concrete and follow the manufacturer’s instructions.
After painting, seal and maintain the coating to keep it looking good and durable.
Prep And Clean Surface
Before you paint, clean and prep the concrete thoroughly so the latex will bond properly: sweep and vacuum loose debris, degrease oil spots, etch or acid-wash smooth surfaces, and repair cracks or spalling so the primer and paint can adhere evenly. You’ll want a clean, dry base to avoid peeling and uneven color.
Follow this quick checklist:
- Remove stains and contaminants with degreaser or trisodium phosphate.
- Etch smooth slabs or acid-wash to increase porosity for better adhesion.
- Fill cracks, patch spalled areas, and sand rough patches before priming.
Proper prep lets your color options and textured finishes look professional and last.
Choose Proper Latex Formula
Now that the slab’s prepped, pick a latex formula made for masonry or concrete so the coating will grip, breathe, and hold up to foot traffic and moisture.
You’ll want a breathable acrylic-latex or polymer-modified paint labeled for concrete; these resist peeling and allow moisture vapor escape. Choose a product suited to the traffic level—floor-grade for garages, masonry paint for walls.
If you plan color mixing, use compatible tint bases and avoid universal tints that weaken durability.
For slip resistance and texture enhancement, add a grit additive or select a textured formula.
Follow manufacturer coverage rates and dry-times for best results.
Seal And Maintain Coating
When you finish painting, seal the surface with a concrete-rated acrylic sealer to protect the latex coating from wear, stains, and moisture while allowing vapor to escape. You’ll maintain appearance and performance by reapplying every 1–3 years, cleaning spills promptly, and spot-repairing chips.
Choose a sealer that suits your color options and slip-resistance needs; clear sealers preserve hue while tinted sealers alter tone. Consider environmental impact: pick low-VOC products and dispose of materials responsibly.
Follow manufacturer cure times before heavy use to avoid blisters and peeling.
- Clean and prep annually.
- Recoat sealer every 1–3 years.
- Use low-VOC products.
Which Concrete Surfaces Accept Latex Paint?
You can use latex paint on many interior concrete floors if they’re clean, dry, and properly primed for adhesion.
It also works well on exterior concrete walls when you choose exterior-grade latex and prepare the surface to prevent moisture issues.
Below we’ll cover specific prep steps and product choices for each surface.
Interior Concrete Floors
Although interior concrete floors are common candidates for latex paint, their suitability depends on factors like moisture, existing coatings, and surface texture. You should test for dampness, remove oils, and strip loose paint before applying primer.
Consider concrete aesthetics and decorative finishes when choosing color, sheen, and patterns to guarantee durability and appeal. Prep and product choice affect longevity.
- Test and prep: moisture test, degrease, etch or sand.
- Prime and seal: use a compatible primer for adhesion.
- Finish options: breathable latex for basements, epoxy alternatives for high traffic.
Exterior Concrete Walls
Want to know if latex paint will stick to exterior concrete walls? You can paint them, but success depends on preparation.
Clean surfaces thoroughly, repair cracks, and wait for full drying. Apply concrete sealing when needed to reduce porosity and prevent moisture migration that undermines adhesion.
Use a quality masonry primer before latex paint to improve bond and paint durability. Choose exterior-grade latex formulated for masonry and follow manufacturer instructions for temperatures and humidity.
Regular maintenance—inspecting, cleaning, and touching up—extends lifespan. When you prep correctly and seal appropriately, latex paint performs well on exterior concrete walls.
When Latex Paint Is a Poor Choice for Concrete
When might latex paint fail on concrete? You’ll want alternatives if the surface gets heavy wear, constant moisture, or extreme temperatures. Consider these scenarios:
- High-traffic floors: latex chips and wears quickly, limiting long-term color options and requiring frequent recoats.
- Damp or hydrostatic conditions: moisture can lift latex coatings, causing bubbling and mold risk, worsening environmental impact from repeated maintenance.
- Chemical exposure or hot surfaces: solvents, oils, or heat degrade latex, so choose epoxy or masonry-specific products instead.
If any apply, don’t rely on latex. Assess conditions, then pick a more durable, moisture-resistant coating for longevity.
How Concrete Porosity Affects Latex Paint Adhesion
You’ll notice that the size and distribution of pores in concrete determine how well latex paint keys to the surface. If the substrate absorbs water too quickly or unevenly, the paint can’t form a proper film and may flake.
Also consider moisture vapor transmission through the slab, since trapped moisture will break adhesion over time.
Pore Size Distribution
How do the pores in concrete actually influence latex paint adhesion? You’ll find pore size distribution dictates contact area and mechanical interlock. Larger pores boost penetration but can trap moisture; tiny pores limit primer grip.
Consider:
- Large pores: increase surface porosity and require filling to prevent voids under paint.
- Small pores: offer less mechanical anchoring but reduce moisture movement, acting like partial moisture barriers.
- Mixed sizes: create uneven adhesion; you’ll need tailored primers or consolidants to balance absorption and sealing.
Assess pore sizes before painting so you choose the right surface prep and primers for lasting latex paint adhesion.
Surface Absorption Rate
Because concrete soaks up water and primers at varying rates, its surface absorption directly controls how well latex paint bonds and how many coats you’ll need. You’ll assess absorption by a simple water test or porosity gauge.
High absorption sucks primer away, forcing extra coats and reducing surface durability unless you seal properly. Low-absorption slabs may need etching or special primers to promote adhesion.
Choose primers and paints with proven chemical compatibility to avoid failed bonds. Always match primer type to concrete porosity, apply evenly, and allow proper drying times so your latex paint adheres and the finish lasts.
Moisture Vapor Transmission
Surface absorption tells you how much primer and paint the slab will pull in, but you also need to control moisture moving up through the concrete. If vapor rises, latex paint can blister, peel, or lose adhesion. You should test with a plastic sheet or moisture meter, then address high readings before painting.
- Reduce vapor: apply a vapor barrier or breathable masonry sealer.
- Choose primers that tolerate moisture and allow color matching without hiding moisture issues.
- Consider eco friendly options like low-VOC breathable coatings that control vapor yet avoid trapping it.
Treat porosity proactively to guarantee durable latex finishes.
How Moisture and Vapor Cause Latex Paint Failure
When moisture or vapor moves through concrete, it can push latex paint off the substrate as blistering, peeling, or adhesion loss. You’ll often see bubbles or flaking where trapped dampness forces the coating to lift.
When moisture migrates through concrete, trapped dampness can lift latex paint into bubbles, blisters, and peeling.
You should recognize that vapor pressure and capillary moisture disrupt film formation and weaken adhesion. Without proper concrete sealing or installed moisture barriers, paint can delaminate quickly.
Temperature swings and salts exacerbate failure by expanding trapped vapor and promoting osmotic blistering.
To prevent waste, you’ll need to control substrate moisture, use compatible primers and breathable coatings, and address sources of water intrusion before painting.
Test Your Concrete for Paint Readiness
Before you paint, test the concrete so the job lasts: do a water test to spot moisture, scan for cracks that need repair, and measure surface porosity to guarantee proper adhesion.
If water beads or soaks in too slowly, or the surface is highly porous or cracked, address those issues first.
Taking these simple checks now will save you from peeling and failure later.
Perform A Water Test
If you’re unsure whether your concrete will accept paint, do a simple water test to check for porosity and moisture issues. Wet a small area and watch how water behaves: quick absorption means high porosity; beaded water signals low porosity or sealers.
Surface texture affects results—rough, porous areas soak more and help paint adhesion; smooth, sealed spots may need etching. Perform the test in several spots, especially high-traffic zones.
Record observations and wait 24 hours to ensure no rising moisture. Use findings to decide on primers, etchers, or moisture mitigation before painting.
- Prep area and pour water
- Observe absorption
- Note and act on results
Check For Cracks
Because cracks let moisture and movement undermine paint, you should inspect your concrete closely before priming. Walk the area, note hairline to wider fissures, and tap suspect spots; hollow sounds can indicate delamination.
Clean debris from cracks so repairs bond well. Fill hairline cracks with a flexible polymer caulk and wider gaps with a concrete patch or epoxy designed for outdoor use.
Consider crack prevention measures like control joints and sealants to limit future movement. For large or recurring cracks, consult a structural professional about reinforcement options—proper structural reinforcement prevents recurrence and guarantees your latex paint adheres and lasts.
Measure Surface Porosity
To make certain paint will bond and wear evenly, test the concrete’s porosity before priming. You’ll assess surface texture and determine paint compatibility with simple steps. Use water to gauge absorption: drop tests, timing, and observations tell you if sealing or a specialized primer’s needed.
- Drop test: place 1–2 tablespoons of water; note how fast it soaks.
- Scratch test: rub a coin or wire brush to feel texture and loose particles.
- Tape test: apply painter’s tape to see adhesion and reveal weak zones.
Record results to pick the right primer and guarantee lasting coverage.
Which Primer to Use for Latex on Concrete
When you’re prepping concrete for latex paint, pick a primer that bonds to masonry and seals porous surfaces—acrylic latex masonry primers are usually the best choice because they adhere well, breathe, and resist alkali from the concrete.
You’ll want a primer labeled for concrete or masonry; breathable formulations prevent trapped moisture and peeling. For exterior or high-traffic floors, choose a primer with stain-blocking properties and good adhesion to maximize paint durability.
Some primers offer tintable color options so your topcoat needs fewer coats. Apply per manufacturer instructions and allow full cure before painting to assure a long-lasting finish.
Step-By-Step Concrete Prep for Latex Paint
Before you paint, get the concrete clean, dry, and sound so your latex finish will stick and last. Start by sweeping and pressure-washing to remove dirt, salts, and loose material.
Repair cracks with patching compound and let cures fully.
Etch smooth surfaces if needed for adhesion, then rinse and allow complete drying.
Consider Color options when planning—test swatches after prep.
Also weigh environmental impact: use low-VOC latex and dispose wash water responsibly.
Follow this concise sequence:
- Clean and degrease thoroughly.
- Repair and etch for adhesion.
- Dry, test color, and minimize runoff.
Best Latex Paint Types for Floors and Patios
Although exterior concrete sees more wear and moisture, you can get durable results by choosing the right latex formulas—look for exterior- or floor-grade 100% acrylic latex or masonry-specific paints that resist abrasion, UV, and water.
For durable exterior concrete, use exterior/floor-grade 100% acrylic latex or masonry paints that resist abrasion, UV, and water
For patios and garage floors, pick floor-grade epoxy-acrylic blends or high-solids 100% acrylics for toughness and easy cleaning. Choose slip-resistant additives if needed.
Look for brands offering broad color options and UV-stable pigments so finishes won’t fade. If you’re environmentally conscious, select eco-friendly formulations with low-VOC or water-based labels.
Always verify compatibility with concrete sealer and intended traffic levels.
Application Techniques: Brush, Roller, and Sprayer Tips
After you’ve picked the right latex formula for your concrete, you’ll need the right tools and techniques to get a durable, even finish. Choose brushes for edges, rollers for flats, and sprayers for large areas.
Test a small patch first to confirm color options match expectations and environmental impact concerns like overspray control.
Clean tools between coats and use a nap roller suited to texture.
- Brush: cut in along joints and steps.
- Roller: use 3/8″–1/2″ nap for porous concrete.
- Sprayer: maintain consistent overlap; mask surroundings.
Coverage, Coats, and Recoat Timing for Latex on Concrete
Plan for roughly 300–400 sq ft per gallon on smooth concrete and less on porous surfaces so you know how much paint to buy.
You’ll usually need two coats for even coverage, though high-traffic areas or drastic color changes might call for a third.
Wait the manufacturer’s recommended recoat time—typically 2–4 hours for latex—longer in cool or humid conditions to guarantee proper adhesion.
Coverage Per Square Foot
One gallon of typical latex paint will cover about 300–400 square feet on smooth, primed concrete, but rough or porous surfaces can cut that to 200 sq ft or less, so always calculate using the worst-case number and buy a little extra.
You’ll choose color options that suit lighting and wear; lighter shades hide imperfections less but reflect heat. Pick an environmentally friendly formula with low VOCs for indoor or enclosed spaces.
Consider these practical points:
- Measure surface area precisely, subtracting fixtures.
- Factor porosity: rough surfaces need more paint.
- Allow for touch-ups and waste.
Number Of Coats
How many coats will you need depends on surface texture, color change, and wear expectations: most smooth, primed concrete needs two coats of latex for durable, even coverage, while porous or previously stained concrete often requires a third coat or a penetrating primer plus two finish coats. You should test a small area to confirm coverage and color options. Higher-traffic areas may justify extra coat for longevity and reduced environmental impact by avoiding frequent recoats. Consider sheen and pigment concentration; darker or brighter colors often need more coats for full opacity.
| Surface | Typical Coats | Notes |
|---|---|---|
| Smooth, primed | 2 | Standard |
| Porous/stained | 3 | Or primer +2 |
| High-traffic | 3 | Improves durability |
| Light tint | 2–3 | May need extra coat |
Recoat Timing Guidelines
Now that you’ve chosen the number of coats, you’ll want to time each application for proper coverage and adhesion. Allow the initial coat to dry fully—usually 2–4 hours—before recoating. Humidity and temperature affect cure time.
Lightly sand between coats for better bond and to refine texture effects. Match recoats to the manufacturer window to avoid peeling.
- Wait 2–4 hours for touch-dry, 24 hours for heavy traffic.
- Recoat thinner layers within the manufacturer window to build color options without hiding concrete detail.
- For exterior surfaces, extend recoat time in cold/wet conditions; ensure full cure before sealing or heavy use.
Boost Durability With Topcoats and Sealers
Because latex paint alone won’t fully protect concrete from wear and moisture, you should apply a compatible topcoat or sealer to boost durability. Choose water-based polyurethane, acrylic sealers, or breathable silane/siloxane products that match your color options and desired sheen. Test adhesion on a small patch and follow cure times; some sealers deepen color while others remain clear.
Consider environmental impact—opt for low-VOC products and proper disposal. Apply thin, even coats with a roller, avoid puddling, and allow full cure before traffic. Reapply as recommended to maintain protection against abrasion, stains, and moisture intrusion.
Cost & Time: Latex vs Epoxy & Acrylic Concrete Paints
You’ll notice latex is usually the cheapest and quickest option, while epoxy and acrylic coatings cost more upfront but offer longer-lasting protection.
Expect latex to dry fast and be ready for light use in a day or two, whereas epoxy needs longer cure times and sometimes multiple coats or primers.
We’ll compare typical prices and realistic curing schedules so you can match cost to how soon and how hard the surface will be used.
Cost Comparison Overview
How much will your paint job cost and how long will it take? You’ll weigh upfront price, finish, and environmental impact when choosing latex, epoxy, or acrylic for concrete. Latex is cheapest per gallon and offers wide color options; epoxy costs more but gives durability; acrylic sits midrange.
- Latex: low material cost, DIY friendly, quicker application.
- Epoxy: higher material and prep costs, long lifespan, specialized labor.
- Acrylic: moderate cost, decent durability, simpler maintenance.
Factor in surface prep, primer, and potential contractor fees. Compare lifecycle cost, not just sticker price, to make a smart choice.
Time To Cure
Curious how long you’ll wait before walking or driving on that freshly painted concrete? You’ll see big differences: latex dries to touch fast but needs longer to cure for full paint durability; epoxy cures slowest but gives top durability; acrylic sits between. Consider color choices too—darker hues can feel dry quicker in sun but don’t change cure time. Plan sealing and light use around manufacturer cure windows.
| Paint Type | Dry to Touch | Full Cure Time |
|---|---|---|
| Latex | 1–2 hours | 24–72 hours |
| Acrylic | 1–4 hours | 48–72 hours |
Choose based on schedule and durability.
How Long Latex-Painted Concrete Typically Lasts
Although exact lifespans vary with conditions, latex paint on well-prepared, sheltered concrete typically lasts 5–10 years before showing significant wear. You’ll get longer life when you prioritize concrete durability and proper paint compatibility during prep and selection.
On well-prepared, sheltered concrete, latex paint usually endures about 5–10 years before noticeable wear appears.
Expect outdoor floors or driveways to age faster than covered patios.
- Exposure — sun, moisture, freeze-thaw cycles shorten life.
- Prep & product — proper etching, primer, and a compatible latex formula extend life.
- Traffic & maintenance — heavy foot or vehicle use plus poor cleaning speeds wear.
Monitor painted surfaces so you can plan timely refreshes rather than emergency repairs.
Fixing Peeling, Flaking, and Blistering on Concrete
When paint starts peeling, flaking, or blistering on concrete, you’ll want to tackle it promptly to prevent moisture damage and guarantee any new coating will adhere properly. Scrape loose paint, use a wire brush, then pressure-wash and let dry thoroughly.
Address staining or efflorescence with appropriate cleaners and repair cracks with a concrete patch. Prime the area with a moisture-tolerant primer before repainting.
Consider eco-friendly alternatives like low-VOC or water-based primers and paints for safer indoor/outdoor use.
Test small sections for adhesion and use color customization to match surrounding surfaces or update the look confidently.
Painting New Concrete vs Old Concrete
After you’ve removed peeling paint and prepped the surface, you’ll face different challenges depending on whether the concrete is new or already painted.
New concrete needs curing (usually 28 days) and thorough etching. You’ll pick primers that allow breathability and consider color options since base porosity affects hue.
Old painted concrete requires testing adhesion, removing loose layers, and spot-priming bare patches. Choose latex products or eco-friendly formulations to minimize odor and VOCs.
Maintenance differs: new pours accept coatings more uniformly; previously coated surfaces may need repeated adhesion checks.
Match prep and product to the substrate for lasting results.
- New: cure, etch, prime
- Old: test, strip, prime
- Choose breathable, low-VOC paints
Painting Outdoor Concrete: Sun, Freeze-Thaw, and UV
Because outdoor concrete faces intense sun, repeated freeze–thaw cycles, and constant UV exposure, you’ll need coatings and prep that specifically resist fading, chalking, and surface spalling. You should start with proper concrete sealing to block moisture that expands and cracks in freezing weather.
Choose latex paints formulated for exterior use and UV stability to maximize paint durability. Prime porous surfaces, repair hairline cracks, and guarantee good drainage so water won’t sit and worsen freeze–thaw damage.
Recoat schedules matter: inspect annually and touch up before visible chalking or loss of adhesion to protect the substrate long term.
Safety When Painting Concrete With Latex
If you’re painting concrete with latex, prioritize ventilation, skin and eye protection, and safe handling to keep fumes, splatter, and slips from turning a routine job into an injury. Wear goggles, gloves, and a respirator when needed; tape and plastic protect nearby surfaces.
Consider environmental concerns: choose low-VOC latex and contain runoff to avoid soil or water contamination. Plan safe footing and clean spills immediately.
Think about paint color options for visibility and heat absorption indoors or out.
- PPE: gloves, goggles, respirator.
- Containment: tarps, drip trays, proper disposal.
- Surface safety: non-slip additives, dry time management.
When to Hire a Pro for Concrete Painting
Keeping safety and prep in mind, you’ll also want to know when the job is better left to a pro. If surfaces are heavily cracked, spalled, or require structural repair, hire someone with concrete expertise. Call a pro when large square footage, complex patterns, or precise color matching are important, since professionals have tools and pigment blending skills.
Choose contractors who offer warranties and use environmentally friendly products if sustainability matters to you. Also consider a pro for high-traffic commercial areas, tricky drainage or slope issues, or when you lack time or confidence.
Get multiple quotes and check references before deciding.
Maintenance Tips for Latex-Painted Concrete
Once your latex paint has cured, maintain its look and durability with regular, simple care. You’ll prevent peeling and fading by sweeping debris, rinsing spills promptly, and avoiding harsh de-icers that harm finish and concrete.
Inspect yearly for chips and touch up small areas to keep color options consistent across the surface. Use mild detergent and a soft-bristle brush for deeper cleaning; pressure washing at low setting works for stubborn grime.
Consider recoat intervals based on foot or vehicle traffic and local climate to reduce environmental impact. Store leftover paint for future touch-ups and label shade and date.
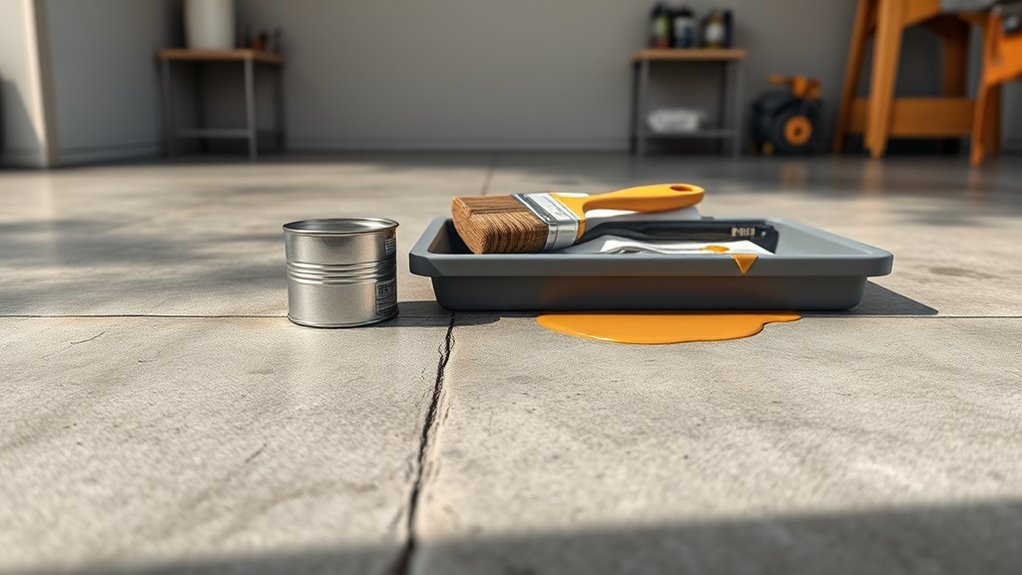
Product Checklist: Primers, Paints, Tools, and Test Supplies
Maintaining your latex-painted concrete keeps it looking great, but choosing the right products before you start will make maintenance easier down the road. Gather a concrete primer formulated for latex, high-quality latex concrete paint in your chosen color options, a breathable sealer if required, and patching compound for cracks.
Tools: roller with a 3/8–1/2″ nap, angled brush, mixer, bucket, scraper, and respirator.
Test supplies: pH test kit, small concrete patch, and sample cans for trial areas.
Check VOC levels and environmental impact on labels to balance durability with eco-friendly choices.
Frequently Asked Questions
Can Latex Paint Be Tinted to Match Concrete Stains?
Yes — you can tint latex paint to match concrete stains. You’ll get decent color matching by using tint customization at the store and testing samples, but accept limitations versus true stain depth and natural variance in concrete.
Will Latex Paint Hide Minor Concrete Cracks?
Yes — latex paint can hide minor concrete cracks if you prep and use proper application techniques, but don’t expect long-term coverage; color durability varies, so you’ll likely need fillers and periodic touch-ups to maintain appearance.
Can Latex-Painted Concrete Be Used With Radiant Floor Heating?
Want warm floors that still look good? Yes—you can use latex-painted concrete with radiant heating if you prioritize concrete sealing and paint durability, prep properly, choose heat-tolerant coatings, and allow full curing for reliable performance.
Is Latex Paint Safe for Concrete Used in Food-Prep Areas?
Yes — but you’ll need food-safe concrete sealing and a certified, low-VOC coating; plain latex paint alone won’t suffice. Guarantee proper paint adhesion, follow sanitary standards, and use NSF-approved or epoxy finishes for food-prep safety.
How Soon After Rain Can I Paint Exterior Concrete?
Wait at least 24–48 hours after rain before painting exterior concrete. You’ll guarantee surface preparation’s complete—clean, dry, and free of efflorescence—and factor weather considerations like temperature and humidity to ensure proper adhesion and curing.
Conclusion
Yes — you can use latex paint on concrete, but choose the right prep, primer, and product. You’ll clean and etch the surface, patch cracks, and let it dry; you’ll prime porous or previously painted concrete, pick a masonry or concrete-specific latex, and apply thin, even coats. You’ll avoid using indoor latex on floors or damp areas, test a small patch first, and maintain the finish with periodic cleaning and touch-ups.