How Long Does Behr Paint and Primer Take to Dry
Most Behr paint-and-primer latex formulas will be touch‑dry in about 30–60 minutes and ready for a recoat in roughly 2–4 hours under warm, low‑humidity conditions; oil‑based versions can take up to 4–6 hours to feel dry and about 24 hours before you recoat. Full cure for latex paints typically takes 7–30 days depending on temperature and humidity, so handle with care until then — keep going and you’ll find detailed tips and scenarios next.
Who This Guide Is For and How to Use It
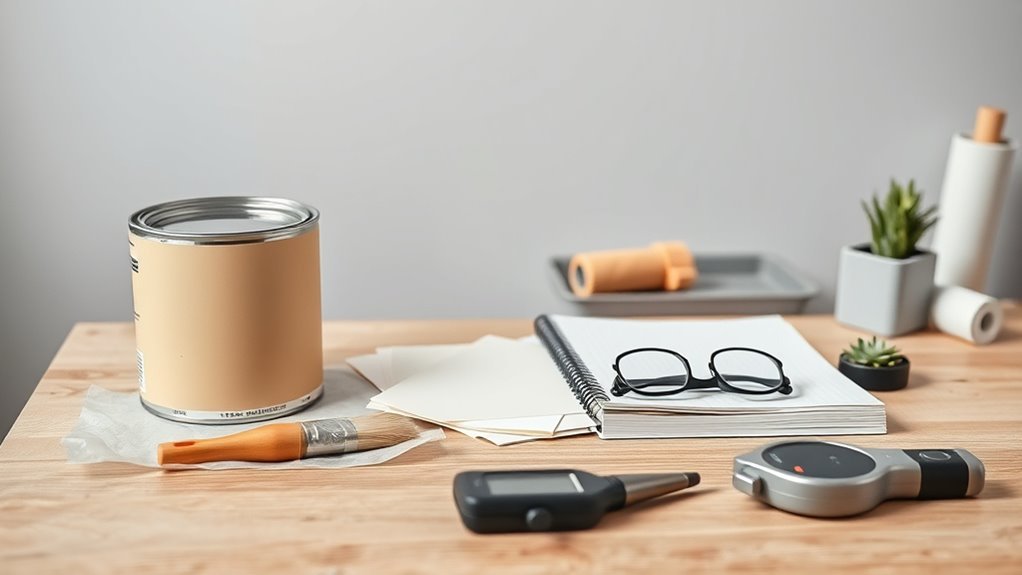
If you’re planning a painting project—whether it’s a quick touch-up, a full room repaint, or tackling exterior siding—this guide is for you. You’ll find practical drying timelines, factors that change them, and steps to check readiness before recoating or using surfaces.
It’s aimed at DIYers, renters, and pros who want reliable timing without guesswork. Use the sections to match your project type, note environmental variables, and adapt schedules. Pay attention to color mixing tips that affect drying and to paint storage advice that preserves product performance.
Refer back when conditions or materials differ from the examples.
Quick Answer: Typical Behr Dry and Recoat Times
Here’s a quick snapshot of typical Behr timings so you know what to expect.
You’ll usually see a touch-dry surface within 30 minutes to an hour.
Recoat times are commonly between 2 and 4 hours depending on product and conditions.
Full cure takes longer—often several days to weeks—so plan light use only after the recommended cure period.
Dry Time Overview
Wondering how long Behr paint will take before you can touch up or recoat? You’ll usually see surface dry in 30 minutes to 1 hour and recoat times from 2 to 4 hours for latex, longer for high humidity or low temperature. Oil-based formulas need up to 24 hours.
Expect full cure in 7 to 30 days depending on thickness and conditions.
Maintain color consistency by applying even coats and matching sheen across sections. Confirm primer compatibility—use recommended primers for faster adhesion and proper drying.
Always follow label instructions and adjust timing for ventilation and weather to avoid problems.
Touch Dry Window
Now that you know general surface and recoat expectations, let’s pinpoint the touch-dry window so you can plan recoats and light handling.
You’ll usually find Behr latex feels dry to the touch in 30 minutes to 1 hour in warm, low-humidity conditions; oil-based formulations take longer, often 4–6 hours. Test by lightly brushing a fingertip—if paint lifts, wait longer.
Texture plays a role: thicker paint or heavy nap rollers extend touch-dry time. Avoid heavy handling until touch-dry across the surface.
Note that early exposure to sunlight may influence color fading, so protect fresh finishes during this vulnerable window.
Recoat And Cure
Although exact times vary with product and conditions, Behr water‑based paints typically allow recoating after 2–4 hours and reach full cure in about 7–30 days.
While oil‑based formulas usually need 24 hours between coats and up to 30 days to fully cure.
When you plan recoats, test adhesion and surface dryness—tackiness means wait longer.
Recoat windows let you layer for color blending without lifting underlying coats.
Full cure yields maximum hardness and chemical resistance, important before heavy use.
Allow cure for texture smoothing and to avoid premature wear or finish defects.
What “Dry to Touch,” “Recoat,” and “Fully Cured” Mean
When a Behr finish is “dry to touch,” you can lightly press it without worrying about smudges, but it hasn’t reached its full strength yet.
“Recoat” time tells you how long to wait before applying another layer so the new coat bonds properly.
“Fully cured” means the paint has reached maximum hardness and durability, which can take days to weeks depending on the formula and conditions.
Dry To Touch
If you’ve ever wondered why paint can feel dry but still stain or peel later, it’s because “dry to touch,” “recoat,” and “fully cured” describe different stages of drying.
Dry to touch means the surface won’t feel tacky when you lightly press a fingertip, but solvents or moisture can still be inside. You’ll still wait before heavy use or cleaning.
Factors like temperature, humidity, color mixing accuracy, and paint storage affect this stage.
Picture these moments:
- A cool spray of dew on a painted porch
- Fingertip lifting without tack
- Cans lined neatly in a shed
- Brushes resting between coats
Fully Cured Time
You’ve felt the paint stop being tacky and maybe even applied another coat, but fully cured means something different: it’s the point when the paint has reached its maximum hardness, adhesion, and chemical resistance, and you can safely subject the surface to regular use, cleaning, and heavy wear.
Fully cured time for Behr varies—typically 7 to 30 days depending on temperature, humidity, and coat thickness. During curing, paint texture evens out and solvents finish evaporating; rushed cleaning can alter sheen or cause color fading.
Wait the manufacturer’s recommended cure period before heavy use to guarantee durability.
How to Read Behr Product Labels for Dry and Recoat Info
Although the specifics vary by formula, Behr product labels give clear dry and recoat times you can use to plan your project. Read the label’s “Dry Time” and “Recoat” lines—you’ll see hours for touch, recoat, and tack-free stages.
Check the label’s “Dry Time” and “Recoat” lines to plan — hours for touch, tack-free, and recoat stages.
Note temperature, humidity, and surface prep notes; paint color and drying pigments can slightly shift times. Follow the recommended wait to avoid lifting or uneven sheen.
- Visualize a satin wall drying to touch in an hour
- Imagine high humidity slowing tack-free time
- Picture darker paint color warming and drying faster
- See labeled icons for temperature ranges
Behr Interior Latex Paint: Dry and Recoat Times
When you’re working with Behr’s interior latex paints, expect most satin and eggshell finishes to be touch-dry within about 1 hour and ready for a light recoat in 2–4 hours under normal conditions. You’ll want to monitor humidity and temperature, since cooler or damp rooms slow cure. Stir thoroughly for consistent color blending and avoid heavy coats to preserve finish sheen. Use the table below for quick reference.
| Finish | Touch-dry | Recoat |
|---|---|---|
| Flat | 30–60 min | 2–4 hrs |
| Eggshell/Satin | ~1 hr | 2–4 hrs |
| Semi-gloss | 1–2 hrs | 4 hrs |
Behr Exterior Latex Paint: Dry and Recoat Times
Outside, Behr exterior latex usually feels dry to the touch within 30 minutes to an hour, but that’s just the start—full cure takes days to weeks depending on temperature and humidity.
You’ll usually be able to recoat after 1–4 hours in ideal conditions, yet colder or damper weather extends that window.
Keep in mind cure time affects durability and you should avoid heavy use until the paint has fully set.
Dry Time Overview
If you’re using Behr exterior latex, expect it to feel dry to the touch within about 30 minutes to an hour under ideal conditions, with a safe recoat window typically between 1 and 4 hours. Full cure can take up to 7 days depending on temperature, humidity, and airflow.
You’ll notice how color blending appears smoother as the paint levels, and the finish sheen matures slightly as solvents evaporate.
Monitor conditions: cooler temperatures and higher humidity slow drying. Protect fresh work from dew and dust. Quick checks with a fingernail help avoid smudging.
- Sun-warmed siding drying evenly
- Damp morning slowing touch-dry
- Wind aiding evaporation
- Overcast extending tackiness
Recoat And Cure
Although temperature, humidity, and airflow all affect timing, you can typically recoat Behr exterior latex within 1–4 hours for light recoats and should allow up to 24 hours for heavier builds or cooler, damper conditions.
Full cure usually takes about 7 days, so avoid heavy cleaning or placing objects against the surface until then.
When you plan recoats, sand lightly and remove dust for proper adhesion.
Keep mixed batches consistent—color mixing helps avoid shade differences between coats.
Store leftover material properly: seal cans, label with tint info, and follow paint storage guidelines to preserve performance for touch-ups during the cure period.
Behr Alkyd (Oil‑Based) Paints: Dry and Recoat Times
When you choose Behr’s alkyd (oil‑based) paints, expect a longer tack and curing window than with water‑based formulas. You’ll notice initial tack in 6–8 hours, recoat readiness around 16–24 hours, and full cure in several days to a week depending on temperature and ventilation.
Color mixing affects drying slightly; heavier pigments can tack longer, and proper brush selection matters—natural‑bristle brushes move alkyds smoothly. Work in thin coats, avoid humidity, and allow extra cure time for high‑traffic areas.
- warm workshop smell lingering
- glossy, leveling finish forming
- slow tack retreat over hours
- denser, durable film developing
How Long Behr Primer Usually Takes to Dry and Be Recoated
Because primers are formulated to grab and seal quickly, Behr primers usually become dry to the touch within 30 minutes to an hour and are ready for light sanding or recoating in about 1 to 3 hours for most water‑based products.
Oil‑based or specialty primers can take longer, often 6–24 hours to recoat. You should check surface feel and tack before recoating, and allow extra time in high humidity or low temperatures.
When prepping, protect fresh primer from dust and avoid extreme temperature swings that affect cure. Store unused primer per label directions—proper paint storage preserves performance and avoids issues with color mixing later.
Drying Times for Behr Paint‑And‑Primer‑In‑One Products
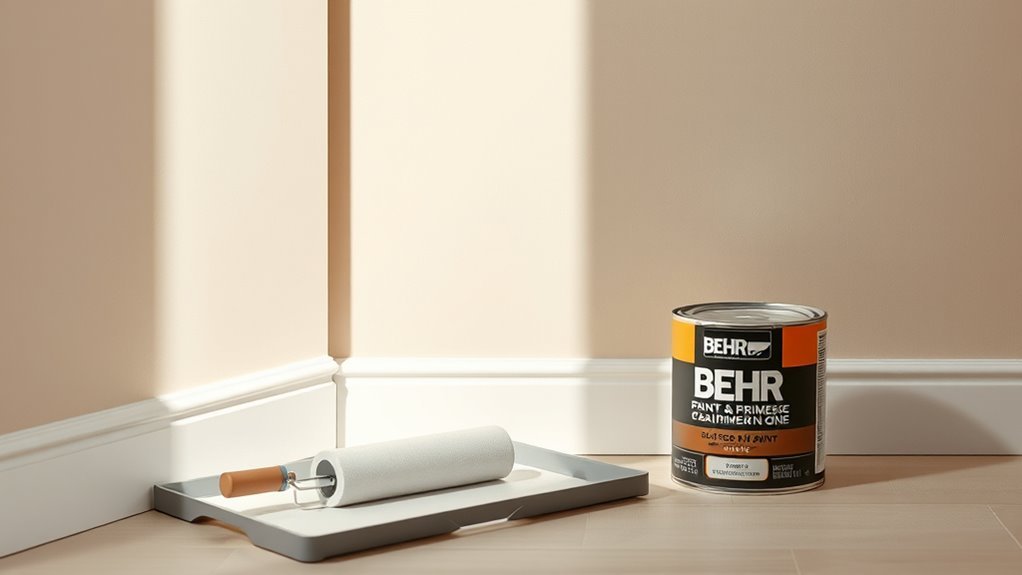
If you choose a Behr paint‑and‑primer‑in‑one, expect it to feel dry to the touch faster than traditional paints—usually within 30 minutes to an hour under ideal conditions—and to be ready for a light recoat in about 1 to 4 hours for most water‑based formulations. Heavier sheens, deep colors, or cooler, humid conditions can stretch recoat times toward the longer end.
You’ll notice surface cure is quick, but full cure can take up to 7 days. Mind ventilation and temperature. Proper color mixing guarantees uniform dry appearance. Match brush selection to sheen for smooth laydown and minimal brush marks.
- A satin wall drying under warm sun
- A deep navy taking longer to even out
- A small roller smoothing a pale tone
- A fine brush refining trim edges
How Behr Paint‑And‑Primer Formulas Differ From Separate Primer Then Paint
Having faster surface dry times doesn’t change the fact that paint‑and‑primer blends are designed differently from using a separate primer and paint. You’ll notice Behr’s combined formulas include more pigments and binders to improve color blending and adhesion in one coat, which can speed project completion.
Using separate primer then paint gives you a dedicated sealing layer that can block stains, even out porosity, and allow thinner topcoats to perform at their best.
For longevity, Behr’s blended products aim for good finish durability and convenience, while separate systems let you customize primer properties for challenging surfaces before applying the finish coat.
Do Textured or High‑Build Behr Paints Dry Differently?
When you work with textured or high‑build Behr paints, expect drying behavior that differs from standard low‑build finishes: thicker material and added texture slow water evaporation and solvent release, so surface and full cure times usually take longer.
You’ll notice Texture variation and paint consistency change how long tackiness and recoat windows last. You should plan extra drying time, thinner layers, or longer curing between coats.
Visualize the finish:
- A stippled wall holding moisture in tiny pockets.
- A heavy skim coat sagging before it firms.
- Deep grooves drying from the surface inward.
- A velvety high‑build finish feeling dry but still curing.
How Specialty Finishes (Eggshell, Satin, Semi‑Gloss) Affect Drying
Because sheen changes how paint lays and dries, eggshell, satin, and semi‑gloss finishes each behave a bit differently. You’ll notice eggshell dries with a softer, slightly porous feel, so surface cure may take a bit longer even though it’s dry to the touch quickly.
Satin balances drying speed and finish durability, offering quicker surface set and good wear resistance.
Semi‑gloss films dry fastest to a hard, smooth surface, promoting the best color retention and resisting scuffs sooner.
In all cases, temperature and humidity matter most; lower humidity and moderate heat speed cure without compromising finish durability or color retention.
How Paint Sheen Affects Recoat Time and Appearance
Sheen not only changes how paint feels and resists wear, it also affects how soon you can apply another coat and how the final appearance reads. You’ll find glossier sheens dry to touch faster but need longer before recoating to avoid lap marks.
Flatter sheens hide imperfections and let you recoat sooner for consistent color. Remember environmental factors like humidity and airflow will still influence timing.
Consider sheen when planning touch-ups or multi-coat jobs so the finish looks uniform.
- A satin wall catching soft light
- Semi-gloss trim reflecting highlights
- Eggshell masking minor flaws
- High-gloss showing every edge
How Temperature Influences Behr Paint Drying Speed
Although temperature doesn’t act alone, it plays a primary role in how fast Behr paint and primer dry, and you’ll see clear differences between cool, moderate, and hot conditions.
Temperature isn’t the only factor, but it chiefly determines how quickly Behr paint and primer dry.
You’ll notice in moderate temps (50–85°F) paint cures predictably, so recoat windows match label guidance.
Cooler air slows solvent evaporation, extending tack time; colder temps can inhibit film formation.
Higher temps speed drying but risk skin formation and trapped solvents, affecting finish and color tone — important if you’re considering color psychology for indoor spaces.
Also remember eco-friendly ingredients may alter drying profiles, so follow product-specific temp recommendations closely.
How Humidity Affects Drying and What Levels Cause Delays
When humidity is high, water in Behr paint evaporates more slowly, so you’ll notice longer tack and recoat times.
Levels above about 60% relative humidity commonly start to cause measurable delays, and anything near or above 80% can considerably prolong drying.
Increasing ventilation and using dehumidifiers helps move moisture out of the air and speed curing.
High Humidity Effects
If you’re painting in muggy conditions, high humidity slows Behr’s paint-and-primer drying by trapping moisture on the surface and in the film, so tack-free and recoat times can stretch well beyond the label’s estimates. You’ll notice longer cure times, cloudy sheen, and a higher chance of mold growth if moisture lingers.
Wet edges can soften, causing surface peeling later. To protect your work, delay heavy traffic and keep ventilation moving until the film loses excess moisture.
- beads of moisture clinging to a wall at dawn
- a soft, gummy brush stroke under a light
- dark spots encouraging mildew
- paint sagging into drips
Thresholds Causing Delays
Because moisture in the air directly slows solvent and water evaporation, you’ll start seeing delays once relative humidity climbs above about 50–60%.
At 60–70% you’ll notice tackiness lasts longer; at 70–80% surface drying can take hours longer than on dry days.
Above 85% wet film retention becomes significant, and recoating or walking on the surface risks damage.
These threshold delays force you to adjust painting schedules: plan for extra drying time, avoid wet-season application, or choose fast-dry formulations rated for higher humidity.
Monitor local RH and delay nonessential coats when readings near or exceed these critical thresholds.
Ventilation And Drying
Those humidity thresholds also interact with how well a space ventilates, so you’ll see very different drying times in a stuffy garage versus a breezy room.
You should aim for 40–50% relative humidity; above 60% drying slows, and at 75% you’ll likely need extra days. Use fans or open windows to speed solvent evaporation, especially after applying tint-rich coats that affect color blending.
Watch thin versus thick coats and keep air moving during recoats. Proper ventilation preserves finish and brush techniques, preventing dragging or sags caused by tacky paint.
- closed basement with damp air
- sunlit room with cross-breeze
- humid coastal porch
- ventilated studio with fan
How Ventilation and Airflow Change Drying and Curing Times
Proper ventilation and steady airflow speed up both the surface drying and the full curing of Behr paint by removing moisture and solvents from the area. You’ll see noticeably shorter tack-free and recoat times in a well-ventilated room compared to a stagnant one.
You should open windows, run fans, and use exhaust to keep air moving; that lowers humidity and helps solvent evaporation.
Consistent airflow also preserves color blending and promotes even sheen consistency, reducing patchy look or gloss variations.
Avoid blasting air directly on wet sections to prevent spray patterns; aim for gentle, uniform circulation until curing completes.
How Surface Type (Drywall, Wood, Metal, Masonry) Affects Behr Drying
Good airflow helps speed drying, but the surface you’re painting often has an even bigger impact on how quickly Behr paint dries and cures. You’ll notice drywall soaks a bit then skins over, while bare wood can drink paint unevenly unless sealed, affecting paint adhesion.
Good airflow helps, but the surface matters most—drywall soaks then skins over, while raw wood needs sealing for even adhesion.
Metal stays slick and may bead, so primers help bonding and faster cure. Masonry’s coarse grains hold moisture longer and can slow drying.
Consider these images as you prep:
- Unsealed drywall absorbing a thin coat
- Raw wood grain pulling paint into fibers
- Smooth metal causing beads to form
- Rough masonry trapping moisture in pores
How Porosity of the Substrate Speeds or Slows Drying
Because porous materials pull solvent and water into their pores, they usually let Behr paint dry faster on the surface but can trap moisture deeper down, causing uneven cure times. You’ll notice porosity effects immediately: highly porous drywall or untreated wood soaks up solvent, thinning the film and speeding surface drying while substrate absorption can leave hidden dampness.
Less porous surfaces like metal repel absorption, so drying stays surface-level and slower. To manage this, you should seal very porous substrates or allow extra ventilation and drying time to guarantee the entire film cures uniformly, not just the top layer.
How Coat Thickness and Number of Coats Impact Dry Time
If you apply thicker coats or stack multiple layers, you’ll slow drying and extend cure time because solvents and water take longer to evaporate through the film. You should apply moderate, even coats to balance drying speed with Color blending and Finish durability.
Thicker films trap moisture, increasing tack time and risk of runs; multiple thin layers let each level set faster and bond better.
Thicker films trap moisture and tack; thin, even layers set faster, bond better, and resist runs.
- A globby brush stroke sagging under its own weight
- A roller loaded until it beads on the surface
- Successive wet-on-wet passes that blur edges
- Smooth thin layers building a resilient sheen
Measure recoat windows and wait fully before stressing.
How Undercoats, Stains, or Previous Finishes Change Drying Needs
Once you’ve controlled coat thickness and layering, look at what’s already on the surface—undercoats, stains, and old finishes change how quickly paint dries and cures.
If a glossy old finish remains, reduced absorption slows drying; matte or porous substrates soak up solvents, speeding surface dry but risking uneven sheen and longer cure. Stains can bleed through or alter solvent balance, so use compatible primers.
Low-porosity materials and high Paint sheen choices may need longer flash times between coats. Always prep by sanding or deglossing to adjust surface porosity and guarantee predictable drying and uniform appearance.
When to Do a Touch Test vs. Following the Label Times?
You should use the label’s drying and recoat times as your baseline, since they’re tested under controlled conditions.
When humidity, temperature, or previous finishes differ from the label conditions, do a gentle touch test to confirm the surface is dry to the feel before recoating.
Remember that a “dry to the touch” surface can still need more time to cure, so weigh both the label’s guidance and your touch test results.
When To Touch Test
Although label times give a solid baseline, you’ll want to do a touch test before rushing into additional coats or handling painted surfaces. Trust your fingers: lightly press a hidden corner after the minimum label time, noting tackiness.
Consider paint color and drying temperature—darker hues and cooler air often feel tackier longer. If it’s dry to the touch but soft under pressure, wait. Repeat every 15–30 minutes until firm.
- Dab a fingertip on a trim corner
- Press gently, don’t scrape
- Check in different light and spots
- Note room humidity and airflow
Label Drying Versus Feel
Feeling the paint gives you real-time feedback, but the label provides a tested guideline you shouldn’t ignore. You can do a gentle touch test for tackiness, yet follow label times for full cure and color matching accuracy. Trust feel for quick checks; trust the label for sanding, recoating, and final paint sheen decisions. If feel and label conflict, prioritize the label—it accounts for chemistry, not just surface dryness. Use touch tests selectively after the minimum label time and in areas where sheen looks right.
| Test | Use | When |
|---|---|---|
| Touch | Tackiness | After label time |
| Label | Cure/Recoat | Always |
| Visual | Sheen/Color matching | After label time |
Factors Affecting Touchibility
Because several variables change how quickly paint loses tack, you’ll want to weigh surface type, temperature, humidity, and coat thickness before doing a touch test.
You should trust label times for full cure but use a gentle touch test to confirm tack, especially when color blending or finish sheen might mask dryness.
Test in an inconspicuous spot, wait the label’s minimum, then press lightly with a clean fingertip. If it lifts or smudges, wait longer.
- A rough cedar deck after stain
- A glossy cabinet with fresh color blending
- A damp bathroom wall
- A thick roller-applied coat
How to Plan a Painting Timeline Using Behr Dry and Recoat Times
When you plan a painting timeline with Behr, factor in both the paint’s touch-dry times and the manufacturer’s recoat window so you can schedule prep, coats, and breaks without delays. You’ll map tasks: surface prep, first coat, wait for touch-dry, recoat within the window, then final cure. Track humidity and temperature to protect color consistency and follow paint storage guidance between sessions. Use the table to break a day-by-day plan.
| Task | Timeframe |
|---|---|
| Prep | 2–4 hours |
| First coat | 1–2 hours |
| Wait (touch-dry) | 30–60 minutes |
| Recoat window | 1–4 hours |
Speed Drying Safely: Heat, Fans, and Dehumidifiers
You’ve scheduled coats around Behr’s touch-dry and recoat windows, but you can also speed drying safely with controlled heat, increased airflow, and dehumidification so you don’t wait longer than necessary. Use gentle, consistent warmth—avoid portable heaters that blast hot air—and position fans to move air across surfaces without creating dust.
A dehumidifier pulls moisture from the room for steadier curing. Mind color mixing and brush selection: thicker pigments or heavy nap rollers change drying behavior.
Visualize the setup:
- Low heat source warming the ceiling
- Oscillating fan moving air along walls
- Compact dehumidifier near the painted area
- Proper brush resting on a clean tray
How to Reduce Humidity to Help Behr Paint Dry Faster
You can speed Behr paint drying by improving air circulation and pulling moisture out of the room. Open windows or use fans to move air across the painted surface.
Run a dehumidifier to lower indoor humidity. Both steps cut drying time and help the paint cure more evenly.
Improve Air Circulation
Although lower humidity’s the main game, boosting air circulation gets that moisture out of the drying paint faster. Open windows, run ceiling fans, and position box or exhaust fans to create a steady cross-breeze that replaces humid indoor air with drier outside air.
You’ll speed paint evaporation and reduce tackiness by directing airflow across freshly coated surfaces. Keep fans low to avoid dust, and rotate work areas so each wall gets even drying.
Visualize the movement:
- A window fan pulling damp air out into a bright backyard
- A ceiling fan humming above a newly painted living room
- A box fan angled down a hallway
- A doorway funneling breeze between rooms
Use Dehumidifiers
When humidity’s high, running a dehumidifier pulls moisture from the air so Behr paint can set and cure faster. You’ll place the unit in the painted room, close windows and doors, and run it until relative humidity drops below 50%. That speeds surface drying and reduces tackiness, letting you recoat on schedule.
Monitor levels with a hygrometer and move the dehumidifier as needed. For best results, avoid storing paint cans in damp areas; proper paint storage prevents contamination that affects drying and color mixing.
Empty condensate regularly and follow manufacturer guidance to keep equipment effective and safe.
When to Avoid Accelerating Drying (Cracking, Orange Peel, Adhesion)
If you rush drying in certain situations, you’ll invite problems like cracking, orange peel texture, and poor adhesion that are harder to fix than waiting for natural cure.
Rushing paint drying invites cracking, orange-peel texture, and poor adhesion—wait the full dry time for lasting results.
You should avoid using heat guns, strong fans, or low-humidity tricks on fresh coats, especially when Painting safety concerns or delicate Color selection require care. Accelerated drying stresses film formation and traps solvents, causing defects.
- a bubbled wall with tiny ridges
- a brittle patch that flakes under a fingernail
- uneven sheen where color looks blotchy
- a seam where new paint peels away
Wait for recommended dry times to guarantee durability.
Best Practices for Applying Thin, Even Coats With Behr Products
Before you start painting, make sure the surface is clean, dry, and sanded smooth so paint adheres evenly.
Use the right brush or roller and load it sparingly, working in long, consistent strokes to lay down thin coats.
Let each coat dry to Behr’s recommended time before lightly sanding and applying the next.
Proper Surface Preparation
Although paint quality matters, proper surface prep lets you apply thinner, more even coats that dry correctly and hide fewer imperfections. You’ll start by cleaning, sanding, and repairing surfaces so paint texture lays smooth and color consistency isn’t ruined by dust or grease. Prime patched or porous areas to balance absorption. Remove loose paint and fill gaps; let repairs cure fully before coating. Mask edges for crisp lines. Work in recommended temperature and humidity for Behr products so each thin coat bonds evenly and dries on schedule.
- A sanded, smooth door ready for primer
- A dust-free, wiped wall surface
- Filled nail holes, cured and smooth
- Taped, protected trim and windows
Using Correct Brushwork
Want brushstrokes that disappear into a smooth, even finish? You’ll load your brush sparingly, tapping off excess to lay thin, uniform coats that dry faster and avoid runs.
Work with the grain or direction of the surface, maintaining a wet edge to prevent lap marks and guarantee subtle color blending between strokes.
Use long, steady strokes and feather the final pass for seamless coverage.
After each session, follow proper brush maintenance: clean brushes promptly with the recommended solvent, reshape bristles, and store upright.
Proper technique and care save time and improve your Behr finish.
How Long to Wait Before Moving Furniture or Rehanging Pictures
Once the Behr paint feels dry to the touch, give it extra time before moving furniture or rehanging pictures—typically 24 to 48 hours for light use and up to 7 days for heavy items or frequent contact. You’ll protect fresh Color consistency and avoid impressions from weight or sudden rubbing.
Wait 24–48 hours before light use and up to 7 days for heavy items to protect the fresh finish.
Check edges and corners; touch lightly before leaning pieces. Remember Brush selection earlier affects finish smoothness and drying uniformity, so be cautious.
- A lamp base gently set on a nightstand
- A framed photo you’ll hang at eye level
- A bookshelf you’ll slide into place
- A heavy dresser with metal feet
When It’s Safe to Clean Painted Surfaces and Wash Brushes
You can tell a surface is still tacky if it feels slightly sticky to the touch or shows fingerprints.
Wait until the paint is no longer tacky before cleaning the area—usually the same 24–48 hour window for light cleaning, but follow the product’s recoat and cure guidelines for heavier scrubbing.
For brushes and rollers, rinse immediately after use with warm soapy water (for latex) or the appropriate solvent, then let them dry thoroughly before storing.
When Surfaces Are Tacky
Although the paint may feel dry to the touch after a couple of hours, tackiness usually means solvents are still evaporating and the film hasn’t fully set, so hold off on heavy handling. You’ll avoid smudges, uneven paint texture, and ruined color matching by waiting. Light dusting is okay, but don’t scrub or wash yet.
Check tackiness by gently touching an inconspicuous spot; if it lifts or feels sticky, delay cleaning.
- Run a fingertip along a door edge and note resistance.
- Press a paper towel lightly—does it snag?
- Inspect sheen for dull patches.
- Smell lingering solvent odors.
Safe Time To Wash
When the paint feels fully dry and no longer tacky, it’s safe to start washing nearby surfaces and cleaning brushes.
You should wait the manufacturer’s recommended dry time and consider weather conditions—humidity and temperature can extend curing even after surface dryness.
Test a hidden spot before wiping large areas.
Use gentle cleaners and avoid scrubbing too hard until paint cures fully.
For brushes, follow label instructions for solvent or soap cleaning and dry them thoroughly before storing.
Proper paint storage keeps leftover primers and paints usable for touch-ups; seal lids tight and store in a cool, dry place away from freezing.
Cleaning Tools Timeline
If the paint feels dry to the touch and follows the label’s recommended dry time, you can start planning to clean nearby surfaces and wash brushes. Keep in mind that full cure can take longer, so proceed gently.
You should wait the minimum recoat time before heavy cleaning to avoid disturbing color blending or altering the finish sheen. Light wiping with a damp cloth is fine after touch-dry; solvent or vigorous scrubbing should wait until cured.
Clean brushes immediately after use per product instructions to preserve bristles. Check edges and high-gloss areas for tackiness before deep cleaning.
- A soft cloth gliding over paint
- Bristles rinsing clear water
- Tape lifted without streaks
- Light reflection on sheen
How to Handle Cold‑Weather Painting With Behr Products
Because cold slows drying and can affect adhesion, you’ll need to adjust timing and technique when using Behr paints and primers in chilly conditions. Work when temperatures are within product recommendations, typically above 35–50°F, and monitor humidity.
Use slow-drying paint additives only if recommended by Behr to improve flow and leveling; avoid unauthorized solvents.
Keep cans warm indoors before application to aid color matching and consistency. Preheat and clean surfaces, ensuring they’re dry and frost-free.
Extend drying and recoat times—sometimes double—while using heaters or tenting cautiously to raise ambient temperature without introducing fumes or condensation.
How to Handle Hot‑Weather Painting With Behr Products
When painting in hot weather, plan to work in the cooler morning or late afternoon and thin your coats so they level without trapping brush marks.
Faster drying can be good, but it shortens open time, so keep sections small and use shade or a pop-up canopy to slow cure when needed.
Stay hydrated and take breaks to avoid rushed mistakes.
Plan Cooler Work Times
Though hot days speed up drying, they can also cause blistering, lap marks, and uneven sheen, so plan your Behr painting for cooler parts of the day. You’ll get more control over Color blending and Finish gloss when temperatures drop. Work early mornings or late afternoons, watch humidity forecasts, and avoid direct midday sun on walls.
Move manageable sections into shade and take short breaks to reassess wet edges. Visualize the result:
- A shaded siding strip drying evenly
- Soft morning light revealing true color
- Even sheen across a living room wall
- A smooth gradual change between painted panels
Thin Coats, Faster Drying
If temperatures climb, keep your Behr application thin so each coat dries quickly and evenly; thin layers reduce sagging, lessen lap marks, and let you add follow-up coats within the recommended recoat window. You’ll control paint texture and preserve color consistency by using thin passes with a quality brush or roller, working fast across sections. Monitor edges to avoid overlap sheen. Use light, even pressure and maintain wet edges; thin coats also cut drips and uneven buildup. Refer to this quick guide:
| Surface | Coat Thickness | Dry Time |
|---|---|---|
| Trim | Thin | Faster |
| Wall | Thin | Faster |
Hydration And Shade Tips
Keeping coats thin helps them dry faster in heat, but you also need to manage hydration and shade to protect both the paint and yourself. You’ll keep color consistency by painting in shaded areas or during cooler morning/evening hours. You’ll preserve the finish by ensuring proper surface preparation before you start.
Drink water, take regular breaks, and don’t rush application when temperatures spike. Use temporary shade cloth or umbrellas to slow drying on exposed sections and avoid lap marks.
- A cooled porch under a canopy
- A damp hat and water bottle at hand
- A prepped, clean, dust-free wall
- A shaded ladder spot
Troubleshooting Slow Drying: Common Causes and Fixes
When your Behr paint seems to stay tacky far longer than expected, a few common issues usually cause the delay — high humidity, low temperatures, thick application, poor ventilation, or dirty surfaces.
Check humidity and heat; use a dehumidifier or warm the room to speed curing. Thin coats and follow manufacturer recoat times.
Improve airflow with fans and open windows. Clean and prime grimy surfaces before painting.
Beware improper color mixing and old paint storage—both can alter drying chemistry.
If problems persist, test a small area with fresh product or consult Behr support to avoid wasting time and materials.
Troubleshooting Tacky or Soft Paint After Recommended Dry Time
Although you’ve waited the recommended time, paint can still feel tacky or soft for several reasons, and you’ll need to isolate the cause before reworking the finish. First check humidity, temperature, and ventilation; slow curing often follows damp or cool conditions.
Older cans or poor paint storage can degrade binders, slowing set time. Additives or wrong primer/topcoat combos and recent color matching adjustments can alter drying.
Test a small area: scrape a corner, smell for solvents, and note texture.
- Damp basement, cool air pooling
- Can with rusted lid or bloated sides
- Fresh tint lines, uneven shade
- Fingerprints leaving slight impressions
What to Do if Paint Bubbles, Wrinkles, or Peels During Drying
If your paint starts to bubble, wrinkle, or peel while drying, stop adding coats and assess the area before doing more work. Check for high drying humidity or lingering paint smell — both signal trapped moisture or solvents. Gently lift a loose area; remove all failed film, sand edges smooth, and let substrate fully dry. Prime exposed spots if needed, using a compatible primer. Repaint only when conditions are right: low humidity, good ventilation, and correct temperature.
| Issue | Quick Fix |
|---|---|
| Bubbles | Pop, smooth, dry |
| Wrinkles | Sand, dry |
| Peels | Remove, prime |
| Odor | Ventilate, wait |
How to Test Adhesion and Cure for a Reliable Finish
Before you commit to another coat or reinstallation, test adhesion and cure so you know the finish will hold up. You’ll gently press, flex, and scratch a small, hidden area after the topcoat has dried to touch.
Evaluate firmness, tack, and whether color transfer occurs; proper Color mixing and consistent Brush techniques improve results. If paint resists abrasion and doesn’t peel, it’s cured enough for light use.
If it smears or flakes, wait longer or retest. Use these quick checks to avoid failures:
- Fingernail scratch on an inconspicuous corner
- Tape pull test on a painted edge
- Light bend on thin trim
- Rub with a soft cloth
When to Sand Between Coats and How Long to Wait
You should wait until the paint is dry to the touch and has cured enough to resist gumminess—typically 1–2 hours for recoat and up to 24 hours for a firmer cure depending on temperature and humidity.
When sanding, use fine-grit paper (220–320) and light pressure to scuff the surface without cutting through the finish. Proper timing and gentle technique will keep edges smooth and promote strong adhesion for the next coat.
When To Sand
When the first Behr coat feels dry to the touch and no longer tacky, it’s time to decide whether to sand. Light sanding between coats smooths imperfections and helps the next layer adhere.
You’ll sand if you see brush marks, drips, or uneven color blending, or if paint consistency left slight texture.
Wait until the surface resists fingerprints but isn’t fully cured—usually after the recommended tack-free interval—then sand lightly with fine-grit paper and remove dust before recoating.
Visualize the finish:
- A satin wall, uniformly smooth
- Feathered edges at trim lines
- Tiny raised drips leveled
- Even color transition across panels
Proper Drying Time
Light sanding prepares the surface, but correct drying intervals determine whether your next coat will bond and look smooth. You’ll wait until the paint feels dry to the touch—usually one hour for Behr’s latex—but resist sanding until it’s dry enough to prevent gumminess.
For recoating, follow the label: often two to four hours between coats at moderate temperatures, longer in cold or humid conditions.
When doing color blending or paint mixing, confirm each layer cures fully so hues layer predictably. Test a small patch: if the topcoat drags or peels, extend drying time before sanding and reapplying.
Sanding Technique Tips
Although timing varies with temperature and humidity, plan to sand between coats only after the paint has fully set—typically 2–4 hours for Behr latex under moderate conditions—and longer in cool or damp environments.
You’ll sand lightly with fine grit (220–320) to remove dust nibs and improve adhesion; don’t rush or you’ll cut through the finish. Wipe with a tack cloth, inspect under good light, and proceed when the surface feels smooth.
Consider eco friendly options for cleanup and sanding dust control, and remember that even subtle color mixing can show through if you over-sand.
- Smooth, satin surface under a lamp
- Tiny dust specs on fingertips
- Fine grit sanding block glide
- Tacky cloth lifted lint-free
How to Choose Between Primer‑First and Paint‑And‑Primer Options
Deciding whether to prime first or use a paint‑and‑primer combo depends on the surface condition, the color change you’re making, and how durable you need the finish to be.
Decide between priming or a paint‑and‑primer based on surface condition, color change, and needed durability.
If you’re covering bare drywall, stains, or drastic color shifts, prime first for better adhesion and uniformity. For minor color tweaks or well‑sealed surfaces, a paint‑and‑primer will save time.
Consider durability needs: high‑traffic areas benefit from separate primer plus topcoat.
Also factor in color mixing—tinting primer or paint can affect opacity—and proper paint storage to keep primers and combos usable for touchups.
Choose based on surface, coverage, and longevity.
How to Estimate Total Project Time for a Room Using Behr Paints
When planning a room paint project with Behr products, start by breaking the job into measurable steps—prep, priming (if needed), painting each coat, and cleanup—and estimate time for each based on room size, surface condition, and the specific Behr formula you’re using.
Add minutes for Color mixing and drying between coats; note that heavier textures need more prep and sanding. Choose Brush selection and roller naps to match sheen and surface for efficient coverage. Add buffer for ventilation and touchups.
Sum tasks to get total hours, then convert to days considering realistic work windows and drying intervals.
- Emptying furniture and taping
- Sanding and patching
- Mixing paint and loading brushes
- Waiting between coats and inspection
How Paint Color and Pigment Load Affect Drying and Coverage
Because darker, more heavily pigmented Behr colors pack more solids into each coat, they generally take longer to dry and may require extra coats to achieve full, uniform coverage. Lighter tints dry a bit faster and often cover more evenly on the first pass.
You’ll notice denser pigments slow solvent evaporation and can trap moisture, so plan longer recoat times for deep hues. Check manufacturer notes for pigment stability—unstable pigments may shift or thin out during drying, increasing the risk of color fading or uneven sheen.
Test samples on your surface to confirm coverage, drying time, and final appearance before committing.
How to Dry and Store Leftover Behr Paint and Primers Properly
After you’ve tested colors and noted drying behavior, you’ll want to handle leftovers so they stay usable. Seal cans tightly, wipe rims, and store upright in a cool, dry place away from temperature extremes. Label containers with date and color notes to help future color blending. Strain before reuse to remove skin or debris.
Keep small amounts in airtight jars for touch-ups and press plastic wrap onto paint surface before sealing to reduce skinning.
Clean brushes immediately for proper brush maintenance and store them dry. Check stored primer for separation—stir thoroughly before application.
- a sealed metal can on a shelf
- a jar with clear plastic wrap over paint
- a cleaned brush hanging to dry
- a labeled can with a handwritten date
How to Prepare Surfaces to Minimize Rework and Drying Delays
If you prep surfaces properly, you’ll cut down on drying delays and avoid costly rework by ensuring paint and primer bond evenly the first time.
Start by cleaning to remove grease, dust, and surface contamination; use TSP or a mild detergent, then rinse and dry.
Sand glossy areas for adhesion and wipe away residue with a tack cloth.
Repair cracks and fill holes, then prime bare or repaired spots to unify porosity.
Check substrate temperature and humidity—simple environmental controls like closing open windows and avoiding direct sun help.
Allow recommended cure times before recoating to prevent adhesion failures and uneven drying.
Tools to Speed Drying and Control Conditions: Fans, Heaters, Dehumidifiers
You can speed drying by placing fans to move air across freshly painted surfaces, but point them to promote even airflow rather than direct blasts that can cause dust to settle.
If temperatures are low, use controlled, indirect heat to raise ambient warmth without overheating the paint or fumes.
And keep indoor humidity in check with a dehumidifier so solvent evaporation stays efficient and drying times stay predictable.
Use Fans Strategically
While paint cures on its own, you can speed surface drying and reduce tackiness by directing airflow with fans. Focus on Fan placement and Airflow management: position fans to move moist air away from the painted surface, not blast it directly, and create a gentle cross-breeze. You’ll cut drying times and avoid uneven finish.
- A box fan at a doorway pushing humid air out
- A oscillating fan creating a soft sweep across the wall
- A small clip-on fan aimed along the surface, not at the paint
- Two fans set to draw air across the room for steady circulation
Apply Controlled Heat
After getting airflow right with fans, adding controlled heat will further shorten surface drying and help inner layers cure more consistently. You’ll use heat application carefully: aim for gentle, even warmth to avoid blistering or uneven gloss. Position portable heaters so they don’t blast one spot, and monitor temperature with a thermometer. This environmental control approach speeds drying without forcing defects. Keep heaters at safe distances, watch for fumes, and combine with fans for balanced circulation. Below is a quick tool-guide to help you plan.
| Tool | Use |
|---|---|
| Portable heater | Gentle, even warmth |
| Thermometer | Monitor temp |
| Fan | Circulate air |
| Timer | Track cycles |
| Safety gauge | Prevent overheating |
Manage Indoor Humidity
Because moisture in the air slows solvent evaporation, controlling indoor humidity is one of the fastest ways to speed Behr paint and primer drying. Use a dehumidifier to pull excess moisture while fans and heaters keep air moving and warm.
You should monitor relative humidity—ideally 40–50%—and position fans to circulate air across painted surfaces without blasting dust or disturbing tacky edges. Remove indoor plants temporarily, since transpiration raises humidity.
Keep doors open for cross-ventilation and test small patches before committing to a full room, because paint color and temperature interactions can affect perceived drying time.
- Dehumidifier hum in the corner
- Oscillating fan near the wall
- Portable heater on low
- Cup of condensation collecting water
Safety Considerations When Accelerating Drying (Ventilation, VOCs)
If you speed up Behr paint’s drying by raising temperature or airflow, remember to prioritize ventilation and VOC exposure—open windows, run fans, and, if available, use an exhaust fan to push fumes outside.
You’ll also want to limit heat spikes that can alter chemical reactions in the paint, causing skin irritation or smell intensification. Wear a respirator rated for VOCs if ventilation’s imperfect, and keep children and pets away until fumes dissipate.
Avoid low-quality heaters that emit additional pollutants. Let pigment settling occur naturally; forcing rapid cure can cause uneven color or film defects, so balance speed with safety.
How Professional Painters Manage Drying Times on Large Jobs
When you’re handling a large job, professional painters plan drying time into every step—scheduling coats, staging crews, and controlling environment so work moves steadily without costly rework. You’ll see them sequence tasks, measure humidity and temp, and rotate teams so each coat cures before the next touch.
They balance open windows, dehumidifiers, and low-heat fans to speed safe drying while avoiding blushing or tackiness. Color mixing gets done off to the side so wet work isn’t interrupted, and meticulous brush cleaning keeps edges crisp.
You’ll notice labeled buckets, taped-off zones, and timed checklists to keep progress predictable.
- Labeled paint buckets lined up
- Fans and dehumidifiers humming
- Painters wiping crisp edges
- Timed checklists on clipboards
When to Call a Pro: Signs Your Project Needs Expert Help
If you’re seeing visible paint defects like bubbling, cracking, or uneven sheen, it’s time to think about calling a pro.
If odors don’t fade after the recommended drying and airing time, a professional can identify off-gassing sources and ventilation problems.
And if delays are pushing your project past deadlines, hiring an expert can get work back on schedule without compromising quality.
Visible Paint Defects
Although small imperfections are normal on DIY jobs, some visible paint defects mean you should call a pro—especially if you see widespread blistering, cracking, peeling, severe lap marks, or persistent runs that don’t sand out. You’ll want an expert if issues suggest poor paint consistency, substrate failure, or application mistakes beyond simple touch-up.
A pro can diagnose adhesion problems, moisture sources, or incorrect prep and recommend remediation rather than more coats. Visual red flags include texture and coverage problems that recur after repairs.
- Bubble clusters across a wall
- Long, deep cracks along trim
- Large peeled sheets revealing substrate
- Heavy, shiny runs that resist sanding
Persistent Odor Issues
Because lingering paint smell can signal a deeper problem, you shouldn’t shrug off persistent odors after a project—especially when they won’t fade after proper ventilation and time. If you still notice strong odor issues days or weeks later, call a pro.
They’ll inspect for trapped solvent in drywall, improper curing, or hidden contamination causing off-gassing. Professionals use targeted smell removal techniques—air exchangers, activated carbon, ozone only when safe, and replacing affected materials.
Don’t keep guessing: persistent smells can indicate health risks or material failure. A timely expert evaluation prevents ongoing exposure and costly repairs down the line.
Project Timeline Delays
When your painting schedule starts slipping—wet coats taking longer to dry, recoat windows getting pushed back, or contractors repeatedly rescheduling—you should consider bringing in a pro; they’ll pinpoint the cause and help get the project back on track. You’ll know it’s time if humidity, surface prep mistakes, or improper ventilation stall progress.
A pro diagnoses issues fast, adjusts drying conditions, and saves your chosen paint color from damage while advising on cleanup and brush cleaning best practices. Don’t wait until deadlines slip more; call an expert to restore momentum and protect your investment.
- Damp drop cloths and smeared trim
- Buckling edges near windows
- Paint color shifting under poor light
- Tacky brushes left overnight
Quick Checklist: Ready‑to‑Recoat and Ready‑to‑Use Signs for Behr Paint
If you’re checking paint for a second coat or to put furniture back, look for clear visual and tactile cues that tell you it’s ready-to-recoat or ready-to-use. You’ll also consider Environmental impact and Color selection when planning recoat timing—low-VOC dries similarly but check label. Use this quick checklist and table to confirm readiness.
| Sign | What to check | Action |
|---|---|---|
| Dry touch | No tackiness | Wait if sticky |
| Uniform sheen | Even gloss/matte | Recoat if consistent |
| No imprint | Finger test leaves none | Safe to use |
| Smell | Faint odor only | Ventilate if strong |
| Edge lift | No peeling edges | Sand before recoating |
Scenario Guide: Dry Times for Common Projects (Trim, Ceilings, Siding)
Although drying times vary with surface and conditions, you can use clear benchmarks to plan your trim, ceiling, and siding projects so you know when it’s safe to recoat or return items to service.
Although drying times vary, clear benchmarks help plan trim, ceiling, and siding projects for safe recoating and return to service.
For trim, expect touch‑dry in 1–2 hours, recoat in 2–4 hours.
Ceilings often need 2–4 hours touch‑dry, 4–6 hours recoat because of reduced airflow.
Exterior siding can be touch‑dry in 1–2 hours but needs 24 hours before full service if humid.
Mind color mixing effects on film thickness and allow proper paint storage between coats to maintain performance.
- Freshly cut trim pieces
- Painted popcorn ceiling
- Sun‑baked siding
- Damp evening humidity
Quick Comparison to Other Brands’ Dry Times
Because drying times hinge on formulation and conditions, you’ll find Behr’s touch‑dry and recoat windows generally sit in the same range as major competitors but can be faster on some water‑based products and slower on heavy‑bodied primers.
When you compare brands, note that acrylic latex options often match Behr for quick recoat, while oil‑based systems usually take longer.
If you prioritize color blending, test samples side‑by‑side to see how pigments level and dry. Also check VOC ratings — many Eco friendly formulas dry comparably fast now.
You’ll choose based on substrate, weather, and how soon you need full cure.
Common Myths About Paint Drying Times Debunked
Comparing brands and formulas gives you real-world expectations, but it won’t clear up common misconceptions about drying times. You shouldn’t assume faster touch-dry equals ready-for-recoat; solvents may evaporate while deeper curing continues. Humidity and temperature, not brand hype, control cure speed.
Thin coats dry more evenly than thick ones, so you can manage Color blending without rushing. Texture techniques can change surface dryness perception, but they don’t speed chemical cure.
- A damp room that smells faintly of paint
- A satin wall that looks dry but dents slightly
- A textured finish holding moisture in crevices
- A glossy patch that skins over prematurely
Practical Final Tips to Avoid Delays and Get a Perfect Behr Finish
When you’re wrapping up a Behr paint job, plan each step so drying and curing don’t hold you back: work in thin, even coats, monitor temperature and humidity, and wait the full recoat and cure times on the can before heavy use.
You’ll avoid tacky finishes by keeping fans slow, doors cracked, and dust off surfaces. Choose primer selection that matches substrate and stain-blocking needs to speed adhesion.
For tricky shades, test color blending on a scrap and let samples fully cure before committing. Walk the room under different light, correct imperfections, then let the finish harden per the label.
Frequently Asked Questions
Can Behr Paint Be Layered Over Oil-Based Paint Without Special Prep?
No, you shouldn’t; you’ll need special prep. For color consistency and proper adhesion, you’ll sand, clean, and use a suitable primer. Application techniques like feathering edges and thin coats will guarantee an even finish.
Do Paint Additives (Extenders, Retarders) Change Behr’s Warranty Coverage?
Birds of a feather, you shouldn’t assume paint additives void warranty coverage; you’ll want to check Behr’s specific warranty coverage terms because using extenders or retarders can affect performance and might alter warranty eligibility.
How Do Uv-Index and Direct Sunlight During Drying Affect Outdoor Behr Paints?
Directly, UV impact and sun exposure speed surface drying but can cause skin forming, faster curing, fading, chalking, and reduced adhesion; you should paint in moderate UV, avoid peak sun, and use UV-resistant Behr formulas for protection.
Will Tinting Behr Base Paints at the Store Alter Dry and Recoat Times?
Yes — tinting Behr base paints at the store can change drying and recoat times; you’ll notice slight shifts in paint texture and drying temperature sensitivity, so allow extra cure time and follow manufacturer recoat recommendations.
Are There Fda/Food‑Surface Guidelines for Behr Paints Used in Kitchens?
Yes — you’ll want to play it safe: Behr isn’t FDA‑certified for direct food contact, so follow Food safety guidance and Surface cleaning routines, cure fully, use approved finishes, and avoid placing food directly on painted surfaces.
Conclusion
You’ve got the basics down, and now you’re ready to paint with confidence. Follow Behr’s dry-to-touch and recoat guidelines, check the label, and adjust for temperature and humidity so your finish sets like clockwork. Treat trim, ceilings, and siding differently, and don’t rush curing—mistakes are easier to fix than a ruined coat. With patience and the right conditions, your Behr project will come out smooth and durable, like a well-tuned instrument.