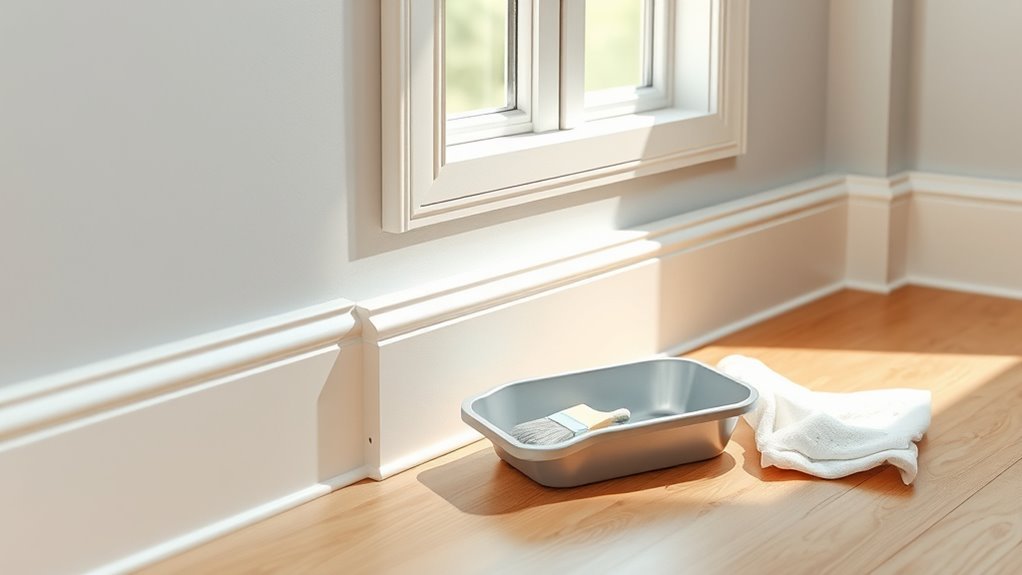
How Long Does It Take for Trim Paint to Dry
You’ll usually find trim paint dry to the touch within 1–4 hours for latex and 8–24 hours for oil-based; water‑based enamels can feel tack‑free in 30 minutes to 2 hours. Recoat windows run 2–4 hours for latex and 8–24 for oils, but full cure—maximum hardness and resistance—takes days to weeks depending on temperature, humidity, and coat thickness. Follow manufacturer times and tests for handling, and keep reading to learn practical tips and troubleshooting.
What People Searching “Trim Paint Dry Time” Want to Know
When you search “trim paint dry time,” you’re usually trying to know how long before you can recoat, handle, or reinstall trim without damaging the finish. You want clear expectations for tack-free moments, recoat windows, and full cure so you don’t smudge paint or misjudge color matching between coats.
You’re thinking about humidity, temperature, and product type because they affect drying speed and final sheen. You also care about texture smoothing—whether brush strokes will level out or require sanding.
Practical tips you seek include test spots, manufacturer guidance, and waiting longer when conditions are uncertain.
Quick Answer: Typical Trim Paint Drying and Curing Times
Quick answer: drying time is when paint feels dry to the touch, while curing is when it reaches full hardness and chemical resistance.
How fast that happens depends on paint type, temperature, humidity, and coat thickness.
You can usually recoat within a few hours for latex or after 24 hours for oil-based paints, but wait several days to a week before heavy use.
Dry Time vs. Curing Time
Although paint may feel dry to the touch within a few hours, trim typically needs days to fully cure, and you should plan accordingly for handling, cleaning, or reinstalling moldings.
Dry time means surfaces are non-tacky and you can lightly touch them; curing time means solvents have evaporated and the finish reaches full hardness.
You’ll notice color consistency improves as the paint cures, so avoid final assessments too soon.
Use proper brush techniques to minimize uneven film thickness, which can lengthen curing.
Be patient: treating dry and cured as the same risks fingerprints, dents, or finish failure.
Factors That Affect Drying
Because several variables interact, you’ll see a range of dry and cure times for trim paint rather than a single answer.
Temperature, humidity, and airflow speed drying; warm, low-humidity, well-ventilated spaces dry faster.
Paint type matters: oil-based films cure slower than water-based.
Film thickness and number of coats extend drying and cure times.
Surface prep and primer choice influence absorption and adhesion.
Your brush techniques affect film uniformity—heavy brushing or poor strokes can leave thicker areas that take longer.
Color matching can require extra coats for opacity, adding time.
Plan dry and cure schedules around these controllable factors.
When To Recoat Or Use
Now that you’ve seen how temperature, humidity, paint type, and technique affect drying, here’s a quick guide on when you can recoat or start using trim paint.
For latex, wait 2–4 hours between coats; for enamel or oil-based, wait 8–24 hours. Touch-dry happens sooner, but full cure can take days to weeks—avoid heavy use or cleaning until cured.
If you’re layering contrasting color combinations, allow extra time to prevent tack transfer.
Smooth paint texture dries differently than heavy brush strokes; thin, even coats speed safe recoating.
When in doubt, follow manufacturer times and test a small area.
Dry to the Touch” vs. “Recoat” vs. “Fully Cured” Explained
“Dry to the touch” means you can gently touch the surface without paint coming off, usually within a couple hours.
You can typically recoat after the manufacturer’s recommended recoat time—often 2–4 hours for latex and 24 hours for oil-based paints.
Full cure, when the paint reaches maximum hardness and chemical resistance, can take days to weeks depending on the formula and conditions.
Dry-To-Touch Defined
While the surface may feel dry after a short time, “dry to the touch” only means the paint won’t transfer onto your fingers; it doesn’t indicate it’s safe to handle, sand, or recoat. You should still treat the trim gently because solvents can remain beneath the film and pressure may cause tackiness or smudging.
Factors like color mixing, paint branding, ambient temperature, and humidity affect how quickly the surface forms a skin. Test by lightly touching an inconspicuous edge; if paint lifts or feels gummy, wait longer.
Recoat Timeframe
Because “dry to the touch” only means the surface won’t transfer to your fingers, you shouldn’t assume it’s ready for a new coat or handling.
Recoat time refers to when paint has set enough to accept another layer without lifting or adhesion problems. Check the manufacturer’s window—often 2–6 hours for latex, longer for oil-based—but adjust for temperature and humidity.
Lightly sand between coats for proper bonding and better color matching, especially when switching batches. Use recommended paint primers when needed to improve adhesion and hide stains.
If you’re unsure, wait longer; rushing risks streaks, peeling, or uneven finish.
Full Cure Timeline
Knowing when paint is simply dry to the touch, ready for a recoat, or fully cured will save you from mistakes like premature handling or heavy use. You’ll feel tack-free within hours, recoat safely after the manufacturer’s recommended window, and wait weeks for full cure before heavy contact. Full cure affects color blending and texture smoothing—don’t rush sanding or moving furniture. Use light tests: press, scratch, and flex.
| Stage | Typical Time | What to Do |
|---|---|---|
| Dry to touch | Hours | Light handling |
| Recoat | 2–24 hrs | Apply next coat |
| Fully cured | 7–30 days | Full use allowed |
Latex vs. Oil-Based Trim Paint: How Drying Differs
If you’re choosing trim paint, you’ll want to understand that latex and oil-based formulas dry in fundamentally different ways.
You’ll notice latex dries by water evaporation, so it becomes touch-dry within an hour and recoatable in 2–4 hours. It keeps a thinner paint texture and eases color matching across batches because pigment disperses evenly.
Oil-based paint cures by oxidation, taking longer to harden — often 6–8 hours to recoat and days to firm up. It yields a richer, smoother texture that can deepen hue perception.
Choose based on workflow, desired finish, and room ventilation.
Dry Times by Finish: Satin, Semi-Gloss, Gloss
When you pick a finish—satin, semi-gloss, or gloss—expect differences in both feel and drying pace.
When choosing satin, semi‑gloss, or gloss, expect noticeable differences in feel and drying time.
Satin dries to the softest touch and often cures fastest to the point of light handling, typically within 1–2 hours dry to touch and 6–8 hours recoat.
Semi-gloss gives more sheen and stands up to wear; it’s dry to touch in 1–2 hours but may need 8–12 hours before recoating.
Gloss shows the highest paint sheen, levels differently, and can feel tacky longer; plan on 2–4 hours dry to touch and 12–24 hours before full handling.
Consider humidity and color matching.
Water-Based Enamel: Typical Drying and Curing Times
With water-based enamel, you’ll usually see a dry-to-touch surface in about 30 minutes to an hour, depending on temperature and humidity.
You can often recoat or handle trim after 2 to 4 hours, though heavier coats may need longer.
Expect a full cure in 7 to 14 days before subjecting the trim to heavy use.
Dry-To-Touch Time
How quickly does water-based enamel become dry to the touch? You’ll usually feel dryness within 30 minutes to 2 hours under ideal conditions. Humidity, temperature, and film thickness change that window, so check before trusting the surface.
Consider these practical tips:
- Thin coats dry faster; heavy laydowns extend tackiness.
- Warmer, lower-humidity rooms speed evaporation and drying.
- Poor ventilation or cool temps slow drying and can affect color matching and paint recycling suitability.
Test by gentle fingertip touch on an inconspicuous edge. If it’s tacky, wait longer; don’t risk blemishes or contaminants on the finish.
Recoat And Handle
Although the surface may feel dry to the touch within an hour or two, you should wait longer before recoating or heavy handling to avoid lifting or soft spots.
For water-based enamel, plan a minimum 4-hour recoat window under moderate conditions; colder or humid environments demand more time.
When you recoat, match sheen and perform careful color matching to avoid visible joins.
Use proper brush techniques—light, even strokes and minimal pressure—to blend edges and prevent streaks.
Handle trim gently for at least 24 hours, avoiding knocks or heavy contact that can mar newly laid paint before it’s sufficiently set.
Full Cure Duration
Because full curing involves chemical crosslinking and solvent evaporation, water-based enamel can feel dry long before it reaches full hardness. You’ll often wait days to weeks for full cure depending on temperature, humidity, and film thickness. That affects durability, color matching, and final paint sheen; test discreetly before heavy use.
- Light handling: 24–48 hours
- Moderate use: 3–7 days
- Full cure for maximum hardness: 14–30 days
During this period avoid abrasive cleaning and heavy contact. If you need quicker service, choose fast-cure formulations or boost warmth and airflow to accelerate solvent release.
Alkyd and Oil-Based Enamels: Dry and Cure Timelines

When you choose alkyd or oil-based enamel for trim, expect a slower dry and cure process than with latex. You’ll notice tack-free times around 6–8 hours, but recoat windows often span 16–24 hours.
Full cure can take 7–30 days depending on film thickness and ventilation. Oil enamels level nicely; proper brush strokes reduce visible marks and help the finish smooth as it hardens.
Darker paint color may show brush marks more, so use even pressure and high-quality brushes. Plan longer before heavy use or polishing, since the cross-linking cure is gradual and durable.
How Temperature Speeds Up or Slows Trim Paint Drying
If you raise the temperature in the room, trim paint will dry faster because heat speeds solvent evaporation and chemical reactions in the film.
You’ll notice lighter Paint color sometimes seems to dry quicker on the surface, while deep tones can retain warmth and slow curing. Adjust temperature carefully to avoid skinning or blistering.
Consider how heat interacts with brush types and film thickness: thinner coats dry faster. Use consistent warmth for even results.
- Thin coats dry quicker
- Heavy coats retain solvent longer
- Consistent temperature yields uniform drying
How Humidity and Ventilation Affect Drying and Curing
High humidity slows solvent and water evaporation, so your trim will take longer to dry and may stay tacky.
Good ventilation speeds evaporation and helps coatings cure evenly, so open windows or use fans when you can.
To prevent moisture-related problems like blistering or poor adhesion, control indoor humidity and keep air moving during and after painting.
Humidity’s Impact On Drying
Because moisture in the air slows solvent evaporation and chemical reactions, humidity directly lengthens both drying and curing times for trim paint, and poor ventilation makes the effect worse by trapping that moisture. You’ll notice longer tack times, potential blushing, and slower recoat windows when humidity’s high.
Choose Color options and adjust brush techniques to minimize visible defects: thinner coats, slower strokes, and proper overlap. Monitor conditions and schedule painting for lower-humidity periods when possible.
Consider these practical steps:
- Wait longer between coats.
- Use slightly thinner application.
- Keep room temperature steady to aid solvent release.
Ventilation Speeds Evaporation
When you boost airflow in a painted space, fresh air carries away solvent-laden vapors so the paint can dry faster and more evenly. You’ll notice lower humidity and steady ventilation shorten open time, letting successive coats go on sooner without trapping moisture.
Use fans and open windows to create cross-flow, but avoid blasting air directly at wet trim to prevent dust adhesion. Proper ventilation helps paint cure uniformly, which preserves color matching by preventing uneven sheen or tint.
Combine good airflow with careful brush techniques—smooth, consistent strokes—to minimize brush marks and achieve a professional finish.
Preventing Moisture-Related Issues
Although temperature and airflow play roles, humidity is the factor that most directly slows both drying and curing of trim paint, so you’ll want to control moisture to avoid tacky finishes, extended recoat times, and adhesion problems.
You should monitor humidity, use fans and dehumidifiers, and schedule painting on drier days.
High moisture also affects color matching and paint blending, so wait for full cure before final touch-ups.
Practical steps:
- Run a dehumidifier or HVAC to keep RH below 50%.
- Increase ventilation with fans and open windows when possible.
- Delay recoats when humidity spikes or condensation forms.
How Paint Thickness and Coat Count Change Dry Time
If you apply thicker paint or stack multiple coats, you’ll extend the drying time because solvents and water take longer to escape through more material. You should apply thin, even layers so each coat dries reliably; that also helps with color matching when blending new paint into existing trim.
Between coats, wait the manufacturer’s recommended tack-free time and test with a fingertip in an inconspicuous spot.
Wait the maker’s recommended tack-free time, then do a fingertip test in an inconspicuous spot before recoating.
Your brush selection affects film thickness—use the right-size brush to avoid heavy buildup in corners.
Multiple thin coats produce a durable finish faster overall than fewer thick coats, reducing runs, pooling, and extended cure times.
How Primer Choice Alters Trim Paint Dry Times
Choosing the right primer can greatly change how fast your trim paint dries and how well it bonds, so after getting coat thickness right you should consider primer type before painting.
You’ll pick between oil, latex, or specialty primers, and each affects drying speed, sanding time, and adhesion.
Oil slows initial cure but improves stain blocking; latex dries faster and eases recoating; specialty primers boost paint durability and adhesion for tricky jobs.
Consider these factors:
- Dry time vs. recoating window
- Stain blocking and color matching needs
- Adhesion and long-term paint durability
Surface Matters: Wood, MDF, Metal, and PVC Drying Differences
Because substrates absorb, react to, and hold moisture differently, the type of surface you’re painting—wood, MDF, metal, or PVC—directly shapes how fast trim paint dries and how it performs.
Because surfaces absorb and hold moisture differently, the substrate—wood, MDF, metal, or PVC—dictates trim paint drying and performance.
You’ll find wood soaks primer and can speed drying in warm, dry rooms but may need grain-specific brush techniques for a smooth finish.
MDF swells if wet; use sealed primers and thin coats.
Metal requires rust treatment and solvent-based paints that dry differently.
PVC needs flexible, adhesion-promoting primers and paints that cure rather than just surface-dry.
For accurate color matching, test samples on each substrate before committing.
When It’s Safe to Sand Between Trim Paint Coats
You should only sand between coats once the paint feels dry to the touch and no longer gummy—usually after the manufacturer’s recommended dry time.
Lightly scuff with fine-grit sandpaper to knock down imperfections without cutting through the film.
If the paint still feels tacky, wait longer so you don’t ruin the finish.
When To Sand
Once the first coat feels dry to the touch, wait longer before sanding—most latex and oil-based trim paints need at least 24 hours to cure enough for gentle sanding, while quick-dry formulas can be ready in 2–4 hours; sanding too soon risks gumming the sandpaper and lifting the paint.
You’ll sand when the surface resists indentation, the paint texture looks even, and color matching won’t be affected. Check these steps before you sand:
- Lightly press to test firmness.
- Inspect finish for roller or brush marks.
- Ensure dust-free, clean surface.
Use fine grit and minimal pressure.
Proper Sanding Wait
Although trim paint may feel dry to the touch in a few hours, wait until the coat resists indentation and sanding leaves no gummy residue before you sand between coats. You’ll test by pressing a fingernail; if it dents, give it more time. Temperature, humidity, and paint sheen affect cure time. Light sanding with fine grit smooths runs and helps color matching between coats. If sanding drags, wait longer.
| Test | Indicator | Action |
|---|---|---|
| Fingernail | No dent | Sand gently |
| Residue | None | Proceed |
| Drag | Yes | Wait longer |
| Gloss change | Stable | Continue |
When You Can Recoat Without Ruining the Finish
Before you recoat trim, check the paint’s tackiness and the manufacturer’s recommended dry time so you don’t trap solvents or cause poor adhesion. You’ll want a dry-to-touch surface without stickiness; if it’s still tacky, wait. Also consider color coordination to avoid bleeding through base coats. Keep tool maintenance in mind—clean brushes and rollers between coats to prevent cross-contamination.
Before recoating trim, ensure paint is dry-to-touch, tack-free, and within the manufacturer’s recoat window; clean tools.
Follow these steps before recoating:
- Confirm dry-to-touch and tack-free.
- Verify recommended recoat window on the label.
- Lightly scuff-sand glossy areas and remove dust.
Recoat within the manufacturer’s window to preserve finish and adhesion.
When Painted Trim Is Safe to Handle, Move, or Tape Off
When the paint feels dry to the touch and the surface no longer gives under light pressure, you can carefully handle, move, or tape off trim without risking marks or smudges. Check edges and corners for tackiness before lifting or shifting pieces.
Use soft gloves and support long trim to prevent bending. If you must overlap tape, press gently and remove it at a 45-degree angle after the paint has set for the recommended time.
Keep leftover paint sealed and stored upright in proper paint storage conditions; label cans for color matching later so repairs or touch-ups match seamlessly.
How to Avoid Smudges, Brush Marks, and Lap Lines
Now that you know when trim is safe to handle and move, focus on techniques that keep the finish flawless: smudges, brush marks, and lap lines usually come from too much paint, slow drying, or poor technique. Work wet edge to wet edge, thin your coats, and avoid overworking the brush. Match color and sheen between coats so touch-ups blend; full cures reveal true color matching and paint sheen.
Follow this quick checklist to prevent flaws:
- Load brush sparingly, use long smooth strokes.
- Maintain a consistent wet edge and direction.
- Sand lightly between coats for adhesion and smoothness.
Simple Ways to Speed Up Drying Indoors (Heater, Fan, Dehumidifier)
If you want trim paint to dry faster indoors, use heat, airflow, and humidity control together: raise room temperature modestly with a space heater, aim a fan to move fresh air across the painted surfaces, and run a dehumidifier to remove moisture from the air so solvents evaporate more quickly.
Combine those tools while you follow good brush techniques—thin, even coats dry faster and reduce lap marks.
Keep doors or windows slightly open to refresh air without dusting the trim.
Maintain consistent conditions between coats so color matching stays accurate and you won’t need extra touch-ups later.
When to Use a Dehumidifier, Heater, or Fan : Practical Settings
Although each room and paint type needs slightly different conditions, you can follow straightforward practical settings to decide whether to run a dehumidifier, heater, or fan.
You’ll use tools based on humidity, temperature, and airflow to protect color selection and paint texture. Aim for 40–50% RH, 65–75°F, and gentle cross-ventilation.
Use a dehumidifier when RH exceeds 55%, a heater when the room is under 60°F, and a fan when air is still but temperature and humidity are OK.
- Dehumidifier: target 40–50% RH
- Heater: maintain 65–75°F
- Fan: low-speed crossflow
How to Slow Drying to Prevent Lap Marks and Bubbles
Slowing the drying process helps you blend wet edges and avoid lap marks and bubbles by giving paint more time to level and release trapped solvents. To slow drying, work in cooler, slightly more humid conditions and avoid direct heat or strong fans.
Thin coats improve flow; use the manufacturer’s recommended reducer rather than over-thinning. Mind color mixing—introducing tint can change drying times, so test a small panel.
Choose the right brush selection for your trim: a soft, high-quality synthetic brush lays down smoother films that level better. Work consistently along the grain and keep a wet edge to minimize overlaps.
Troubleshooting: Paint Stays Tacky or Won’t Cure – Fixes
If your trim paint stays tacky or won’t cure, check for surface contamination like grease, wax, or silicone that can prevent proper adhesion.
Also consider environmental conditions—high humidity, low temperature, or poor ventilation can dramatically slow or stop curing.
Addressing both contamination and climate usually fixes the problem quickly.
Surface Contamination Issues
When trim paint stays tacky or never fully cures, surface contamination is often the culprit—dust, oils from fingerprints, wax, silicone, or residue from cleaners can all block adhesion and prevent solvents from evaporating properly.
You should inspect and test the surface before repainting. Remove contaminants with a solvent recommended by the paint maker, then degrease with trisodium phosphate or a dedicated cleaner.
Lightly scuff glossy areas for better paint adhesion.
If tackiness persists, strip and start over.
Follow these steps:
- Clean thoroughly.
- Scuff or sand.
- Reprime and repaint.
Environmental Condition Problems
After you’ve ruled out surface contamination, look at the environment—temperature, humidity, ventilation, and air movement all influence how trim paint cures.
If paint stays tacky, raise temperature to the manufacturer’s recommended range and lower humidity with dehumidifiers or heat. Improve ventilation and add fans for airflow; avoid direct drafts that cause uneven paint sheen.
Allow extra curing time in cool or damp conditions. If problems persist, check product compatibility—old primers, incorrect color matching tints, or mixed sheens can interfere with curing.
When in doubt, consult the paint data sheet or contact the manufacturer for specific cure-time guidance.
How to Test If Trim Paint Is Fully Cured (Simple Tests)
Because cured paint can look dry long before it’s fully hardened, you’ll want to run a few simple checks to confirm your trim is ready for normal use.
Even when paint looks dry, run quick checks to confirm trim is fully hardened before regular use.
Start by inspecting color matching under natural light and feel along edges with clean fingers to detect tackiness. Use older paint brushes gently—drag a soft bristle across a hidden spot to check for lifting.
Perform these quick tests:
- Light press test: press a fingernail gently for tack.
- Scratch test: use a toothpick at a seam.
- Adhesion test: tape a small square, peel sharply.
If any test shows damage, wait longer and retest.
Scheduling Trim Paint Around Other Home Projects
If you’re coordinating multiple projects, plan trim painting around tasks that generate dust, moisture, or heavy foot traffic so the finish can cure uninterrupted. Schedule painting after drywall sanding and tile cutting, and before carpet installation or moving furniture back in.
Allow extra drying time if plumbing or HVAC work will raise humidity. Coordinate with contractors so color matching decisions and final touch-ups happen when lighting is installed; that avoids redoing trim later.
Choose work windows when occupants won’t track dirt or create bumps against fresh paint. Communicate timelines, set clear off-limits areas, and inspect sheen and edges before reopening spaces.
Best Formulations for Faster-Drying Trim Paint
When you’re scheduling trim painting around other work, picking a faster-drying formulation lets you stick to tight timelines and reopen rooms sooner. Choose water-based acrylic or alkyd hybrid trims for quick recoat times and durable finish.
Consider how color contrast and paint sheen affect perception: high contrast or glossy sheen may show imperfections faster, so plan light sanding.
Quick tips:
- Use fast-dry acrylic for low odor and rapid cure.
- Try alkyd hybrid for leveling and toughness with faster dry than traditional oil.
- Pick satin or semi-gloss sheen for easy cleaning and quicker handling.
Test samples first.
When to Hire a Pro Because of Tight Dry-Time Constraints
Tight dry times can turn a routine trim paint job into a scheduling headache, so hire a pro when you need guaranteed recoat windows, minimal downtime, or work coordinated with other trades.
You should call a pro if deadlines won’t budge, if adjacent contractors depend on precise timing, or if occupancy can’t tolerate long cure periods.
Pros manage environmental controls, choose fast-curing formulations, and assure consistent color coordination across touch-ups. They also assess surfaces for issues that affect paint texture and longevity.
If you require warranty-backed timelines or can’t risk delays, hiring a professional is the pragmatic choice.
Quick Checklist: Prep, Painting, and Timing for a Trim Job
Having pros on speed-sensitive jobs makes sense, but you can still handle many trim projects yourself if you follow a focused checklist.
Prep: clean, sand, fill gaps, and tape; check Color matching before you buy.
Painting: use thin coats, watch drying windows, and sand between coats for smoothness.
Timing: plan humidity, temperature, and cure time; allow full cure before reinstalling hardware.
Maintain tools and brushes—Tool maintenance saves time and improves finish.
Prioritize:
- Prep thoroughly.
- Paint in controlled conditions.
- Respect dry and cure times.
Follow this and you’ll finish trims efficiently with lasting results.
Frequently Asked Questions
Can I Paint Trim in Cold Garages or Unheated Basements During Winter?
You can, but low paint temperature and high humidity levels slow drying and curing; you’ll need a warmer space or heaters, humidity control, and slower recoat times, or the finish may tack, crack, or refuse to harden properly.
Will Paint Fumes From Trim Affect Sensitive Pets or Infants?
Yes — they can be harmed. You’ll want to limit pet safety and fume exposure: ventilate, use low-VOC paint, keep infants and pets out until odor’s gone, and monitor for coughing, lethargy, or eye irritation.
How Do Paint Additives (Flow Enhancers) Change Dry and Cure Times?
They speed leveling and improve paint consistency, so you’ll get smoother application; drying accelerators in additives can shorten tack-free time but may not fully speed cure, so you’ll need longer for full hardness.
Can Colored vs. White Trim Paint Dry at Different Rates?
Sure — yes, surprisingly. You’ll find colored versus white trim paint can dry differently due to pigment load affecting color consistency and paint sheen, so you’ll want to test swatches and adjust techniques for uniform results.
Are Low-Voc or Zero-Voc Paints Slower to Fully Cure?
Yes — low-VOC and zero-VOC paints can take longer to fully cure because their paint chemical makeup off-gasses differently; you’ll speed cure by controlling the drying environment—temperature, humidity, and ventilation to help them finish faster.
Conclusion
Think of trim painting like baking a loaf: you’ll wait while the crust firms, then resist slicing too early. In most rooms you’ll touch up in hours, recoat within a day or two, and expect full cure in a week or more—oil takes longer, latex is quicker, and gloss dries fastest. Plan around those windows, pick fast-dry formulas when time’s tight, and call a pro if your schedule can’t afford uncertainty.