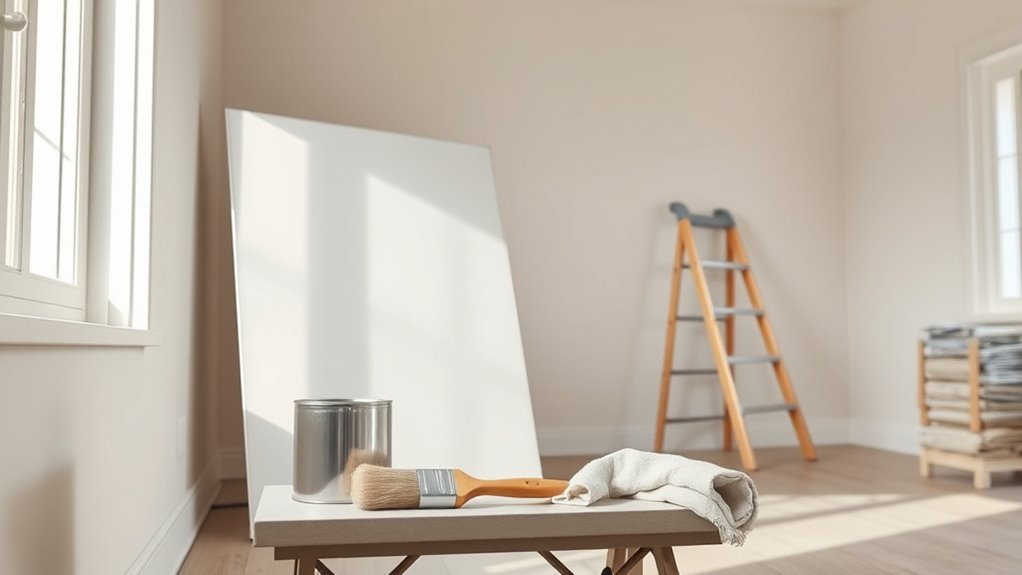
How Long Does Kilz Need to Dry Before Painting
You’ll usually wait about 1–2 hours for water‑based Kilz to be dry to the touch and ready for paint, though full cure can take up to 24 hours; oil‑based Kilz often needs 6–8 hours to dry and 24–48 hours to fully cure before topcoating. Shellac‑based Kilz dries fastest (15–60 minutes). Temperature, humidity, application thickness, and surface type will change times, and tips below will help you time your next coat right.
Who This Guide Is For and How to Use It
If you’re tackling a repaint or sealing project and wondering when it’s safe to apply paint over Kilz, this guide is for you. You’ll find concise steps tailored to DIYers, renters, and pros who need clear safety precautions and practical tips.
Use it to assess surface condition, decide when primer removal is necessary, and choose the right Kilz product for stains or odors. Skip sections that don’t match your project — focus on prep, ventilation, and curing indicators.
You’ll avoid common mistakes, protect occupants and finishes, and know when it’s appropriate to proceed with topcoats.
How Long Does Kilz Need to Dry Before Painting? (Quick Answer)
Because drying times vary by Kilz formula and conditions, you should wait at least 30 minutes to 1 hour for quick-dry solvent-based primers and 1 to 2 hours for most water-based Kilz before recoating. Full cure can take longer.
You’ll want to test a small area before painting to confirm tack-free status. If you’re doing color matching, allow complete dry time to see true primer color under your finish.
Avoid premature primer removal or sanding until the primer is fully dry, or you’ll damage adhesion. When in doubt, follow label guidance and extend drying time in cool or humid conditions.
Kilz Product Groups: Oil, Water, and Shellac Primers
Now that you know how drying times can vary, it helps to understand the three main Kilz primer families—oil (solvent), water (latex), and shellac—so you can pick the right one for your project.
You’ll choose oil-based for stain-blocking and strong primer adhesion on oil-painted or glossy surfaces. Water-based offers easier cleanup, faster recoat, and better color matching for light topcoats. Shellac dries fastest, excels at sealing severe stains, and bonds well to tricky substrates.
Match primer type to surface and stain level, test a small area, and you’ll get reliable adhesion and accurate color matching before painting.
Kilz Dry Time: Water-Based Primers
When you use a Kilz water-based primer, expect it to dry to the touch fairly quickly—usually within 30 minutes to an hour under normal indoor conditions. Though you should wait the manufacturer’s recommended 1–2 hours before recoating to guarantee proper film formation and adhesion.
You’ll find water-based Kilz minimizes odor, cleans up with soap and water, and supports faster project turnaround while preserving primer longevity when applied correctly.
Pay attention to temperature and humidity; slower conditions extend cure times. Consider these tips for best results:
- Apply thin, even coats for consistent color matching.
- Wait full recoat time before sanding.
- Store unused primer sealed.
Kilz Dry Time: Oil-Based Primers
If you’re using an oil-based Kilz primer, expect noticeably longer dry and recoat times than with water-based formulas. Typically, it’ll be dry to the touch in 1–2 hours but require 24 hours (or the manufacturer’s specified time) before sanding or topcoating to guarantee full adhesion and solvent evaporation.
You’ll want to confirm primer compatibility with your chosen topcoat—oil-based primers pair best with oil or alkyd paints, though some latex paints will work if labeled.
Use proper application techniques: apply thin, even coats, maintain recommended temperature and humidity, and allow the full cure time to avoid adhesion failures or solvent entrapment.
Kilz Dry Time: Shellac-Based Primers
Shellac-based Kilz usually feels dry to the touch within 15–30 minutes, so you can move carefully around the job sooner than with oil-based primers.
You’ll typically be able to recoat or apply a topcoat after about 45 minutes to an hour, but follow the can’s guidance and test a small area first.
Make sure you’ve got good ventilation and moderate temperatures, since humidity and cold will slow curing and shorten those time windows.
Dry-To-Touch Time
Because shellac-based Kilz dries very quickly, you’ll usually be able to touch the surface within 15 to 30 minutes at room temperature and normal humidity. You can check feel and appearance; if it’s dry to touch, it won’t gum your finger.
Keep in mind color matching may shift slightly as the primer cures, so confirm tones before committing. If you prefer primer alternatives with longer open times, plan accordingly.
Quick dry reduces dust pickup but don’t assume full cure.
- Light touch test: no tack.
- Visual check: even sheen.
- Smell test: mild solvent odor gone.
Recoat And Topcoat
When the primer feels dry to the touch—usually within 15–30 minutes under normal conditions—you can recoat or apply a topcoat fairly quickly; just make sure the surface is fully dry across the whole area before proceeding.
You’ll still want to wait the manufacturer’s recommended cure time before heavy handling or washing.
For color matching, apply a thin test coat to confirm finish and hue under your lighting.
If you must remove shellac-based primer, use appropriate solvent and gentle sanding, then clean thoroughly before recoating.
Always check for tackiness and imperfections so your topcoat adheres and looks uniform.
Ventilation And Temperature
If you keep the room well-ventilated and maintain moderate temperatures, Kilz shellac-based primers will dry much faster and more consistently. Poor airflow or cold, humid conditions can prolong tackiness and raise solvent odor levels. You should control ventilation and temperature to hit manufacturer dry times and verify primer compatibility with your topcoat.
Use fans and open windows, keep heat steady (65–75°F), and avoid high humidity. Proper conditions also help with color matching by preventing flashiness or uneven sheen that alters perceived hue.
- Increase airflow with cross-ventilation.
- Maintain stable, moderate heat.
- Monitor humidity levels closely.
Recoat Window vs. Paint Window: When to Do Each
Although both terms sound similar, the recoat window and the paint window refer to different stages you need to watch for when working with Kilz: the recoat window is the period when you can safely apply another coat of the same primer or paint without sanding, while the paint window is when the primer has cured enough to accept a topcoat. You’ll check primer compatibility and consider drying accelerators for faster recoat times. Timeframes vary by product and conditions.
| Stage | Action |
|---|---|
| Recoat window | Apply additional primer/paint |
| Paint window | Apply topcoat |
| Missed window | Sanding required |
How Temperature Affects Kilz Drying
Because Kilz’s solvents and resins react faster in warm air, higher temperatures speed evaporation and shorten both recoat and paint windows.
While cold slows curing and can leave surfaces tacky for much longer.
You’ll want to adjust priming techniques and timing based on temperature: aim for manufacturer-recommended ranges (usually 50–90°F).
In cool conditions, wait extra hours; in heat, paint sooner but avoid direct sun.
Also check tack before repainting to protect color matching and finish uniformity.
- Warm: faster dry, shorter recoat.
- Cool: extend wait, risk tackiness.
- Extreme temps: delay application.
How Humidity Changes Kilz Drying and Curing
You’ve seen how temperature alters Kilz’s drying speed; humidity plays an equally important role by controlling how quickly solvents evaporate and films cure. You’ll notice slower drying in high humidity and faster drying when air is dry. Monitor Humidity effects alongside Temperature considerations to pick the best painting window. Use fans and dehumidifiers to speed evaporation, and avoid painting during damp weather. Expect longer cure times for thicker coats or trapped moisture. Below is a quick reference to help you judge conditions.
| Condition | Effect |
|---|---|
| High humidity | Slower evaporation |
| Low humidity | Faster drying |
| Variable | Inconsistent cure |
How Coat Thickness Alters Kilz Dry Time
When you apply a thicker coat of Kilz, solvents take longer to evaporate and the film needs more time to set, so dry time can increase considerably compared with thin coats. You should expect longer tack and waiting times; thicker layers can trap solvents, risking uneven cure and affecting primer adhesion and color consistency.
To manage this:
- Apply thinner, even coats to speed evaporation and ensure uniform color consistency.
- Allow full flash time between coats; thicker layers need proportionally more wait time for primer adhesion.
- Test a small patch: confirm cure, adhesion, and consistent color before topcoating the entire area.
Surface Differences: Drywall, Wood, Metal, Masonry
Different surfaces change how Kilz dries and bonds, so you’ll want to adjust prep and drying times for drywall, wood, metal, and masonry.
For drywall, lightly sand and remove dust; Kilz seals quickly and supports fast recoat for typical interior durability.
On wood, strip wax, sand, and use a compatible primer. Compatibility check is recommended—porous grain soaks primer and may need longer cure.
Metal needs de-rusting, solvent cleaning, and often a metal-specific Kilz for adhesion; expect slower bonding on cold surfaces.
Masonry is highly porous; apply thicker coats, allow extended drying for surface durability, and check moisture before painting.
Choosing Kilz for Old Stains and Strong Odors
After prepping the surface, you’ll want to pick a Kilz formula that handles old stains and strong odors effectively. You should choose oil-based or shellac primers for severe tannin bleed or smoke; water-based options work for milder issues. Consider color matching when switching topcoat hues so the primer neutralizes underlying tones. Light primer sanding between coats improves adhesion and smoothness. Follow manufacturer dry times before painting.
- Use shellac-based Kilz for nicotine or heavy odor sealing.
- Pick oil-based for tannin-rich wood stains.
- Test a small area to confirm color matching and sanding results.
When Kilz Needs Extra Tack-Free Time
Because environmental and application factors slow drying, you may need to give Kilz extra tack-free time before painting. If humidity is high, temperatures are low, or coats are heavy, wait longer so priming adhesion isn’t compromised.
Test lightly with a fingertip in an inconspicuous spot; if it feels tacky, hold off. Follow product instructions and local drying regulations for safe intervals, especially in poorly ventilated spaces.
Thin coats, improve airflow, and keep temperatures within recommended ranges to reduce delay. Taking these steps guarantees the primer sets properly and your topcoat bonds uniformly without trapping solvents or moisture.
How Long to Wait Before Sanding Kilz Primer
Before sanding Kilz primer, wait until it’s fully dry to the touch and has had the manufacturer-recommended drying time—usually a few hours for water-based and longer for oil-based formulas.
Check surface readiness by lightly pressing or running your fingernail across the primer; it shouldn’t feel tacky or gum up.
If it passes that quick test, you can proceed with light sanding to smooth imperfections.
Drying Time Before Sanding
When you’re planning to sand Kilz primer, wait until it’s fully dry to the touch and has cured enough to avoid clogging your sandpaper or causing uneven spots. Typically, latex Kilz needs 1–2 hours to dry and 24 hours to cure for light sanding.
Oil-based varieties can take 6–8 hours to dry and up to 48 hours to cure. Proper drying helps color matching later and preserves primer adhesion. Check product label and room conditions.
Sand gently with fine-grit to scuff, not remove, the primer.
- Wait recommended cure time.
- Use 220–320 grit.
- Test a small area first.
Surface Readiness Check
Although the label gives a baseline, you should confirm Kilz primer is touch-dry and has reached its light-sanding cure before you start sanding.
Check surface texture by running your hand gently—no tackiness, uniform feel, and minimal dust shedding. Press a fingernail lightly; if it smears, wait longer.
Use 220–320 grit for a light scuff to refine texture without breaching primer film.
After sanding, wipe with a tack cloth and inspect for even primer adhesion and consistent color.
If you see peeling, bubbling, or uneven spots, allow more cure time and re-evaluate before painting.
Sanding vs. Scuffing: Timing and Technique
If you’ve applied a coat of Kilz, decide whether to sand or scuff based on the finish and how long you waited to dry. For proper surface preparation and primer selection, know that glossy or cured Kilz benefits from light sanding; flatter, recently dried coats usually only need scuffing. Choose technique to promote adhesion without removing primer.
Decide to sand glossy, cured Kilz or scuff flatter, newly dried coats—promote adhesion without removing primer.
- Sand glossy or fully cured primer with fine grit (220) for a smooth key.
- Scuff dull, not fully cured surfaces with a scuff pad to avoid cutting primer.
- Clean dust thoroughly before repainting to guarantee consistent topcoat bond.
How to Test if Kilz Is Ready to Paint (Touch, Thumb, Tape)?
Before you grab a paintbrush, you’ll want to run three quick checks to confirm the Kilz is dry enough.
Lightly touch the surface, press your thumb with moderate pressure, and do a small tape pull to see if any primer lifts.
If the surface feels tack-free, resists thumb indentation, and the tape comes off cleanly, you’re good to paint.
Touch Test Method
When the Kilz feels dry to the touch, you can use a simple thumb, finger, or tape test to confirm it’s ready for paint. Check primer consistency and your application techniques first so you know what dryness to expect. Perform these quick checks gently to avoid damage:
- Light tap: Tap the surface with a clean finger—no tackiness means surface cure.
- Edge tape: Press a small piece of painter’s tape, then remove quickly; residue or lifting shows more drying needed.
- Visual sheen: Inspect under good light for even matte finish and no wet spots; inconsistent sheen suggests uneven primer consistency or application techniques.
Thumb Pressure Check
Although a light touch can feel inconclusive, the thumb pressure check gives you a quick, practical way to verify Kilz has cured enough for paint. Press gently with your thumb for a few seconds; you’re checking for tackiness, softness, or indenting.
If the surface springs back and your thumb leaves no mark, primer adhesion is likely solid and you can proceed. If it feels gummy or indents, wait longer.
Also consider how the Kilz’s appearance interacts with your topcoat—do a small color matching spot to ensure the final hue reads correctly before committing.
Repeat checks in shaded and sunlit areas.
Tape Pull Inspection
If you want a clear, objective check beyond touch and thumb tests, do a tape pull inspection to see whether Kilz has fully adhered and cured. You’ll pick a discreet spot, press good-quality painter’s tape, then pull sharply. If the primer lifts, it needs more dry time. Note color matching and surface texture changes — lifted bits reveal uncured layers or poor adhesion.
- Press tape firmly on a small, hidden area; smooth to remove bubbles.
- Pull quickly at a 45° angle; inspect for primer on the tape.
- Re-test after extra drying until no primer transfers.
Using Moisture Meters and Infrared to Check Dryness
To be sure the Kilz is truly dry before you paint, use a moisture meter or infrared camera to get objective readings rather than relying on touch or time alone. You’ll avoid trapped moisture that ruins color matching and ensure primer compatibility before topcoating. Moisture meters give percent readings; infrared shows cold spots where moisture lingers. Scan multiple areas, record readings, and wait until levels match recommended substrate values. Use the table below to log checks.
| Tool | What it shows | Action |
|---|---|---|
| Moisture meter | % moisture | Record, compare |
| Infrared camera | Surface temp map | Scan cold spots |
| Notes | Conditions | Recheck |
How to Speed Kilz Drying Safely (Heat, Fans, Dehumidifiers)
When you need to speed Kilz drying, use controlled heat, increased airflow, and dehumidification rather than blasting the primer with high direct heat. You’ll manage environmental factors and tweak application techniques to shorten cure time without harming adhesion.
Monitor temperature and humidity; keep heat steady, not hot, and aim for good cross-ventilation. Use a low-setting space heater, box fans, and a dehumidifier placed to pull moist air away.
Allow full flash time between coats.
- Position fans for crossflow, avoid direct blasting of surface.
- Run dehumidifier until relative humidity is stable.
- Keep temperature consistent and within product specs.
What Not to Do: Solvents, Open Flames, and Shortcuts
Don’t expose fresh Kilz to solvents — they can react with the primer and ruin adhesion.
Never use open flames or smoking near drying areas, since fumes are flammable and pose a serious fire risk.
And skip gimmicky fast-drying shortcuts that promise speed over proper cure time.
Avoid Solvent Exposure
Although solvent-based cleaners and thinners can speed prep, you should steer clear of them near fresh Kilz or open cans of paint because their fumes can break down primers, create hazardous vapors, and increase fire risk.
You’ll protect primer compatibility and aid odor mitigation by using water-based cleaners and low-VOC products, ventilating well, and waiting full recommended dry times.
Avoid shortcuts like wiping with mineral spirits.
- Use mild detergent or water-based degreaser.
- Keep windows open and fans running for ventilation.
- Wait the manufacturer’s dry time before repainting or using stronger chemicals.
Never Use Open Flames
You’ve already learned to avoid solvent fumes around fresh Kilz; you should apply the same caution to open flames and sparks. Don’t smoke, light candles, use gas stoves, or run pilot lights near freshly applied primer — Kilz can emit flammable vapors as it cures.
Treat the area like any space with solvent-based products: ventilate, post no-smoking signs, and keep ignition sources well away. Use spark-free tools and turn off electrical equipment if recommended.
These safety precautions reduce fire hazards and protect you and your home. If you smell strong solvents, stop work and ventilate until vapors dissipate.
Skip Fast-Drying Shortcuts
If you’re tempted to speed up Kilz drying with solvents, open flames, or other shortcuts, resist the urge—those tactics do more harm than good. You’ll risk compromised primer adhesion, surface irregularities, and safety hazards.
Stick to safe drying techniques: proper ventilation, controlled temperature, and patience. Don’t use chemical accelerants or heat sources that can break down binders.
- Avoid solvents or thinners — they thin the primer and ruin adhesion.
- Never use open flames or high heat — they create fire risks and uneven curing.
- Use fans, moderate warmth, and time — proven drying techniques that protect finish.
Applying Multiple Kilz Coats: Timing Between Coats
When applying multiple Kilz coats, wait until the previous coat is fully dry to the touch and no longer tacky—typically 30 minutes to 2 hours for water-based primers and 2 to 4 hours for oil-based formulas—so each layer bonds properly and traps stains as designed.
You’ll check for consistent sheen and feel; uneven spots may need light sanding to restore primer adhesion. Space coats appropriately to avoid lifting or blush.
If you’re trying to adjust color matching between layers, test small areas and let them cure before deciding on another coat. Follow label recommendations for best results.
Best Timing to Topcoat With Latex Over Kilz
Before you topcoat with latex, make sure the Kilz is fully dry and adequately cured—this usually means waiting the manufacturer’s minimum dry time (often 30 minutes to 2 hours for water-based Kilz) and checking that the surface is dry to the touch, not tacky, and free of fumes.
Once dry, test primer adhesion by lightly scuffing and applying a small latex patch. Wait longer in high humidity.
Consider color mixing effects when choosing your topcoat—thin translucent primers can alter final hue.
Follow these simple steps:
- Check tack and smell.
- Scuff and test adhesion.
- Apply thin, even latex coats.
Best Timing to Topcoat With Oil-Based Paint Over Kilz
When you’re ready to topcoat Kilz with oil-based paint, wait until the primer feels fully dry—typically 24 hours but longer in cool or humid conditions.
Check for tackiness, odor reduction, and an even matte finish as surface-prep indicators before applying paint.
If the primer still feels soft or gives off a strong solvent smell, give it more time to cure.
Dry Time Before Topcoat
If your project uses an oil-based topcoat over Kilz, plan on letting the primer cure rather than just feel dry—most oil-based topcoats should be applied after 24 hours, but waiting 48 hours in cool or humid conditions is safer to guarantee proper adhesion and avoid blushing or solvent trapping.
You shouldn’t rush; curing lets solvents out and prevents solvent trapping under the finish. Also consider color matching once fully cured, and avoid primer removal or sanding too aggressively before cure.
Follow these quick tips:
- Wait 24–48 hours; extend for humidity.
- Lightly scuff, not remove primer.
- Test a small patch before full topcoat.
Surface Prep Indicators
Since oil-based topcoats need a fully cured, stable primer underneath, look for clear surface cues—no tackiness, an even matte finish, and no solvent smell—before painting.
You’ll also check adhesion by gently scuffing a small area; the primer should resist peeling and show consistent primer compatibility with your chosen oil formula.
Confirm the Kilz’s color shift has settled so your desired paint color reads true.
Test a tiny patch with the actual topcoat and let it dry to confirm no bubbling or fish-eye.
Only proceed when the surface feels dry, odorless, uniform, and firmly bonded to substrate.
Troubleshooting After Repainting Too Soon
Although you might be tempted to cover up tacky or bubbling spots immediately, repainting too soon can cause peeling, uneven texture, or solvent entrapment—and you’ll need to address those issues before a proper finish is possible.
If paint feels tacky or bubbles, don’t repaint—test, fix, and wait for full cure before refinishing.
Check primer durability and paint adhesion first: gently test edges for lift and note soft or gummy areas. Sand and remove loose paint, then clean with a degreaser. Allow full cure time before reapplying.
- Strip loose or bubbled paint to sound substrate.
- Sand feathered edges, wipe dust, and use compatible primer.
- Repaint only after manufacturer-recommended dry and cure times.
Kilz Off-Gassing: How Long Before Repainting and Occupancy?
When you apply KILZ, solvents and low levels of volatile organic compounds (VOCs) will off-gas as the primer dries and cures, so you’ll want to wait until odors fade and the manufacturer’s recommended dry and cure times have passed before repainting or reoccupying the space.
Typically, allow 1–3 hours for surface dry and up to 24–72 hours for curing depending on product and ventilation. Improve air exchange to reduce off-gassing and lessen environmental impact.
Wait longer if sensitive occupants are present. Only repaint once odors are gone to guarantee accurate color matching and long-lasting adhesion.
Exterior Kilz: Weather and Outdoor Considerations
If you’re using KILZ outdoors, pay close attention to temperature, humidity, and forecasted precipitation because they directly affect drying, adhesion, and long-term performance. You’ll plan timing around a dry window and avoid application before rain or heavy dew.
For surfaces like siding, garden furniture, or areas needing concrete sealing, follow label dry times and allow extra cure time in high humidity. Protect freshly primed surfaces from splatter and pests.
Check wind — dust can mar the finish. Monitor forecasted highs and lows to prevent flash freeze or slow cure.
- Pick a dry, warm day.
- Shield from rain and wind.
- Wait longer in humid conditions.
Painting in Cold Climates: Winter Best Practices
Because cold slows chemical reactions, you’ll need to adjust timing, product choice, and technique to get durable results when painting in winter.
You’ll wait longer for Kilz to dry and cure; follow manufacturer minimums and add extra drying time between coats.
Use cold-weather-rated formulations and verify primer compatibility with your topcoat to prevent adhesion failures.
Heat the workspace and maintain recommended humidity to speed drying without baking the paint.
Test a small area for color matching under actual winter light.
Work on small sections and avoid painting when temperatures fluctuate near freezing to ensure a consistent, lasting finish.
Quick Jobs vs. Pro Projects: Realistic Time Trade-Offs
While a quick touch-up with Kilz might seem tempting, you’ll usually trade speed for longevity. Pro projects demand more prep, multiple coats, and longer dry times to prevent issues like bleed-through or poor adhesion.
You’ll weigh schedules: fast rooms get one coat, light sanding, and minimal waiting; full renovations need proper cure times, color mixing tests, and strict primer compatibility checks. Follow realistic timelines to avoid rework.
- Fast fix: 1 coat, 1–2 hours dry, limited sanding.
- Standard room: 2 coats, 4–6 hours between coats, test color mixing.
- Pro job: multiple primers, full cure 24–48 hours, verify primer compatibility.
Roller vs. Sprayer vs. Brush: Effects on Drying
When you roll Kilz on, the thicker nap and overlapping passes can leave a slightly longer surface dry time than a thin spray.
Spraying puts down fine droplets that evaporate faster but give a lighter, more even film that may need a follow-up coat sooner.
Brushing soaks into porous areas more and can slow total cure if you press in too heavily, so adjust your technique and wait times accordingly.
Roller Application Dry Time
If you apply Kilz with a roller, expect slightly longer tack and dry times than with a sprayer but generally faster than heavy brushwork. Rollers deposit a thicker, more even film that holds more solvent and slows evaporation. You’ll notice less streaking, aiding color blending, but thicker roller nap can trap solvent longer, so wait fully before recoating to avoid primer peeling or mudcracking. Temperature and humidity still control rates, so monitor conditions. Use a thin, even pass and light back-roll to speed drying.
- Allow 1–2 hours tack-free in warm, dry conditions.
- Wait 4–6 hours before recoating in moderate conditions.
- Extend to 24 hours if cool or humid.
Sprayer Coat Evaporation
How quickly does a sprayed coat of Kilz dry compared with roller or brush application? You’ll notice spray evaporation speeds up surface drying because atomized droplets are finer and spread thinner, reducing tack time. That quicker feel can tempt you to paint sooner, but thin sprayed films can mask incomplete solvent release underneath.
Check manufacturer recoat times to protect primer adhesion; environmental factors still govern curing. Compared with roller’s thicker laydown and brush’s texture, spraying gives uniform coverage and faster surface set, yet you should allow full dry/cure per label to avoid adhesion failures when topcoating.
Brush Stroke Absorption
Because different application tools lay down primer differently, you’ll notice varying absorption and drying behavior tied to brush strokes, roller nap, or spray pattern. You should expect brush strokes to deposit uneven film thickness, affecting primer adhesion and local drying times. Rollers leave textured nap that soaks more in, influencing color blending under the topcoat. Sprayers give uniform coats that dry fastest.
- Brush: slower surface drying where strokes pool; watch for tacky ridges.
- Roller: moderate absorption; higher nap increases dwell and lengthens cure.
- Sprayer: thin, even film; best for consistent primer adhesion and quick dry.
Estimating Total Project Time Including Kilz Drying
When you’re planning a painting day, factor Kilz drying into the total timeline so you won’t be left waiting or rushing through coats. Estimate surface prep, primer application, and Kilz cure between tasks: sanding, tack cloth, and primer removal if you’re replacing old primer.
Allow shorter recoat times for water-based Kilz, longer for oil-based. Add buffer for temperature and humidity variations.
Include time for color matching, letting samples fully dry before final selection.
Total project time should stack prep, Kilz drying, and topcoat application with contingency—typically a single wall can span several hours to a couple of days.
Where to Find Exact Times: Product Label and TDS
Look at the product label and the Technical Data Sheet (TDS) first—those documents give the manufacturer’s specified dry, recoat, and full cure times for the exact Kilz formula you’re using. You’ll find temperature, humidity ranges, and recommended film thickness that affect times. Follow listed application techniques and heed warnings about substrate prep. Use drying accelerators only if the TDS allows them for that formula.
- Check label for basic dry/recoat windows and surface notes.
- Read TDS for detailed conditions, testing methods, and cure charts.
- Keep the TDS on hand during application for reference.
When to Call a Pro: Persistent Adhesion or Stain Bleed
If stains keep bleeding through a properly dried Kilz or the primer won’t stick despite correct prep, call a pro—these problems usually indicate underlying issues like solvent migration, incompatible substrates, or moisture that simple DIY fixes won’t resolve.
You’ll want an expert to diagnose moisture levels, test adhesion, and identify substrate chemistry. A pro can recommend specific remediation—blocking coats, surface consolidation, or vapor barriers—and advise on primer longevity under those conditions.
They’ll also help with color matching if you need to topcoat or repaint after remediation, ensuring durable results instead of repeated failures and wasted time.
Cost vs. Performance: Choosing Kilz for Your Timeline
Although a higher-priced Kilz product may seem like an upfront splurge, you’ll often save time and touch-ups over the long run because premium formulas dry faster, block stains better, and require fewer coats.
Spending more on a premium Kilz often saves time—faster drying, superior stain blocking, and fewer coats.
You’ll weigh cost versus performance based on schedule: faster dry times let you paint sooner, better primer adhesion reduces rework, and stronger stain blocking cuts touch-ups.
Consider how important color matching is for your project and whether waiting longer for cheaper options is acceptable.
- Fast-dry premium: higher cost, quicker turnaround.
- Mid-range: balance of price and adhesion.
- Budget: low cost, expect longer cure and extra coats.
Real-World Timing Examples for Common Projects
For interior walls and ceilings, you’ll typically wait 30 minutes to an hour for Kilz to dry to the touch before applying paint.
With full cure in a few days depending on humidity.
For exterior trim and siding, plan on at least an hour to two for surface dryness.
And longer in cool or damp conditions to avoid trapping moisture.
These examples will help you schedule projects and decide if you need faster-drying products or extra drying time.
Interior Walls And Ceilings
When you’re tackling interior walls and ceilings, plan on Kilz needing about 30 minutes to 1 hour to become touch-dry and 2 to 4 hours before you can safely topcoat in typical home conditions (70°F/50% RH). Heavier coats, cooler temps, or high humidity will extend those times.
You’ll check color matching after the primer’s cured to ensure true hue, and confirm primer compatibility with your chosen topcoat.
For common rooms, consider these practical timings and tips:
- Living rooms: one thin coat, wait 2–3 hours before painting.
- Bathrooms: allow 4+ hours due to humidity.
- Ceilings: thinner coats, 3–4 hours.
Exterior Trim And Siding
Because exterior conditions vary so much, you’ll need longer dry times for Kilz on trim and siding than you do indoors. You should wait 24–48 hours in warm, dry weather; in cool or humid conditions, expect 48–72+ hours. That guarantees primer adhesion and helps with color matching when you topcoat. Use a quick test: touch for tackiness, then a small paint patch.
| Surface | Typical Dry Time | Note |
|---|---|---|
| Wood trim | 24–48 hrs | Sand before topcoat |
| Fiber cement | 48–72 hrs | Check porosity |
| Siding (painted) | 24–72 hrs | Confirm primer adhesion |
Ready-to-Paint Checklist After Kilz
Before you pick up a paintbrush, confirm the Kilz is fully dry, the surface feels smooth, and any rough spots are sanded and wiped free of dust. Check primer removal marks, test adhesion with a fingernail, and make sure odors have dissipated. Verify color matching by holding your topcoat sample against the primed area in daylight.
- Inspect for tackiness and sand glossy spots; vacuum and tack cloth afterward.
- Confirm primer removal didn’t expose bare substrate; touch up if needed.
- Make certain humidity and temperature meet paint label specs before starting coats.
Quick Reference Chart: Kilz Type, Typical Dry Time, Recoat Time
If you need a quick guide, this chart lists common Kilz formulas with their typical dry and recoat times so you can plan your project accurately.
Use oil-based Kilz Original: tack-free ~30 minutes, recoat 24 hours; great stain blocking but check primer compatibility with water-based topcoats.
Kilz Premium (water-based): dry to touch ~30–60 minutes, recoat 1–2 hours; good color matching under light shades.
Kilz Max (high-hide): dry 1 hour, recoat 2 hours; ideal for heavy stains.
Kilz Restore (specialty): follow label for variable times.
Allow longer in cool or humid conditions for reliable results.
Frequently Asked Questions
Can I Paint Over Kilz if It’s Slightly Tacky?
No — you shouldn’t paint over slightly tacky Kilz; you’ll risk adhesion problems. Check primer compatibility and respect drying time considerations; wait until it’s fully dry, or sanding/another compatible primer may be needed.
Will Kilz Block Dark Stains Permanently?
Kilz can permanently block many dark stains, but you’ll need proper stain blocking and primer compatibility checks; choose the right Kilz formula, follow surface prep, and test a spot to guarantee long-term stain containment.
Is Kilz Safe for Nursery or Baby Rooms After Drying?
Yes — once fully dried and cured per the label, you can use Kilz in a nursery; you should guarantee good nursery safety by airing the space and maintaining baby room ventilation for several days to reduce lingering odors and fumes.
Can I Apply Wallpaper Over Kilz Primer?
Like peeling a sticker off a suitcase, yes — you can apply wallpaper over Kilz, but you’ll want to test adhesion: confirm primer compatibility, follow manufacturer instructions, and use recommended wallpaper adhesive for strong wallpaper adhesion and lasting results.
Does Kilz Affect Final Paint Sheen or Color Appearance?
Yes — Kilz can slightly alter paint sheen and color appearance; you’ll notice improved coverage and truer color on stained surfaces, but sheen may look dulled on rough or highly absorbent areas, so test before finishing.
Conclusion
So you’ve learned the basics—now what? Before painting, make sure the Kilz feels dry to the touch, smells faint, and meets the recoat window on the label. Want your finish to last instead of peeling later? Take the extra hour to wait rather than rush. If you follow the product’s dry/recoat times, do a quick tack test, and sand lightly when needed, you’ll get smooth, durable results every time.